Leaderboard


Popular Content
Showing content with the highest reputation on 11/14/21 in all areas
-
We chose vaulted ceilings because planning here demands a room in roof situation if you want 2 storeys. Vaulted ceilings with gable ends and roof hung from ridge beams gives maximum usable space in the loft rooms. And then insulating them as a warm roof is by far the easiest way to detail a well insulated and air tight roof structure, which puts all the space in the house inside the insulated air tight envelope. I would do it again and go so far as saying the warm roof all inside the insulated envelope was one of the best design decisions we made. There is NO WAY I would want to do another build that tried to keep the loft space as a cold (and necessarily ventilated) space and still hope to get good air tightness and insulation.2 points
-
You were too open. Should have perhaps left it as one big room (either bed/office or loung/office), and added in a stud wall later after the build had been signed off.2 points
-
Since the basement was finished at the end of June things seem to have been dragging on for ages but we are finally out of the ground and ready for the timber frame. It has taken 13 weeks and we had delays with materials that held things up but when I look back at the photos from the basement being finished to where we are now it is amazing how much has been done and we’re very excited about the timber frame going up next week. When the groundworkers came back post-basement they started by insulating the basement walls externally with 200mm of EPS 100 and then backfilling with clean crushed as per the structural engineers specifications. Then they started digging the foundations for the ‘arms’ of the building as I call them and you’ll see why from some later photos as the main building looks like the body with 2 x arms coming off it. These are a garden room (that links to the kitchen/diner) and the utility room and garage. These are designed as insulated slabs with 300mm EPS underneath which you can see in the photos. Here we see I had to put some Perinsul blocks in, thank you to @ToughButterCup for getting them to me. While that was happening the brickie was also on-site building the internal walls for the basement. We have a 3m ceiling height in the basement so we had to get scaffolding in to build them safely which was another expense I hadn’t planned for (beginners naivety) but something that had to be done. It was around this time that I purchased a DJI Mini-2 drone. It is brilliant and has given us a whole new perspective on the build. Here are a few videos from before the slab pours (please excuse the auto-added cheesy music that DJI added). And some photos of the slab pours. I also put in some VCL between the basement and ground floor as a Tony tray. Once the slabs were poured we move on to the block and beam flooring. This caused the biggest issue with getting materials as the company the groundworkers were using moved their lead times from 15 days to 6 - 8 weeks which would’ve put us stupidly behind schedule. So I sourced some beams from a local builders merchant and paid the beamers to cut them to size on site rather than waiting for the correct sizes to be fabricated and delivered. It was pretty stressful to say the least. But what made it worse is that I decided a while ago to move from precast hollow core slabs to block and beam but no one along the way told me that the beams couldn’t take the load of the walls above like the hollow core could and, by chance, during my conversations with the block and beam company designing it I found out that I had to put supporting steels on top of the basement walls to take those load bearing walls from above ground. Back to the structural engineer to get those designed and then fabricated and installed. And then the beamers tell us that they won’t do the work without a complete fall arrest system across the entire basement 600mm down from the top of the basement walls. Back to the scaffolders to come and put that up at yet another expense (although the safety of the contractors is important to us so I didn’t grumble too much!) and we were finally ready for the block and beam to be installed. So what turned out to be the decision to save a few £k by moving to block and beam has in the end cost me a lot more due to the extra work involved. Oh well, you live and you learn. Anyway, the day came for the beamers to install it and they were a smash and grab outfit but that is, apparently, what all block and beamers are like. They just turn up and smash it out and leave without any due care and attention. To say they were miffed that they couldn’t do that on our build due to the steels on the basement wall is an understatement and comments like ‘if I’d known there were steels I wouldn’t have taken the job’ and ‘I’m losing money of this job’ really filled me with confidence. And if I ever do this again I will probably do the block and beam myself as, although hard work, it’s not complicated and I would’ve done a much better job. Anyway, it was done and they left and we could get on with laying the coursing blocks for the sole plates to sit on. This is where I insisted on precision and I spent a lot of time out there with the brickie assisting with setting out to make sure everything was spot on for the sole plates and checking that the levels throughout were within 5mm - 10mm across the building. It was time consuming but I think the accuracy will pay off in the end. While that was happening and with the timber frame imminent the scaffolders came and put up the required 2 lifts around the entire building and by 5pm the Friday before the frame was due it was all finished and we were ready……or so we thought. The timber frame ended up being delayed by 4 days due to the chippies testing positive for Covid-19 (the first time we have been directly impacted (not including the material shortage etc) by Covid) and during that 4 day delay the contract manager attended site and noticed that the garage (which is 120mm below the main house) had it’s coursing blocks below the main house. After a quick email exchange it was pointed out to me that I’d misread the plans and that those blocks, and the sole plates, need to be at the same level throughout so I needed to raise the coursing blocks by 120mm in the garage by the end of the following day. The groundworkers have moved on and I couldn’t get anyone to do it so I knocked up some pug, borrowed a disc cutter, bought myself a trowel and got laying. I’ve never laid blocks before but I did spend a lot of time watching and helping the brickie so I had a good idea as to what to do. I started after work on Wednesday (sole plates due to be fitted Friday) and finished half of it well after dark and then got up early the next day to finish the rest off. And it worked! Level and straight (ish) and still standing the next day. Phew! And this is where we’re at right now. Timber frame ground floor wall panels are due next Tuesday so we should really start to see things happening rapidly now and within 4 weeks our superstructure will be up. But that will be the subject of my next blog. Here’s a time-lapse video of this part of the build. I had to speed up the footage x10 and each day is about 4s long so things happen at quite a speed but it’s amazing to look back and see what has been done these last 13 weeks. Thanks again for reading and I hope you’re enjoying this journey as much as we are. Until next time…1 point
-
If you are doing PHPP I assume you are aiming high. We only have UFH downstairs and no heating upstairs, and the bedrooms, the mezanine and even the enclosed loft space all remain warm, because they are within the sealed and insulated envelope. To my mind it is madness to try and exclude a loft space from the sealed and insulated envelope because it just gives you a whole host of extra details to insulate and make airtight, not least being the loft hatch.1 point
-
Inside a well insulated air tight house, differential temperatures within the building really are a non issue. e.g. I can go up into the little bit of enclosed loft space we have, which is not heated in any way and has no deliberate air flow through it, but is within the air tight and insulated envelope, and is it just as warm as any other part of the house. Upstairs in the one bedroom that has the vaulted ceiling all the way up to the ridge, I can go up onto the mezanine level and it is no warmer than down at floor level. I think what is happening, is without the building losing heat, you don't get the convection circulation you get in an old leaky house.1 point
-
But make sure the architect understands your thermal aspirations as it is dead easy to design a building that won't match them - IE Window sizes and orientation, form factors etc.1 point
-
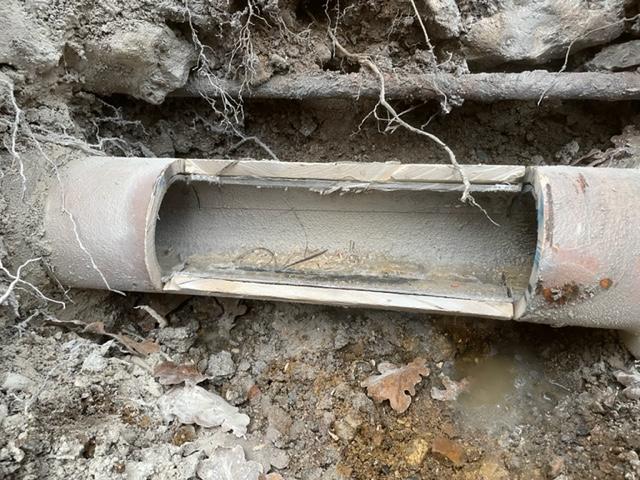
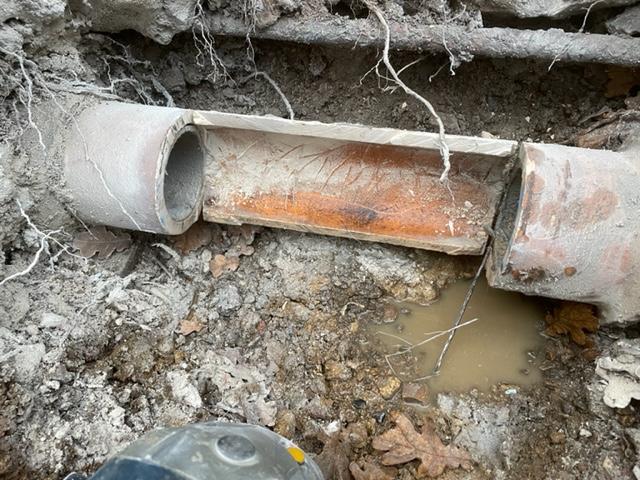
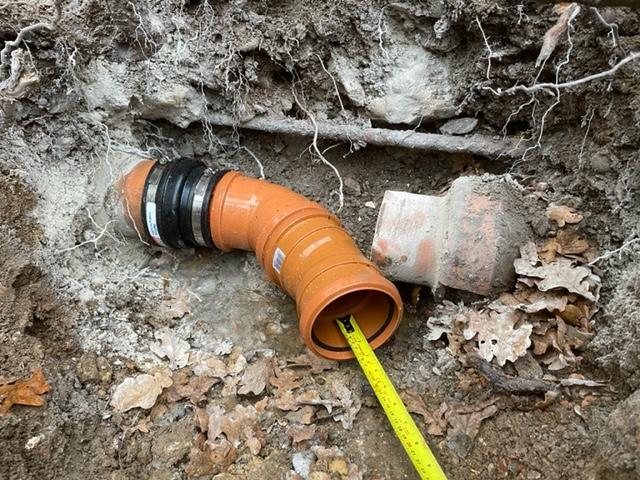
That was the longest 4 minutes of my life ?. Job done though, new house now connected to existing clay soil pipe going into road. Used 9" grinder with a diamond blade (but one with gaps in not continuous), cutted fine, needed to make a number of letterbox cuts in order to get the grinder right through the pipe. Used a cold chisel to break out to corners of the letter box cut. There was a plastic pipe inside the clay - used a multitool to complete the cuts into the corners of that.
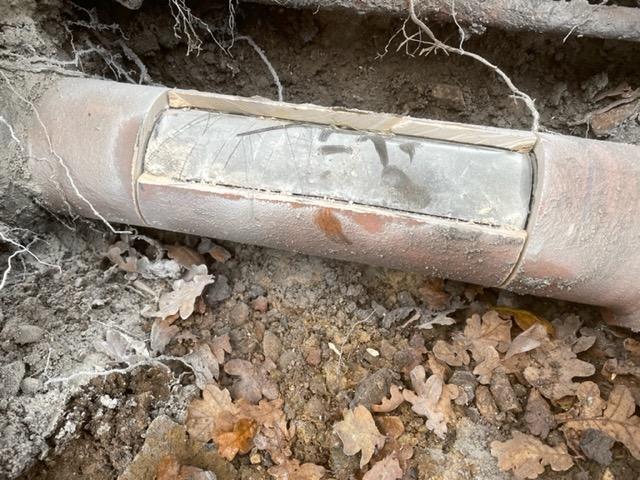
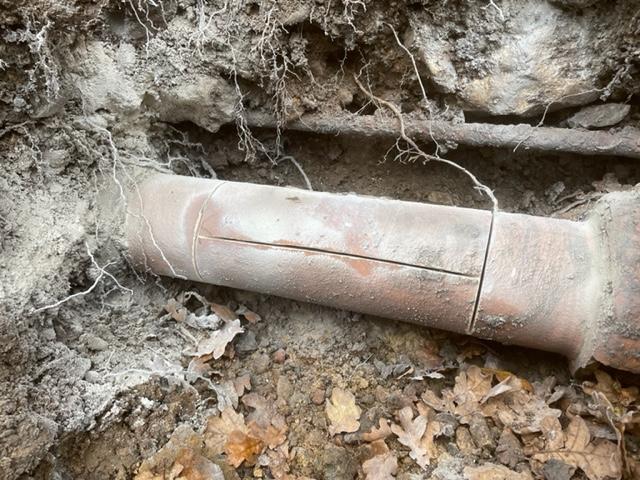
 1 point
 -
https://passivehouse-database.org/index.php?lang=en#s_37e0180462e73879604f2efcaeba53b3 Have a look at this for a start. You can filter down the results further if you like. Also if you drive around the locality and simply knock on doors of any new house you like and say "I love your house, who was your architect and would you recommend them?" People will be mostly probably happy to share.1 point
-
It's a fake chimney. There is a twin wall flue that goes out through the wall. That's the top of it in the bottom picture.1 point
-
I wouldn't like to embed copper pipes as you say with joints, Pert-al-Pert or similar would be better, a manifold would be easy enough. You could almost run it like UFH, but with radiators. Assume the upstairs will be bedrooms, do you like the same temperatures in your bedrooms? A thermostat in each bedroom, would enable you run slightly cooler temps in one or more rooms.1 point
-
I opted for double glazing with coatings that was very near triple glazing levels as I don’t like heavy bulky window frames., also I used ordinary wall ties.1 point
-
I think it looks very nice. The maker appears genuine. Saying about stoves gone back for a refurb, one of his early ones being 15 years old etc. Nice too it's made in England. https://m.facebook.com/champstoveco/?locale2=en_GB1 point
-
They don't1 point
-
I added until I had a double cream thickness1 point
-
Got to agree, the reason I would clean out the loose from underneath and stabilise the soil with concrete or similar. I used the term underpinning loosely to try and describe what I was thinking.1 point
-
Why do you want to hide that lovely big stone?, I wouldn’t , if you render it you are open to cracking, frost pushing it off (I don’t like render), natural stone like the rest of your cottage would look far better IMO. more in keeping with the rest of it ?1 point
-
Thinking about it, under screed pipes they have to be installed in such a way that makes it possible to replace; hence the conduit. If you have joint below the screed, it cannot be replaced, so will not comply with Building Regs1 point
-
https://www.gov.uk/guidance/appeals-average-timescales-for-arranging-inquiries-and-hearings1 point
-
Hello Bosi. Yes you mention weight.. it would be a good idea to have a look at what your roof structure can carry in terms of extra load. You have strenthened the roof but what has been allowed for in terms of acoustic plasterboard etc? You'll probably get much more noise ingressing through and around the window frames, service penetrations in the roof, put in a stove and the noise comes down the flue, the solum vents under the floor if you have them, your letter box and so on. I would try and identify / quantify all these areas first before spashing out on a fancy roof envelope. Don't forget how you are going to light the place.. no point in spending loads on the roof if you then go and cut holes in it for say down lighters. Yes if you live next to an RAF base then you may need a fancy roof acosutic wise but if the RAF are flying at night regularly then we probably have a bit more to worry about.1 point
-
I think with regards to the old RHI, they decided that they were cheap enough not to need subsidising. Fir a lot of places, they would be a viable heating system.1 point
-
Quote. MCS installation guide. ’Because PV array cables almost exclusively rely on double or reinforced insulation as their means of shock protection they should not be buried in walls or otherwise hidden in the building structure as mechanical damage would be very difficult to detect and may lead to increase instances of shock and fire risk. Where this cannot be avoided conductors should be suitably protected from mechanical damage, suitable methods may include the use of metallic trunking or conduit or the use of steel wire armoured cable in accordance with BS 7671’1 point
-
Quick sums. DHW 3000 kWh + Heating 6000kWh/annum. Storage heaters + immersion £2000 upfront. E7 @18p per kWh. 20 year cost £34400 ASHP COP of 3 for DHW and COP of 4 for Heating Electricity at 22p/kWh to account for some day heating. ASHP + UFH initial outlay £11000 20 year cost £23000 Cost of £10000 credit over 20 years @2.2% = £2400 Total £24400 ASHP cheaper by £10k over 20years.1 point
-
The existing loft insulation irritated the .... out of me. Mainly because I needed to change a lot of pipes in the loft and the roof is only 22.5 degrees and the fluffy was very thick. What with the 150mm insulated MVHR pipes (190mm thick) 2 high and a roof at 1300 ish it was too cramped. Anyone looking at the ducting photos will see the loft was bare. Before insulating, the bungalow was loosing 87% of the heat through the roof because the rest is so well insulated. Gonna have to turn the ASHP down a bit .. Now started replacing with this stuff.1 point
-
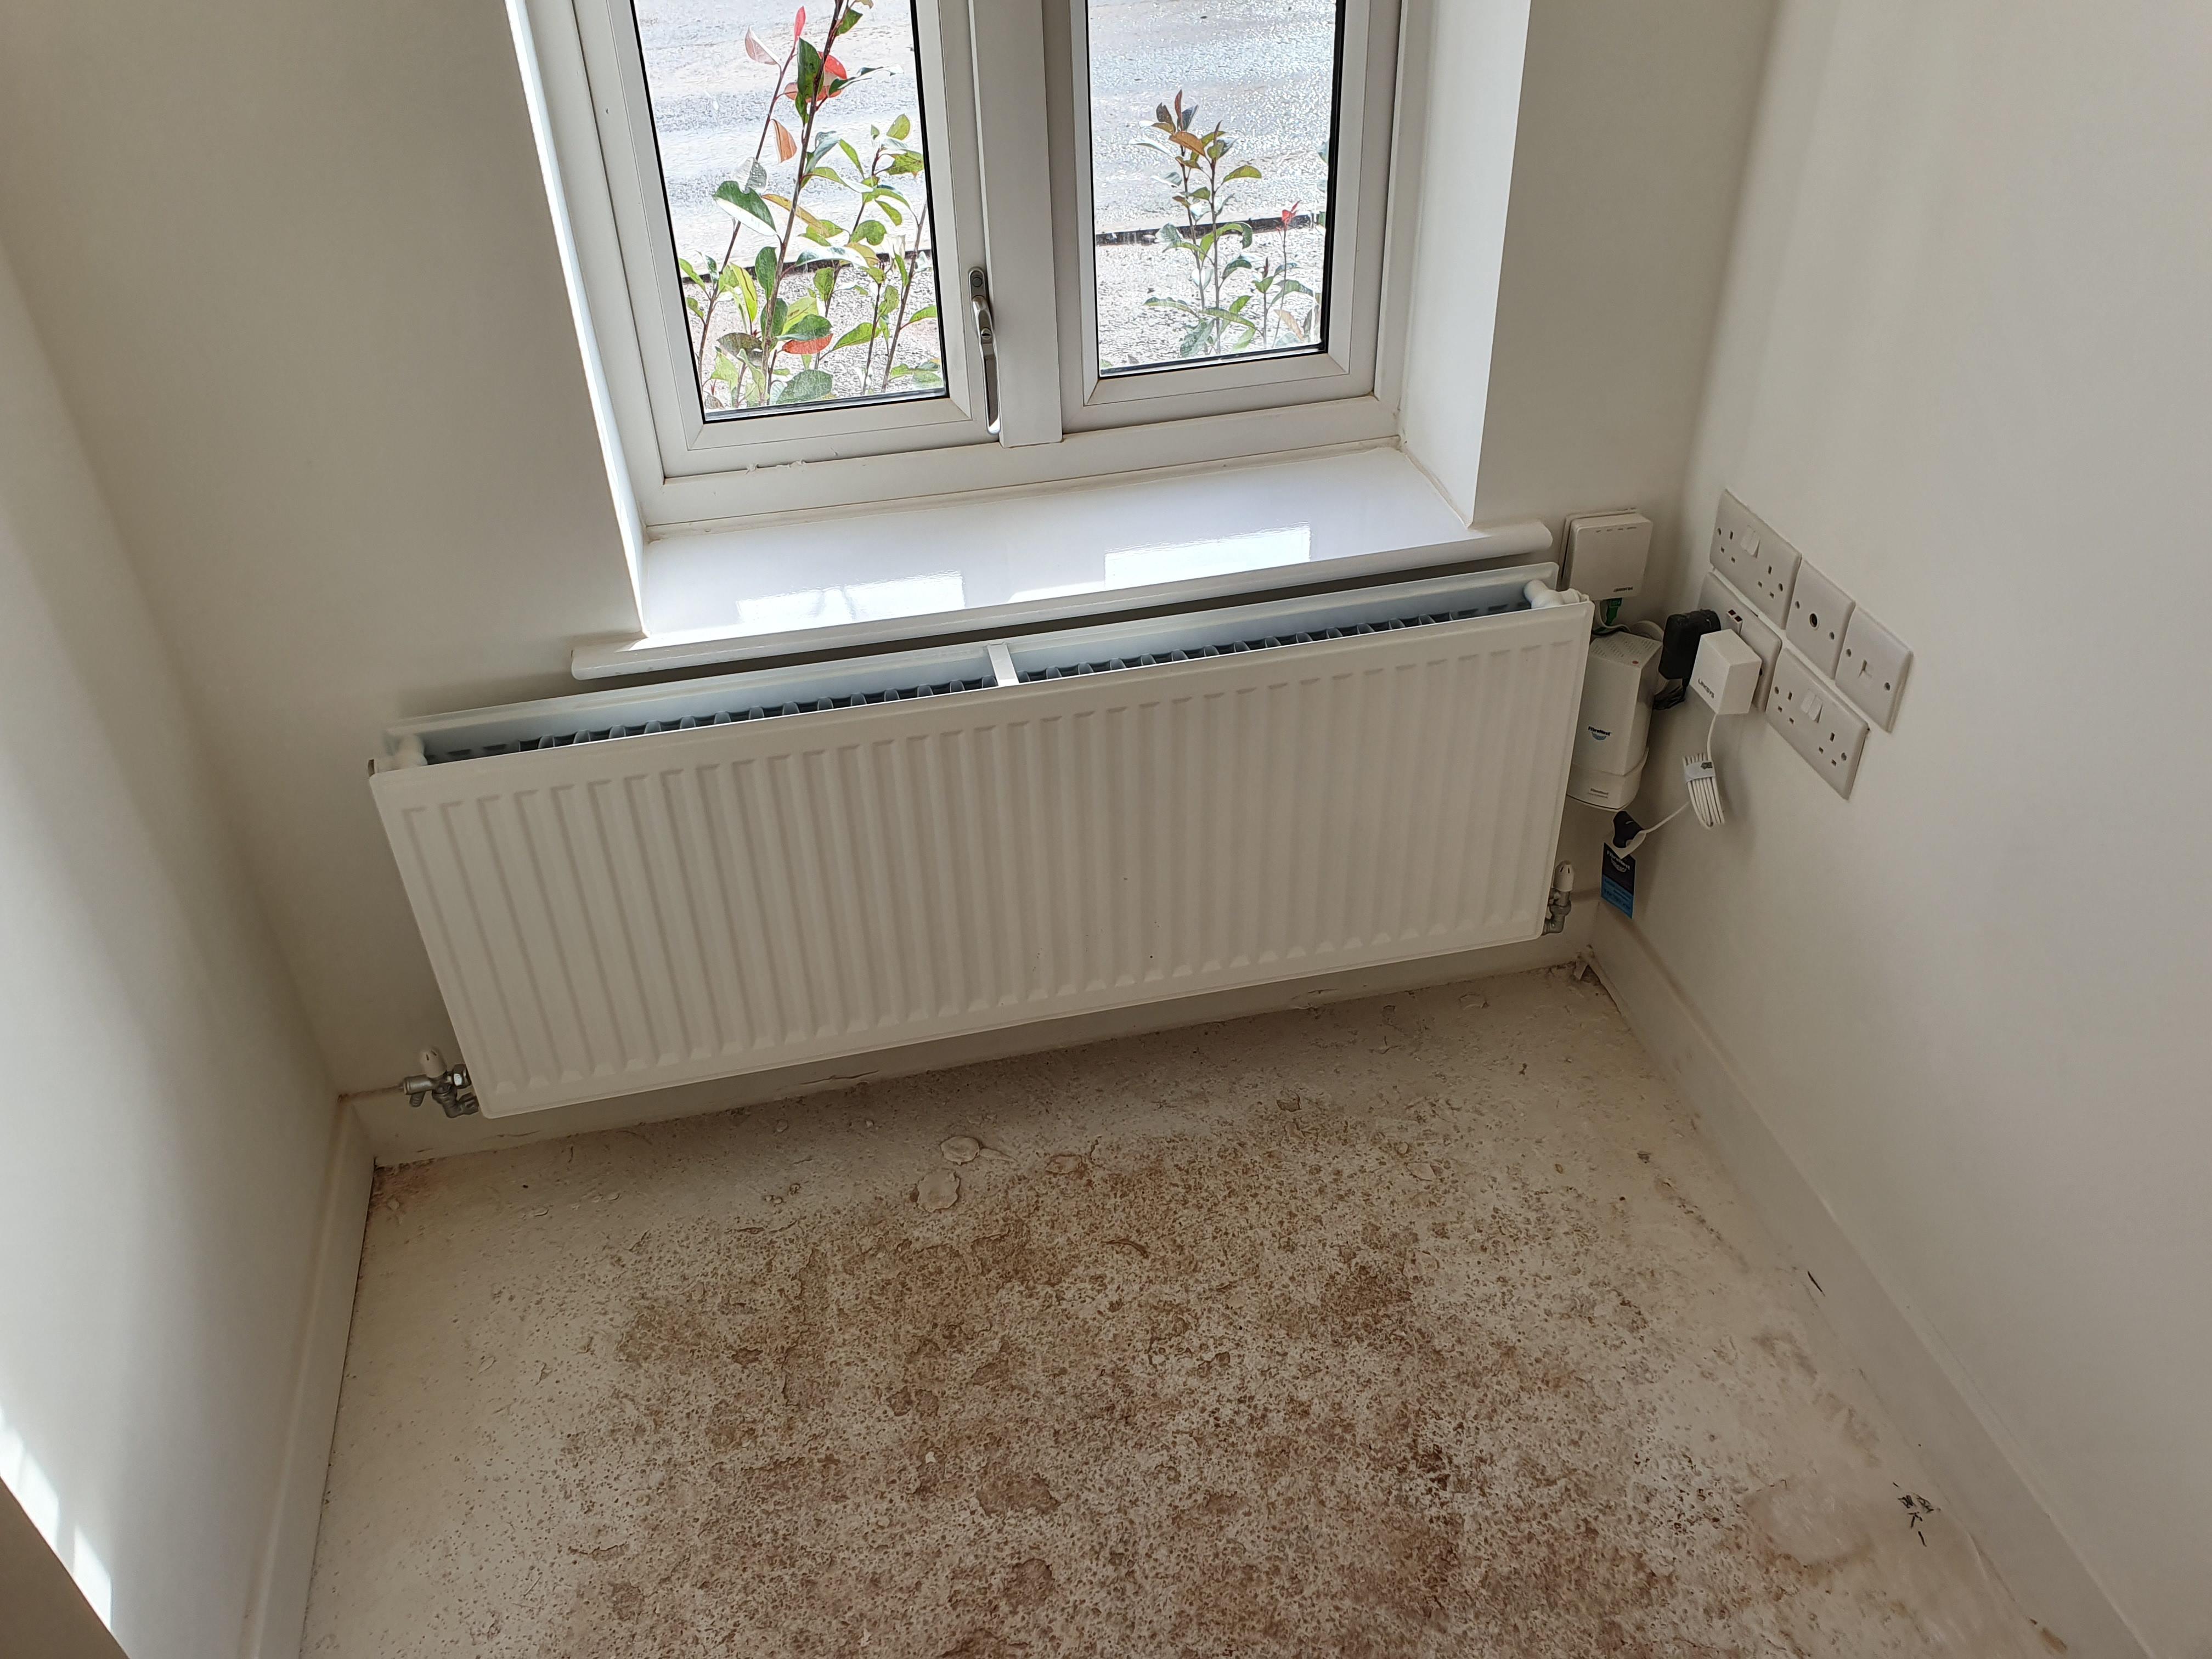
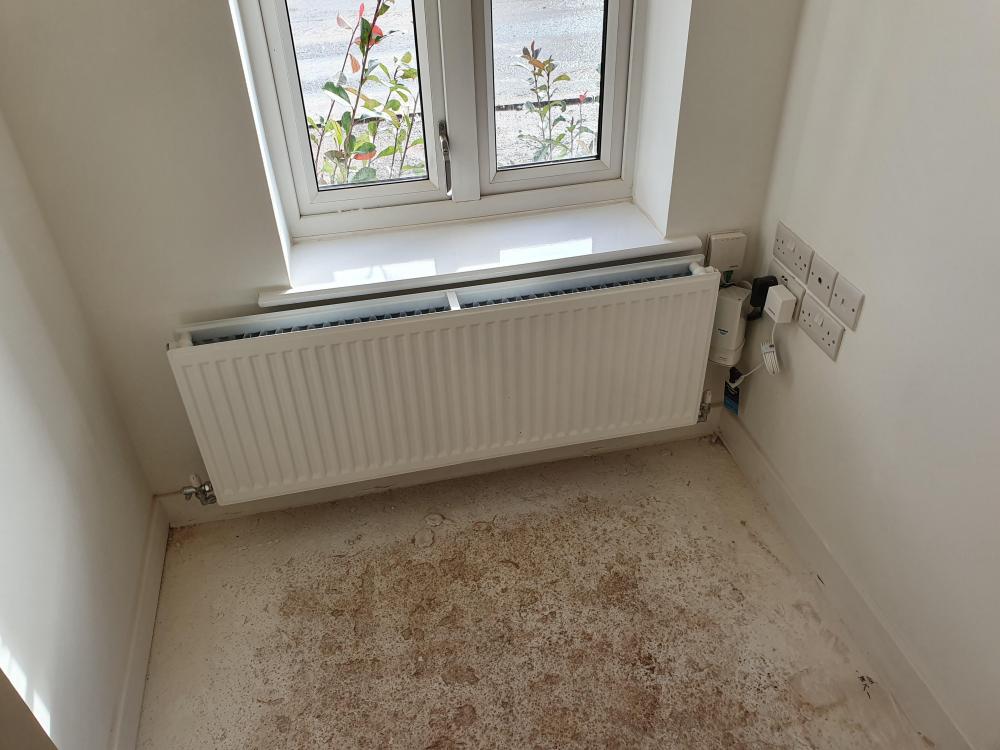
Why is the radiator so big? Smaller radiator would mean those sockets make a bit more sense (ie corner TV hides them behind it)1 point
-
We have everything in the ceiling void. From the basement buffer tank, the 22mm pipes go though a service cavity and along the ceiling voids to the manifold. Only thing in the floor is ufh pipes and the odd bit of waste pipe.1 point
-
Probably but BC here only seem to make exceptions in extreme cases. e.g. a neighbour was allowed to install a treatment plant about 3 metres away from a watercourse.1 point
-
it’s feasible, but there is also cabling between the indoor/outdoor unit too. mot will need pressure tested and capped off, best to make sure a route from a to b is available with accessible risers/ underfloor ducts etc1 point
-
I used 120mm concrete screws into our ICF (Durisol) - drilled to 135mm to allow for concrete dust that gets pushed ahead of the screws. I think part of the answer might be to do with the nature of the wall where you want to put the sink. I went to a lot of trouble to make sure that the brackets keyed into the concrete cores of the Durisol - and avoided the woodcrete type 'cladding' to the concrete lattice. You might want to consider mounting a really thick piece of wood as a shelf to carry the sink perhaps? My mum's house had an arrangement like that - gave you somewhere to put bits and bobs (like dirty boots)1 point
-
During August we focussed on clearing the exterior of the site to allow for easier access for future work, such as laying drainage and installing electricity. This was the back passage when we started, at the end of the winter before all the weeds started growing. and this is after most of the roof is gone and the bank & retaining wall are cleared. In the south west yard where the electricity pylon is, this time in the middle of winter. This was what it looked like. during the clearance, lots of mess and now, getting ready for the electricity to come from the pylon. We need to do a trench to within 1m of the pole and still need to dig up the yard, but as that is thick concrete that's going to be quite a bit more effort with the breaker and digger. Aside from that we reduced the size of one of the openings in the barn to allow for the pantry, something I have now and can't do with out. After knocking out the half blocks, this also shows how the back bank looked before it was dug out, lots of bracken. and now reduced in size. What does Sept bring, well I don't know yet, block work to build up the internal walls I hope, but HID has a bad hip at the moment so moving and lifting blocks is a bit beyond him at the moment. So, we shall see. Have fun and 'see' you next month. Jill1 point
-
I believe you' need more than Solar Control glass, and relying on manual shutters won't work when you are away from the house or insolation levels are changeable, unless you just leave them shut, which detracts from having all that glazing. Or, are you powering the shutters and automating their use? Have you considered automated, external Venetians? My experience comes from a similar setup to yours, where I have 33m² of glazing on a South-West facade into an open plan area of a similar size to you, that is also double volume with vaulted ceilings. If I don't deploy the external blinds, then with as little as 3 hours of sunshine in Spring or Autumn the internal temp will be above 25°C and normally heading towards 28°C. In the Summer this would be over 30°C. Due to my window sizing and the wish for single span blinds, I've "only" covered 22m² of the glazed area, so I have 5m x 2.2m area uncovered by external blinds. This is OK in Spring and Autumn, it warms the area without over-heating, but in Summer I have to deploy active cooling through the ASHP. I'm considering adding a film to this window to reduce the cooling need.1 point
-
The viewpoint used to decide items is a balance between the outlay cost and the running costs. This system will not be the cheapest way to produce heating and hot water nor the most expensive installation system but a balance related to the existing equipment and personal requirements. BEST ADVICE: Read the manual of the product you are proposing to use BEFORE you buy, especially regarding the installation and check that it will work for you. Choosing the ASHP: The size of the ASHP was determined by the heat loss calculated and the peak heat demand when the outside temperature is -8C. This resulted in the requirement of a small ASHP. We did not want an all singing all dancing system, but one that would combine with the existing central heating radiators/hot water tank and MVHR. An air to water ASHP was chosen to be able to use the existing central heating radiators already installed. The radiators are too small to produce enough heat at the lower running temperature of an ASHP so water coils are being installed in the MVHR system. The other alternative would have been to replace the radiators with larger ones as the existing ones are almost all single panel which could be replaced with double panel to increase the heat output. This option is going to be held in reserve depending on the effectiveness of the water coils in the MVHR ducts. The ASHP was chosen for it minimum working temperature of -20C and the fact that it had an inverter. An inverter heat pump uses a variable speed compressor which modulates its output increasing or decreasing its speed to match exactly the heat demand requirements of the building as the outdoor air temperature changes. This makes for a more efficient output. Because the bungalow is on the edge of an estate we wanted have a low noise unit. The unit installed is listed as 46 and 60db. I think that means 46db when running at lowest and 60db when flat out. (I'm sure someone will tell me). With the distance from walls and other properties this is well within MCS requirements. Because the bungalow suffered from strong solar gain in the summer the choice was made to install an ASHP with cooling. ASHP - planning, MCS: In order to avoid requiring planning permission the decision was taken to install the ASHP under the permitted development rules. The only position where the ASHP unit could be situated within the rules was on the flat roof. Because the flat roof has 200mm of PIR and the ASHP unit is about 88kgs concern has been raised that the vibrating motion may erode the PIR over time. The decision was taken to install and monitor the out come. The positioning gives an open run of air to the unit, but far enough from neighbours to hopefully avoid problems. Its. not perfect because during the summer it is exposed to the full sun. We hope to mitigate this when cooling the building by using the PV energy to run the ASHP. The theory being: Summer=hotter sun=more electricity produced= more power to produce cooling using the ASHP. ASHP pipework: The shorter the pipework between the ASHP and the thermal envelope of the building the more efficient. The greater the pipe insulation the more efficient. The shorter the pipework between the ASHP and the hot water tank/ heating system the more efficient, especially to/from the hot water tank as the water temperature is usually higher. ASHP connections: The pipework required is 28mm for this ASHP all the way round through the hot water tank, through the buffer tank and back to the ASHP. We used 25mm thick insulation. Two flexi hoses were used at the ASHP end with two 28mm isolating valves. The power cable used was 6mm twin and earth. The cable size is related to the possible voltage loss not just the power required! Apparently the ASHP is sensitive to voltage loss. To be honest I think 4mm could have been used but there was a roll of 6mm purchased for the PV with enough excess, so this was used. A suitable fuse was required which needed to be a MCB or RCBO Type C 20amp with this ASHP. A RCBO was installed. The control of the ASHP is via a Carel LCD "user-friendly" interface Controller and various electrical links. (More later as this develops...) The 3 port valve is a 3 Port Diverter Valve not a 3 port mid-position valve. The mid-position would allow water from the ASHP to go both to hot water and heating at the same time. However the temperature of the water flowing to heat the hot water tank is expected to be different to the temperature of the water flowing to the heating/cooling. The water side of the system will require antifreeze. so the volume of the water will need to be calculated... Please let me know what else I have forgotten...1 point
-
Zero Vat on new build and lower maintenance for years to come, even decades if you design in low maintenance lower or no heating bills - plenty enough up sides to demolish and start again1 point
-
the elephant in the room is the VAT, with a conversion like this you're handing a fifth of the cost over to the tax man and inheriting a load of issues with the existing fabric - have you had it costed up as a new build compared to the conversion?1 point
-
I think you will require a test just to put your mind at rest. However, asbestos was mainly used in insulating and fire proof products. It is unlikely to be in residential plaster/board. If you had ceiling tiles or Artex I would be more concerned. Even if there is asbestos there, it is cumulative long term exposure that is most concerning and you would not have reached that point.1 point
-
As above, both methods can produce a well insulated low energy house. both can also produce a rubbish house, so whatever you do take care with the details. Timber frame is traditionally recognised as easier to run services, but that assumes if you build in brick and block then you chase all the wires into the walls and wet plaster direct onto the block. If you want the best of both worlds, there is nothing stopping you doing brick and block, and then creating a battened service void and plasterboarding the walls (NOT dot and dab) which will give you the same service void for easier alterations or additions in the future.1 point
-
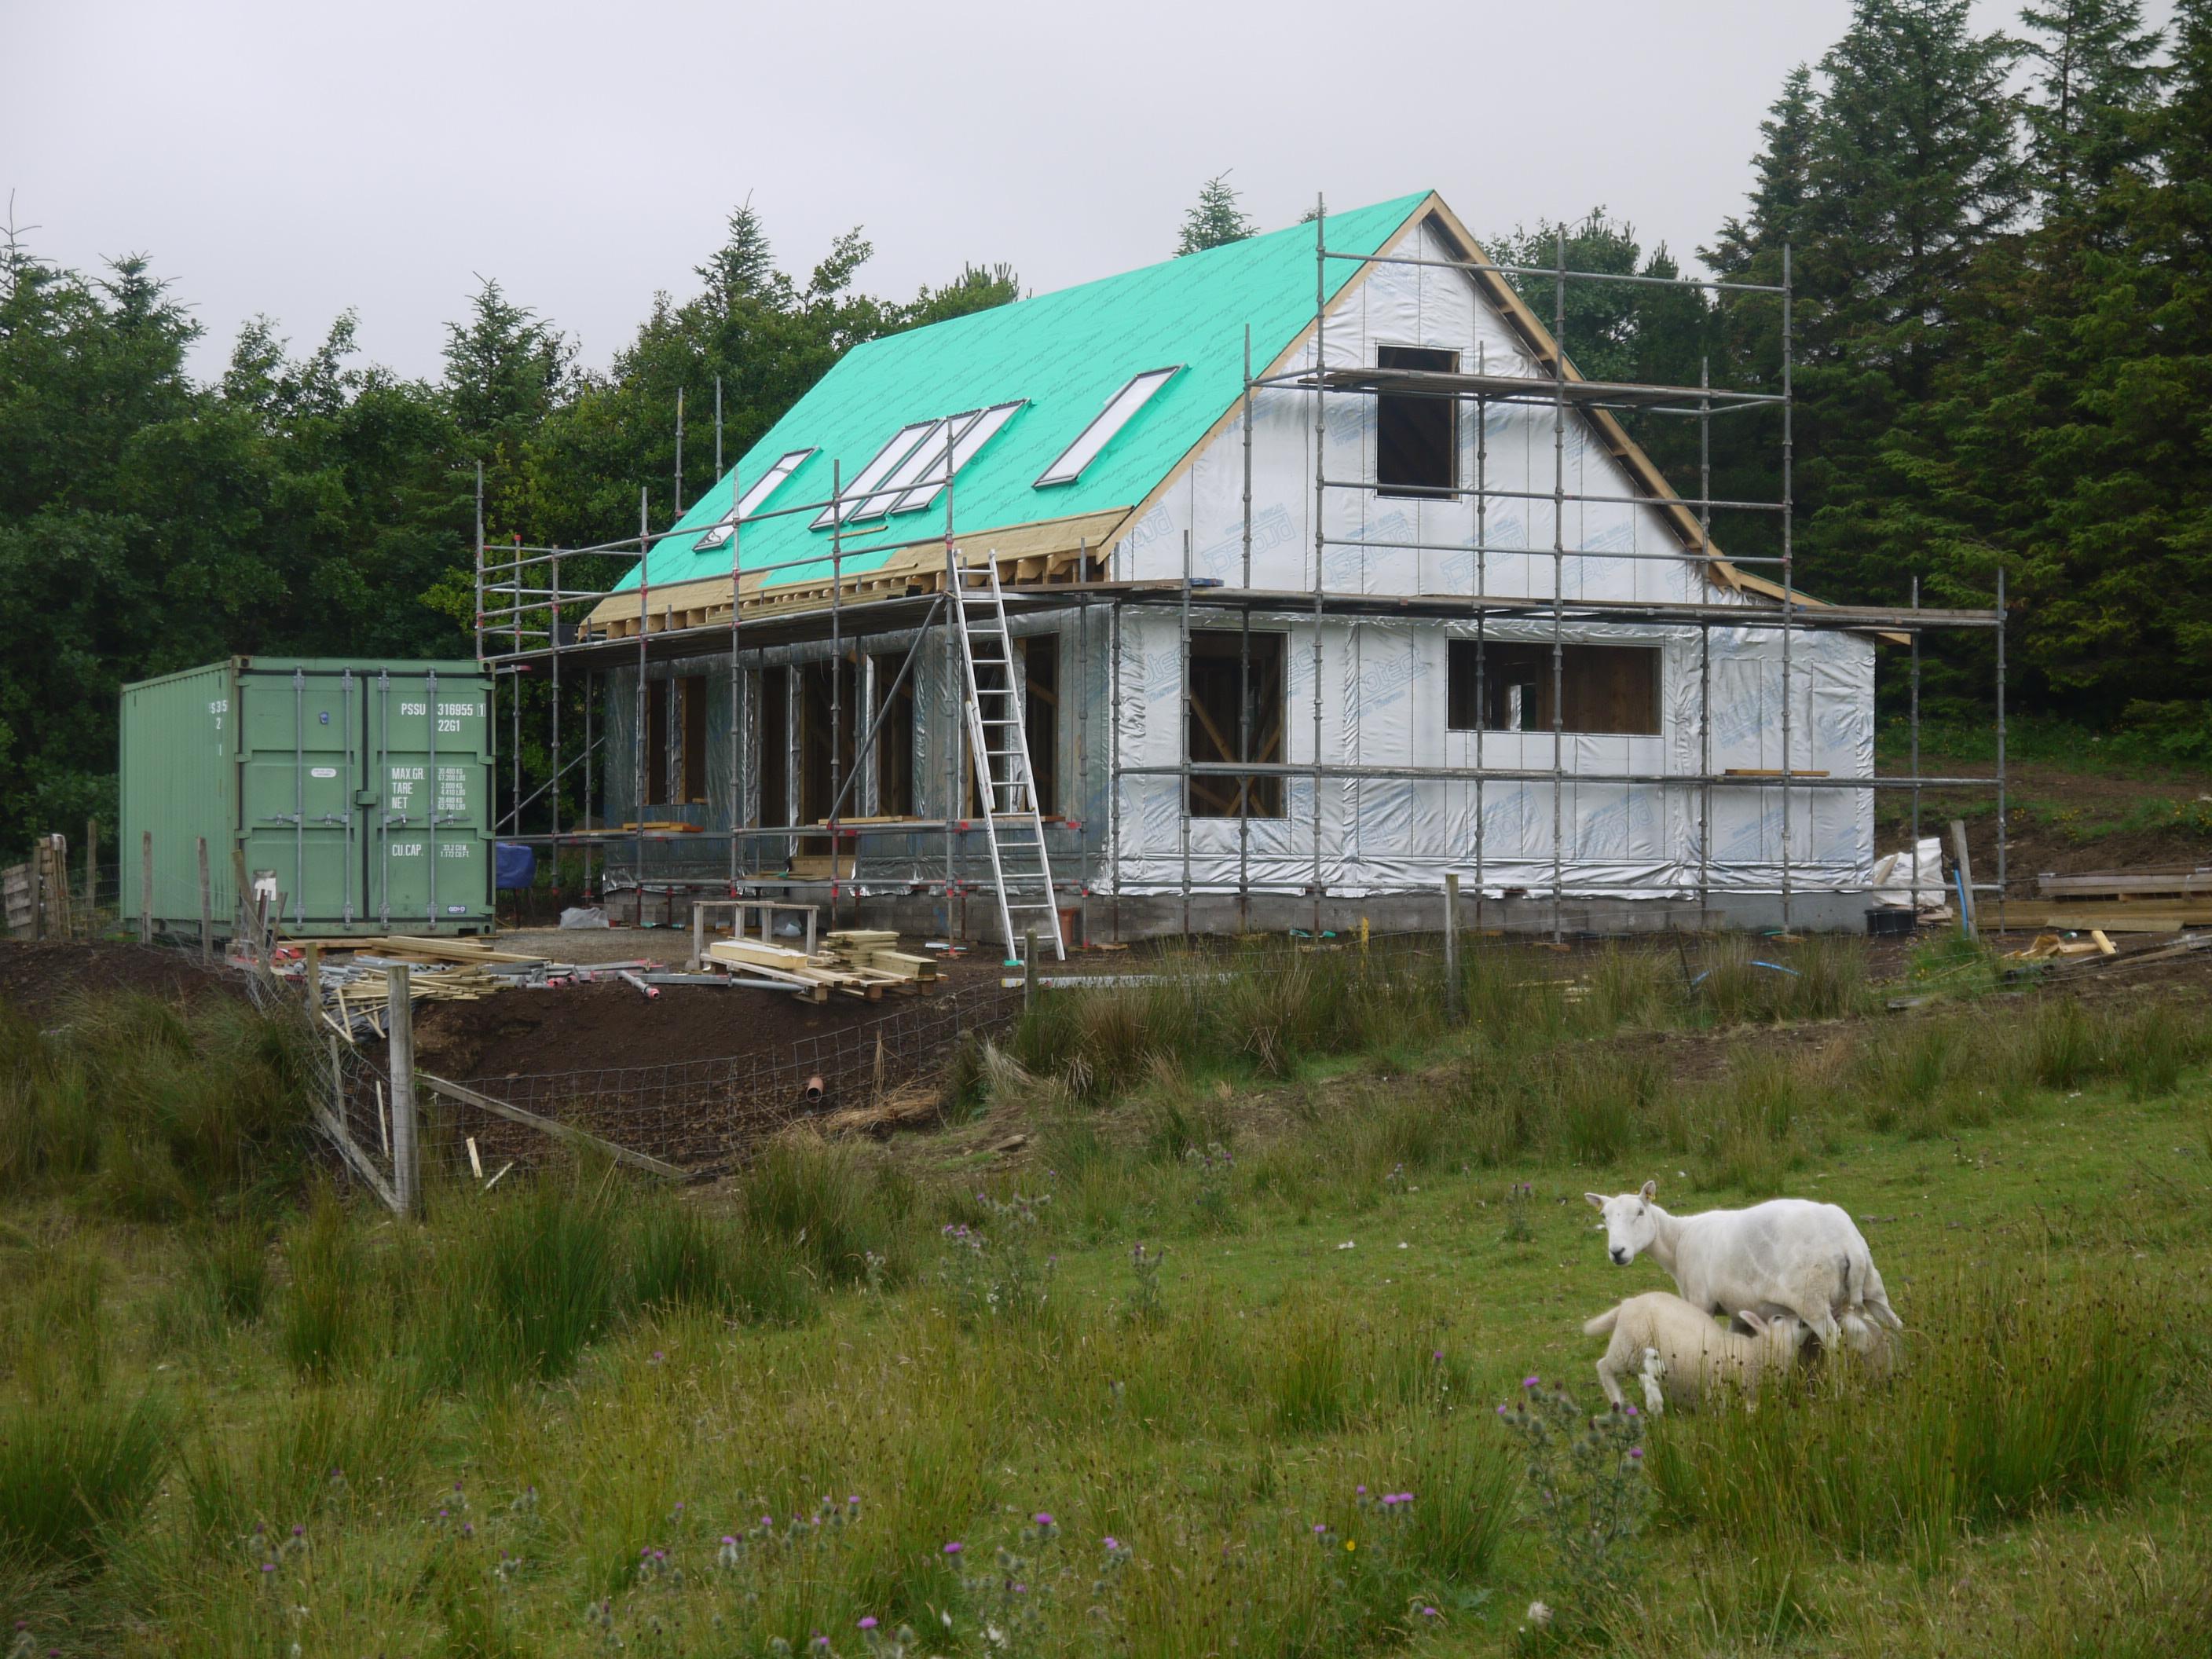
You won't get 2 storey except perhaps in the town, in the countryside you are expected to have some element of room in roof. I think our design with gable ends rather than dormers pushes that quite far, almost all of the upstairs space is usable headroom, much more so that a roof with dormers, while still keeping the room in roof look. I got the idea seeing houses like this more common on Skye, so should fit in where you are.
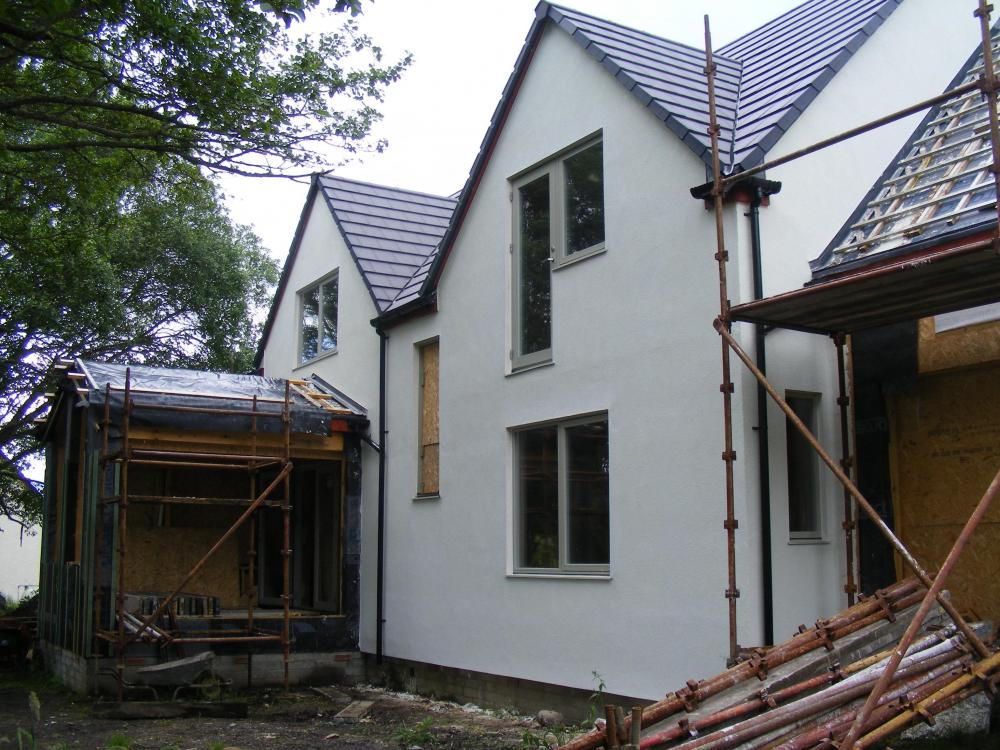
 1 point
 -
Thank you for your reply and information, Really like the layout you've gone for. Did you ever get a price from a kit manufacturer for your build to see how much you saved by just building it on site? At what point did you clear your site? As soon as you got planning permission? We are just waiting for final site plan to come back then can start the design stage to get planning underway1 point
-
I used local joiners to stick build with structural plans. Even with me sourcing the materials (1st time self builder) we were wind and water tight in a matter of weeks. This saved a lot and resulted in me having a big cashflow advantage during the build. This is from my blog on here It cost £13k for the materials to build the kit. Included within that is £5k for engineered attic trusses from Pasquill. Labour was £9k, included within that was the time making the kit, erecting it and also the suspended ground floor. Other expensive items were a steel beam for the vaulted ceiling and three Kerto beams for the middle ridge part. I also had to hire a telehandler with a truss jib for two weeks that cost around £750. By the end of that we looked like this. That just under 140m2 for reference. https://forum.buildhub.org.uk/blogs/entry/811-financing-and-reflection/ What's your plot like? I wanted to eliminate some uncertainty before building getting the foundations, access and utilities all sorted.
 1 point
 -
As @Russell griffiths pointed Out numerous times... if you dont go over the poured slab often and quick, again and again , you be ending up with a garage floor. So we had the concrete ordered for morning and ready with 4guys to spread and level, tamper and float. Pouring went smooth. Pumping was good. But when we started tampering and levelling the concrete, Murphys law kicked in: -concrete went off a lot faster than my groundworkers seen in quite a while -one Of the guys (concrete pump driver) had a stroke and needed medical attention:which took 2hours until ambulance arrived...taking out 1 labourer to take care of him So we where trying to get it done as best of my(our) skills. Managed levels and no massive dents (unlevel In a few spots but very minor /mm) . Managed getting it fairly smooth . But when it came to doing details/corners, concrete was already too hard to work it ... well , now we need to lay floor over it (later) anyways . Just thinking if that is already good enough to work with tiling on top or if we need to go over it with self levelling compound (I think that's overkill) ..1 point
-
This will be the last entry for our self build blog. Our plan We originally commenced a self build as there was no affordable housing for us to get on the housing ladder. The approach for the self build, was whether we could build a better-quality house than what we could purchase from a developer for the same cost. This was later refined to achieving a lower mortgage if possible. For the self build we decided to split the project into three chunks. 1. Obtain outline planning, purchase of site – this allowed us to know that a build was possible. 2. Put in services, access, design – this was the first actual work and made an area of croft ground into a valuable plot for lending purposes. Commence the build over two years - using subcontractors and our own materials to eliminate any margins and ensure tight control over the specification. Doing this would allow us to complete the project and prevent us being stuck unable to finish it. What did it cost? The total cost for the project was just over £196,000 (net of VAT). This includes the land, services, professional fees, overheads and the actual build costs. I’ve summarised all of my costs into a pie chart below. How was it funded? · A small electricity grant £1,550 · We obtained a croft house grant for £38,000 · The final mortgage of £74,500 · The remaining balance of £81,950 was funded by savings from employment, which started when we were 23 and finished when we moved into the house in July 20 at 33. · Most of the work we carried out was decorating and general labouring, therefore contributed a small amount of sweat equity to the project. What is the final result? The surveyor provided a valuation back to the building society of £265,000. This was pleasing as sometimes self builds can be more expensive then the total project costs or just about breakeven. Prior to building we were aware of building cost being measured per m2. However, during the build process I realised that this method of reviewing the financial performance of a self build had room for error, as the calculation could be skewed depending on the quality of the finish. For the purposes of our project this would be £1,420 or £1,230 excluding (land, professional fees and overheads). I came to the conclusion that the best method for us is calculating the final cost per month (mortgage, utilities, council tax, insurance) to live in the house. I set a target of £500 per month and I am pleased that we have been able to achieve this. I feel this is a good measure as I wouldn’t want to live in an expensive house that has a huge mortgage. Often at the end of Grand Designs and other tv shows, the presenter asks whether they would do it again? For us I would say, yes, of course. When I look around, every single item in the house was researched, compared, purchased and gradually put together. The thought, time and energy that we have put into this build has created a much deeper connection to the property. Our blood, sweat and tears are in the very fabric of the house. The hardest part of the process was when we were focussing on saving as much of our income as possible to ensuring a low mortgage. We made many sacrifices to ensure we reached this end goal, but we knew these relatively short term sacrifices would have long term gains for our family. For the actual building of the house, we chose a two year build schedule from starting on the foundations. This allowed us planning time between build stages and made the build process more manageable. It also allowed us time to do some jobs ourselves such as fitting insulation, interior decorating etc. We enjoyed taking time to do the jobs we were confident in doing well ourselves. Perhaps we could have taken on the more tasks, but I’ve come to the conclusion that it made more sense to work a bit of overtime and pay a contractor to do the work well, rather than us doing a job slowly and at a reduced quality. In the future, we would consider another self-build, perhaps in thirty years when I will be semi or hopefully fully retired. So until then… See you next time and thanks for reading.1 point
-
A busy November saw all the trades coming good, albeit some were cutting it fine for the moving in day – 30th November – However, we have moved in with all the services up and running. Having said that, BT and Openreach have missed the deadlines and as a result we are without any internet, phone line or TV for at least a week! Also the master bedroom built in wardrobes are still be fitted. The landscapers have finished their work, providing us with a patio area and a driveway area which will see plenty of activity. Look closely and you should see the hedging that has been planted. 330 separate plants in all. This was a planning condition and the hedges are a mixture of Hawthorn, Beech, Holly and Maple. Locally referred to as native hedging. The turf will be laid next Spring. Our Air Tightness test was conducted by a guy from Perth - a good couple of hours away. We never set out to achieve such low levels because we didn’t want the capital outlay of such a system as well as the infrastructure it requires. Our score was 4.9 which in our eyes is very good. There are a number of minor jobs which I need to do such as touching up the paint work here and there; re-oiling some wood in places but all that can wait until we have given the whole place a deep clean. The main external jobs outstanding are the erection of the oak framed porch and the downpipes. Both of which should be completed within the next 10 days or so. Anyway, this was not a self build in the true sense of the words but it was project managed by myself and built using a main contractor and sub contractors after the TF had been erected. I hope you have not only enjoyed reading about our project but have found some useful bits of information within the blogs in order to assist yourselves with your projects, whatever that may be. Overall my experience has been a good one. It hasn’t been without its difficulties, such as additional unforeseen expenditure and additional expenditure as a result of our mistakes, or due to us changing our minds! Such examples include ordering the wrong door frame - we failed to realise we hadn't ordered a threshold suitable for level access - a mistake that cost us £1k. Changing our minds over the 3 toilets we had ordered. They simply looked lost in their respective environments so 3 new ones were ordered at an additional cost of £850. A failure to get a full grip of the scaffolding cost an additional £1k and a failure to budget correctly for the foundations and dwarf wall for the carport cost an additional £4k. Final facts and figures - Build schedule – 6 months from the day the TF arrived. Cost per sq metre - £1850 – includes everything, and I mean everything - from the scaffolding through to the landscaping and it includes the car port and porch [ still to be erected] but not the land or fees. Only two skips were used throughout the build – everything else was removed by us to the local dump or burnt on site – best investment was a £25 oil drum which we used as an incinerator. Thanks for reading - Paul.1 point
-
I've paid a planning consultant 25k so far (plus architect 13k and surveys £12k). The person dealing with my application left the company so it was handed to someone else who isn't really interested and doesn't reply to my emails.0 points
-
pmsl. ….nearly choked on my Worthers original. It may only open the gate part way for you….?0 points
-
not my site, and the more i look at it the worse it gets!
 0 points
 -
This the glory hole door entry system ? . Is it ready yet ? I wish to try it .0 points
-
@pocster's ideal date.......0 points