
Leaderboard


Popular Content
Showing content with the highest reputation since 06/27/24 in all areas
-
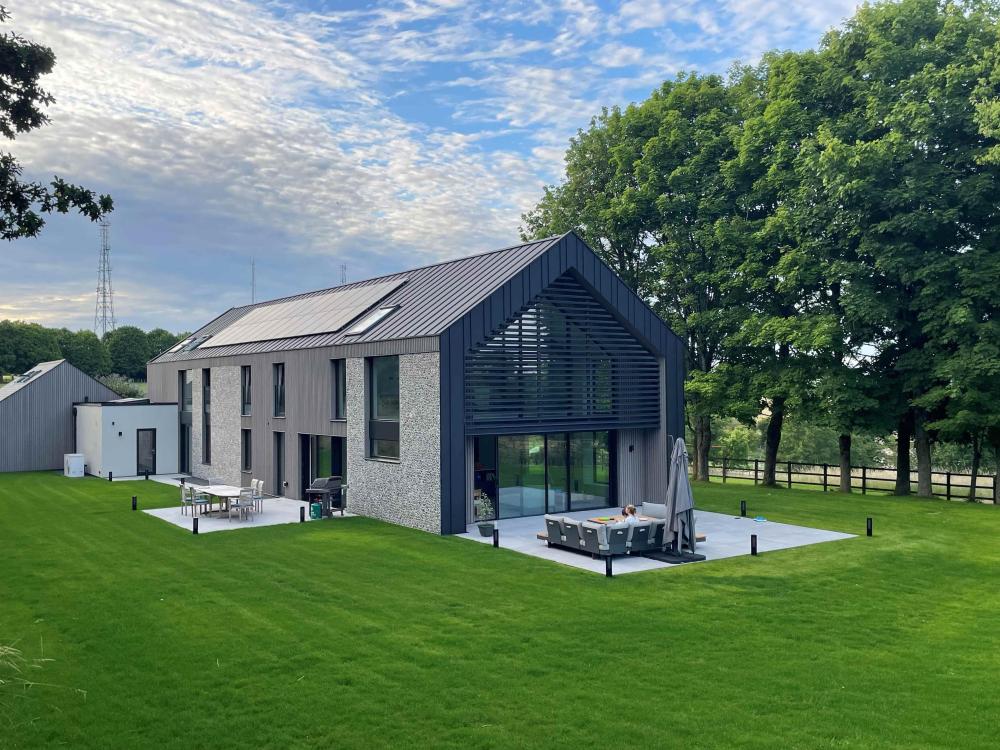
Hi All Well its been quite a journey ... House is finished (a year after moving in!!) with only the never ending snag list to sort ... Thanks for all those who have posted and replied to my many questions Bob (now an officially retired self builder !)

 26 points
 -
I hate these types of threads.....there is absolutely zero standardised way of quantifying this question. There are far too many variables in how folks achieve a self build and what they include in their costs to enable a like for like comparison. @nod is an absolute outlier and every time this question is raised pipes up about how little he has spent per m2 with no context to how that was achieved. Is land included in your cost there, i expect not, how much have you spent on labour throughout vs how much have you done yourself? There is not much to be saved on materials...shopping around and economies of scale will help but the margains for material cost savings are small compared to the savings which can be made if you eliminate external labour costs and are able to do the work yourself. Labour costs are the killer and individual self build costs per m2 are primarily determined by how much work they can actually do themselves. But it comes at a cost of time.7 points
-
6. Force development companies to start building on their "land banks" or compulsory purchase them and return them to other housebuilders / councils / small developers.7 points
-
If it were me, something new & innovative like this is needed. 1. Govt instruct local councils to identify a minimum of % of their area for housing within x months targeting brownfield sites, MOD land, factories etc etc etc prior to using greenfield. if land not already owned by state or local authority, compulsory purchases made to create fast track building zones. 2. This newly state owned zones sold as single plots to private individuals, developers, housing associations etc. As such the cost of the compulsory purchases is recovered at zero cost to taxpayer or even a small profit to the state. Nobody is making money out if it. 3. Local authorities agree a set of broad design requirements to fit in with local area and needs and produce a catalogue of hundreds of designs and styles with detailed drawings for high quality houses. Like what Kim Jong Un does with the North Korean haircuts. Any design outwith this catalogue needs normal PP otherwise default being you can just crack on and build your preferred approved design via a fast fact approval process. Eg plot 27 is pre approved for a single house, or two semis. Plot 41 for 6 flats or three terraced houses. Etc 4. Land Owners can then go ahead and build on this basis. No planning required. 5. If plot is not built on with x limited years plot ownership returns to state, without refund for purchase price. Build on it or lose it. 6. Self builders in one of these zones are VAT exempt from the outset. No paying vat then claiming back. HMRC do spot checks to ensure no fraud. Upfront build costs reduce by 20%. 7. Lending schemd so that the wealthier people can use their own savings or equity in their own homes to go into a national fund or similar that provides cheap loans to those seeking to build in these zones. Sort of a credit Union whereby the wealthier contribute at zero risk and some return (eg tax free saving), and the younger generation access and benefit from cheap loans. Effectively the wealthier lend to the poorer. The bank of mum and dad actually effectively becomes just that via a scheme. no doubt what I’m suggesting can easily be picked apart and criticised but mainly what I’m saying is if not my idea, we do definitely need real innovation to facilitate individuals and companies to build good quality homes easily, quickly and cheaply in a way that everyone wins, not just the very wealthy.6 points
-
For starters, my list includes: + force the inspectorate and LPAs to publish full stats and don't let them play games e.g. taking 3 months to get to validation. Put the bottom 5% in 'special measures' without fail. + penalise LPAs financially if they're slow - return planning fees after 13 weeks, automatic approval after 20 weeks. + penalise LPAs if the pre-app advice they give is wrong. Allow recovery of resulting follow-on costs in the county courts (architects fees etc) due to erroneous pre-app advice. + force LPAs to accept paid-for meetings with applicants. + stop LPAs using generic terms without more detailed definition - amenity, environment etc. + allow applicants to nominate applications for planning committee review. + make single dwellings exempt from part O, SuDs, biodiversity, nitrate neutrality rules. + make LPAs suggest design amendments (in at least 3 rounds) instead of just blank refusal. + disallow LPA refusal using generic terms without evidence & substantiation. For instance if the LPA thinks the design is 'too big' they should justify why (e.g. floor areas of neighbours, average floor areas in LPA region) and propose a figure for an acceptable floor area. + for appeals, throw out the LPA statements of case (i.e. appeal automatically allowed) if the LPA doesn't follow the appeals procedural guide. + automatically award full costs (including applicant's time at a prescribed rate) if an appeal is allowed - right now, there are no repercussions for an LPA that wastes applicant's resources by going to appeal.6 points
-
After reading the thread below I went looking for how to properly hold a bigger drill. I'm sharing in case other beginners like me need to know how to safely hold a drill - and that a clutch won't kick in magically but needs you to provide resistance.5 points
-
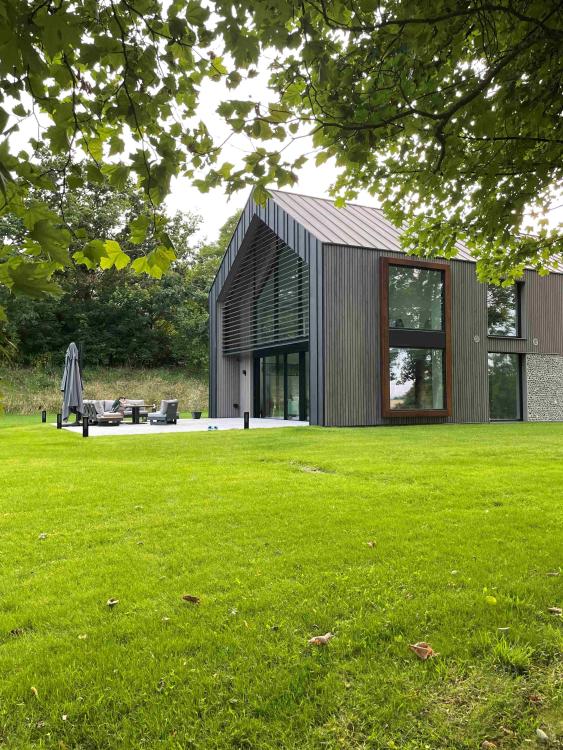
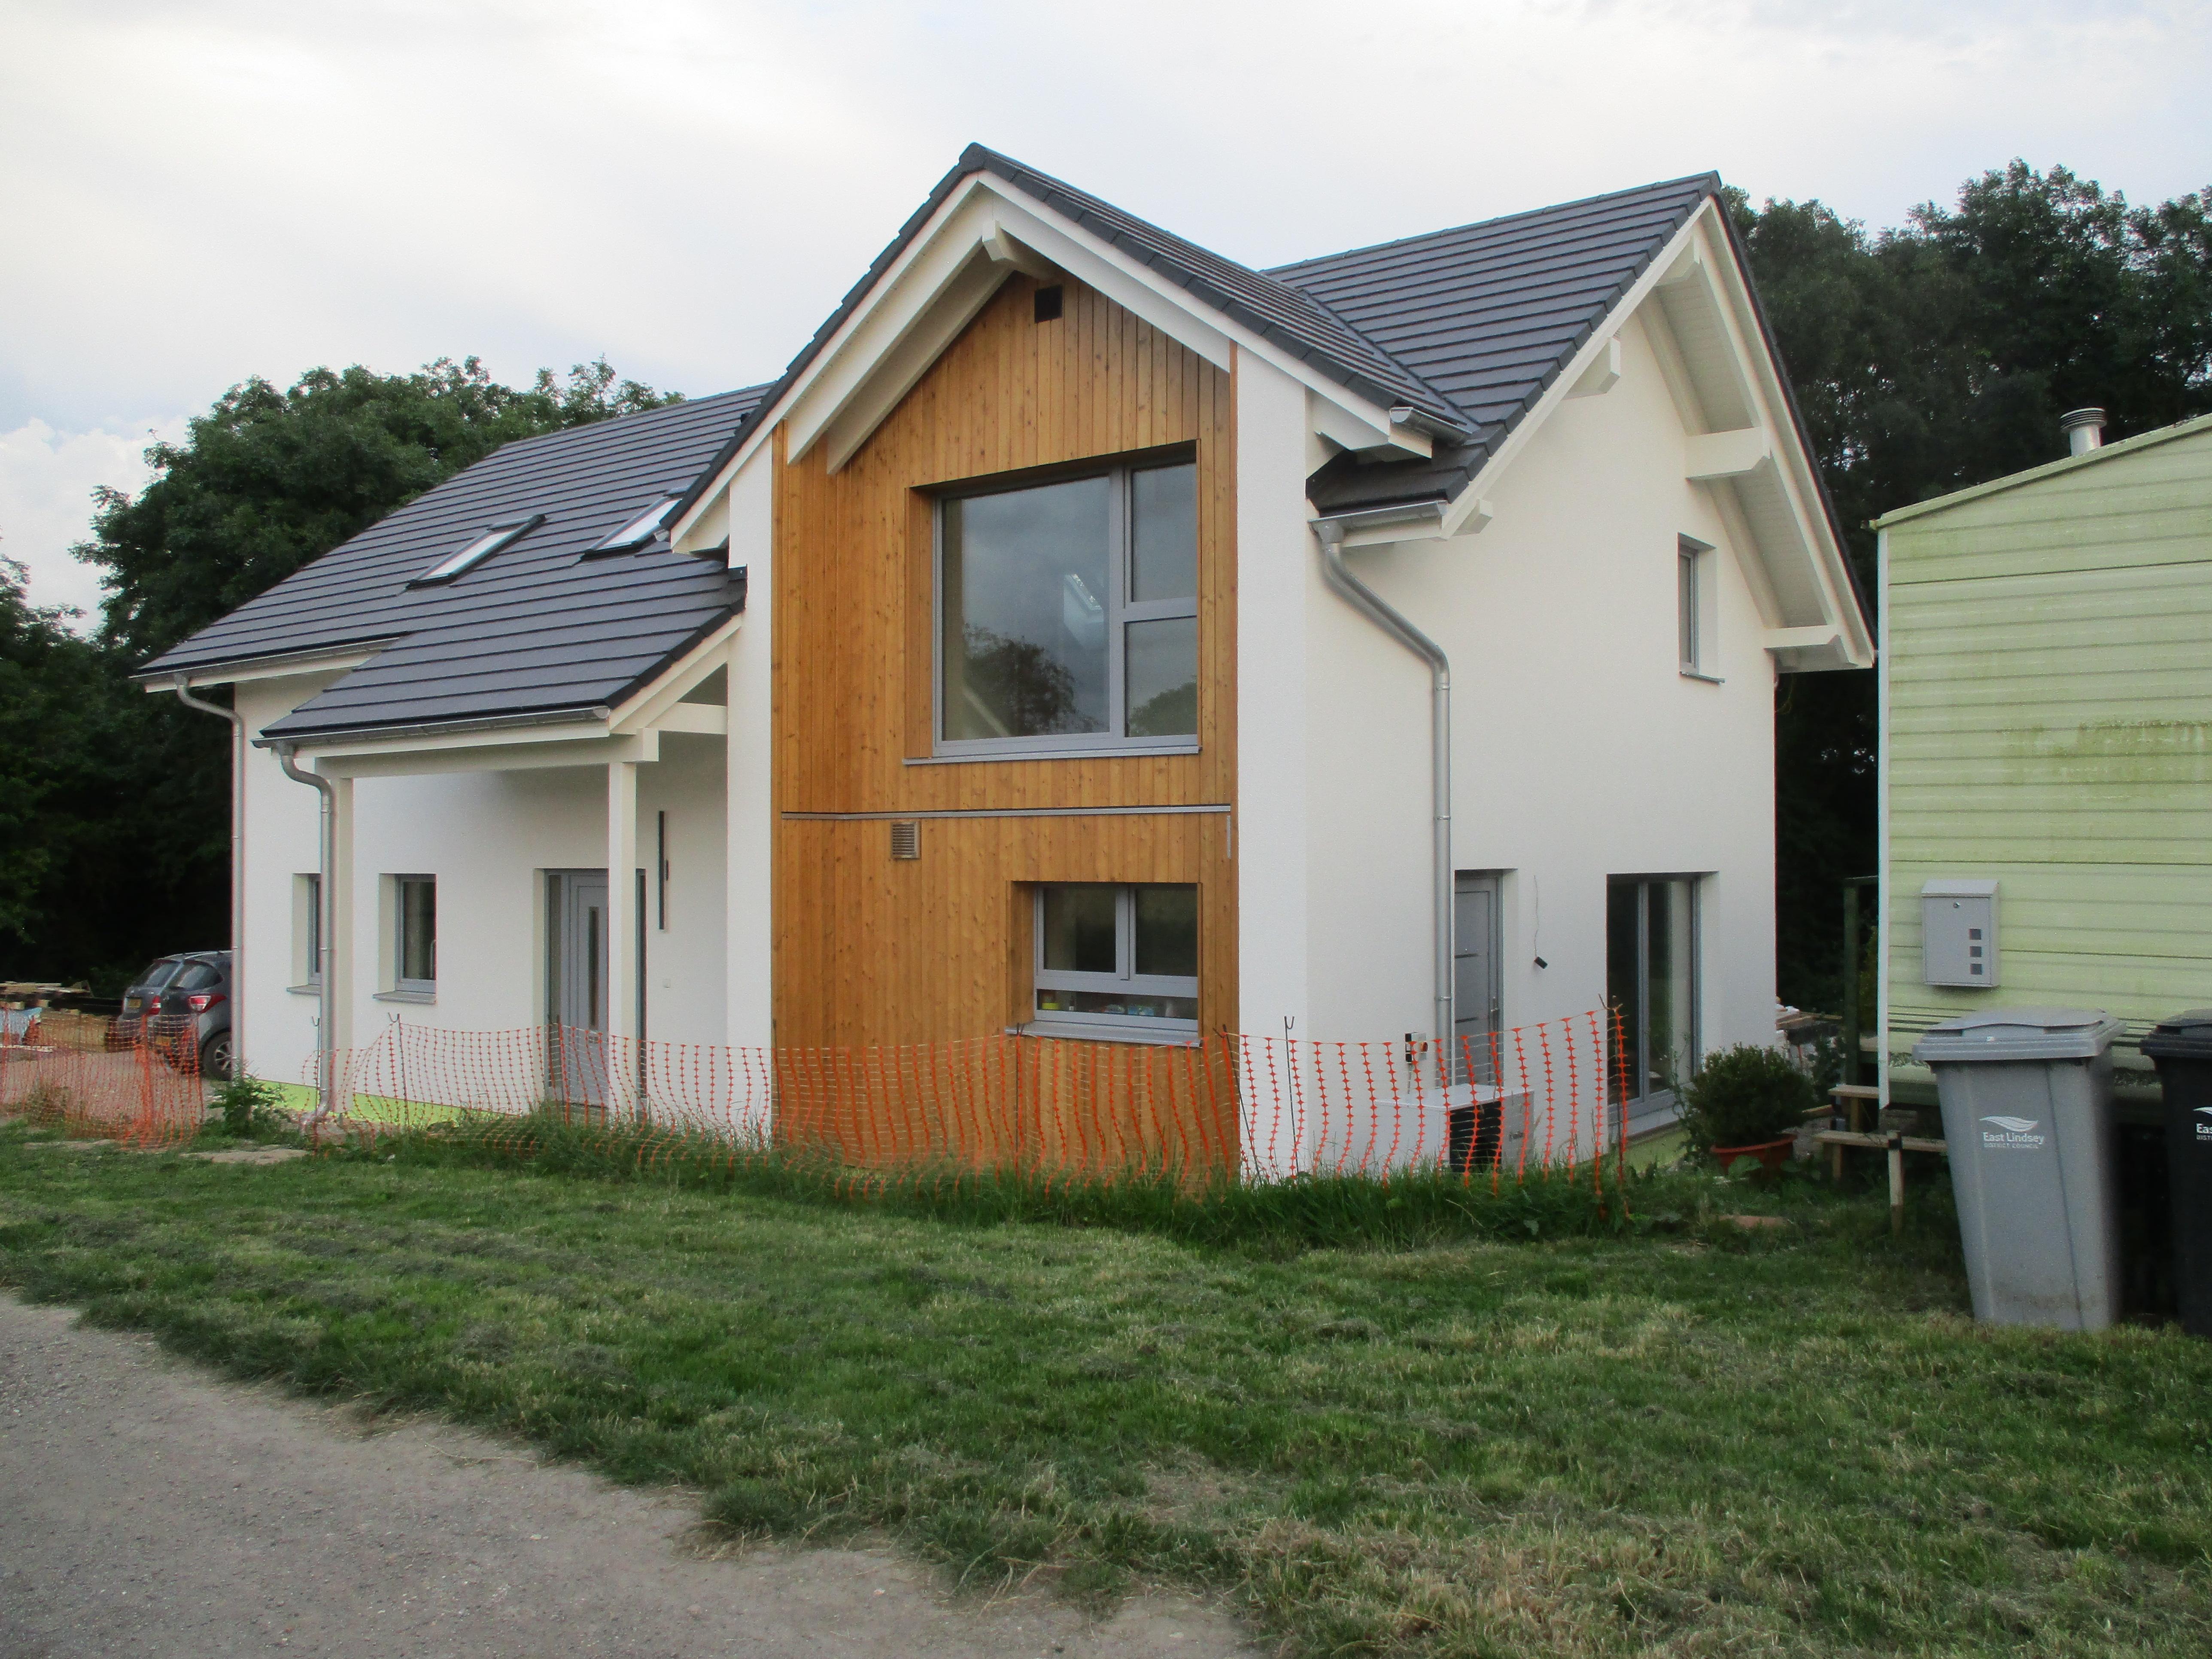
Well this is entirely our original design but adapted for the DW system so they can do it (if you alter any of their standard designs by say moving a window it becomes "bespoke"). We omitted additional cladding due to cost and didn't do the glazed gable and fancy aluminium glazing as their system couldn't handle it. The interior is however exactly as we wanted. Sure there were compromises to make but we should be in, carpets laid and sitting on the sofa watching TV within 12 months of clearing the site and bringing on the static. We are both in our later 60's so didn't want a prolonged build on site, been there, done that. Garden to sort but can enjoy a warm modern house this winter after the last couple of renovations of old, cold "characterful" houses.
 4 points
 -
Not at all, achieving the standard is not particularly difficult for the self-builder. Probably because the standard is very well considered, setting achievable targets for justified reasons that deliver a return. Certification is a personal choice. It does cost extra, but doesn't tell you anything about your home that you don't already know. Living in a PH house has given me more significant reasons as to "why", than I had when I chose to build one. I initially wanted reduced bills, I was building a long-term family home. Since the targets are significantly higher than Building Regs at the time, especially for a conversion, I did wonder if they'd be achievable and wasn't too concerned if I didn't quite get there. I also knew that I wanted more glazing than a PH house should really have. Through the Design phase the PHPP software really informed my decisions, and demonstrated where budget was best spent to achieve the overall building performance. The PH targets became my targets, as the PHPP software showed what changes were needed and didn't leave me guessing whether or not I had too much roof light area or not enough insulation. Had I just been building "better than regs", there are loads of minor changes I wouldn't have made, because I wouldn't have been using the tools that showed me exactly how the building would perform without those changes. While PH does deliver the low bills that I was after, the greater impact is comfort. I believe it's the lack of temperature gradients across rooms, with no perceivable convection currents, stable internal temps across the day, no perceivable air infiltration, the quietness of 3G glazing and while not specifically PH, the solidity of blown cellulose insulation gives rise to a comfort level I've not felt in any other building.4 points
-
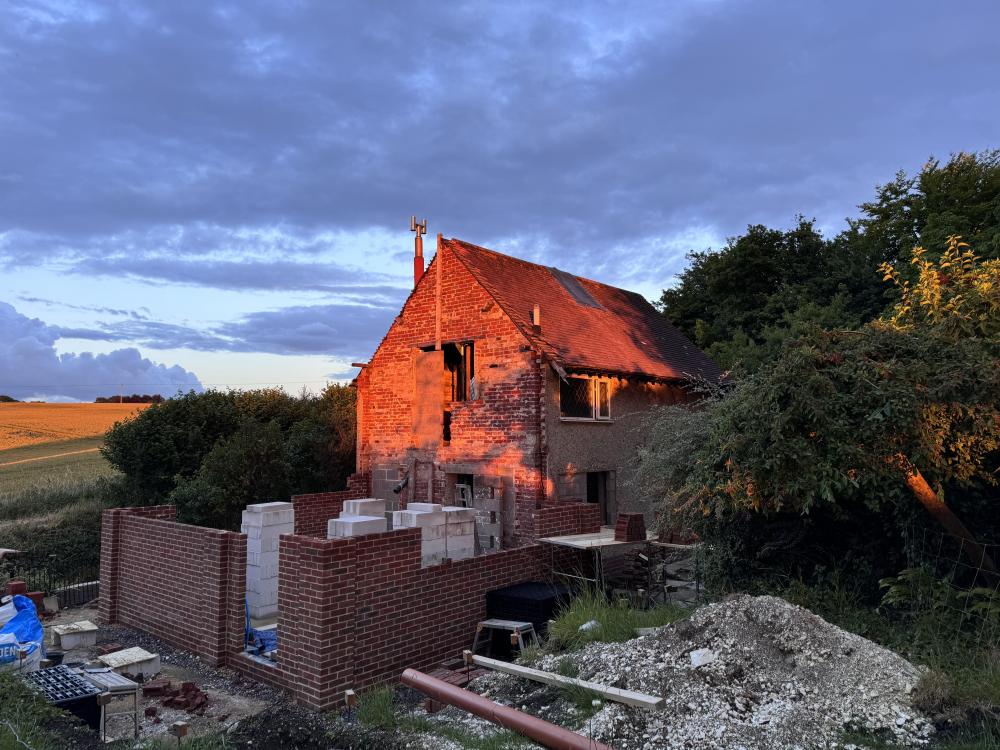
Over the last couple of months we have made steady progress. But, I've been very remiss in taking photos. Last time I posted we were busy building up the walls in phase 1. It's now ready for the lintels, which we waiting a month to be delivered. This one requires some blockwork changes as the overhang is over a block joint. This is the inside looking North looking down over the valley. This is the outside looking in, again some block changes needed. We used thermally broken IG lintels, which were on a 4 week lead time so to fill some of the time we have been prepping for phase 2. We realised we didn't have enough space for concrete lorries and storing the spoil so we moved the soil spoil heap further into the field. This doesn't look much, but it took 3 days and countless repeats of load dumper, move and tip, and repeat !!!! We've also moved into one of the horses winter fields, but we will return to a field when we've finished. Apart from putting block on block and repeat we've bought a few items at auction. We got some windows that are exactly the same model as we are ordering, maybe not the exact size, but we can make them fit. Of course the cill will be replaced. We also got a lovely sink for the utility room. For the first time in months we are dry on site, not sure how long it will last. At the moment I'm trying to order the posi-rafters for phase 1, but I need some input on a beam from the SE who is being very un-responsive. We've realised that we have a beam on our SE drawings which say 'B3' and no details. He initially responded saying it could be either an RSJ or a flitch beam, but that was 2 weeks ago. I was told last week that the rafters are also on 4 weeks lead time. Once we have those then we will be putting some of the barn roofing on as a temporary measure as we'll get the whole build roofed at the same time. I'm horrified at how little we seem to have done, but as I'm no longer working at home I think the work force (hubby) may be slacking 🙂 More soon, when I have some proper progress to show. Jill4 points
-
And don't get me started on Affordable Housing contributions. My LPA want £12,797 from me in Affordable Housing contributions despite the fact I'm proposing a *single* self-build development! They are using the vague wording of the NPPF and the PPG because they are a 'Designated Rural Area' to set a requirement that should be a *threshold* of "5 units or less" to actually set the requirement effectively at "1 or more" as 1 is *less* than 5! Now there should be an evidence base and local justifications to support any lower threshold but there are none and even the financial viability report does not mention self-build, only "developer profit margins" concerning viability, and there are no developer profit margins in self-build! I tried to challenge it through my appeal but the Inspector declined to comment due to it not being necessary until the Technical Details Consent stage, so I've gone full FOI request on the LPA today! 😉 https://www.whatdotheyknow.com/request/evidence_base_and_local_circumst?nocache=incoming-2696710#outgoing-16861474 points
-
Awesome response Alan - can't disagree with anything; great ideas! On a personal note, following my dismissed appeal, evidence is a key one for me. The Inspector made several observations that were clearly opinions and yet used that to substantiate their decision. They clearly don't know that "demonstrably" in relation to harm is not about opinions but means they actually have to provide evidence to support the observation.4 points
-
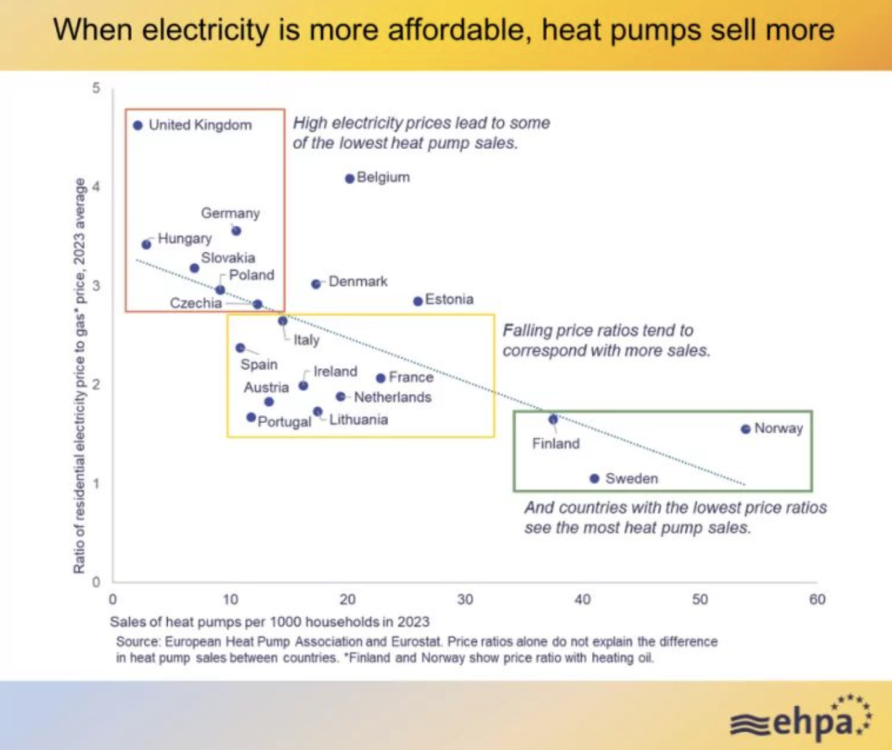
It's been said on here before, but this graph from the European Heat Pump Association shows clearly the relationship. A higher ratio of electricity price to gas price ("spark gap") correlates with fewer heat pump installs. The UK has the highest spark gap amongst the countries included in the analysis. No surprise then that people in the UK are not choosing to install heat pumps so much as other countries .... when there is a choice. Btw, it's helpful that the UK are included in this analysis.
 3 points
 -
Like Joe90 we built to passive ideals but did not agree with certain aspects of the standard. In particular the need for and ASHP. The whole point of passive is a focus on energy reduction. A house built to them frequently doesn't consume enough energy to make and ASHP install sensible, the alternative of a low cost A2A makes more sense. Understanding the basics of passive build is fundamental to reducing inputs, certification isn't. I can't overstate the benefits of living in a house built on the passive principles, it's an incredibly comfortable living environment.3 points
-
I built to passive principles, probably not actually achieving a “pass” and had no intention of getting certification. The driving principle for me was a comfortable house that was affordable. My thought was if I ever sold the house showing how cheap it was to run would have more clout than a certificate that most buyers would not even understand. Even now i believe a lot of buyers take very little notice of the EPC rating (presuming it’s accurate which I believe a lot are not!!!!).3 points
-
In case anyone else is not familiar with "VDI 2035", as I wasn't, this is a good quick intro… https://www.heatgeek.com/heating-water-treatment-explained-vdi-2035/3 points
-
For the last couple of years, every time I've finish a box of pozis, I've replaced them with the torx equivalent. They're just so much more pleasant to use.3 points
-
The electric car thing. We are being told they are just as good as an ICE car and we should all have one. Just 2 problems with that. First they are NOT as "good" in some respects because range and charging times limit their use compared to almost instant refuelling of an ICE car, and they are even more hopeless if you want to tow something. The "sales pitch" needs to be more honest, they are just as good for many users that don't do long journeys or tow anything, but be HONEST that they are not a drop in replacement that will suit all uses. And if you answer that with "they will get better" then that just reinforces my point, they are not yet ready for all users so why buy a pre production development model? And secondly they are just too expensive, most people like me could not afford one even if I wanted one.3 points
-
If we all adopted “. I will when they do”. Attitude then nothing will ever get done.3 points
-
I would take lots of photos especially of any areas of cracks, etc on the wall and neighbours house then carry on, get the diggers in on a Saturday morning and book the building inspector and concrete for the following Monday! Better still stalk the neighbour on Facebook etc and find out when they are off on holiday and get the shell built before they get back.3 points
-
@canalsiderenovation, a thought. Theres a group of people living near us who have used the River Lune for just such a hair-brained project. Its called Halton Lune Hydro. Its being going for over 10 years. They have open days every year - there will be a significant number of people there who can at least point you in the right direction. They also built a series of passivhauses way back then. Thats why we know of them. Very helpful people indeed. Halton is ust at Junction 32 on the M63 points
-
Hi mate. To give you a reality check, this sounds like way too steep a learning curve, in too short a space of time, on an extremely fragile budget (being polite there btw). As above, £160k will get you the keys to a house you can just walk in to and put your toothbrush in the holder, switch the telly on, and open a beer. So, question has to be; “Why not take this simple route vs the leap into the unknown”?3 points
-
If we assume by the "Right to Build waiting list" you mean you are on the Self-Build and Custom Housebuilding Register of your Local Authority (or more than one Register perhaps), then I hate to be the one to break it to you, but they aren't going to provide you with a plot. At best, you'll get weekly updates from your LPA on applications that have been allowed, including those designated as self-build or for custom housing. You may to able to approach someone who has gained permission and buy a plot from them, or you may be able to find a plot of your own and apply for permission, but it isn't going to just drop into your lap because you are on the list, and it certainly isn't going to be "given to you". I wish you well and hope you find yourself in a better position soon.3 points
-
Are you able to get some work in the building trade even part time at the weekends? This is where you will be able to supplement your academic learning with hands on stuff. If possible get work local to where you want to build.. much of self building is about contacts.. the folk you know, the ones who do a good job and have "flexible methods" of payment. It is possible I think. I'm a firm believer that if you work hard you generate your own luck. Also, at times, you may feel that this is a mountain too high to climb. Do it in small stages.. get to base camp first then plan and prepare for the next part of the ascent. I wish you all the best and keep BH folks updated if you can.3 points
-
just install AC. We did and love it. We have external blinds which shade nicely but have big windows that we like to look through so sometimes want the blinds open when the sun shines. other areas have large windows that we can’t shade so the heat comes in. we just turn on the AC which is powered from the solar so we just use it and enjoy our house. we also leave it on overnight if required to maintain a nice temperature in our bedroom. It uses very little electricity to maintain a temperature. love it. So glad we installed it.3 points
-
Just saying hello, About 18 months ago the builder turned up to start work on our home. We have NEVER done any kind of renovation/extension work before, so naively thought it’ll be easy to add on/extend a dormer bed room :). A well, unstable existing foundations, complex steel installs, chasing HETAS certified installers for the flue etc etc, and we are now have the finish line in sights 😀. Still have some decision to make on garden wall finishes etc, but we are nearly there. Pretty sure we could have done lots of things differently etc, though I’ve actually enjoyed the process, and feel really lucky to have been able to build a home bespoke to our needs. I’m looking forwards to doing the same thing again, but for retirement some time around 2050!!3 points
-
We have put two 4K (8K to the very local) HDMI and two CAT6 cables and a terrestrial Arial cable to each TV point and fed the HDMI, only cost £150 for the cables, back to the media panel - not really sure why but it seemed like belt and braces. We can stream the same image / sound to all the TVs in synch (nearly) via the HDMI.3 points
-
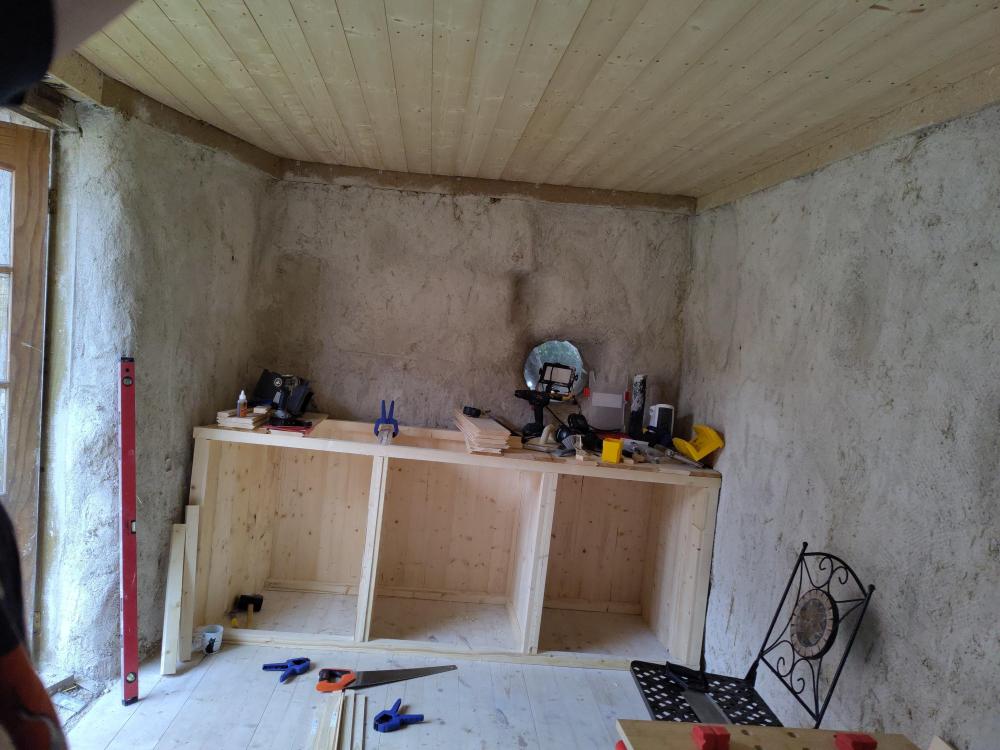
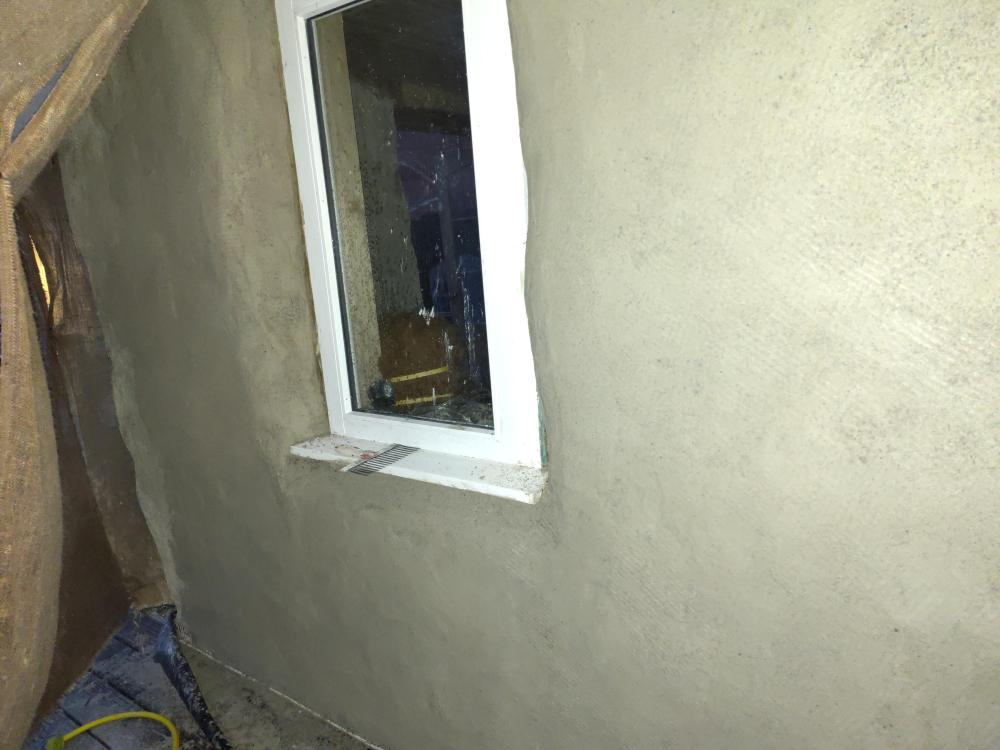
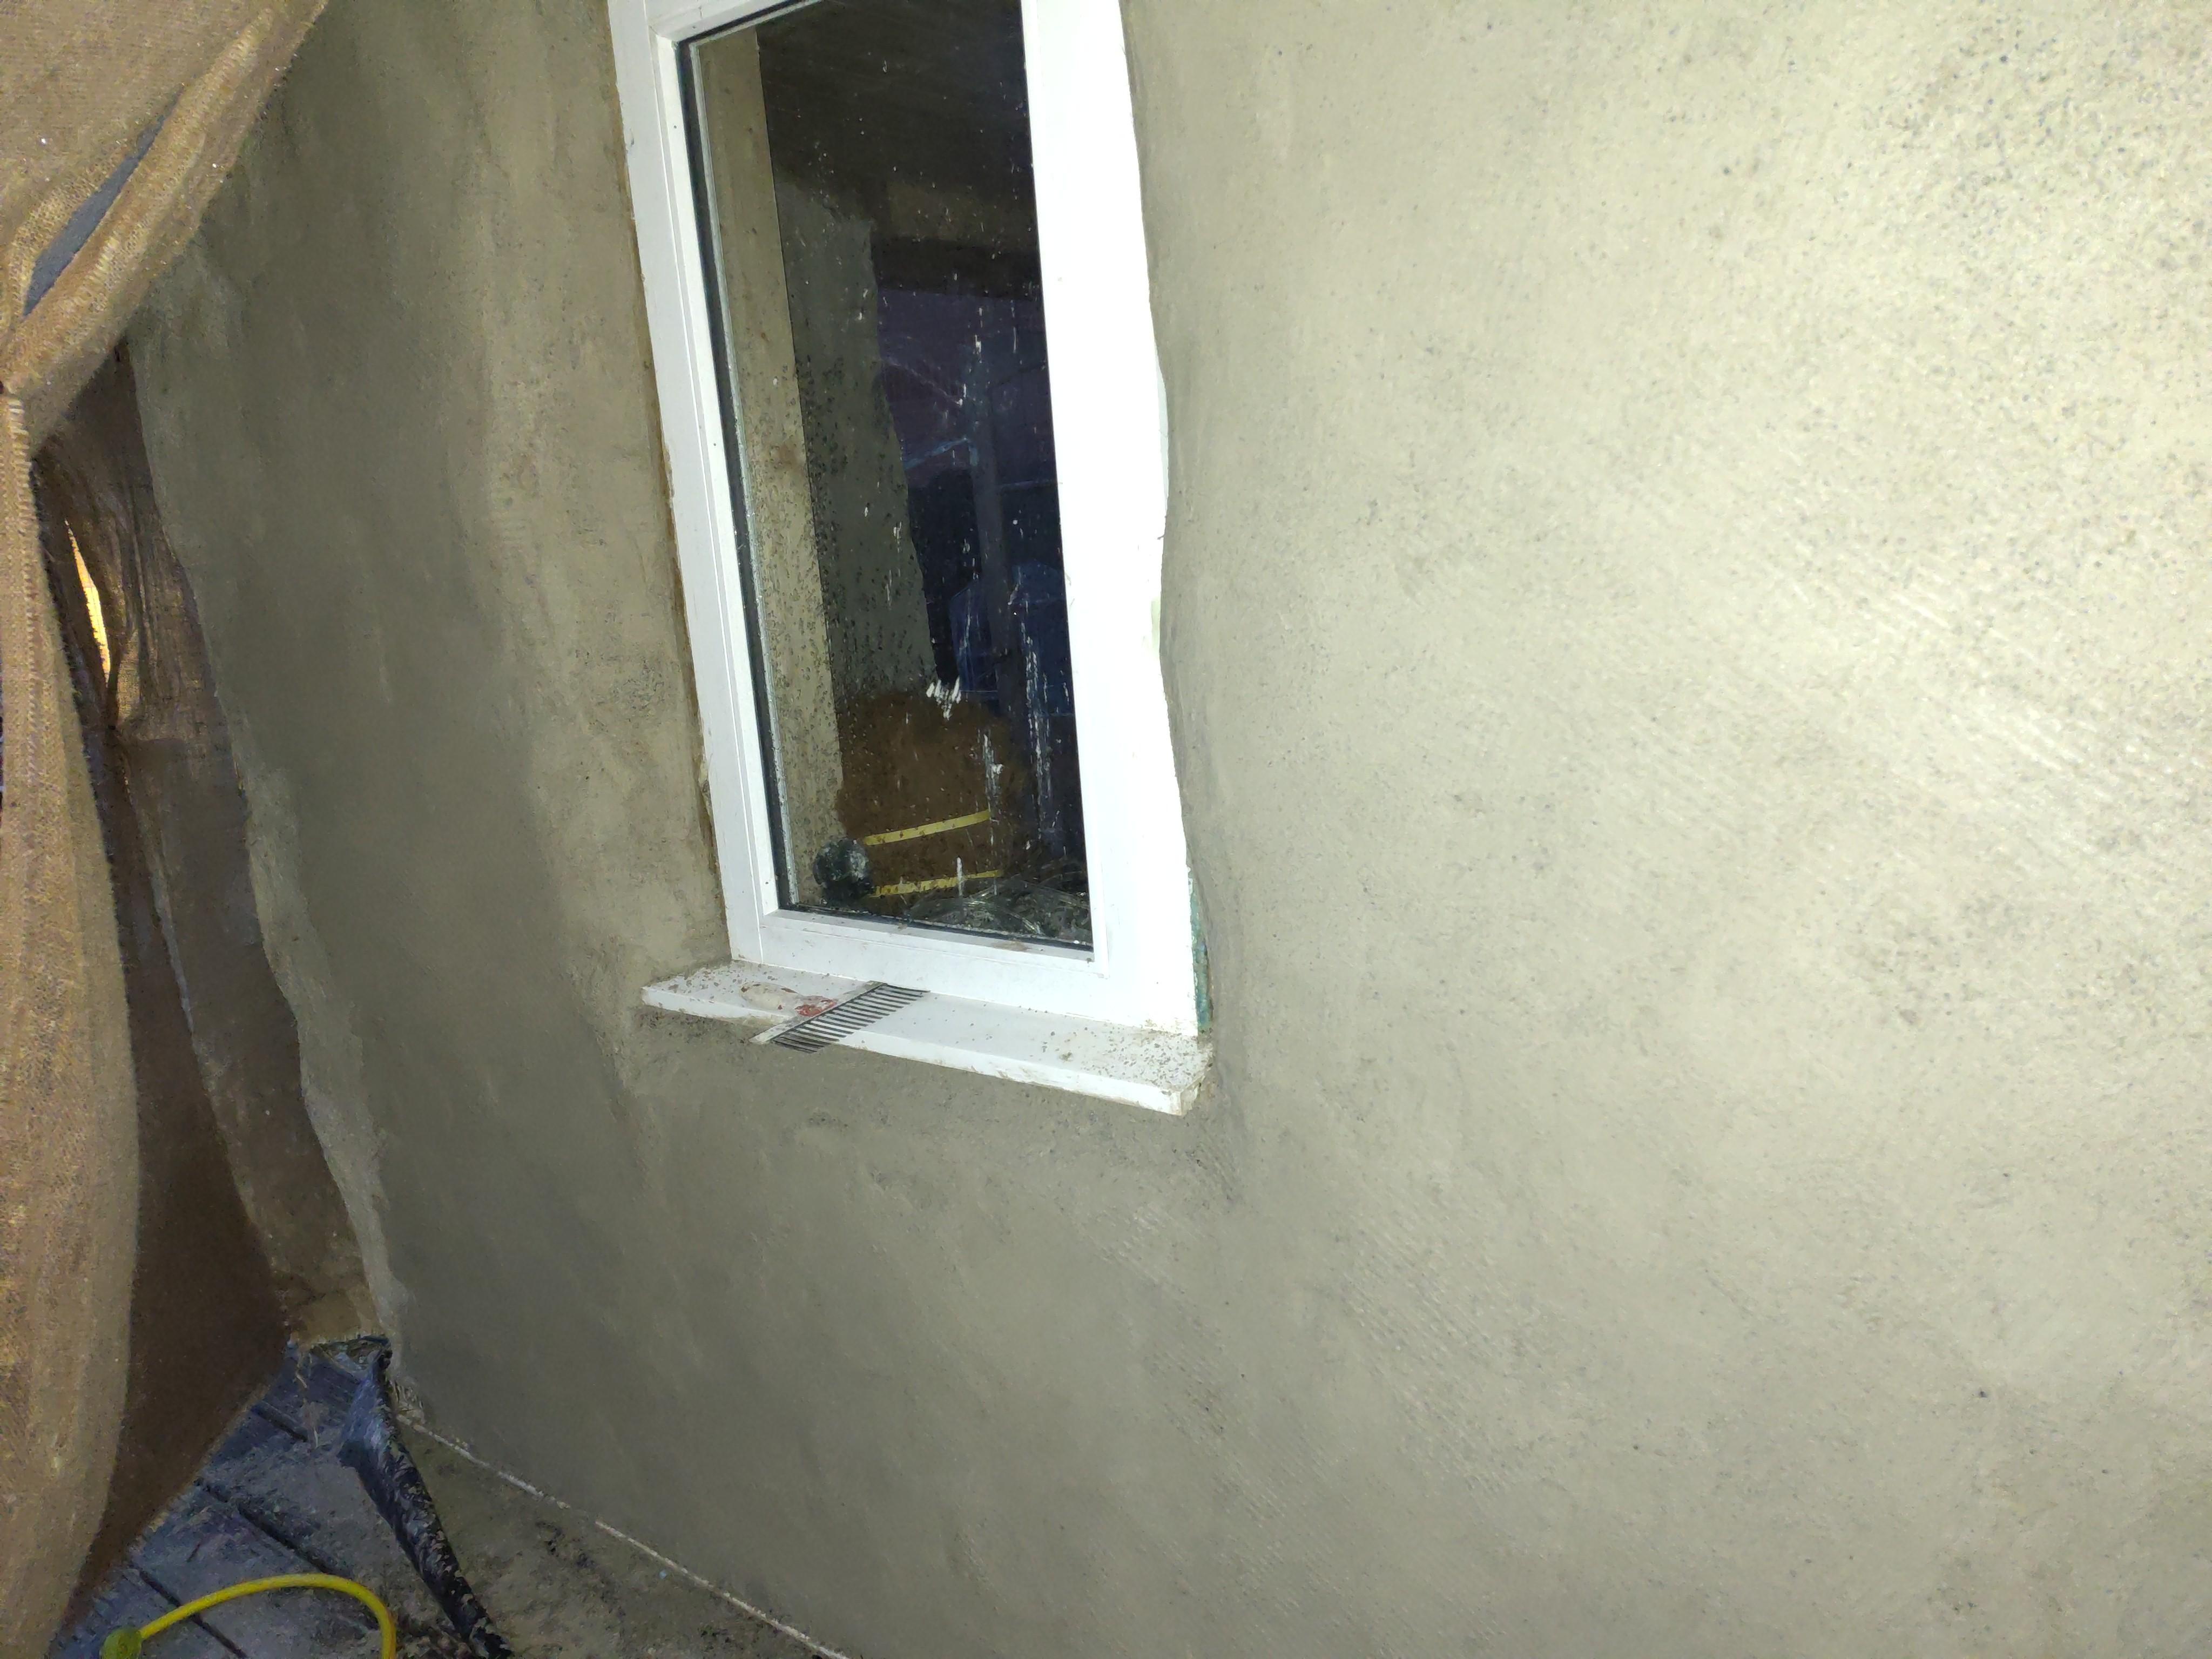
OK, unit finished except for shelves, doors and trim. Sink is arriving tomorrow, so I get to start fitting services soon. I figure I'll make them all temporary and pluggable until I can dig a trench and get a Real Electrician™ out for that side of things. Got a second coat on the east wall, and it's looking much better than I expected it to. It still undulates, but most of the smaller-scale variation is just... gone. Trowelling it on is much harder and slower than slapping it on with my hands though ^^. One bag went pretty far; the remaining seven ought to be enough to finish this coat everywhere, but I'll definitely need more for the final coat.

 3 points
 -
I cant claim any expertise, but it doesn't look particularly dodgy to me. Plot addresses are frequently 'land adjacent to ...' or similar. Speak to Approved Inspectors Ltd and ask for a copy of the initial notice referred to in para 2, so as you can see the 'official' scope of works. If electrics/glazing was part of the notice, then I expect certificates were provided to the inspector prior to his sign off.3 points
-
Agreed, but we don't live in that same world. The number of dwellings required has increased significantly, as has our understanding of the environmental impact of them being built and being used. We need control. Despite my disagreements with the opinions of my Planning Officer and the Inspector, I'm very supportive of the planning system as a whole. The problem is that much of it is still unclear and remains inherently open to interpretation. What is needed, IMHO, is unequivocal tests against policy items that seek to remove interpretation and opinion. Take my favourite paragraph as an example; "Significant development should be focused on locations which are or can be made sustainable, through limiting the need to travel and offering a genuine choice of transport modes. This can help to reduce congestion and emissions and improve air quality and public health. However, opportunities to maximise sustainable transport solutions will vary between urban and rural areas, and this should be taken into account in both plan-making and decision-making.” I think the principle of that paragraph is sound - don't build large developments in areas that aren't or cannot be made "sustainable". The problem is that although "Major development" is well-defined as 10 or more dwellings, "Significant development" has no such definition. Can a single dwelling really be classed as significant development? If not, then in language terms, the remainder of that paragraph should not be applicable, but it is routinely used to refuse permission on very small (less than "major") developments. Even "sustainable" - the golden thread that runs throughout the whole of the NPPF *isn't actually defined* within the document itself!3 points
-
I hope it works but fundamentally I think government targets are the wrong way to go. Feels like the infamous Soviet tractors factories. Better in my view to eliminate the hurdles in the planning system. Here are some of my ideas. 1. A walk in, walk out service for domestic houses. 2. Default an application to approval if the council doesn't reply in an appropriate period of time. 3. Guaranteed same day approval for knock and rebuild if your house fits inside the same "box" and the style is appropriate. 4. Compulsory purchase and immediate public auction of derelict houses and brownfield sites. 5. Relax the listing criteria for lower grades of houses so that people can properly "restomod" their houses rather than being forced to live in something's from the dark age.3 points
-
No no no no no. Stick to the metal. It goes up so fast, perfectly level and straight, little wastage, great sound insulating properties.3 points
-
Hi Please refer attached document page 1 section Application: 0.2 The recommendation of this volume of this approved document apply to newly erected dwellings, and dwellings undergoing alteration only. They do not apply to the extension of a dwelling BR_PDF_AD_M1_2015_with_2016_amendments_V3.pdf3 points
-
For me I would weigh up getting a bit of professional advice (say £300 - £400 + vat) against say a days builder's labour and materials that could prove a waste of time.. or make things worse. I hope the following helps a bit. Take an old building like yours 1920's. Door frames tended to be made out of 6" x 2" timber with bricks over. The bricks and timber interacted a little so developed what we today call composite action.. in those days they knew it kind of worked but could not quantify it. Window frames were more sturdy timbers and these too interacted with the surrounding walls. I see this a lot where folk are making open plan spaces and wonder why I want to introduce wind posts and other stuff. But I point out.. hey you now have PVC windows which are very flexible.. some silicon and plastic DPCs which create slip planes.. so now there is no interaction and things start to bend / protest. For me I go back to the way to when the building was constructed.. try and understand what has changed and when.. then try and work out what to do next.. in a cost effective and buildable way. To do this well you need to examine the whole building to get a feel for it and then look in detal at the windows / doors etc.3 points
-
The MCS database may be helpful, giving SCOP test results at different flow temps (typically 35 to 55) for most (possibly all?) commercially available MCS certified heat pumps, now including the new Octopus Cosy 6. https://mcscertified.com/product-directory/ While accepting that design and operation mode are most important, it is worth noting that, generally, the MCS tests show that R32 heat pumps have significantly better SCOPs than their R290 equivalents. You can see this most clearly by comparing like for like R32 vs R290 models, for example the Misubishi R32 6kW model PUZ-WM60VAA has SCOP of 4.81 at 35degC, compared to the Mitsubishi R290 6kW model PUZ-WZ60VAA (a much newer model) which has a SCOP of 4.39 at 35degC3 points
-
I looked into this years ago and my main worry was storing and moving water above living accommodation rather than just having a waterproof cover. IF I did rainwater harvesting I would use an underground tank filter and pump.3 points
-
Being as we are getting pressed by our buyers to vacate our previous build I’ve started going through our spreadsheets Though at one stage it seamed pretty pointless with materials costs rising weekly 420m2 We set out expecting to spend 350k Though I didn’t intend doing so much of the foundation work myself this time We have spent 305k But still have the oak stairs to pay for and tiles for one of the four bathrooms workshop d door and s door and all the landscaping and drive I’ve fitted the German kitchen and templates for quarts have been done today First job in the morning is to tell them to hang fire as I’ve fitted a run of units in the wrong place 😁 We have about 37 k to come back in vat we’ve followed and improved on our previous build Mostly German and Italian brands I we’ve both managed to carryon working full time plus 30 hours per week on the build But have spent far more time shopping around for materials Like last time We will post a spreadsheet showing a breakdown3 points
-
>>> The moral of this particular part of the story is that as intelligent as you think you are, there are always experts in the field that have experience aligned to that intelligence that will trump you every time. You are rightly treating this as a logical exercise with rules, regulations, standards, arguments, precedents etc. The cynical part of me suggests that 'sustainable travel' is just an excuse to do what the planners want - which is to discourage development in some circumstances. My LPA often uses the words 'amenity' and/or 'environment' regularly as justifications for their decisions without bothering to explain which aspect of amenity or environment they mean - and they have 3 or 4 definitions of each in their local plan. That is, they use these fuzzy words to 'justify' what they want - at least to themselves. Maybe Labour will change things around a little and some of that might work in your favour - at least they say they will re-write the NPPF.3 points
-
Haha - I actually did it a few months ago, much closer to when I initially posted, but there was still a bit of a lag! Just tying up a few loose ends.....2 points
-
Hi All long time lurker, first time poster. We are renovating and extending our cottage in South Wilts. We’re about 6 months into the build having got planning in Jan, took us a while to get there due to bats, false start with first architect, and a slow planning process generally. The cottage consisted of an original 2-up-2-down and a couple of poorly constructed extensions (a ground floor lean-to which was then somehow converted to be two storey, maybe in the 70s). We’ve demolished the extensions and rebuilt GF to the same footprint, and FF will be a cantilevered, triple-gabled and vaulted ceiling “box” which we’ll have as a kitchen-living area (an upstairs down house to take advantage of the views we have here). Hoping to be weather-tight by the winter, and then complete by Christmas 2025. I am project managing sub-contractors and have a good friend who is a very skilled labourer/builder looking to gain more experience who is doing lots of the work and providing continuity throughout. We have converted a room above our double garage to live in whilst the work is ongoing, so here on site most of the time and we largely work from home. Thanks for hosting such an invaluable resource here - I look forward to contributing and please forgive the odd awkward question
 2 points
 -
I had the opposite. Scottish water subcontracted our water connection. The plan said the water was in the verge the other side of the road. The subbies dug for it and could not find it. They dug deeper and further from the road into the field, still no sign. They were on the verge of packing up and going home when I got my rods out. You could see them sniggering as I slowly walked further into the field and my rods reacted, so I said "here it is". Just to humour me they dug a bit further and there it was.2 points
-
We went through a period a few years ago where spammers would join, post a few inoccuous posts, then go back and edit spam into them once they'd disappeared off the front page. It was just about impossible to police. We still get people posting the inoccuous initial posts, but they generally lose interest and stop posting when they realise the editing block is in place. Facebook has its own tools for reducing the impact of spam (on top of actions of the page admins). We don't have anything like that. We have over 40 times as many members as Camelot, but probably a similar number of mods. If anyone wants anything edited, just let a mod know and they'll happily do it for you.2 points
-
Go divining to locate the pipe. Yes I AM being serious.2 points
-
[shuffles to his feet, looking intently at his own shoes while repeatedly clearing his throat, gathering courage until finally managing to look up and blurt out…] I am a self builder and I believe in thermal mass. [sits down quickly, avoiding all eye contact.]2 points
-
>>> the site is about 800sqm, my main concern is to find a possible water pipe underneath the ground so that I can build at 3m away from that You'll probably get what you need straight from your local water authority - at least a rough approximation to the location. Sometimes the records are missing or not accurate though. That'll hopefully give you a rough idea for planning a house location. The doc might have already been obtained in the searches when you bought the plot. The authority should also be able to tell you what kind of pipe it is, which'll be useful so you know how fragile it is. If the pipe is going to provide your own supply, you'll make much progress by going through the 'apply for a new supply' application and get an actual bod on site. They often know stuff that's not on the plans. That's probably all you need to kick off an architect. To get it accurately though, which you'll want to do at some time, you might need to dig down to it at a few points to verify and to get the level. You might be able to locate it remotely if iron, otherwise some sleuth work and some digging. Re a proper topo - yeah, dwg / dxf CAD file is key for people to draw on (computer-wise) using it as a base. Prints / pdfs are negligible extra cost. You probably need to specify exactly what you want - here's my spec (below), but I probably missed a few things - some tree stumps, eave heights of neighbouring buildings, height of mid-point of LV line. Local firm is good, as it's probably 1/2 day for a team of two. £400-500 + VAT maybe depending on how big the site is / how much it varies in height / how many 'features' there are / what grid size you want etc. Boundaries with heights & description Pick up the gates, driveway & the relationship to the highway The position & invert level of the ditch culvert at the front of the plot and the position and top level of the culvert pipe (now exposed) at the rear of the plot (one point at each end) as marked on the plan provided. The top being ~70cm down from the surface. This is behind the Ash tree. A paint line indicates the approx line of the culvert, please pick up one other on the surface from that so we can establish the approximate track The invert points of the culvert pipe in the ditch next to the highway have been highlighted The location and height of the poles at each end of the LV line All street furniture All service covers Overhead Cables Buildings (Outlines) All changes in surface All water features Trees; Location of the four trees and, if possible, the approximate tree height & extent of the foliage. Also pick up position & heights of 3 trees on the opposite side of the road Trees fully detailed - surveyed trunk & 4 points on canopy Road markings Existing building outlines Contours (interval) Existing building heights and neighbouring buildings The ridge height (only) of the 4 nearby barns (assuming these can easily be sited reflectorless from the plot). Levels over the site - 10m grid Floor Window and Door Heights of existing buildings Visibility splays - include all nearside features with heights (trees/hedges/fences etc.), with requested distance of splays in each direction from site access2 points
-
That gutter edge is surely wrong? It depends on the individual system but some have a two piece trim that sandwiches the membrane. If I recall the system we used a few years ago on a porch roof had a mechanically fixed gutter edge membrane strip that the main sheet glued onto using contact adhesive. Whatever it should be it ought to be neater. Best way is to find out who makes the edpm and look up their standard installation detail on the web. That should illustrate how it's done.2 points
-
Topo survey won't locate a water pipe. Need to contact UE... Unlikely they'll help and you might need to do some trial pits. Worth have a Topo anyway. But do things in right order. Speak to an architect first, then think about ground investigations.2 points
-
He’s not trying to be representative. I know many farmers. All of them have said that he’s done more to highlight some of the challenges farmers face than just about anyone else.2 points
-
Children don't stay at school for ever. Ours flew the nest after we gave them as much money as we could (some would say bribed ?) In any case we're horrible parents - insist on clean rooms no loud sex after midnight, no drugs, limited rock and roll . If we found their booze we stole it, usually by accident. Well one bottle just looks like another. It worked. That meant we could live in a smaller house. Is four or five years too long to wait?2 points
-
There is no concern for 1ph. But when surveyed i was told that its only about £150 more for a 3ph supply. So i said yep lets go for that then. Then i got a phone call saying 'no capacity in the village for 3ph you can pay for a new sub station.' Single phase it is then.2 points
-
Greetings on a miserably rainy Sunday October morning. Perfect weather for catching up on some blog writing! As the title suggests this blog will be about our external coverings of the house and, by the end of it, the outside of the building will be pretty much finished allowing us to crack on internally. We started many months ago by battening the outside of the buildings. As we are having external blinds and they have a requirement for fitting the blind cassette we needed a large gap between the house walls and the outside of the cladding. This meant 50mm x 50mm timber battens and counter battens. We did this ourselves and saved many thousands and, even though it was slow going (as, it seems, everything is when you do it yourself!), it was very satisfying with the carpenter saying that it was good work and he’d seen chippies do a lot worse jobs than we did. Nice warm fuzzy feeling ensued. We are having a mixture of burnt Siberian larch (https://en.wikipedia.org/wiki/Yakisugi) and, to contrast the black, standard Siberian larch on the ‘arms’ of our property and entrance porch (all will be revealed in photos below) and I ordered all the cladding to be delivered on-site prior to the carpenter starting. The carpenter started on the garage using the standard Siberian larch which we bought from Jewson at a very reasonable price, and quite a bit cheaper than we could get from the usual timber cladding suppliers and we are very happy with the quality of the wood. He then went on to the black charred larch (which gets everywhere and he and his tools looked like they’d been in a coal mine by the end of each day!). We purchased the charred larch from Permachar (https://permachar.co.uk) who gave us a brilliant price. The wood itself was burnt and delivered from Lithuania (https://degmeda.eu) but they will only sell to the UK via Permachar. It is stunning wood, but incredibly fragile and any sort of dragging or scraping will cause the black char to flake off. While he was busy doing that and while the scaffolding was up I thought it a good time to get the guttering started. Our architect specified Zinc guttering and after a lot of thought and looking at stainless steel and zinc we also decided that zinc was the choice for us. We ordered it from Rainclear (https://www.rainclear.co.uk/guttering/copper-zinc-guttering/guttering-fittings.html?color=235) who offer next day delivery if in stock and were incredibly helpful and very well priced. It’s also a clip on system which even I managed to install without any major issues! Around the same time and while the carpenter was busy putting the cladding up our external blinds got fitted. We bought those from a local company called Powell blinds (https://powellblinds.com) who stepped in brilliantly at the last minute after we were seriously let down by Cornerstar Aluminium (long story which I won’t get in to here). The blinds are fitted up behind the cladding above the windows but externally so they will be hidden from view when lifted up. We absolutely love them and during the heatwave this summer we lowered them and this drastically reduced the temperature inside the house. There was still one large south facing window that didn’t have blinds that needed shading. We wanted and the architect designed a Brise Soleil in this area but all we had to go on was a 2D drawing. I contacted a few companies about getting one made and installed and the quotes came back at between £6k - £7k! A figure we simply could not afford. So I did research and spoke to a local forge called Horsham Forge (https://www.horshamforge.co.uk) with an idea I had. He said ‘that could be done but how about this instead?’. He suggested brackets with a pole running through them and vertical timbers slid on. Genius! On to Sketchup where I draw up the brackets and gave them to the forge to be created and spoke to my timber manager at Jewson who procured me some thermowood at the size I needed and got my carpenter to fit it and it cost me £1700 in total. So we saved around £5k by doing it ourselves and we also enjoyed the journey and got a solution that we designed (with the help of the forge of course). We think it looks fab and it does a good job of shading from the sun apart from a couple of hours when the sun is directly facing that side of the house. So we will still get some solar gain but it is definitely reduced and it’s a brilliant architectural feature. 😉 Right, while all this was going on the chippie was finishing up the cladding and now that it is all finished and I have put the downpipes on we have an almost finished external facade to our dream home. We love it and think it’s stunning. So very happy with the carpenter’s work (http://www.kmlcarpentryandroofing.co.uk). Kieran’s attention to detail at the junctions between the 2 types of wood is fabulous as it is in other areas too. He would also discuss any issues and potential solutions with us to make sure we were happy with them rather than just doing something he thought was right. Hopefully the pictures below do it all justice! (Note: please ignore the 110mm brown downpipe in the below photo! It will eventually be a rain chain but this works for now. 😉 ) Thanks for reading and we hope you like what we’ve achieved so far.2 points


.jpg.c21f3ac78c9b7efd90cbdcb312744dc5.thumb.jpg.7adcad4c0e384f5ecd7d56b0618df6e5.jpg)


This leaderboard is set to London/GMT+01:00