Leaderboard
Popular Content
Showing content with the highest reputation on 10/28/21 in all areas
-
3 points
-
I generally see 13mm OSB used as sheathing. Use double headers and footers. the way it normally works is you fix a single footer the the wall plate or whatever is sits one. You then build the stud walls in sections with single header and footer to each wall section. Then you fix a second header across the top with the joints staggered to tie it all together.2 points
-
A primer is the correct choice. Tapes need a dry and very importantly dust free surface to stick to. Masonry is rarely this without a primer.2 points
-
We have bought small straw bales over the last few years, and have never had problems sourcing them. Though for these, we never had a spec to try and meet. They can be wheat or barley for construction, it makes little difference. What is important is that they are as dry as possible, and are baled at the maximum compression possible. We have built up lots of farming contacts locally over the years, and a neighbour has offered for us to use his straw. This grows 100m from where we hope to site the house. It may be a bit of a faff for him in terms of the exact spec we are looking to achieve with the bales, but even if we paid double the market rate for the finished bales, it would add less than a grand to the build cost. We've not even applied for planning yet, and I'm well aware that the odds are stacked against us. But we'll fight as hard as we can to get it, and have a lot of support locally. Including all the local residents. We can but try.1 point
-
+1 to this @Smallholder This is the issue - it’s only normally hay that gets baled small. You also need to decide if you want wheat straw or barley straw, and the compression rates etc. You’ll need to find an Ag contractor to do this and a farmer who will be happy for you to bale probably only part of a field in this way.1 point
-
Angled? Each to there own, so you are putting plaster board roughy up to glass and not seeing any frame? normally cavity closer plaster board pushed to block work with adhesive and maybe a silicone bead up frame or stop bead. regards. James1 point
-
I assume you are providing a cavity fire barrier at reveals and just omitted for clarity1 point
-
Nothing wrong with a splayed reveal, also allows percentage of frame to be hidden. This may be what your after1 point
-
9mm osb is plenty adequate for structural stud walling. It is only to provide racking resistance ie diaphragm/bracing. Many people recommend ply which offered a little more moisture resistance. TBH I wouldn’t bother1 point
-
9mm osb is plenty adequate for structural stud walling. It is only to provide racking resistance ie diaphragm/bracing. Many people recommend ply which offered a little more moisture resistance. TBH I wouldn’t bother1 point
-
First, welcome. Next, lay in a good supply of cider. I think you'll need it. Network, network, network. Good luck Ian1 point
-
Not great. MVHR is a good for ventilation, not much else. Shades only work on southern elevations really due to the low sun angle east/west.1 point
-
I would never use 9mm OSB on walls or roof, it’s just too flimsy and drum like, no need for 18 as that’s overkilll and too much hard work. you don’t need to double headers and footers unless specified but it does make the install a lot easier especially when working alone … put a single footer and header in first, make the wall to suit and then rock it up into place and align, nail through! Much easier than singles.1 point
-
1 point
-
Beautiful if it works, but very risky. All concrete cracks. If poured to perfection the cracks will be invisible but will still be there, to collect dust, and to show up whenever there is a spill. so it needs a lacquer finish. Look closely at the floor in a b&q for example and there are cracks everywhere. If you mean a ground, polished finish, with the stones visible then the same applies. The cracks will be severe if you don't create a box-out around the columns to let it move as the concrete shrinks. I recommend separating the functional concrete floor from the finished screed in a domestic situation. They cannot float it to kitchen specifications. The workers pouring your slab are not thinking about an internal finish. And what if it is raining? You can later screed in many finishes, including very expensive, polished, exposed aggregate.1 point
-
I would start with cavity wall insulation - blown bead isn’t expensive and is a days job for a decent company. I can recommend a couple depending on where you are in the U.K. Then I would look at air tightness, windows and doors and finding the leaks. Finally, look at improving internal insulation but only when you’ve done the first two. What insulation is in the attic and the floor..?1 point
-
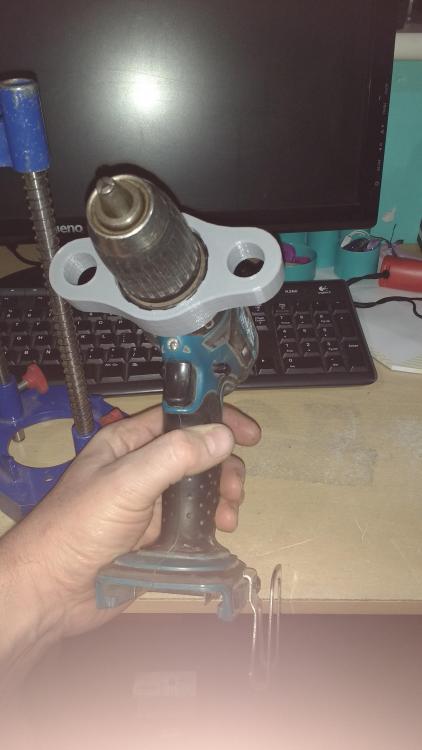
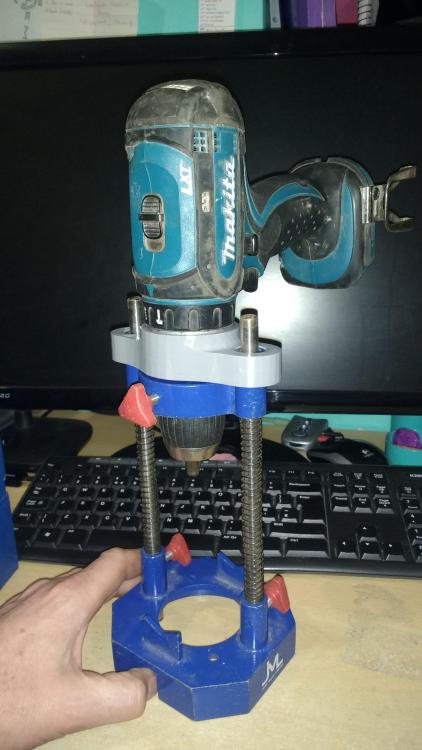
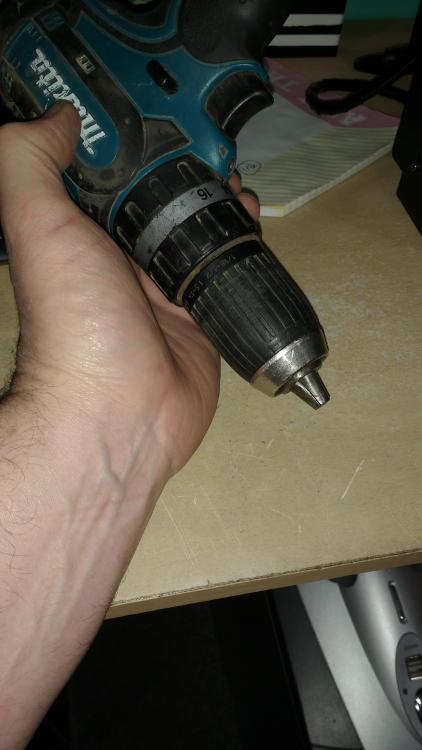
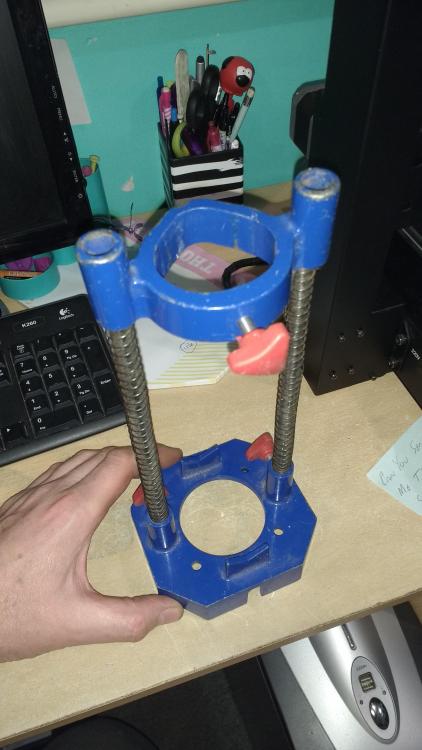
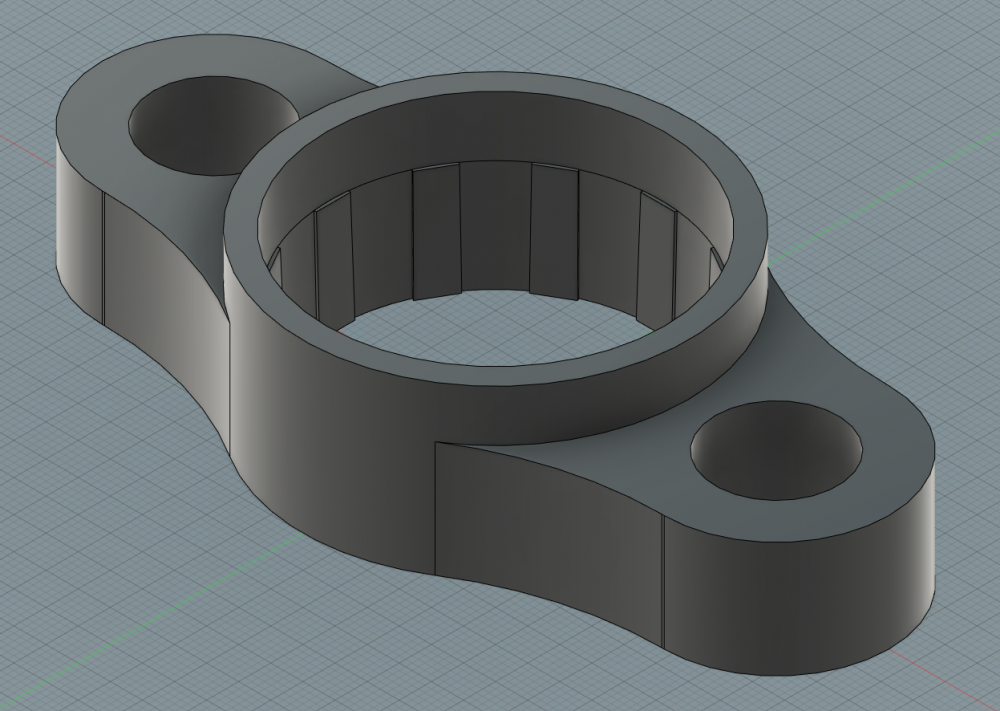
Got one of those little drill presses years ago, the type you'd lock your B&D mains drill in to drill reasonably plumb holes. Nothing I've got now fits it. Gave it, one of my Makitas and a Vernier to No.1 son and left him to get on with it. Came up with this: This slips onto the drill that slides over the blue casting. Appears to fit nicely. Where the drill fits in is actually tapered and he's got that pretty much bang on. Got to find the original plastic, ,"top hat" liners that go inside the blue casting. If not will print a pair! As it was a test, only 5% infill but surprisingly strong.1 point
-
We have a Miele 600mm fully integrated dishwasher. I screwed the fixing brackets to the back of the door cover which then hook onto the dishwasher door and a screw at each side holds it tight and adjusts the height. The door opens towards the end of the drying cycle and then turns itself off.1 point
-
most have a plastic "frame" that you screw to the door then "clip" it onto the dishwasher and fit screws through the door to hold it, all integrated dish washers will be expected to fit most off the shelf kitchens. for example this is the fitting instructions for a lamona dishwasher https://www.manualslib.com/manual/1479391/Lamona-Lam8303.html?page=8#manual1 point
-
Full integration all buttons hidden when door is closed. Semi - portion at the top about 100mm visible, looks daft in my opinion. 450mm dishwashers only fitted one, for my mum and dad, just coped with their requirements. stick with the standard 600mm1 point
-
We started about 2 months ago and I'd forgotten they'd said they would put us on the urgent list after my 2nd call. And we'd about given up and had decided to use a 4G/5G router instead. So it was a surprise last week when I was given a date for a surveyor to visit. Well before the date, on a wet morning he called, he lives locally and could pop round. After a bit of discussion he agreed that if we would put the duct in, they would connect from the bottom of the pole outside the property. It's a private lane with a grass verge where the pole is. He asked me to pace out how long the duct would be and to let him know how many corners there would be and he'd get the ducting etc. delivered. They would call before delivery. Of course they didn't, but all the gubbins arrived yesterday. Think I'll ebay it if we go the 4G/5G router although it can't be worth anything given they hand it out willy nilly. Simon1 point
-
I try and give him these little projects to keep him occupied. Needs to be finding a job really. With a good computer science degree it shouldn't be that hard! Oh well, I'll have to let him loose on the magazine fed, stacking toilet roll holder dispenser with digital roll counter project I've been mulling for a few years! ?1 point
-
Just to update the thread when we originally assumed 500L for 6 bedrooms (3 bathrooms)....now settled on 300L with ASHP. The higher heat loss & actual need for that volume of hot water just didn't make sense for us to go for 500L. It is a constant high thermal loss & enhanced strain on ASHP to keep it hot....for a volume of water we would use <5% of the time. 300L should cover our needs for 90% of the time, so a reasonable medium ground of cost/efficiency/need.1 point
-
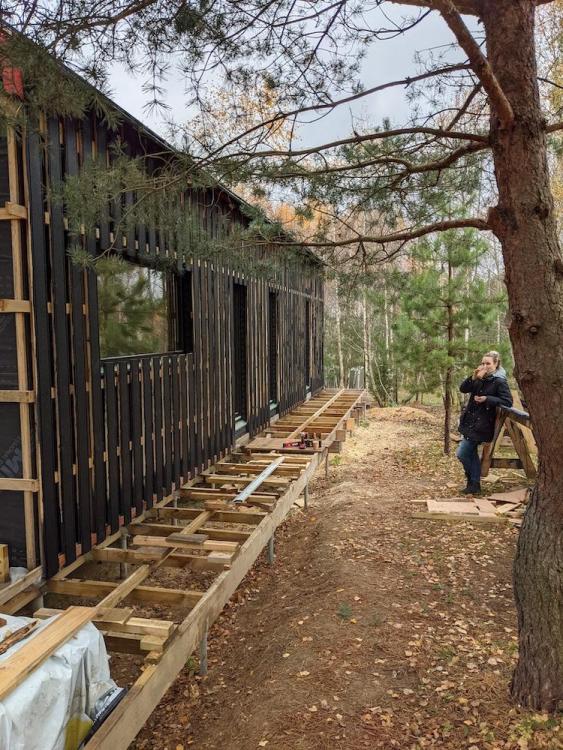
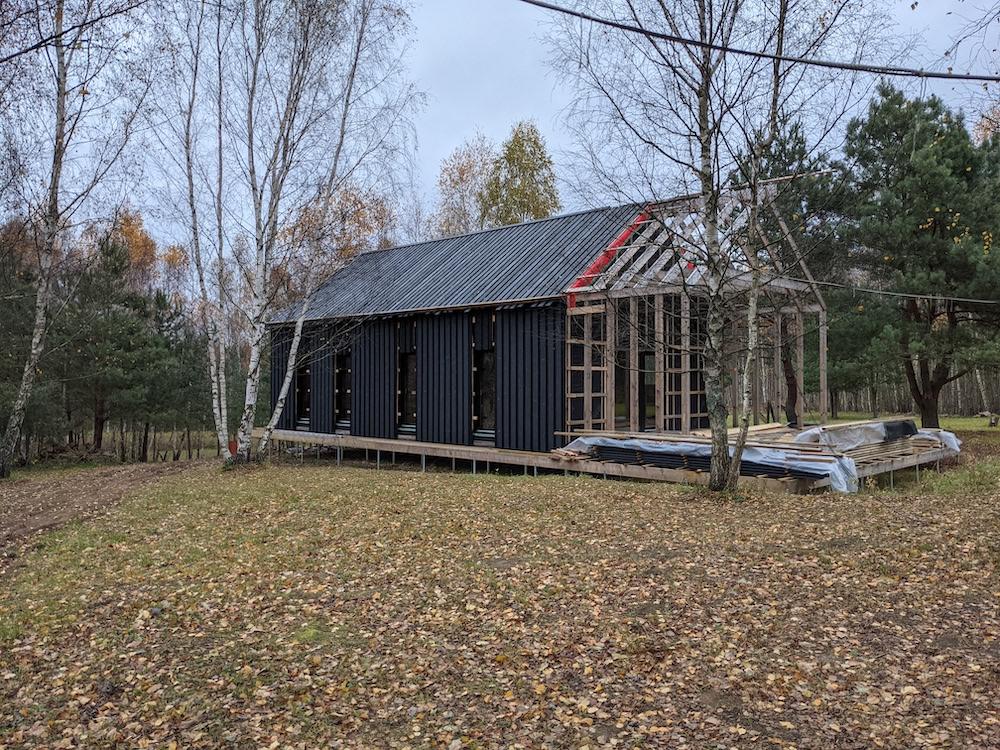
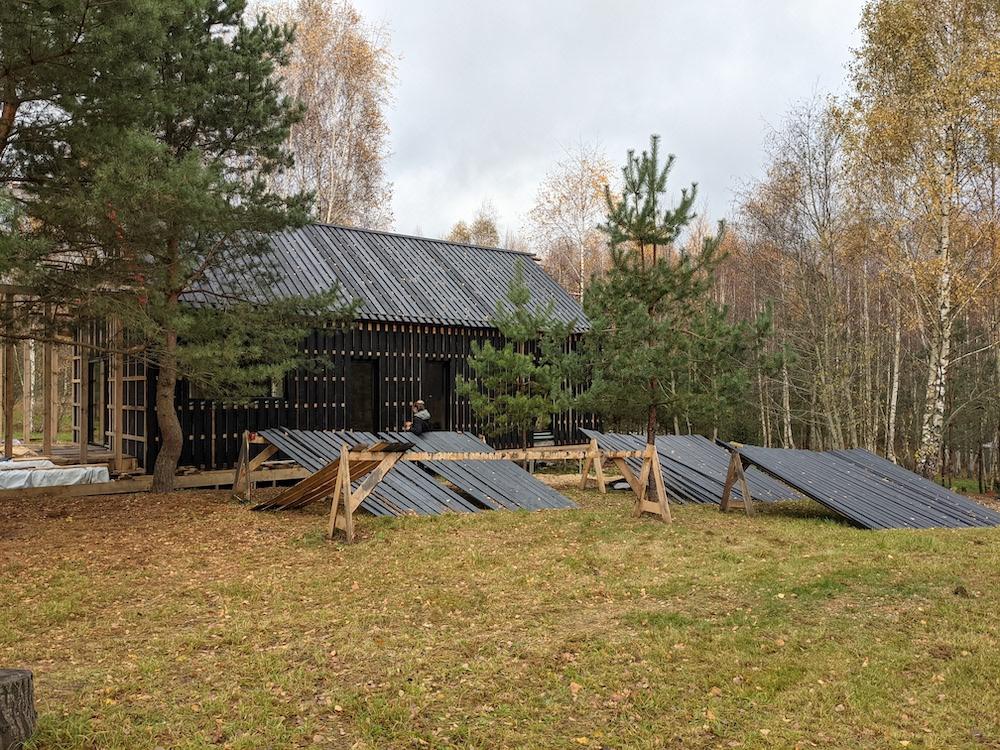
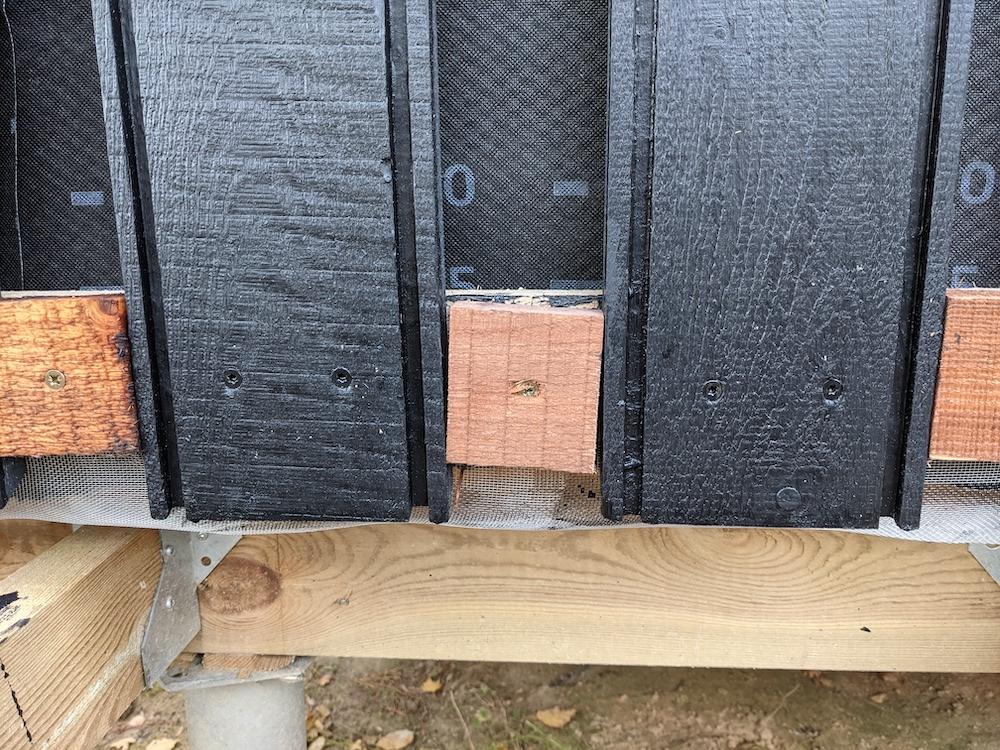
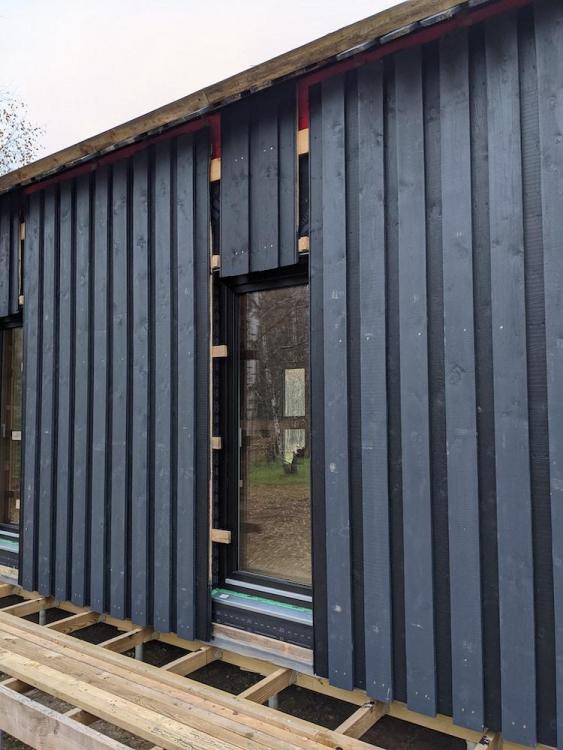
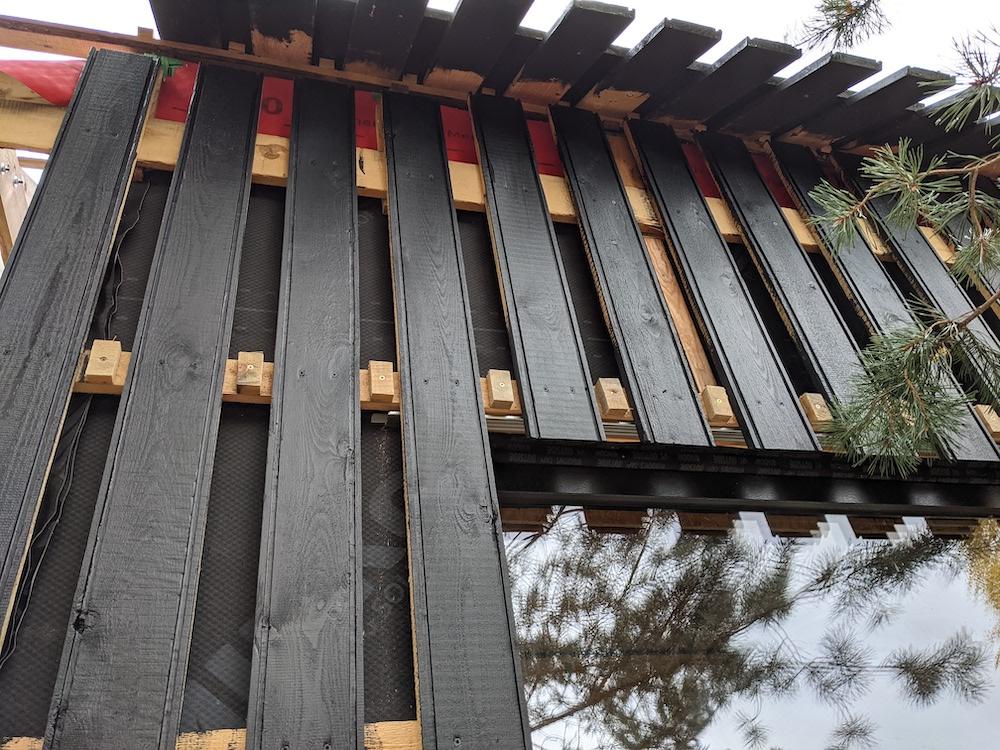
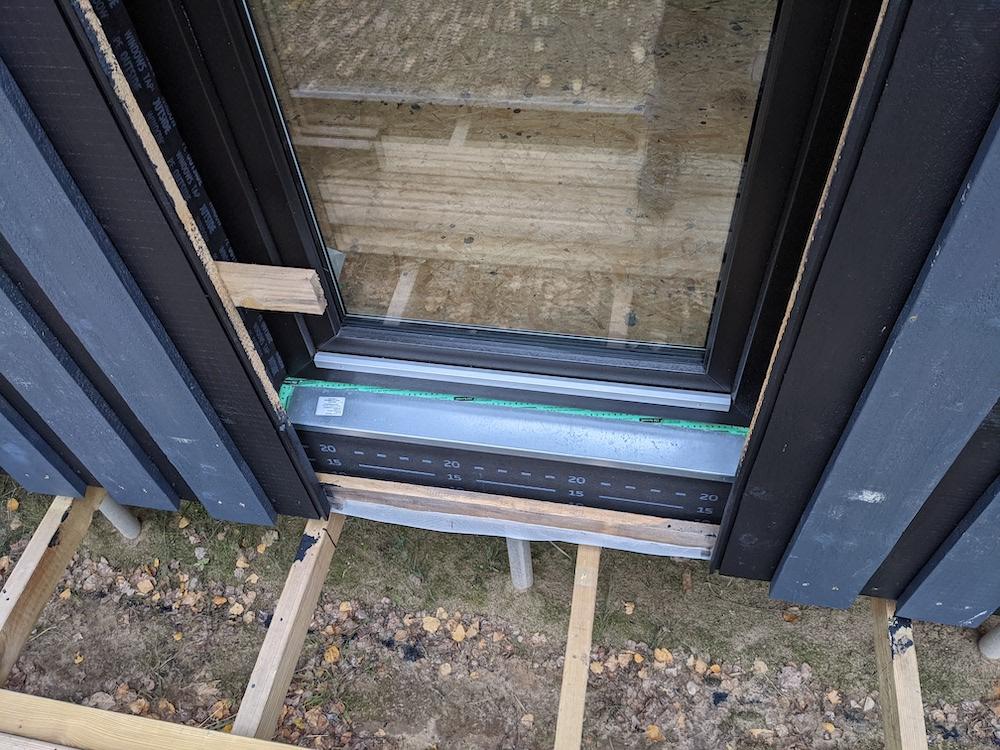
Screwdriver for window changes. I imagine that the UPVC frames will outlast the cladding immediately around the window anyhow. Progress has been made: Here's a tip for doing the bottom of board-on-board cladding. You need blocking between the 'inner' boards to close off the gap to avoid insects making it their home. (the ventilation happens behind the horiontal battens and is closed off by a "U" of metal mesh between the face of the horizontal batten and the face of the house) Don't cut these to exact length. Cut them short and fit them on an angle to suit the (variable) gap between each board. This is fast and there's no danger of them ever over-expanding forcing things apart should they find themselves damp. Mainly it's fast. Current window detail is this: There's a little metal channel above each window to catch any water running down the membrane. Probably total overkill but given that the roof is also wooden and there's a non zero chance of a knot falling out etc we might get water running down that membrane. This will keep it from falling on the horizontal cladding board above the window. You can see some crumbs on the wall membrane from where it was only membrane on the roof/walls (with these little channels above the windows) for 6 months. It did help keep water away from the windows during this time. Drip edge above is a 30 degree cut on the end of the boards. There'll be a horiontal board between the window frame and these to close the top of the reveal. Either side of the window finishes as an "inner" board to make the detailing a little less painful. This will be trimmed to width in situ then a vertical board fits behind it and across to the frame as the sides of the reveal. Perhaps I'll trim them back more and have the "sides" os the reveal poke out beyond the cladding boards like JSH's horizontal cladding in the earlier post. This is bottom of the reveal. A 'secondary sill' sits upder the window frame (frame drips are on the underside - this in hindsight was a mistake as it would be much easier to clean these and to seal frame<>sill if they were face mounted frame drips) and catches everything from the frame / window reveal tapes and dumps it outboard of the wall membrane but inboard of the cladding (i.e. anything getting in here disappears behind the cladding) Over the top of this is going to be a wooden sill / step that's loadbearing, pretty, and mostly waterproof but doesn't need to be completely waterproof. Now that my wife has an idea of what the finished item will look like (the outer boards still need all the screws putting in and their final coat of black rather than grey)... ...I think these are definitely not going to be frameless and it's all a bit RAL9005 at the moment. It might even get a decorative reveal in a contrast colour. I'll leave this detail until the 11th hour so that she can decide. Perhaps post a few photos for her to choose between too...1 point
-
So this is the tape I'm looking at, in the 60mm width. @IcevergeI am sticking either to concrete reveals that were cast three months ago, or in most cases to timber frames. The company selling the tape is hitting me with "You may also need this primer" (https://www.ecologicalbuildingsystems.com/product/tescon-sprimer). Do i, or is this just upselling?1 point
-
If you need structural screed the SE would have specified it on the drawings. It's unlikely unless you have high loadings on top (e.g. garage and green flat roof was only place it was specified for us)1 point
-
We had pipes in place throughout last winter, but kept them pressurised with air, not water. This means if anything gets damaged during first or second fix it's easy to see the pressure meter has dropped, but no damage done from leaked water. ASHP won't cool water below freezing (ours only gets down to 5°C) so no risk of that damaging pipes. However anything below about 12-15° is liable to cause condensation which needs careful planning to manage / avoid1 point
-
1 point
-
So the screed is 'OK' at 30mm but what does the plank need to perform as specified? The screed on a hollow-core floor is an important part of the strength, unless yours has been specified conservatively. Check.1 point
-
Personal preference. So the concrete doesn't seep into the insulation when it's poured and so the EPS isn't sitting in a swimming pool of water before the concrete is poured. I don't like the idea of 2 layers of impermeable material anywhere in a building as water can't escape from between. The EPS won't be wet underneath if you take care to ensure the water table never gets above its base. No, the main purpose here is to ensure water from outside doesn't get in. The blocks are somewhat porus anyway and any moisture will drain away through them over time. I did drill some larger holes to allow rain water escape during construction. I put many iterations through Therm to see what performed best. I did try a third block below but the gain was tiny. Ideally they would be directly in line with the insulation but in the real world blocks only come in certain sizes. It's vital the aerated concrete blocks are kept dry. Hence keeping them away from the bottom of the cavity. The one below is a strip of membrane and the one above is an extension of the whole DMP barrier extending over and down the cavity. The 100mm block above it is to give a level surface to screed the floor from. You don't want to screed on top of a DPC as it'll tear. Mislabeled This is not the detail we built but rather an improved one I would have preferred. Our actual foundation is stepped twice so various levels of fully filled wall were raised to give a level platform to work from. It's called deadwork in Ireland. Not sure about the UK. Also begining a cavity wall directly from the foundations will be difficult as it'll be too uneven and rough. I will direct you towards our as built design if I can find it. 100mm to save concrete. A production builder near us uses this with reinforcing fibers and no mesh. We used 150mm with mesh. Total overkill in my opinion but our builder wanted it and didn't charge extra so hey ho. One thing that is vital with no subfloor is to compact the substrate thoroughly. Otherwise it may sink and you will get cracked tiles etc.1 point
-
What's on the external face of the wall? Render etc? I guess you're going for the "warm batten" method - the idea of the insulation taped tight against the wall is to form an impervious barrier. If there was ever any moisture build up behind the insulation, you'll end up with mould on that wallpaper and no access to it. I'd be inclined to knock it all off it back to brick and gain a few cm extra in the process.1 point
-
We have been living in it for a year, and had the VOA done when we moved in to keep council of our back. Now nearing completion, hopefully sign off before xmass. Been buying stuff thats claimable throughout as it was a shell when we moved in... VAT stuff is ready to go so will submit straight after BCO sign off, going to use that to get flooring in! I will be very unhappy if they challange this.......1 point
-
I had issue getting a new line into our build. The BT manhole is 12 inches from our boundary and carries fibre aswell The local openreach gadgee said unless we were in occupancy, we wern't priority but we needed broadband for cctv of the site. He was very helpful and said if we sign up for a phone and broadband deal with a 3rd party provider, they lean on openreach to get the connection sorted. This we did with excellent results with plusnet but they could only promise a low broadband speed on an unknown new line. The connection was sorted post haste and we cooled off with plusnet and went for a more competitive and greater speed deal elsewhere, not openreach1 point
-
If they haven't even sent a surveyor yet you have some way to go. I would chase BT Retail quoting your order number and complain Openreach haven't even sent a surveyor yet. Google suggest the process should be... Get your address into the Royal Mail Postcode Database first (yes really). Hope it makes it into the Openreach version of the same database. Order a new line from BT Retail (or whichever retail company you prefer). They will place order with Openreach. Openreach should send surveyor who will report the back to BT. Keep chasing BT Retail who should chase Openreach for you. BT say you can track the order here.. https://my.bt.com/s/apps/appsorder/customer/index.html#/index?order_ref=&s_cid=con_FURL_myorder&s_cid=con_FURL_ordertracking1 point
-
1 point
-
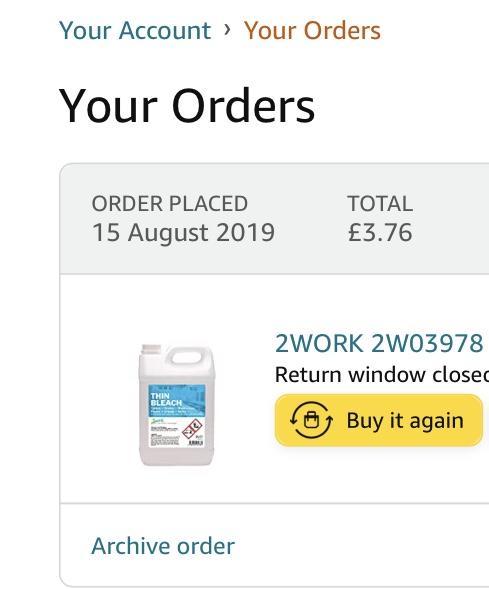
I have not read this whole thread in detail but I HAVE seen this happen. I have an unheated workshop and I have every type of timber in there, hundreds of bits from OSB to shower board, from mahogany to soft pine and the ONLY thing that goes mouldy is certain types (most types actually) of ply board, NOTHING else goes mouldy. I have seen this happen over the years and now just steer clear of ply. OSB EVERY time now and never a problem. I made the grave mistake of using ply in another shed rather than sarking or OSB and your shed looks exactly as what happened to me, my shed was very well ventilated but it still went mouldy…… I was / am still so frustrated that I went down this route. I treated it with neat thin bleach, sprayed it on with a kitchen spray bottle and it’s been very effective, i wore a full body protection, eye protection and a gas mask with carbon filter. I tried other bleaches - thin bleach from tesco and they did NOTHING !!!!! I have warned a few friends about ply going mouldy and some of then ignored this only to suffer the same fate…… https://www.amazon.co.uk/gp/product/B00COM84IM/ref=ppx_yo_dt_b_search_asin_title?ie=UTF8&psc=1 this is the stuff I used with great effect, I even bought a few bottles as back up just in case I needed to re- apply but so far so good. if your concerned about mould I would rip it out and replace with osb, I am still sitting on the fence about ripping mine as it’s a big cost and a lot of work. I see the price has gone through the roof since 2019 but I would still recommend this type.1 point
-
Loooong time ago https://www.jpdetails.co.uk/history-of-automotive-detailing1 point
-
The tape I used from gerband required a type of glue that you applied like silicone into y the block work. It was a flexible adhesive and very very sticky. https://passivehousesystems.co.uk/product/winflex-i-airtight-window-tape/ https://passivehousesystems.co.uk/product/gerband-fortax-6400-airtight-sealant/1 point
-
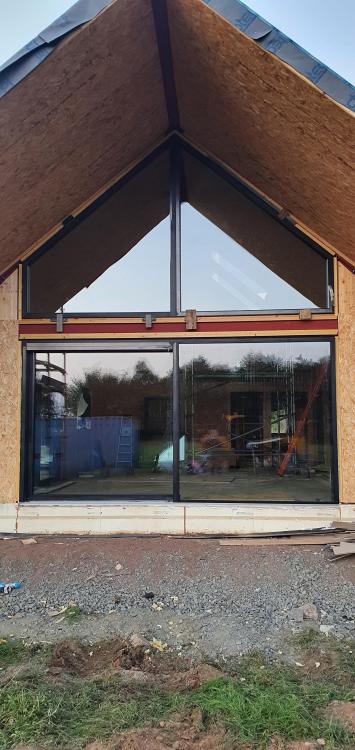
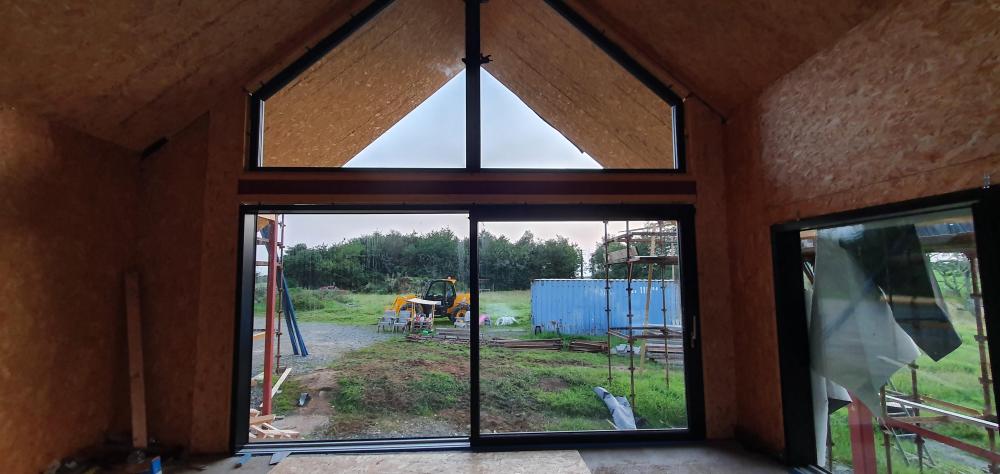
I just installed Zyle Fenster 3g timber framed Aluclad supplied by Ecowin who is @craig on here. Plenty happy with the quality. I have black internally and externally. I had most of the slates on when wi down went in but if I didn't I wouldn't have been bothered. Plenty clearance at 10mm all round. Thats 4.6m wide and bottom 2.4m slider high1 point
-
Let me put it another way: I think @Digger1 you are putting far too much faith in the BCO. He is not going to check your concrete has been mixed to the right consistency, or that the dimensions of the blocks you are casting are the right size, or that any reinforcement bars are of the correct spec and in the correct position. Most BCOs, as far as I’m aware, don’t have any special qualifications. Some may have surveying of building backgrounds, but most don’t. They are effectively underpaid pen pushers, some are very good at what they do, but many aren’t. It’s completely luck of the draw. Maybe you are extremely confident in your ability to follow your SE’s plans and in your SE’s ability. But the fact you are enquiring about insurance suggests to me that maybe somewhere you have some doubt. I can also say that even the best professionals make mistakes, and good teams consist of members that will spot other’s mistakes. My SE is good, occasionally a bit slow/lazy but on the whole has helped us do things I didn’t think were possible. He did however make a mistake in one of the beam designs. Luckily, my builder is very experienced and spotted the mistake before he ordered all of the beams. Who is going to spot your SE’s mistakes? Who is going to spot your mistakes? If you think it’s the BCO, then you are, to an extent, elevating your BCO to that of a project manager or site foreman, with a level of expertise that I don’t think they have.1 point
-
Put the DPM above the slab and look out for cavity tie locations in relation to the height of the tanking.1 point
-
IS it a covenant that restricts you? If so, if others have breached the same covenant then it is likely to be unenforcible. So I would download the deeds of the houses where these other places were built in the gardens, and see if any have that same covenant. Then you have evidence of unenforcibility. Perhaps once you have that, check with a local long-established legal firm, or Town Planner (MRTPI), who may with luck have dealt with the question before. For your PP I would go for Outline, not detailed, with most matters reserved. Others may differ on that. F1 point
-
Are these like marks on brushed alu fridges? Perhaps WD40? Or computer screen cleaner? Or baby oil? Or perhaps a razor blade scraper, as used for ceramic hobs?1 point
-
Sorry if this is obvious but.. Don't use insulated screed over UFH or you will wonder why your rooms are cold and your return temperatures are so high ?1 point
-
My compromise is a 300L UVC heated by the ASHP. I have the ASHP timed to start heating DHW at 11AM to ensure reasonable solar PV veneration by then so a good chance solar PV will power it. The ASHP only heats the tank to 48 degrees, still allowing plenty of headroom for surplus solar PV to heat it hotter on a good sunny day. Most of us usually shower in the evening so not much HW demand in the mornings. To cover the eventuality of a cool HW tank for any reason I have a 10kW modulating steible eltron instant water heater in line with the UVC output. that too is set to 48 degrees so nromally does nothing. But if the tank is cool, either for an unexpected early shower, or simply too many people have used up all the hot water faster than the ASHP can recharge the tank, you still have hot water.1 point
-
It is written. My circumstances require 100cc. 3.1 mm x 50 mm wire nails at 100 or 150 mm centres as calculated That makes 5000 nails in the external walls alone, so a nail gun is rather important.0 points
-
0 points


