
Leaderboard


Popular Content
Showing content with the highest reputation on 10/01/18 in all areas
-
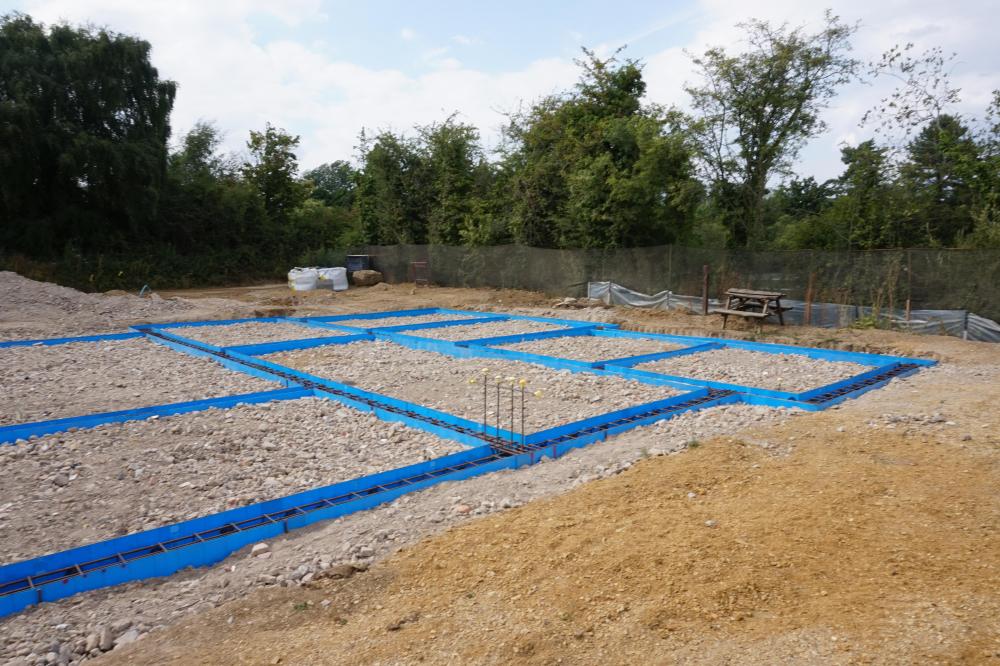
Not on my bloody site there’s not as the seasons start to change I thought I would add my opinion on mud on site nope don’t want it, your trades will walk it through your new house, their van will drag it down the road, and it makes for an unhappy environment to work in. When I did the site scrape I extended it for 5-6 m in all directions from the hose footprint, I removed all topsoil and replaced it with recycled crushed hardcore and a blinding of local stone, the cost was 3 truckloads of crushed at £145 per load and 1load of stone at £165 the outcome is priceless not a drop of crud anywhere.
 3 points
 -
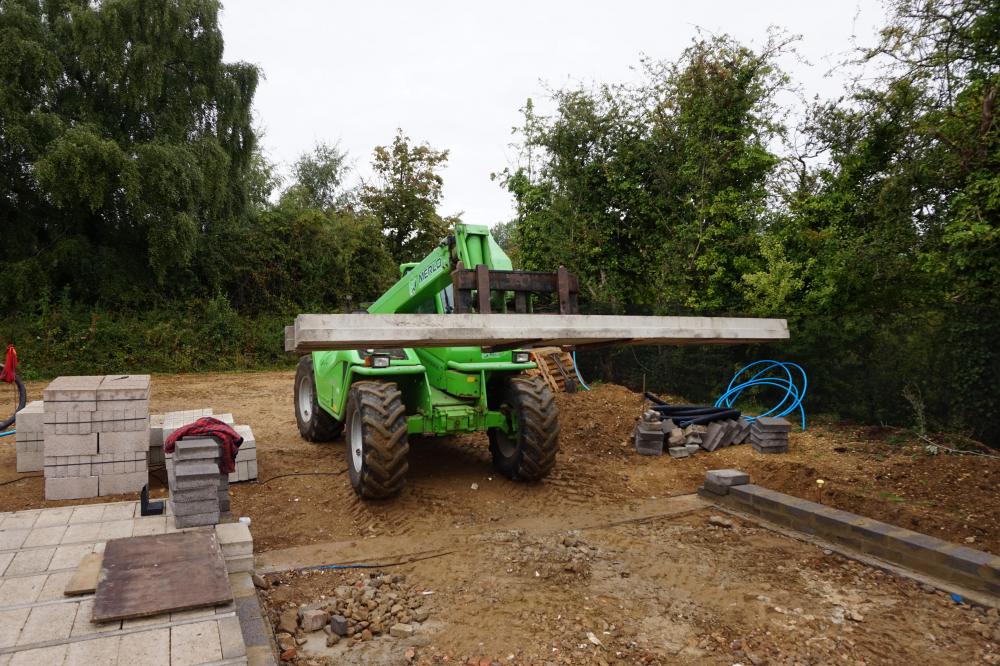
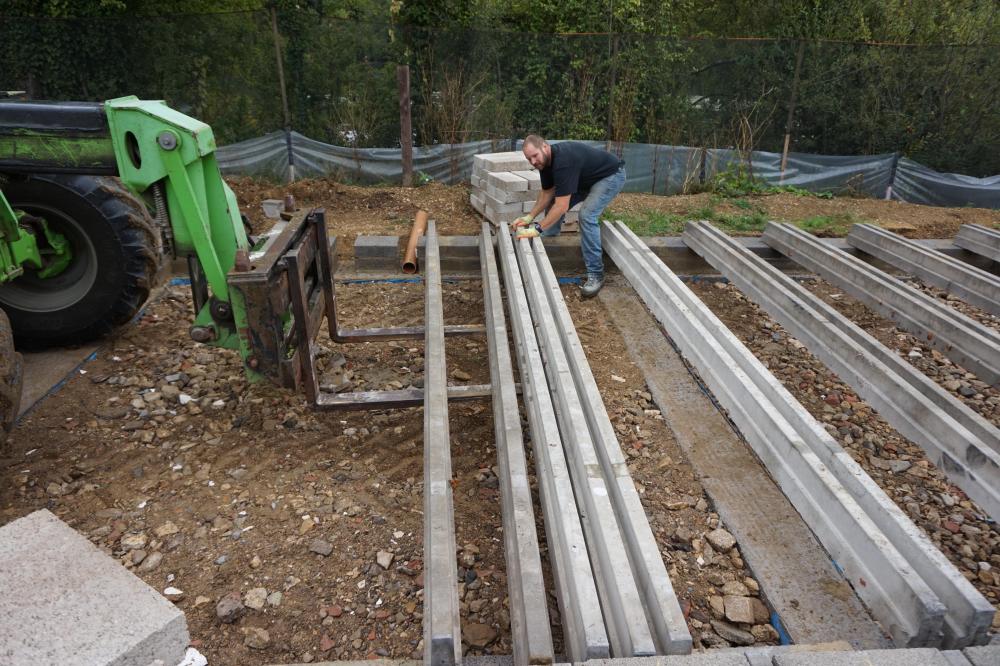
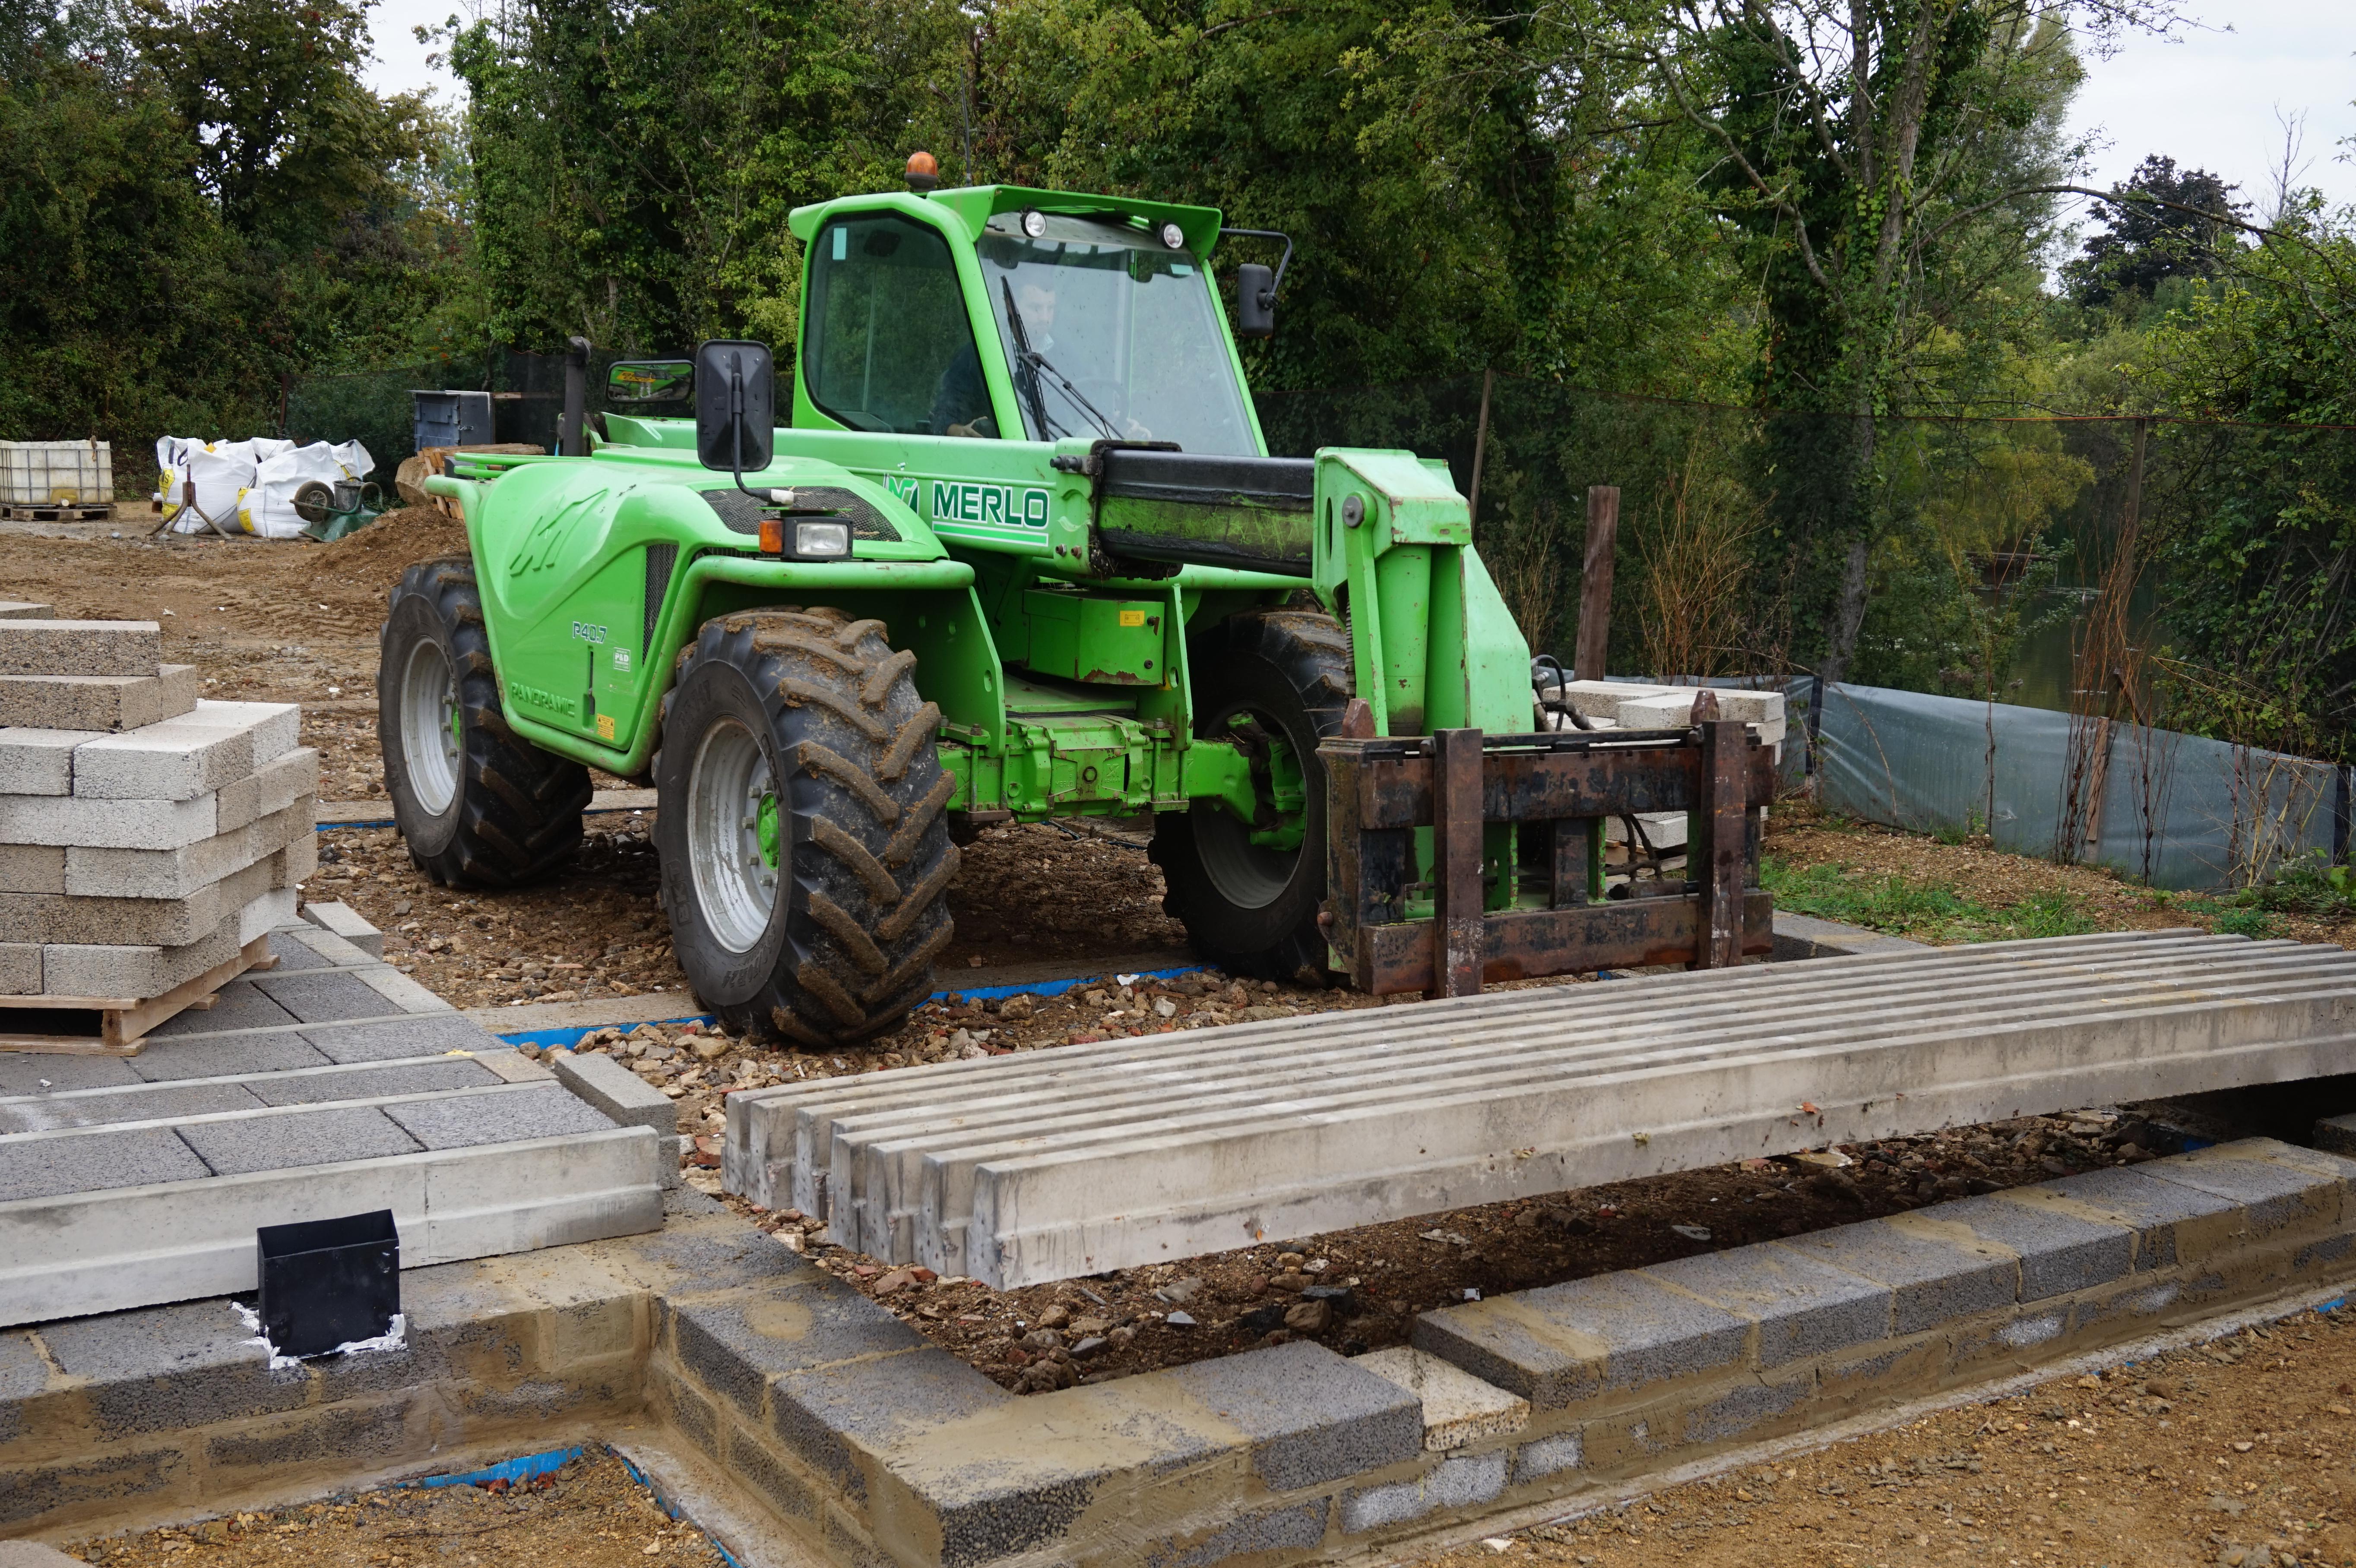
Just a silly topic if anybody is having to do this sort of thing themselves i had 16 tonnes of concrete floor beams to put in place at a distance of 15m from where we could get the closest lifting equipment, answer don’t build the front wall of the house and drive the forklift inside the house working your way out until all beams in place, once all in place finish off the last bit of wall. Pic one the forklift sitting in the back bedroom, pic 2 halfway, pic 3 just exiting the garage. All done.
 2 points
 -
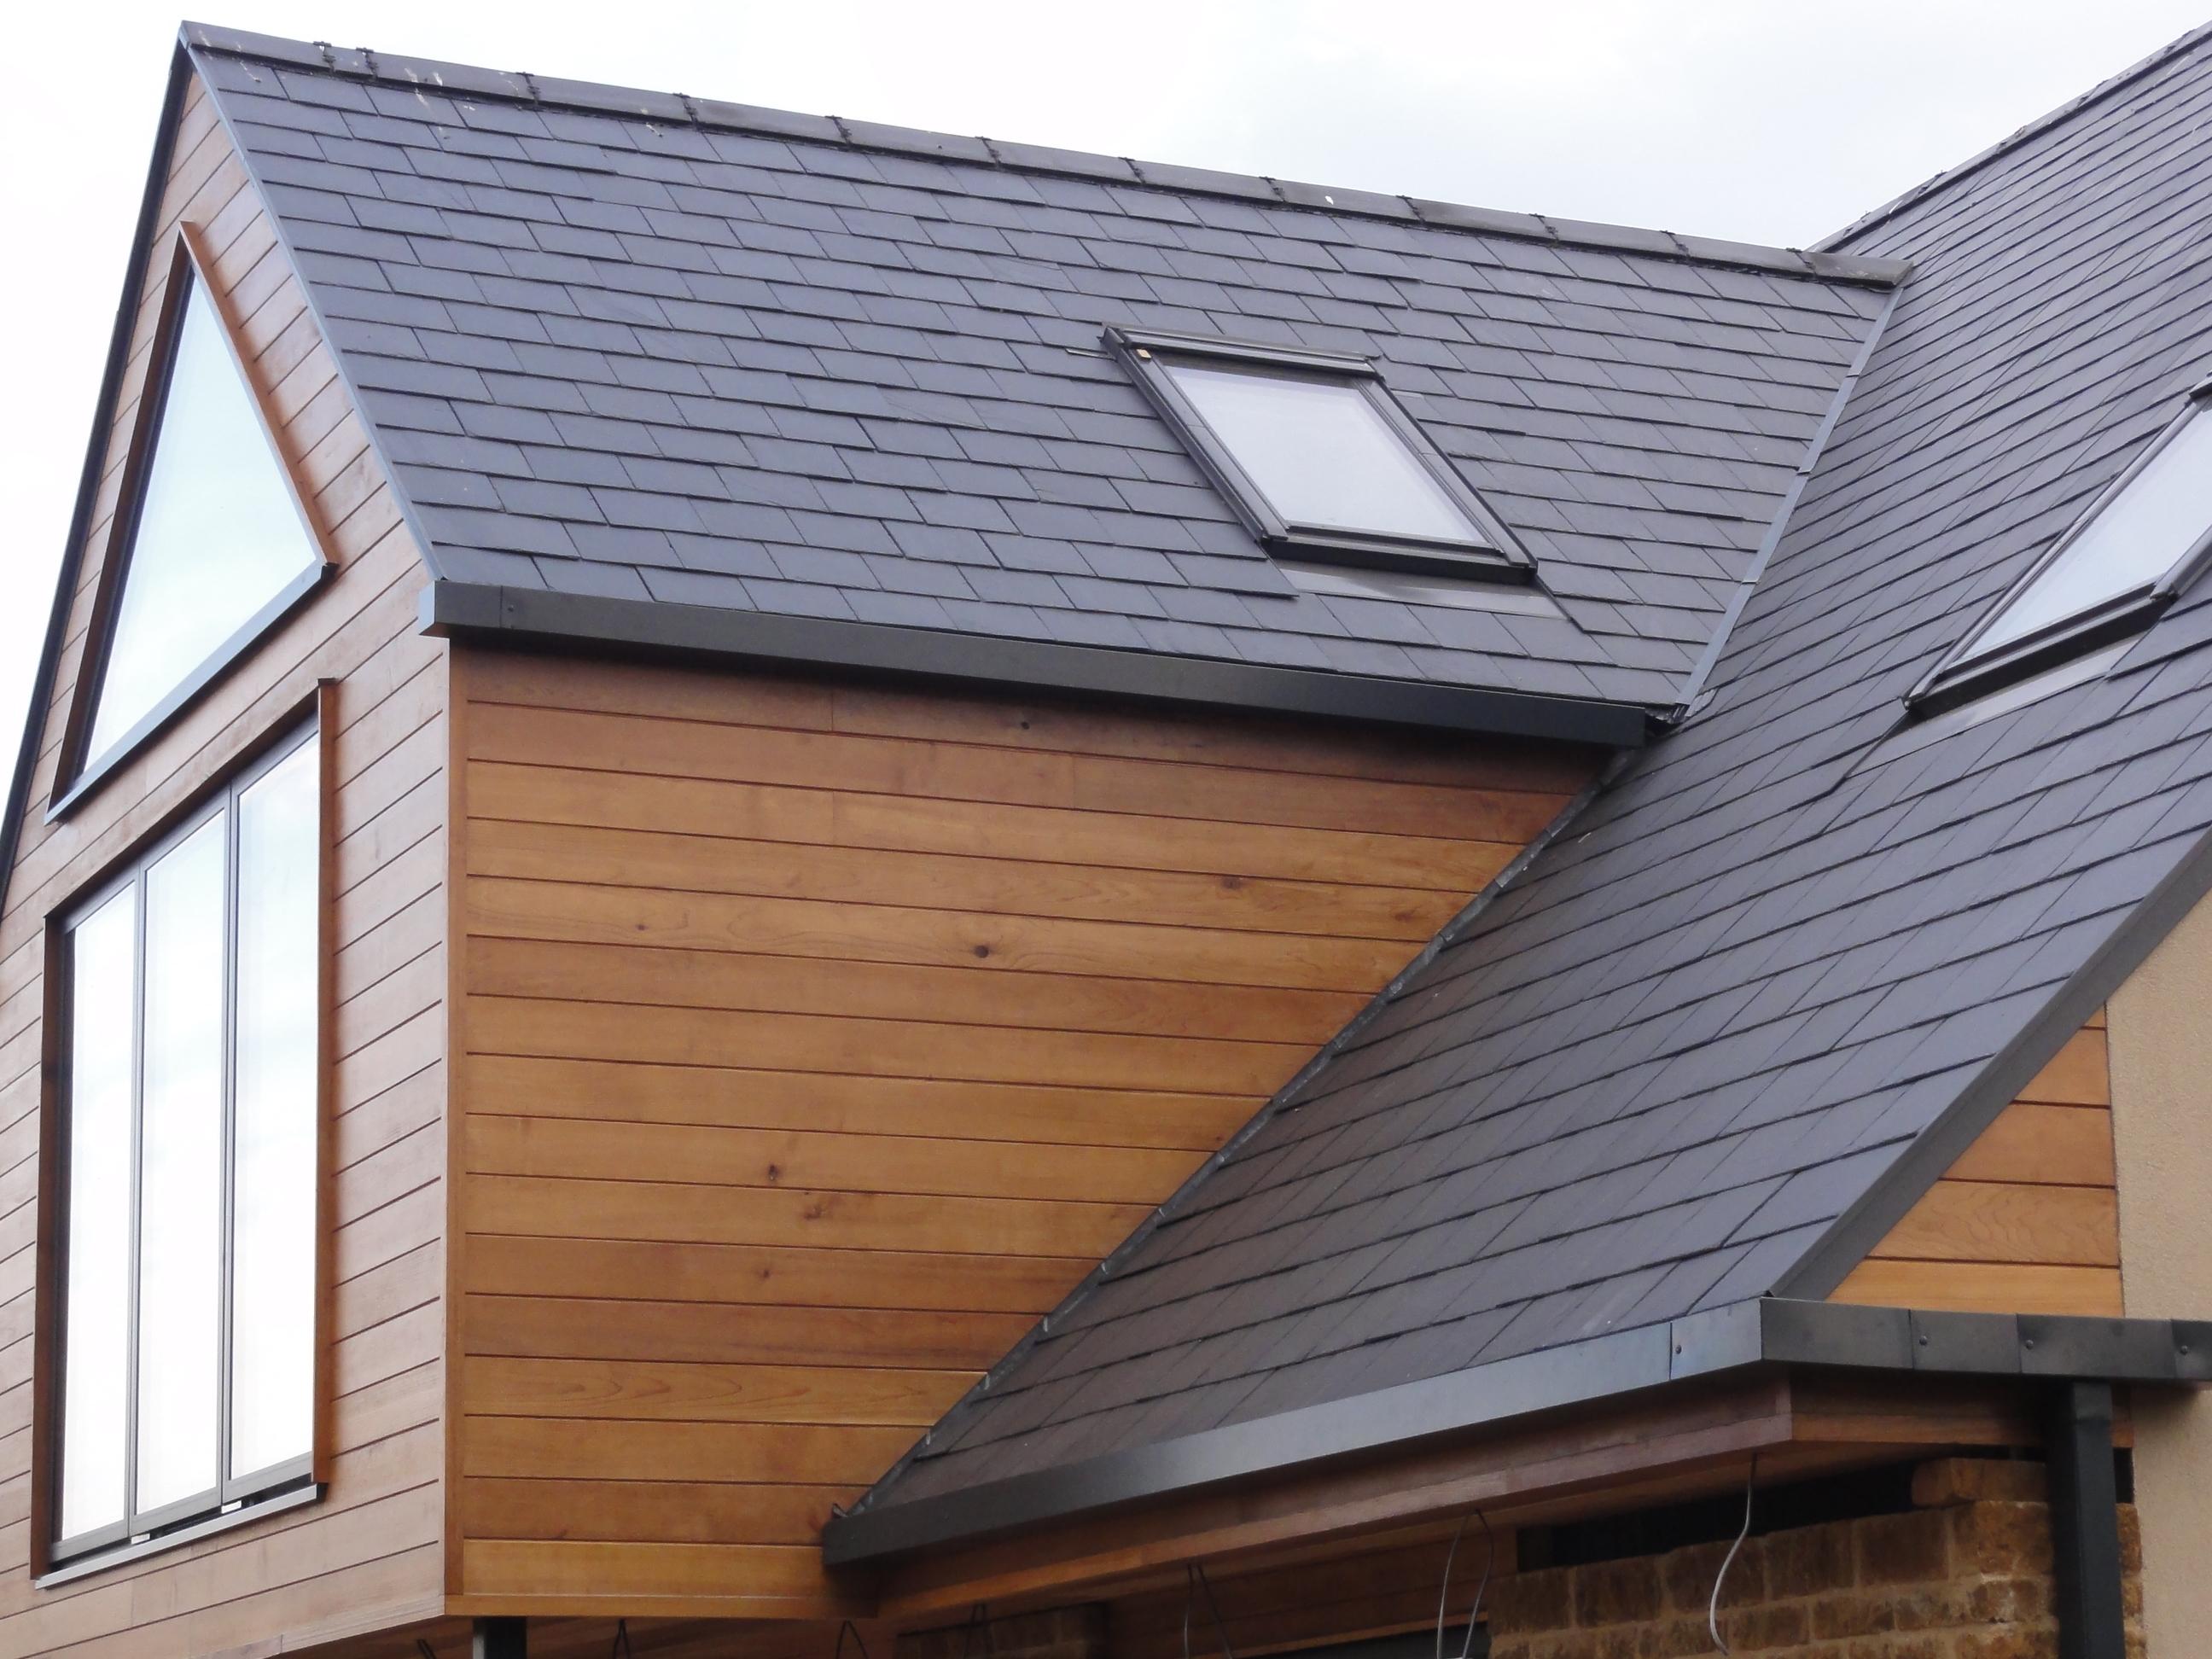
We have used exterior Osmo oil with the oak stain as we did not want the cedar to silver. We used the clear osmo to start with but found out it doesn't have great UV protection. The cedar started to lose its colour & grey quite quickly. The new stain looks good & is showing no signs of weathering yet. We tried the other colours available but the oak was nearest to the original colour of the cedar. As it is translucent it there is still a variation between the cedar planks. The cedar stain is too orangey red. I would get a sample sachet & try it in a discreet place.
 2 points
 -
Every night's a school night! Well it is for me, learning as I tile. I think @Nickfromwales referred to the importance of avoiding "rips" I think he called them, thin strips of tiles that look awkward and unplanned. Well I managed it! I've ended up with a nom 40mm strip up by the ceiling. I was going to cut the mosaics down in strips to say the 30mm width of the squares? It'd mean a 5mm grout line either side. Or cut it down to 35mm keeping the pseudo grout line. Then put that against the ceiling and grout as normal between the main tiles and mosaics. Thoughts? Cheers.2 points
-
Judge (G)Rinder?2 points
-
My recommendation with these sort of events (something turning out an unexpected shade etc..) is to leave it for a few months and then see if you still notice or care. Very tempting to try and fix it in the moment when you're focused on it ....2 points
-
Sell now get money in the bank = fewer middle class clipboard huggers stealing your money. Conversely consider family relation dynamics should your build take an extra year. At some point your parents will revert to treating you like a teenager again which could be as stressful as self building. My advice is build a weather tight house for less than £200k, move in then finish off incrementally without a mortgage.2 points
-
Russel, this topic isn't silly. It would have taken me ages to work out the logistics of how to solve your problem. And everyone who reads your post will use it as a starting point for their own thinking. In other words, stand on your shoulders. Keep them coming. You can never know what readers will make of your posts.2 points
-
@epsilonGreedy I'm usually the last to comment on these posts but you should reflect before you press the submit button. Yellow card time is looming I'd guess...1 point
-
Now which publication is that from? looks like your gonna tile all over her back....1 point
-
Looks fine to me but your the one who has to live with it. Just be aware that if you overpaint with a lighter colour it’s going to need a few coats. I know as I did the same thing but in brown Cuprinol ducks back. In the end I really liked the two tone colour and am repainting my whole massive shed with another two coats light brown first and then dark brown (4 in total !) I got the paint of amazon for £10 per 5 litres so decided to go crazy !1 point
-
Been using something similar but even thinner..... It’s just like a hack saw cut. Great find. The ones Peter recommends look even better, will order some when I run out.1 point
-
it looks OK to me TBH.1 point
-
B Like cutting butter dont forget your goggles as they do shatter1 point
-
Not my experience at all. Ours can heat to 50C regardless of outside temperature. Sunamp for storage is a separate subject, 50C is too low for the regular PCM, and the 34C PCM is not hot enough for DHW. We use a 300l cylinder, the only downside is that recovery time is slow with our small heat pump.1 point
-
Seems right, I get around 4 when heating and 3 when cooling.1 point
-
I used these for the first time about six moths ago I couldn’t believe how something so flimsy looking would cut through steel like butter1 point
-
You have not answered my question - but don't bother. Your evasiveness says it all. You didn't need to explain the principle behind the basis of your original comment; it's the manner in which you deliver your comments time and time again - you have an issue, you know you do hence the deflection and you don't like that you were called out on it. Across your posts it is clear you don't like that many people on this forum can afford things you cannot - you are obviously doing your best in this self-build world, but due to the nature of this type of endeavour it takes a fair bit of money, even if just secured finance, to build a home that most people could only dream of.1 point
-
It's spelled "Grindr" isn't it?1 point
-
1 point
-
Practice may be slightly different but probably not much different: in theory the cooling COP should be one less than the heating COP because the energy in the electricity going into the pump contributes to the heating but not to the cooling. I = thermal energy going into the heat pump (from outside when heating, from the house when cooling). What matters when cooling. O = thermal energy coming out of the heat pump (to the house when heating, to the outside when cooling). What matters when heating. E = electrical energy going into the heat pump. Assuming no other losses then O = I + E. Cooling COP = I/E. Heating COP = O/E = (I + E)/E = I/E + E/E = I/E + 1 = cooling COP + 1.1 point
-
My ASHP is heating my DHW to 47 degrees. This was found by experiment over a few days to be the absolute hottest I could hold my hand under without it being painful. Hot enough for washing up. Bathwater will be cooler with cold water added. So an ASHP seems perfectly capable of heating DHW. The caveat being I fitted a larger hot water cylider as you will be diluting with less cold, so will need a greater volume of hot water.1 point
-
You've hit the nail on the head there. Exactly our problem. Coming from gas previously or even the current oil system we love a hot steamy bath and hot water. We are what you'd say 'nesh' and I, coming from my parents who have an aga and continually heated house, every house I've ever lived in since hasn't t had the constant heat I was brought up witj. We are typical 'always cold' people and I love a nice hot steamy bath and don't know if the system will do this, but then I'm not convinced an Ashp will either, but we do know we want underfloor heating throughout, my brother has it and I love it. This technology is without anything else such as solar etc, obviously we need to get some figures and go from there and compare with Ashp.1 point
-
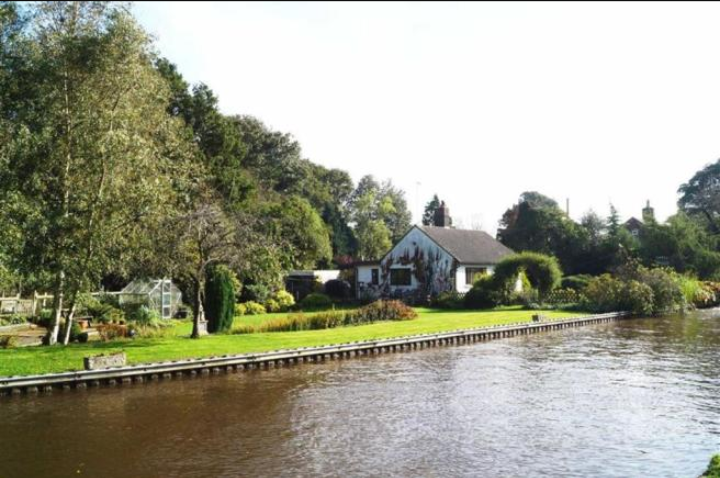
Thanks for this, I have indeed. I have had a lot of if formation on the blades from the ISO website already, https://www.isoenergy.co.uk/latest-news/isoenergy-news/cutting-costs-with-the-energy-blade-heat-collector Nuenta is the supplier of the blades. The information on the podcast was really helpful and made me more keen to explore it. It's ironic hydro has been mentioned @ProDave as this was something I initially explored, BUT the cost was likely to be huge. The red tape is very, very complex. Planning permission, abstraction licences, fish things and major environmental agency permissions all make this a non-starter. In addition, whilst the flow is sufficient, we don't have the drop at all. Our property is adjacent to the canal and the bywash is on our side (see pic). Now water source closed loop like the blade, no planning permission, no abstraction licence, very little red tape as long as the c&r trust are on board.
 1 point
 -
I think the point I was trying to make and obviously failing is I’ve heard day rates and half day rates quoted as little as £120 per day Even for a sole trader running a van and tools holidays etc is very low and I hear folk paying around £40 per mtr for floor tiling I’ve started a job this morning and have laid about 20 mtrs so far at £30 per mtr grouted and covered Three of us will easily complete 50 mtrs per day for the duration of this job As I have pointed out previously there are massive differences between the site operatives and the bottom feeders that most have to make do with on self builds The small builders are struggling for labour I'm in the north of England so not the lowest but certainly not the highest wages Redrowand others are guaranteeing bricklayer 220 per day rain or shine I’m not taking any more work on till after Easter We hear so many tales of woe on here so let’s go into it with our eyes open Make no mistake it’s a bad time to selfbuild Building has always been boom or bust If things were tight on-site we would have a pool of eager and well qualified tradesmen looking to earn some extra cash Instead the jobbers have a clear run at all the private work 12 editions definitely does not make a best seller1 point
-
I have visited the author in his recently finished new house in Cambridge. The house is designed by a top (and very expensive) architect, has a fabric-first approach, and looks splendid. A frivolity he was keen to show off was a 3-metre powered opening glass roof panel.1 point
-
Those discs that PeterW has suggested will cut much better as they are much thinner - be careful when cutting anything galvanised, it is toxic.1 point
-
I think it looks good, a lighter colour would contrast / stand out more. Like a lot of others have said, its bound to fade to a lighter colour.1 point
-
These1 point
-
Use a pencil and draw it out on the wall. You don't want to end up with tiny bits of tiles. Start with the obvious, a full tile and then a half above and see how the cuts work. Then try a 3/4 and a 1/4. It's just trail and error to see what works best.1 point
-
I think that is the wrong answer ?, particularly as your 2 years in the howling Scottish salt-laden eviscerating gales is equivalent to about 10 in the gentle Shires of the South. In a minute you'll tell us you used the same paint !1 point
-
Mine is hit and miss too so I can appreciate how long it took ?. We must both be hit and miss with the colour choice too as I don’t really like mine. Dried much more orange than I expected, but as per some comments above after 2 years I don’t care much. And it hasn’t faded either lol.1 point
-
I think the colour contrasts nicely against the red brick and coping stones. Warship grey would suit a corporate HQ.1 point
-
There you go then, see how you feel about it in 5 years1 point
-
It will mellow / fade fairly quickly. Are you going to do the edges too?1 point
-
Colour isn't too bad. I would leave it and see if it fades. Paint it light next time. On sawn timber I prefer wood stains (Ronseal etc) which I spray with a cheap hoselock pump up garden sprayer. It ruins the sprayer but the small ones aren't much more expensive than several good brushes.1 point
-
Our stats have been off all summer but this weekend we decided to turn on the bathroom and living room stats they could call for heat if needed. They both came on first thing today so it must have been below 18C in the living room overnight.1 point
-
Smoke may well be being drawn upwards as is air - through the wadding. Sealing the bottom means all the “draw” is through the stove, when it’s hot there will be significant draw from the chimney, when it’s not you’re reliant on the stack effect and the breeze over the top to make it draw and opening the door may mean the pressure is just too low as the wadding is not sufficient. Bear in mind that a register plate is the correct installation method and what you have would not pass building regs or a Hetas inspection.1 point
-
I call it having my finger on the contemporary pulse of British life. Economic prospects for the under 40's have not looked so dismal for 50 years, polarization of wealth is an undeniable global economic trend and home ownership rates for the young are plummeting. A self builder needs to question every expenditure that does not materially contribute to the build and short term mortgage finance is going to be such an example once fees are taken into account.1 point
-
I can't really comment on this one, as my preferred approach to painted fences is "don't, without a really good reason".1 point
-
1 point
-
@Ferdinand yes that marked part is part of the plot, as well as another garden area to the east, also a decent curtilage around the whole building to allow for maintenance. Various covenants in place with the farm for access, services, etc. The woodland 'just out of shot' to the left of that model picture is under a long-term woodland management grant, and the whole area is green belt, so in the event of everything changing hands in years to come, the new owners shouldn't have to worry about their north view being onto an abattoir. Class Q has been a bit tricky, but on a firmer footing with the recent updates about structure. Martin Goodall's blog has been essential. The planners are (now) happy with the design, and I think we've got a good relationship with the planning dept. Further amendments to include stainless steel cladding might be a step too far though. If it's ever of interest to anyone, the GPDO does explicitly allow making design amendments to a previous class Q agricultural conversion PD, though councils may not initially know this is possible.1 point
-
In the most recent Passivhaus Trust newsletter (link below) is a link to this document, "Good Practice Guide, MVHR for single dwellings". Its a detailed description of how to design an MVHR system for a Passive House. The guide: http://passivhaustrust.org.uk/UserFiles/File/Technical Papers/2018 MVHR Good Practice Guide rev 1.2(1).pdf The newsletter: https://mailchi.mp/passivhaustrust/pht-news-sept-18?e=894c841f591 point
-
Having promised my wife Debbie that I’d get people in to do most of the Work associated with the new house, i contacted two local demolition companies and got prices to demolish the old timber bungalow. The prices were £6,000 and £12,200. Being tight I demolished it myself, it cost the price of three skips, £540, The bonus for me was over £1,000 in payment for the scrap from the house, things like a hot water copper cylinder and piping, lead off the roof, the old cast iron AGA and two baths, the oil fired boiler, taps, light and socket fittings etc. The problem in demolishing a timber frame house is the amount of timber! So I saved as much of the timber as possible and cut up the rest into firewood sized pieces, I used leftover builders bags to store it and we’re burning it very slowly in the cabin, the problem is the cabin is so well insulated we only managed to burn half a builders bags worth last year!. An even biggest problem was the cedar shingle roof, it had been re-covered during its life so the shingles were two layers thick. I ended up cutting the roof up using a reciprocating saw, a lot less dangerous than a chain saw! The roof as then burnt on site, The roof being stripped. It’s going slowly! Progress. Finally clearing up the plot. All told it took me six months to dismantle the old bungalow and clear the site. luckly my time is free and I did save £6k and taking the scrap value into account I’m £7,000 in pocket to spend elsewhere.1 point
-
Just found out why the Salus motorised UFH actuator works so well on our system. The headline temperature differential that it tries to maintain between flow and return is 7 deg C, which is higher than the differential we see on our system, and something I'd just put down to manufacturing tolerances. I've just read the detailed technical stuff on this actuator and it seems that it reduces the temperature differential that it tries to maintain to 4 deg C when the flow temperature is below 30 deg C. That's just about perfect for our needs, and explains why it works better than I thought it would. The main reason I fitted it was because it has a much faster actuation time than the thermal actuators. It's a real bonus to find that it also does such a good job of controlling a low power UFH system.1 point
-
So for the larger ground floor room, we got a professional screeding company to come in. They were due to start Monday morning so I took the day off work. For some unknown reason, over the weekend both my wife and I had we had an uneasy feeling they weren't going to turn up, but there was no logical basis for that. By about 0930 I had a suspicion, and sent a text asking roughly what time they thought they would arrive. A few moments later the phone rings and its the owner apologising saying their forced screed mixer broke down on Friday and he'd gone down South for a second hand one but it didn't seem to be working properly when he got it back. He called again a bit later to say he'd found a solution and his guys would be there tomorrow (Tuesday). Cue me ringing work and offering to work on Saturday if I could take Tuesday off too. So, Tuesday and 0830 the guys turn up. I'm pottering about but notice a distinct lack of noise and by 1030 they tell me that they cannot get the mixer to run and away they go. So another day taken off work for nothing..... I'm back to work on the Wednesday but my wife was at home. She rang me to say that the team had turned up at 0715 (!) and had the machine working. By lunchtime they were done, and the result is excellent. When I got home I even texted the owner of the firm to say how pleased we are. Last night, (Friday) I discovered they'd dumped a barrowload excess mix on my topsoil pile out of sight of the house! Now in front of the future garage is a hole I need filled so if they;'d only asked instead of sneaking out of sight with it they could have actually done me a favour - instead I've now got to take a pickaxe to it and break it up then barrow it back to where it can actually serve a purpose. What a shame to let themselves down like that after doing a good job. So..... next objective is to finish the downstairs bathroom.1 point
-
In the last blog entry I was putting down insulation and the UFH pipework in the smaller of the 2 main downstairs rooms. In the end I decided we would do the smaller (3.5m x 7.5m) sitting room ourselves. So with myself and daughter levelling, wife and friend mixing and super fit farmer friend on the wheelbarrow we mixed the requisite 4 tons of screed and ton of cement and laid it in a day. Fish and chip lunch provided of course to helpers! All in all we didn't to too bad a job. Not as smooth as the pros but more than sufficiently so, and I may just run a very thin layer of self levelling over, more to fill in little voids than anything.1 point
-
Before we get into the events of the day, I have a little quiz question for readers of the blog. - What is the connection between my build in rural north Dorset and a mystical character from the legend of King Arthur? Answer at the end of today's entry. All will become clear. Today was another busy day on site, with 3 main areas of activity - flat roof, pitched roof and windows. Let's start with the windows, as they are (mostly) looking great. Both of the big lift and slide windows in the living room area are in now and quite a bit of the upstairs glazing is in as well. The flat roof guys changed their work order to get the membrane from the balconies and parapet gullies overlapped on the window thresholds so that the windows could be installed on top of them. This will allow the sarnafil membrane to then be folded up slightly against the window frame and give a shield against any water that tries to force its way in under the window frame. There's a bit of debris on top from the window fitting, but you can see how the membrane extends inside from the balcony. This is the west facing bedroom first thing this morning. And here is the west facing lift and slide window, looking west down towards the woods. Note the view of the woods, which are in a slight valley formed by the River Lydden. It is relevant for a later comment. Unfortunately, all didn't go to plan for the window installers today. The final window in the living room area faces south towards my neighbours' cottages and is a four pane fixed window. As the bracket was being screwed into the frame, this happened: The window installers looked very troubled by this, not surpringly. It's the inner pane of glass that has shattered and you can see that it radiates out from an obvious stress point. Stepping aside from the obvious downside of this, the very small amount of my brain devoted to aesthetics allows me to think that in a strange kind of way, it looks rather fetching. Then the far greater logical part of my brain tells the aesthetic side to get a grip as we have a broken window. So, what happened next, I hear you ask. Well, the window was put in situ and fitted along with the other 3 panels and Norrsken have ordered up a replacement pane and internal bead. They are, however, up against the clock on this one, as it can take several weeks for the replacement to arrive and MBC are now due back on 5th November, by which time all my windows must be fully installed and as they need to be in order for the air test to be carried out. Tick, tick, tick. Breakages aside, I'm delighted with the windows. I know that it's possible to go to the ends of the earth in research and expense to seek ever thinner frames and other features and that my windows are certainly not the most minimalist products out there. However, given the expanse of glass compared to the width of the frames, bearing in mind that plasterboard will reduce the visual appearance of these in due course, I think that the frame:glass ratio is more than pleasing enough for me. Also, the profile is very flat, both inside and out, and combined with the washed wood interior finish, I am content. Tomorrow will be very interesting as the installation team have quite the challenge ahead of them when they fit the floor to upper ceiling window that is in front of the stairwell. It's one heck of a piece of glazing, so I think we shall all be holding our breath then. Moving out of the building and up to the roof areas, both roofing teams have worked their socks off today. It was hot work as today's weather was warm/hot, sunny and lovely. Let's start with the flat roof guys, who have been very busy with their protractors getting all the framework in place to make the capping that sits on top of the parapet, ready to receive the membrane that will wrap over it. you may recall that due to the MBC construction methods, I have a cold roof. This means that it needs to be ventilated, and this can be a little tricky when you need to have a membrane on the flat roof and it needs to go over a parapet. Fortunately, I visited the build of @Weebles a little while back now and they had exactly this set up, so being the diligent researcher I am, I did nothing more after that and just shamelessly stole their idea. And their flat roof people. Why re-invent the wheel? From the firring pieces and OSB that I pictured on yesterday's blog entry, more of the membrane went down over the main part of the stairwell roof: The flat roof guys had to put in the upstand that goes up onto the pitch and they've been measuring and sawing as much as they have putting down membrane today. Here's the framework they made ready for OSB to go on top and form the cap over the parapet: As well as forming the cap over the parapet, this area also needs a drain for all the water that will come down from the pitched roof, and this is a hole drilled through the parapet and a drain liner inserted through, then the inside will be coated and sealed with the membrane. Prior to putting the membrane on, the OSB is rollered with a contact adhesive (red), then the membrane is heated to activate the glue. This is where they are bringing in the membrane from the parapet gully to run under the window frame, working ahead of the window installers. In their current allocation of time, I have the flat roof guys for one more day, so I'm not sure how much more we will get done, perhaps the remaining balcony, which would be good, as the balustrades are going in next week. And so onto the pitched roof. The pitched roof team were badly delayed yesterday as the tiles that were coming from Bradfords in Yeovil were supposed to have been on a morning delivery but didn't arrive until 3pm. They made a good start yesterday but have gone at an amazing pace today. They've done all they can on the east/south faces for now, pending the PV installation. This picture was taken just after 2pm and you can see that this side of the roof is still getting a good amount of sun, and had been since sunrise. At the same time as that pitch being tiled, the guys were also working on the long north face of the roof, leaving gaps for both the velux and the MVHR penetrations. This is early afternoon: And by the end of this afternoon, they had got this far: That's about it on the roofing today, but the scaffolding is also being used as a storage area. As the telehandler was on site yesterday, as much heavy stuff as possibly was lifted close to its final position yesterday, and the solar panels are stacked up there now. My panels are black on black (not quite the title of the AC/DC track) and from LG. As these things go, I think they're a nice looking piece of kit: And so now to the question I posed at the start of today's entry. There are a few mystical characters in the legend of King Arthur, but the one I have in mind is the wizard, Merlin. I hope you're enjoying the blog, guys, and wasn't it a lovely day for buzzing a self build in north Dorset?! Let me explain to, by now, confused buildhubbers. I've mentioned that there seems to be a definite airborne interest in my build, mainly stemming from RNAS Yeovilton and up until this week, it was predominantly the Navy Lynx helicopters. I got an upgrade this week and having nearly peed my pants with a very low buzz from a Hercules yesterday, we had an interesting buzz from a Navy Merlin helicopter this afternoon. I need to give this a bit of context, though. The Merlin is a big bugger with its three engines and gives out a very distinct bass thud that doesn't quite make your liver tremble in the way that a chinook does, but it's not lacking in long wave frequencies. So let me take you back to the view that I asked you to make note of earlier, looking west over the field and down towards Bagber Wood. I couldn't hear Ride of the Valkyrie, but there was undoubtedly a whiff of Apocalypse Now as I heard the distant but increasingly loud thud of a helicopter from the direction of the wood, before it rose up from the dip of the valley, over the wood and well and truly buzzed us, flying low and slow over the house. Nice to see you guys, keep up the good work, but honestly, you'll get a better view from the ground. Victor Zulu signing off until tomorrow.1 point
-
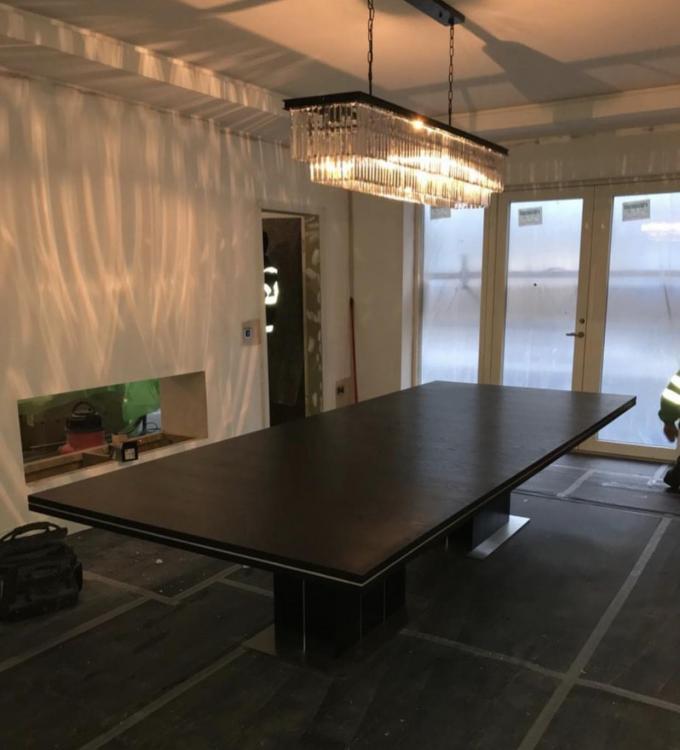
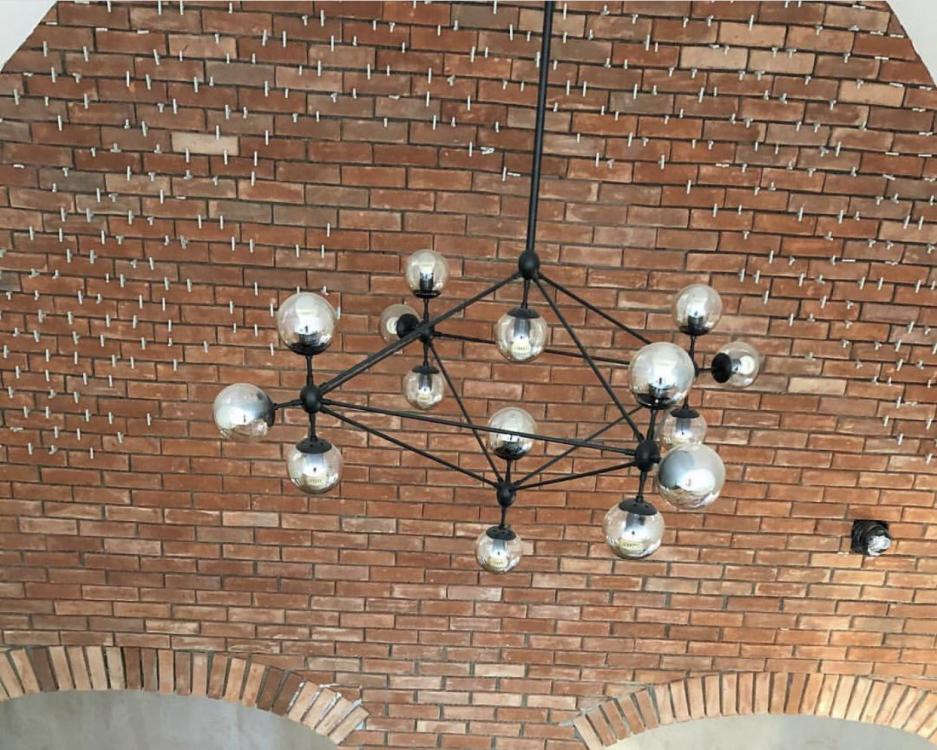
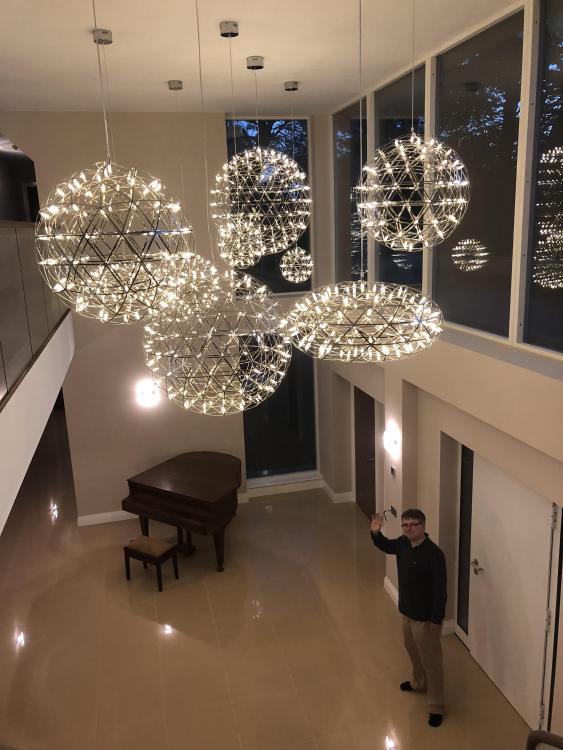
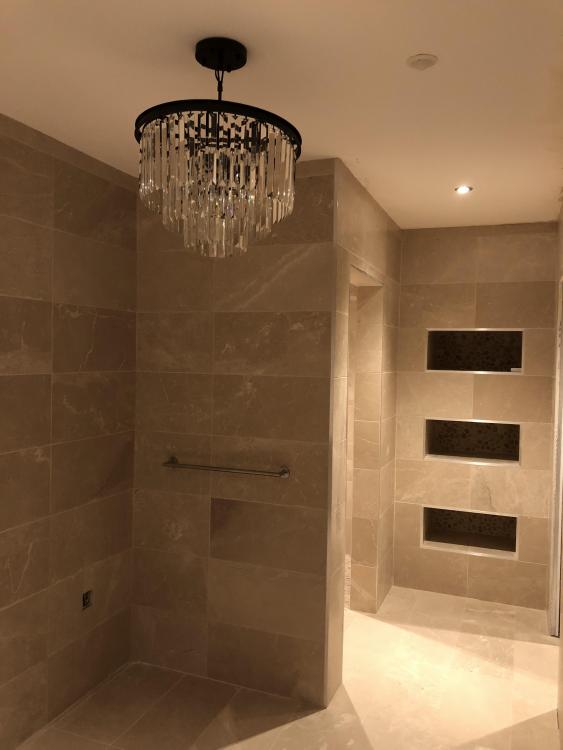
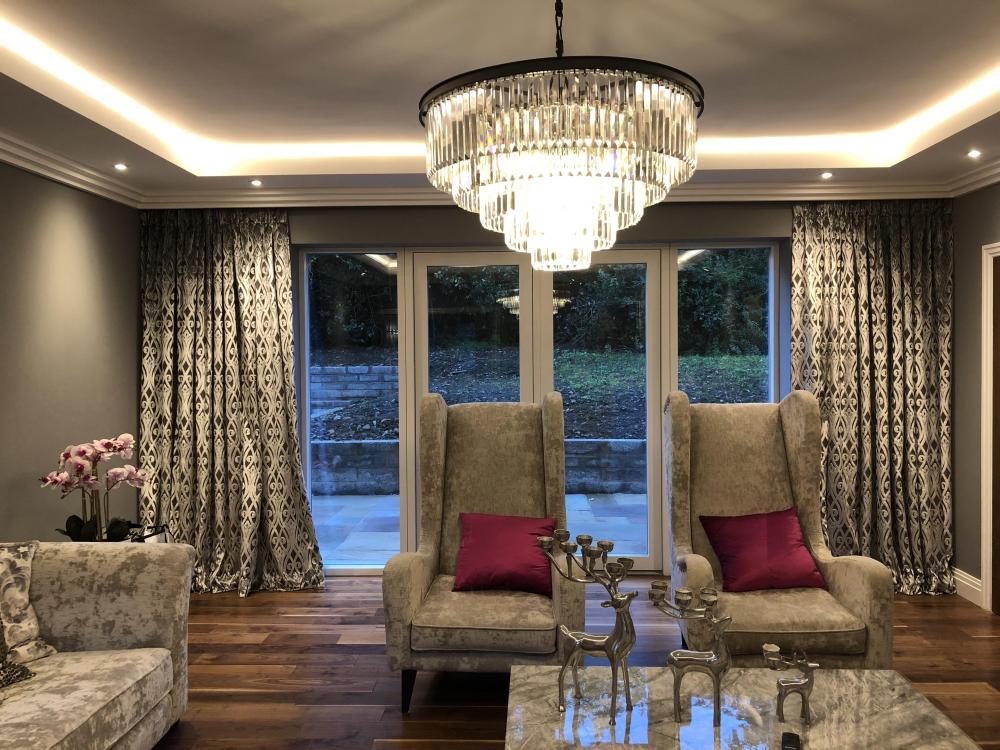
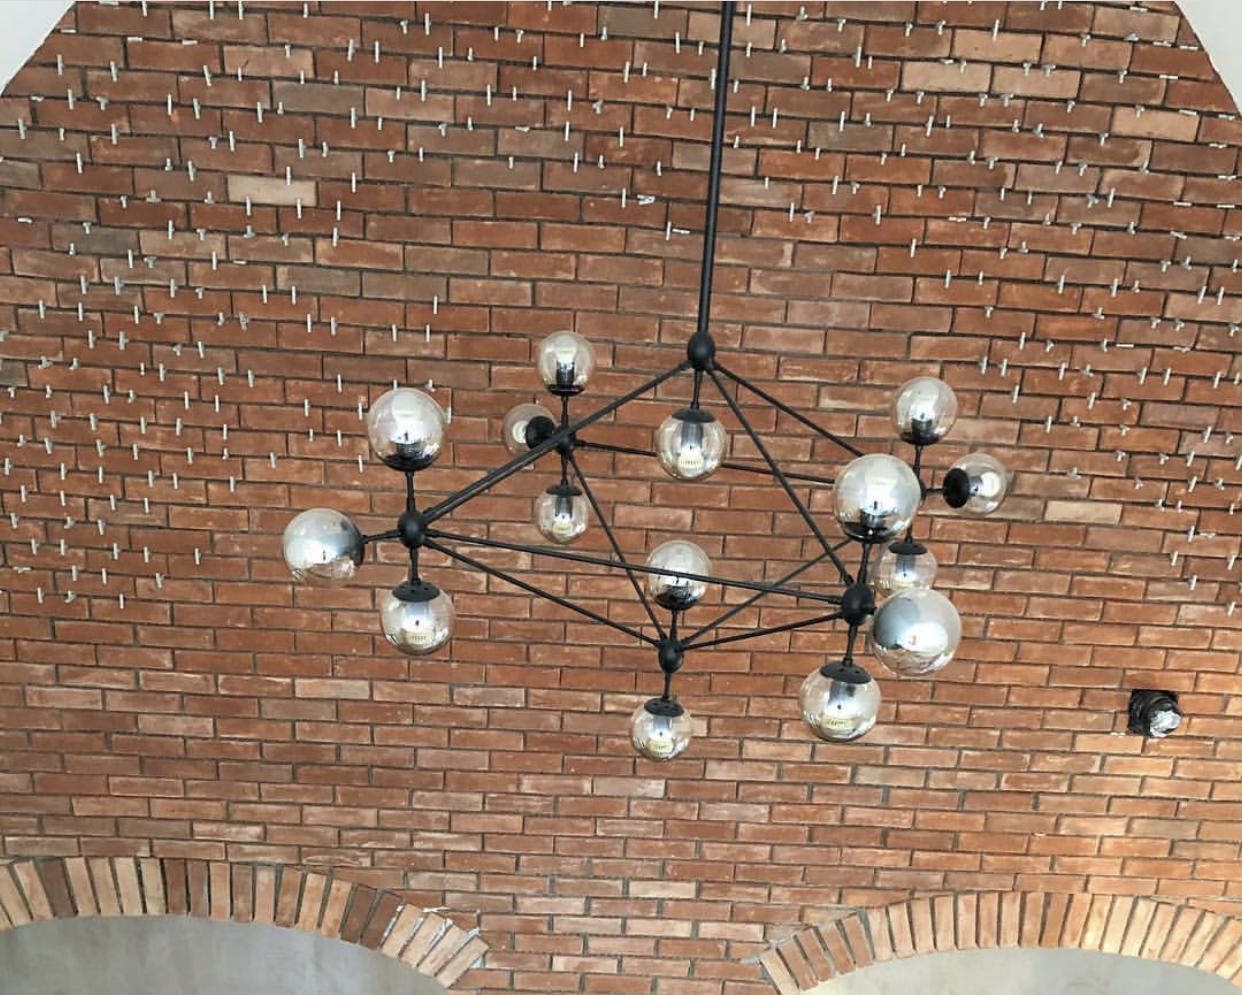
Indeed I have many lights imported from China all up and running and working nicely. In fairness to @JSHarris though most of these are simple ceiling light fittings. The LED bulbs I bought here. There is a lot less to go wrong on an indoor ceiling fitting, you can see straight away if it is wired up correctly. In the past when I have bought cheap sealed unit PIR LEDs from EBAY they have proven pretty unreliable. All our GU10 LEDs and LED strips were from UK suppliers The lights in our hall do have integrated LEDs and drivers and they were the only lights we had trouble with. They had the option of wireless dimming, that I chose. They didn't work properly until we removed the wireless dimmers, it seemed like multiple units on the same circuit interfered with each other. All the pendant fittings in these pictures came from China via Aliexpress. We have more that I could not find pictures of. Generally they were 1/3-1/4 of buying them locally. The other benefit was that as you were dealing with the manufacturer I was able to ask for adjustments to be made, e.g. the light against the brick wall background, they made it longer as it went into a double height room. People were very responsive to emails and it all worked as easily as any supplier I have worked with here, often easier.

 1 point


.jpg.c21f3ac78c9b7efd90cbdcb312744dc5.thumb.jpg.7adcad4c0e384f5ecd7d56b0618df6e5.jpg)


This leaderboard is set to London/GMT+01:00