
Leaderboard


Popular Content
Showing content with the highest reputation on 04/06/22 in all areas
-
Well, it’s been quite a while since my last blog post but we’ve not been idle but I do admit to having been slack in updating the blog. At the end of the last blog we had a superstructure and the roofer was about to begin his journey up the scaffolding. This is where that tale begins….. ’Twas a sunny November morning when all was quiet that a white van man arrived at our site to felt, batten and slate our sloping roofs. And he wasted no time at all in cracking on with it after the site orientation was complete. With his dad along to help with the battening it didn’t take long for the membrane (or ‘felt’ if you’re a roofer) and battens and counter battens to be done. After discussions with our BCO it was decided that we would fully fill our rafters and use a breathable membrane (Proctor Roofshield) attached to the roof trusses and then 25mm x 50mm counter battens and then slate battens which gave us 50mm ventilation. This allows us to not need soffit vents (or indeed soffits) which fitted in to the design of the house better and also meant we don’t have to worry about creepy crawlies living in the soffits. We started with the southern elevation so that the solar PV array could be installed and the roofer (Chris) fitted the first few rows of slates and some flashing leaving it ready for the solar team to arrive before moving on to the northern elevation So while Chris was busy working on the north side of the house the solar installers arrived and fitted our GSE trays. Once done they started to fit the panels. But it was then discovered that the company who did the ordering ordered the wrong size GSE trays and the panels wouldn’t fit. So the solar installers took all the trays down and left site after wasting a day’s work. Meanwhile the flat roofers attended site to single-ply membrane our flat roofs and balcony. A great bunch of guys from a company recommended to me by Chris so I had every confidence of them doing a great job, and they didn’t disappoint. DPM, PIR, OSB then single-ply membrane. First roof which will have a wildflower green roof being overlooked by our bedroom balcony Second roof above our utility room which links the house to the garage which will have a sedum roof They will return a little later on in the blog to install the green roofs. Meanwhile the solar installers returned after the correctly sized GSE trays had been delivered and managed to fit it all in a day. We think it looks brilliant. 28 x 375W LG panels, each with Solaredge optimisers as we have lots of trees around us. And when they’d finished each panel was giving out 1V and was confirmed each was working by being shown the 14V on each string in the loft. Job done for now until we get electrics first fix done and they can come back and fit the inverter. The only real issue we had with the solar is that the panels were resting on the slates making them lift up in places. I created a thread about them (https://forum.buildhub.org.uk/topic/24530-slate-tiles-lifted/) and after much discussion and deliberation I decided to simply use black CT1 to stick them down which worked nicely. A bit of a bodge but you can’t tell from the ground and a lot less disruption to timelines than other solutions. While all of that was going on Chris was busy slating the northern elevation and it was all coming along nicely. During that I had another discussion with the BCO about vent pipes. I asked if I could have one by the STP but she was adamant that I had to have one through the roof. When I mentioned I didn’t want a pipe sticking out the top of the roof she said that they do slate vents. A quick google search revealed what she was talking about and I purchased the item and it was installed. Looks fab and from the ground you can barely notice it which is just what I wanted. And now the solar PV install was finished he could move on to the southern elevation. But while he was doing that the flat roofers came back and installed our green roofs. The wildflower material So that’s those finished although we were still waiting on a Velux roof light for one of the roofs which was delayed but the flat roofers came back to install that for me and finish off that roof a bit later. They also installed our patio paving slabs which we think look ace. So, back to Chris and he’d now finished the main house roof slating and it finished off around the PV panels nicely. He did make a start on the garage roof but as we were still waiting on Velux windows he couldn’t finish that so he left site and would return once the Velux’s were delivered. During that period our windows and doors arrived! We used Norrsken for these and went for alu-clad triple glazed windows and sliders. The majority of our windows are fixed and we had quite a small profile for the frame which means more glass. The installers, Elite Installations Nationwide (https://www.eliteinstalls.co.uk) were brilliant and Jim and his team were a joy to have on site. They brought their spider crane with them which made lifting our windows up to the first floor a breeze for them. We decided to be bold and went for a red front door. We love it. As the window install was done the week of Christmas the installers couldn’t finish them all in time before the Christmas break so we wished them a safe trip back to York and would see them in the new year. Happy new year!! (Belated). With the new year came the return of Jim and his team to finish off all our windows and doors. Once they were installed it made the house feel so much more like a house. Closing the front door had a feel of shutting out the outside world and we were (almost) water tight at last. We also eventually received our Velux roof light and sloping and vertical windows. So the flat roof was finally completed and so was the garage roof. So we are very nicely watertight at this point. All that’s left now is the time-lapse video for this period of time. Sadly our camera only shows the south side of the building so we only get footage for stuff that happens on that side but it still makes for an interesting watch and I hope you enjoy it. Until next time.5 points
-
I was finding it hard to find the British Gypsum Site Book and Good Practice Guide so thought I would upload it here for anyone else who wants it. British-Gypsum-Good-Practice-Guide.pdf
 3 points
 -
Anyone wanting Makita LXT batteries this is a bargain https://www.screwfix.com/p/makita-dhp453ste-18v-5-0ah-li-ion-lxt-cordless-combi-drill/487kg Pair of 5Ah batteries for £139 with a drill and charger thrown in for free.2 points
-
Done it with Progressive on a self build mortgage, but got on a residential rate with Progressive when Architect issued completion cert. Will never be selling house - so I guess there's no real panic to get it.2 points
-
Couldn't agree more. Constant current if at all possible. With decent dimmers, you can dim smoothly all the way down to zero. I played around with an EldoLED constant current driver when I was thinking about switching from mains dimming, and the quality of the dimming was startling compared to the mains dimming I was using at the time (now since replaced with a White Wings multi-channel dimmer and a KNX multi-channel dimmer). Interestingly, the White Wings dimmer has let me dim noticeably lower than even the decent quality KNX mains dimmer I have running the rest of the house. I assumed the drivers would completely dominate dimming performance, but it's marked how much better the White Wings dimmer is.2 points
-
Have you already got the LEDs? By choosing the right sort you can do it with one cable as others have said. Constant current driving is best and as @jack says might drive all twelve in series. But only if you find a LED spot that has a single white LED without any built-in current limitation (i.e. just a single LED (probably 3W) with two wires attached) You need to allow for around 4V each so you'd need a CC driver with a minimum output of 48V.2 points
-
It seems easily forgotten! I've explained it 3 times on this on page alone, and umpteen times elsewhere on this forum. But this myth keeps popping back up2 points
-
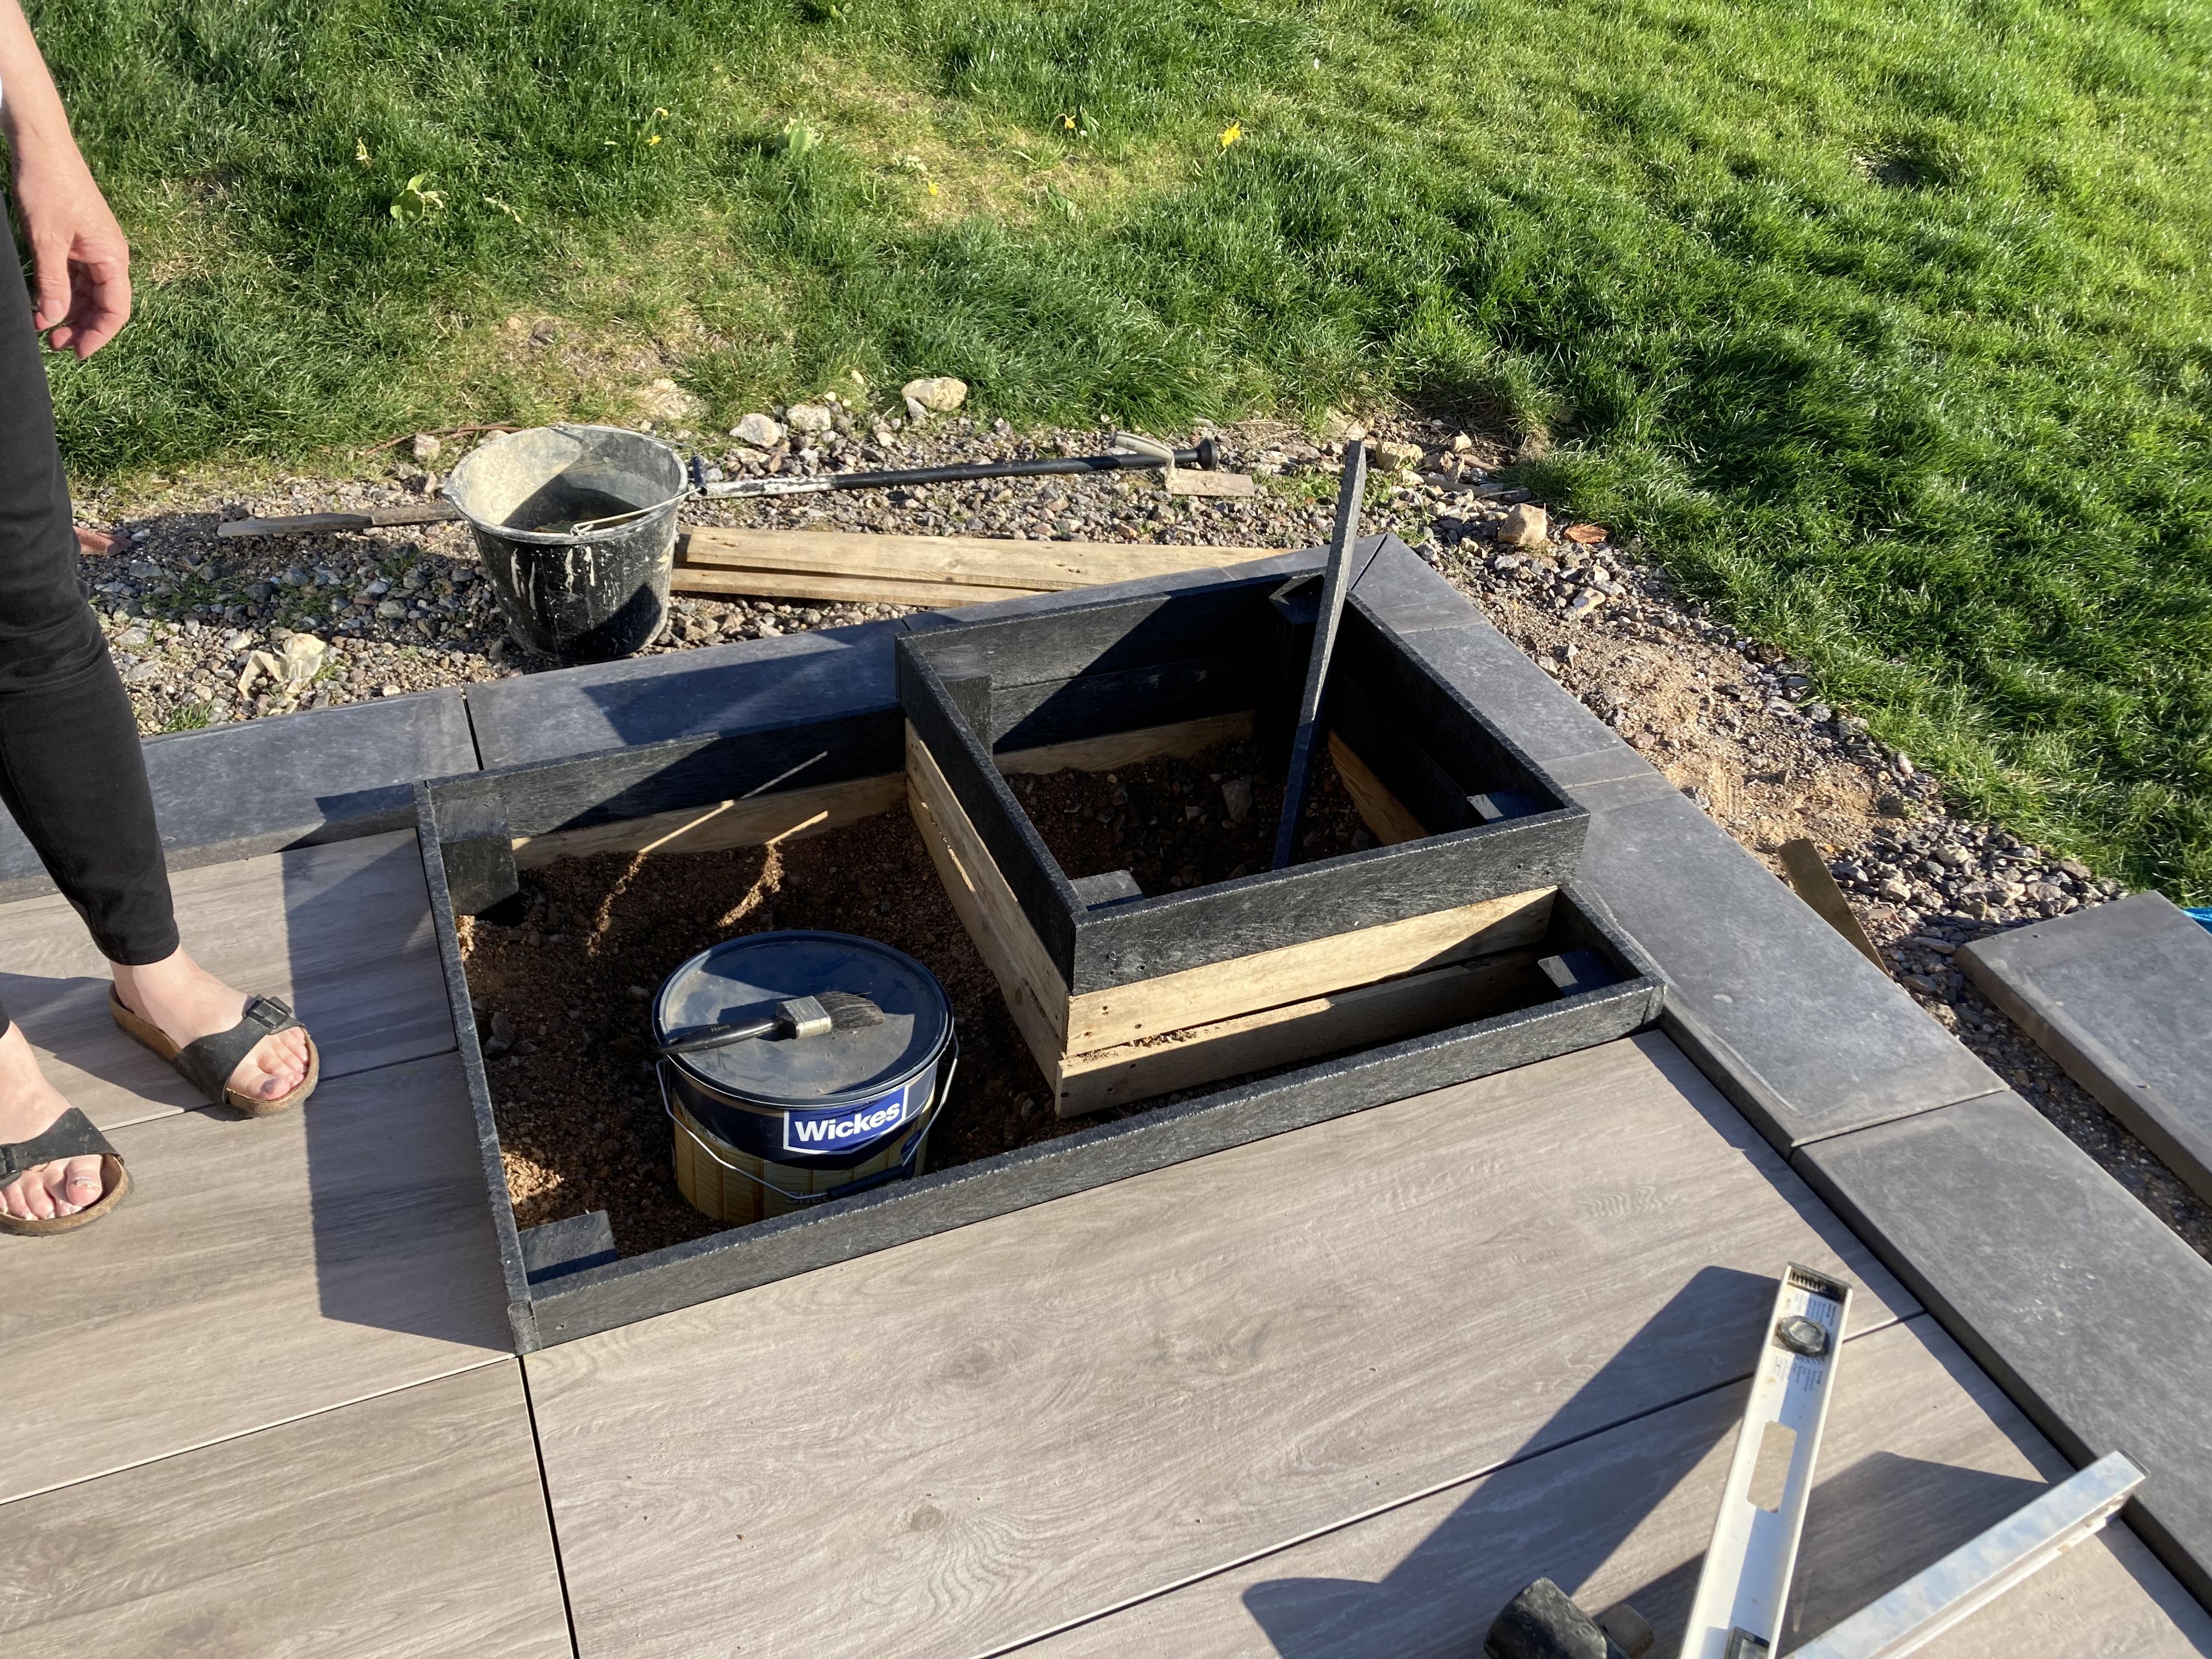
Pedestals would definitely do it, and on a concrete slab I wouldn’t have thought it would be too problematic. I’ve used pedestals on a compacted base of type 1 and a bit of sand to level than as we didn’t have the articulated pedestals. Whilst it’s taken me an age, problems haven’t been too many. They’re not cheap, but not massively expensive either, however if you change your mind about any aspect of your patio (which we have) it’s really easy to start over, for example we decided to remove two tiles and put plants there instead, we dug out the type one to make a hole, lined it with some leftover geo textile membrane and planted away. Really easy to do with pedestals and equally easy to reverse. (It’s still a work in progress, but the olive tree has been pruned!)

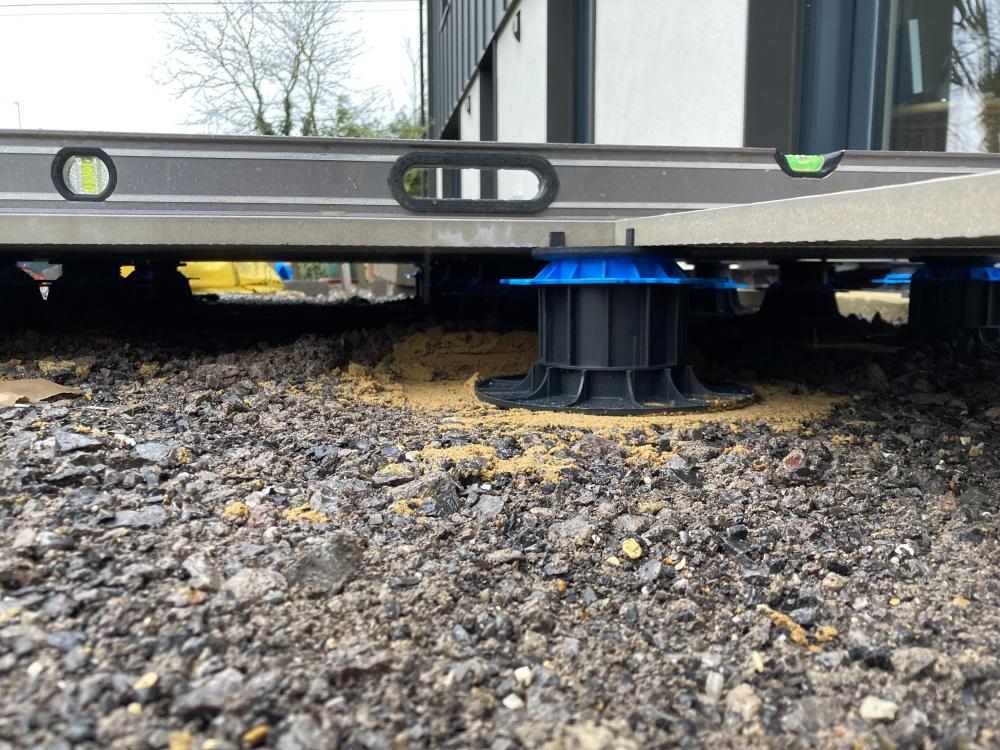
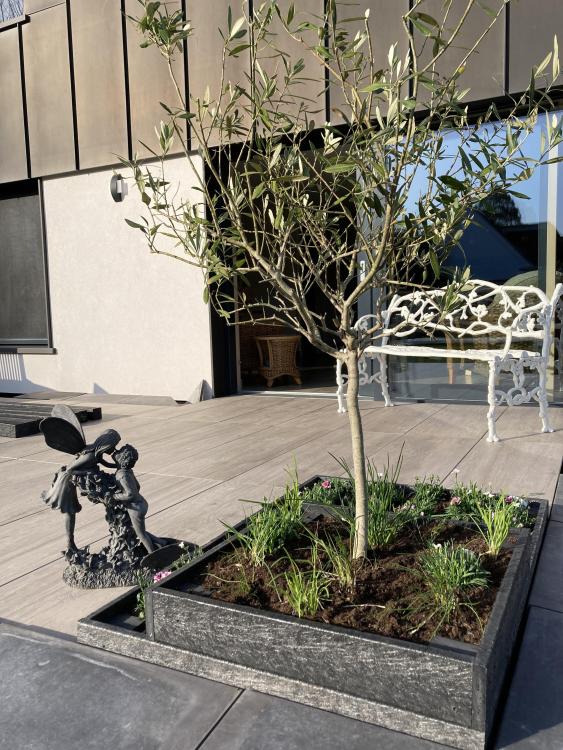 2 points
 -
I created a post a few months ago asking people for their thoughts and experiences on heat pumps for a book I was writing and many people kindly replied. The book has finally been published on Amazon and I want to thank all the people who contributed and who I have quoted in the book in Chapter 12. It`s been a while as the illustrations took a long time so I can`t remember which contributors were from this particular group but I know Joe 90, Gone West and Ian R were to name three. If anyone has Kindle Unlimited they can read the book for free at the following link https://www.amazon.co.uk/dp/B09WWBXVD8 The book isn`t just about heat pumps, it covers hydrogen powered boilers, district heating systems, climate change and government responses & legislation, and it is written more from a layman`s point of view than a technical one. Thanks once again to all the contributors here.1 point
-
Sorry I don't. I have never had cause to use anything other than the correct lamp for the fitting. And I don't like G9 lamps anyway.1 point
-
Me too. No idea if it will be any use but it was the only cover of any kind, at a palatable price.1 point
-
I’m an Octopus customer in exactly this situation. I have 3 phase PV, 3 phase smart meter, 1 x Tesla Powerwall and net metering is real, trust me 😬1 point
-
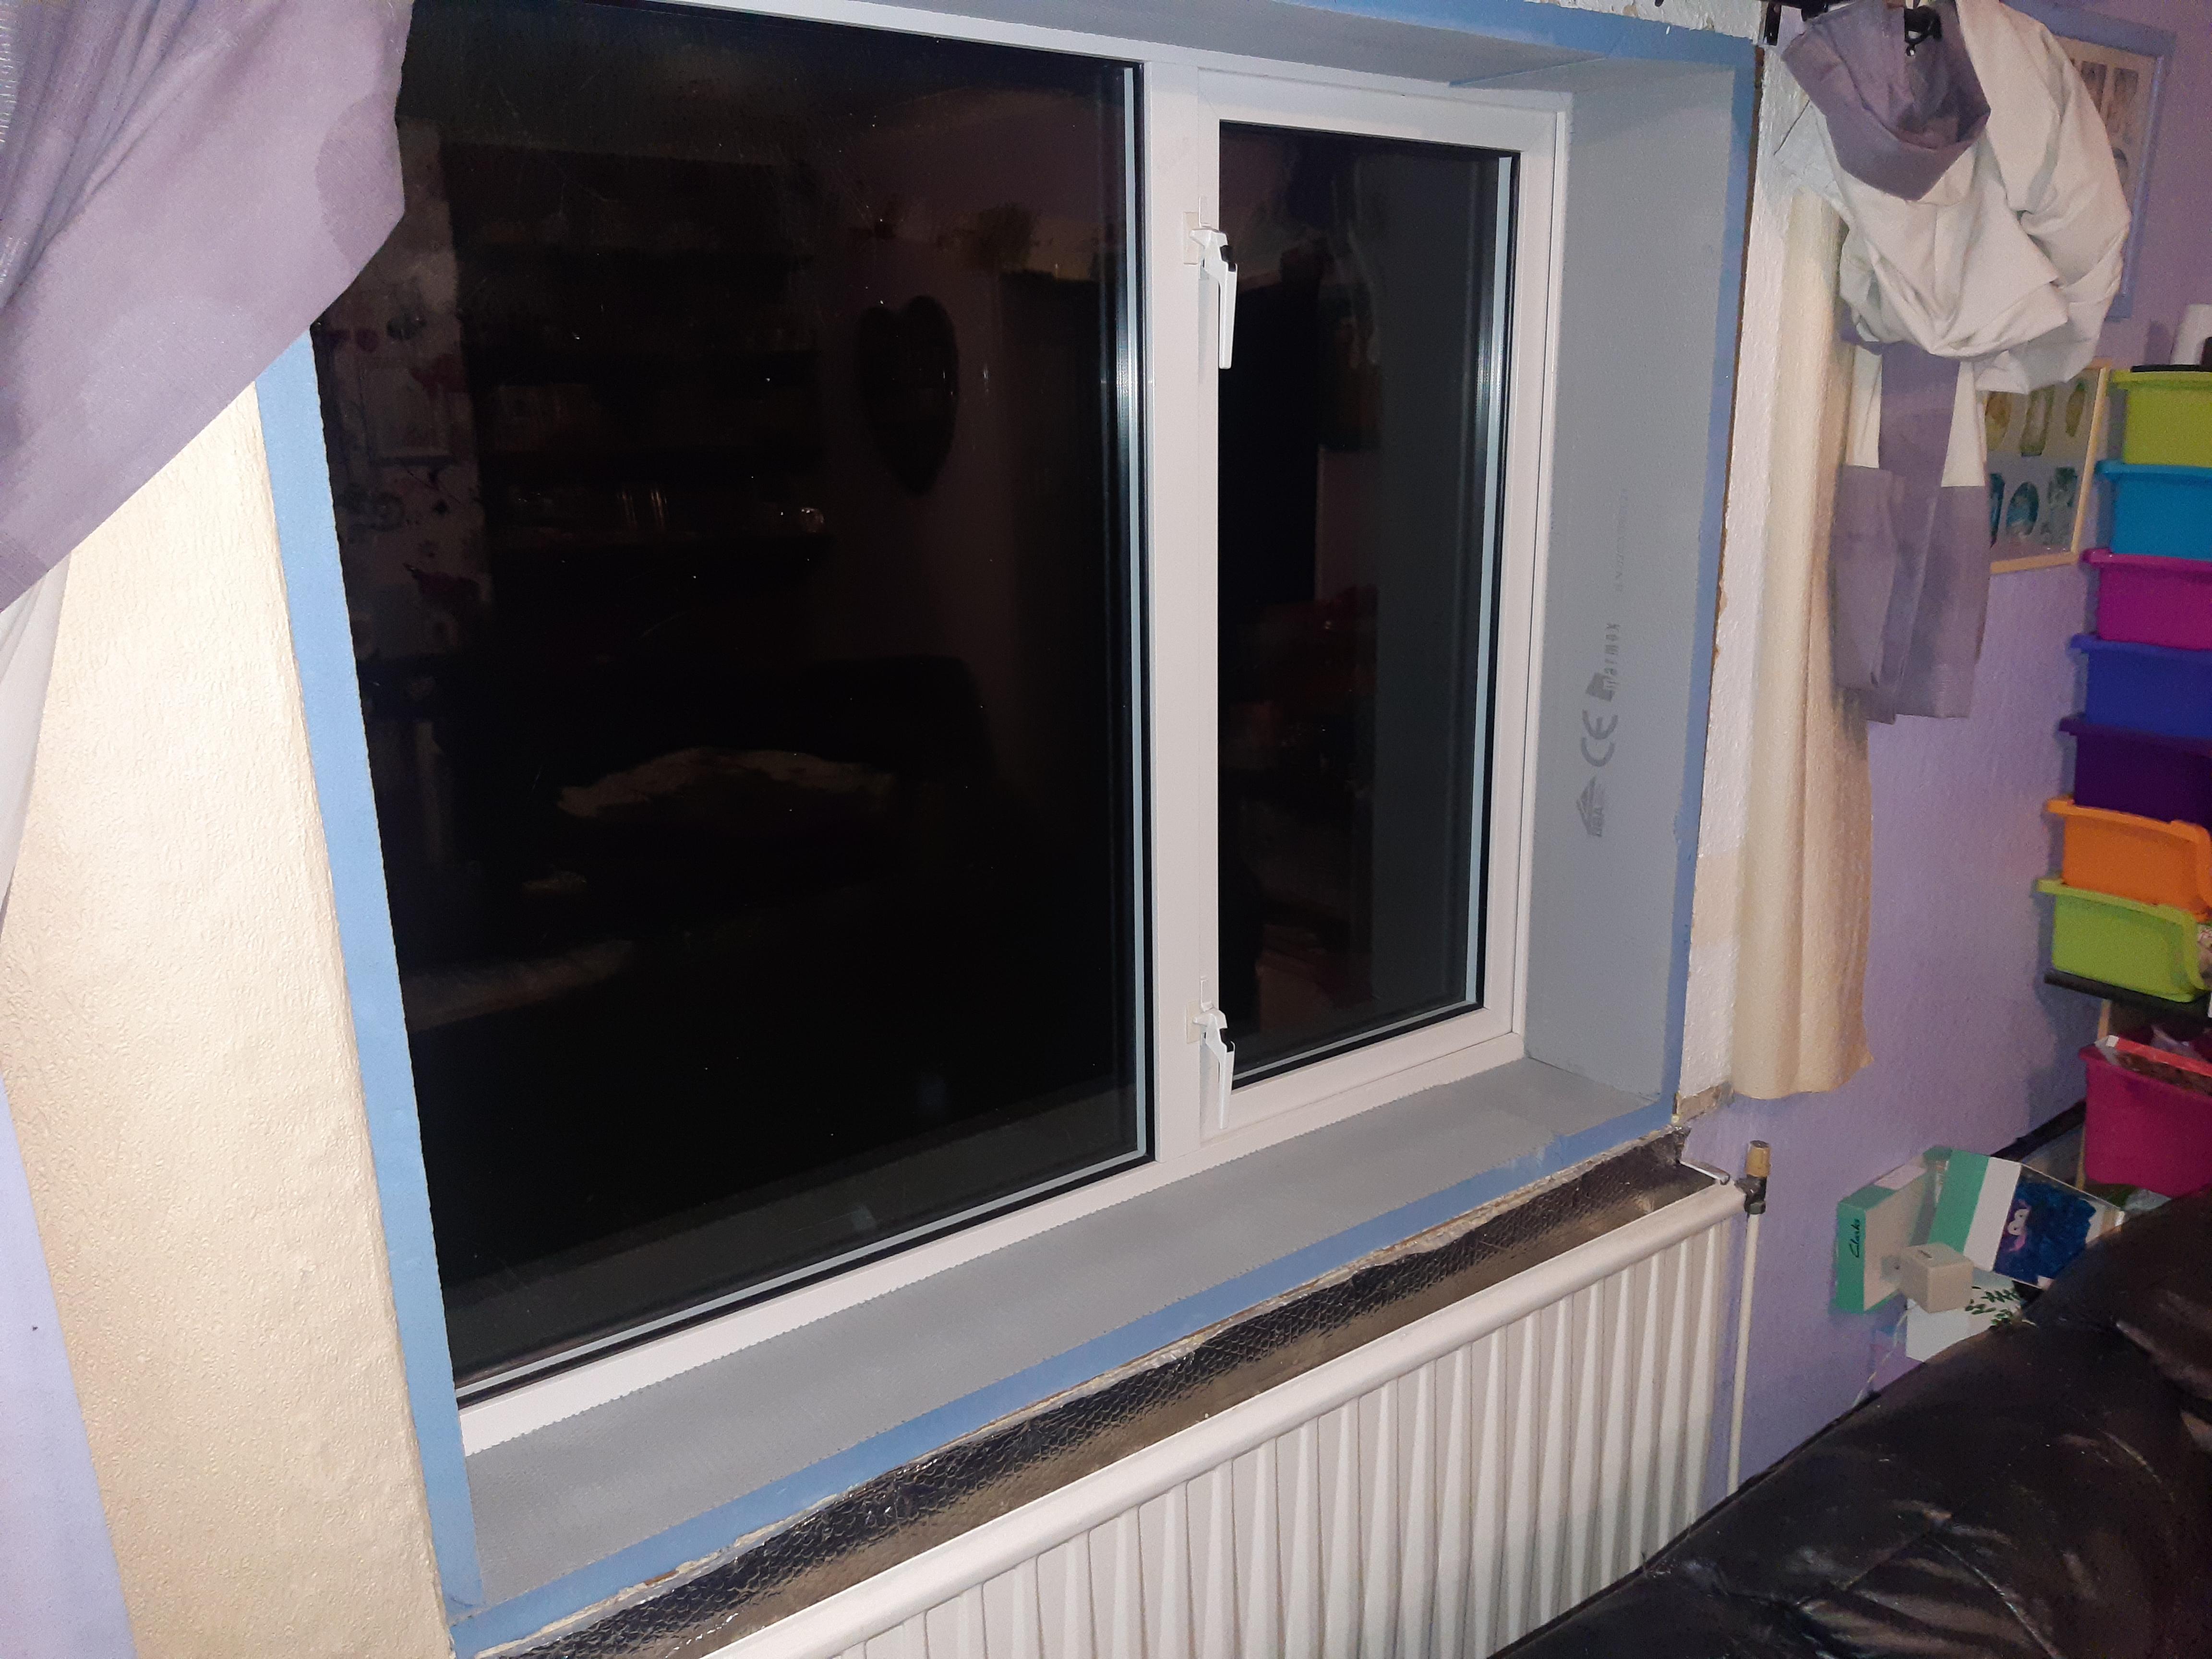
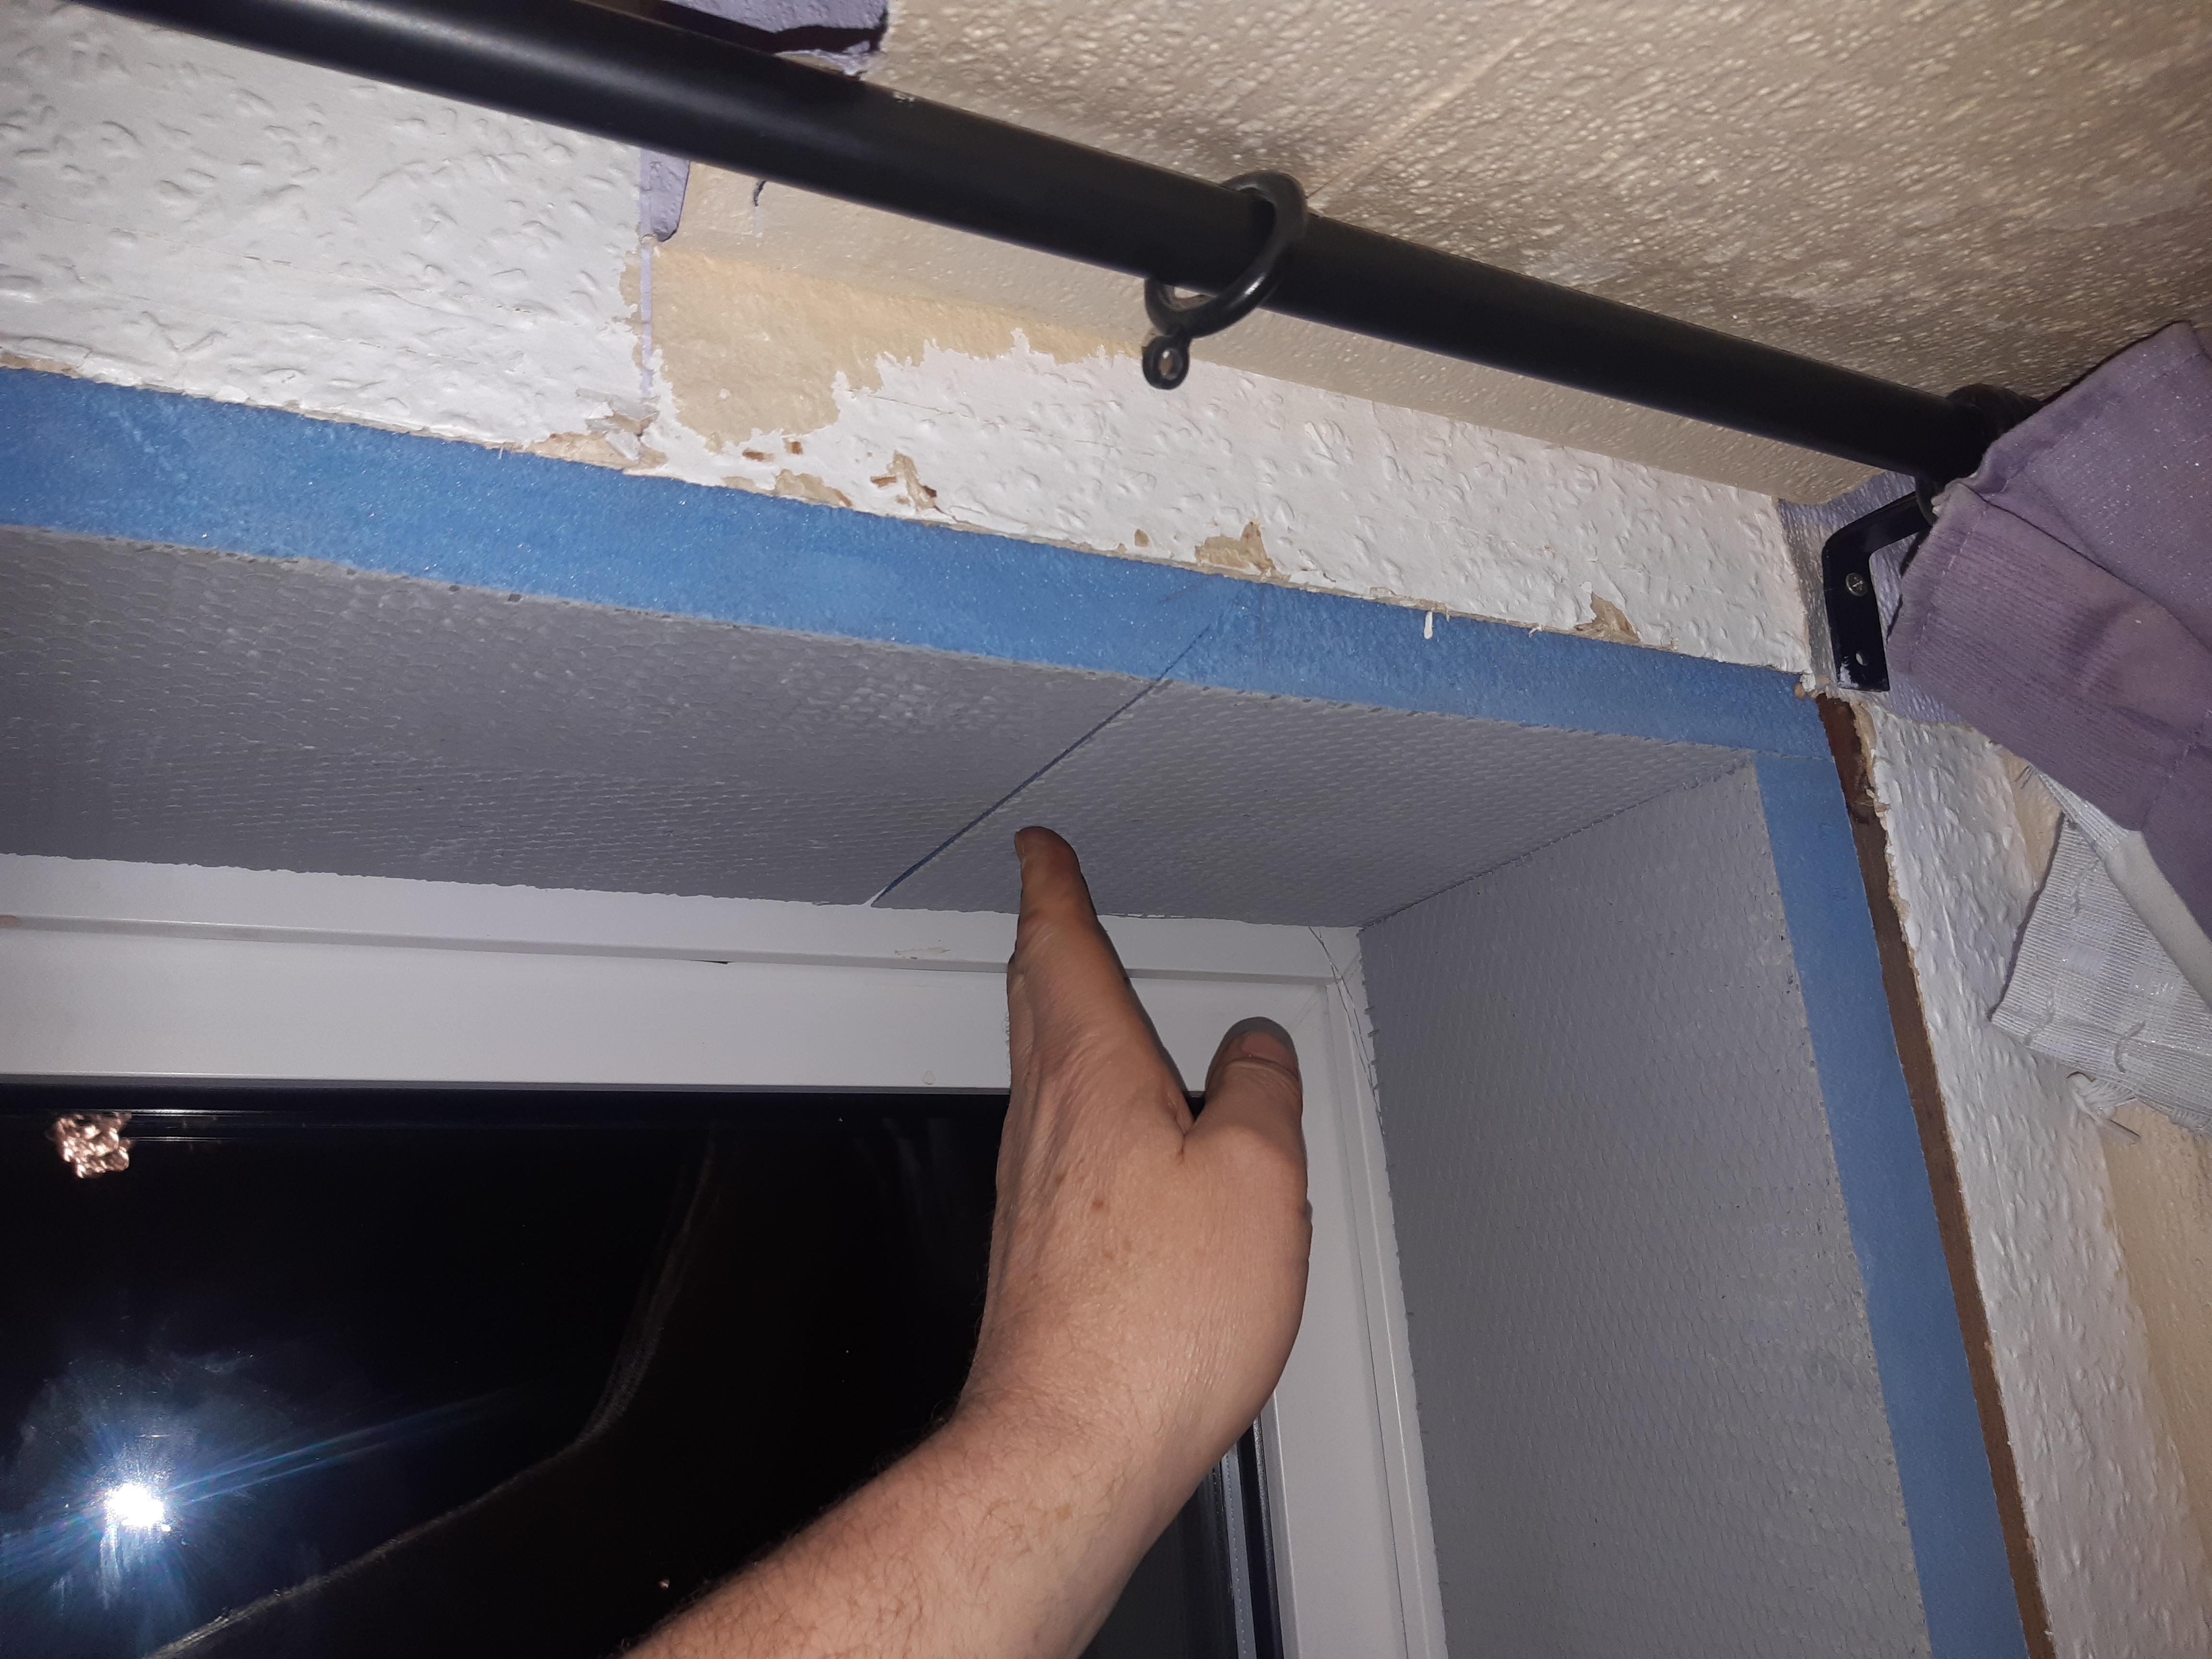
Soffit wasn't pi$$ed. The Marmox was catching a nail on the hardboard! 😂 All the bits cut. Yet to stick when I decide a) what to use, i.e Soudafoam Low Expansion or something else and b) whether to dig out the existing cheapo foam. Need to tweak the little infill bit on the sill at the end by the window. Mitred the soffit section:

 1 point
 -
This might help: SBR_Bonding_Agent_2016.pdf I said do it as you go as SBR dries really quick if a thin layer. The slurry should stay "wet".1 point
-
Most of it was from Bigdug, other stuff came from Rapid Racking1 point
-
Feel free to carry on ignoring me 😁 But your best results will come from applying a SBR cement slurry to both surfaces before you bed them on. You would only have needed to apply it to the copings if you'd bedded them directly on top of the levelling fill. That's now a 'day joint'. Just get a rectangular icecream container and cover the bottom in SBR. Slowly add cement and stir in to make a porridge. If too thick/thin add more SBR/cement. You want to be able to apply with a stiff paintbrush - like one of those boxy 4" fence paint brushes. You can also add SBR to the bedding mix using the mixing instructions on the container. This will frostproof things by making the mortar less water permeable.1 point
-
If you are in a CIL area and expect to get self build exemption, I wouldn't do anything that could be confused with breaking ground until the exemption is agreed. This has to be done prior to commencement.1 point
-
have you looked at costco?1 point
-
I certainly wouldn't break ground on any foundations until you get the green light, but general maintenance like you've mentioned should be fine to crack on with.1 point
-
10.5kWp. when we're done it will eventually all be on a single phase running the house with excess going to some form of battery storage for use overnight. at least that's the plan!1 point
-
Looks brilliant well done, you must be very pleased 😇1 point
-
https://www.britishgoatsociety.com/about-us/breeds/pygmy/ but they're so cute (and yes, I am kidding)1 point
-
Not sure on the activity space on a quadrant shower. However I don’t think they qualify as accessible if that is also required as the entry is too narrow.1 point
-
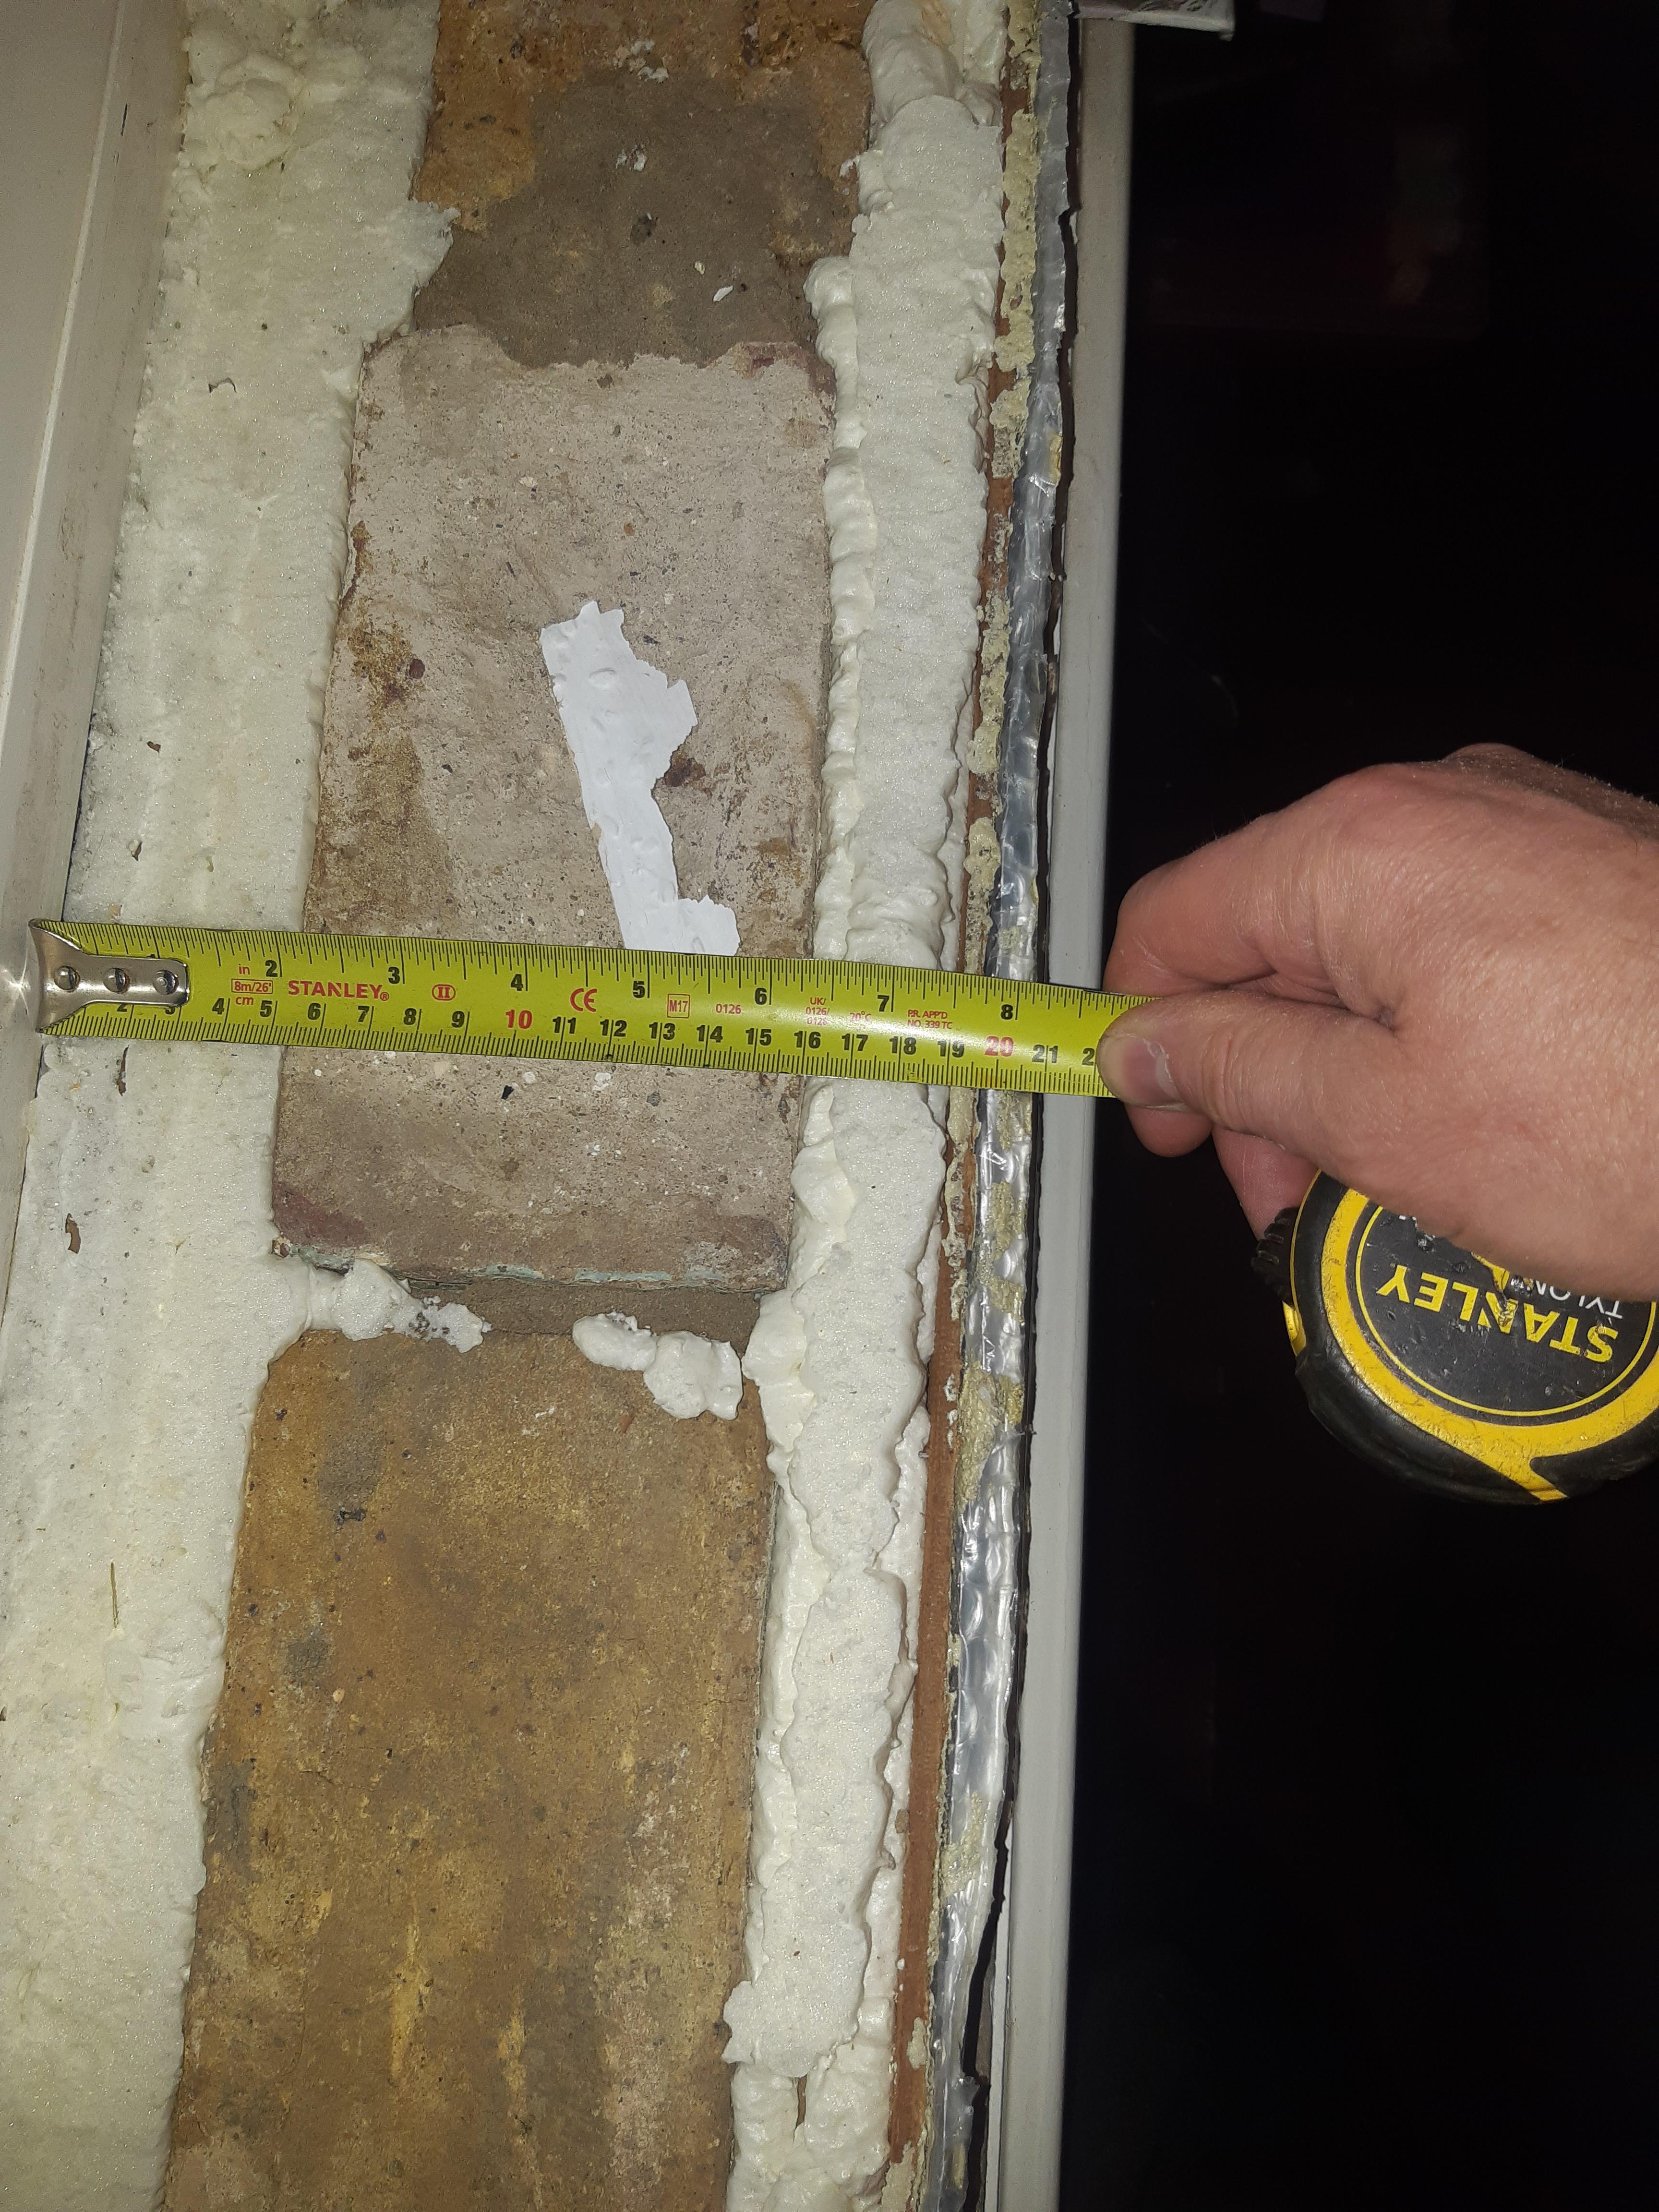
I'll raise you 200mm then? Sides: Sill:
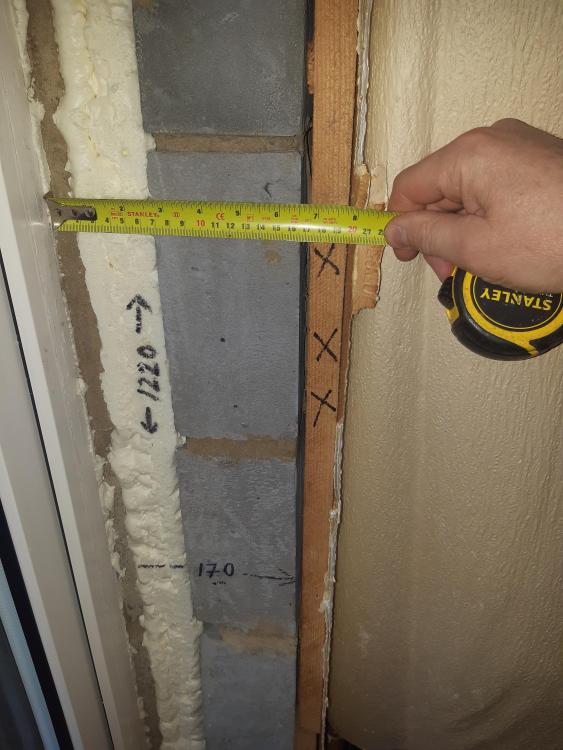
 1 point
 -
But that 'later' could be decades away! Why not bring it out all the way out and then, when you get around to IWI, trim it back flush when the battens are removed. That stuff is just so easy to cut.1 point
-
Yes you get offset quadrants too, longer on one side, I have a Matki one no issues 17 years on…1 point
-
yes, agreed. and in this instance they should be. we're very happy with what the lighting designer has designed. she did say that she can help with the sourcing/control/install etc but as that will cost us more money we're fine with figuring this out on our own (and with the help of this wonderful forum 😇)1 point
-
Going from DMX -> 250V mains -> 350mA constant current is inefficient, expensive, and gives very poor dimming control especially at low light intensity. You're also at the mercy of the "mains dimmable" LED driver the fitting is matched too, some are OK (we have some from Phos that work well) others are barely better than on/off. Really, ideally, I'd use mains dimmers only for GU10 and decorative fittings that only have mains driven option, and DMX constant current drivers for everything else.1 point
-
Hi All, Did anyone ever go with CMLC ? I am in the same boat as others here and they are not only the cheapest but others have been so challenging to even get a quote, I have given up with them.1 point
-
the wildflowers have started to bloom
 1 point
 -
I shopped about after getting quote from BPC, mainly because I couldnt work out where I was going to install the unit and run the ducting, and I was buying kit in dribs and drabs using my salary rather than the build capex. Purchased bits from efans, blauberg, and BPC, they all seem to be better priced on some items than others, just got to make sure the small order values are worth any postage charges...1 point
-
I reckon that I could install MVHR in the future here without too much fuss. The original bungalow has 4x2 celing joists. The dormer is built on top. The bottom of the dormer floor joist sit way above the top of the original ceiling joists. The dormer is basically a frame that sits on padstones on the walls. This is from when I gutted the downstairs bathroom (in Oct 2012 apparently). The downstairs wall plate / ceiling joists are just above the red bricks. The dormer consists of a circas 9x6 frame sat on pad stones at the corners and in the middle. Padstone on the left, 9x6 running left to right (with the junction boxes tacked on). There's the centre pad stone just above that bit of corner mesh leaning against the wall. There is mind an RSJ further in running left / right sort of mid dormer too. I reckon then I could run MVHR ducts in the gap. I would of course have to bring everything within a thermal envelope which is the mission!1 point
-
No,that's not true. The COP has nothing directly to do with insulation or draughts. A poorly insulated/draughty house has a higher heat demand. If you meet the heat demand with a suitably sized heat pump and emitters with a reasonable flow temp your COP will be good. If you undersize your heat pump and/or require high flow temps it won't be. These last two sentences apply whether you're heating a passivhaus or the Albert Hall. Of course a good COP isn't everything and the more you can reduce demand the better. There are plenty of houses with solid walls running heat pumps successfully.1 point
-
Thats a misnomer. If a house has a 15kw heating demand, any 15kw heat source will heat it. The confusion lies in that gas boilers have traditionally been massively oversized so when a gas boiler fires up its got loads of excess capacity to get radiators up to temperature quickly. Heat pumps loose their efficiency when they have to produce hotter water than optimum, such as when trying to heat a hot water tank or heating a house via undersized radiators. Heat pumps are going to need a big mindset change in the way that heating systems are used. Particularly for rental properties theres a need to get the system designed, installed and set properly by someone who knows what they are doing. Therell also be a need to spend time explaining to home owners/tenants how to best operate the heating.1 point
-
From a bit of Googling, it does appear that you can buy an extra box that limits export from the inverter. So you could install more PV and limit export to 3.68kw when not using all of the power. I couldn't actually find one to buy, but I only had a quick look. I do wonder if batteries are the better solution for what you propose. The problem with PV is that it produces power over a very limited time period. As you can see from my Octopus chart the moment we produce lots of power between 9am and 4 pm. This will get better as we move into summer. If I go back to February (before I had Intelligent Octopus) the charts look like this. For 4 months you get very little output and also only for a very short time during the day. You may also want to consider putting some panels up facing a different direction in a large system to expand the amount of time that you are generating. I have considered adding a west facing array to generate in the late afternoon or east facing for the morning. But it is a hassle now the roof is built, the other panels are integrated into the roof. From using the power perspective, one phase is better than three phases, as the three phase output has to be split and so you have to try and balance your usage across the three phases. This is not easy. The car can use all three phases to charge, but for example, you would maybe want to try and split your appliances across phases which is awkward. I need to actually try and figure out if the oven etc are on the same phase as the washing machine/dishwasher/tumble dryer in our house (Edit: I had a look and things are reasonably well spread) So if you can limit export, what is the most efficient amount of PV to install. Admittedly in a non MCS install, the cost per kw may be quite a bit less, maybe £600-700. On one phase you can charge your car at 7kw. This allows you to charge up 20mph give or take. I have a three phase charger, but the cable has recently become iffy and I have been using a three pin 2.4kw charger for a couple of months. This has so far always sufficed. It depends on your origin habits, but the number of times we drive more than 50 miles in a single day is quite rare. And if you drive a long way, you are probably charging on the road. So the reality is that you could charge your car in two-three hours max on 7kw. Nothing else int the house comes close to using 7kw of power, maybe a power shower, but then if you shower when getting up or going to bed there won't be PV generation most of the time. The next largest instantaneous power draw would be the oven or a kettle both of which draw 3kw. Thus other than car charging you will rarely have instantaneous power draw of more than 5-6kw, even the oven which draws 3kw to heat up, only actually uses around 1kWh an hour so it cycles on and off once up to temperature. You can install a smart car charger that would draw 7kw when available and then reduce this when using power elsewhere. Thus I suspect the amount of use that capacity over 7-8kw would get is fleeting. Meanwhile unless the oven etc are on you would have the full PV capacity available to charge the car much of the time. The only way more than 7-8kw capacity would be useful is if you install batteries so that the excess power generated during the day can be used to run lights, showers etc when it is dark. You might get a little longer coverage during the day and into winter with more generating capacity, but I suspect the benefits are small. Assuming that you use around 3-400 litres of hot water a day, this will need around 15kWh to heat it. If you have free PV electricity you can heat it just using an immersion, but in winter this will mean paying out to heat it. The alternative is heating it using an ASHP, but the COP onto water heating is likely less than 3. Considering that you don't need an ASHP for heating, the immersion probably wins out. Assuming an average of 6 hours a day of generation, you may want to add 2-3kw of capacity to heat hot water when you have PV. This gets you up to around 10kw as a good number. Again this can be set up to use excess generation when available. I would still want to be on an Octopus type deal as this will cover energy use during the night and can be used to heat hot water more cheaply at night in the winter when there is no PV. Nighttime electricity should be cheaper for the foreseeable future due to the drop in demand overnight.
 1 point
 -
I think the wall looks fine @pocster, keep going!1 point
-
I think radon goes through polythene, even think poly and so you need vents and radon sump under the floor to catch and expel it. I hate closing cavities with blockwork and that is a no no proprietary cavity closers are expensive and unfit for purpose, I used sheet insulation. Aim for zero bridging and air tight. Don’t do dot and dab. I like fitting windows behind the masonry, ie in the cavity. See my site for pics and details.1 point
-
XPS below the cavity tray, as you where above it1 point
-
Only yesterday was I reading an article in the Guardian about the cost of house renovation and extension and how you can maximise your return on investment. Sadly, there was absolutely no mention of energy performance but singled the biggest benefit being to do the bathrooms and kitchens. I wonder how long it's going to take for the priorities to change in light of this huge bump in prices? I have to say though, I abhor the focus on economic payback associated with energy performance upgrades when they actually add so much value to day to day comfort and pleasure which makes the house a much nicer place to live. I'd much prefer a basic plain kitchen and bathroom and a warm and cosy house. When will the penny drop not just for the population but the government too, I wonder?1 point
-
Very clever! hat off to @saveasteading its almost counter intuitive to use a smaller diameter pipe. Yes I too think you could make this fly with careful control over the laying of the pipe and the odd extra inspection chamber. On a straight run its even more promising.1 point
-
This is the depth from the cover, so make sure that your site is not lower than this, every mm is counting with your numbers. Let's assume that the land at your site is the same level. The drain has to go underground and the minimum will be 400mm if you are clever enough with the layout. that is leaving you with 1.15m, and things are getting tight. If I was your Engineer I think I could show that a 100 pipe can go at that sort of slope, because the volume is small and the building reg slopes are a bit cautious. In fact the smaller pipe might run better over that long distance. It is very much cheaper to do this gravity drain if you can. 90m of pipe from your own 'gathering' manhole, a proper manhole at the connection, which the water company will want to approve, and a couple of intermediate inspection chambers for rodding. you cannot afford to lose any height from the property, so lowering the floor would create an issue, whereas lifting it will help. re treatment tank/ septic/ cess tank: these terms are much confused. The building regulations are well written on this subject and I recommend reading several times. My second choice is treatment tank, because it costs much the same as a pump and connections. (it has to be a big tank in case of failure) , it is all yours and you don't have pay sewage rates. Although it is correct about digging a 1m hole, you can try a hole nearer the surface as a quick guide.1 point
-
Almost. the 300mm cube is dug at the bottom of usually a 1 metre cube hole, so the actual test hole is 1 metre deep.1 point
-
A treatment plant will cost you £2500 to buy then fit and build the drain field. So your going to be in to £5000 materials only if you do all the work yourself including the digging. I would go for a 90m run to a main sewer all day long. remember with the water tread plant you have ongoing electricity cost plus emptying cost. I would give my right arm for a main sewage connection.1 point
-
Plus1 that's what I'm doing1 point
-
Or drain to a ditch that’s wet some of the year (depending on type, mine is a vortex and is allowed to do this). And it’s a lot less work that a leach field.1 point
-
I think you’ll find that a sewage treatment plant will still need a drainage field. We have just put our drainage field in. It has 3 rows of slotted pipe giving a total of 34m to look after 11 people (it s shared with our neighbours). Our soil is pretty average I would say. you can do your own percolation test, it’s just a 300x300mm cube dug down into the soil and record the time for the water to disappear into the hole. Do this 3 times. You need the time from 75% to 25%, not full to empty.1 point
-
You can go to 1:150 with a 150mm pipe. It needs to be spot on - not just chucked in by a gibbon. Whose land is the 90m dig? Is it verge or road? Given the option mains gravity drainage is a clear winner.1 point
-
Not sure in England but is Scotland septic tanks are outlawed, you have to use a treatment tank. You simplest cheapest may be a pumped solution to the main. Not sure you would have any maintenance, a decent quality pump should last for years. You just need to watch what fats you chuck down the drain, and other stuff that should not go in a drain, like female monthly products, face wipes baby wipes etc, as these clog the pump.1 point
-
Absolutely The main thing is that it’s recognized by almost all the lenders Same bit of paper At half the price1 point
-
Find someone locally that does bar and hotel work, that kinda thing is their bread and butter...1 point


.jpg.c21f3ac78c9b7efd90cbdcb312744dc5.thumb.jpg.7adcad4c0e384f5ecd7d56b0618df6e5.jpg)


.thumb.jpg.bac90f3bbf6868cf2118d010d936c99d.jpg)


This leaderboard is set to London/GMT+01:00