Leaderboard
Popular Content
Showing content with the highest reputation on 03/21/23 in all areas
-
Thanks for that I’m now 61 I’ve run my own business for 40 years now and work full time So I’m used to being busy I don’t tend to get stressed out about much I don’t see any reason why we can’t come in under a £1000 m2 The fees need to be kept under control Paying large sums to an architect’ in my opinion is a waste of money We spent about 3k on Architects fees £500 on SE on our first build We have spent 5 k and £1000 on SE this time Which should be plenty for a single house I’ve to fit the windows next and do the roughcast render Then the scaffold can come down3 points
-
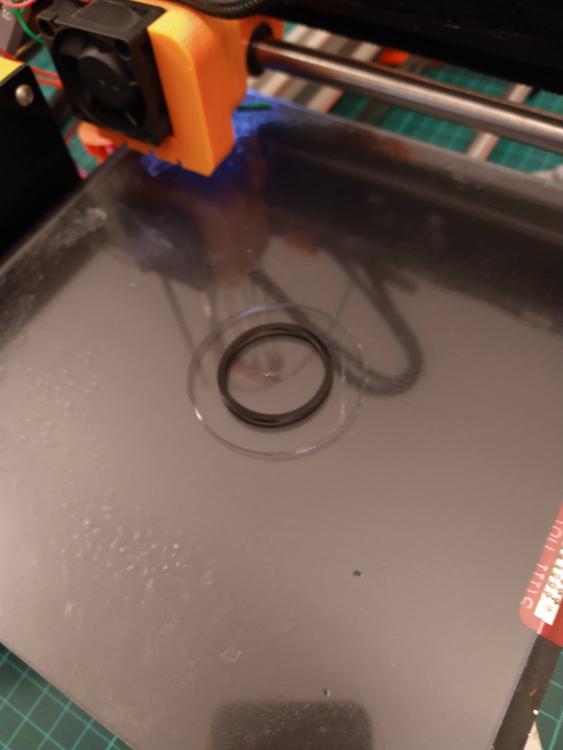
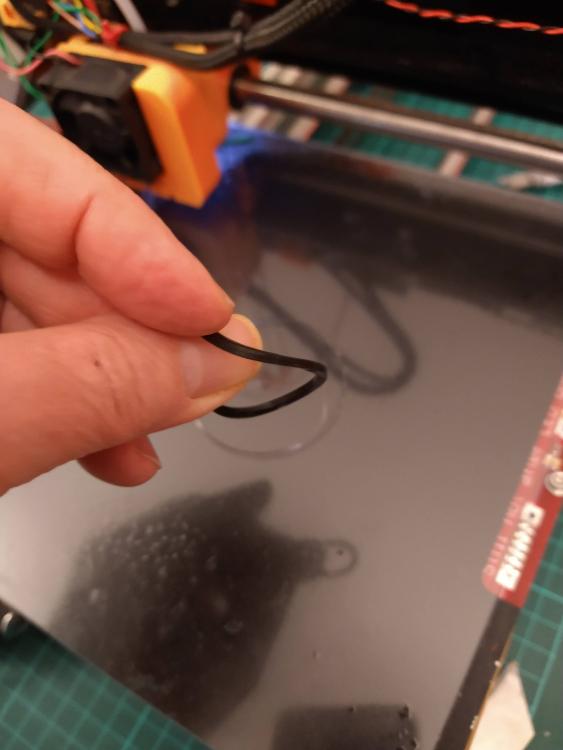
TPU is a great material and useful to be able to 3D print with it! Just a tip for anyone who does have the kit however.... You can buy O ring cord which can be cut to length and joined with superglue. The only trick is cutting the ends square and getting a smooth joint but you can make a jig to help with that. We use O rings made like this at work for testing pipes, up to about 2000psi (above that the material starts to extrude so you need a metal composite seal)3 points
-
When asked how much we had spent on our previous build I could answer within a few hundred quid on any given day Tonight we’ve gone through the spreadsheets and any outstanding invoices We’ve don’t 155k A good chunk going on the workshop so I’ve counted this in Attic trusses etc we are pretty much watertight now that my wife and myself have finished building and slating the roofs Four months around our day jobs We originally set out to come in a couple of hundred more per m2 than last time at around a 1000m2 Now that the unknowns are out of the way and prices stabilizing or going doing as some things have and are We should be around what we though So self building still seems worth the effort Just about 😁2 points
-
2 points
-
Guys, interesting discussion but would you mind starting a different thread? It's drifted *way* off topic and is at risk of halting what was otherwise a really valuable subject to debate and one that we keep coming back to so is clearly of interest.2 points
-
2 points
-
Thanks for the thoughts. The technical designs are not complete yet. This cost plan was based on a number of conversations with the architect and semi-detailed drawings. Therefore, I am not going to jump the gun too much as there are a lot of provisional sums. I will give further updates off our conversation together tomorrow. For now, I have sent this email to the team: " Dear .... We are looking forward to our meeting tomorrow. So everyone is singing off the same hymn sheet, and so you understand our perspective and firm position, we are particularly conscious around the financing of this project. We bought the house for £600,000. We have now spent £693,000 including architects fees, stamp duty and other costs. We are assuming the structural engineer and party wall process will cost around another £7000. This brings the cost up to £700,000. We have a maximum total budget of £1,250,000 (including VAT). We estimate the house with the small extension room to be worth £1,300,000. We therefore are firmly targeting £500,000 (including VAT) as our total build cost with £50,000 leftover as a backup in case of unforeseen issues. If the small extension room isn't given planning permission, the house will be estimated at £1,250,000, and therefore our maximum total budget will be £1,200,000. If we assume the house is 128m squared, including the small extension room, then the total renovation / build cost per square metre has to be £3900 (including VAT). This means, if we assume the VAT to come in at 10% overall (as some will be 5% and some will be 20%), then the total cost per square metre before VAT has to come in at £3500. It is as simple as that, and our decision making flows from this premise. We will have to make some compromises clearly, but we are confident we can achieve a mid-high range finish with this budget. We hope this is clear, and we are looking forward to chatting through this tomorrow 🙏 Best, James & Grace"1 point
-
It seems to me that we would all do well to recall the old corollary to the addage "if you can't measure it you can't control it" which is "Just because you can measure it it does not mean you can control it." We have a passive stack plan, alongside full MVHR, for our build high level roof lights and low (ground level) windows. Although they are electrically actuated and we have sensors, all sorts everywhere, I have no idea how to control it other than bang bang control until I see the data.1 point
-
1 point
-
I've just taken CO2 readings and currently in the space I've been doing admin most of the day it's hovering between 650-660ppm and downstairs it's about 430ppm. PM2.5 & 10 are at good levels and HCHO is at healthy level. Having just cooked some dinner and eaten, kitchen RH is 60% and downstairs is 55%. Even though I haven't used a lot of wets in the build, RH was much higher and is still gently on its way down, month by month. In terms of approach, it was mostly a research based with just a few numbers to crunch. I read a lot of material not just on ventilation but also on building fabric, finding some real world research showing the reduction in RH coming from moisture buffering materials that either simply temporarily store excess moisture and/or pass it through the whole fabric of the building (I'm avoiding the terms breathable and vapour permeable on purpose here due to common misconceptions). This fabric approach means that my ventilation requirement is significantly reduced (I can provide a link to recent research showing this in real world buildings if you want). I do wonder whether this is really important for well functioning natural ventilation. In terms of natural ventilation, I was dissappointed by a lack of recent good quality research on the subject specifically in domestic contexts so my starting point was The Handbook of Domestic Ventilation by Roger Edwards: https://www.taylorfrancis.com/books/mono/10.4324/9780080454580/handbook-domestic-ventilation-rodger-edwards In weighing up the evidence, Edward's book comes out reasonably in favour of natural ventilation. After this I found some books from the middle to end of the 1800s dealing with principles of natural ventilation including some specific figures re flow rates etc. These weresome of the best things I'd read. Putting this all together including current recommended ventilation rates, I found some papers using computational fluid dynamics to model air flow through buildings and rooms (almost entirely non-domestic) and drew upon these together with my local climate to size and locate my vents and stack (stack is just for cooling). I also had to make sure they're sized in a way that keeps BC happy. I spent a few years designing motorcycle exhaust systems so although now rusty, I got a reasonably good feel for fluid dynamics basics which, once you've played with some numbers actually becomes quite intuitive instead of computational.1 point
-
Having looked at the floor plans and for that size of a building and making a stab at the extent of the works required I still think the fees were far too high. While I appreciate that restoration works tend to be more labour intensive for everyone including your architect I would have expected 10% to include a complete design team (if one was needed) including a QS for the complete duration of the project. Having looked at the cost breakdown there are quite a few Provisional Sums which make me wonder how detailed the drawings are and how much information the materials specifications actually have. I would love to see the drawings if you are minded to post them - I’d love to see what a set of drawings that cost £50k actually look like. As an architect I pride myself in making sure everything is specified to within an inch of its life before a QS gets anywhere near it. I really think that having so many Provisional Sums in a cost estimate is really a cop out and looks like someone throwing costs at a project and covering their back side. For what it’s worth I would take a deep breath, circle the wagons and look at getting some advice from another architect and/or QS. A second opinion as it were.1 point
-
1 point
-
You should be able to tap the screws into the wood to get started, so no skin stripping required.1 point
-
If there was an emoji for ' silly me' I would use it now. Yes of course.1 point
-
My recollection of school classrooms is at change of period when you all march to the next classroom previously occupied by the last lot, the air in the room as you walked in was rank, and all the windows were thrown open to make it breathable. You tend not to notice the stink and lack of oxygen when it is you creating it and it creeps up gradually. Scottish regs now demand a CO2 meter in the master bedroom. If they were not so expensive I would buy one out of curiosity, as a measure of how well the mvhr is actually doing.1 point
-
I find that a staggering cost. My mvhr unit was about £500 and all the ducting about £1000 all DIY fitted. Even allowing for doubling due to inflation I don't see where £10K comes from.1 point
-
i'm certainly with you. i used pipe clips at 500mm centres for my hep2o pipes. my chippie friend who came to visit thought it was a little excessive. 😂1 point
-
We had exactly the same scenario. I fixed a 6x2" to the side of the slab using 180mm concrete screws, then fixed another on top with just woodscrews. A bit of ply on the face to act as shuttering for the screed. No issues and job done in an hour. The plasterboard fitted to the edge and then shoe rail for the ballustrading.1 point
-
Or a chuck adaptor. I find they often come in handy.1 point
-
1 point
-
I agree about creating contingency. Ideally, we don't want to be in a pressure cooker of stress, as we have a newborn, self-employed jobs etc. As you say, there are plenty of unforeseens with an old house renovation ...1 point
-
We've been chatting about Flux a bit here: I recently switched to it, enjoying it so far.1 point
-
Most modern cameras weigh nothing so the soffit will support one of them no problem1 point
-
I did some similar for a friend over Christmas Really clever Dimply plaster I’ve them Then pull the foam strip out I have some pictures on my phone1 point
-
I'm planning to use GypsoLignum - on the spectrum between Fermacell and HD plasterboard - with some very interesting properties. It can support 40kg on a regular screw / 80kg with a plug and screw / 125kg with an expanding plasterboard fixing.1 point
-
Don’t do it!! Frowned upon by BS6229 & BS5250 and doubt insulation manufacturer would support it without lots of caveats. On your head be it.1 point
-
as long as you have a proper VCL under the kingspan and sealed down onto the internal wall it will be fine.1 point
-
1 point
-
i was in a similar position and just bought the cheapest one i could find. which looked identical to yours and i was surprised on how decent it actually was. i think mine was closer to 1m and was a bit bendy being only 6mm so yours will probably be better being narrower. just make sure you fit the hinges the right way around so the water drains inwards.1 point
-
1 point
-
That doesn’t sound terribly practical though especially in the winter or when it’s pouring with rain. As others have said, MVHR systems are relatively simple things so hopefully reliable. The point about them failing 15 years down the line and no parts available is a good point though but that’s true of every appliance in the house of course.1 point
-
Perhaps just put it in the kitchen? Possibly one wall in the living room if you plan to hang a TV. Possibly the bathroom if you think you might have a cabinet? Perhaps not bother in other rooms.1 point
-
If you know where the toilet fittings are going exactly, then you can board inset between studs to get solid fixings. That needs only offcuts ov osb or any timber. Kitchen doesn't need strengthening but you can do the same at wall cuboard hangers for security. Elsewhere doesn't need it. For acoustics, in normal domestic situations it is normal to just put insulation in between rooms where you think a bit of quiet is preferable. Up to you to improve it if you want, but not osb. There you are. No osb required, or a few offcuts.1 point
-
He’s persuaded himself ‘you can afford it’ and he ‘isn’t ripping you off as the house will still be worth it.’ That’s none of his business and your risk to take. You won’t be living for free during the build, rent can get out of control with build delays. Also, I’d want to build in a profit margin for myself, not the builder. Don’t underestimate how stressful self building is, it would be nice to have something back. This is the tip of the iceberg.1 point
-
@jackthanks for the link. It does look complex though, and tbh we havent been that meticulous about correcting and saving invoices since the claim went in, probably looking at about £2k in claimable VAT lost. So a second claim would probably not be cost effective.1 point
-
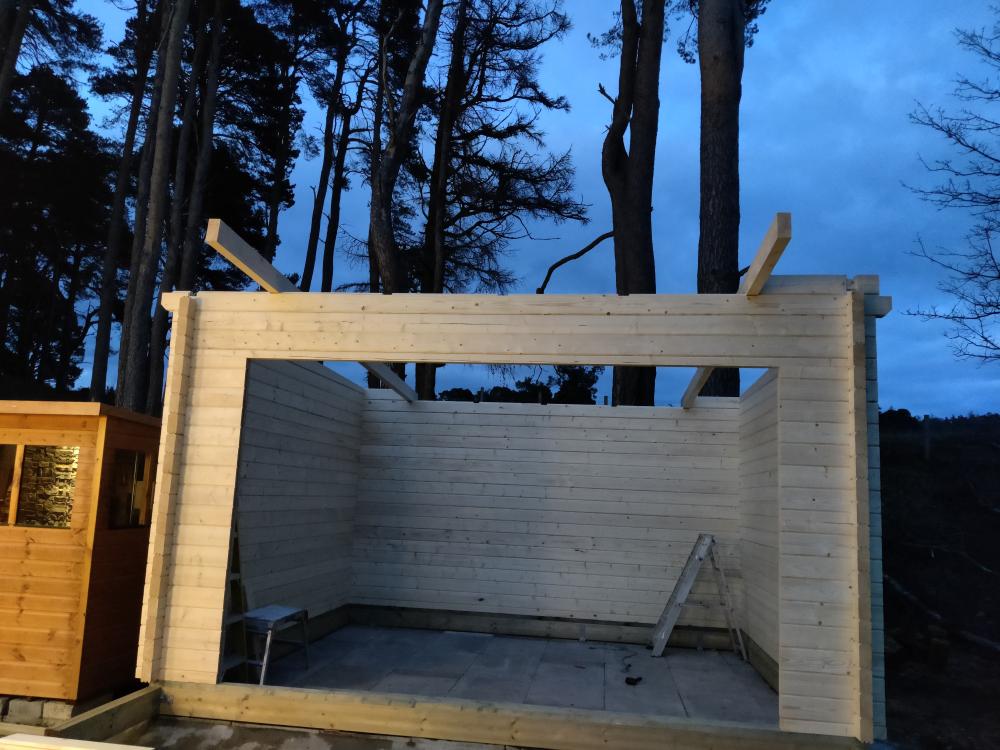
The boards at the base are there for ever. That is the base frame the cabin sits on and will be filled with insulation inside and form the floor. The bits at the front will never be seen as there will be a cantilevered small deck with a step hiding it.1 point
-
I doubt there is ever an economic case for wool as a house insulant. Theres too many steps involved for something that can be done well with other materials. It's a shame more people don't realise how bloody excellent it is as clothing however. Wool socks and wool jumpers are tremendous. Always warm, never sweaty. I wear them every day. Something like hemp would be far more economic as an insulant I suspect. It would sequester loads of carbon too and can be grown really easily. Unfortunately processing facilities are tough to find.1 point
-
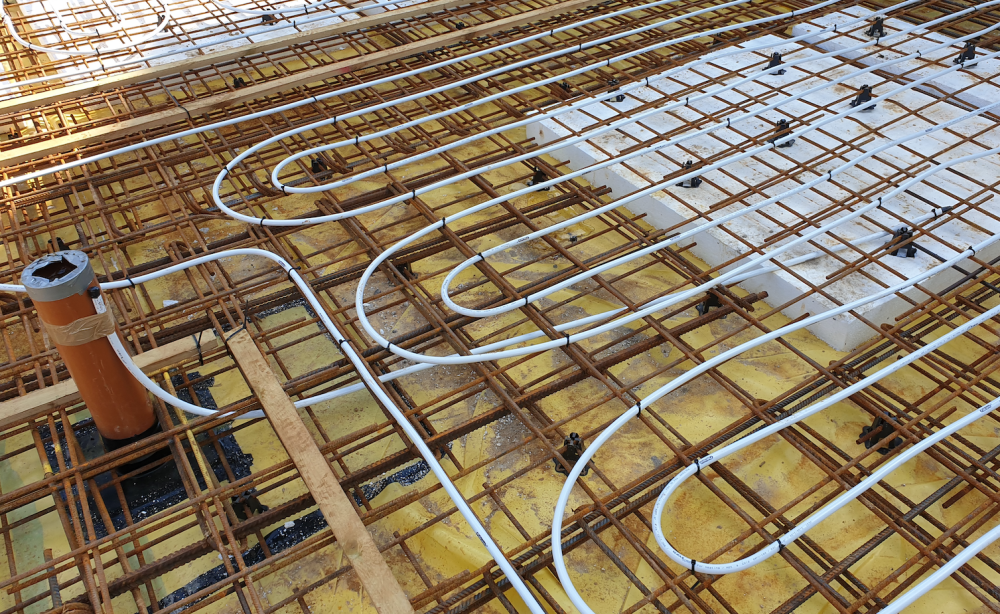
I used UFH pipe off-cuts and formed them into L shapes with a fairly shallow bed. One else I squashed to close and the other end I left open and then I taped both ends. I then attached the horizontal section to mesh with cable ties and the vertical portions I had sticking up clear of the final slab level. Where possible I brought these up next to SVP pipes which was quite convenient, but otherwise, they come up in locations which I knew would be within stud walls.1 point
-
I'm not sure I'd still be pals with your 'mate' after that quote - absolutely wild stuff. Get some additional quotes and see where you are from there - but don't tell them you paid an architect 50k to draw up some plans for you.1 point
-
I appreciate this - I agree, this is a big warning sign and one to be listened to.1 point
-
This is all incredibly helpful so far. I really appreciate the feedback and the guidance. We are reading your thoughts carefully and reflectively. In terms of the value of the house, it would be around £1,300,000 with medium spec. The average price per square metre on the street is £10,000 but this may have gone down with the recent movements in the property market. We told him our budget was £550,000 including VAT (taking the total cost including architect fees, stamp duty etc. to £1,150,000). I think we are going medium / medium high spec (but please tell me given the below). With the size of the house at 122 square metres, this would allow £4500 per square metre. We are only going medium / medium high spec as we plan on living in the house for the rest of our lives (in theory!). We don't, however, want to be doing this at the risk of paying it off for the rest of our lives! Some links below of items (please tell me where this sits on the spec level?): - https://www.bigbathroomshop.co.uk/milano-elizabeth-brushed-gold-traditional-thermostatic-shower-with-wall-mounted-shower-head-1-outlet-86281 - https://www.lussostone.com/taps-c3/celeste-2-hole-traditional-kitchen-tap-brushed-gold-p4675 - https://www.bigbathroomshop.co.uk/milano-elizabeth-traditional-wall-mounted-crosshead-3-tap-hole-basin-mixer-tap-choice-of-finish-82086 The kitchen is largely British Standard.1 point
-
Here be dragons. Big nasty dragons, and oceans of tears. The sums of money involved in this case are not to be sniffed at. Unless your friend has worked for you before, and you have come to know and trust his judgement and practice, may I suggest you do not employ him? Professional distance is what is needed here. Ask your mate for confidential advice, contacts, his judgment about other companies you employ: but don't employ him. All too often we hear of mates rates relationships which have gone wrong, and in my case that has happened twice. And in this case, re-read @miike , @Bozza , @Canski , @Mattg4321 hint at above. The warning signs are already there.1 point
-
>>> The issue with quite a lot of fixings is that they don't service the fixing being temporarily removed because the back bit drops down down the cavity. A total PITA IMO. I find those squeeze-grip fixings very effective but you need to work out how to remove them with the minimum amount of damage if you need to. In the case of these fixings, I find that the easiect way is to unscrew then part rescrew in the bolt then give it a bang with a hammer. This punches the whole fixing through into the void -- at least enough to leave a small indent or even a small whole which can be filled, sanded down and painted. What ever you do, don't try to pull them out as this will tear out a big whole in the board. <<< Yeah I agree with both those thoughts. All of these fixings are made with dodgy thin stuff unfortunately (presumably not good quality steel) - perhaps they need to be a bit like that so they can be squeezed by hand. This means that they need to be treated with some care during installation. After they're installed they're nicely strong. I found 'Fischer HM-S cavity fixings' to be the best.1 point
-
Sure but to be double the original estimate. HH build enough houses of similar designs so their estimates ought to be more accurate than they appear to be. I’ve spoken to a few people now that have been caught out by them.1 point
-
I've got to wonder how Uncle Google is listening in. I've just gone to YouTube and for the first time in months I've had something like: YouTube -- Fixing Big Holes from Drywall Anchors! recommended to me. 🤣1 point
-
Yes it was put in as an experiment really in ASHP's in general and A2W vs A2A. Some early notes: The product delivered was actually eiQ-12WMINV-V4, though the user guide linked on the store page is V3. I can't see any obvious differences other than a couple I came across installing. The V4 manual states 100mm clearance is needed above the internal unit whereas the V3 manual states 250mm. Also the V4 data sheet shows a minimum room size which the V3 does not. I've uploaded the V3 installation manual for interest as it's not available on the site I used a 65mm diamond tip core drill with an SDS plus drill with safety clutch. The clutch kicked in when the brick core separated along a mortar join as i reached the internal hole from outside, up a ladder, so I wouldn't recommend drilling without a safety clutch. The pipes, wire and drain actually fit through a 50mm drainpipe which I used as a sleeve inside the 65mm hole, packed externally with strips of pipe insulation and siliconed in. The manual mentions the sleeve and packing but none are supplied with the unit There is very little space behind the internal unit for the pipes, drain and wire so avoiding a tight bend on the coolant pipes means the bottom of my unit sits several mm proud of the wall. It may be possible to improve this by trimming insulation as the unit can be pushed flush with force or it may just be the design of the bracket, I'm not sure. The internal unit is charged, I presume with nitrogen, so once the internal work is complete you can be confident there isn't a leak as there is a release of pressure when the plastic pipe caps are removed You have to use the supplied 3m pipe extension even if not required as it has two female ends, converting the internal unit's male end I used a hand vacuum pump as per this video: https://www.youtube.com/watch?v=2RDfAkmDId0 - The unit can be installed without a vacuum pump and my hand pump only reached -26.5 rather than -30 so I did one flush of coolant as described in the installation manual. I have no idea how much better this is than just doing the three flushes without vacuuming at all as per the instructions so it can probably be skipped The unit seems to be able to modulate down to 400W input from it's nominal 1.2kW then starts cycling on/off to reach lower gains. I've been running it between 400-800W so far The wifi module uses the Tuya smart app, which has a Python library here: https://pypi.org/project/tinytuya/ - Some customisation is needed for the data registers which I can upload if required but this allows control of the unit via Python, so I intend to put together a more intelligent control system using this. The input power seems to be some function of set temperature and difference between set temperature and current temperature so combined with tracking power draw via a smart plug this could be adjusted to divert solar export without any expensive hardware and with a high CoP. This needs to be coupled with heat requirement modelling to prevent overheating. Hopefully that helps those interested. Installation Manual V3.pdf1 point
-
We took our incoming power through from the meter box (in armored cable), up the service cavity and floor void to the distro box, so the up-and-over route is an option here. It's a lot easier to pull stuff through 110mm than 50mm, especially if you turn up through the slab using a slow bend. Also ASHP double insulated pipe runs to your potential ASHP location. Even if you don't fit an ASHP on day one; it's a lot easier to future proof before pouring the slab than digging up after you are in.1 point
-
I would strongly advise employing an AT testing company who agree to stay on site for an hour or two whilst you locate / cure / re-try. AT is the key to cheap heating bills and maximising the RoI from you MVHR. AT is a far better bang for your buck than insulation, IMO, as ventilation heat loss is a killer vs fabric heat loss. Go at this with all you have is my advice, and get sub 1.0ACH or better. I'm now going to get myself a DIY rig as suggested by others here, so I can perform my own "day of plugging / testing" on my clients behalf, eg before employing a 4rd party to come and test and issue a cert. Seems the best money my clients could spend, and is already going down well when I suggest it.1 point
-
It was 10% of the total build cost (but this didn't include the manufacturing and construction phase). I think it was therefore at a 15% rate of total build cost which is high-end and in retrospect, foolish.0 points
-
Hole 10mm . Depth of steel 20mm Probably once going ( I take it steady ) 3 minutes to cut hole . Cleaning up the metal ‘ splinters ‘ ( they go everywhere- 20 mins . Setting up a few minutes . Turning off magnetic when you shouldn’t means shutting down takes 5 seconds . 😁0 points


