Leaderboard


Popular Content
Showing content with the highest reputation on 01/31/22 in all areas
-
We're in the middle of building with thin joint masonry (so as quick and airtight as masonry can be), facing stone outer. While it *can* be neater, quicker, etc. it still relies on messy trades, and frankly their attention to detail is just not good enough for a high performance house, so unless you're there all day everyday on the details or doing it yourself, I think you'll be disappointed. I would 100% not do it again, and would go for timber frame all day long, whether clad, rendered or even with stone/brick outer. I would probably get a package company for a foundations + frame/shell build such as MBC. We got them to quote and looked into it in detail, but (unfortunately) stuck with masonry. I have no views on ICF as have no experience of it, but suspect the insurance/mortgageability is still trickier than timber frame.3 points
-
Or dont tell them. I find this approach much easier.2 points
-
If your looking at cost Solid Icf TF2 points
-
Think longevity, long term comfort = thermally stable, solid feel, good sound insulation2 points
-
My day is getting better. Thanks you lot. Feeling better by the minute. And if - in addition - Sue Grey kicks Boris' Botty really hard tonight, I'll have a wee dram I think. PS Just had a look at the cost of Suplux and Glasroc fireboard. Suitably expensive. Serves me right. So there.....?2 points
-
Do what you can at the build stage to reduce heating need, so lots of insulation, good air tightness, good windows, low temperature under floor heating, Unvented hot water tank (not thermal store) Then the heat source is less important, a small system boiler will do it for now, as will an ASHP. You could also swap for an ASHP later, I am not awre of a need to seek DNO approval for a retro fit. But if you have a low energy house design that only needs a small inverter driven ASHP then I really cannot see why the DNO would say no. If you want a boiler for short term I would probably go oil with a small tank, and avoid the cost of a gas connection. Choose an outdoor oil boiler and it's a relatively easy swap to an ASHP.2 points
-
@JohnBishop why do you think it’s your neighbours roof leaking, if yours was the one that was replaced, then it was the roofers that did yours that haven’t provided a good join between old and new. Others have said that’s it’s a bit of a mess, well it is, but that row of ridge tiles was a very standard practice in the 80-90s for joining two roofs of different materials. The tiles on the left are a clay small tile, not slate. The tiles on the right are an interlocking concrete, again a standard replacement due to cost. I think you need a roofer and I would say it’s down to you to fix it, your neighbour was probably very happy with their roof before yours got re done., and could well be causing a leak on their side as well. The black stuff as nick said is air pollution that doesn’t get washed off because it is hidden under the roof line.2 points
-
We're using a planning consultant and he advised that a pre-app was a waste of time and money. Regarding time, most planning departments are taking a very long time to process full applications at the moment, and pre-apps go to the bottom of the pile. Regarding value for money (professional fees and the applications fee), our guy told us that case officers are cautious about committing themselves, so just reply with a list of the policies you'ill have to comply with. He told us the days are gone when you could sit down with a case officer and get their input on whether what you're proposing would be acceptable. That's how it is here, anyway. Maybe different where you are. We're in a conservation area and were a bit unsure whether the architects we talked to had a sufficient understanding of what would be acceptable. We got the planning consultant to write a short constraints plan which we gave to the designer - maximin ridge height, footprint, position on the plot any overlooking issues etc. The fee proposals we got from architects included a fee for handling the planning application, writing the design and access statement etc, and we felt the money was better spent with a planning specialist. If you do decide to engage a planning consultant, you can find ones in your area via the RTPI website https://www.rtpi.org.uk. Our project is in two phases. We're first refurbishing a Victorian coach house which we'll live in during the build. The planning application for the coach house was submitted in September. It's very simple, non contentious, no neighbours objected and one supported. It recently made it onto the case officer's desk and she has proposed two pre-commencement conditions which would require us to make further submissions after the consent had been granted, which would mean further delays. We're happy to have a specialist deal with this on our behalf and we hope resolve them prior to determination.2 points
-
We use 2 × SunAmp PVs for our HW system in a household of 3 people. According to our water bills, our consumption is about 83 ltr per person per day. Our pattern of use is pretty even across the year: more showers in the summer; an occasional shared bath in the winter. The year round average temperature of our rising main is 11.3 °C (Oh, the wonders of logging everything in a DB and knowing how to do SQL subqueries). The H/W manifold is mixed to 53°C (perhaps a little too hot for kiddies but we are an adult household). I estimate that ~40% of our water is run as hot. (The washing machine and dishwasher, bogs, etc. are cold fill.) Cranking these number into a heat calculator, this gives a total heating requirement of just under 5 kWh / day + another 1 kWh / day heat loss as the SunAmps are tight side-by-side and amazingly insulated. (I don't separately meter the SunAmps, but a quick sanity check of my actual half-hourly electricity meter readings would indicate this figure is about 20% too high, but let us stick with this figure for estimating purposes. All heating is done at cheap rate tariff ( fixed at 9.66 p / kWh inc VAT) so this costs us ~ £211 p.a. Using an ASHP to supply the SunAmps at 40 °C, say, would drop this to 2.5 + 1 kWh saving us less than £100 p.a. or about £1K over 10 years. So in our case if we decide to install an ASHP, there aren't enough savings to make it worth installing an extra pump, a buffer tank and a two temperature ASHP to use it to (part) heat the DHW. We will stick to Keep It Simple Stupid. A couple of caveats here: I think our pattern of water use would be very different with children in the household. We have a fixed price deal until end 2022. We are going to see a big hike in our next tariff, but I feel that this will settle down in the longer term, so I am ignoring this for now.1 point
-
I have another thread in the new build design section detailing the journey to get the plans finalised and submitted. In the meantime, have been reading up about how to actually build and also attended the NSBRC show over the weekend and took in their talks/seminars (quite useful for a beginner). So far, I have no preference for a particular method of building apart from wanting what everyone wants - super speed and super cheap, with a top quality finish(!) I've listed out the pros and cons of each to try and understand the differences between the three methods: Traditional masonry - Pros 1. Cheap parts and easy to get insurance/mortgages 2. Easy to DIY in the future Traditional masonry - Cons 1. Slow to build 2. Labour in London is expensive (£500 for a brickie apparently) so cheap parts are offset by the long time it takes to build and get water/airtight. Timber frame - Pros 1. Quick to build when on site as all the design is done prior and built in a factory 2. Can find companies to do foundation slab and erect structure - which is the hardest part of the build. 3. Great insulation and thermal efficiency Timer frame - Cons 1. Used to be about 10-15% more expensive pre-COVID, and this has only got worse with timber prices shooting through the roof. 2. Slightly harder to get insurance/mortgages but this is the dominant method of new builds now apparently. 3. Noise issues are greater in a timber framed house? ICF - Pros 1. DIY element of laying out blocks, meaning some labour costs can be saved. 2. Monolithic structure means efficient house, and a feeling of being much more solid as compared to Timber frame. 3. Less noise issues - especially if paired with a block and beam floor. 4. Used to be relatively expensive - but now very competitive as concrete costs haven't gone up as much as timber in the last 2 years! ICF Cons 1. DIY options will become limited in the future as cutting through concrete isn't fun 2. Waterproofing external insulation is key - though not impossible. 3. As with TF - harder to get insurance/mortgages as this is less popular but now growing. All in all, I'm leaning towards ICF now as having a concrete structure and combination of beam and block floors will get rid of my biggest bugbear - the noise issues in old housing stock. Hate hate hate creaky floorboards and sound travelling through the house when you drop something relatively light. Thoughts greatly appreciated. Cost is obviously a concern though all conversations point to each system roughly equating to about the same in the end - higher part costs are offset with quicker build times (and lower labour costs).1 point
-
Why didn't they install the internal side of the split ASHP where the boiler used to live on the ground floor. It would have been much easier to plumb I would have thought.1 point
-
I am missing something here. Our electricity and water was on site when the only thing there was the static caravan. All fully energised and functional.1 point
-
Mine was also masonry but was lucky to have a brilliant team and I was on site to project manage, I didn’t have to micromanage as they took my instructions seriously.1 point
-
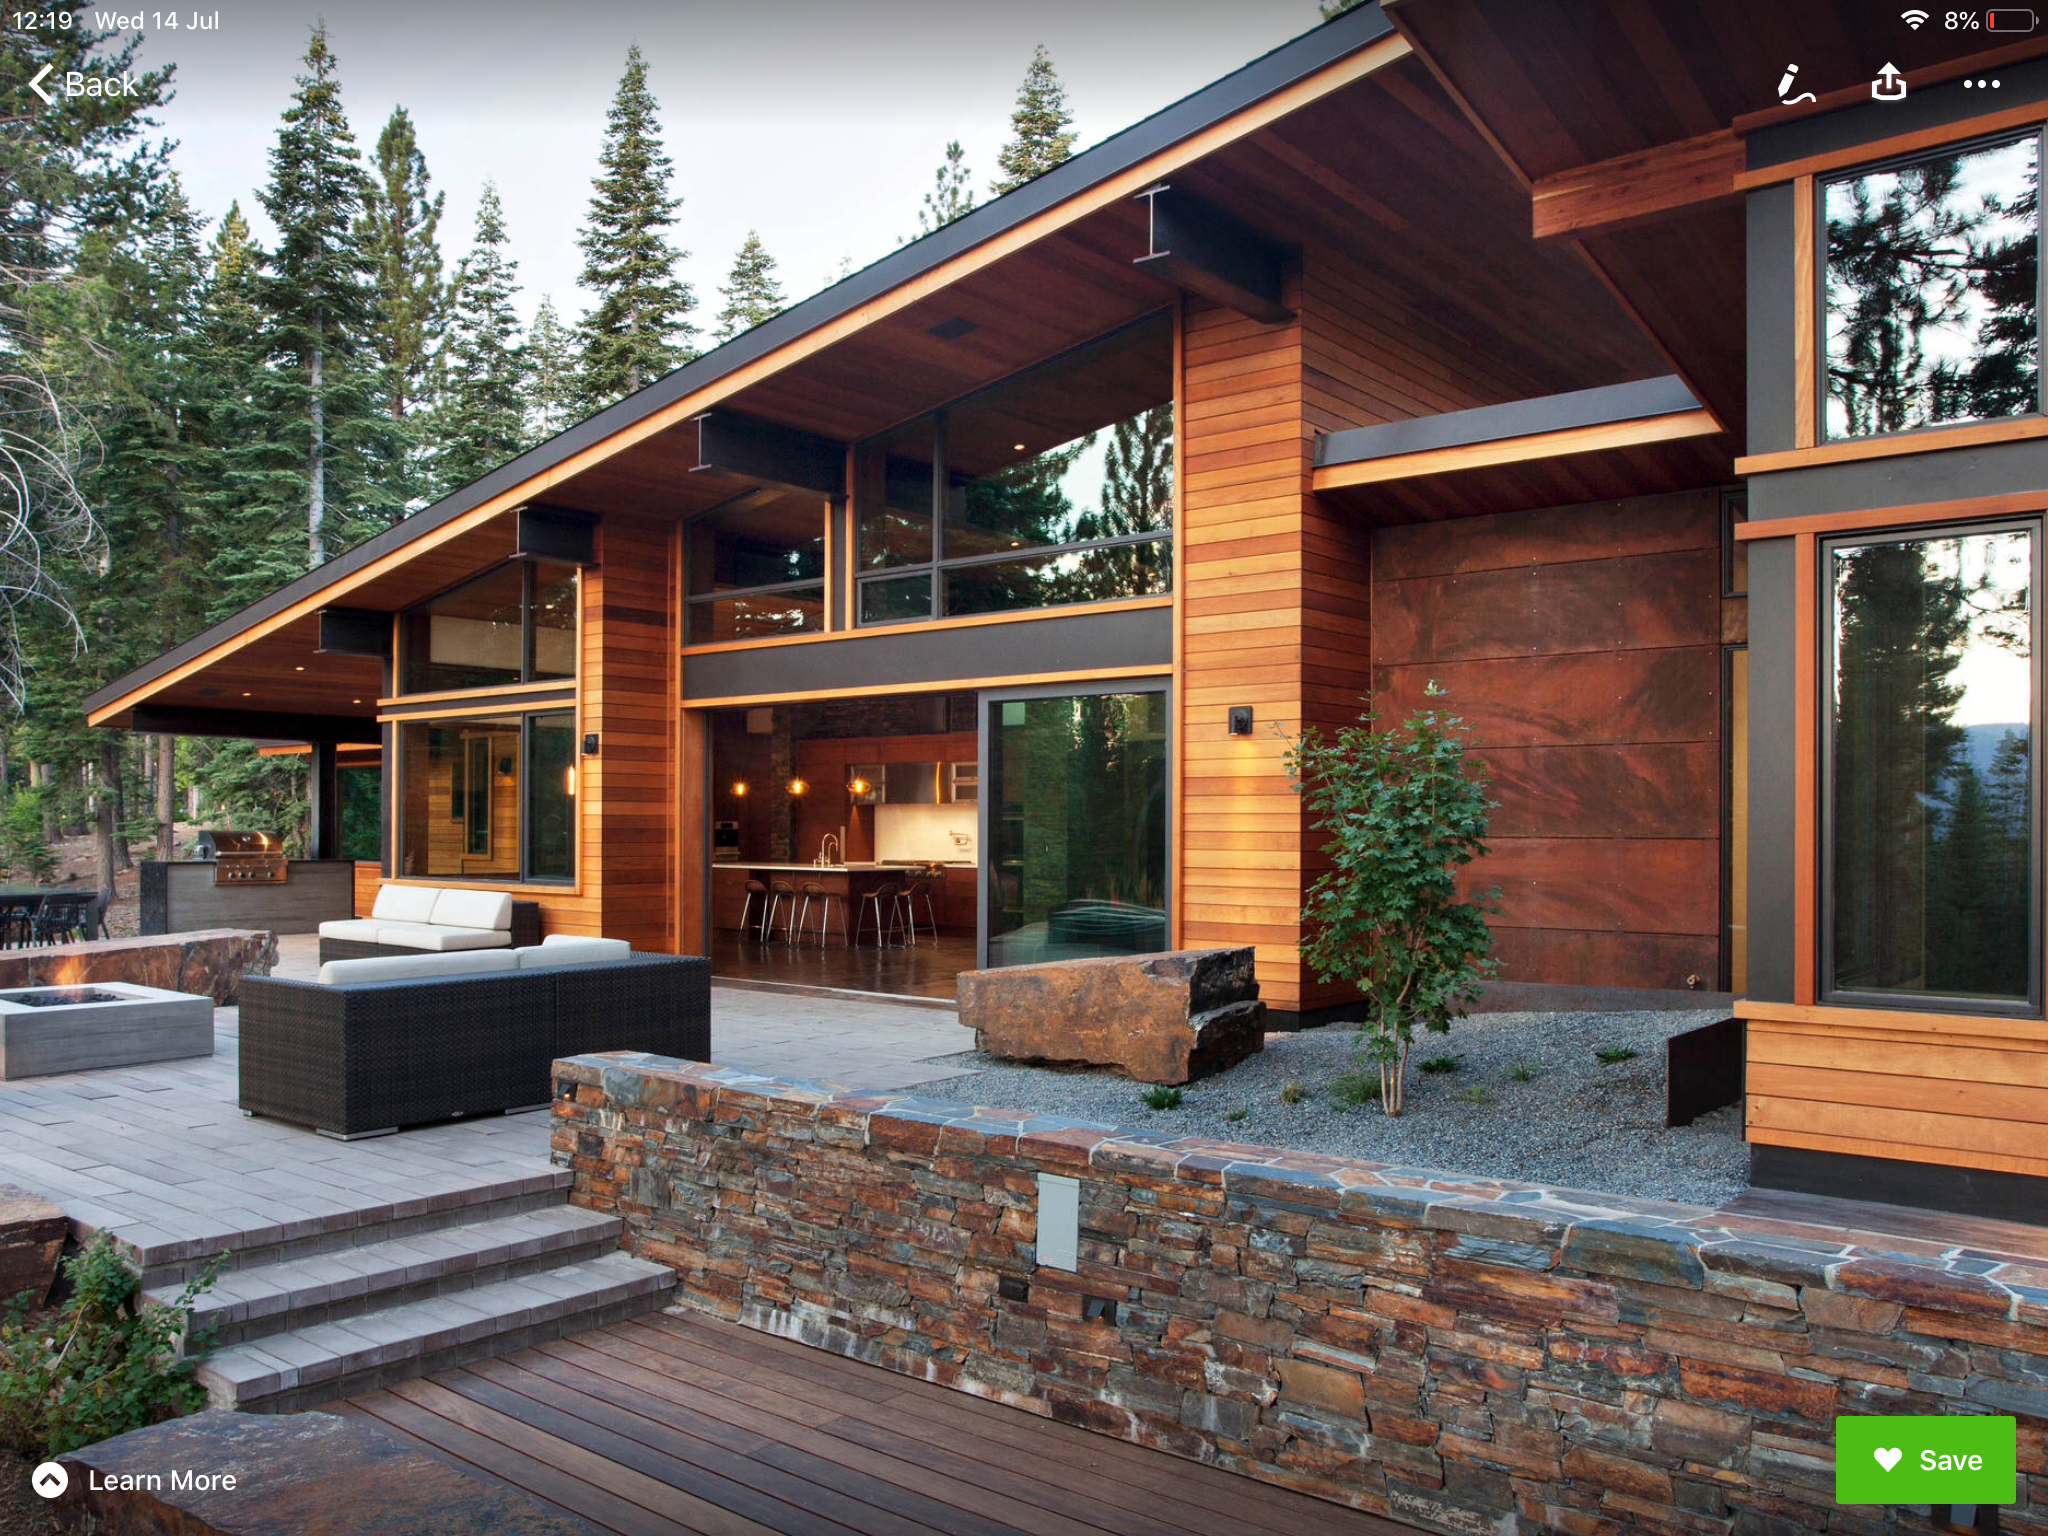
That's fantastic. We seem to have similar taste. Here's a render of ours. :
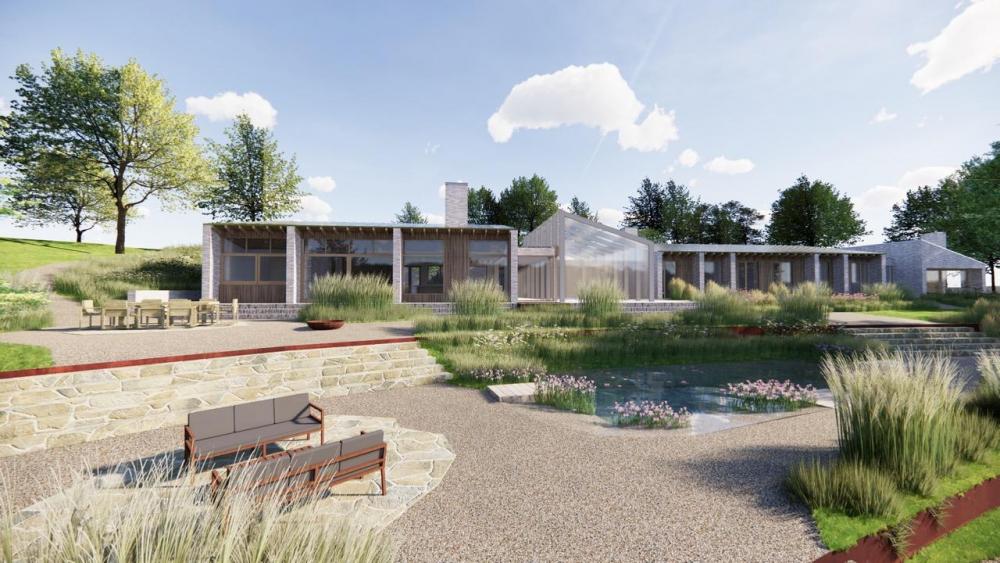 1 point
 -
This was the thing I was talking about. It's actually bigger than I had remembered: https://www.viessmann.co.uk/products/combined-heat-and-power/fuel-cell/vitovalor1 point
-
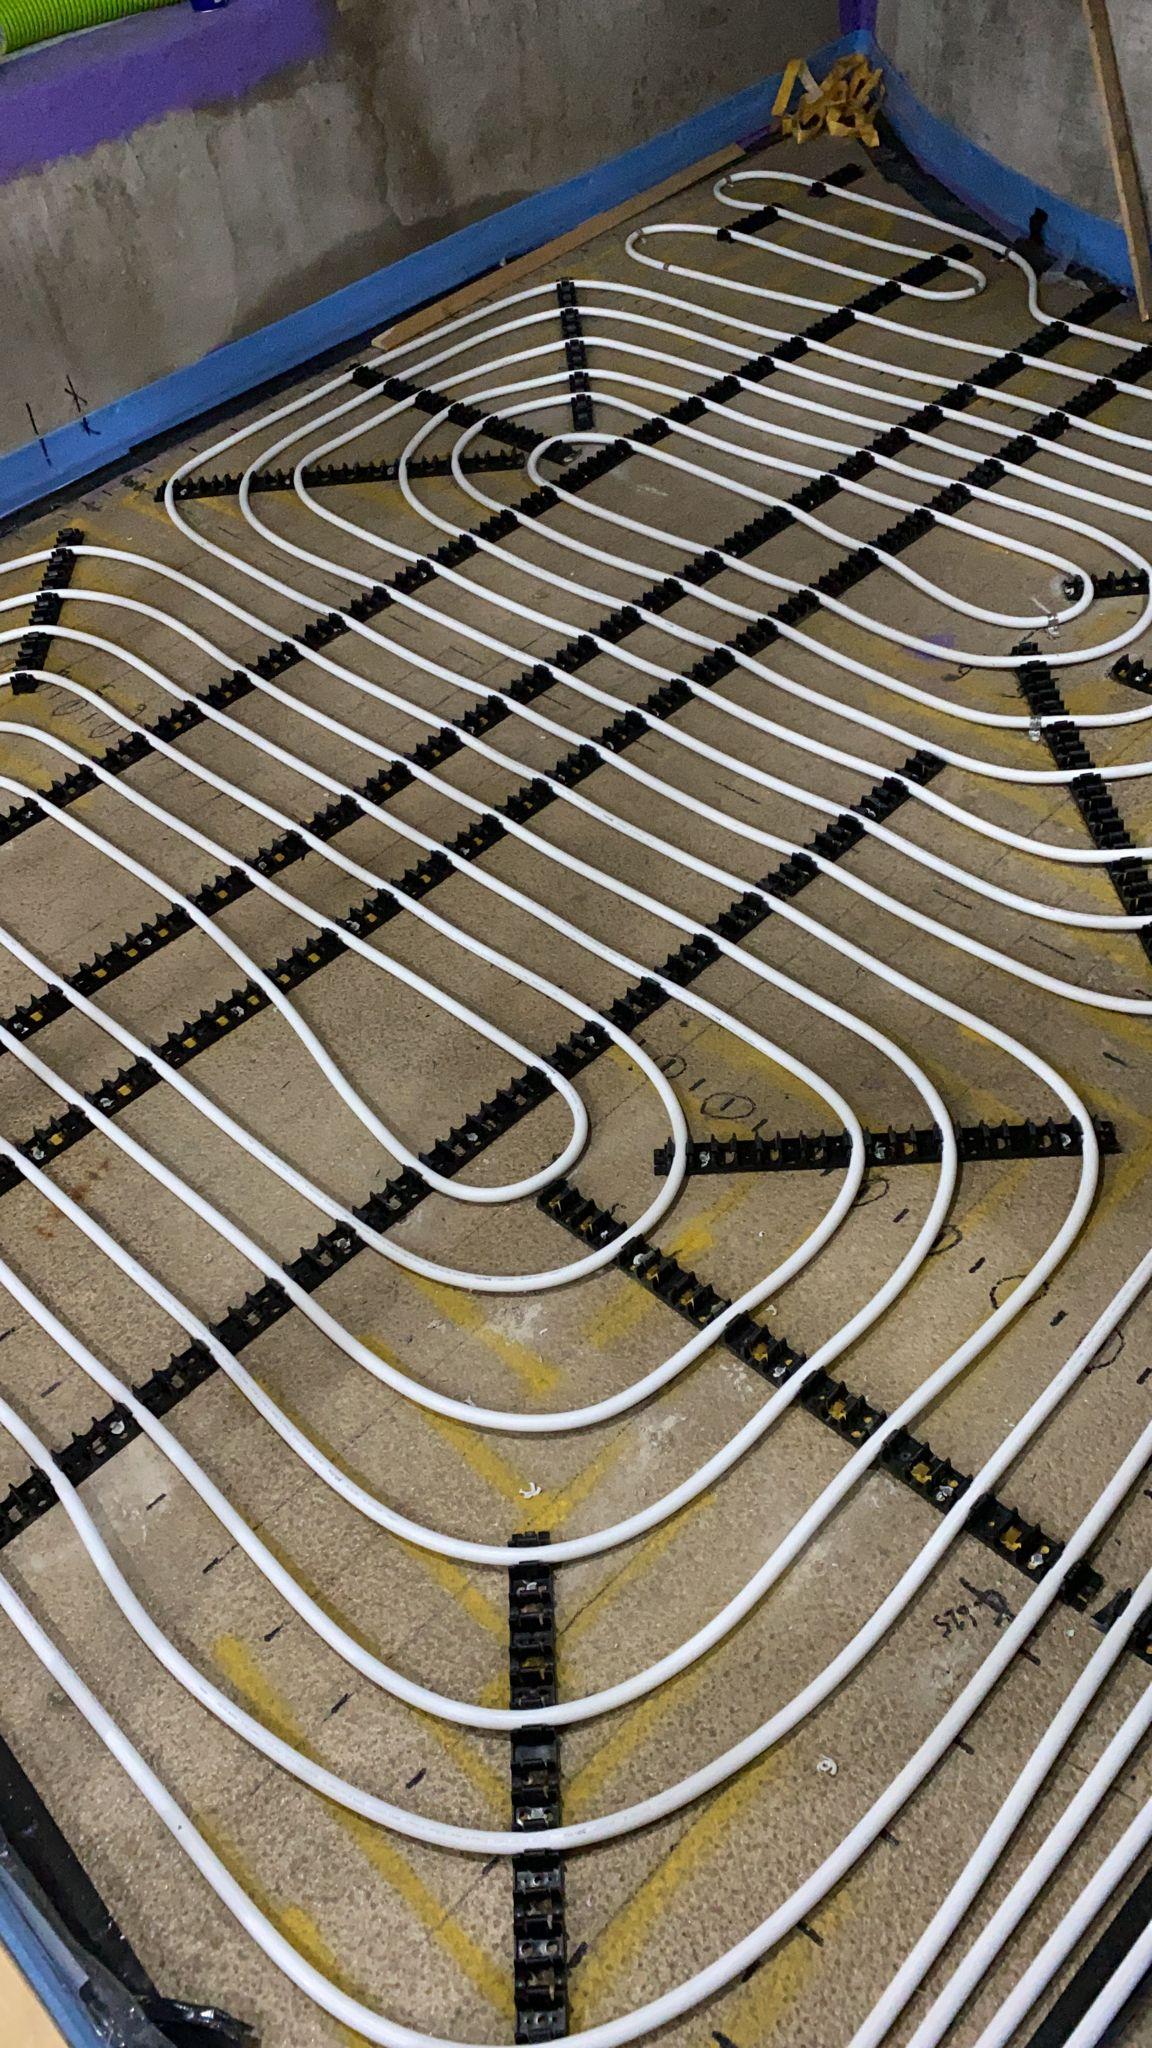
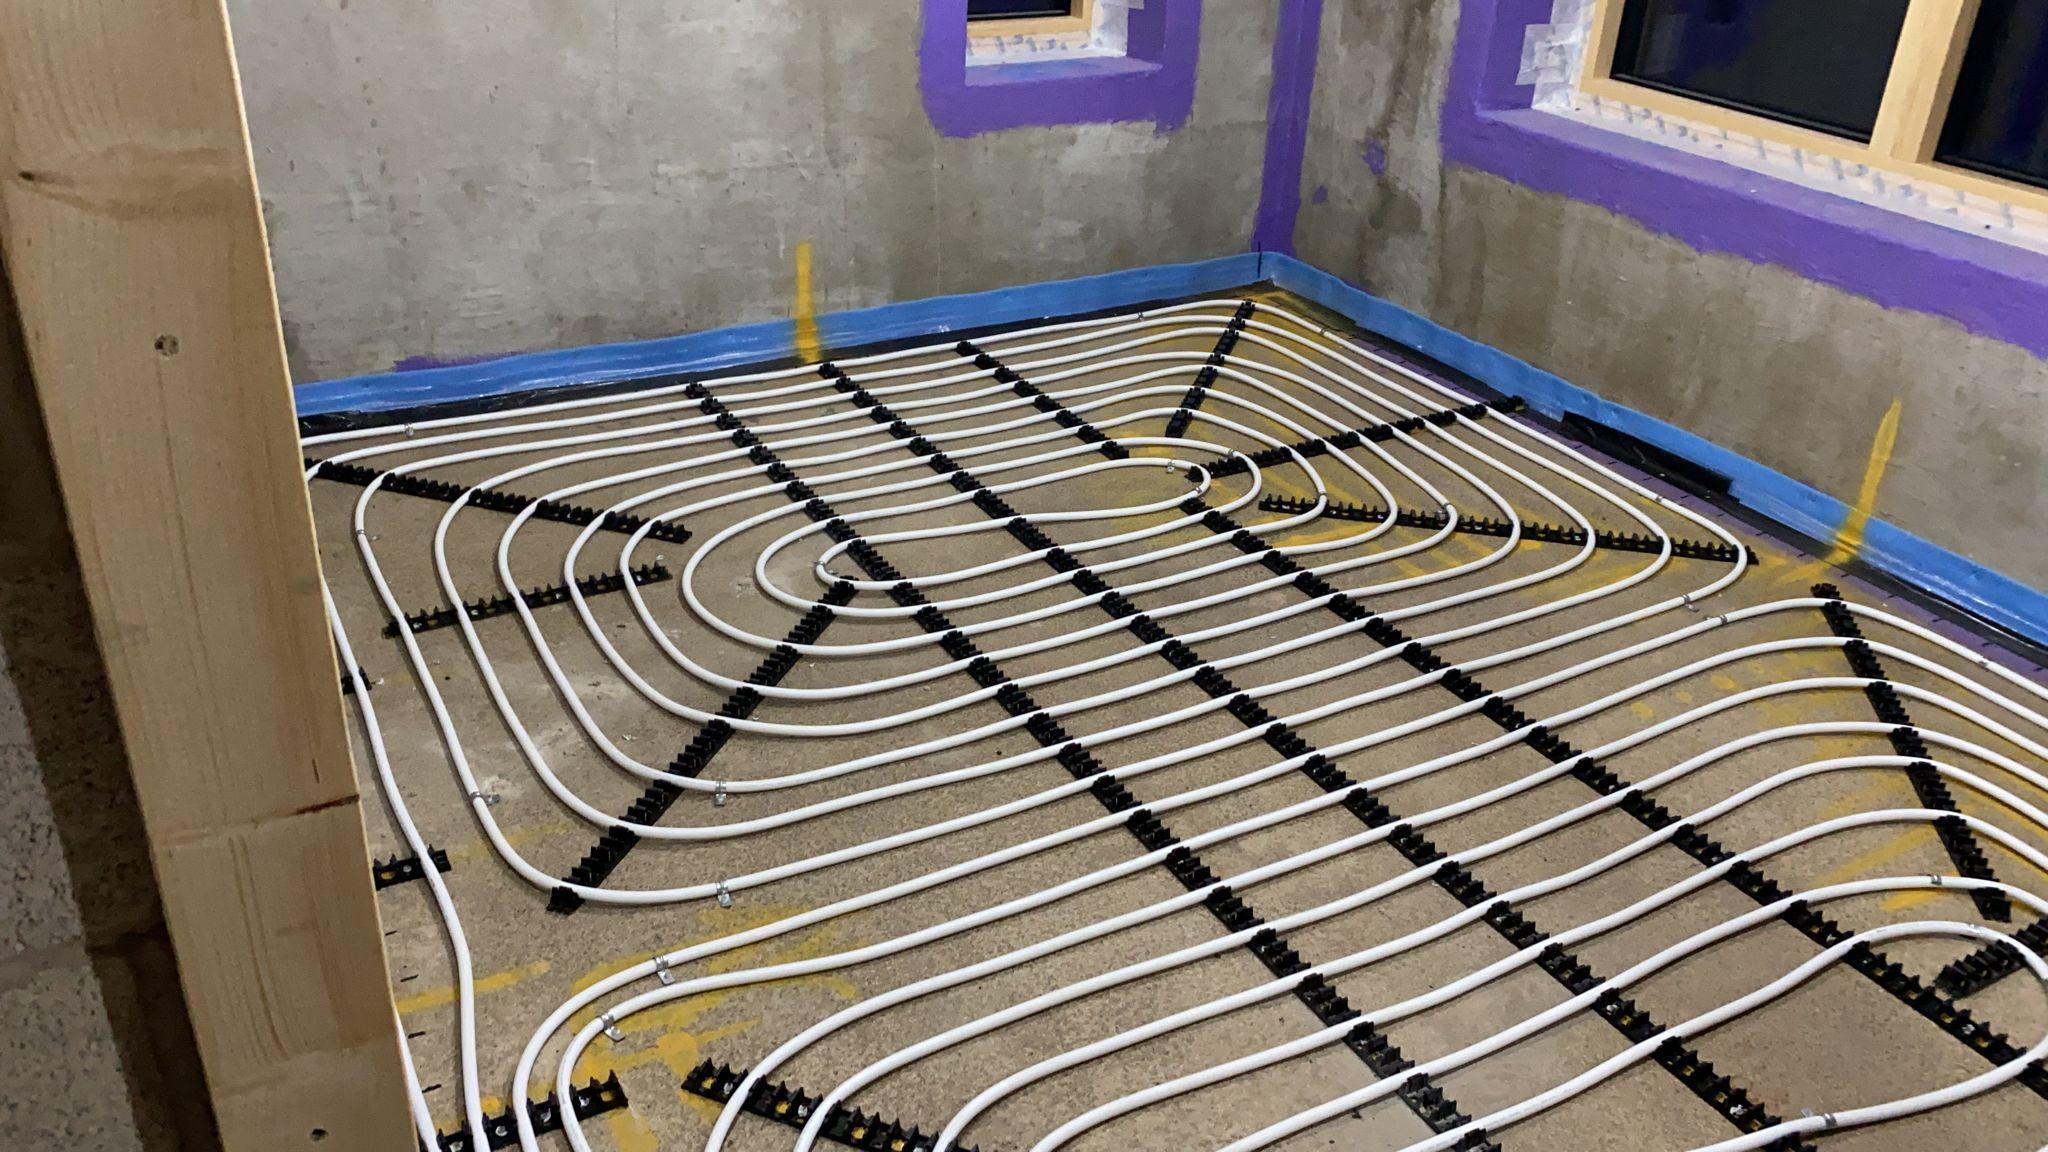
Got any pictures. Im trying to build this.
 1 point
 -
You can have two at the cost of the third, take your pick We did TF, looked seriously at ICF (contractor, not DIY) and what swung it for us as novices was the amount of progress we would get on the build using a single TF contractor plus the high quality of passive detail (insulation & airtightness) built in that package. We did not use MBC's foundation system as we had a basement but that would have been another decider as they take responsibility for that as well as the frame - which is peace of mind both from a practical point of view (A fits onto B) but also the passive detailing. As the frames were factory built, we were able to have the windows pre-ordered and arriving on site within a week of the frame being complete externally. Once they were installed and taped to the internal airtight layer we were able to get the exterior cladding on and the roof (which was felted and battened by MBC) and roof lights completed all within about 6 weeks of commencement. MBC then return to pump the insulation and do the airtightness test. When the frame was complete we had all internal stud walls, floor decks and temp stairs which meant we could crack on with first fix within weeks. We also experienced a big difference between TF vendors, mostly to do with the degree of interior stuff walling, insulation and sundries like cranage, welfare, safety systems etc. So TF wins for speed and quality (assuming you have a quality crew) but the cost is higher. However you need to offset that against how long you want to wait to start 1st fix and eventually move in.1 point
-
Don't get me wrong, I'm not saying there aren't any reasons or upsides to masonry construction (we had the same debate before committing), all I'm saying is that having gone through the reality of a build with masonry, I would not repeat or recommend it for most high performance houses due to the realities of trades using this type of construction. If you've got a builder who is shit hot on details, thermal bridges and the like, and who can guarantee that all of his subbies and labourers will operate at the same level, OR you/a project manager micromanages the detailing full-time on site, you will NOT get real-world performance from a masonry house that you think you'll get in theory. I appreciate that is a bit cynical and I'm sure people will have examples of good experiences of masonry build, but I've yet to come across mainstream trades who will go around and fix every tiny little nick in a membrane, or take care not to make a hole or leave a small gap, or think about how they need to change the construction to avoid vapour build up or thermal bridging on a particularly detailed part of a house. Even if you give them detailed architect's drawings, they will follow them 90%, not 100%. As always, that is just my *opinion* based on our experience. As Tony suggests, there are plenty of upsides to masonry construction, and the balance of which is more important or carries more risk is down to you and your house, not to a bunch of grumpy selfbuilders on a forum1 point
-
Yeah, Fabric first is the term that was thrown at us several times. This will mean upping the spec on the fundamentals and maybe cheaping out on 2nd fix items like doors/kitchens/bathrooms for now, as the latter will be relatively easier to upgrade in the future.1 point
-
As someone who has recently paid for concrete foundations I would dispute that cost of concrete hasn't gone up much lately. I found the percentage increase greater than that of my timber frame.1 point
-
@dpmiller @Dave Jones @Carrerahill @Russell griffiths Thank you for your suggestions I reckon I get rid off the ropey ridge on the other side as well as this will leak there too. I think they haven't done a good job around chimney as well what would explain the damp on the chimney wall.1 point
-
There are ASHP’s which are on a specific list and those “that are not” No electrician ever stops to ask to fit a new huge induction hob or a replacement upgrade to a 10kw electric shower1 point
-
So, just fit a £40 Willis heater to get signed off as a “3kW electric boiler”, and pipe / duct services in, in anticipation of the retro fit ASHP? TBH you’d put more load on fitting a big electric shower !!!! DNO’s need a reality check. The ASHP I fitted before Xmas starts at less current than a toaster.1 point
-
Here's what I'd do... (and I'm not saying this conforms with all the regs, but in my head it should be a good deal similar or better in real world performance to some of the "compliant" installations what have had no care or attention to detail). Cut fireboard strips to fill the web of the RSJ Install 6mm cement board (hardibacker or similar) in the gap to the stairs where the stairs are. 12mm Fireboard on the wall below/above that1 point
-
Nearly all gas boilers can run on a mix of hydrogen and gas as well. My guess is that _if_ hydrogen is used at all it will be just a few percent perhaps increasing over many decades like we have done with E10 biofuel.1 point
-
A brief update following some very active conversation with my architect this week (who also has a link to this thread and has been through the comments and other sketches). 1. They very kindly drew up a number of different Georgian options for us to consider. Not that this hadn't been considered in the past but laying it on the plot and comparing ridge and eaves heights, its clear that the georgian facade wouldn't work. The Chartered Planning consultant that's part of their firm also provided her professional opinion that the design would be out of kilter with the neighbouring plots and that the planners would take a very strong view of the proposed height of our development - which goes from 1.5 storey to 2 storeys and a loft. The end result is that we've taken their professional view into consideration and decided that it's not going to work. 2. We are in the process of looking at alternative options to pretty up the front facade, which includes the increased glazing on the 1st floor windows, different fenestration options amongst other things. I hope to get updates from them by the end of this week. 3. I've asked them to reconsider the roof design and we're looking to incorporate some rooflights/velux windows to bring more light into the centre of the house and change the design of the front gables so that it allows us to take the glazing all the way to the roof. This will mean a revised roof design and adding considerable cost - so we're considering our options here - but this is something that can be tweaked at a later stage, after planning has been granted.1 point
-
Thanks all, and particularly @Redoctober for the breakdown. Even if it's just relative, seeing the build cost vs other fixtures etc is really helpful. We're at the start of this journey, so many more questions I'm sure, thanks for your help.1 point
-
So that it appears to conform with regs. Ponder on that first. Alternatively can you not paint steels with a special paint to make them fireproof? again what you can't see........1 point
-
If planning to replace with a larger building make sure you have applied for and received the CIL exemption for self builders. Starting work before you have that can mean loosing the exemption.1 point
-
We are building on top our existing bungalow with 70mm cavity and the builder is going to step it out 15mm either way to create a 100mm cavity. Many Thanks1 point
-
Given EV's are my day job, I can comment on some aspects here... 1) The degradation thing, as SteamyTea suggests, is a non issue if you manage it to small amounts of SoC, and within certain windows. E.g. it will only ever charge-discharge by +/- 10-15% and always within a prescribed window (e.g. 40-75% total state of charge). The degradation at these levels is virtually non existent. 2) The biggest difficulty with it all is creating these parameters within which the OEM will allow its car's use as a battery bank, and the integration of that with the grid and different brands' equipment. Relatively simple if all are coming from the same manufacturer, virtually impossible to do it as a universal plug-n-play without a lot of work on protocols and standards. This is why something like a Tesla PW concept is the "best", in that it's an OEM-created storage solution, with all of the sign-off and interfacing with the grid. Adding a (in this example) Tesla charger, and a Tesla EV as an extended buffer is relatively straightforward. 3) Some additional electrical safety regulation work is still required for the V2G side of things to be compliant, but to be fair this part isn't insurmountable. 4) With the price of used battery packs dropping at a rapid rate as EV adoption increases, I suspect it'll be much easier, cheaper, and "greener" to just integrate complete used modules into a permanent home storage installation with swappable module banks. Even a 50% degraded EV battery is still way more capacity than is required for any normal domestic power storage. However, there are some cases where V2G is really suitable and I suspect it will mature/develop further. Japan are a fair few years ahead on this as the Chademo protocol actually incorporates V2G within its standards.1 point
-
Not sure what that bodge of ridge tiles is about. As far as I know those are ridge tiles for a ridge. What should have been used is called a "Secret joining/bonding gutter" - it looks like a flat piece of tray with an upstand in the middle, the flat sections have some grooves and usually a rough finish to limit water travel, you cut back the neighbouring roof slightly, they lap the hopefully good felt up onto the gutter, then your new roof membrane is laid up to the gutter before re-covering. Job done. Looks like someone has gone cheap and used tiles on your roof instead of slate which has maybe caused the contractor (horse tied up out back?) some issues with the joint. But that is an abomination. If they have not used a gutter, which I suspect they have not or else why the ridge tile bodge? Then I do wonder if they have just lapped the felt, then tried to rely on the ridge tiles and mortar to provide the seal. The ridge tiles and mortar are now ropey and there you have it, a leak.1 point
-
I reckon a passive house that didn't need and didnt have heating upstairs, which is perfectly possible. Would sell for less than a less well insulated house that did have heating in all rooms. A buyer wouldnt trust someone else telling them heating wasn't needed. Also less traditional build / heating usually sells for less. Shouldn't be like this, but it is. If it wasn't new builds from mass building company's would be going down the passive route.1 point
-
Hi. Looking at the gap, and the fact that you no longer have any bevel to the face of the cut, I would just scrub these completely clean of any residual adhesive and fill and finish with clear CT1. No need for any super skills at all, just don’t cut the nozzle and use at the 3-4mm bead size it comes at. Start at the bottom horizontal ‘grout’ line where these meet the floor / tray / other and work that in vigorously with your finger, rubbing it in in both directions ( don’t worry about the CT1 getting over the face of the tiles / other as it comes off in seconds. Caveat is do NOT let it get on anything that is not flat and impervious ( like floor grout ) as it doesn’t like coming back off that without a lot of extra effort ). Once you’ve completed the horizontal application and your finger and wall / floor has CT1 all over it, use cheap baby wipes to clean the wet sealant off your hands first, then off anywhere you do not wish it to be. Use one BW just a couple of times and discard it to a bag, as otherwise you’ll defeat the object and start bringing it back to the surfaces you’re trying to remove it from. Finish this part of the process by putting a BW over your finger and sweep from one side to the other in one long slow movement ( all the way along the horizontal ) to leave nothing of the CT1 on the tiles or floor / tray. Do this long sweep as many times as is necessary until you’re happy with what you see. Then leave for 24hrs to cure. Do exactly the same for all the vertical lines, working from the top > down. Do one vertical line at a time, cleaning 90% of the residual away at the horizontal grout lines up the wall. Once you’ve done 3 verticals, get a BW flat on your palm and polish all the area of tile 1 top to bottom. When you’ve done he 90% of tile run 4, go back and polish up tile 2 top to bottom, then 5 > 3, 6 > 4 and so on. The idea is to be constantly working wet sealant over / against wet sealant and to not allow the 90% area to start firing before polishing with your flat palm + BW. That will be much better than grout, 50 times better than silicone ( which has a very short lifespan on surfaces which are regularly cleaned thoroughly ) and will NEVER attract mould / go black. ??1 point
-
It’s just moss / other growth that hasn’t been hit by the rain. You’ll see it on many surrounding properties and is of zero concern.1 point
-
the bottom two rows of tiles kick up a helluva bit. Did the damp follow windy weather? I'd suggest the felt at the eaves is questionable at least.1 point
-
there should be a hidden gutter between the two roofs under that bodge of ridge tiles. It's purpose is to provide a watertight barrier where you have 2 dissimilar tiles that dont bond. Not a huge job, get rid of those ridge tiles and fit the trays. days work tops. Assume the right hand house is a council house with the external cladding, maybe get onto them ?1 point
-
A whole load of offensive and dam right rude posts have been removed. Learn to behave like grown ups.1 point
-
Just miss out one tile dead centre at the back perhaps? Or...I could 3D print you up a mould that you could cast a plaque with the date in or something...as a feature and have it at the front...1 point
-
It looks like your roof has been re-done at some point. Looks like water getting under the ridge tiles between the Two buildings.1 point
-
Well done Faz. I think you only have One left. As it's only 10 mins away from my daughters i'd buy that. especially if you gave me a decent garden. Problem is, it's to far from the other Two daughters. Can you do the next one's equidistant from all Three daughters. Cheers Faz.1 point
-
That’s a bit of a waste of an architect’s skills isn’t it? I don’t think people train for 7 years+ to convert your drawings to CAD. Like I say, it’s reasonably easy to get above building regs, some councils even require 10% above, the architects would be used to get the most out of the glazing orientation and do the certification. If you want a Passivehouse level you’re looking at SIPs and an investment in renewables. Expensive and not practical for most people.1 point
-
1 point
-
@SteamyTea Nick, if you bring the tank to temp say up to midnight, turn off electricity and don't draw any HW until the morning, then you could use the sort of curves above to estimate the daily heat loss and do the sums and trade-offs on insulation options. I suspect that that its doing to be a few kWh of heating being dumped into the general internal heating. I haven't done this calc for a conventional cylinder because I don't have one, but I do know that the one in our old house lost a lot of heat -- we used it as a drying / airing cupboard because of this. The choice of SunAmp for us was one of those informed coin tosses that you have to make when finalising the house design. It's also one that I think experience has shown to be a good one for us. Why? Form factor. The 2 units are the size of a large PC / small server and are cuboid rather than cylindrical. We use a small cupboard off our downstairs toilet for all of our services: DHW, CH and water filter. This form factor means that we could stand them on a shelf against the walls, and so be very space efficient. Low heat losses. The thermal density of PCM means that the units have a small external area, and the flat surfaces means allows for the use of vacuum insulated panels which have an R-value maybe 5-7 × greater then equivalent foam insulation. This means that the service area doesn't overheat, and we can do all of our heating overnight. Redundancy. Controller failures (see below) have meant that we've been on one SunAmp a couple times, but one SunAmp still gives enough HW even if I needed a midday heat top-up -- a lot better than no HW. No CITB training requirement / G3 certification needed for installation. I installed and plumbed in the SunAmps myself. (The electrician wired them in and his Part P certificate covered this.) My BCO did as for the G3 certificated, but accepted the manufacturers statement that there was only ~1 litre internal H/W at 3 bar pressure, there wasn't a safety issue as with an UVC. Being able to do all the plumbing ourselves saved us a lot more than the price premium for the SunAmps. The general build quality of the SunAmpPV units is excellent, though I notice that some members have reported quality issues with the next generation Uniq units. I also personally view the controller board design as overly complicated and poorly implemented (used in both types) . For example there is no proper separation of the 5V logic and the 240V power and the 240V tracking is totally inadequate. Also, even though the PCM-base units are more thermal dense and hence kWh for kWr they are a lot lighter than the equivalent full water cylinder; however unlike a conventional cylinder, their empty weight is still basically the same as their full weight so they aren't easily movable for maintenance. For this reason, I view this "all in 1 box" approach as unwise because of long-term maintenance issues, though to be fair I can see why this is a better option for the vendor and for most customers and installers. It's a pity that you can't just get a mini dumb thermal store in this cuboid + PCM form-factor.1 point
-
Don't pay for servicing. All you need to do is replace the filters every 12 months (I choose 6 months) - there's nothing else to do. Depending on what type of filters you've got (form/frame etc) you might be able to buy suitable replacement media by the square metre for next to nothing. P.S. Mods - This thread ought to be in the MVHR section - it risks not being discovered again in here which would be a shame as it's an interesting situation that we tend not to see.1 point
-
Jdp in Inverness can get hold of graf plants at reasonable prices.1 point
-
Hi and welcome. I wonder where abouts you are, might not be all that far from me. Yes I have been enjoying the mild January and the lower than normal heating requirements. A bit blowy and miserable today and tomorrow though.1 point
-
As others have said, state you cannot keep paying the builder and tell him his services will not be required after date xxxx. Inform him to remove all materials not belonging to you. Once he is off-site, his insurance on your property is void, so what you do is of no concern to him or the now lapsed insurance. Don't ask questions, of BC where you may not want or like the answer. Assume you need fires for a multi level house. Just live on the ground floor so escape isn't an issue.1 point
-
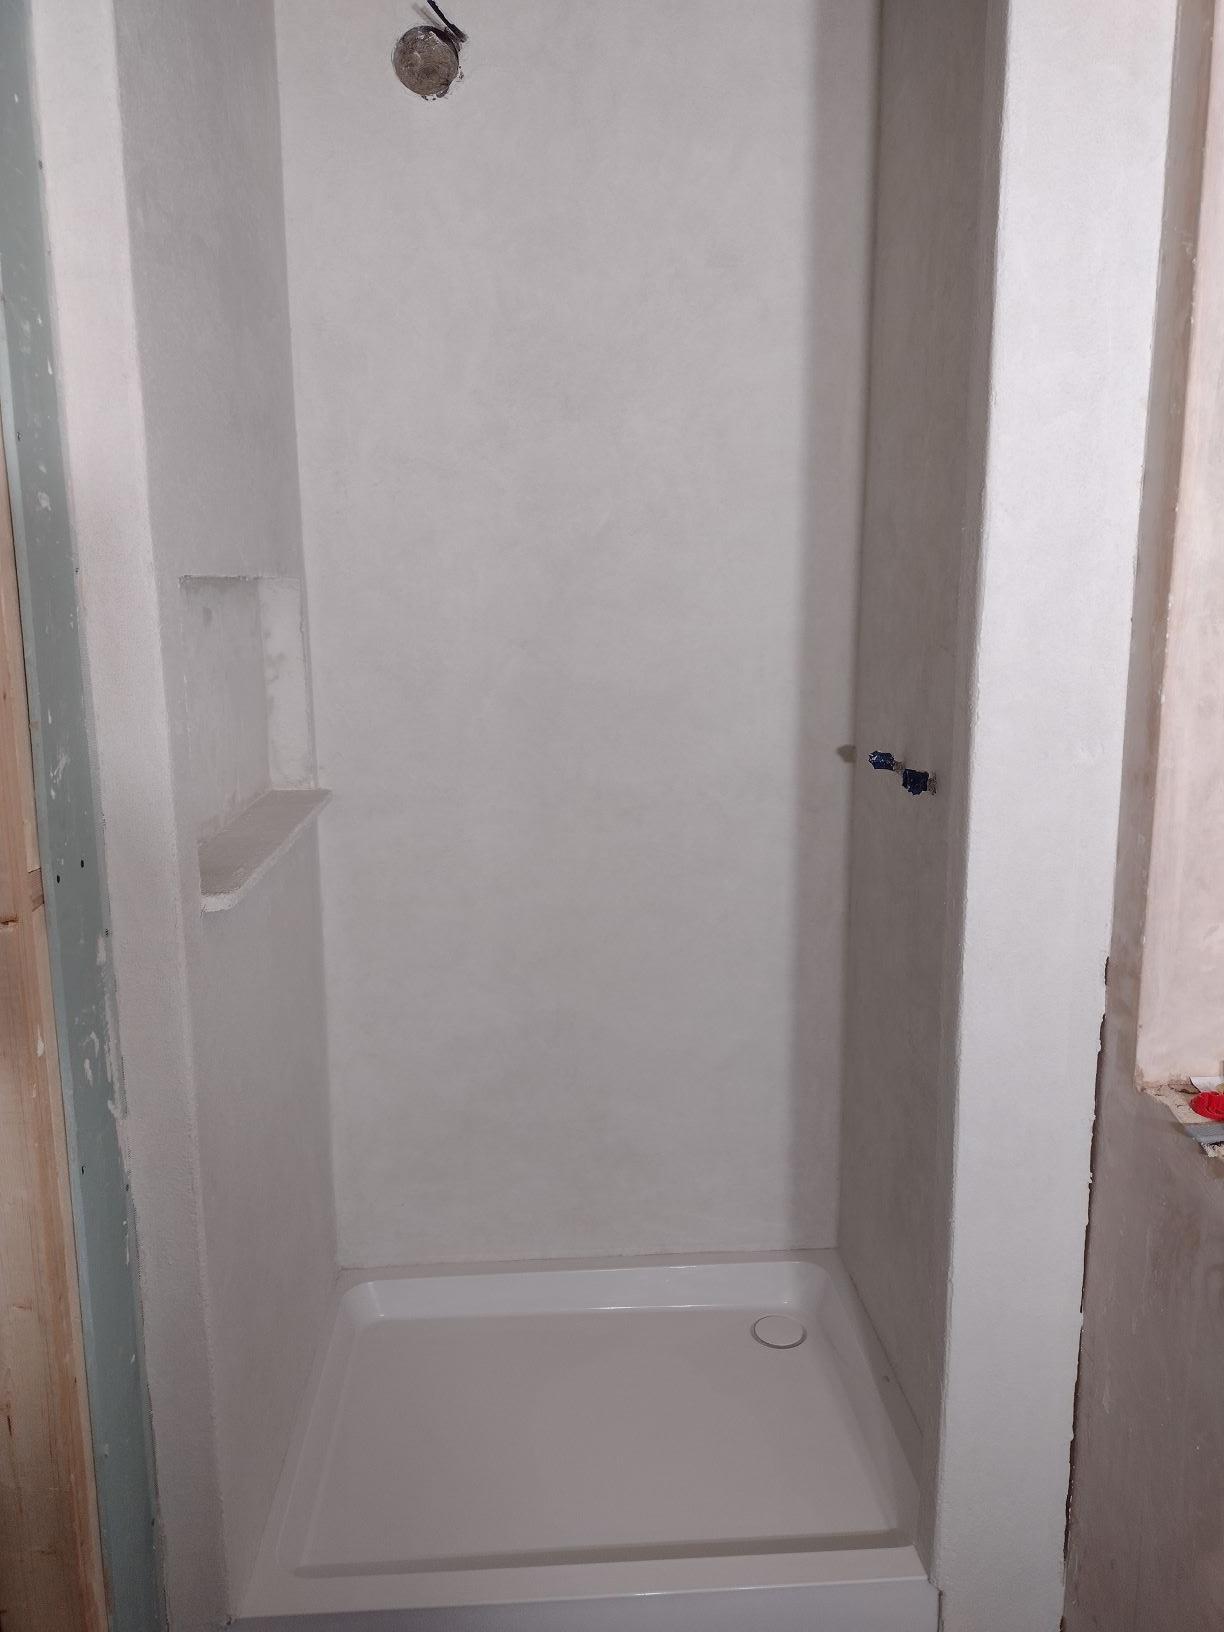
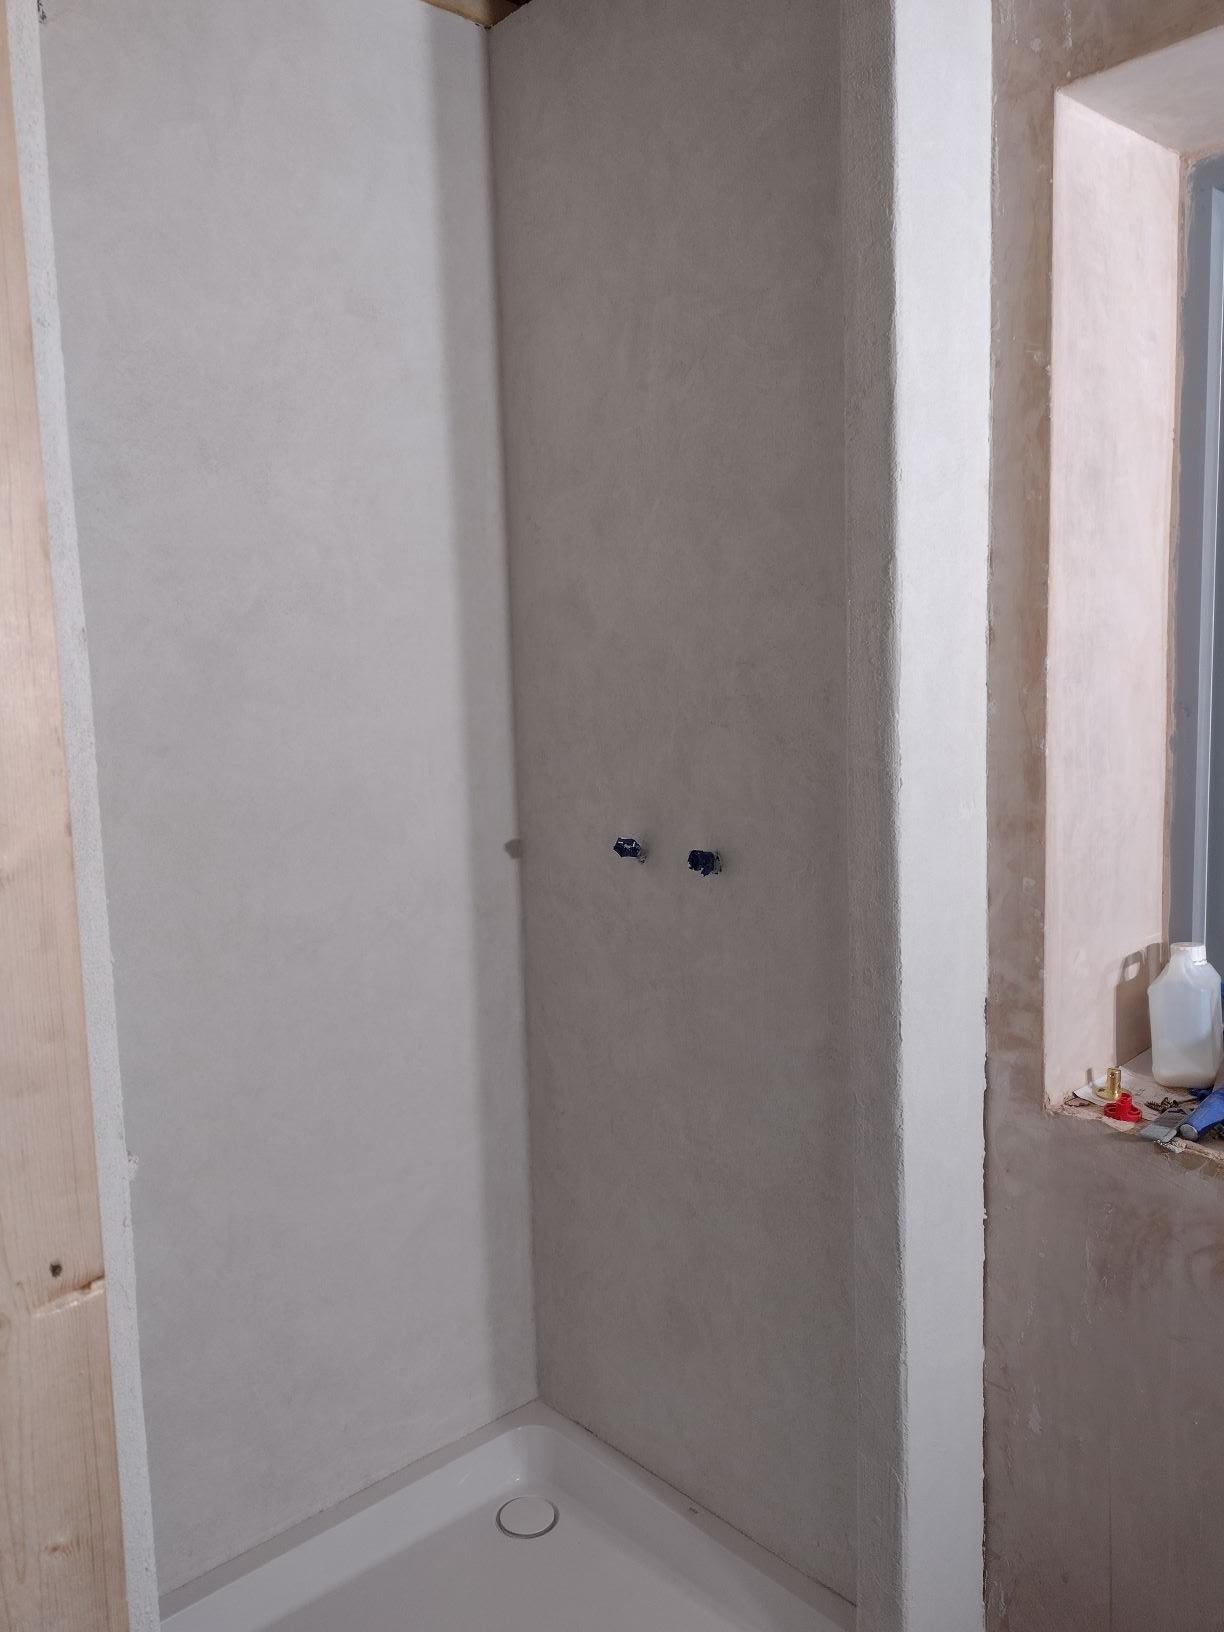
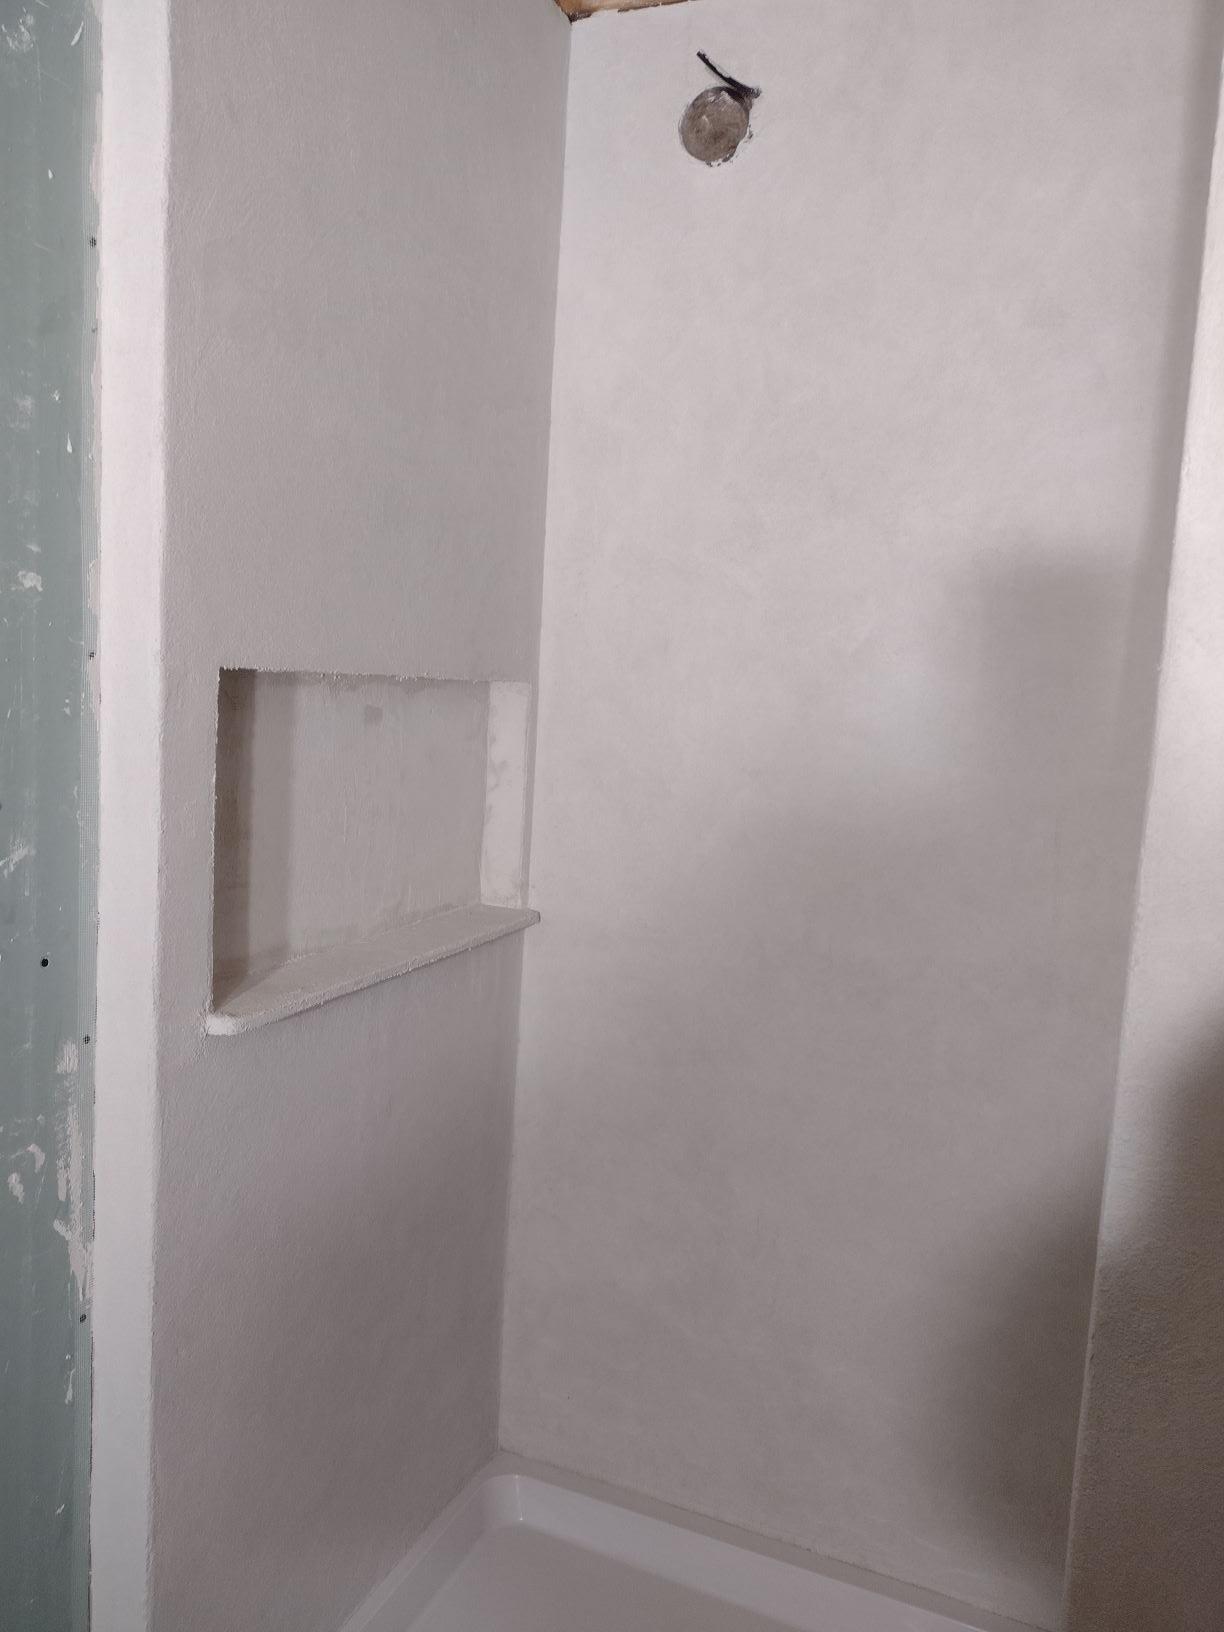
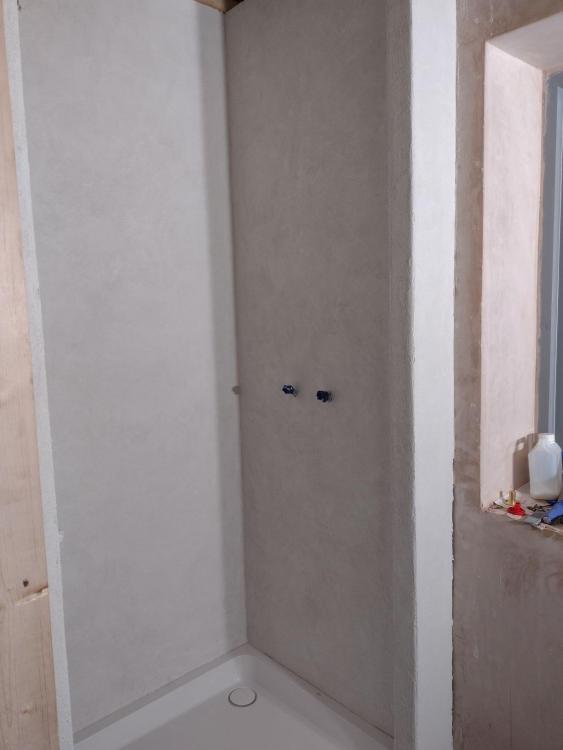
Okay, so next stage done now with 2 coats of the basecoat. I've some mistakes in that I used the basecoat to fill joints and countersunk screw holes and I used the microcement mesh across all the corners. This meant that I used a bit too much basecoat and ran a bit short on the second coat! I also used the mirocement mesh on both internal and external corners, which was not great. Next time I'll use normal scrim tape on any corners. Having never done this before I may have applied the first coat slightly too thick too. Anyway, not too much of a disaster. All that has happened is the small wall area within the built in shelf will need to be tiled at the back and sides. Applying the basecoat is really quite similar to applying thin coat render on external wall insulation, but it's a lot thinner, with each layer being only approx. 1mm. I'm going to allow this cement to set overnight and tomorrow, first sand down this layer and then apply two more layers of a slightly different cement layer with what looks like a finer aggregate, but is still trowelled on like the basecoat. Overall, I'm quite happy with how it's turning out.

 1 point