Leaderboard
Popular Content
Showing content with the highest reputation on 11/03/19 in all areas
-
The video for Week 6 doesn't have Thursday and Friday as the camera played up (I blame Halloween) but good progress. this week. You can see them laying in the service ducts and drainage pipes and then laying a thin 'blinding layer' of concrete = our first pour. They then went on to put shuttering up around the edge ready to fit the waterproof membrane and then the steel on top. By Saturday (see photo) the rain had filled it up quite a bit and the black shuttering you can see round the edge keeps it in a treat (or is that Trick or Treat?). The problem comes is that if this happens after the membrane goes down and before its weighted down with the steel then the membrane floats up. Lets hope its dry (ish) next week. And see below we can now officially pump it out on Monday. This week (I am sure it is related to Halloween) our worst nightmare came back to haunt us - Planning !!!! Having spent 5 years fighting Planning we thought we were home and (relatively) dry, but no; Planning raised its ugly head yet again. Six weeks ago we put in and paid for Planning Conditions to be removed, and on the day the decision was due we contacted the latest Planning Officer (we are on our 7th so far) who had 'forgotten' about it, was most apologetic and asked for a 3 week extension. We needed three conditions removed: Materials, Landscaping and Drainage, so it was passed it to the Wilts Drainage Engineer who promptly came back and queried the design they had agreed 18 months ago! He wanted cctv surveys, hydraulic modelling and a repair schedule for the Highways drain so he could agree to let us discharge some of the surface water into it (i.e. a really drawn out and very costly agreement). However they had agreed to this as part of the Planning Application and were really difficult about it then! So we duly pointed all this out and offered to work with them and suggested that rather than granting an extension we would hold off on our third Appeal unless that became necessary. We were delighted when they decided to remove their objection! Now all we need is to get the materials agreed, and as she requested an elevation of a post and rail fence (WHY???) , the Architect has drawn a beautifully detailed picture. Hopefully she will agree the landscaping and materials we should be condition free! We had a visit from the Structural Warranty surveyor who, unlike the BCO, came across as really negative and slagged off our basement and contractors when in fact they have already declined to insure the basement anyway. We debated if were going to pay for Structural Warranty as there is much discussion that its often not worth the paper its written on - but in the interests of future resale and the Council of Mortgage Lenders we bit the bullet. However if the first visit is anything to go by its less than inspiring. So first concrete is in and we are probably a couple of weeks away from the main slab - which is the bit that the BCO and LABC want to see almost as much as we do. See https://www.dropbox.com/sh/th9f6e3cel5dm1q/AAAfsWdAH184J75bCNUUtzVra?dl=0 for the weekly videos3 points
-
3 points
-
I'm posting this as a single blog entry for a number of reasons. One as it's the biggest bit of work we've done without professional help. Two as sheet roofing seems to be a topic of interest on BH and three because this stuff was hard going, with minimal information available on fitting guidance, so hopefully this might help others. We are using eternit profile 6 sheet roofing. It is fibre cement board and we initially chose it due to some perceived benefits over wriggly tin (principally acoustics, condensation management and durability). Cost wise it seems to come out roughly similar (from what I could tell). One of the biggest differences is in weight. Each cement board sheet is in the order of 55kg. All 54 were manhandled on to the scaffolding, and the roof. Without doubt this is the biggest downside and I'd strongly recommend anyone considering using this stuff to be sure they have a way of moving it safely. Another challenging aspect is the sheet thickness. At around 7mm thick, this means potentially 28mm thickness where 4 sheets overlap. To avoid this, the sheets are mitred, which is a pain to do accurately on a curved sheet. The profiled wavelength and amplitude is greater than on most metal sheeting which when combined with the sheet thickness makes neat fitting around velux quite hard, irrespective of the pre-planning we did. A profile 3 sheet is available which is more similar to traditional metal sheeting. This probably sounds highly negative, but we're pretty pleased with how it looks. We've had a few downpours recently and it's looking quite solid. Still a couple of small bits to complete, but nearly done. As to whether I'd use it again, jury's still out... While it's still fresh in my mind, the other things I'll note are: -there is a right and wrong way to overlap sheets which is not obvious in the eternit guidance. It's not crucial for weatherproofness, but it can make the roof appear bumpy if not done correctly. -eternit helpline was not hugely helpful, but the local reps were definitely worth speaking to and very useful. Anyway, the photos: Above shows the sheet overlaps, with the mitre clearly visible. When the top right sheet is added, this disappears. Above shows the sheet overlap in section, but it also helps illustrates the sheet thickness. Below are a couple of more general shots of the finished product.3 points
-
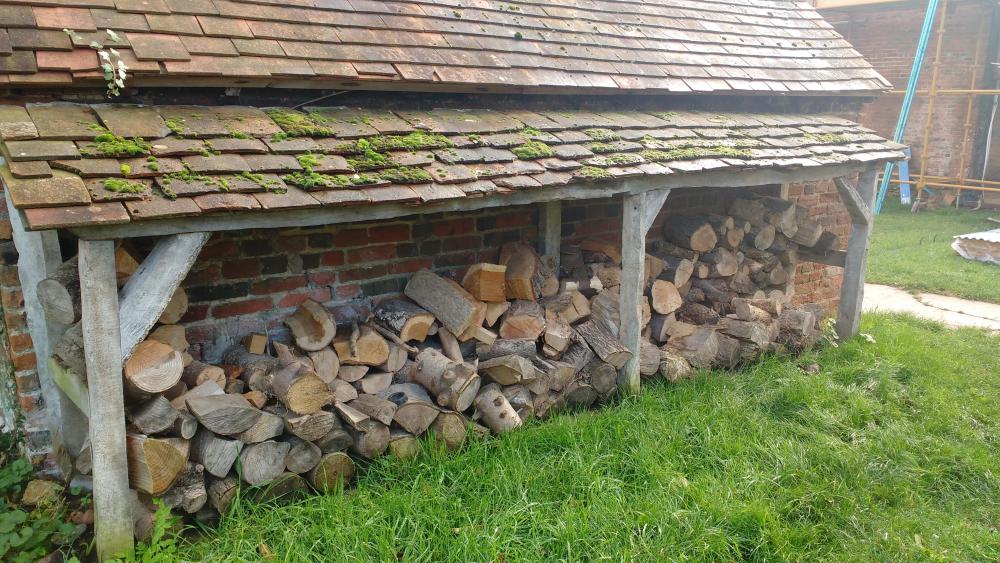
As we are building on a croft with an area of woodlands, the stove was a consideration at the initial design stage and we wanted it to be at the very heart of the house. As well as being the focal point of the living room, it was also considered from a practical point of view as to how the heat would be distributed throughout the house, as often I have heard that a stove can overheat well insulated rooms, resulting in a waste of money and just really something to look at. The work leading up to the stove installation began right back at the foundation stage, with excavation, concrete foundation, blockwork, back filled and compacted, insulated and then a concrete slab added on top. Dense concrete blockwork was put up during the summer with the aim of holding some of the heat when the stove is lit. The stove itself is a multi fuel Charnwood C4, built in England out of iron. We choose one with a log stand underneath to provide a bit more height as this is one of their smaller models. We decided that a lime render would suit the fireplace and this will lighten as it dries out. The mantle piece has some history attached to it. It was originally part of a massive beam in the local school, which was knocked down in the early 90’s. My wife’s uncle salvaged the beam and it was stored on our local township road next to our sheep pens. It was used as a spot to sit down when being out on the croft. A couple of years ago we cut the beam into manageable chunks and took it inside our wood shelter to dry out before it was cut and planed this week. The wood is at least 150 years old, was outside for around 30 years, but now it’s been tided up, it feels stronger than the timber we used to construct the house with. I love old timber! The hearth is also a highland product, not as local as the mantel piece but 40mm Caithness slab, very heavy (but I was at work when it went in). My wife carried out the measurements and this was spot on when fitted. Outside we have used anchor ties to hold the flue in place, some houses seem to fit flues without these but with our Hebridean weather this is a must. I went with the black soil pipe vent earlier on this year so it would match the flue when this went in. Sometimes flues can be ridiculously long and a bit of an eye sore as they need to be above the ridge, but having the stove close to the centre has allow this to be quite modest. Also, respect to our stove fitter, this seems to be a trade that covers not only the stove installation but masonry, carpentry and roof work. The stove has now been commissioned and certification provided. There is a bit of work to tidy up with plasterboard above the mantle piece and we have decided now that the flue is up, that boxing in with plasterboard is probably best to protect the kids and also to protect the flue from them! Next up, the kitchen and flooring is due to arrive next week. Thanks for reading.2 points
-
As long as your services are in ducts, IE you can replace the cables and water / gas pipes without digging the whole lot up I cannot see a problem. You dont want to have to dig up your drains to get at the water pipe below or even dig up the water pipe to get to the drains, although I assume the drains will be above the ducts, do you!2 points
-
I wanted to use the insulated beam and block but the cost simply didn't stack up. In the end I laid normal 7n blocks and got 150mm of Kingspan K103 from seconds and co for £24 a sheet. The stuff turned up brand new, still shrink wrapped with a few damaged corners on several sheets - bargain really.2 points
-
I design and build log cabins. Yes, they can be made to comply with building regulations. But I wouldn't recommend them for a home, 99% of the time they are unmortgageable and depreciate rather than an appreciating asset like bricks and mortar. The one you have linked to is pretty much a wendy house in my eyes2 points
-
2 points
-
@Patrick you need some clarification on this, piercing the DPM is a big problem. In @nod pictures he hasn’t pierced the DPM, this is covered by the insulation, the black plastic you can see with the clips pierced through is a second layer called a slip layer, this is there to stop the screed getting between the insulation and lifting it up. You need to make it clear you you are not using block n beam but beam with insulation panels. What detail has the insulation block manufacturer recomended. And why use the insert insulation if it’s £3000 dearer than normal blocks.2 points
-
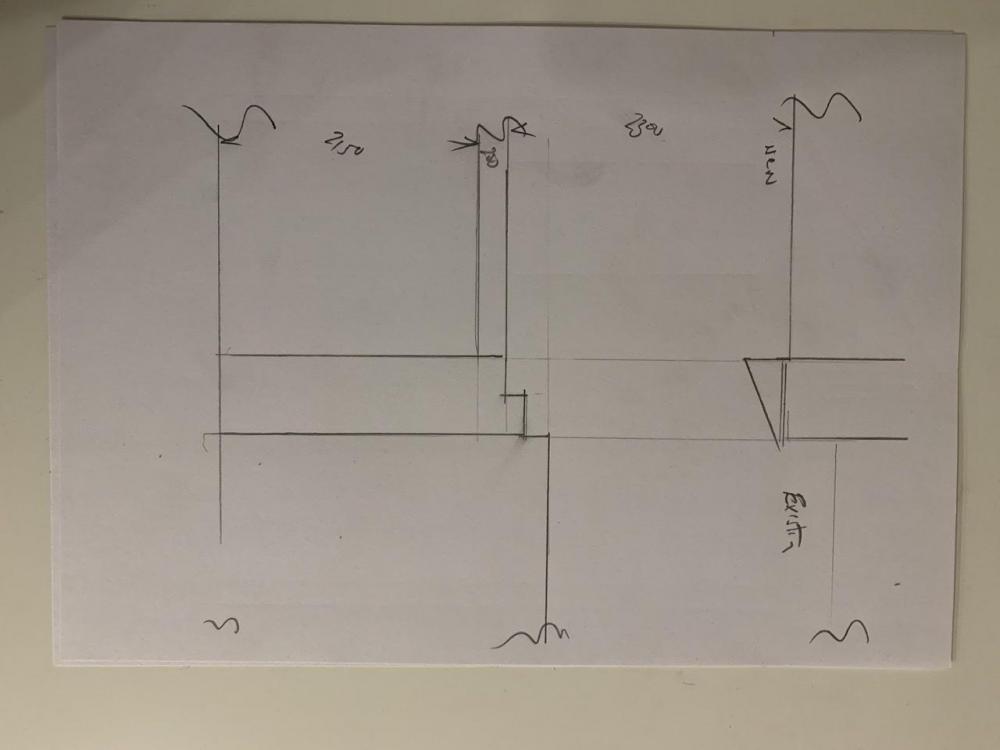
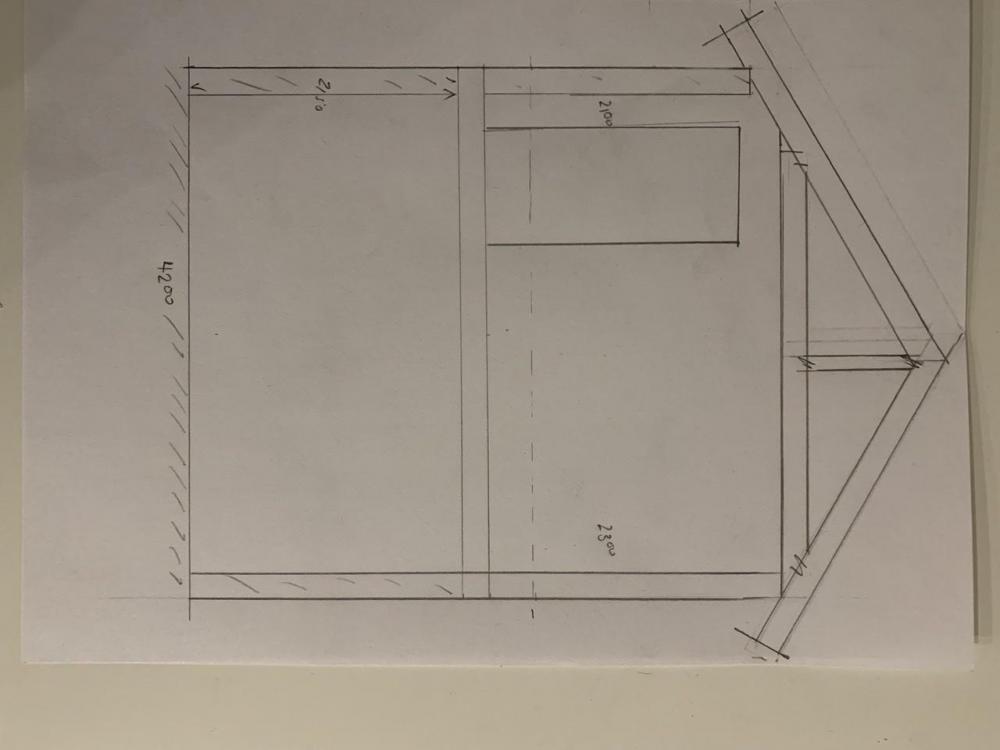
The fact it's the wrong way round is competely irrelevant here, for reasons that are obvious. I've already stated, as has BigJim that there may be a small section of sloped ceiling. You can even see that in my drawing, but rather than have a daft tiny sloped bit I've elected to batten it out and ensure 90degrees. However if it's really important to have a sloped ceiling of 100mm, then yes, that's an option. I do kindly suggest that changing your attitude to problems, including your neighbours, may be helpful. The fact you refused point blank to start on the premise 'someone else is right' about this problem speaks volumes. I didn't at that point ask you to accept I was right, I asked you to look at the problem from the point of view that I was right. This is a community, with real people, people who care and try to help all comers. But if you don't play ball, especially given your serious lack of technical understanding, then you'll eventually find no-one responds to your posts.2 points
-
The design of our new kitchen for our open-plan extension is slowly maturing and, having decided what induction hob and double built-under oven we want, I would be grateful for opinions on what power supply(/ies) to run to them. The specs are: Hob: AEG IKB64401FB, Total Loading 7350W (/230V = 32A) Oven: AEG DUB331110M, Total Loading 5300W (/230V = 23A) The route from the CU to the hob+oven is pretty straightforward: Up 1m inside an uninsulated stud wall, across 5m inside an uninsulated ceiling and down 1.5m behind uninsulated plasterboard. Taking the IET OSG guidance on diversity for cooking appliances, the total supply requirements would be: First 10A + 30% of remainder = 10 + ( ((32+23)-10) x 0.3) = 10 + 13.5 = 23.5A If my understanding and calculations are correct a single 6mm2 going to a single 45A DP switch (a rare white one!) and dual appliance outlet plate should suffice. This would be adequately protected by a 32A MCB. However, for future proofing (and better/safer? operation) should I put two 6mm2 cables in instead, each with there own 32A MCB? Or perhaps a single 10mm2 with a 40A MCB? Running cable is easy at the moment as the ceiling is down and I have open access to the rear of the CU (which, whilst a bit tight for wiring, does have some spare ways). Note that this open-plan extension is being done under building control and so, with the hob+oven being a new circuit and therefore notifiable, I plan to get an electrician in to do the work (and, more importantly, give me the necessary certificate for sign-off) however I wanted to give some thought myself to what we should do in advance of asking them (whoever that might be).1 point
-
How does that feel, knowing (or at least heavily suspecting) where the money paid to you by one of your favourite clients is coming from?1 point
-
Have a look to see if there is a video on YouTube explaining the advantages and disadvantages of resin vs filament printers. Mine is a cheap filament printer - the parts it produces are pretty strong but it can be very slow to print even medium size objects. I spend quite a bit of time optimising the design to reduce print time. It's also near impossible to print objects like the lattice cube that @Jeremy Harris has done above. I get issues with distortion that causes the print head to knock into previously printed layers. I could probably solve it by slowing down print speeds but I don't have the patience.1 point
-
Same happened to me, I have loads also but wasn’t savvy enough to consolidate them and quite a few are in tricky spots, became very obvious when laying the paving at the end of the project. Poor landscaper had to do his best to fit paths etc around them.1 point
-
What’s the rush ..? Do you mean the oversite or are you going to put PIR then another layer of concrete ..?1 point
-
1 point
-
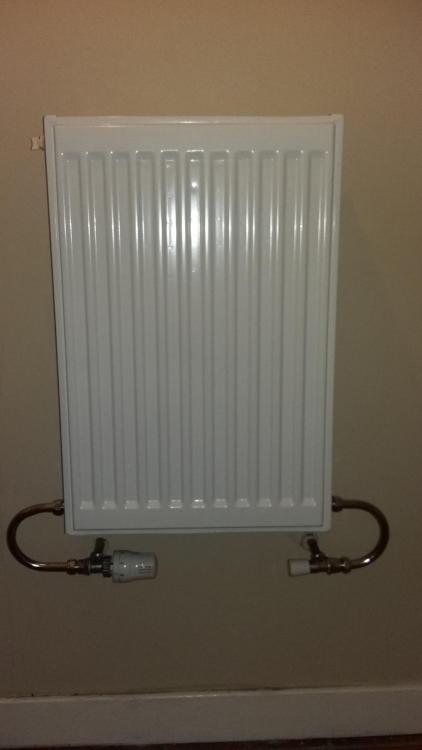
Going back to bathroom heating, our (near) passive build has electric heated towel radiators In both bathroom and en suite but I put electric UFH in our en suite (both bathrooms have luxury vinyl floors which are not as cold as ceramic floor tiles) they are all on timers and are nice and warm to the feel/touch. Bedrooms have no heating (UFH Downstairs only) but super cold winter days are catered fir by small electric radiators (which have not been used yet).1 point
-
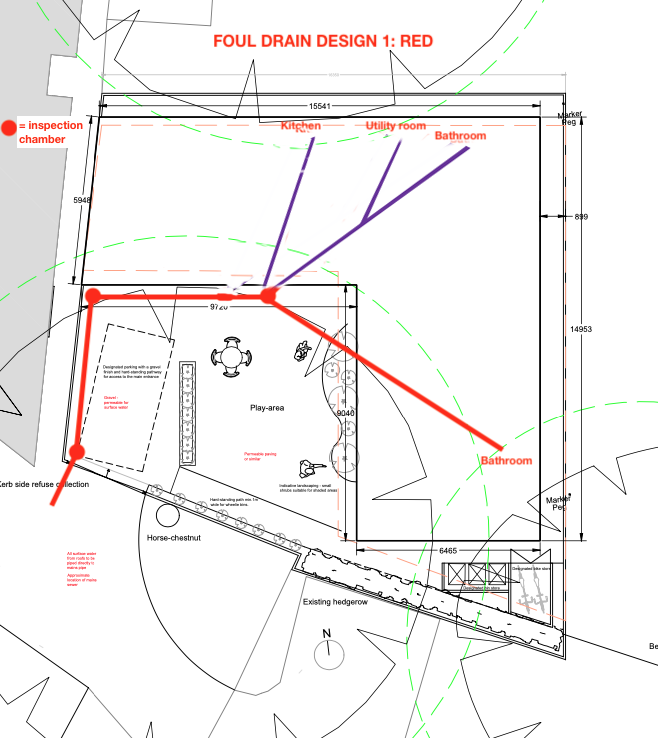
Agree with @peterw - also consider that ICs are a reasonable cost, as are extension collars and nice Clarke drain covers (the type you can inlay with whatever you're using in your patio). Plus the labour to place them etc.1 point
-
@Oz07 This thread had some interesting points on the risks of cheap MVHR unit, especially around the noise output1 point
-
FWIW, we only have UFH on the ground floor, and no heating at all in the bedrooms, but we find that the bedroom temperatures are, if anything, a bit too warm at times, just from heat that rises from the warmer ground floor. With regard to bathrooms, then one thing I wish I had done was fit UFH in ours. The bathroom temperature is fine, no need for any heating really, but having the floor slightly warmed would be nice. I'd not bother to fit wet UFH in the bathrooms, as I think that just fitting low power electric heating mats under the flooring would be fine. They would be cheaper and easier to install, and the running cost would be low, as the need for a bit of heat in the floor is only really for a very short time each day.1 point
-
Homebuilding and Renovating marazine (6 month DD subscription) + Housebuilder's Bible 13th ed. by Mark Brinkley - £14.99 Other options available - I chose a digital subscription which is £17.49 https://www.myfavouritemagazines.co.uk/hbr/xmas192/1 point
-
My Anycubic Photon seems very well made. Produces very high quality prints, but has a limited build volume and, being a resin printer, it's a bit smelly and messy to use. It's hard to tell the difference between the prints it produces and an injection moulded part though, as there are virtually no 3D printing artefacts.1 point
-
I use this one on external intakes and on kitchen extract https://uk.rs-online.com/web/p/filter-media/1221772/ this size will last along time and free delivery.1 point
-
That Balco doesn’t get great reviews. mates company do rapid prototyping and use the AnyCubic machines - they have the big ones but also have 3 or 4 of these attached to work stations as they rate them ANYCUBIC I3 MEGA 3D Printer1 point
-
1 point
-
1 point
-
Here they are, but the largest is only 50mm, so not much use for lights: https://www.banggood.com/Drillpro-12pcs-15mm-50mm-Hole-Saw-Cutter-Kit-Drill-Bit-Set-p-1038253.html?rmmds=buy&cur_warehouse=UK1 point
-
1 point
-
1 point
-
1 point
-
For us the lower membrane below the insulation was our radon barrier (Cornwall) so much thicker. The slip membrane on top of insulation was a very thin DPM, pierced a lot of times for the UFH but no issues whatsoever. This was just taped up the walls whereas the lower radon membrane was fully lapped and taped to the DPC as @nod mentioned. Worth also thinking about how your might link your wall airtightness layer (not sure of construction) to the floor? Our wall membrane is lapped and taped to the lower radon membrane to ensuite continuity in the airtight layer.1 point
-
1 point
-
I would have done the sum as 10 + 22*0.3 + 10 + 13 * 0.3 = 30.5 i.e done the 10 + 30% of the remainder for the oven and the hob seperately then add them together. Result to practical purposes is the same. I would still be inclined to fit 10mm because you never know what you might want in the future.1 point
-
@zoothorn you are now taking the piss and I’ve had enough. This is your first post on the thread Note your words ... Groundworks have been done (+350mm too deep) So your last statement about it being top down lower by 20cm is wrong. You know you started too low, but actually it’s done you a favour. Thats bollocks too - you’ve queried why it’s the shape it is from the point you posted the picture ..! In the words of the great Duncan Bannatyne - I’m out ..! Enjoy the rest of your build.1 point
-
Builders have done a great job working with Zoot the hoots fag packet drawing. They have given him the ceiling height he wanted in the upstairs room, and a reasonable working height in the workshop underneath. to give him these heights they had to dig deeper into the ground. Basically they have taken his crap drawing, and made it work. They have done him a favour, as they could have chucked it back at him, and told him to get some proper drawings done. I think the builder deserves a cup of tea, and a doughnut. A jammy one, not one of those cheap ones with a hole in the middle.1 point
-
It’s wrong, mine is right. Mine shows how the trusses are designed to work. I’ve drawn what you’re getting. You’ve drawn what you thought you were getting now please bin the picture.1 point
-
@zoothorn This is what you are getting. This is what @jamiehamy and @Triassic and @Big Jimbo and @dpmiller have been trying to explain This is how those trusses work... And this is the section through the wall the builder is planning from what you’ve said. Those are drawn from your dimensions that you have provided. If they are wrong then I don’t give two hoots, the principle is the same. I need alcohol...1 point
-
The drawing is competely wrong and misleading. You should bin it and let the builder finish and never look at that drawing again. That's not being snipey - I'm completely serious. I know you do t accept this but the root cause of many of your issues is that drawing. It's not fit for purpose in any shape or form other than a general overview of the aspiration.1 point
-
We have a UNiQ eDual12 pcm58 which we use with a myenergi Eddi. We had a lot of early problems, partly poor communication with Sunamp (now a lot better) and partly with the controller, now replaced. Once fixed we have been 100% solar powered with only one recent tepid shower because we were seeing how long it would last without charging (4 days) So now all is happy with that, and a lot of thanks goes to JSHarris! We also have 2 x Dual4 pcm34 batteries, heated by a low temp Daikin ASHP, that went through the same problems as the pcm58 battery, but are now working with their new controllers, albeit never used in anger. In retrospect these were a mistake for various reasons (some ours), especially as each one was comfortably more expensive than the big battery. However, now we’ve reached the week when there is typically going to be insufficient solar to power the big battery and we’re starting to fire up the ASHP again for ufh, we’ll be experimenting with using the smaller batteries to preheat the water heading to the big battery. Will report back..... (Situation is a new energy positive certified Passivhaus)1 point
-
Where do you derive that statement from? Taking into account the COP of a heat pump, the actual running cost per KWh of delivered heat is comparable to mains gas price, making it a very viable option when you don't have access to gas, and saving an additional install cost and standing charge if you do. Solar thermal does not have zero running cost and has a maintenance cost. Yes it can work very well, but not as your only hot water heating (it would be useless today) Electric resistance IR heating is 100% efficient like any other form of electric heating compared to a heat pump that will be between 300 and 400% eficcient by the same measure. Be careful not to be taken in by some outrageous claims by some systems.1 point
-
Since you are outside a conservation area and no TPOs you can (and should) remove any unwanted tress without any consents. Do this BEFORE you apply for consent for the housing. Don't concern yourself with whether the planners will "like" this or not. You have done nothing wrong. If you apply for consent BEFORE removing the unwanted trees they may include a planning condition or TPOs, which could interfere with your scheme.1 point
-
I have recently (had) installed on our downstairs doors a set of doorstops that would prevent doors needing to be reopened from behind the swing, and hold them open when they do not need to be closed. Even oak suffers eventually from too many "Open that Door" impacts. This was needed to help make the house more accessible or an older person, who sometimes used a wheelchair. So the requirement was: Something to hold an open door, open. That would catch the door relatively gently. Such that the door could be closed again with a relatively gentle tug by an older person. This is the product I used, which is a "Rauken DS-002 Stainless Steel Soft-Catch Magnetic Door Stop in Brushed Satin Nickel, Wall Mount-2 Pack", at about £16:00 for a 2-pack. Reasonably easy to fit, well made and recommended. The magnet is strong (though a little variable across half a dozen examples). I fitted them half-way along the back of the door, but towards the edge of the front door for a stronger attachment to be less vulnerable to any draught-driven opening if both front and back doors were open at once. The only issue with fitting is registration between the two halves, if the door is not to be quite parallel to the wall. One way would be to attach one half, chalk the end, then test open the door to see where it touches the chalk. Another is to put it on with a single screw initially (out of three) and then adjust later. A third option is to have long, thin, arms and a stubby screwdriver and hope the dog does not tread on you. The main limitation is that this product requires approx 6 inches (150mm) between the back of your door and your wall. If you meet those requirements, then I can recommend. It also comes with Amazon Prime, so no delivery charges at this time. It is perhaps worth trying a smaller order first to see if they work for you, as it is on Prime. There are options which are a little cheaper, but I am currently short of pfaff-time so I went for the one with the larger number of good reviews.1 point
-
Here's a few points that may help. Our MVHR unit is very quiet, but it could be because it is very heavy and floor standing. External vents can be almost flush to the wall so not very visible. Wherever the unit is installed there should be ample space around it so changing filters and general maintenance is easy. This is a list of tips that I researched when installing our system. 1. The inlet and outlet grilles should be 3m apart to prevent cross contamination of air. 2. The inlet and outlet grilles should be high enough (2m) to prevent interference by animals or children but low enough for easy cleaning. 3. The inlet and outlet grilles should be on the same wall so they are affected equally by the wind. 4. The free flow area of the grill including insect screen should be at least as great as the cross sectional area of the duct. 5. The duct should be smooth wall to reduce air flow restriction. 6. Any ducting bends should be large radius of curvature or two 45 degree bends to reduce air flow restriction. 7. The ducting to the inlet and outlet grilles should slope downwards slightly to ensure any moisture drains to the outside.1 point
-
It's the one thing I wish I'd done, fit electric UFH in the bathrooms. It's not a major issue, but it is something I miss, as I fitted electric UFH under the tiles in the bathroom at our old house. It wasn't until we moved in that I realised the difference having the floor just a couple of degrees warmer made to bare foot comfort. TBH, it's not a major issue, it just means keeping slippers on until stepping into the shower, and having a reasonable bath mat to step out on to, but it niggles me that I didn't think to do it.0 points
-
Crumbs ! Makes discussions with the EU look easy . What an earth is going to happen when we get to plumbing , electrics etc. Etc.0 points
-
I have to say @zoothorn that if your builder does not give you a smack in the mouth he is a saint.0 points
-
0 points
-
0 points


