Leaderboard


Popular Content
Showing content with the highest reputation on 02/11/19 in all areas
-
Fair enough, that sounds like a good enough reason to drop EWI. Thermal Mass, is probably better called Heat Storage Capacity, its is a materials capacity in which to store heat, and release it slowly to the environment, which in theory dampens the temperature from moving so much either up or down. A room with IWI will warm up very quickly, a really fast response, because the insulation prevents the heat from having to warm the heavy masonry behind it, but in contrast the heat will dissipate quicker than it would had the walls stored some of that heat. This room would have a low heat storage capacity. One with EWI allows the walls of the building to store the heat, with the EWI acting like a tea cosy, keeping the heat in the walls where you want it, so the room would take a long time to warm up initially, as you are warming not just the air, but also the masonry, however once warmed, it should keep a reasonably constant temperature with little heat input. This room would have a high heat storage capacity. EWI should also help on a sunny hot day in summer, as the walls will be relatively cool, so any excess heat gets absorbed by the walls, keeping the temperature down, whereas in the room with IWI you would potentially get overheating unless you put measures in place to reduce this potential. A free service such as this may help you simulate your plans, and understand thermal mass/heat storage capacity: https://www.ubakus.de/u-wert-rechner/? This also models the Phase Shift, and temperature amplitude damping which i spoke about above, which are quite important. Site is in german, so use chrome to convert it. Hope it helps.3 points
-
No. Please find out what a watt is; you clearly don't understand and you're just reinforcing an all-to-common confusion.2 points
-
Keep up, it's DONE!2 points
-
enough for a hat?2 points
-
Not sure if that reply was to me or not, but here goes anyway. Not sure whether you mean power or energy, but I'll answer for both. In very cold weather (-10°C outside), with no incidental heat gain, the house needs a heat input power of about 1.6 kW to maintain 21°C room temperature. That equates to about 38.4 kWh of heat energy over 24 hours. However, our heating does not use PV generation, as in winter it's both low and unreliable (same goes for solar thermal), so we use off-peak E7 to run an ASHP at a COP of around 3.5, so the energy usage for heating in very cold weather is about 11 kWh per day. We've never had temperatures that low here though, the lowest we've seen is about -5°C, and then only for around half a day at most, so in reality that 11 kWh/day figure is more than double our normal cold weather usage. We don't ever need to heat the floor as high as 24°C, as that would give us a heat output of about 2.4 kW, far more than we ever need in the coldest weather. The highest temperature we ever need to heat the floor to is about 23°C.2 points
-
Yeah @Nickfromwales. I do wish you would stop making assumptions like this2 points
-
Yes, but you hand-crafted each panel from milk-bottle tops2 points
-
Or my case hypercheap DIY install 4KW for £1500, I hope it to have paid for itself in 5 years.2 points
-
Youtube video of using the fugi tool2 points
-
Because PV is cheaper through life per kWp than solar thermal. The price of PV has reduced a great deal over the past few years, whereas the price of solar thermal has pretty much stayed the same. Add in that PV produces energy that can be used for many purposes, not just to heat hot water, and that even when the FiT ends there will still be an export payment, and it is really a bit of a no-brainer. I'll just add that I spent the best part of a day last week trying to fix someone's evacuated tube solar thermal system. It had been installed about 5 years ago and the installer had since gone bust, leaving the owner with no easy way to get the system fixed. It was not a lot of fun crawling around in a loft replacing the faulty controller and then faffing around refilling and venting the system. Made me thankful that I don't have to deal with all that complexity with our PV system.2 points
-
I run it at 40°C because the DHW pre-heat is useful (cheaper than using more grid energy to charge the Sunamp) and because there seems to be no noticeable performance difference between having the ASHP running at 30°C and 40°C. At 30°C the ASHP would tend to cycle on and off, as the heat output was below its lowest modulation capability, whereas at 40°C it stays on. There seems to be a very slight advantage in having it run for longer periods, as when it starts up it ramps to full output over a period of around 30s to 1m, then gradually modulates down to a speed where it can maintain the set flow temperature.2 points
-
I can’t believe a guy wouldn’t read the instructions! ?2 points
-
I would hate that. I hate and don't use the ordinary rainfall shower contraption we have.2 points
-
Cramer Fugi kit ordered (via a student Amazon Prime account ) Thanks @PeterStarck. Some idiot forgot to position the bath prior to filling it up with water do had to drain & refill! All grouted now. Wouldn't have believed the amount the deck "sank" with water in the bath. Must have been a good mm. Another top tip from @Nickfromwales! Pipes for the towel rad grouted in too.2 points
-
It's 3 weeks since my last blog entry and, as usual, things have been moving at a pace. The difference with the most recent round of work, though, it that the building is starting to look like a liveable house rather than a construction site. This is largely due to the glory coats of plaster and paint, but far more than that has been keeping everyone busy. The boarding started in earnest before Christmas and so the plasterers were in bright and early in the new year. We've got through an astonishing amount of board of various types - I thought I'd calculated reasonably well and had a mahooosive delivery of the stuff a while back, but it all seemed to disappear and the building was hungry for more. I bought all the board from Sydenhams as I found their price to be competitive. I've used standard 12.5mm plasterboard on all external walls, 15mm acoustic on all ceilings and internal walls, moisture board for bath/wet rooms, and pink fire board for the garage walls and ceiling. The garage is attached and so building regs require a fire door (FD30, sourced from Enfield Doors, though I've since found cheaper suppliers when looking at other stuff) and fire board throughout the garage, but only a single layer as there is no habitable space above it. I've had a board lifter on hire as it really helps the team position the boards up onto the ceilings without dropping anything on themselves or damaging either themselves or the boards. Here is the board going up on the lounge/dining area towards the kitchen area. The orange frame is the plaster board lifter. The black thing outside the window is my sewage treatment plant tank, which will be installed in a couple of weeks(ish). Looking in the opposite direction towards the lounge area: There have been plenty of plasterboard offcuts and so we have followed @JSHarris's tip of stuffing as much of this into the stud walls before boarding over. Double bubble - increasing the heat retaining ability of the house and no paying expensive disposal fees on waste plasterboard. As well as the boarding and plastering, first fix is underway, getting all the wiring, sockets and switch positions in and running vast amounts of cable through the building for all sorts of stuff. It's not just a case of chucking the cable in, he's done a great job of working out the flow of the building and the people in it, and how the building's circuitry should function best to suit them. It's a pity that it isn't more visual, but suffice it to say that at the last count, something like 2.9km of cable has gone into the building. It's in there somewhere! The room that forms the greater part of the ground floor is the kitchen/dining/lounge area and it's a very large space. From the outset, I've wanted to achieve some form of visual separation of the living area but without putting physical barriers in the way. It seems a waste to have gone to such great effort to create a lovely large space like that to then chop it up and close it in. I had inspiration for the solution from a couple of sources, the first of which is a tiny, crappy image on Pinterest when I was browsing cinema rooms. The second came about from chatting to another BH member, @Dreadnaught and a suggestion someone made to him to vary the heights of the ceiling throughout his proposed build. From this, I decided that I wanted a dropped section, like a frame, on the ceiling above the lounge area, with lighting recessed into the inner lip of the dropped section. Everyone pulled together really well to meet the challenge, and worked out what was needed from the carpentry, boarding, plastering and electrics contingents. The full ceiling was boarded out first, then the studwork frame put over it. The electrics were run through, then the frame was boarded and eventually plastered. Here's the completed framework and the first of the plasterboard going up. They're a cheerful bunch in their work! One thing I haven't skimped on is hire equipment to make the job of the plasterers and others easier. I figure it's a false economy to not get equipment like platforms and board lifters in as it will just cost me extra labour as the guys won't be able to work efficiently and possibly, not as well either. We had scaffold towers upstairs in the bedrooms for plastering and downstairs, we had a really big platform. I wouldn't do it any other way as the quality of the boarding and plastering is second to none. Once the studwork was boarded out, the inner ceiling section was plastered. The inner lip of the frame had an upstand added to it to make it appear more substantial and to hide the rows of LED lights behind them. We're going for a range of lighting intensity here, achieved by increasing amounts of lights, rather than dimmers. There will be 3 rows of LED lights hidden up there and we've used a car headlight analogy for want of better descriptions - the selection is dipped lights, main beam and rally lights. These are the only ceiling lights in this area as we plan to have floor lamps for specific task or reading lighting. Once the inner ceiling was plastered, the framework itself was done the following day. This photo is some way on from that, as you can see. By this stage, the whole of the downstairs main room has been done and recesses formed for the spotlights at the other end of the room. Not too long after this, the kitchen arrived from DIY Kitchens. Lovely quality units and everything is going together well. It did mean, though, that I had to get on with the painting up the kitchen end so that a start could be made on installation. A paragraph or two on painting is appropriate here. I put a brief post into the main decorating section here on BH regarding spray painting, but it deserves repetition. I've planned from the outset to do the painting myself. I'm competent and it's nice to get some hands on involvement in the build. But, and it really is a big one, there is a vast surface area to cover in this house, and the vaulted ceilings upstairs are really quite intimidating for a vertically challenged person such as myself. Mind you, I think a vault of 4.7m would make most people ponder their method of attack. I decided that by far the most effective approach for me was to spray the mist coats to seal the plaster and continue with white for the ceilings. I wasn't sure at that stage whether I would also apply the colour coats by spraying, so adopted a 'wait and see' approach. First off, masking takes ages, even with a relatively empty house, as that spray will get everywhere and anywhere. Once the masking is done and you've familiarised yourself with the sprayer itself, though, the speed of coverage is astonishing. I was able to comfortably do one large room per day - both mist coats and a couple of extra ones on the ceiling to get it opaque and full white. It was messy. Really messy! Especially as when I first got going I had the spray pressure a little too high, the mad angles of the vaulted ceilings meant that my nozzle was never going to be held at a constant 90 degrees to the surface, and it's just a messy process regardless. In addition, there is a vast amount of moisture in the air, particularly as we had plaster drying at the same time. I hired a commercial dehumidifier for a couple of weeks to help with this and it was very effective. I bought all my paint from Brewer's Decorator Centre, who are mainly based along the south coast of England. I opened a trade account with them and got 20% off the entirety of my first order, so I put everything I could think of onto that, including my antinox floor protection mats. Very useful they were, too. I used their contract matt white for the mist coat and ceilings. It's white, but not brilliant white and it's lovely. Very chalky, easy to sand and gives a nice highly matt finish. Also cheap as chips. Here's one of the bedrooms, masked up and sprayed. Here's another bedroom with that ceiling. My scaffold tower came into its own for reaching up to those heights. Then, finally, the kitchen area with its mist coat. The sprayer is the little beastie sitting on the plasterboard. I popped over on a weekend to also put the first colour coat on over at the kitchen area, whilst I could still get in easily before the kitchen started going in. I'm having splashbacks between the wall and base units, hence the odd looking finish level with the paint. These were all the kitchen units as they arrived, prior to painting. Everything was really well packaged and came with the doors on and drawers in. The delivery crew were pleasant and efficient, so all in all, a good experience. Moving away from painting and plastering, the ceiling plan for the lights was marked up on the floor, along with speakers and smoke detectors before the boards went on so that there was no guesswork involved in what was running where. Here's the marking plan: This is what the kitchen units look like at the moment. I made a cock up in ordering, purely out of ignorance, and I'm waiting for a few end deco panels to arrive. These didn't even occur to me as they will go between units and appliances to give a better appearance from face on. It made perfect sense when it was pointed out to me, so things have halted temporarily until those and my worktops arrive shortly. In the meantime, it's looking good: We also now have spotlights in place: Finally, for the curious, this is what karndean flooring looks like. It has been laid upstairs and the downstairs will be finished in a couple of weeks. Upstairs, it was all laid on ply that was feathered in at the edges and downstairs will have a latex feathering coat to level the floor and provide an even base. Next up is more of the same. The final session of boarding and plastering, lots more painting, the end of first fix and moving onto second fix. Outside, we need to get cracking on the rainwater goods, perimeter drain and exterior cladding. The cladding is due to arrive next week, so it will be interesting to see that and figure out the system. I hope to be able to report back on over height doors soon, as well, and my endeavours to find these at a reasonable price, but that's all for now. There's painting to be done.1 point
-
We bought all our pipe and most of fittings and inspection chambers from an online company called build plumb plastics, I’d need to look at receipt but I’m sure we got 150 m of Brett Martin pipe for around £300, hubby did all the drains along with the digger driver who was really good at getting off his machine to help and it was all done in 6 days that included putting in the sewage treatment plant,1 point
-
Yeah but it's probably as good or better than watching porn where @Onoff is concerned so it was bound to take all night1 point
-
With thermal stores there are many variations some with heat exchangers and some without. My own UFH runs direct from the ASHP. So the primary circuit with inhibitor is from the ASHP to the UFH and to the UVC heat input coil. Some use a buffer tank with UFH in such a situation. I am not sure if that can be combined with an UVC or not.1 point
-
I use a pellet stove.1 point
-
Read my response carefully then comment please. To get anything like a decent capacity - such as 200 litres of usable hot water - you need to use either a UVC of 300 litres at 55c, or a thermal store of around 425 litres due to how they heat the water. That’s a big ass TS to get not a lot of DHW capacity. I expect the Ecodan you’re using is one of the PUTZ units that has its own controller. If you read the technical manual ( I have) and also look at the control algorithms (I have) and then look at the on off cycle of the compressor vs auxiliary heater (I’ve done that too..) you’ll find that it uses a secondary aux heater to get to 55c so your CoP is around 2.1 at best when it’s 17c outside. (Somewhere around page 32 of the manual). At 7c outdoors it’s 1.6, -5c it’s around 1.2. For reference, that’s a pretty crap score and makes your ASHP solution for hot water roughly 30% more expensive than mains gas ... but what do I know ..?? ASHP is not designed to heat to those temperatures unless it has either an auxiliary heater - ie an immersion element - or uses a type of compressor that can create high output temperatures which is at the direct cost of flow volumes. Lower flow volume = longer recovery time. So yes, Mitsubishi do know what they are doing, but I suggest you read the manuals and understand how they actually work before commenting please.1 point
-
Nothing to do with legionella since the water in the thermal store remains inside the store, it only provided heat via a heat exchanger of some sort. The higher temps are needed because as soon as heat is removed from the store to heat the DHW, it starts to cool down, so you want higher temps to maintain a consistent DHW temp for a long period before the store gets too cool to work.1 point
-
Nope - standard cross section which is 300mm trench, pipe 100mm up surrounded by 10mm washed gravel and geotex wrapped pipe, or a geotex lined 300mm trench with the pipe in the centre of 100mm gravel all round. Standard perforated pipes, 1:80 fall. You may want to link the ends of the pipes together too - make either a D or a flat 8 so if it gets blocked there is always a flow.1 point
-
NO. Ive had LPG and it is worse or sometimes better than oil,depending on world pricing and deal you can get --but both are so much worse than mains gas. so spending more on the insulation level should be first goal as that will drop your energy usage now and forever doing that is the first and best thing you can do for your house ,how you heat it is secondary . anyway --look at getting insulation better and look very hard at ASHP +RHI payments you can get -use that to heat UFH and a thermal store for dhw. as already stated getting multiple heat sources will only work well if you are into serious control systems1 point
-
Thanks. That seems like the key point. I guess to some extent it's a matter of the hysteresis on the buffer tank thermostat. If there's a wide hysteresis then the return temperature, at least for most of the “burn” will be lower allowing the HP to put more power into the water. But then, if you have, say, a 10 °C hysteresis when you want a minimum of 30 °C to mix accurately into the UFH you finish up at 40 °C anyway.1 point
-
Just to drive that home with a Baseball Bat. You have taken on the role of Project Manager. A Professional doing that on your build would be charging you 20-30k. At £250-300 per day that is 80-100 days or 600-900 hours. ie 5-6 months full time. Your equivalent in 3 hour evenings plus half of Sat & Sun, assuming you are 2/3 as efficient, is more like 500 evenings and afternoons. Just on the Project Management, and not including anything you do towards designing it, getting the specialist knowledge to PM a build, or actiually building it ! My point is that for such a process you should not be surprised if planning to minimise your budget alone costs you 60-100 evenings in time spent, and if you save yourself say 10-20% it will be worth it. That is normal, so don't worry that it is too much. It is just that many of us don't add all the 2 hours here, and 3 hours there, that we spend on PM, and realise that it adds up to a helluvalot. We just think we are going 25% or 30% slower than we expected, and start worrying. You do not need to worry about taking extra time; you only need to worry if you get 40% of the way through and realise you have spent 60% of the money, then go ........ "oooooooooooh, sheeeeeeeeeeet !". My other tip for this bit is to get a specific office area, and at least a half decent filing system, including an archive set up so you can find things again later. Ferdinand1 point
-
Assuming the following wall build-up from inside to outside: 15mm wet plaster 100mm medium density blockwork cavity with full-fill insulation 100mm facing brick You'll need a 200mm cavity fully filled with mineral wool or EPS beads in order to achieve a 'U' value of 0.17. That gives a total wall thickness of 415mm1 point
-
Assuming you are battening. (I would. So I could use an auto feed gun for plasterboard) I can't see it would matter which way round. Just put a couple in per board and let the battens hold the sheets up properly. Also battens would allow a service void for all your lighting cables. (unless of course they already have a route)1 point
-
Mine came with this:- FUGI SILICONE PROFILING TOOLKIT with 16 profile variations Provides clean and permanent seals. A releasing agent (soapy water) is not needed to apply the soft caulking mass (silicone). This process results in optimum adhesion and therefore prevents mould from forming underneath. Blemishes can easily be redone without removing the entire profile. INSTRUCTION: Remove old silicone carefully with a caulking knife with saw blade, for residue use a scraping blade. When removing old mildew stained grouts or caulks, wear a protective mask. On scratch-sensitive surfaces (acrylic or plastic) use a chemical silicone remover. First clean the surface then choose the right caulking profile and apply silicone on a distance of 60-120 cm. Now make sure that both FUGI edges touch both wall and floor, slightly press the FUGI and pull – always only use the smooth FUGI edge for spreading. Start again for a new line section behind the point at which you just stopped and repeat the process. To bridge across vertical grouts hold the FUGI at a slight angle and cross over the grout-line. By doing so you will keep a uniform grout-pattern profile. When working on corners, first start with the vertical wall grout lines and let them bond. Then proceed to the floor grout starting out of the corners in both directions. Clean the FUGI after usage with household paper towel. Yes I thought it should be with the chamfer towards you but it's better with the flat face towards you, counter intuitive I think.1 point
-
THe actual report .. not linked from the article .. is here. https://eciu.net/assets/Reports/ECIU_Zero_Carbon_Homes.pdf Personally I think it is too much of a "back of the envelope memo" created in a couple of hours to get media attention. Interested in others' comments, though. Ferdinand1 point
-
I recall that my Impey wetroom former came with a matched waste. Therefore when installed, the former sat on joists to make it flush with the 22mm deck around it, the tanking layer went over the top of everything and the waste neatly slotted into the former (making a necessary cut in the tanking membrane, folding the edge into the drain area) so any water that penetrates the tiles would hit the tanking layer and end up in the drain. Your challenge may be to make your cut tidy wrt with the drain you're using.1 point
-
The extension 3 count as new build, the other 3 are conversion, as they're part of the original house. I'm uncertain of the numbers I need to achieve for either, but I'm also not confident in the architect. The flats are small, heating costs won't be an issue. Solar panels would be south facing, sun hits it from about 10am, and has no obstructions after that. Yes, they're all having they're own water and electricity supply, even the additional flats in the existing building will. I want them all as stand alone flats, own front doors, parking, and no communal areas.1 point
-
Sorry @wozza can’t find the receipt (also can’t claim the VAT,)1 point
-
I think you'd have to try it and see, TBH. I have an energy/power meter on the ASHP supply, so I could measure the energy/power going in and estimate what was coming out, and after some experiments with different settings I concluded that, for our set up, there was no benefit in reducing the ASHP flow temperature down to 30°C. I should qualify that by saying that I only tested the different settings over a modest range of weather conditions, and didn't try turning the flow temperature down in very cold weather, to see if there was any performance improvement. As we don't get many days a year here when it's sub-zero, I'm not really that bothered if it is a bit less efficient under those conditions, particularly as I can't see any obvious dip in performance from the energy use data; that seems to track the outside temperature reasonably well, albeit with a bit of lag.1 point
-
For completeness I thought I would tidy this thread up with my findings at 0730hrs this morning. We were once again awoken by the "noises". Ready for them this time. I climbed the ladder to the attic space, flooded it with light and looked - nothing other than the sound of a creaking frame! I know this because the noises continued whilst I was up there. I think the weather plays its part. Although frozen outside, the sun was already having an impact on one side of the house. Whatever, I am more than satisfied there were no visitors as such upstairs which has reassured Mrs W.1 point
-
When I first got mine I just used it without reading the instructions. It turned out the reason it wasn't working very well was that I was using it back to front .1 point
-
Went to Build It Live. Didn't see any integral blinds on the Internorm stand. Having a play with the big sliding doors and I'd say the Velfac ones were smoother and easier to slide than the Internorm. Upset the installers of my 2G windows though. Wasn't going to speak to them but they approached me: "Can I help you Sir?" "No thanks we've already got your windows fitted". "Happy with them?" "No!" It went downhill from there with me berating the surveyors for allowing too much clearance so the job runs smooth and the fitters for whacking 'em in with no foam or Compriband and covering everything up with trim leaving huge gaps. Give her her due she did say it was something their after sales would probably still address even outside the 10 yr guarantee.1 point
-
Welcome, Bob. Ferdinand1 point
-
Another couple who use the forum recently came to visit our house and to discuss issues and ideas. One comment they made was that the whole issue of choosing a TF and evaluating various quotes was very much an "apples and oranges" comparison. You need to discus very carefully with putative suppliers what is in scope of supply and what is not, and have a clear shared understanding of who is responsible for what. Our slab and TF ended up as about 25% of our total build cost. (By way of comparison, we also had to have a local stone skin on our house; this looks beautiful, but this also ended up costing more than the supply and build of the slab, TF, insulation and certified airtightness.) One of the reasons that I feel the the PHPP is total overkill is that the simple calculation method that Jeremy, I and many others used is that it gives an answer accurate to 10% or so and is transparent enough to allow you to do and understand the various design trade-offs. IMO, the major risk / error here is between the nominal as-designed, and the actual as-built. One of the reasons that we finally chose a TF twinwall / passive slab approach (even though this was slight more expensive and 100mm deeper profile than U-value equivalent single frame approaches is that this pump cellulose approach and the corresponding wall profile are very airtight by design and has very low associated Ψ values, to the point that the supplier contracts to deliver to a U-value and airtightness specification. This gave us a high degree of confidence that the as-build performance would be as designed.1 point
-
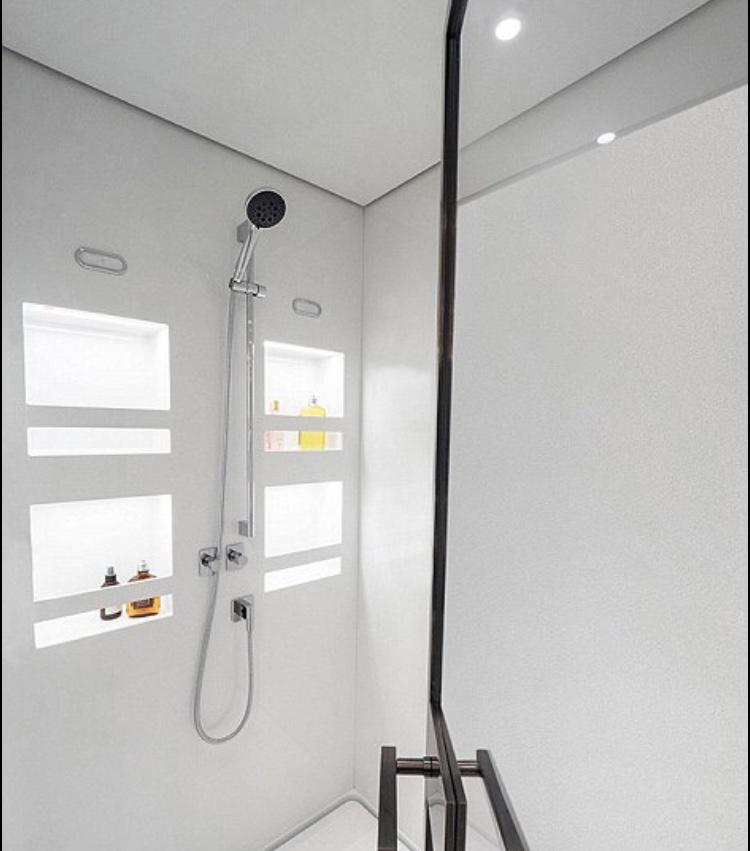
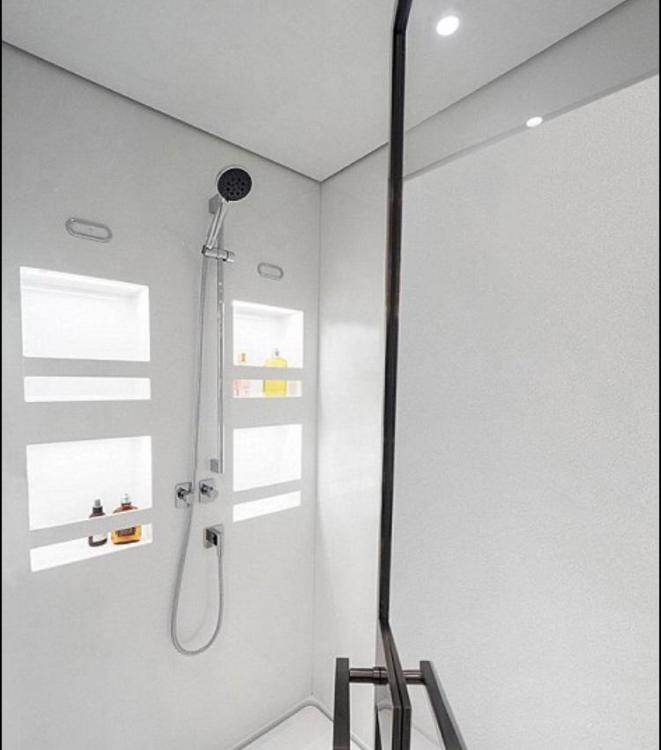
@pocster I agree let’s get back on topic. Here’s a property fine shower, truly unbeatable
 1 point
 -
Excuse me all ! What about my bloody amazing shower ! . Talk about off topic ?1 point
-
Welcome to THE forum for self builders and people of like minds.1 point
-
@vivienz and @Onoff both want to roger the cabin boy ..!!??1 point
-
Tacky ? What’s that mean ? It would look amazing - massive SWMBO points .1 point
-
Oh I’m sure she charges more than that so I’ve heard .1 point
-
OK so two years on and I am 100% happy with boiler performance. 1. Even though its on LPG, it has enough energy to heat two simultaneous showers. In fact, it is probably the water pressure which is the limiting factor; I am running two Hansgrohe showers which run at around 8l per minute (=16l per minute); I have 5 bar pressure but my flow rate is only just adequate for two showers. (That's because I am pumping from a borehole to a pressurised tank, and my pump/borehole capacity is the limiting factor, I believe). The built in storage is not really a factor - that's about 20l only I think, and its really there so when someone turns on a hot tap, hot water is readily available without boiler having to fire up etc. 2. Yes - but measure or estimate your flow rate to the bathrooms. If you believe you can get 16l per minute, the boiler will cope. If you can't get that, or your pressure is too low, you will need to put in a pressurised cylinder and associated plumbing (plenty of threads on this elsewhere). This is the critical factor! 3.Unexpected benefits: we have underfloor heating. The wunda mixing valve which I installed in not effective at controlling low temperatures. But I found out to my surprise that it is entirely acceptable to run the boiler at 43, or 40, or 35 (or even 30). So that's what I use to control the UFH temperature depending on time of year. Really rough and ready, but not a big deal in the scheme of things. (What I need to do and I don't know whether it is possible is to remotely control boiler temperature, and set that according to weather forecasts ...). NB this boiler temperature is independent of the DHW temperature, which is set to 65. 4. Running Costs We've now run this setup for two years with average three people in a very well insulated 200 sq m house. - heating goes off (say) 1st April. comes on (say) 1st November. We use heating during that time for hot water and all gas cooking. We buy two bottles of 47kg at a time (typical price £55 per bottle in NE Essex) and they last 6 months with no heating. So I estimate we spend maybe £220.00 pa on hot water and cooking. (or four bottles - fag packet, I know). - the house is well insulated, and has high solar gain. Our biggest problem is overheating (so we open the doors and windows to control temperatures - even when the underfloor is on). Our total gas consumption during the last year was 12 bottles. Take off those four bottles for washing & cooking and that leaves 8 bottles for heating or £440.00 Could I work this out more accurately? probably. But tbh, at these levels of consumption, I am not very concerned. (I have other issues!)1 point
-
How thick can your walls be? How much insulation are you hoping to have under your floor? Thinnest bang for your u value buck in masonry build is probably single skin blocks and ewi. Cavity wall is possible but to get a decent level of insulation to you are looking at 200mm cavity and so a wider wall1 point
-
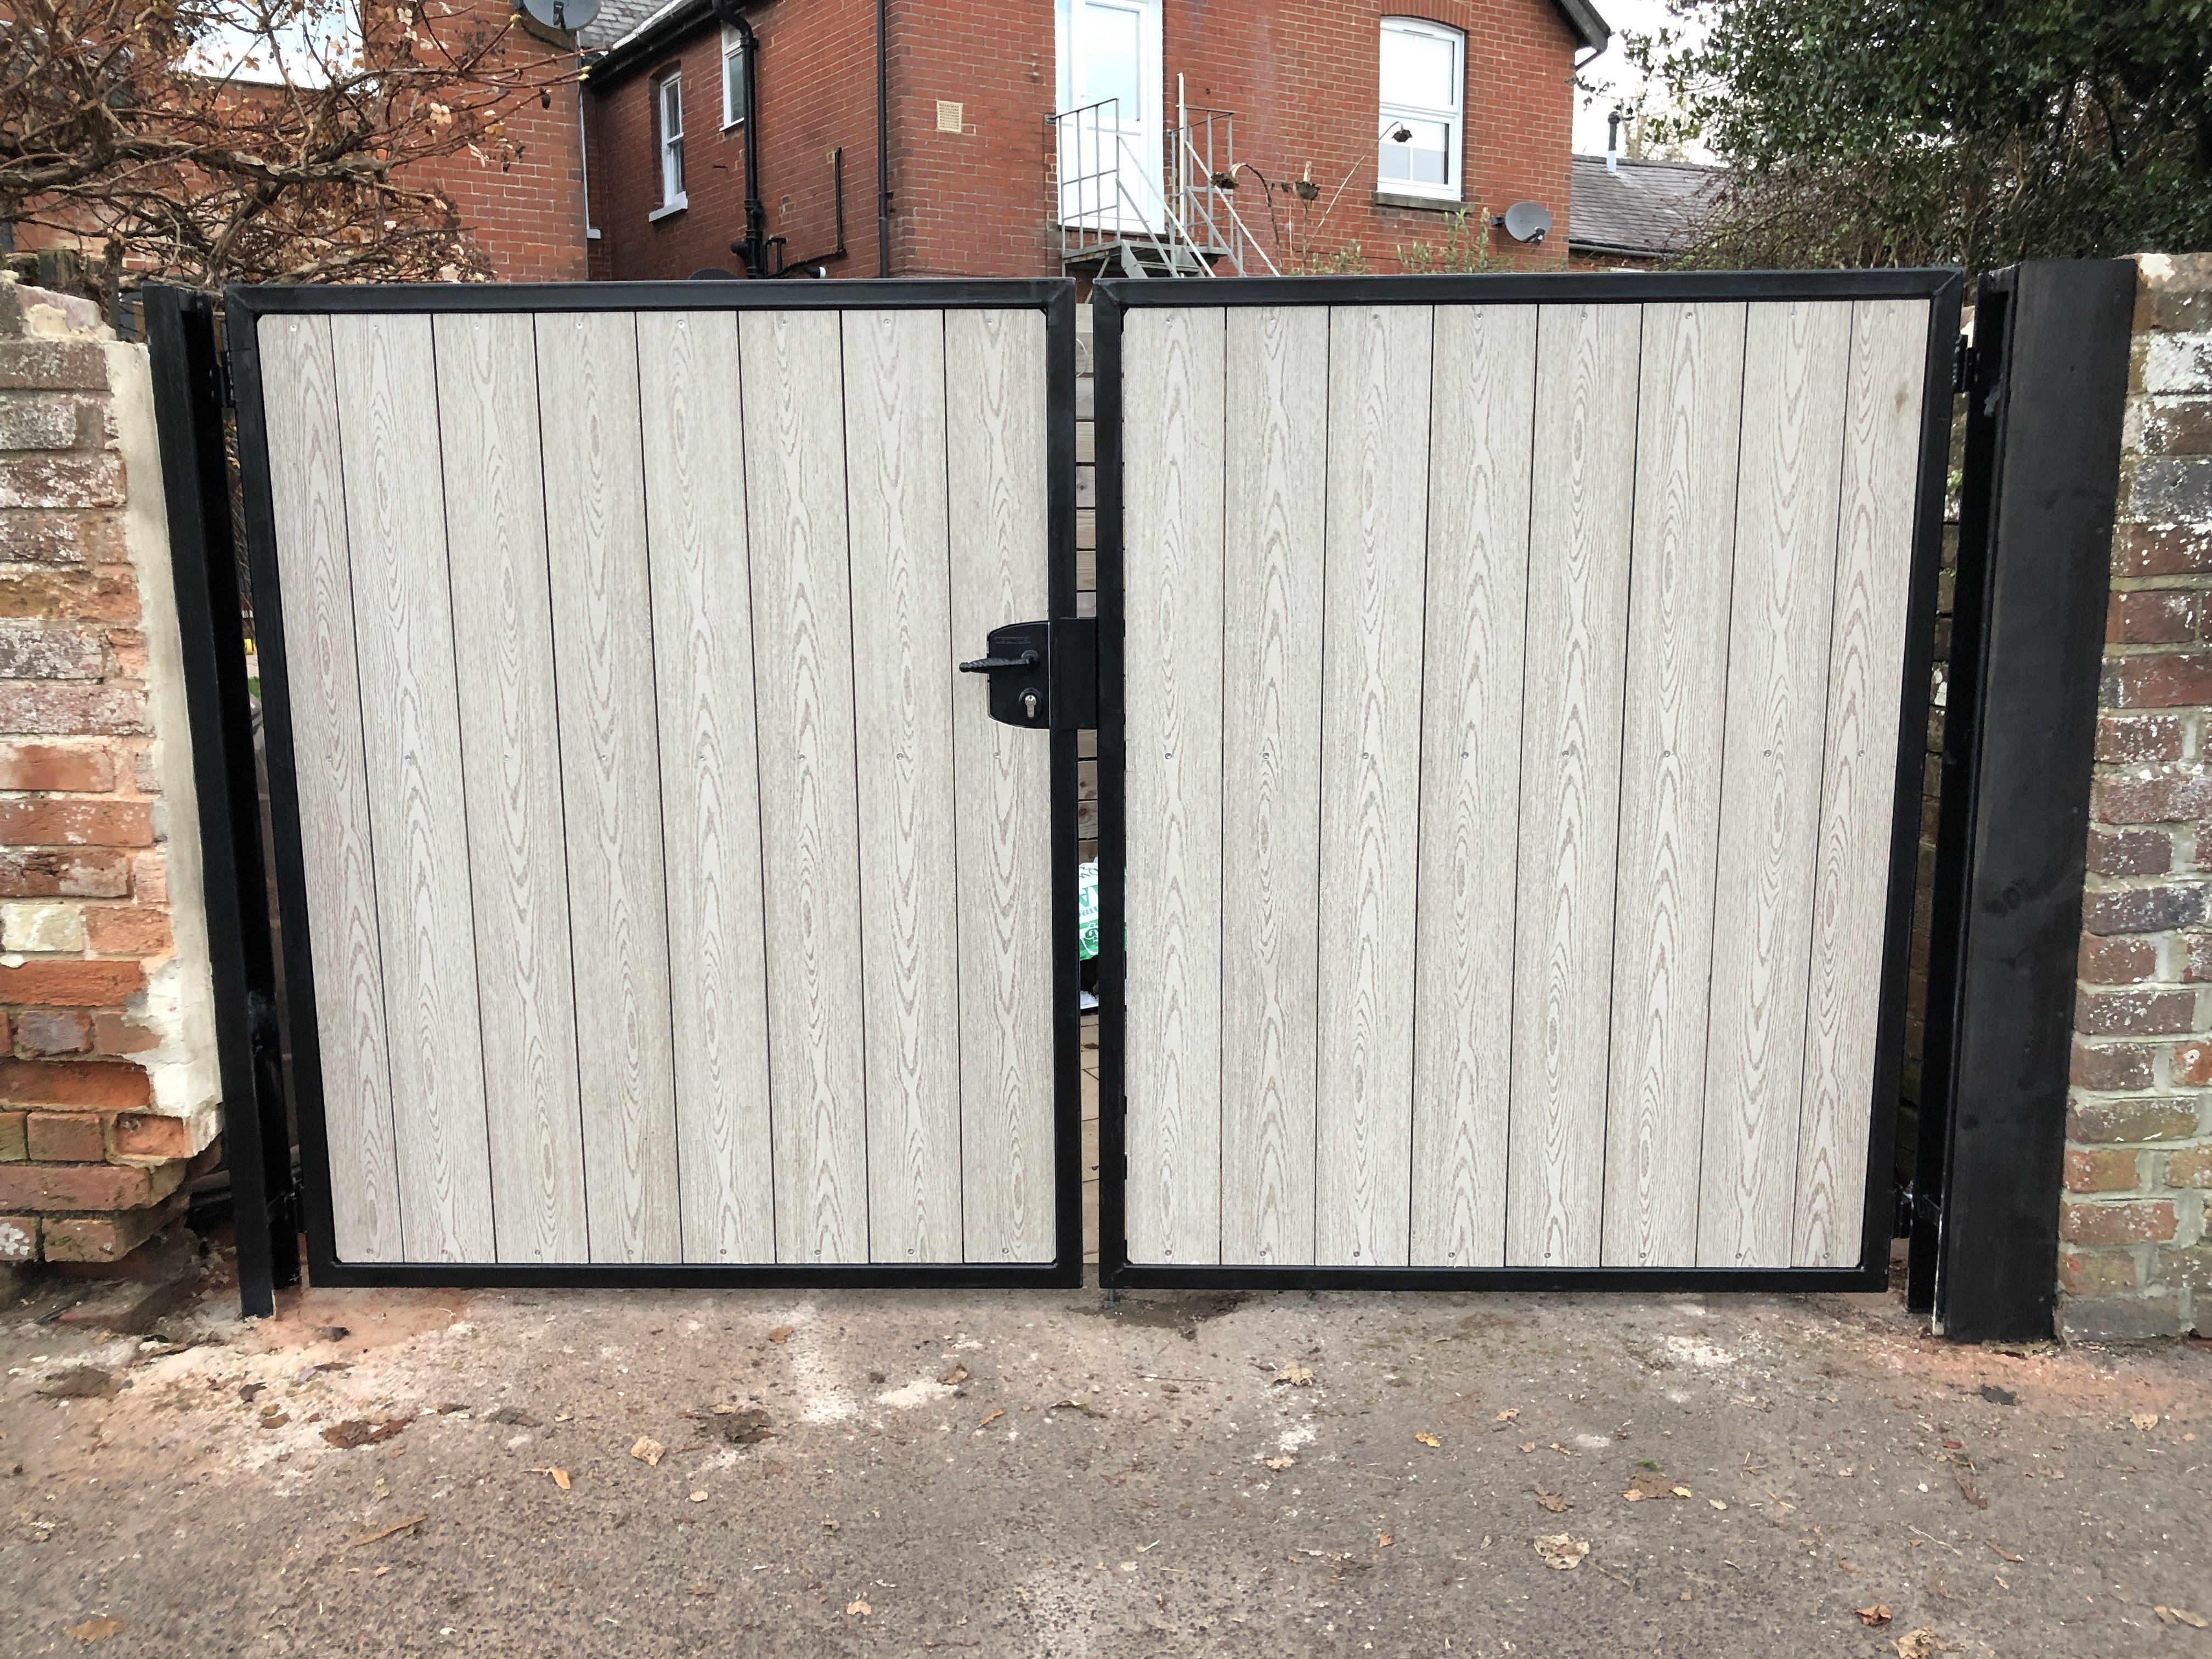
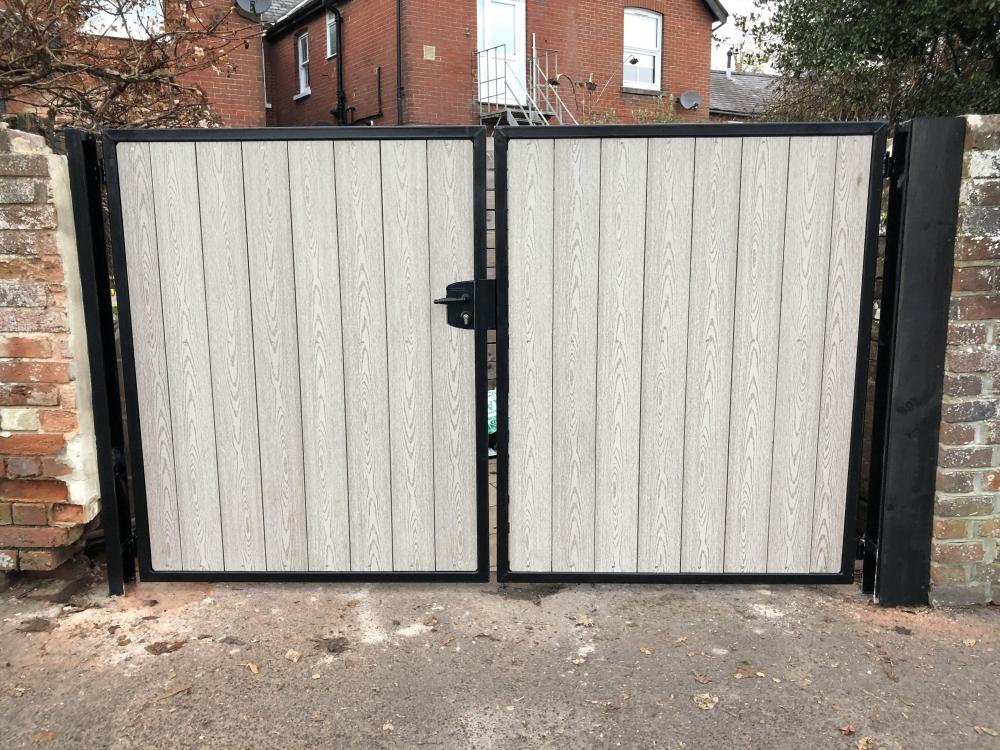
Heres my finished set of gates with decking infill... really happy with the result
 1 point
 -
I have a portable ozone generator that I used to use a bit at the old house to get rid of lingering cooking smells. It works very well, just plug it in, close the door and come back half an hour later and there's no trace of any smells (kills all the bugs in a room too...). I've not felt the need to use it in the new house, mainly as the MVHR is pretty effective at getting rid of any lingering cooking smells. We do still have a small ozone generator that sits inside the fridge, and activates periodically to remove smells. Seems to work well, especially if there are any pongy cheeses in the fridge.1 point
-
I'm doing a steel portal frame conversion of almost identical nature. The SE will be critical to the type of build you go with. The issue your SE will likely raise, at least the ones that we invited did, is the wind loading. We ended up having a design with a significant amount of additional bracing to overcome the twisting of the steel frame that he said the building would have to resist. We tried to argue that the floor and stairs (steel fixed to floor) would offer this restraint but the SE argued that wasn't enough. I didn't have a huge issue with the additional bracing but because we wanted a vaulted ceiling (the roof pitch is too low to make it worth while having a ceiling) it becomes an issue of aesthetics. We will work around that issue when we get to it though! Unless you've investigated already the other thing to be mindful of is that the pad foundations that the stanchions sit on is an unknown. They may need underpinning! Check the building for plumb on all the columns and that they are in line. Check the floor levels. A lot of agricultural buildings are built with a fall on the floor - ours had 80mm from e2e. Also check the depth of the concrete floor and that it can take any internal load bearing walls - ours varied between 100-125mm but SE specified 200mm. It often measured 200mm at the edge of the building but when we trialed a meter or so in the depth reduced as well as being inconsistent - jack hammer and sthil saw time and then pour new foundations!! Another pita job will be digging the external foundations between the columns as the columns get in the damn way! A digger with a knuckle boom would be ideal solution. I did consider at one stage of just taking the whole lot, frame n all, down and selling it so we could start from scratch. However I was advised against this and tbf I'd already had some successes with the LPA in changing some of the conditions of our planning so didn't push any more. I guess you wouldn't want to try this either having the battle you've had. We're using ICF because we can straddle the columns (column is 203 deep so a Nudura unassembled module of 200mm will fit nicely either side of it). It overcomes the cold bridging and any issues of detailing the blocks/timber frame to column fixing as well. You'll probably need to use debonded fixings if you go with blocks.We looked at SIPS and TF but both were around £70-80k. The ICF solution is simpler and around a third of the price - yes we have to put a floor in and a roof but still will works out £10-20k cheaper.1 point
-
About 3 years ago I wedged an oak slither in a gap in our green oak ridge beam when we fitted them. It fell down last weekend and hit me on the head. Took me a good minute to realise what had happened, I shouted hello thinking someone was pranking me as I had the french doors open in the pitch black letting my dog out. Quite scary when your in the middle of a forest with no lighting hah. Creepiest thing was waking up one night to voices outside and opening the caravan curtains, some guy was just staring in. He got more of a fright than me though?1 point