
Leaderboard


Popular Content
Showing content with the highest reputation on 01/10/21 in all areas
-
I give my New Year resolution of updating this blog a bit more frequently until the first really cold snap in February. Simply because I need content, and I can only get this by being on site in the cold when I could of course be sat in a comfortable warm office writing Matlab simulations, sorting through endless sets of test data (I enjoy it. Each to their own...) and drinking coffee. So the big progress for this entry is actually the paperwork. The structural warranty people have sent me an update and they have finished looking at the design documents I submitted (SE stuff for foundations, SIPS structure, drainage etc) and have accepted it is all adequate for the job. This is quite a relief because I was proceeding at risk by this not being complete before I started significant building work. There was little else I could do thanks to Covid slowing everything down and I always believed the risk to be very small, but even so it is good to not have it there in the background any more. There's still some paperwork to go, but it is for parts of the build that are yet to happen. Maybe I will feel inclined to do it when it's cold at the weekend - I wasn't keen on roofing when the slates were frozen together. Now for something visual. I've begun to get the fire breaks around the windows installed as agreed with the BCO. I needed to be at work this week, so passed the job to Jeff and he's done a very accurate job. It is beginning to look a bit more house like now - sometimes small things make a big difference. It now shows the windows to be vast. Much bigger than the plans and elevation drawings would suggest. Might have been able to save some money here, but I've lived in a house with windows that are too small for much too long. It will average out as correct over my lifetime if I'm lucky! I spent Saturday getting the last few solar panels on the roof. I haven't yet bolted the bottom four panels down permanantly because the DC cables are not yet finished. It got cold and dark in a most unreasonable way so I couldn't see to drill the holes for the cables by the time I had done a few other jobs on site that were demanding attention. The house certainly looks the part for a "low energy" building now. Looks like I have lead work on the list tomorrow. The window frame tops each need a lead cover fixed back to the SIPs.2 points
-
So that's the screed drying out nicely now. After the first week of instructed "no heat" I ran the Willis on a 15min every hour cycle for a fortnight. Then on a whim and cost be damned, I put it on continuous for a couple of days. Result is that I'm pleased to see that the heat calculations are confirmed and the house's heat requirements are indeed low. 3kW heater on continuous for 52hrs total, mean ambient temp of about 3c over the duration, raised the slab return temp from 11 to 17c and still rising- and brought room temp from 10c to 15c2 points
-
Yup... that’s what I’d do too!2 points
-
The connector I linked is IP65. It’s all 12v anyway so perfectly safe and all I did was a smear of clear CT1 over the joint on that one and on the ends (they push in) and a quick bead across the top of the profile when installed as the cover snaps in tightly.1 point
-
GRP if it’s behind a parapet as they can hold snow as well as water and ice and snow are more damaging. You can get a decent fall on it (1:40) and it won’t have any issues for decades.1 point
-
The lights may be ip67 but please check the rating of the transformer too, as normally they may Ip44 and located inside.1 point
-
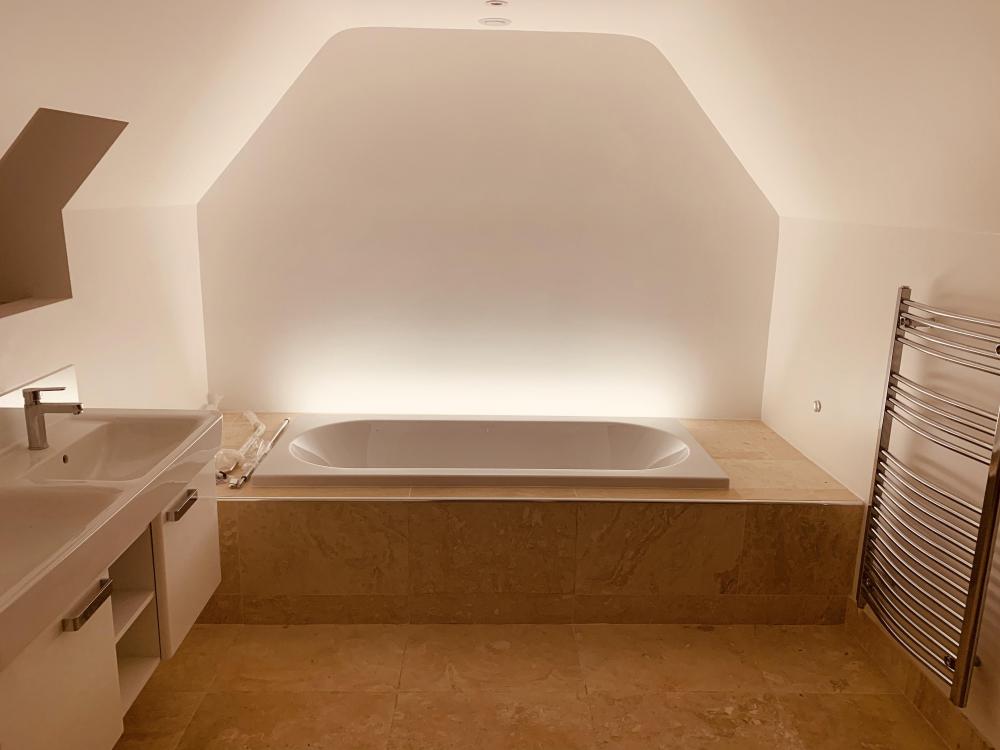
OK so why not use a profile and strip ..? You can buy IP65 self adhesive strip and you can get some really nice profile - I used a quarter round behind a bath to cast a glow up a wall and it was dead easy. You need to “hide” the transformer somehow but not difficult. Or it can go in the attic and just use the grey T&E for 12v to the strip Profiles here https://www.ledspace.co.uk/collections/corner-led-profiles/products/flat-corner-led-profile IP65 strip https://www.ledspace.co.uk/products/tradestrip-60-12v-led-strip-warm-white-splashproof
 1 point
 -
The grey cable is probably 240V, whereas the light cable loom is low-voltage DC - you need an electrician to check and make a suitable connection. If the plasterboard is in situ, the difficult bit will be threading the cable loom for the lights behind the plasterboard, likewise under the floor. Decisions like this really need to be taken at first fix. If you're happy to remove and replace the plasterboard and floorboards, then not really a problem. IP67 rated lights are suitable where there is water immersion.1 point
-
No there is nothing tricky about a combined foul and surface water sewer. I'd say keep them separate and combine just before connecting to the public combined system. You are right that the falls for foul water pipes will be fine with surface water, but may not be for capacity unless maybe you go for larger than 110mm pipes.1 point
-
The parts you are missing will be some tube (square or round) with a washer welded about 5-10mm down from the end. Will be pillar/stand-off of about 75mm long. That bit bolts to the radiator. There is then a plastic bobbin you fix to the wall, mine had a recess cut in the outside. You fit the rad to the bobbins then a grub screw in the side of the stand-off locates into the recess of the bobbin. I'd go with the others above and plead ignorance to start with.1 point
-
Thank you for all the tips - I am going to tile the wall but need a cupboard as the heating vent is behind/underneath the basin and we want a small cupboard to store odds and ends. I have seen Jali doors which will allow the heat out the cupbaord without having to extend the vent which would be difficult and look a bit silly. Our basin will sit on the cupboard. I did look to buy one but it would need to be an odd size so easier to make one to fit. It fits in the end of the loo so only 88cm wide. I did manage to go to Wickes today and the hardwood ply is really smooth and will make an ideal cupboard. The edges looked okay. and I think I'd prefer that to mdf. Photos to be uploaded when its done.1 point
-
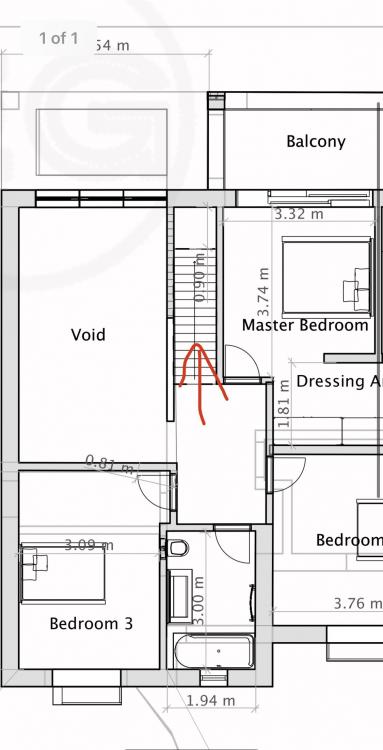
Hey, the stairs from ground to first are as follows: stairs from first to top floor as below: Bart

 1 point
 -
Most likely will be near the boiler - it’s common to the whole system.1 point
-
Updated my reply above as you were responding1 point
-
There will be a filling loop somewhere, usually near the boiler or whatever your heat source is Typically it'll be a braided Flexi hoses with at least one if not two isolation valves, open theses to allow water into the system1 point
-
My take would be phone the supplier and say "I have searched everywhere in the box and all the packaging, and I can't find the fixings that attach it to the wall" And delete this thread PDQ1 point
-
I haven't posted much of late because everything is happening around me in slow motion. Or at least that's how it appears. I am told (by another self builder) that this is fairly normal for this stage. Progress has been limited by shortages of materials (including a supplier going under - wasn't much fun for anyone concerned) and labour shortages - i.e. us both having to do our day jobs! Corona virus is still making self builds difficult. Add to that my recent discovery that at 42 years old, I'm not actually able to do the physical work of two 21 year olds. This was demonstrated by me picking up a very wet pack of roofing battens, putting them on the Range Rover roof rack and then staggering to bed for the rest of the weekend, not attending site after work all week and sitting bolt upright at my desk, causing concern amongst my colleagues still on site that I had started taking the whole work thing seriously. So on to the progress, and maybe a few pictures so you can tell me what I've done wrong! The windows were all ordered in the middle of October. No sign yet, but I am advised of significant delays, so I am hopeful of some of them in very early January. The difficult arch windows will arrive much later because the window maker seemingly forgot how circles work and wanted to make some very expensive hemisphere templates. We offered to send them a nail, a very carefully measured length of string and a pencil. This didn't go down well but it made the point, and the expensive template was suddenly not required. Building control have visited the site while we were in tier 1. Nothing much wrong with the house structure or roof. Just a few simple observations to make sure I don't forget to do some things that are on the list but easy to forget. The battening plan for the cladding was discussed and approved and I now know how cable holes through the structure need to be done - something I've had very mixed advice on from local sources. The cladding and battening is (hopefully) all arranged and we should be ready to start this part of the work as soon as the last ridge tile is screwed down. So on to a few photos of the roof. First fibreglass valley in place. The BCO was keen we didn't use lead because we have a plan to implement a rainwater capture system at some point in proceedings (especially if we need to demonstrate low water usage - SWMBO gets very disagreeable without her swimming pool sized bath) The capping detail of the valley. No idea how to get this to sit nicely - it's just the wrong shape. Hopefully slates will cover it and I won't have to ever look at it. Not a bad view while I sort out how this dry ridge system is supposed to work. Slates on the left of me, solar trays on the right, and me stuck in the middle with my nail gun and saw... Doesn't quite work as a song. While I mention solar trays, all 20 are up and bolted down. They do look a bit bigger than I intended, but I've got a single phase 6kW export allowance so I'm damned well going to use it. First slates on the south roof. It was a bit odd only putting up one slate-and-a-half and one slate on each row. But that's the way it needed to be to get the best out of the solar panels. Otherwise the bedroom roof put too much shadow on the lower right hand panels in the winter. The bedroom roof finished but for a couple of slates in the corner and seating the gable end ridge tile in place. Still working out how the dry ridge system interacts with the dry verge at the gable ends. There are a few annoying slates where my grading could have been better but overall I don't think it's too bad a job for someone who was afraid of heights until this year and has never done any roofing before. Sitting astride the bedroom roof. Only one small section of slates to go now. I think I need to wash my gloves though - too much slate dust over everything. Another 100 or so slates and some solar panels to go, then I can finish the soffits and look at cladding. I need a holiday when the scaffolding comes down. I am told that digging drainage ditches counts as a holiday. Not convinced myself, but at least it's on the ground.1 point
-
Your right there Joe Ive a friend who builds boats His exact advise Everything must be bone dry and no chance of rain Ours runs to a drain at either side So not exactly flat roof Nothing could ever come through it It is like the bottom of a boat1 point
-
Glad to hear (in a nice way) that other people's heat pumps are icing up as I only have experienced mine for two weeks and it seems to ice up regularly and I thought I had problems that I did not know how to sort out!! Glad you got yours sorted @joe901 point
-
Right chaps, ASHP behaving ok, light frosting and slowly bringing the buffer up to temp fir the UFH. DHW already hot because of immersion overnight ?. I think I panicked when I saw it defrost as I had not seen it do that before and unfortunate that it was in DHW mode, recent bath and shower meant little hot water to defrost with. On further thinking my defrost mode pumped hot water through the fins but the fan was not on, if it was then the cold air would suck the heat from the fins even faster, so perhaps defrosting without the fan on is the best way. Interesting that on one of the coldest nights without UFH the house temp dropped by less than 1/2 a degree, so insulation works (but don’t tell zoot ?).1 point
-
I second research research research.1 point
-
I use a plastic bag and then inject the foam into that so it can be pulled out at a later date, and then cheap LMN silicone over the top.1 point
-
Are you talking outside now? I just ran SWA cable buried in the ground next to the drainage pipes to the treatment plant. Why dig a separate trench when it can go in the same one as the drain pipes? they come into the house in different places so the SWA just branches off from the drain pipe and in through it's own duct and up right under the consumer unit where the SWA is glanded into the case of the CU. If I had a borehole I would have done the same, it's cable would have been SWA buried direct entering through the same route. The SWA is buried direct in the ground but does pass through ducting under through the foundations and up under the floor, with the duct sealed where it emerges.1 point
-
welcome. after about 1 month of reading on here you'll be convinced that you can do it all yourself! ?1 point
-
Still -4 here. No ice forming at all and I am not aware of the ASHP defrosting for some time. It is at or just above 0 with high humidity (fog) that is the problem region. We don't seem to get that often here.1 point
-
Tbh I've only cut some Goldscrews down with it so far. Still handy for that. The recip saw has seen the most use.1 point
-
Still -4c here East sussex neighbours Air source iced up with the freezing fog yesterday and last nights cold temps, not a good advert for heat pumps!1 point
-
I had a quick look at this with an ASHP defrosting and pulling the flow temperature down on the UFH flow for about 5 minutes. What was interesting is the flow dropped to about 15°C, but the return from the slab stayed pretty constant at 25°C during defrost so the slab was giving heat back to the ASHP to defrost. When it restarted the flow soon returned to normal. Need to get some proper monitoring in place tbh.! Thinking of building a 10 channel logger ...1 point
-
My A2A units stop the fan for the initial part of the defrost so I wouldn’t worry too much about that as long as it starts back up afterwards! But I concur with the above, they’ve been defrosting much more the past week or so, very damp/foggy here1 point
-
Really cold last night -2.4C and 98%RH freezing fog. Coldest night of the winter by some way.1 point
-
Rebuilding them generally isn't hard as long as the bearings haven't partially seized and chewed up the shaft or housing, but if you don't have the tools or skill-set then I'd go with @PeterW's view.1 point
-
This is why I’d send it to someone like MER who repair these things daily. they will service and test and ensure it’s working correctly.1 point
-
No wonder, I nearly killed myself a few years back in a farm yard when I started to cut through a bit of blue alky pipe and found a live cable inside, something made me stop and check but it could have been someone younger?1 point
-
it's a Papst external-rotor fan. Generally there's a removeable cap in the middle of the mounting bit, and a circlip under that holds the fan and shaft in place. the fan and rotor will then pull off and expose the coils and bearings. /similar motors are used in scientific kit like incubators, that I work on daily.1 point
-
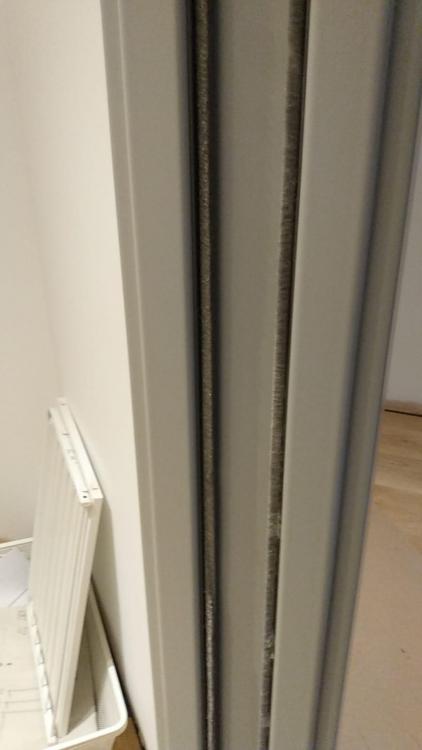
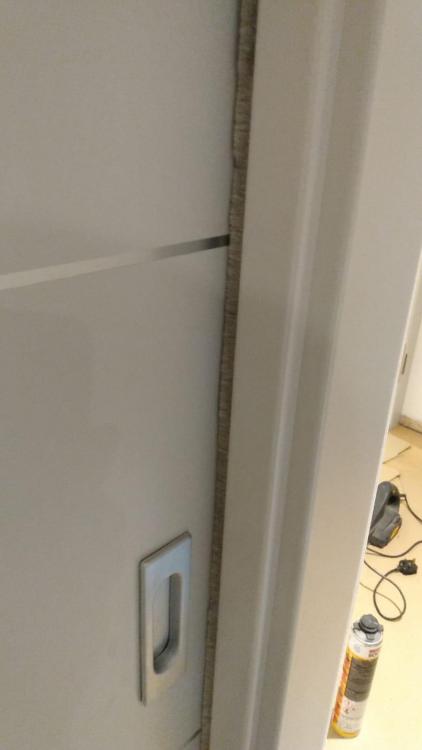
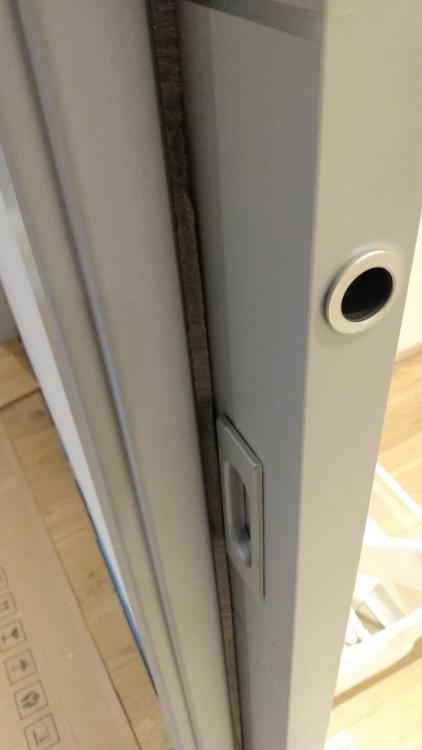
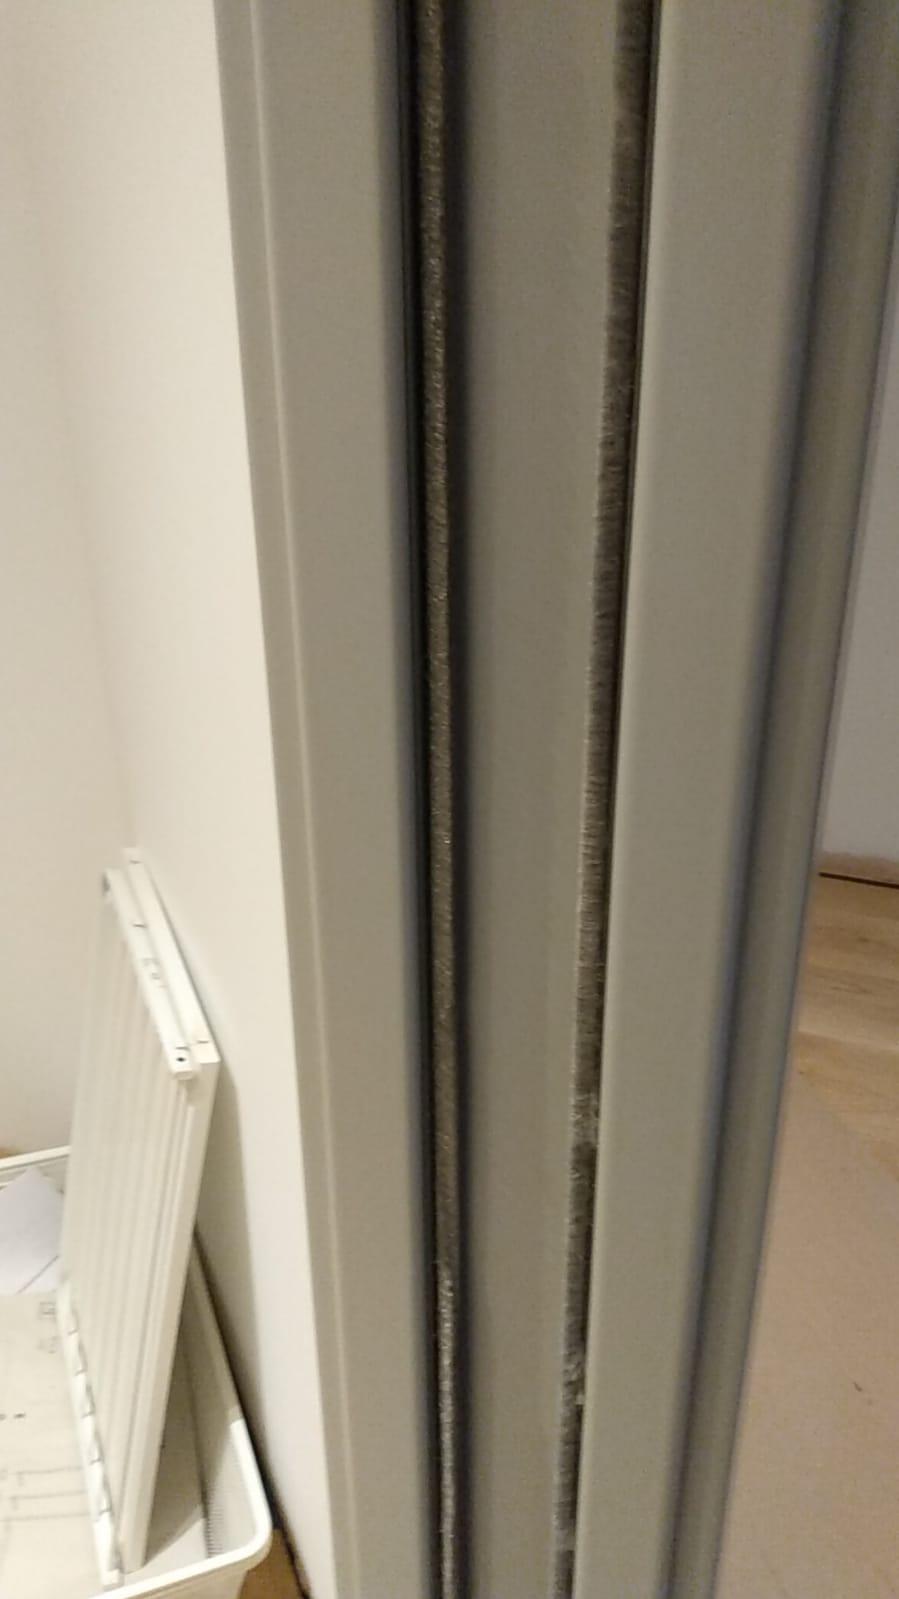
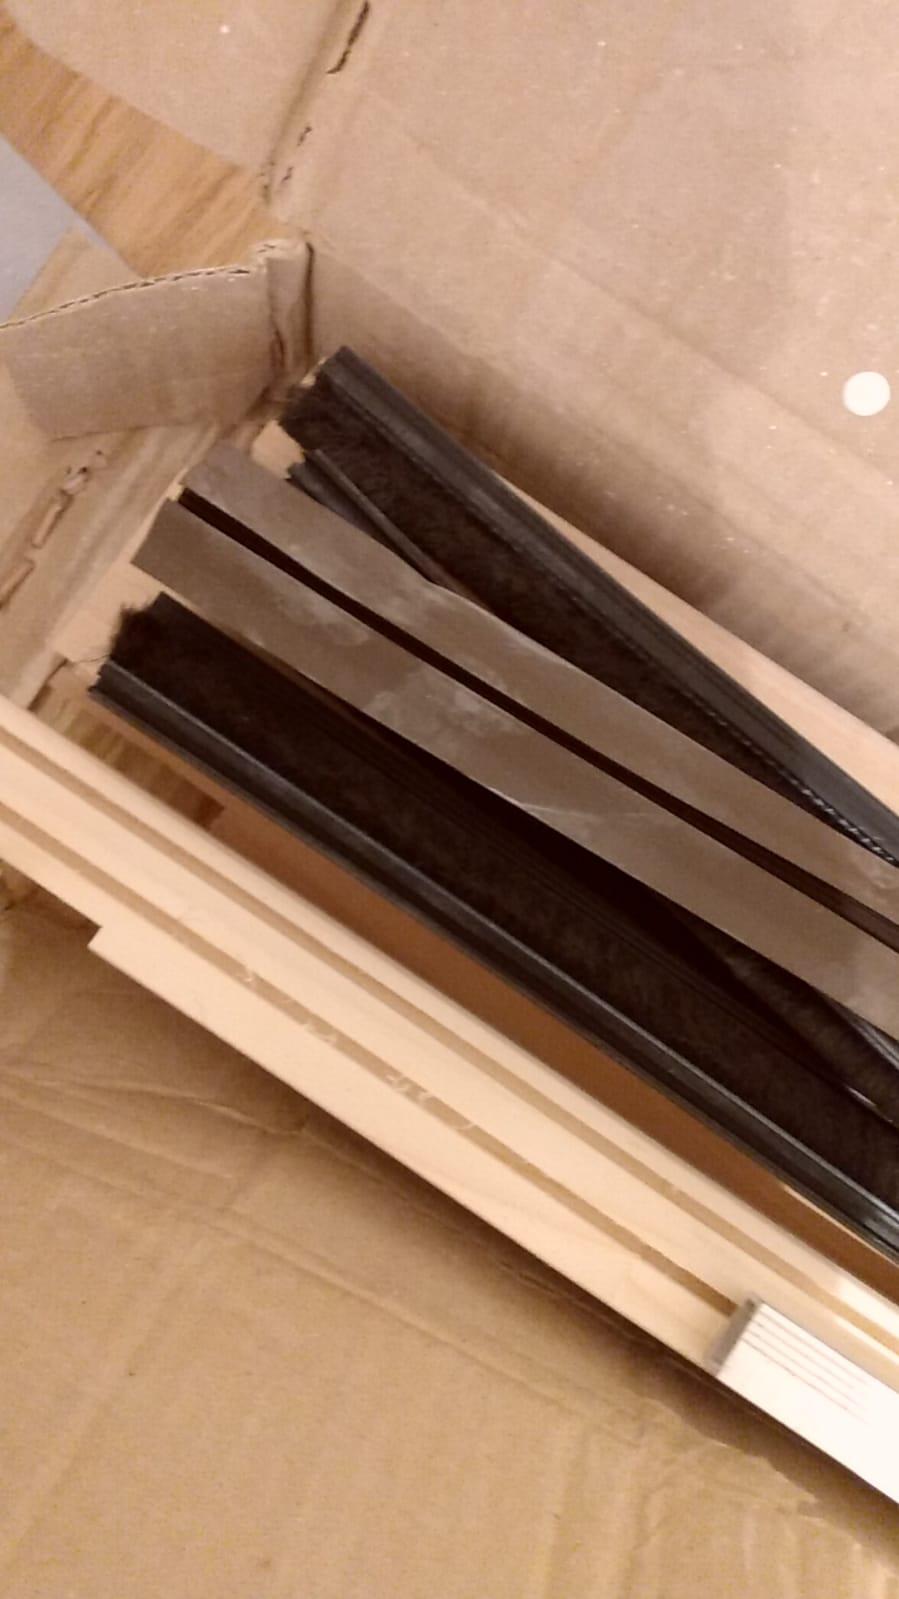
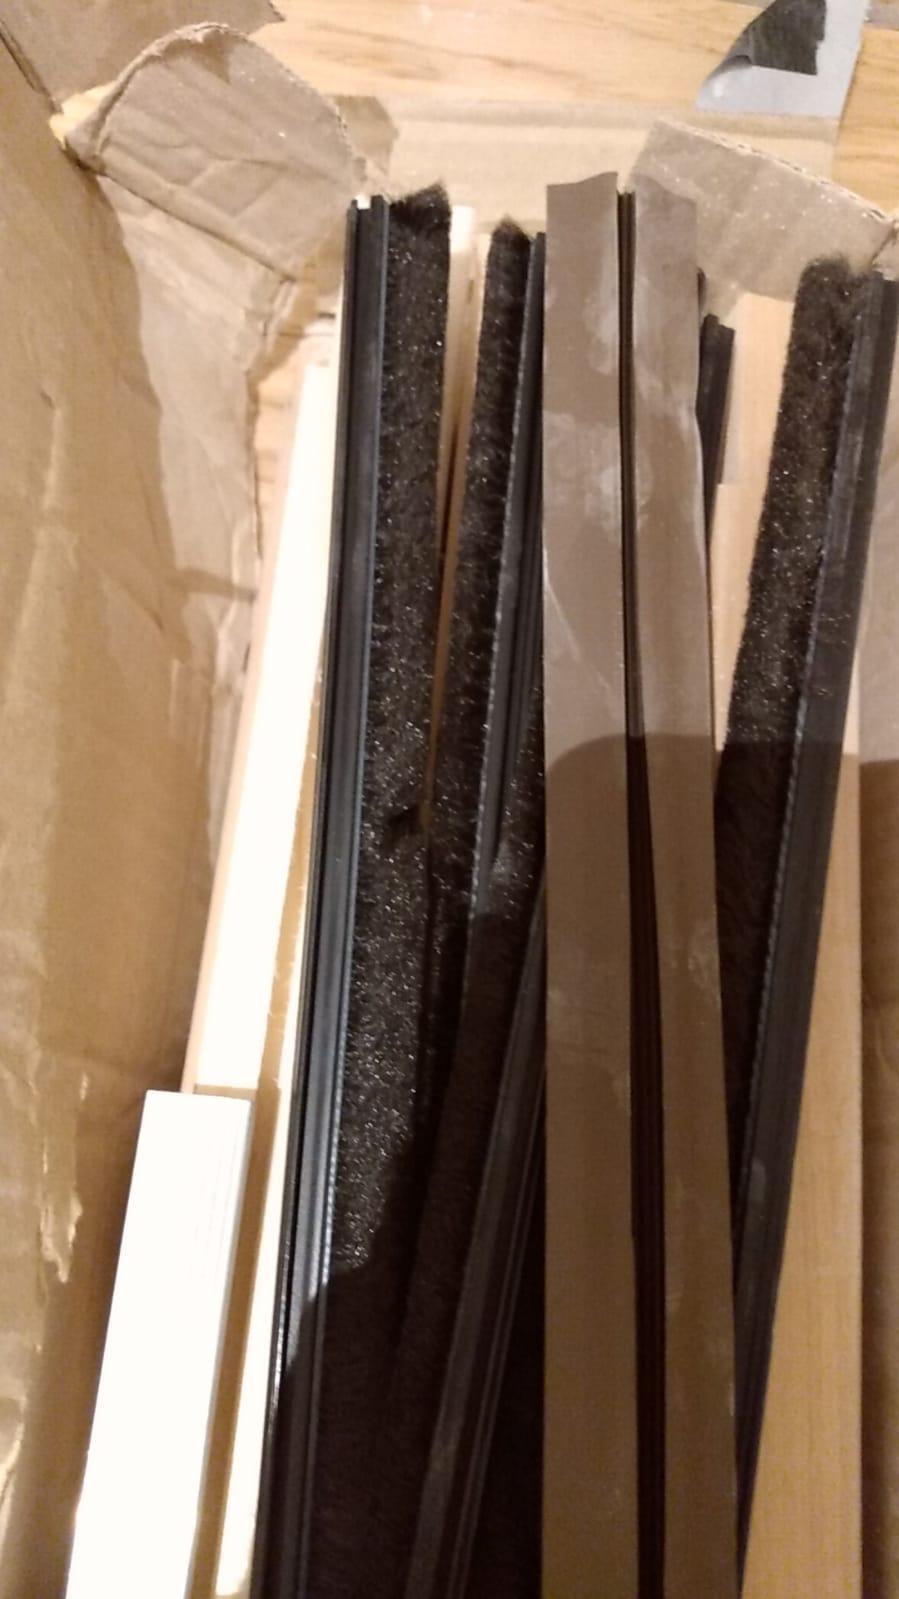
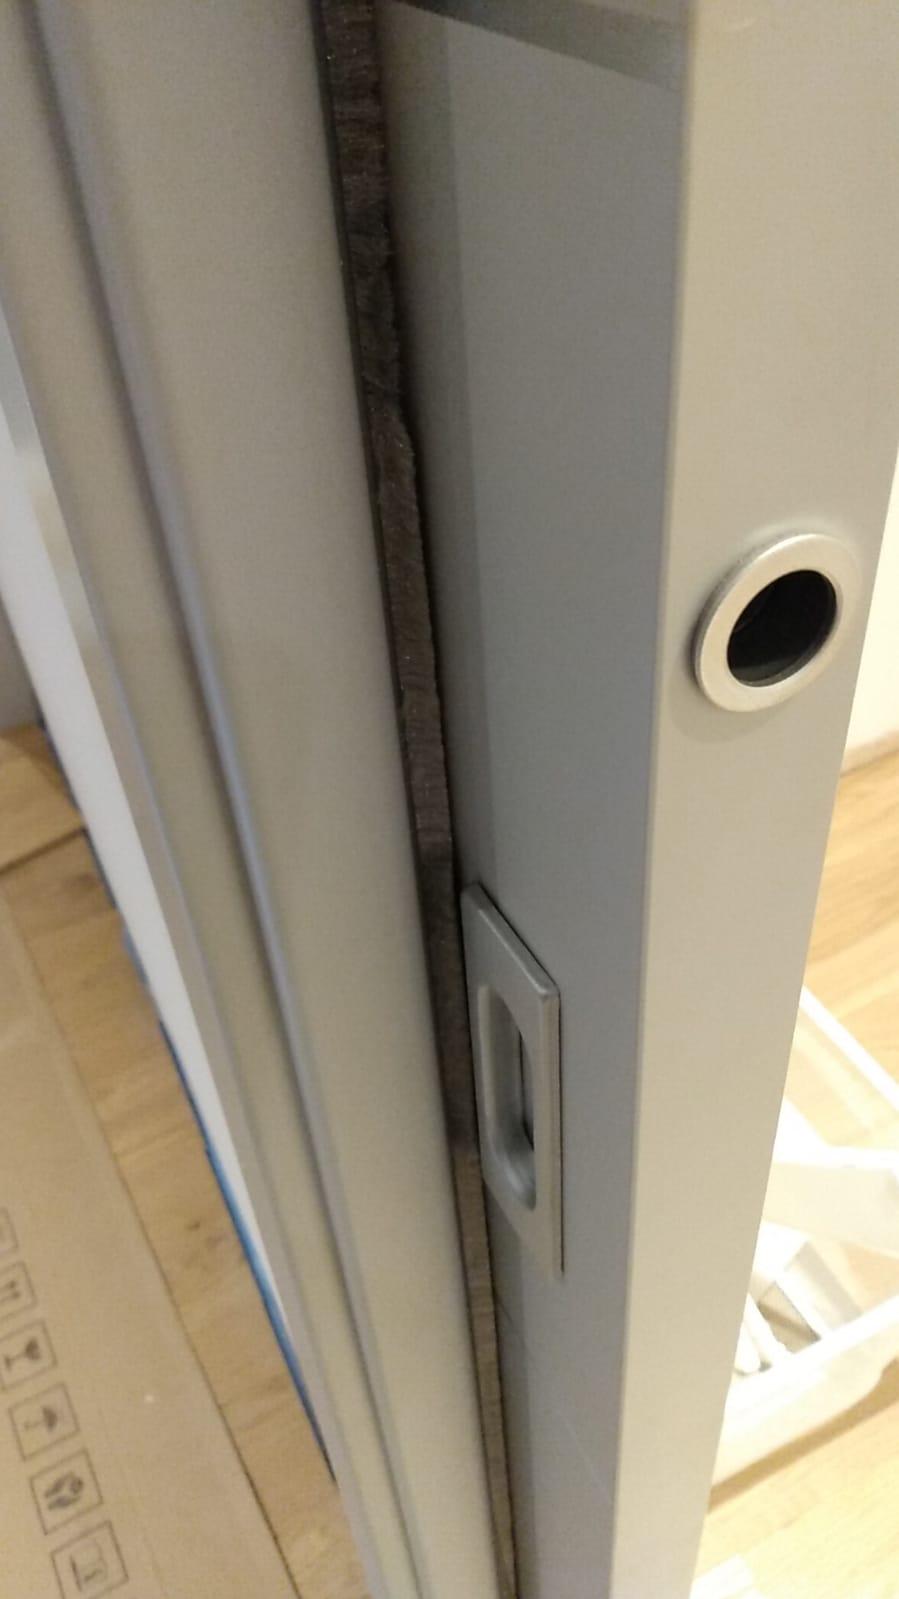
THe grey pictures are our door., it shows how it looks with brushes in case that helps It was an eclise frame in the wall and the porta door frame . The box pics are the whole of the eclise architrave and brushed kit. Ours was not a glass door


 1 point
 -
Kitchen Sink- would bring them through a hole in the plasterboard low enough to allow for the length going to the tap so the only joint is at the isolating valve under the sink. Toilets- use a cold forming bend on the pipe to get a bend on the pipe and then a right angle fitting to take you into the cistern1 point
-
Yep - 90 degree Hep2O elbow and a Talon pipe cover over the holes.1 point
-
I've read in many articles and books that you cannot project manager a build and work full time, even when you live on site. They are right, I've made barely any progress over the last month since work has ramped up to full time. Originally, the new factory move was planned for end Feb with the offices end March. But, this has now been delayed with factory at the end of April and the offices May. That's great for work stress less, but bad for self-build stress levels. The extra money will also be very useful as an addition to the build budget. The only saving grace is that we are busy doing nothing whilst we wait for the conditions to be discharged by the LPA. Just at the end of Dec I sent the notification re the CIL commencement. I was very surprised when I got the response with the acknowledgement the same day. At least that is something of the project planning list. Ironically, a friend of mine put in a planning application for stables & menage the same day as my discharge planning, and although it had to be checked by the parish council it was still passed in 4 weeks whereas my discharge which is simply to get a phase 2 contamination report approved is still waiting. One big concern that we have currently is theft, there has been a lot in the area in the past month, historically we lived in a very low crime area when suddenly sheds are being raided, actually breaking in rather than opportunistic actions. HID has been looking for a digger for 3 months now, but cannot find one, we have a healthy budget, but apart from new Chinese ones, which we have been warned against, we have not been able to find anything. A few have appeared in auctions, but they are 100's of miles away so there is the added cost of delivery and ideally we would like to view as well. They also have VAT added meaning that a guide price of 6-7k ends up selling for 9, then add 20% VAT and £500 delivery and it's way out of our budget. As soon as we get the go ahead this will be a big issue so we may end up hiring one after all, something we are not keen on simply for the flexibility. I'm still working through the detailed estimation, I've just got the big things left to do, the family room, utility room, roof, water treatment and other outside items. I'm not sure what to do about the utilities, we have power / water from the host house, but I do need to consider the cost of those for the budgeting. I guess the best thing to do is to get the guide price for now and hope it doesn't go up to much. Without the above the current material estimate is at 60k, I'm hoping that this will reduce as this is the published price for items in catalogues / websites and in many cases includes VAT. I've been absolutely amazed at how much is needed in each room, when you consider things like grout, EWI mesh or compriband tape. The initial thoughts were about the big items like plasterboard, but the little things are easily the same price again and looking at windows & doors, I had no idea how expensive decent ones are. Once I have everything done then I will get a professional estimate to compare the difference. I've also been really surprised at how long it's taken to do this. If it wasn't for Covid it would never have happened. But, I want to get an estimate with pretty much everything included to stop too many financial surprises when we build. Like most people we have a tight budget and are planning on a majority DIY approach. The first of the bike shed repairs has been completed so we have a shed that is dry for storage, I've been moving wood from the barn to the shed a bit at a time when I'm going from one to the other with the dog or dealing with the horses. I've moved all this wood 4 times now over the years so I hope this is the last resting place. Today, as it's actually not raining for once I'm going to get the dumper to move a load of hay from the current storage place to the barn. This will be the first time we have used the dumper for anything since we bought it last September. This planning period really is the calm before the storm, but it will be great when something physical actually happens. So, for the next month I'm determined to finish estimating and hopefully get the conditions discharged. Talk again in February when I may have something to actually say.1 point
-
I have both the 603CG and LR-6RG units and both worked flawlessly for me. My first lazer level developed a fault after about a year where the horizontal lazer stopped working but Huepar replaced it immediately under warranty. With the sensor, I found I could get a little water behind the sensor screen when used in the rain for a long period. That obviously impacted accuracy but only started doing it after I'd had it, and probably abused it, for a long time. I've been really impressed with both the quality and accuracy of this setup so far and mine has not had an easy life. If it's any help for your diagnostic purposes, I've found that the brightness of the lazer reduces when the pulse mode is turned on. I'd recommend you fire off an email directly to Huepar as I found their service very good when my first unit developed its problem.1 point
-
Hello Balraj. It's worth starting from under the ground up and getting a handle on the foundation cost. This is the bit that introduces uncertainty, and can "burst your football.. burst the baw in Scotland" , it can put the rest on a bit of a back burner. A bit of time spent on the ground conditions here can save you a pile of money which you get to spend on the things that matter, the things you see, the functionality and so on that you want, and sometimes more too! One great thing about self building is that you can experiment, do stuff that no one else has and is unique to you, often at a budget cost. Put in the research work and get a handle on how things work and fit together. Adapt it to suit you, not something that a developer wants to sell you. If you get stuck ( say on ground works, passive slab / insulated slab design and the ins and outs) then just ask folk and you'll be surprised at the positive response you get. Many get to a self build point where they can price the windows, roof, finishes, kitchens, lighting, bathrooms and so on. The uncertainty can lie in the ground, drainage, choice of foundation, soil conditions, and type of superstructure (the bit above the ground) and so on. Can I suggest, although a bit dull that you go back and review from the bottom (foundations) up. Start by looking at the ground and what is best to put on top of that. There may be good savings to be made. If you are not sure post here and you will get a lot of help. It's hard to wade your way thought the merits of different designs and insulation offerings / methods but much of it is not that complex. Yes, it is complex if you are working on high rise high end stuff but you can still get a pretty good outcome by simplifying things while still keeping the innovative concept... without the associated cost and design fees. Have fun and all the best.1 point
-
Peers down Alice’s rabbit hole. Thinks about going to have tea and come back a bit later... (try a few searches, perhaps via a google with +Buildhub in it. There are a lot of threads about this.) To me this is the impossible question. The answer depends 80% on the client, what they want and them knowing their own requirements and criteria. Briefly, an architect should supply inspiration and wow if you need that, provided that you know your own mind well enough to choose one well and be an assertive client, otherwise you may get their vision rather than yours as they have more weight in the debate; it is like a seesaw needing equal balance. An Architectural Technologist should supply drawings plus a bit more if you choose well, but will not have the same hinterland. An Architectural Designer is not a specific registered thing. It means that somebody who is not a Chartered Architect or Registered Architectural Technologist wants to offer that service. You need to judge them solely on their rep. and portfolio. For the other two the title means something. Architects sometimes get really narked about ADs, because they feel it as a bit close to the bone when they themselves in the UK have had a long training of 7 years .. shorter elsewhere. As to whether they are good value .... all of that is in your own hands and judgement; I do not think I can comment on that in general terms. Ferdinand1 point
-
@ferdinand found some useful info Actual costs depend on what you are wanting to build, where you and what type of house you want, a standard house with traditional materials, or a concept house with cantrelevered beams made of brie. Typical planning architect/AT costs for a single house I have seen range from £2k - £5k.1 point
-
Number one, stop buying the magazines and save that money. Mark Brinkley's Home Builder's Bible is the book many here refer to - it's a little long in tooth now but still relevant although does not do justice more modern build methods and low energy approaches, however that's what this site is for Do you have a plot / existing dwelling? You will need a topological survey of that first as this is what the planning drawings are based upon. Plus you'll need to buy the locale 'tile' that shows what else is immediately around you. Do you have a house design? This is the tricky part - designing a dwelling that works on the plot (both aesthetically and from a planning perspective), meets your needs and fits your budget. Also need to take services into consideration (especially if you need to make allowance for treatment units vs mains sewage) as this can impact the position. Traffic is also a consideration - you will need emergency vehicle access plus be able to safely join the main road, turn a car etc. Any design will need to meet the local plan otherwise it will get rejected on that basis. One you have a design that works, the necessary documents are easy enough to generate. While some here (i.e. @JSHarris ) have done it all themselves, most others rely on the services of an architect or architectural technician or even a turnkey design / build service from a company (generally more expensive but you save VAT on professional fees). Many architect's will give you a free consultation and lay out a fee structure that takes you to planning approval. Zero obligation to use them after this, you can part company at any stage - lots of options to get your detailed (BC) design completed, discharge planning conditions etc. So, if you have the skills & knowledge or are prepared to spend time accumulating them then you will only really incur the planning app fees. However the best lesson from 'The Bible' is the cost / quality / time triangle. You can have have two at the expense of the third. This applies from the outset - if you want the cheapest possible planning app with no professional input, it will take time and/or you may be compromising on the quality of the design (and the application) leading to it getting rejected or getting permission for something you don't really want.1 point
-
+1 to all the contributions so far. I have built a MBC timberframe house and used an independent BCO. I started off by sending a full MBC design package, including SE Caculations and foundation design, asking to be advised of anything else that was required for BC approval. I received the following " Do you have a building regs specification as I need to do a plan check and comment on compliance with the building regs ..." I then responded "Not sure what you require for the "building regs specification" - can you please clarify for me? I have sent you a calculation and drawings package for the timberframe and the foundation. What else do you require and I will arrange to provide it? " He responded " with all jobs we normally see a detailedspecification to cover aspects such as fire/ means of escape. ventilation,staircase design etc the plans provided so far cover the structural aspectsand thermal requirements " I asked "Do you an good example that I could use to ensure that I cover everything and i will then quickly develop a detailed specification specific to Eastcroft?" I never received a response. So I did some research online, including Websites such as http://www.buildingregs4plans.co.uk and looked at what @JSHarris had done and what @Bitpipe was experiencing with questions from his BCO at the same time . I then proceeded to develop my Building Regulation Specification and sent it to the BCO with the following note " I have done some research, looking at similar documents, and produced the attached Building Regulation Specification for your review and comment. I have endeavoured to detail all the relevant information but if you require more detail the please advise and I will revise to meet your requirements It refers to various drawings, calculations and related documents (which I attach for your reference and convenience, as I have already submitted most of these documents to you before) and have included them all in one zipped folder for your convenience " I never received any nore questions or comments, though he did visit site on a few occaasions and I kept him updated with regular emails and photos. I requested approval of a couple of areas - proposals for fire/smoke detectors installtion and forjuliet balcony fixings - to which he responded and gave approval. I attach my Building Regulation Specification without the attachments. On reflection, it is not particulalrly good document and I could have included a lot more detail/definition of various systems. I thought that it would require updating with specific information, as the BCO asked questions but the questions never came and I never updated it... On the positive side, it did force me to read and understand all the Buiding Regulations as they applied to my build. Building Regulation Specification for new build house.pdf1 point
-
Shouldn’t that say @pocster will be along with his plans for his HA Laser show .. as he’s still tiling his floor .. and he will be doing it some time in May...0 points
-
@pocster & @joth will be along in a mo with their HA controlled laser shows.0 points


This leaderboard is set to London/GMT+01:00