Leaderboard


Popular Content
Showing content with the highest reputation on 03/13/22 in all areas
-
SHair ~ 1 kJ/kg/K, Densair ~ 1.2 kg/m3. So 108 × 24 × 14 × 1.2 × 1 /3600 = 12 kWh Yes you are correct in that it is not ½kwh / day. It is roughly 25× that. Your inference is wrong. In a near passive class house, air losses are by far the largest heat loss component if you don't install MVHR.3 points
-
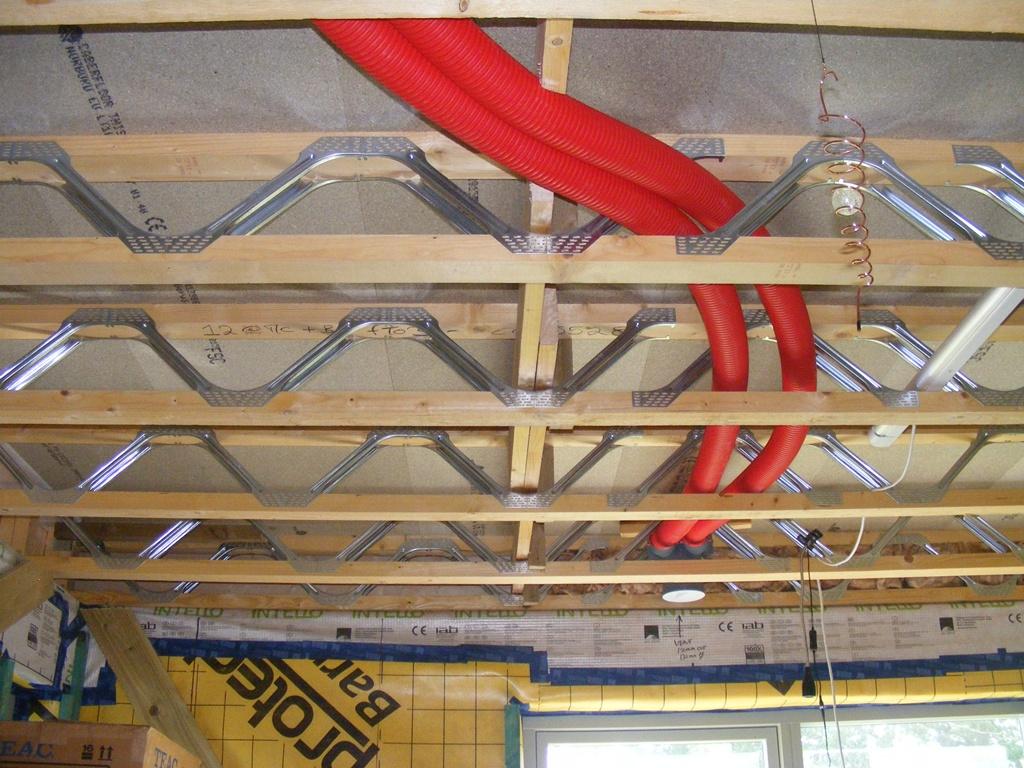
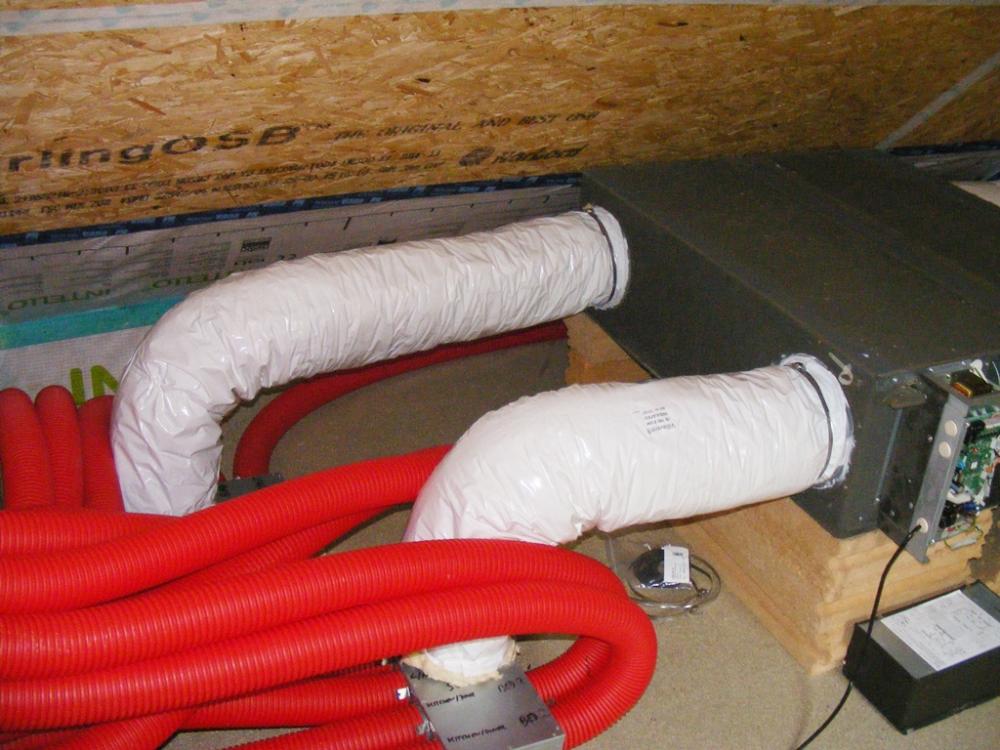
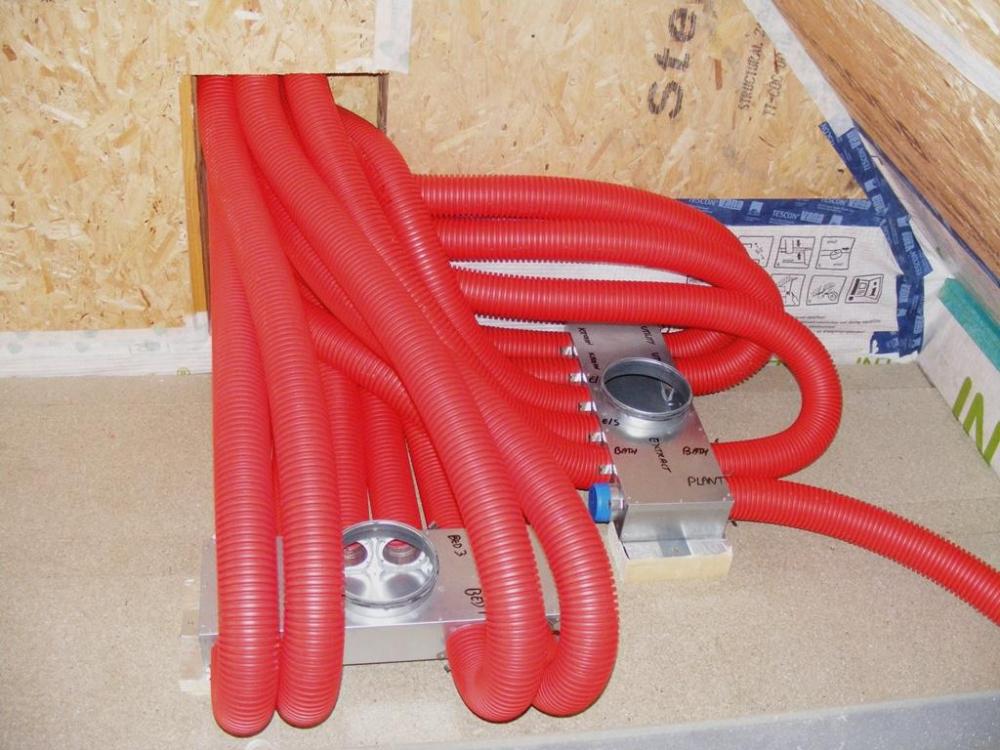
this is how we did ours.
 3 points
 -
Hi all. I can't quite see where all the supports are to the steelwork but there are plenty things that could be going on here and the SE looks like they have spent some time thinking this through. It's looks quite elegant really even though you have a bit of cantilevered floor that with hind sight you may not have chosen at the Architectural stage. Let's start with the basics. A steel beam is designed for "pure bending" called its moment capacity (Mc). This is often where the steel starts to yield and fail but the beam does not distort or twist sideways. Beams can also fail in buckling where they just twist and distort and collapse suddenly. Often you find buckling (Mb) is the governing criteria. We call this (Mb) the buckling capacity of the beam. Long beams buckle easily so what we do is to fix floor joists, floors or other beams to them to prevent them from distorting / twisting / moving sideways and thus we increase the buckling capacity as we shorten what is called the effective length.. that is simplistically the distance between restraint positions. If we do this well we can in cases increase the buckling capacity up to the Mc capacity and thus get most bang for our buck. Lets start with beam 8 and lets assume there is not much restraint from the floors as the joists span beam 9 to 7a. The SE may be using quite a stiff connection from beam 9 to 8 to stop the twisting / provide torsional / twisting restraint to beam 8 thus increasing it's Mb (buckling capacity) significantly. If you don't do this then often you need a heavier and deeper beam. They may also be using beam 12 to further reduce the effective length of beam 8. As you come up the stairs on your left hand side there is the stringer with spindles above and behind the stringer there is a space before you seem to find the first potential support. It actually looks like the end of beam 11 is supported by beam 7a. Thus beam 11 spans from 7a to beam 10.. it is beam 10 that is holding up one end of beam 11, 7a the other. Now for beam 10 to hold up the end of beam 11 it needs to act as a cantilever off beam 8, but if beam 9 was not there then beam 8 would just twist and it would fall down. I think the SE has designed a very stiff connection between beam 10 & 8 and 8 & 9 so that 9 & 10 act as a continuous beam, supported at one end by the outside wall and by beam 8 at the joint. Lastly you also find that where beam 9 rests on the wall the SE has made sure there is enough back weight to stop this end of beam 9 lifting upwards.. like ballast in a boat. That looks like one possible hypothesis but a caveat is that we have not seen all the info, support detail and the global structural design. Lastly the diagonal bracing. I have touched on a few but not all the facets of this but you can see that the steels will be doing a lot more than just carrying the basic loads. Everything will be wanting to twist, bolted joints will slip here and there so I think the SE has introduced the diagonal bracing to stiffen things up. Also the diagonal bracing may be providing global stability to resist wind loading. In summary don't remove beam 10 or any other for that matter without asking your SE! Also don't let your fabricator / metal worker change the SE's connection design in any way without asking. If you have read this far then thanks. Gus2 points
-
It is never as simple as you think. Solar PV is a good companion to an ASHP but it is wrong to think of it in terms of "solar PV will heat my DHW" The reality is "Solar PV will reduce my electricity bill" The trouble is solar PV is maximum in the summer and of course only in the daytime, with max output at mid day. so you have to think how can I shift as much electricity usage to close to mid day as possible? Three things work for me. No 1, I have the ASHP timed to start heating DHW at 11AM, there is a reasonable chance of decent solar PV generation by then. No 2 use the big appliances one at a time around mid day. and No 3 install a solar PV diverter, so if nothing else is using the PV generated power, it will go to the immersion heater.2 points
-
Me! I stupidly changed from the original architect to a friend who is an architect's technician hence loads of problems I naively didn't anticipate when wanting to give him the work. He helped me a lot when I was renovating a previous house and became ill, so what goes around comes around. I'm not the litigious type.2 points
-
I have discovered that the tighter you plan things, the more stressful it is to not have any slack in the system. Electrician with Covid, supply delays, builder needing a heart procedure are just a few things which have caused expensive delays which are no one's fault.2 points
-
One advantage of MVHR is that the ventilation in an airtight house is controlled. With trickle vents on a cold windy day there is lots of cold air entering and on a still day there may not sufficient air changes and the internal air may become stale.2 points
-
Slightly off topic but Prysmian make small cables through to huge subsea power cables 500mm2 and above (I design equipment that lay them), So defo OK.1 point
-
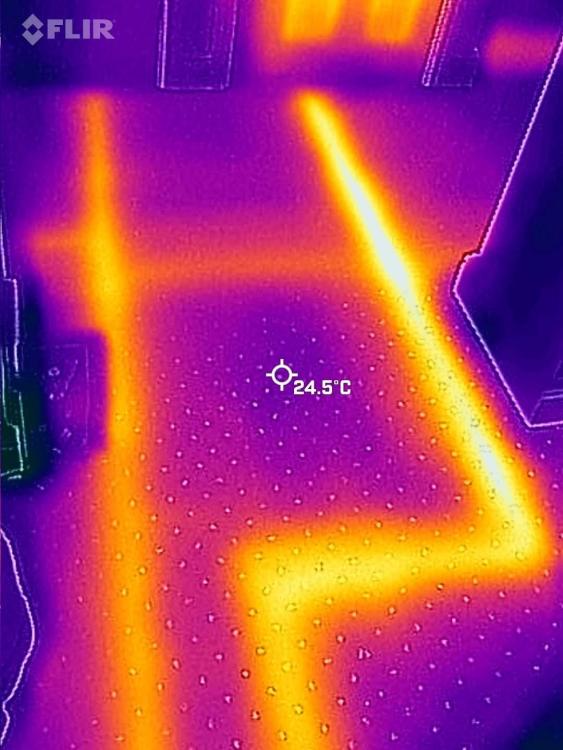
Got anything against using a smartphone adapter version like the Flir One? Not quite the resolution of the Pro versions but still pretty effective...
 1 point
 -
Nope I use Newark Copper as they are up the road and now Telford since I’ve had Trevor on speed dial ..! 🤣1 point
-
Word of mouth is best procurement pathway. Forget LDC plan well and build in waiting time.1 point
-
The easiest for DIY is the semi rigid ducting and a radial system to a plenum box.
 1 point
 -
No blame on BPC, it works fine. We run it at 30% all the time though have a manual boost option and the humidity sensor kicks in when having showers. The machine was specified for the area supplied in the drawings though was at its maximum area. Would not be without it.1 point
-
The initial passion will always fade : thats normal. Seeing other builds go up, owners move in - and in one case (for us) sell up and move while we're still building was hard- at the time. But slowly, the hiccups and disasters have faded into the background. More and more I'm starting to enjoy the process; I now know that feeling of almost controlled terror about doing something for the first time , will fade if I just-bloody-do-it. And if we cannot afford it, there's always a way round the problem. It just needs research. There must have been 20 or 30 instances of that process. To address the OP, I now don't really care when it will end. The only thing that matters is having the guts to put my Head-Down-Arse-Up-Go no matter how I feel 5 days a week. 6 years in, I think I've just about got the T shirt.1 point
-
If you want an installer to take design authority and prepare the building control documentation and certification, then this is one valid route but I feel you should expect to pay ~2-3K for this service plus typical manpower rates for installation. On the other hand if you want to DIY, then I suggest that you need to take design authority and do your own calcs. IMO, BPC provide a useful design validation, but it's essentially a "free" service funded on their supplier margins. Having 4m high ceilings is the sort of thing that they might miss when working from plans. Again, this is a common theme discussed in the past. The BReg ventilation reqs are rather high in terms of volume exchange. A lot of us cranked the flow-rates up high to do the certification report, and then dialled the rate back (say to 30%@ normal; 50% @ boost) for living in.1 point
-
Reading through this thread so many things rang true. Just checked my gallery on my phone and i erected my Hereas fencing in March 2017 and reckon I got another 2 years to go. There have been gaps in construction where very little has happened for a month or more as I have other commitments. I think I was naive with the costs and time it takes and over spent early in the build. Also I had limited network of trades and employing someone cold found in the local free ad is not recommended. My initial passion for project has been sucked away by stressful conflicts of time, cock ups, redos, and seeing other builds go up and now lived in since I started. Now still at it and in the third national/international crisis since start. The more prices go up the more I have to do myself. My advice to anyone starting is decide the max you can afford then divide by two to get your build cost budget. Never again.1 point
-
Had MVHR flow rates set per Scottish planning the other day. As soon as the guy left I put mine on to setback (mid way between min speed and current set point). Considerably lower flow rates, closer to passivhaus and no noticeable increase in CO2 levels, in living space and bedrooms.1 point
-
Make sure you have enough compound and buckets. Have one person mix and carry in the buckets of gear and another lay and smooth out. Trying to do both yourself is a mare.1 point
-
Yes Nick, indeed I have. In fact I have installed quite a few UVC's in the past but not since 2010 when the G3 certification was introduced. I was close to retirement at that time and decided not to undertake the courses required to get a ticket. Instead I spent my remaining working years installing kitchens and bathrooms as a subby for a local improvement store. I still have my tools and quite a few fittings etc so feel confident I could complete the work correctly and safely, albeit somewhat slower these days. We can create a space in the plant room circa 700 wide x 630deep and 2400 high so a standard 250L cylinder + pipe work,fittings, expansion vessel etc should fit OK. I have seen on line Gledhill 1603 high x 530 @ £410 and Telford 1330 high x 554 @ £540. Can you suggest/recommend a cylinder that you would normally to supply to your customers? I would of course welcome any up to date tips, suggestions etc you might think appropriate Regards, Ian1 point
-
Welcome to THE forum! Don't think about clauses in contracts as any contractor who does domestic type work won't accept them - it's a scale thing.1 point
-
I can answer some of your questions. Most of my Heating demand is pre 7am so I can shift the underfloor back an hour to cover that part totally off, my calcs would put my usage with an ASHP to approx 8000KW per anum. That and we have slightly thicker screed so one heat cycle per day normally. Also I would probaly keep the oil boiler for Dec / Jan anyway. From a FIT tarrif view Im on the last Tarrif of 4.5p & 5.5p for export and generation. Using the Calculator on the website reduces my bill by approx £900 per annum this does not include an ASHP.1 point
-
In reality Most people that are doing extensions will ask you for cash So vat won’t come into it In fact most on here bringing in individual trades will be asked for cash It May be worth finding your bricklayer As most doing extensions will either do there own GW Or have someone they work with Better and cheaper to do this1 point
-
There is another solution. Get an Architect to post-rationalise the design: a unique skill that makes good reading in Architects Journal. I can't really do it but something like: The sweeping curves of the sustainably sourced local oak staircase juxtaposes aesthetically and figuratively with the harsh rectilinear oversail, referencing the comforts of modern life contrasting with the harshness of the outside environment. If you can find a useful purpose for the corner of floor, then that will also take away some pain. Then convince yourself you like it and most importantly...stop looking.1 point
-
Airtightness, complexity of design. Insulation levels. The occupants value on air quality and comfortable . £1500 sounds like a bargain, was that from a supplier? Theres a good few threads here where this has been debated to the nth degree. In short no it will probably never pay itself back in cost terms. Then there are lots of things in our house that certainly have no payback. Footpaths, paint on the walls, skirting boards, windows, internal doors. Floor tiles, carpets, fitted kitchen, tumble drier. 2 of the 3 toilets, most of the furniture. Wife, children, etc etc etc. You must decide where the accountant on your shoulder gets told to bugger off!1 point
-
Finally had a minute to breath . Progress is very very fast now. https://www.blogger.com/blog/post/edit/9188371054741800728/87927793314089786231 point
-
Welcome. @hingerz Good to have knowledge on both sides. Working on my own home gave me great knowledge from working for others and how to overcome problems. However, I have learnt masses from the posts here, and been pleased with the gentle responses to my silly questions. (Questions I didn't realise were silly! In case your wondering).1 point
-
To all, I’m a self employed architectural consultant located in South Devon & have just found the BuildHub/forum. As per forum rules, I will not use the forum for any commercial gain, in fact, I may be able to assist others with their queries in the architectural sector. I’m always’ learning myself & in that process, I wanted to pose a question to other planning/architectural types on the subject of PLANNING PRIOR APPROVAL, as ultimately, it should help everyone ‘Lay & Pro’ alike. I’m still navigating this forum as it appears to be split into various forum headings/subject matters & even sub headings, so I’ll try & find the most relevant forum area to post my query on PLANNING PRIOR APPROVAL.1 point
-
44kg per sheet. I’ve been fitting them on my own all week. I’m sure you’d builder will manage.1 point
-
HI @Tom I beg to differ about the energy saving. For 100m2 ours runs at about 17Watts per hour. Call it 20watts times 24 hours a day. So half a kWh a day. During the winter we have witnessed the outside temperature of about 5C air, passing through our MVHR and the heat from the air being expelled, heat the outside air up to 19C before it enters the room at 30 litres a second. Someone who knows the maths will tell me how much energy saving there is on heating 108m3 of air from 5C to 19C per hour. I bet its not half a kWh per day! Thing is you don't see the heat your not using.1 point
-
The link seems to be to "edit post" which means I am asked to log in or register?1 point
-
Why would the staircase person highlight something that he didn’t do had no input in? he’s there to fit the staircase as it was designed not offer design opinions?1 point
-
It is in the lintel spec but the blockwork at the back is usually a minimum of 300mm prior to any wall plate or loads.1 point
-
I would look into getting a length of 150 x 90 PFC cut/rolled/shut into a 1/4 ring beam to link 9 to 11/12 junction.1 point
-
Hairy chest underneath is the answer ( tyvek metal or Dorken DeltaTrela ....)1 point
-
Yes. Problem free, fitted by a reputable company . Warranty only valid if fitted by a qualified company . I cannot stress enough that everyone should do a full and thorough Due Diligence before making any decisions , especially so on recommendation from any online source. Even Buildhub.1 point
-
It depends on how you go about your build For arguments sake If the total brickwork cost was 20k your builder will nearly double that Everything will come with a very large mark up Some friends of ours have even been charged vat on some of the work they had done while using a main contractor Our build is 416 m2 and we will complete it to a very high spec within the 350k that we have budgeted1 point
-
I think you'd be very lucky there! We are building a mid-high ish spec bungalow, 250sqm and when we got quotes last August we received 5 detailed quotes all for around £2500 - 3000psqm. That's for ASHP, MVHR, lots of big aluminium windows, big posh slidding doors, upgraded insulation etc etc. Turn key build though not inc usual fees & paperwork. We managed to get that down to around £2100 when our favourite builder (but also one of the more expensive ones) had a commercial cancellation that overlapped perfectly with our needs, so got a good deal off him, if we fitted to his time framen (which itself caused plenty of headaches) . Edit: we also assumed around 15-20% extra for single story vs 2 story.1 point
-
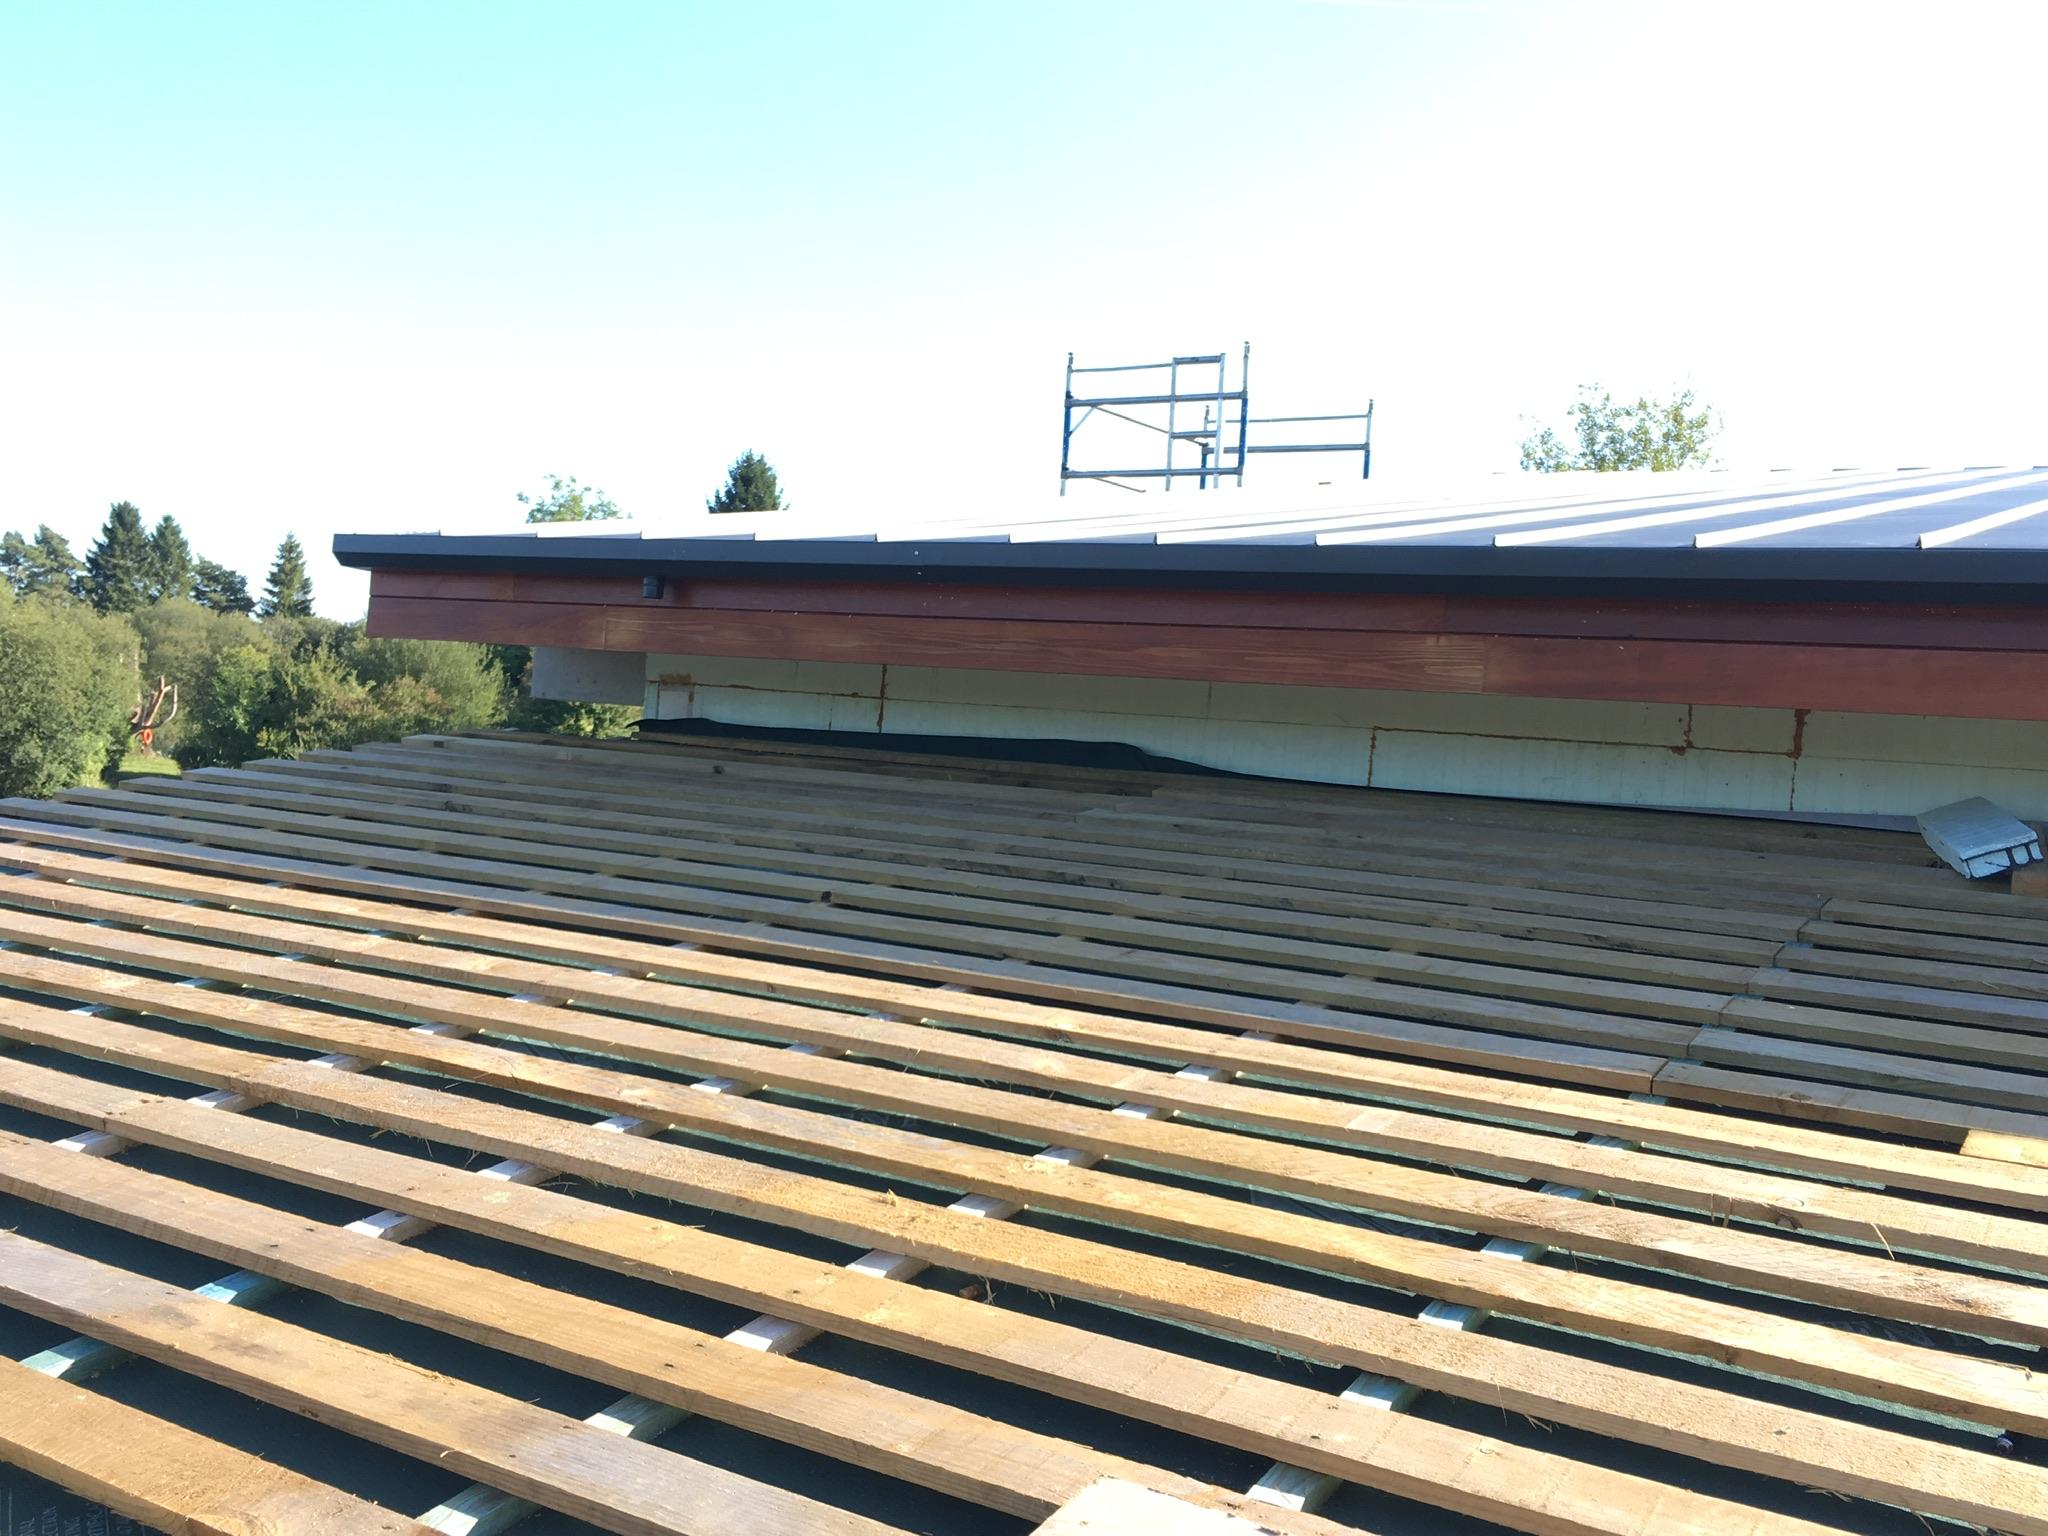
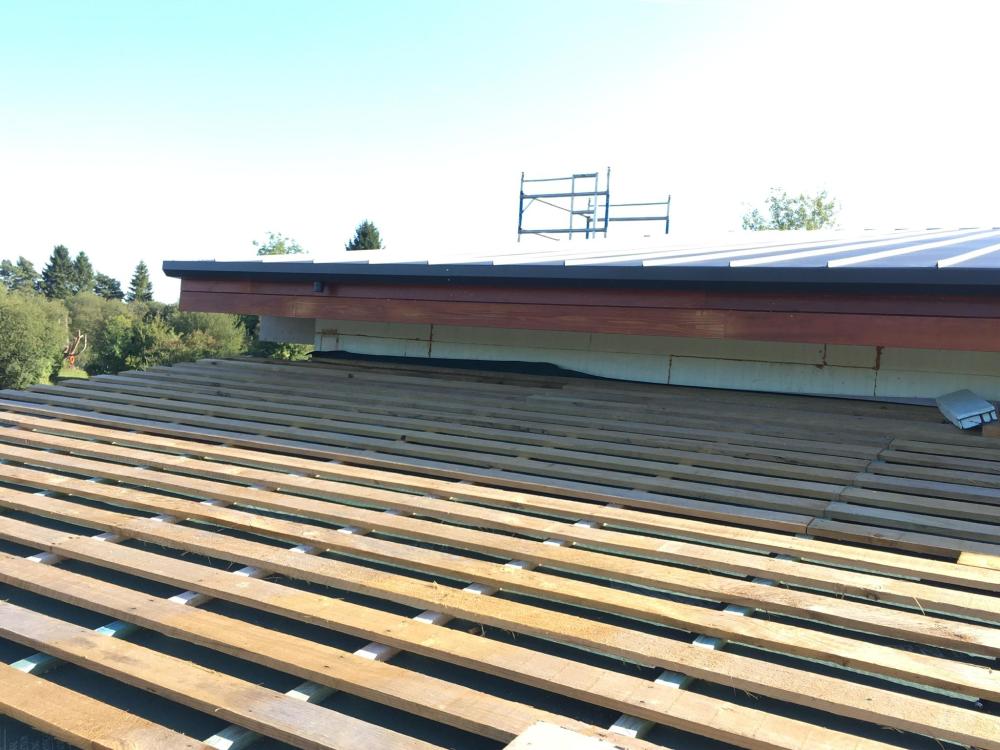
I have a ventilated warm roof fitted with Tata Steel SSR system. Pay attention to the closely fitted battens otherwise it is very noisy when the wind blows.1 point
-
Welcome welcome. Spend £150 ish and buy a copy of PHPP. With an engineering brain it's actually quite possible you'll enjoy it. Looking at the numbers (which are all just school level physics) brings amazing clarity to design in an industry that is rife with misconceptions.1 point
-
Excellent, I didn't know this. I never liked the idea of a flat sheet of metal on a flat sheet of OSB. Far to much chance of moisture between the layers not being able to dry out quickly. The closely spaced battens is a far most robust idea. 10/10.1 point
-
A basement might be an option depending on the ground conditions. I don't think they're as expensive as folk imagine.1 point
-
Not at all. The benefit of dual immersion is that you can use one at 60oC to preheat at the 4/5 hours of octopus cheap rate, on a simple timer, and then have the second ( lower ) immersion set to 85oC and fed from PV excess. Any excess ( after the battery has topped up ) will just further ‘inflate’ the UVC, thus reducing the amount of grid power it consumes during the following overnight top up ( seasonal swings will affect how you manipulate this control ). During the depths of winter you could flip / flop between the two immersions to get more DHW per 4/5 hour charge and that will leave any solar free to help charge the batteries. Without your generation / consumption / export figures it is quite difficult to offer concrete solid answers / suggestions.1 point
-
I'm getting older, and prefer sockets that I plug into at a height where I don't fall down trying to reach them and that's why ours are between 450mm and 1200mm in our "forever home".1 point
-
Have a read through my blog @Jeremy Harris and others. You have Slab losses, wall losses, fenestration losses, roof losses, air exchange losses, and thermal bridging losses. You need to design a house with a sensible balance to optimise so that you get a delta £s invested on any one that gives the best drop in heat losses and therefore delta £s in running costs. As with my and Jeremy's calcs, you don't need anything too sophisticated like the PHPP model which as so many terms and adjustments that it is intractable to make trade offs. With TF, as Dave says 8×2 + an extra layer of slab insulation can get a U-value of 0.12; slab and roof same ballpark; decent triple glazing under 1.0. Once you are in this domain 40+% of your heat losses are from air exchange if you have a pretty airtight house and MVHR; up to 85% if you use poor quality conventional build techniques and no MVHR, so you need to make your house airtight by design. The MVHR means that it always smells fresh because you are continually replenishing with (reheated) external air. If doesn't matter how good the nominal design is if your builder doesn't bother putting in the roof or wall insulation where you can't see -- as many have discovered with a FLIR camera once they've moved in. Ditto thermal bridges on steel I-beam crossing the warm / cold divide. The single biggest cost component in our house was the natural local stone skin -- which was a planning requirement, as well as looking nice. As to the near-passive performance, adding this was maybe 15% of the cost of the skin, but then again I use a 3kW inline heater to heat my water-based UFH system and our internal temp is ~ 22½°C everywhere, all year round. Putting the water-base UFH loops in the slab cost ~$2K and no other CH installation, rads on walls etc needed. (The 22½°C is because a pair of OAPs like it that way.)1 point
-
I would add that design is the bigger factor to cost rather than size. I think if I had changed my design, different roof, less weird angles, different materials. I think I could build my place for £100,000 less than it’s going to cost. Square box, red tiled roof, plastic facia and gutters. Probably why the developers stick to a certain design.1 point
-
Assuming there is a room in the roof or might be in future.. Warm roof has the insulation above the rafters (eg rafters are on the warm side). Cold roof has the insulation between or below rafters (eg rafters are on, or partly on, the cold side of insulation). By that definition a warm roof is usually deeper overall. Cold roof has options... a) Ventilated void - if the membrane is NOT vapour permeable there must be a 50mm ventilated void below it. Typically the membrane drapes/sags 25mm into this void to prevent water being trapped above tile battens. b) No void and counter battens - if the membrane is vapour permeable you can reduce or eliminate the void. If you eliminate the void by fully filling between rafters you should add counter battens on the outside to raise the tile battens off the flat membrane and allow water to run down. If the membrane is in contact with insulation (eg Cold roof with no void/drape) then you should use a membrane approved for that as not all are. A room in the roof design (aka warm loft) can have any of the roof types above. I would go with cold roof b) as the counter battens add 25mm but you avoid the 50mm void. So overall this saves you 25mm for a given thickness of insulation. If height isn't a problem I would build a warm roof with as much of the insulation above the rafters as possible. If you want to build a hybrid (some above and some between) then you must get an Interstitial condensation risk analysis done. I believe the recommended ratio 2/3rds above and 1/3 between. If you put more between the rafters that "moves" the top of the rafters nearer the cold side increasing condensation risk.1 point
-
Our polished structured concrete floor with UFH has been down about 18 months and no damage that we have noticed, heating has been on for about four. Issues we had were with the builder we used to get us to DPC and the subfloor work suffered from slope in his spirits and bent string. The outside walls were woodcrete ICF or glass. All partitions were done after the floor. Glass frames were done after the floor. The finished floor level was set to the threshold of the sliding doors (bedroom 4.5m living room 7m) and the main enterance door which was part of a 9m glass wall. To enable the floor to be finished at this level I started with 150x50 timber which was reduced in thickness by a Aldi bench plane machine (took a while) to the correct thickness and then screwed to the outer blockwork in the correct place. The concrete floating could then be done over the top of these levels. Next problem was the shower drains. Two were required. I couldn't find anything abvailable in the uk. So I modified two very expensive slot type drains from screwfix and set levels using the same process as for the doors. The main man from the floor supplier was more than happy as his power floaters had unrestricted access. The floor is 150mm with two layers of steel mesh and spacers. The UFH is between the mesh, I think. There are a number of expansion slots cut in the floor but most of these are under the intended partitions and edge of the mesh. The man incharge of the men that came to float the floor said we cant put a slope in the floor for the showers as concrete is flat. I pointed out that the other main man said you could. The two nice men doing the floating said they would come back later and do those bits by hand. They spent a long time power floating, well past midnight. Then a few weeks later the polishers came. Polished concrete is NOT a quick process. Our is a darker grey and is a fine finish with just the odd bit of aggregate showing.1 point
-
I've put polished concrete floors into a lot of projects. Huge polished floor to the atrium of a Performance Theatre, Several Universities Projects, lots of houses and even my own house. Many of the projects won prestigious RIAI Awards. I've also seen polished concrete floors by others go horribly wrong. Some put in the wrong reinforcement, some use the wrong mix, etc. I wrote the below for someone at work but is relevant for you too. If you've any questions on any parts let me know. Concrete The concrete is 35N10 which is reinforced with plastic fibres at 900g per cubic meter of concrete. As a polished floor goes in later it might need to also be a pump mix as you’ll have doors, windows and roof on. Whoever you get to do your floor will help input on this. Placing of concrete It’s not just the grinding and polishing of the concrete that’s important. The placing and power floating of the concrete is critical. Unlike a regular concrete floor, a floor poured which will be polished has to be super flat and power floated for hours after. Very few people in Ireland can do this correctly. Formwork for steps and other edges has to be perfect and have 45 degree edges to allow trowels into the corners. Little things like dragging a vibrator, shovel or rake through a floor when placing the concrete the wrong way will result in the drag mark being visible when the floor is polished. These things may not be visible to the untrained eye but are flaws in a lot of cheap or poorly installed polished floors that can never be fixed. Spend time and money on this part as a poorly poured floor can’t be fixed by grinding and could make the errors even more visible. Crack Joint These have to be around every 6 meters max and are a saw cut made the day after in the concrete about 30-50mm deep which is later filled with a flexible mastic. Don’t have any areas too small as they could rock like paving slabs. Don’t have them long and thin either as they can crack in the middle like a seesaw. If you have a few pipes in the floor, eg heating pipes coming from a manifold it’s a good idea to have a joint here. It’s also good to line these up with any columns you have. Hide them under lightweight internal stud walls and have them at all doors, etc. You have to think about underfloor heating pipes and ensure they’ve sufficient coverage before cutting the crack joints. That’s where the thickness of the floor is important. Expansion joint Not to be confused with a crack joint these are flexible day pour joints and are also positioned above expansion joints in the structural floor below. As a result they’re slightly wider than a crack joint but again are filled with flexible mastic. For a house you probably won’t have one however we had one on a larger project I worked on a major project. Coloured Stone This is optional. I’ve done it in some projects but not my own floor. Make sure you get the contractors to quote for 4-5 samples if you plan on using coloured stone as you don’t want to get a claim later. You can pick whatever stone you want and also the size of stone. Usually they’re sprinkled over the top during powerfloating. They can be mixed through at the concrete plant but you’ll use a lot more coloured stone and it will be a lot more expensive. Glass which can also be used has to be lead glass as ordinary glass can shatter when grinded. Slip Resistance The slip resistance of polished concrete usually complies with all regulations. Like any regular floor it can be more slippery when wet. Additional grinding and polishing doesn’t necessarily impact the slip resistance of the floor so thinking a shiny polished floor will be a lot more slippery isn’t right. As it’s a domestic situation I wouldn’t worry about this however if it’s a public building you’ll need to include in your specification a slip resistance pendlium test to be carried out at the end of the project to prove the floor is safe. This is a useful document to have in the safety file should someone slip in the future. If you want to get it carried out for peace of mind you can. Sealing Make sure you ask in your quotes for sealing the floor after it’s grinded and polished as the concrete is porous and will absorb tea/coffee spills and heavy traffic if not sealed. The sealing will make the floor a tiny bit darker but in my opinion is worth it. Protection Include in the spec for the contractor to protect the floor after its poured for the duration of the works. We had two layers of cardboard over the floor for three months. It dired out more in areas where it wasn’t protected and at joints but once exposed the variation disappeared. Just ensure it’s well protected everywhere particularly if its not yet sealed as any paint spills etc, will destroy it. Grinding and polishing You can very lightly grind the floor and then polish it as normal if you don’t want to expose aggerate or alternatively grind it to expose the aggerate and then polish it. Grinding a floor is time consuming and therefore expensive so include for grinding the floor to expose a lot of aggerate and for a lot of polishing. You can then later decide with samples not to grind as much or go for a reduced polish. If you don’t specify the amount of grinding required they’ll assume a very light grinding with no aggerate revealed. The floor will be grinded in stages starting at 10 grit working through 15 grit, 25 grit, 50 grit, 100 grit, 200 grit, etc. 800 grit is matt finish and 1500 grit would be a medium shine with 3000 grit a high shine. If you want lots of stone aggerate exposed they’ll spend longer at the 10 and 15 grit before moving up. Reinforcement We used a plastic fibres reinforcement. You can get thin ones and heavier ones but the heavier ones can appear if you look closely in the finish. It’s 900g per meter cubed that use used which is standard. Don’t use steel fibres and don’t use steel mesh. I researched a lot of failed concrete floors and one major issue with steel mesh is when they cut the crack joints they don’t cut through the steel mesh so the floor can’t crack at the crack joints. The joints are still reinforced and therefore crack elsewhere. Perimeter You’ll need flexible insulation 12-15mm thick around all perimeters and at columns, service popups and penetrations, etc. Don’t use rigid insulation as this won’t allow the slab to move and therefore risk cracking. Another issue is with stone walls which are very uneven require thicker flexible insulation. If you intend to dryline do this after the floor is poured and you’ll hide the perimeter insulation easily. Thickness Our floor is 100mm thick and that’s the optimum. Don’t go below 75mm as below this is too thin and you’ll risk cracking. If the floor changes thickness anywhere you’ll need additional crack joints. For example if you’ve steps, ramps or around all recessed matwells as you have a change in thickness in the concrete. Services All electrical trunking and mechanical services should be cut out of the insulation below the concrete floor. If a 50x150mm electrical trunking was placed on top of the insulation the concrete would crack over the trunking. Where we had several pipes close to each other in the floor we had to include a steel plate to rest over to ensure the concrete remained 100mm think and didn’t flow down between the pipes increasing the depth but also preventing the slab from moving. Underfloor heating This works great with polished concrete floors due to the thermal mass of the floor and the slow release of heat. It’s important to have the floor well insulated so put in as much insulation as you can afford otherwise you’ll be paying to heat the ground under the building. Another key point is to ensure the underfloor heating pipes are firmly clipped down to the insulation as any pipes which become loose or if the plastic staples become loose they can be exposed or damaged in the polishing of the floor. Also you’ll be cutting into the slab for the crack joint and if the pipes rise a bit you risk cutting them.1 point
-
What’s your concern about smart meters; I really like having one.1 point
-
Unexpected consequence of Corona Virus - you need your 8.5 month pregnant partner to help you pull the house down as all the hire places are closed and you need a long chain and a VW golf in lieu of a telehandler... VID-20200328-WA0006.mp41 point