Leaderboard
Popular Content
Showing content with the highest reputation on 02/20/21 in all areas
-
I think the fact that it is split horizontally with the materials will mean that your eye will not be drawn to the verticals. I think it looks fine.3 points
-
It's not like you've got a full arrangement that's perfectly symmetrical and then one thing out of place, the whole thing isn't symmetrical! It's not an issue3 points
-
2 points
-
2 points
-
You need professional input to avoid you doing anything that resultsin the house sliding down into a big hole. Can you not repair the garage and use that, it will be by far your simplest form of off road parking. If it has been built properly it will have been built into the hillside with retaining walls. What is to the right of your garage? is it right on the boundary or is there scope to widen it by rebuilding the retaining wall further to the right?2 points
-
Yes I was referring to the forum we're on and I appreciate that buildhub is a self-build forum. I share the concern that some companies are biased and the risk of unsuitable systems is real, but I've vetted installers as much as possible, spoken to previous customers and read into their over 10-year long histories. Yes, although costing money is not the only cost I think we should consider. When I weigh up the reduction CO2 emissions (I can expect around 67% decrease according to this: https://www.london.gov.uk/sites/default/files/heat-pump-retrofit-in-london-v2.pdf), I could argue that heat pumps are cheaper all things considered. We need to consider all of the materials we use in building too; there's some excellent progress in Europe with increased timber for example. I appreciate your replies to my thread ProDave, I hope the above isn't read as confrontational - just my answer to the 'why should they because gas is so cheap' question. It's a like the ICE vs. electric car debate, I'd love to drive a 6-cylinder NA monster around but it just seems wrong to me and I hope that the subsidies for fossil fuel will reduce in future. Thanks ?2 points
-
When you sell. Can define all rights, boundaries, obligations etc etc then.2 points
-
Just to recap Six weeks after instructing our solicitor on the purchase of two plots and a field She has informed us this morning that all the searches are back and contracts should be ready to sign in two weeks Which is far quicker than we thought2 points
-
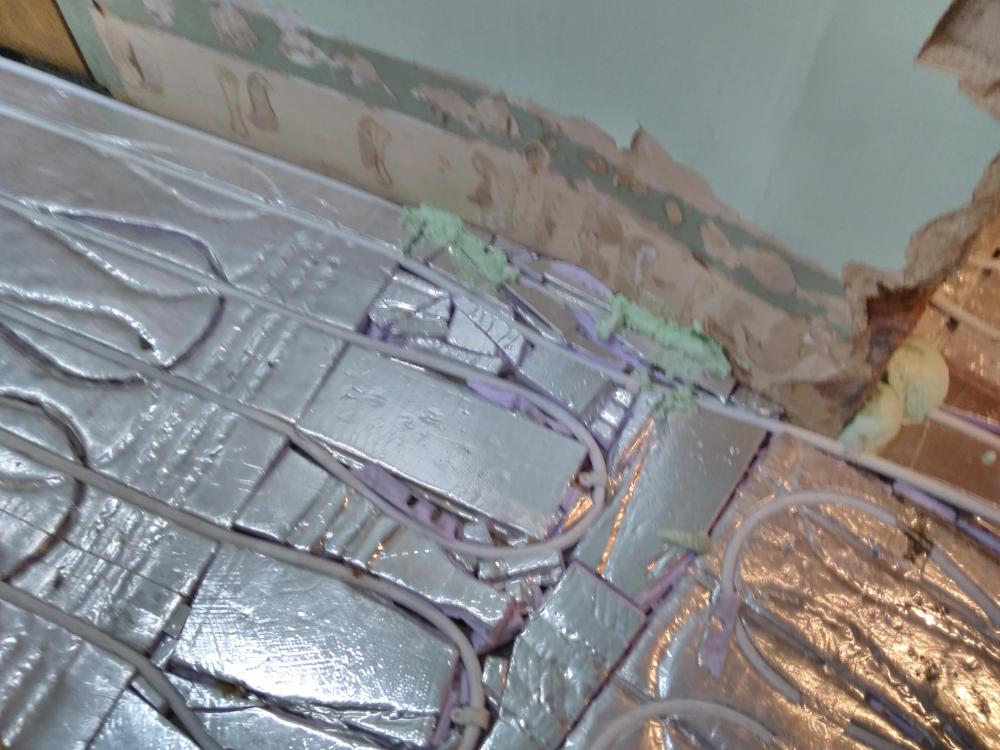
Hi, We have just had a new underfloor heating system installed and would like some feedback on the quality of work. We have a retrofit installation with insulation panels that has traces in it. Soon there should be a latex screed going down but the company doing the screed has said they cannot do anything until the insulation boards have been stuck down and the edges sealed so the boards don't float up. When the board were put down no adhesive was used, is this normal? Also the boards were not cut to the shape of the rooms and gaps were left. On the advise of the screed company the plumbers were asked to come back and fill them in as a huge amount of screed would be needed to fill them. The guys came back and filled in the gaps with boards they cut in to random piece and put in but again did not fix down. Finally they used some expanding foam around the edges but the board lifted due to not being stuck down. Anyway I have included some pictures to let you see for yourselves. Thanks https://ibb.co/St199JD https://ibb.co/svWfn1T https://ibb.co/7vC4MKv https://ibb.co/xjJmBr0 https://ibb.co/5WBZQgh https://ibb.co/TKhrChX https://ibb.co/hsGkkMB https://ibb.co/fpxDKKd1 point
-
It's been a wile since the last blog entry and I didn't expect to have gone through yet another contractor by this stage but that's the way life goes! We had some good progress with the basement floor walls going up and getting poured without a hitch. We moved on to the basement roof which is a terrace for the lower ground floor so was propped with acros (decided to buy 50 as can re-sell later). That also went well - aside from some issues identified by the structural engineer. Due to a delay in the concrete pour (don't ask), managed to get a local firm in to make up the shuttering for the exterior stairway so poured them at the same time as the basement roof - not really saving money just getting it done a bit earlier. With that done we could get no with some backfilling on the sides of the building, brining up the drainage pipes from the soakaway and building some planters between the side the basement and the boundary - reusing some of the sleepers from the retaining structure we built along the boundary. Also meant we could get some blocks in to the other boundary wall and close in our neighbour - she's been great and very understanding! After applying the waterproofing and a few weeks we were able to properly backfill behind the basement. The engineer required more granular fill than the beautiful sand we had removed so that hurt a bit but never mind we cracked on with that and backfilled against the eps sheets we laid against the double drain which was against the waterproof membrane. This took a lot of time compacting in 150mm layers but we had a big excavator on site to help and a few bodies. With the backfill done we could start on the ground works for the lower ground floor. Unfortunately a ground worker though a boundary wall should come down (I wasn't on site) so that made a lot more work - was the remaining part (about 8m) of a 20m long wall so more to get rid of and more to rebuild (he didn't last a lot longer). As this floor is below street sewer level we installed a1.5m x1m pump station for foul water/sewage - the upper floors go direct to the sewer so we can last a while if this get blocked up - though it does have 2 pumps, an alarm etc. Issue really was that it had to be pretty deep due to the distance from the furthest bathroom - though the groundworks guys did a great job with that. We found that a large tree we had felled (with permission) had it's stump in the way so a day was spent getting rid of that -managed to find a neighbour to take it + some off-cuts of timber! You can see in the pics some decent size I beams we installed to make a king post wall retaining our neighbour's new fancy house - the beams were 9m long so 6m in the ground and 3 out to retain the excavations. Luckily I could call upon the firm I used for the earlier retaining king post wall who happened to have hired in a great new machine which they used for 2 days to make the holes and we then used the 13T excavator to drop the steels in place - this was completely heart in your mouth stuff. The steels were too long to be lifted so the guys cut a wedge in them 1m down from the top to wrap the lifting chain around to get more height - worked great. A bit of concrete later and we had 4 solid steels which we could install the sleepers in to. Rest of the ground works just took its time, we're 3.5m below ground level so all materials had to be sent down a home made chute but more problematic was the removal of 160T of additional excavations from the trenches and final levelling. how do you get that up 3.5m? We hired a long reach HiAb with a clam shell bucket and paid extra for a tipper to be loaded at the rate of 1 per hour. Took it's time but we got there eventually. We still had some final trenches and drainage right at the front of the site which of course resulted in 30T more excavations which we put in dumpy bags and got the HiAb back to lift out and put in a tipper - though kept 10 on site as a safety barrier and to reuse for backfill later. And the long boundary wall - well we re-built that much stronger than it was and also a little higher to fit with a future stairway - not looking forward to the rendering cost for that ! So we're now ready for the concrete blinding layer and then we get the steel fixers in for 10T of rebar for the next slab. I hope it gets easier after that! and hope we keep the current team for the duration....1 point
-
I think that would easily be physically possible... I think the hinge side of my bifolds (short 3 panel) could easily be a slide side. No idea if there is a locking or security issue, or whether anyone would make it.1 point
-
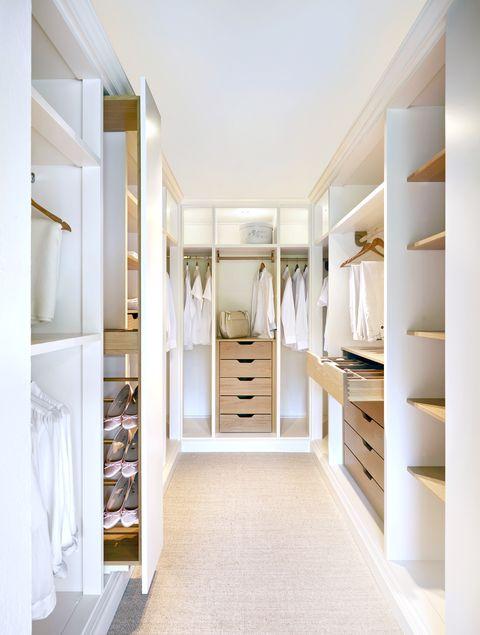
Yes indeed. It will only look like the show home if you only have about 12 items of clothing or a housekeeper. Whoever has time to line everything up in order of colours etc?1 point
-
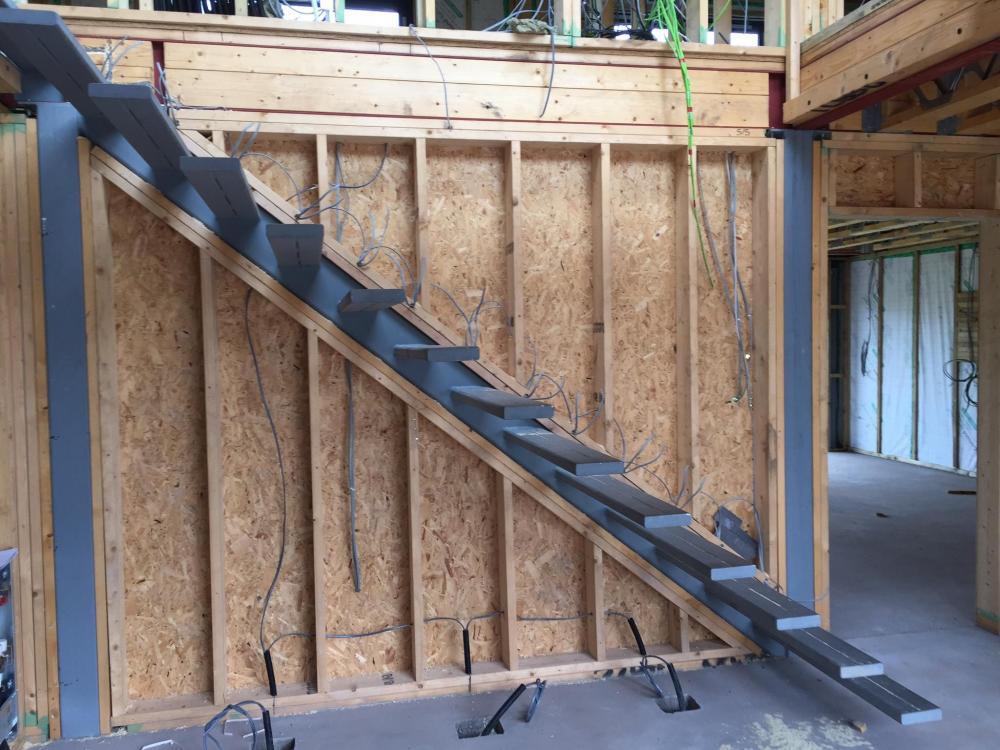
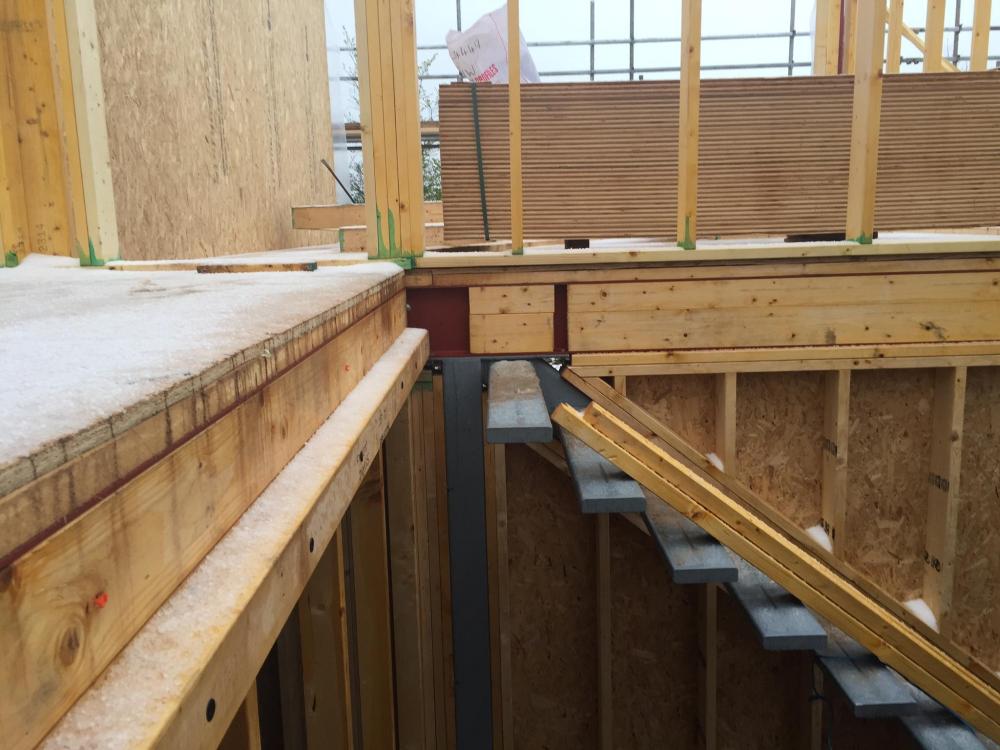
Yes in my experience you would definitely want those timbers to brace it together rather than just be aesthetic/balustrading1 point
-
What size bolts? What you're talking about is a bit different to how @Trw144 has done it! If going into blockwork I'd be looking at resin anchors.1 point
-
1 point
-
Agree with ProDave, be careful. I excavated approx 140 tonnes to create my driveway and had to hold up the corner of my house and garden with a 2.5 metre high wall, luckily old school builder and SE did a great job1 point
-
1 point
-
One circuit at a time, remove the wires from the MCB AND remove the corresponding neutral wired from the neutral block top left. Take particular care to follow the lives back to identify the cable and identify the corresponding neutral. Neutrals look all jumbled up in the N block so not as straightforward as it could be. the first mcb, the 32A one, looks to be a red / black ring final with a later brown / blue spur added. Treat that as 2 circuits so try removing the 2 reds (and corresponding blacks) or try removing the brown and corresponding blue one at a time.1 point
-
1 point
-
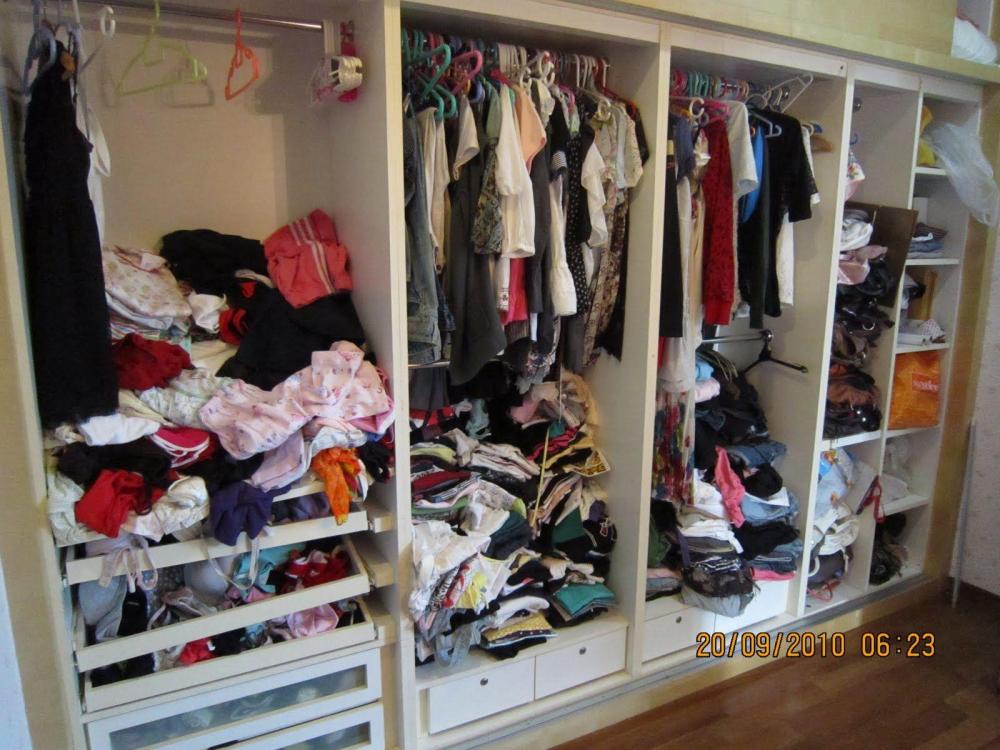
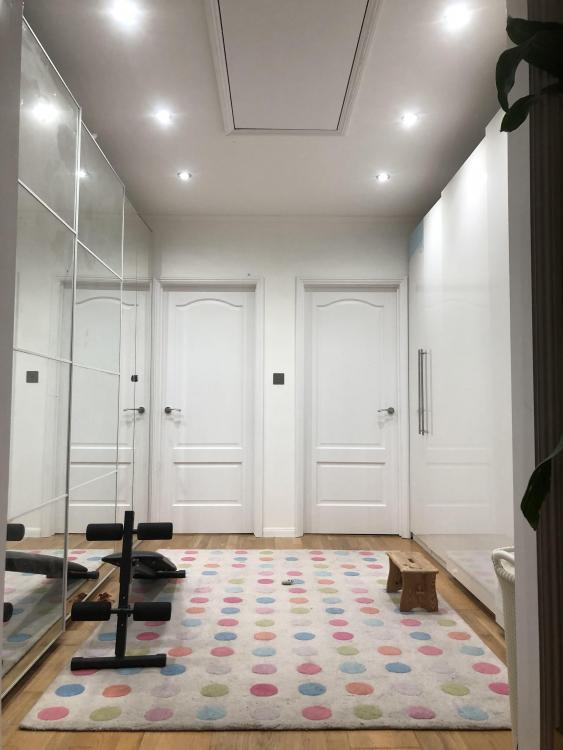
We have a walk-through wardrobes area (3300 x 3300mm), stuffed with IKEA PAXs. I hate open wardrobes as the amount of dust they gather is phenomenal, and I can't be bothered to keep dusting all the shelves and clothing. So we went with doors. Overall, I love this area, it is so convenient to have all clothing etc in one place, thus I have NO wardrobes in my bedroom and it is soo much better so! With regards to the width of your walk-in area, make sure you can comfortably pull out a drawer whilst standing in front of it (not being squashed against the opposite wall).1 point
-
1 point
-
Water companies often fit small bore meters as standard. Apparently they are better at recording low flows. If you want a higher flow / larger pipe without the restriction at the meter they often have a much higher standing charge. If you need a sprinkler supply, have it as a separate pipe. Our water company like to fit a meter to these as well, just to make sure you are not nicking their water or leaking. In this case it is well worth specifying a large meter to guarantee flow rate. Fire supplies do no have a standing charge.1 point
-
1 point
-
@Bartholomew Looking at the link you posted it says:- 'We have seen many people try and save time and money by leaving the frame in when they try to block up an opening but this never works.' I would use concrete blocks, you can still put cladding on.1 point
-
Exactly. You do this by way of a transfer with the land registry. You can't transfer land you own to yourself. You will transfer the existing house to a new owner and retain the plot for the new house.1 point
-
Yes, and good prices Just placed another order for Fresh Sawn Structural Grade European Oak, actually to build a 4 poster bed!1 point
-
Will give a slightly better dynamic pressure ( with the bigger pipe ). The thing to understand here is that you will get X flow and static pressure at the mains connection point ( usually at the street ) and what you need to do is preserve that value where it arrives at your internal stopcock. So you look at the incline / length of pipe / straight or convoluted run etc and decide which size pipe is required to stave off the losses created by the pipe run. You want to get as close to the original values at the stopcock as possible, so the size is not relative to the supply, it's relative to what you need to not suffer significant losses from conveying it from street to house. If you're digging a trench anyways, then upgrading from 25mm to 32mm is a negligible increase in cost, and a wise investment in the future. Remember that in areas which may attract development the water authority may not improve, just add properties to, and then your connection dynamics may change. A bigger pipe makes complete sense, and is a great insurance policy too.1 point
-
I do agree with Nick above, just saying we have one, stuck with it, so just need to get on with it. Spare carried to minimise down time1 point
-
It’s very difficult to match all the windows up on modern designs When you take into account Bathroom requirements and building into roof spaces In the past It wasn’t unusual to have a large five bed house with just one bathroom But all the windows and bays in neat lines ?1 point
-
I really would try hard to get a gravity connection. Failing that, a small pump station. I would rather people crapped in the garden than have a Saniflo.1 point
-
I have a Hive thermostat in my house. I was in Lidl today and noticed they were selling Smart lamps that used Zigbee so thought it was a £9.99 chance and bought one as I thought Hive used Zigbee as well. Got home and tried to pair the lamp to my Hive system using my Phone App, couldn’t get it to see it. Anybody else tried this, am I being stupid and doing something wrong, or is it just not compatible? Cheers1 point
-
I appreciate the advice, I have two main builders who are fairly sensible as far as the right foot gear, ear protection and eye protection when needed. I am hopping that all my plumbing work, plastering and first fix electrics are done before the stairs go in, then try to manage the rest.1 point
-
1 point
-
Nah, part of the reason I decided on getting the pre plumbed cylinder is that alot of the stuff is already on it and connected up to the FTC too. A lot less for me to think about. If I'd bought all the parts separately I don't doubt that I could do it, I just felt the cost saving that way wasn't worth all the extra hours I'd have to put in with reading pams etc to get it right.1 point
-
1 point
-
What does passive actually mean? There's a technical standard defined by the Passive haus institute detailed above which you can go for but that's just a vanity £5k spend on a certificate. It basically entails the level of insulation/heat loss and airtightness of the structure. In mine, its 300mm insulation in the walls plus 35mm dead air gap, 400mm in the attic, 300mm XPS under the floor tapered to a minimum 100mm at the dpc edge (so totally enclosed foundations) and triple glazing. All airtight to a measured 0.17ach @50pa. In heat loss terms of U values, walls are 0.1u, roof 0.1u and floor 0.12u. All windows/frames better than 0.8u. A 1930s cavity wall? Well the cavity is likely to be small, so I'd guess the u value would be around 0.5u. My running costs in the past freeze, 15th of Jan to 15th of Feb for heating and hot water around £65. £2 a day. Whole house at 22 to 23 deg plus warm attic circa 85m2 too. 14 zone UFH cast directly into the slab, 155ton heat store. Around 1.5km of pipes! 400l hwt1 point
-
How long is the run, is it in duct? Are we talking 25m here or 250m? Is the ground above the trench still just rough made up ground - i.e. no reason why you cannot re-dig it easily enough? Personally I'd probably just dig it up, lay in a 32mm and leave the 25mm next to it just in case there is a future benefit to it being there - you never know - could even be repurposed for something else.1 point
-
The plumber will no doubt say it’s fine, as he is being paid by the builder so will be on his next job too. You will be stitched up. the plumber won’t have showers going, washing machine running garden taps etc he will say it’s fine, or as others have said allow for future proofing for anything such as sprinklers. The reason the designers in the utility company specify things is so builders don’t just buy the cheapest product at the merchants1 point
-
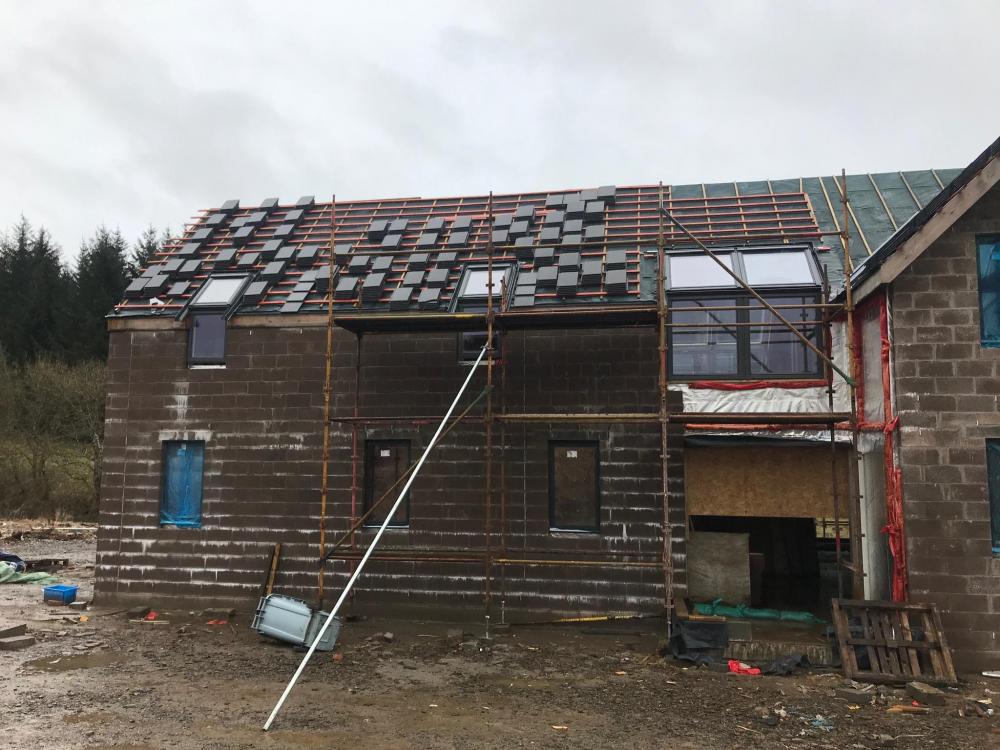
Well, a few weeks have passed since my last past. We finished up the road and last post we had scrapped back the house footprint. I feel like we haven't come that far since then, but in reality we probably have actually now that I look at the pictures. Once we had scrapped back the top and subsoil we got the levels down to where I thought we should be. The house was meant to have FFL of 138.5m (referenced to sea level of course!) but I increased the height by 0.75m. It was just too low in the ground for the plot and the driveway would have ended up higher and now seems to be in the right place. So first full week at it, I was basically running around organising things as you do. I gave Jewson about zero notice of all the stuff I wanted. They gave me good list prices, 90% off with my self build credit account. I tested these on the internet and a few others merchants and they were decent. They delivered the mesh and underground drainage pipes, mesh castles, visqueen etc all in quick time which was good. I also took delivery of my container - which was much required and has been a god send to store everything. On the first day when I was out, the groundworkers were scrapping back to ground bearing soil, but found a soft patch at one end - instinctively they dug another 500mm deeper to get hard ground. Then called me to say we had an issue. They felt it was quite soft, I turned up - had a look it seemed softish but not overly. However I have no experience - fortunately I called the SE and he came straught by to have a look ...wasn't an issue and he told us to continue. Phew. I'd ordered type 1 for the sub base. I did price both type 1 and type 3, but there was quite a difference of 3-4 per tonne. I needed 120 Tonne (turns out actually 250 in the end). I checked with Tanners who had stated Type 3, but they said if it was a struggle type 1 would be fine. Plus I checked with a local guy who does passive foundations and he said they just use that so all ok. We continued the scrape down, then we laid a geotextile and covered with the type 1. What was immediately apparent was how wet it was, that extra dug down section filled with water quickly to form a lovely swimming pool. From here we tried to stone up a little more, but stopped due to rain. Then the guys decided we needed to get that land drain in to dry it up. I have used twinwall perforated pipe to do the land drain (under the guidance of my groundworkers) then added Tees wherever downpipes are going to be. This saves costs as then you're not digging another pipe above it later on. You can just roll the tees up and drop the downpipes into it. I discharge directly into a burn too so makes sense. I helped with the drains and we used the laser the set the fall ( @LA3222 ) I know why you like it so much, great tool and makes it dead easy. I did nearly make a schoolboy error and lift the full pipe up in the pea gravel...before the groundworker stopped me Once we had the drains in this has helped no end with getting the water out, and allowed us to continue a little more. In between this the power connection was brought on site, I had 6 poles put in from 3 fields away. I managed to also get them to hide the transformer pole in my woods which was ideal as I had planned it in the corner if the plotand that would have been visible always so a good win. The trench was also repositioned around the outskirts of the plot so that if I ever build another house ( my retirement bungalow) in the front garden I don't need to move it again. 6 poles put up in a day, then a week later cable pulled and terminated. The connection currently resides under the ground about 15m from the plant room, once I'm ready. I'll dig the duct to there and then I can call them back and pull it into the house at my leisure. We got a little bit of rolling done on the first layer of Type 1, but it's been mega cold and snowy for a few weeks which has stopped us. One thing that has been a pain was the test holes left big soft spots. We had to dig these out completely and fill with stone. The groundworks boys said he always have this issue and would be better if the SE put them off to the side. A good bit of info for others. So since that point it got basically rock solid cold. little happened for about 10 days just due to weather. Then last Thursday after postponing him 5 times, got the surveyor on site. I had marked up various times using the TOPO stations and tapes, but wanted very accurate positions on site for the walls and so I can get the ducts and drainage bang on. I spent days on the plant room design and layout which is now hopefully pretty good. The surveyor and I put all the profile boards up outside the footprint which went well, I was 400mm off the actual CAD position I had given for the house. Which considering I was using tapes from topo points which were 80m away wasn't bad. I had already cut drains in so we just moved house position quickly by offsetting using total station. The profiles are in and all good. So this week we managed to stone up more, the boys done a bit of rolling on Tuesday - in fact I even did the rolling while they moved stone around. The stone is compacting but not as hard as I would and as quickly. They had to put a thicker layer on that the 150mm due it being so wet it would just bubble up. But the stone is soaked, and taking a while to drain off through the type 1 as my stone seemed to have loads and loads of fines. Now If i go back to the start of this post....maybe I should have bought that Type 3, but we are where we are! We rolled it down, then got another layer on and continued to roll it. It was still quite spongy at the end of the other day in a few places but we haven't finished rolling this layer just due to it being wet. The boys definitely put on thicker layers than stated and we rolled the lower layer less than the required 16 passes. I was having a bit of a hairy canary when I cam home and started to doubt what had been done, I was checking the roller weight and spec religiously against the KORE manual, and then getting worried that it would leave the lower layers too soft. It's hard here as, how hard is hard enough as I don't have any experience of laying a sub base and reading on here it should be rock solid. So I was back and forth the next day to site, jumping up and down, seeing how hard it was. I made a plan the night before as it was concerning me, that if needed I would just strip it back down a layer and re roll that bit and not to worry myself too much (the boys keep telling me to put my worry beads away) that we can fix it. Now that we have had two sunny dry days with no ice, it has drained off well and feels better actually and I talked it through with the groundworker that i was worried and didn;t think we had enough passes, and he help reassure me somewhat (and I trust him) that albeit the textbook says 16 passes and 100mm layer that, it simply isn't possible here to do it in the 100mm layer as the roller would bring the water through at that point and we need a thicker lower layer. Now that we are up a but and it's drying it should compact better. It's now pissing it down for the rest of the week and we can't do anything. However he has left me the roller over the weekend, so I can roll it to my hearts content which will make me very happy. Hopefully we get a couple of days dry at weekend and I can et that done, then they will be back Tuesday to hopefully get the last layer or two on and bring it all up to the correct level and then we can mark the ducts and drains and get them dug in to the stone. I was quite surprised at how not flat my flat looking plot was. Standing looking at it is quite deceiving, at one end of my 20m length footprint, I needed around 150mm stone, at the other end I will end up with 4-500mm stone which is quite remarkable. To the eye it's very deceiving. Having the laser there is great and helps make it all very easy. Lots of challenges, on site with weather and generally getting organised. Also the stone compaction and not having done it before definitely caused worry which unsettled me, simply I think because there's nobody else really to take the responsibility as ultimately it's for me to say what's ok and what's not. Having a major responsibility is not a daunting thing for me, I work at a high level in a business and directly responsible for managing and being the technical expert for very large value and complex equipment. However there's something about being in unfamiliar territory here and doing it for the first time with nobody to else to take the responsibility which is both exhilirating but also slighlty terrifying. It's like when you take your first foreign trip without your folks, or when your new born baby won't stop crying. It's a challenge and when you get through it, it's good. You just need to feel your way through and make as best decisions you can and rely on the people around you. I can say I am absolutely thoroughly enjoying myself. I have loved being out my home office (daughters nursery!) and being out and about on site. I cannot wait till get further ahead, the kit comes, which is planned for April now, and I can work up there every night in the spring and summer. The kit has been delayed somewhat due to messing around with L shaped combination skylight windows for a week, I can firmly say trying to get them figured out has been a PITA. Also, I had added the angled reveals at the top and bottom (which I may scrap tonight!) but that's another post for another day.... Lots of pictures as that's what blogs are about. Test holes sense having them dug below.1 point
-
Omg you both need therapy, there’s nothing there even worth keeping box of matches to all of it.1 point
-
I think wires have been crossed here. Years ago truss manufacturers only provided trusses for the main regular segments of a roof and where there was an L-shaped intersection the roof carpenter filled in the missing section of the roof with traditional cut rafters that diminished in length going up the valley. These days the truss manufacturers provide a set mini trusses that infill the L-intersection. I thought we were talking about missing valley boards that support the valley material (GRP or lead). Valley boards can either be continuous lengths of timber running over the top of main trusses and infill trusses or the valley support can be fabricated from multiple flush infill boards shaped to fit between the trusses. I am guessing your building inspector has looked at the spec for the GRP valley and is now saying why are the valley boards missing. Somehow the conversation about missing valleyboards has become conflated with a side discussion about truss infills. There might be a relationship because the valleyboards will connect with the infill trusses.1 point
-
You could move into the caravan while you finish the bathroom... en-suite.... boiler cupboard...... heating .... UFH........ roof...... On the upside it may be warmer than the house ..??1 point
-
I spoke to land registry the other day and I was told that you can made a request to expedite applications.1 point
-
At the moment there isn’t anyway of quickening things up I was talking to our solicitor about three parcels of land that we are buying and she basically told me It is what it is But added if the stamp duty holiday ends in March Her and other conveyancer workloads will drop dramatically mid Feb So some hope of things quickening up Unless the chancellor extends the SD holiday1 point
-
Yes, I admit the way that Jay held my enquiry was very reassuring, and refreshingly straightforward. Also, their company values resonated very well with me, and the way I run my businesses. I will try to provide a brief summary of my experiences so far in a new thread later, as I feel it could help many in their early evaluations. Bart1 point
-
Here is my experience this year - I wish there had been more on here to help guide the supplier selection process... Kingspan Timber Solutions- very helpful but ultimately could not get price down to a reasonable level for the insulated frame. Did have reasonably priced options for a weathertight package. The only supplier I came across that offered 89mm studs as opposed to 140mm - to be fair they did offer their 140mm stud option but noting above point on price. Not many options for insulation: basically PIR for TF with no option for uninsulated frame - I preferred a mix of mineral wool and PIR. I raised a few questions on here about claimed U values - some uncertainty as to whether U values could be achieved in practice given specifications. Liked the idea of a SIPs roof but it required purlins that would have been intrusive with our 1.5 storie design. Flemming - price was too high. Ecosips - helpful and reasonably priced SIPs solution. Put off SIPs as limitted experience of this on Buildhub - perhaps even some misunderstanding. Would have struggled to hit target u values with SIPs alone - would need additional insulation such as PIR. Solo - a very close second in terms of best price and very helpful and responsive. Was very little experience of them on Buildhub that I could find. Went with MBC uninsulated frame as best price and a great reputation on Buildhub. In their quote they offered various costed insulation options for standard 140mm timber frame and a separate option for the passive frame (with Larsen truss frame and Warmcell insulation) - very nice but beyond my budget. Have completed frame design and now in manufacture- positive experience so far.1 point
-
1 point
-
Unfortunately I have come across this attitude before but quickly nipped it in the bud by talking about the build process and using words they didn’t expect a woman to know, can’t stand men like that and certainly wouldn’t give them my business. Hubby had put some of them in their place too when they tried to address him instead of me and he turned round and said there’s no good talking to me you need to talk to the boss!1 point
-
Have you a copy of the Home Builders Bible? Pretty much does what you ask, using a model house to base the numbers around. You can also get hold of SPONs to price individual elements. However, may be worth getting a QS to independently draw up a costings worksheet from your plans - we did this (£1500 plus a PHPP analysis) and it was money well spent as I was able to target each individual element and set my self the goal of beating the price. Regarding getting sub trades vs a single contractor, not that complicated really. You just need to break the job into logical stages by trade and then go get quotes to compare. On our build we had the following trades/contractors in the following order (quite a few trades overlapped at end) - Electrician (site prep for relocation of existing power, supply to caravan and container/site office) - Groundworks (demolition, site prep, basement & services) - Scaffolding (design & erect, 12 week hire) - Timber frame (design, supply, erection & return to insulate & finish airtightness detail after doors & windows fitted). - Windows & doors (supply & fit contract) - Roofer (supply & fit, also fitted the velux that I purchased directly) - Render contractor (supply & fit) - Guttering contractor (soffit, fascia, parapets, guttering & downpipes) - Front door (supply & fit) - Electrical first fix - Plumbing first fix - Joiner (boxing in, door frames, pocket door preparation etc) - Plasterer (supply & fit board & skim coat) - Decorators (supply & paint) - Tiling (I supplied) - Plumbing second fix - Flooring install (supply & fit) - Joiner (hang doors, cills, skirting and architrave) - Resin flooring - Kitchen (supply & fit) We then moved in, and about a year later started - Landscaping (laying patio, prepping for driveway and gates, wall building etc.) - Resin driveway and gates were by separate specialist contractors. - Internal & external glass balustrade & balconies (Supply & Fit) - Electrician still coming and going to finish driveway lights, external power etc. As you can see it was mostly supply and fit (that way everything is VAT free). We supplied some of the groundworks material (EPS & GRP light-wells), Velux windows, MVHR I fit), first & second fix timber, internal doors & ironmongery, bathroom fittings (Megabad), bath, sinks, tiles, wood flooring and all the landscaping materials. I'm sure I've forgotten something here but you get the gist. Key to my success was getting a fully insulated airtight timber frame that included felted roof, floor decks and all internal stud walls as this took away any concerns about the structural elements being in multiple hands. We shared the TF design with the SE doing the basement spec - that was my main concern but both elements came together without a hitch. Main frustration was trades getting delayed on other jobs and throwing out your schedule, but you just need to roll with it. It also gets a bit busy near then end with plasterers, joiners, painters, tilers, plumbers and sparks all trying to get done!1 point
-
Having never used one, can someone explain how a straight claw hammer works? The curved claw of a conventional one seems to work well for pulling nails out, what advantage does making the claw straight have? (if it ain't broke, don't fix it) And how does a magnetic nail holder work? Surely you want to position the nail where you want it, and hit it. If space is tight a pair of long nosed pliers works wonders for holding a nail and it doesn't hurt your thumb if you hit the pliers (I do this a lot nailing cable clips). A magnetic holder on the hammer, what do you do? put the nail in the holder then swing the hammer plus nail at the bit of wood and see how near the mark you can get the nail to start? Again never tried it but it seem so counter intuitive.1 point

