
Leaderboard


Popular Content
Showing content with the highest reputation on 12/31/20 in all areas
-
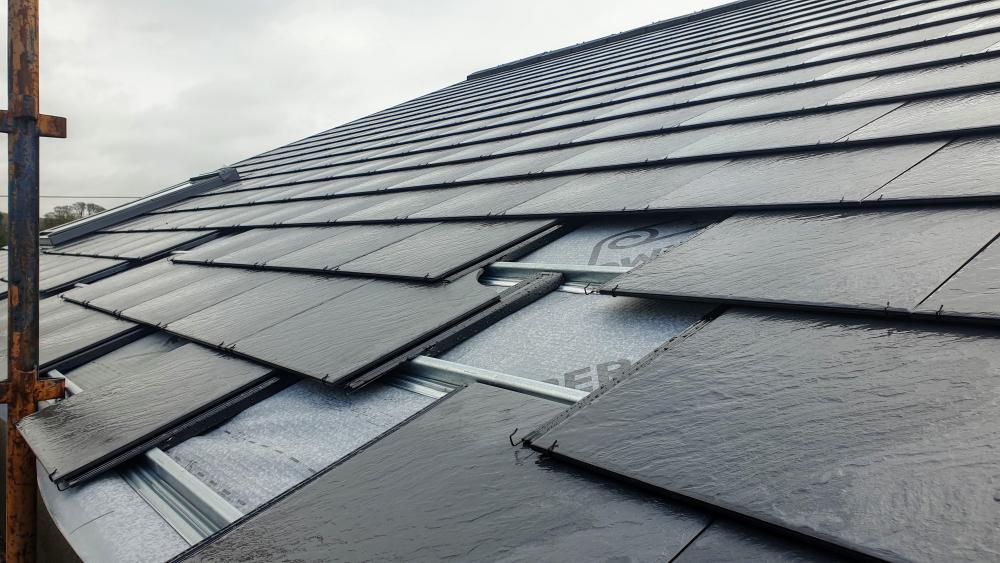
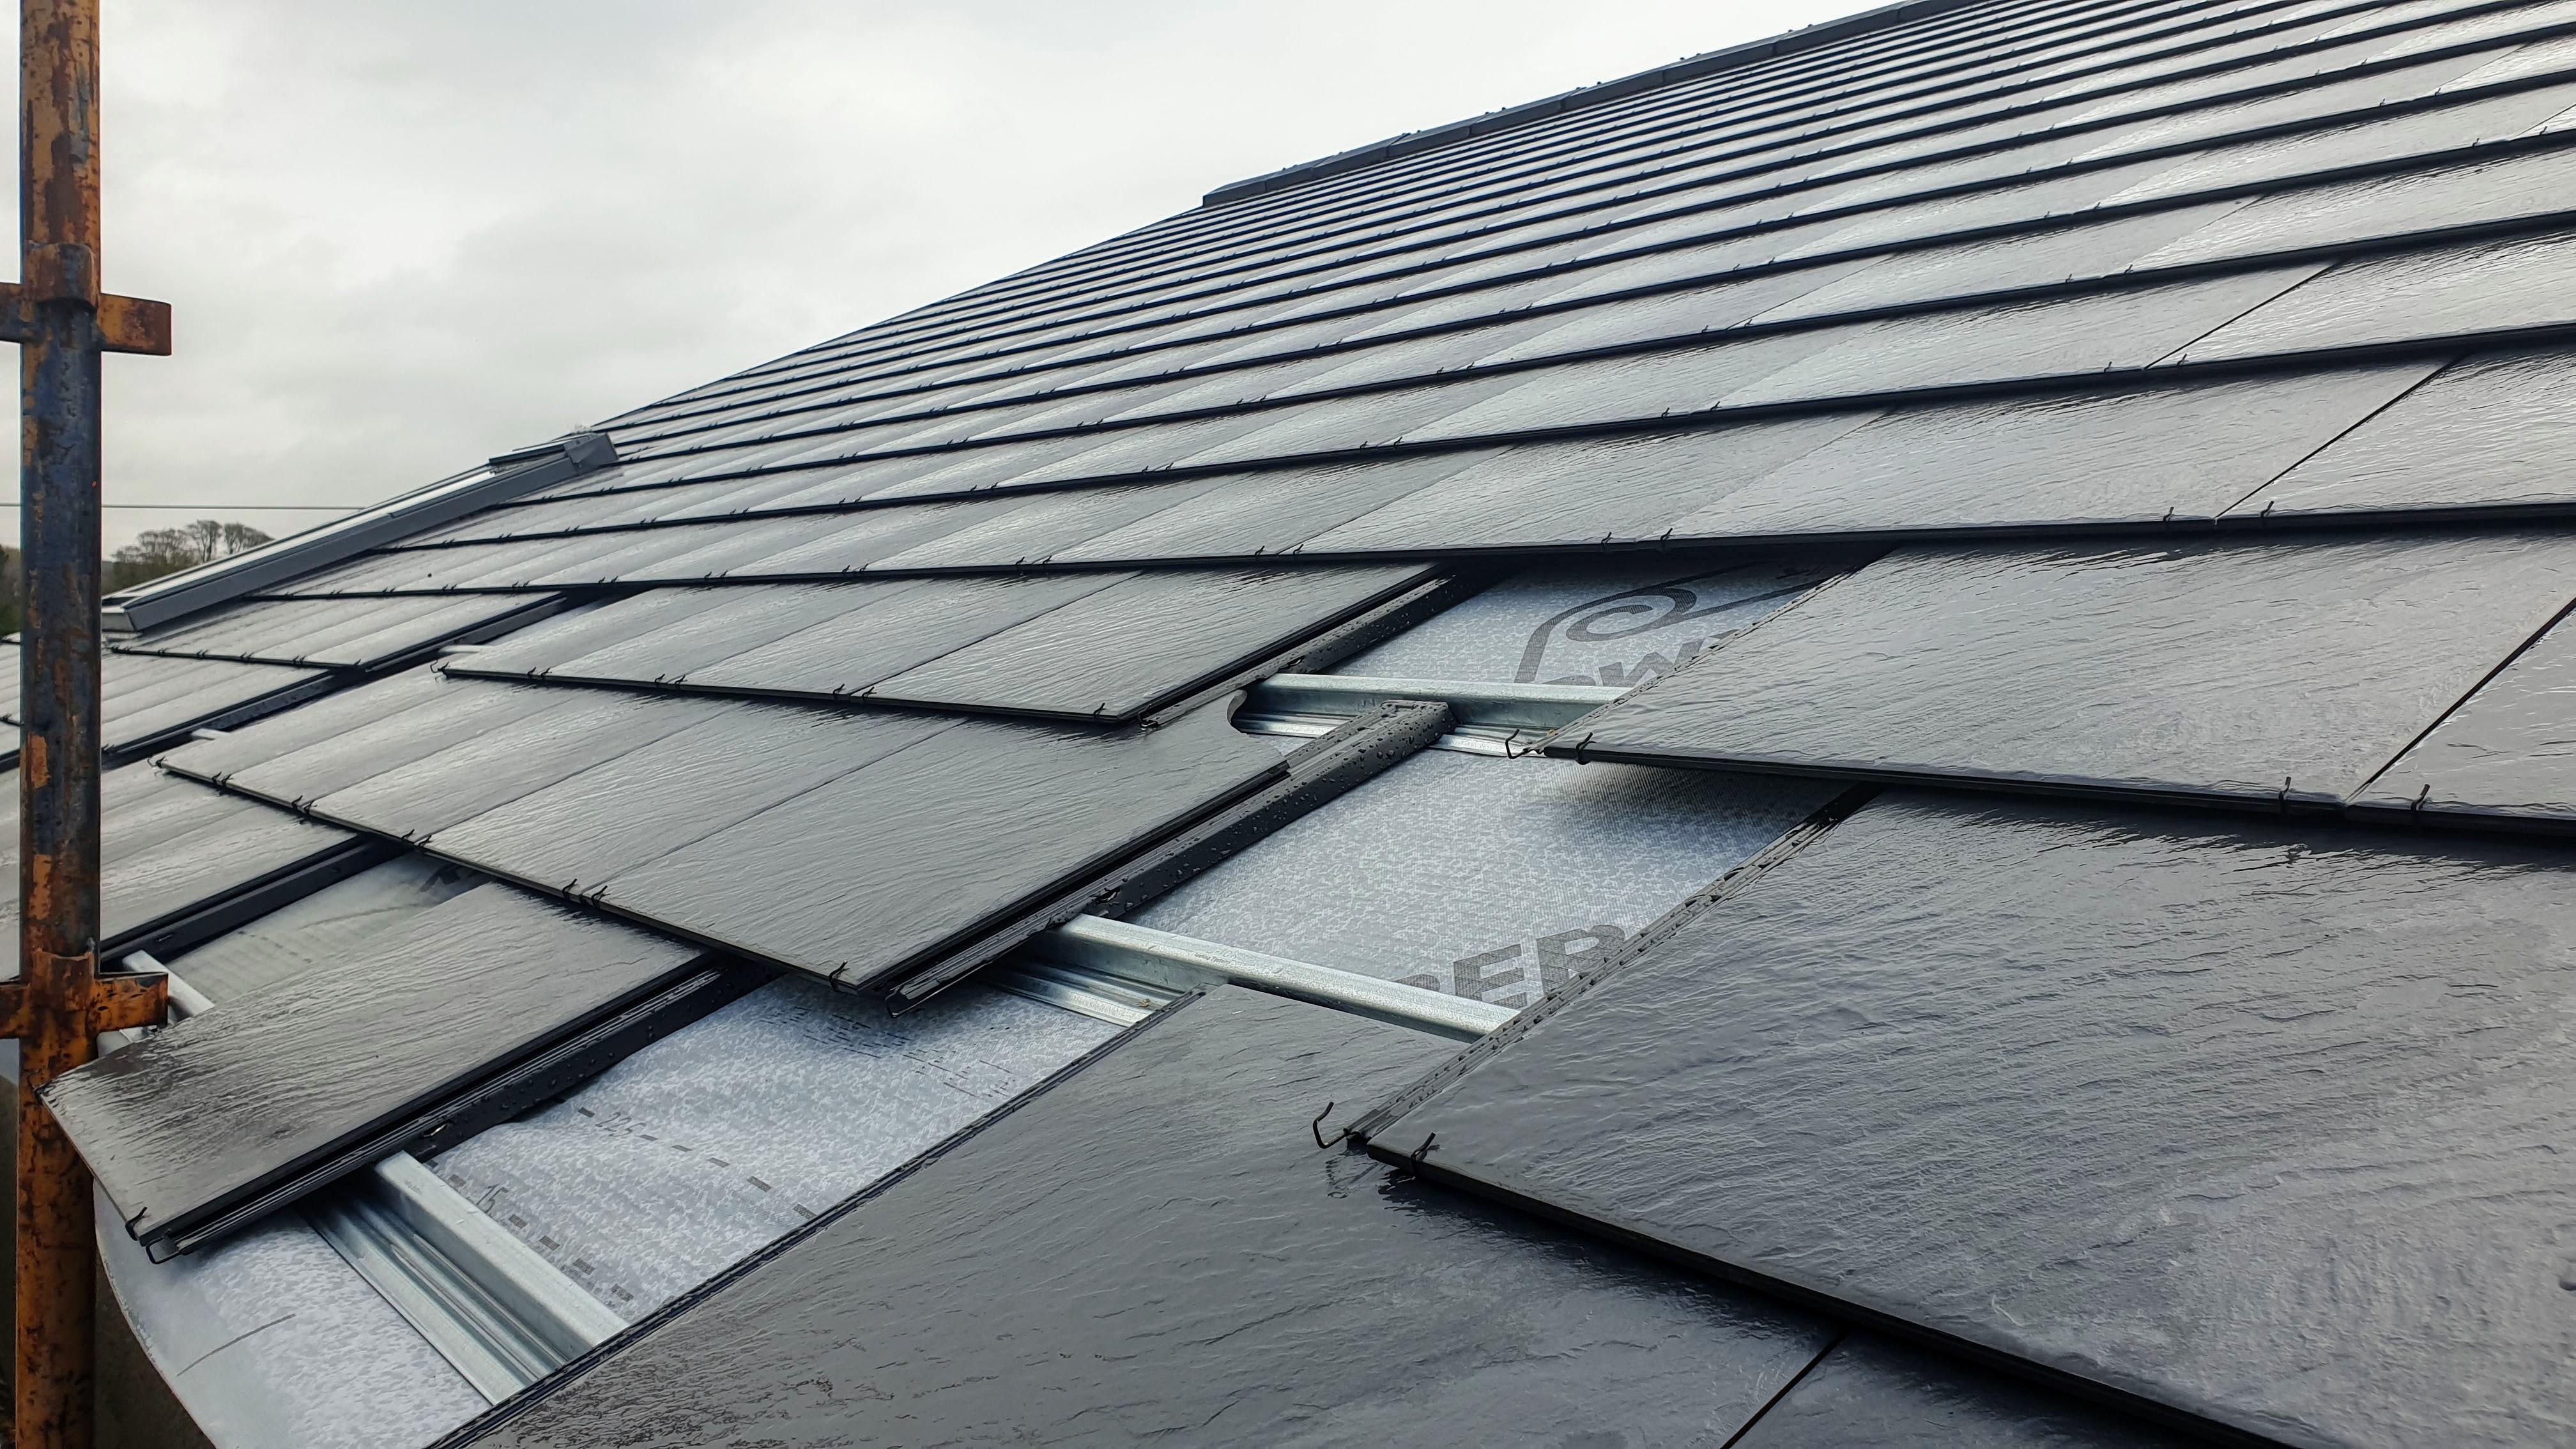
I haven't posted much of late because everything is happening around me in slow motion. Or at least that's how it appears. I am told (by another self builder) that this is fairly normal for this stage. Progress has been limited by shortages of materials (including a supplier going under - wasn't much fun for anyone concerned) and labour shortages - i.e. us both having to do our day jobs! Corona virus is still making self builds difficult. Add to that my recent discovery that at 42 years old, I'm not actually able to do the physical work of two 21 year olds. This was demonstrated by me picking up a very wet pack of roofing battens, putting them on the Range Rover roof rack and then staggering to bed for the rest of the weekend, not attending site after work all week and sitting bolt upright at my desk, causing concern amongst my colleagues still on site that I had started taking the whole work thing seriously. So on to the progress, and maybe a few pictures so you can tell me what I've done wrong! The windows were all ordered in the middle of October. No sign yet, but I am advised of significant delays, so I am hopeful of some of them in very early January. The difficult arch windows will arrive much later because the window maker seemingly forgot how circles work and wanted to make some very expensive hemisphere templates. We offered to send them a nail, a very carefully measured length of string and a pencil. This didn't go down well but it made the point, and the expensive template was suddenly not required. Building control have visited the site while we were in tier 1. Nothing much wrong with the house structure or roof. Just a few simple observations to make sure I don't forget to do some things that are on the list but easy to forget. The battening plan for the cladding was discussed and approved and I now know how cable holes through the structure need to be done - something I've had very mixed advice on from local sources. The cladding and battening is (hopefully) all arranged and we should be ready to start this part of the work as soon as the last ridge tile is screwed down. So on to a few photos of the roof. First fibreglass valley in place. The BCO was keen we didn't use lead because we have a plan to implement a rainwater capture system at some point in proceedings (especially if we need to demonstrate low water usage - SWMBO gets very disagreeable without her swimming pool sized bath) The capping detail of the valley. No idea how to get this to sit nicely - it's just the wrong shape. Hopefully slates will cover it and I won't have to ever look at it. Not a bad view while I sort out how this dry ridge system is supposed to work. Slates on the left of me, solar trays on the right, and me stuck in the middle with my nail gun and saw... Doesn't quite work as a song. While I mention solar trays, all 20 are up and bolted down. They do look a bit bigger than I intended, but I've got a single phase 6kW export allowance so I'm damned well going to use it. First slates on the south roof. It was a bit odd only putting up one slate-and-a-half and one slate on each row. But that's the way it needed to be to get the best out of the solar panels. Otherwise the bedroom roof put too much shadow on the lower right hand panels in the winter. The bedroom roof finished but for a couple of slates in the corner and seating the gable end ridge tile in place. Still working out how the dry ridge system interacts with the dry verge at the gable ends. There are a few annoying slates where my grading could have been better but overall I don't think it's too bad a job for someone who was afraid of heights until this year and has never done any roofing before. Sitting astride the bedroom roof. Only one small section of slates to go now. I think I need to wash my gloves though - too much slate dust over everything. Another 100 or so slates and some solar panels to go, then I can finish the soffits and look at cladding. I need a holiday when the scaffolding comes down. I am told that digging drainage ditches counts as a holiday. Not convinced myself, but at least it's on the ground.7 points
-
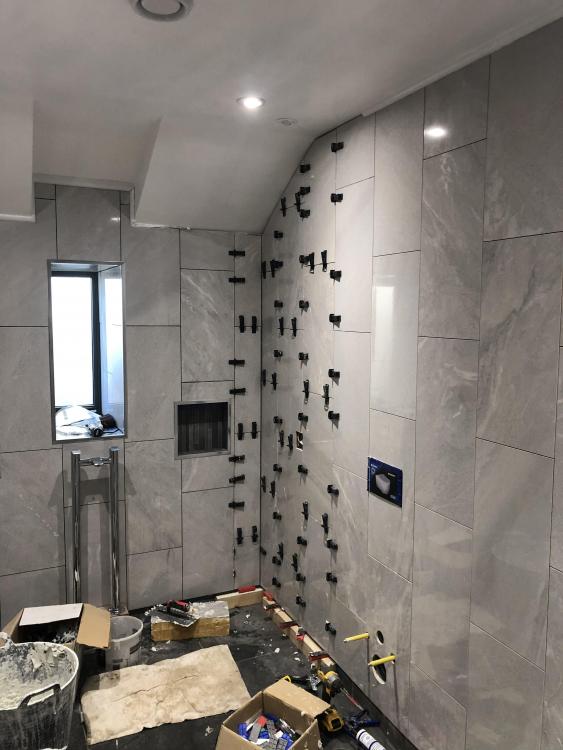
Done ; with zero wall tiles spare You lot are all locked down so enjoy my photo entitled “Freedom”
 3 points
 -
but unless your building a house to sell on it’s not a business. I installed MVHR for quality of life, I have a tv because I like it and can afford it. I don’t have granite worktops because I think they are massively overpriced (and not that easy to look after/based on kitchen installation fir years and hearing from customers). I am always surprised by people having new range Rovers on the drive but living in a pokey terraced house. I would rather have a detached nice house and drive an old Merc (? oh I do). It’s all about life’s choices not necessarily justification.2 points
-
IME the blokes would rather pee in a bush than use a portaloo.2 points
-
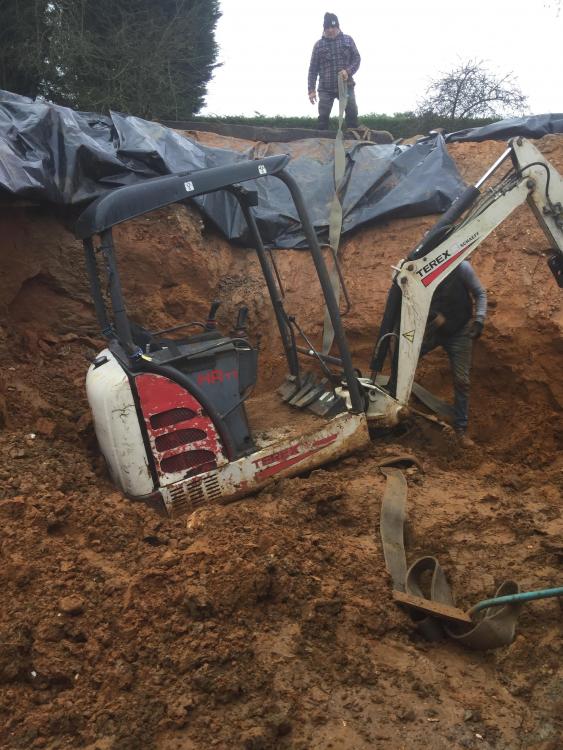
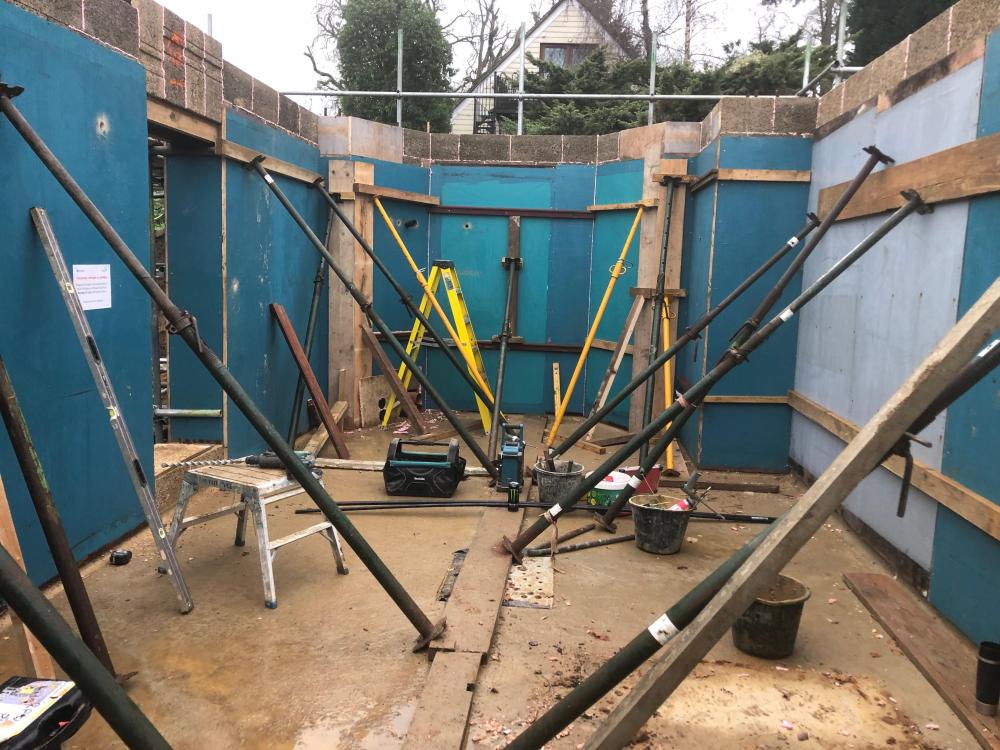
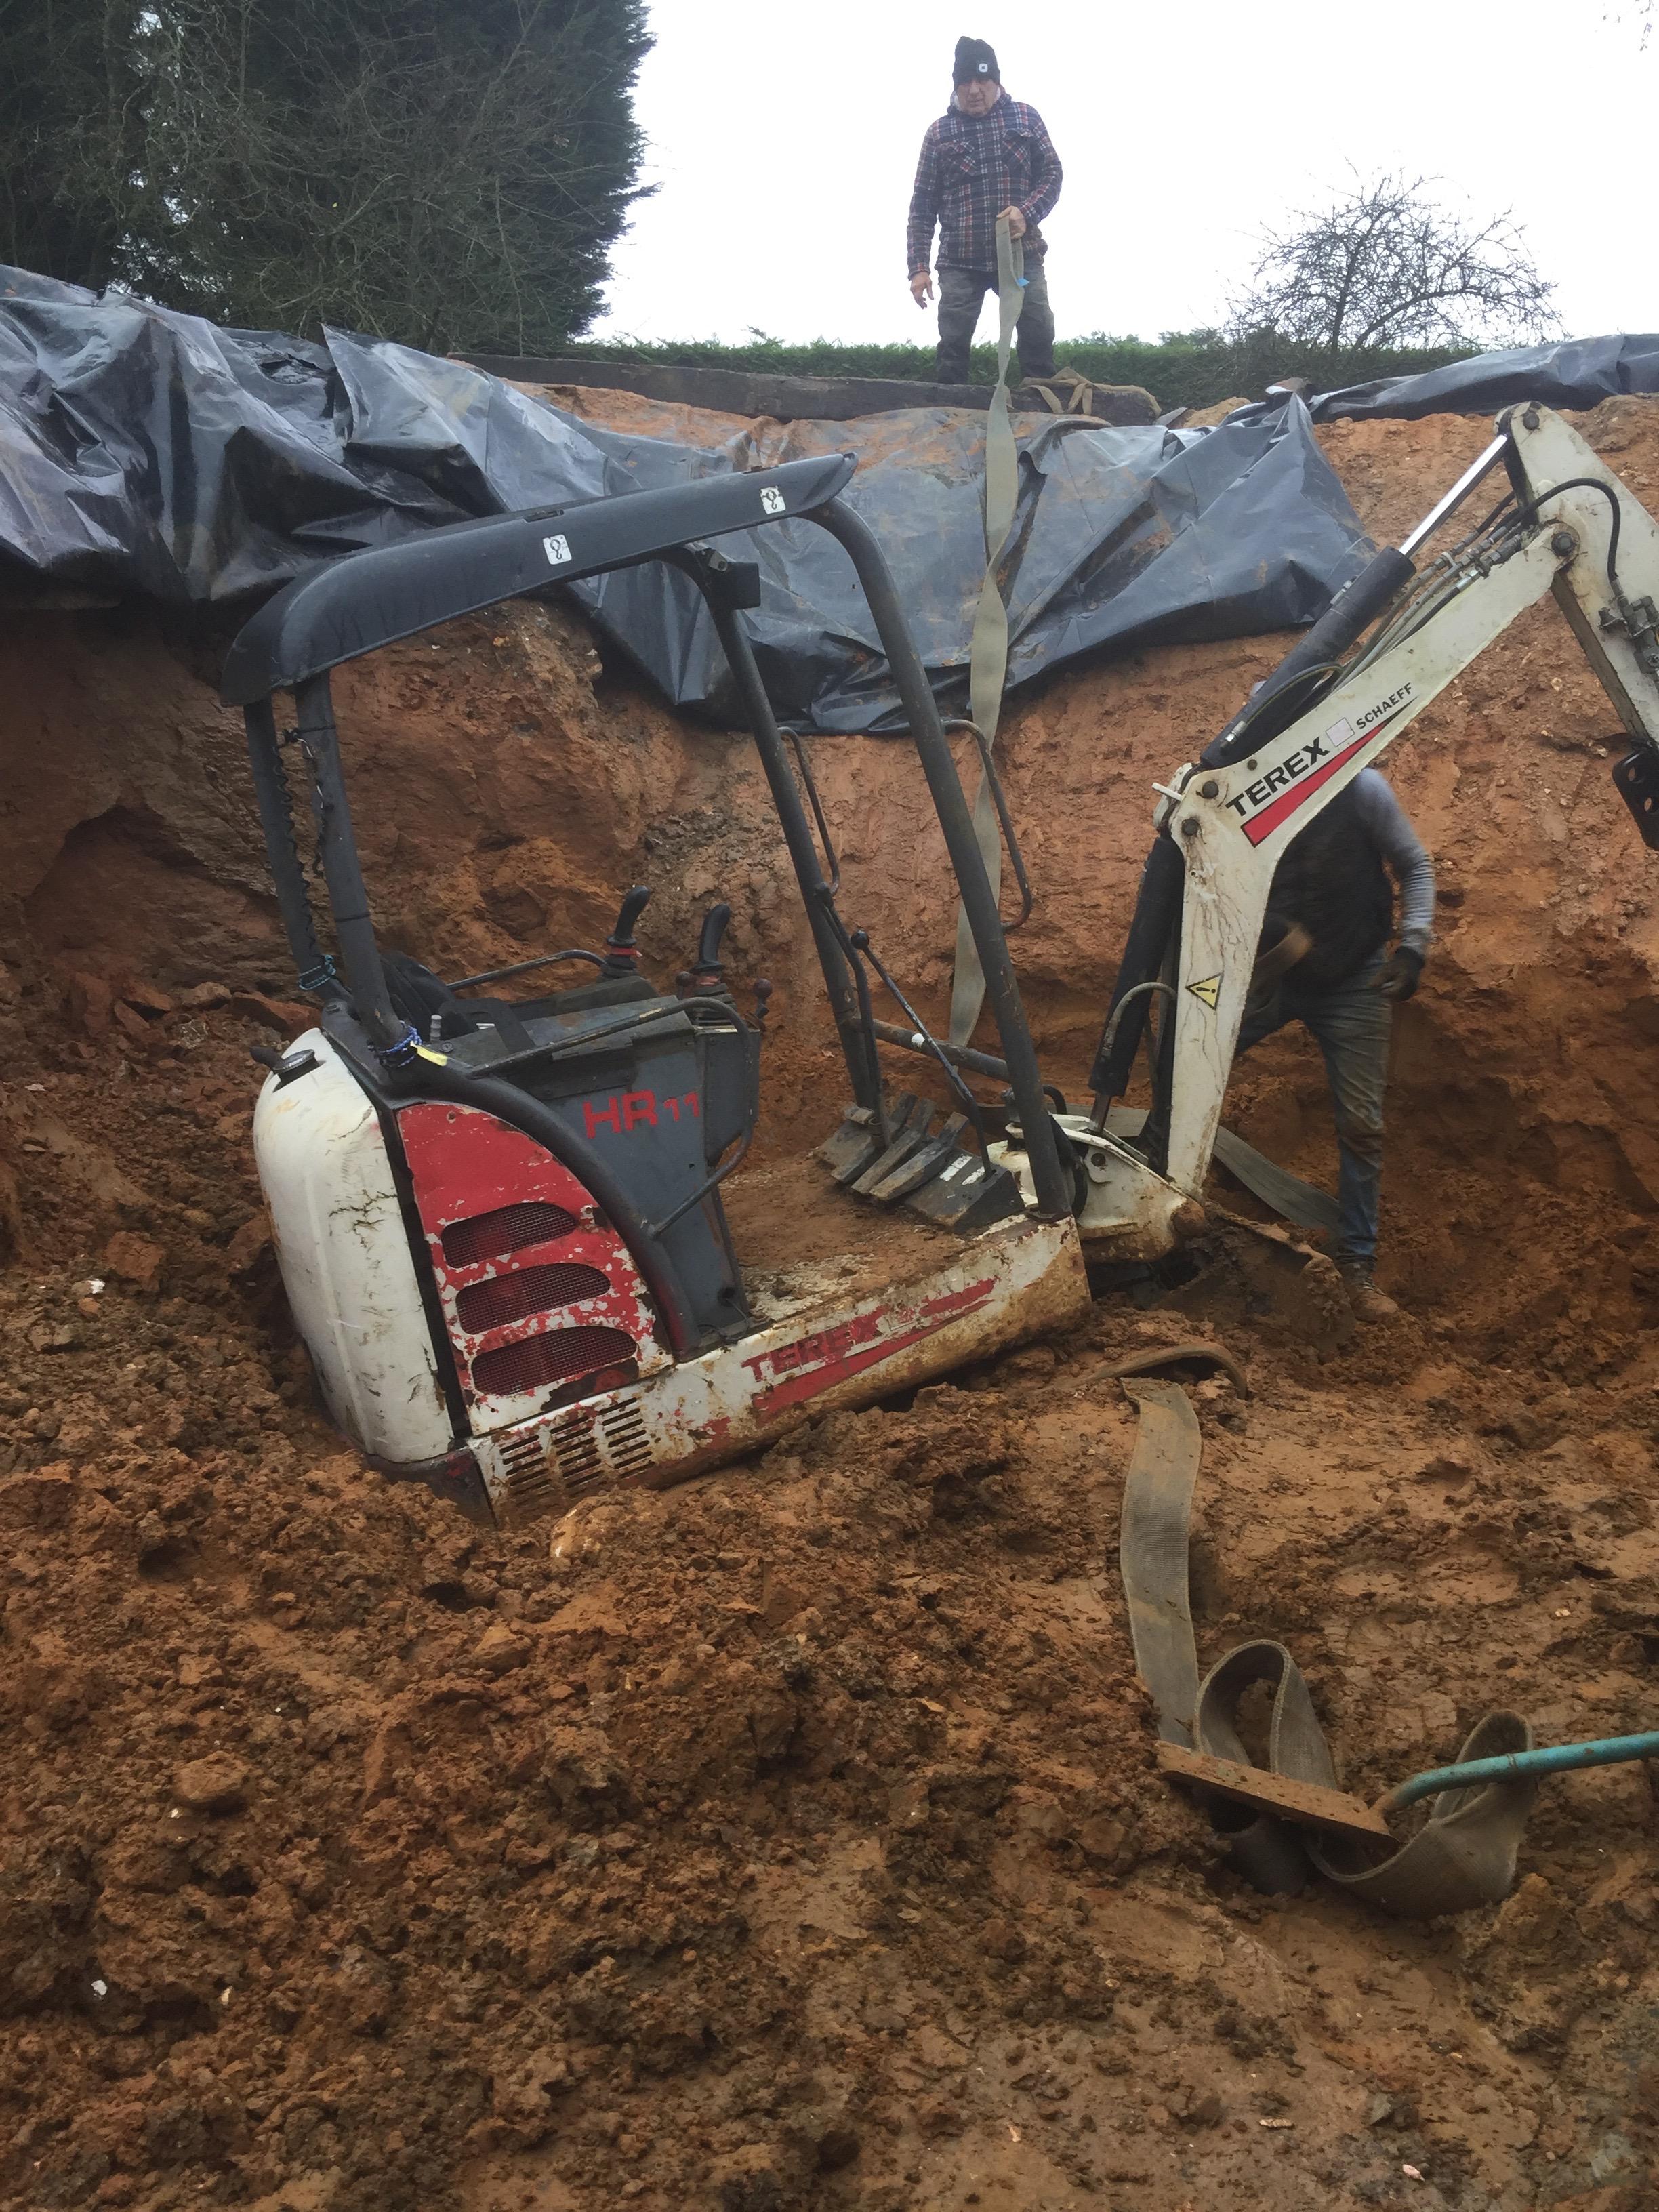
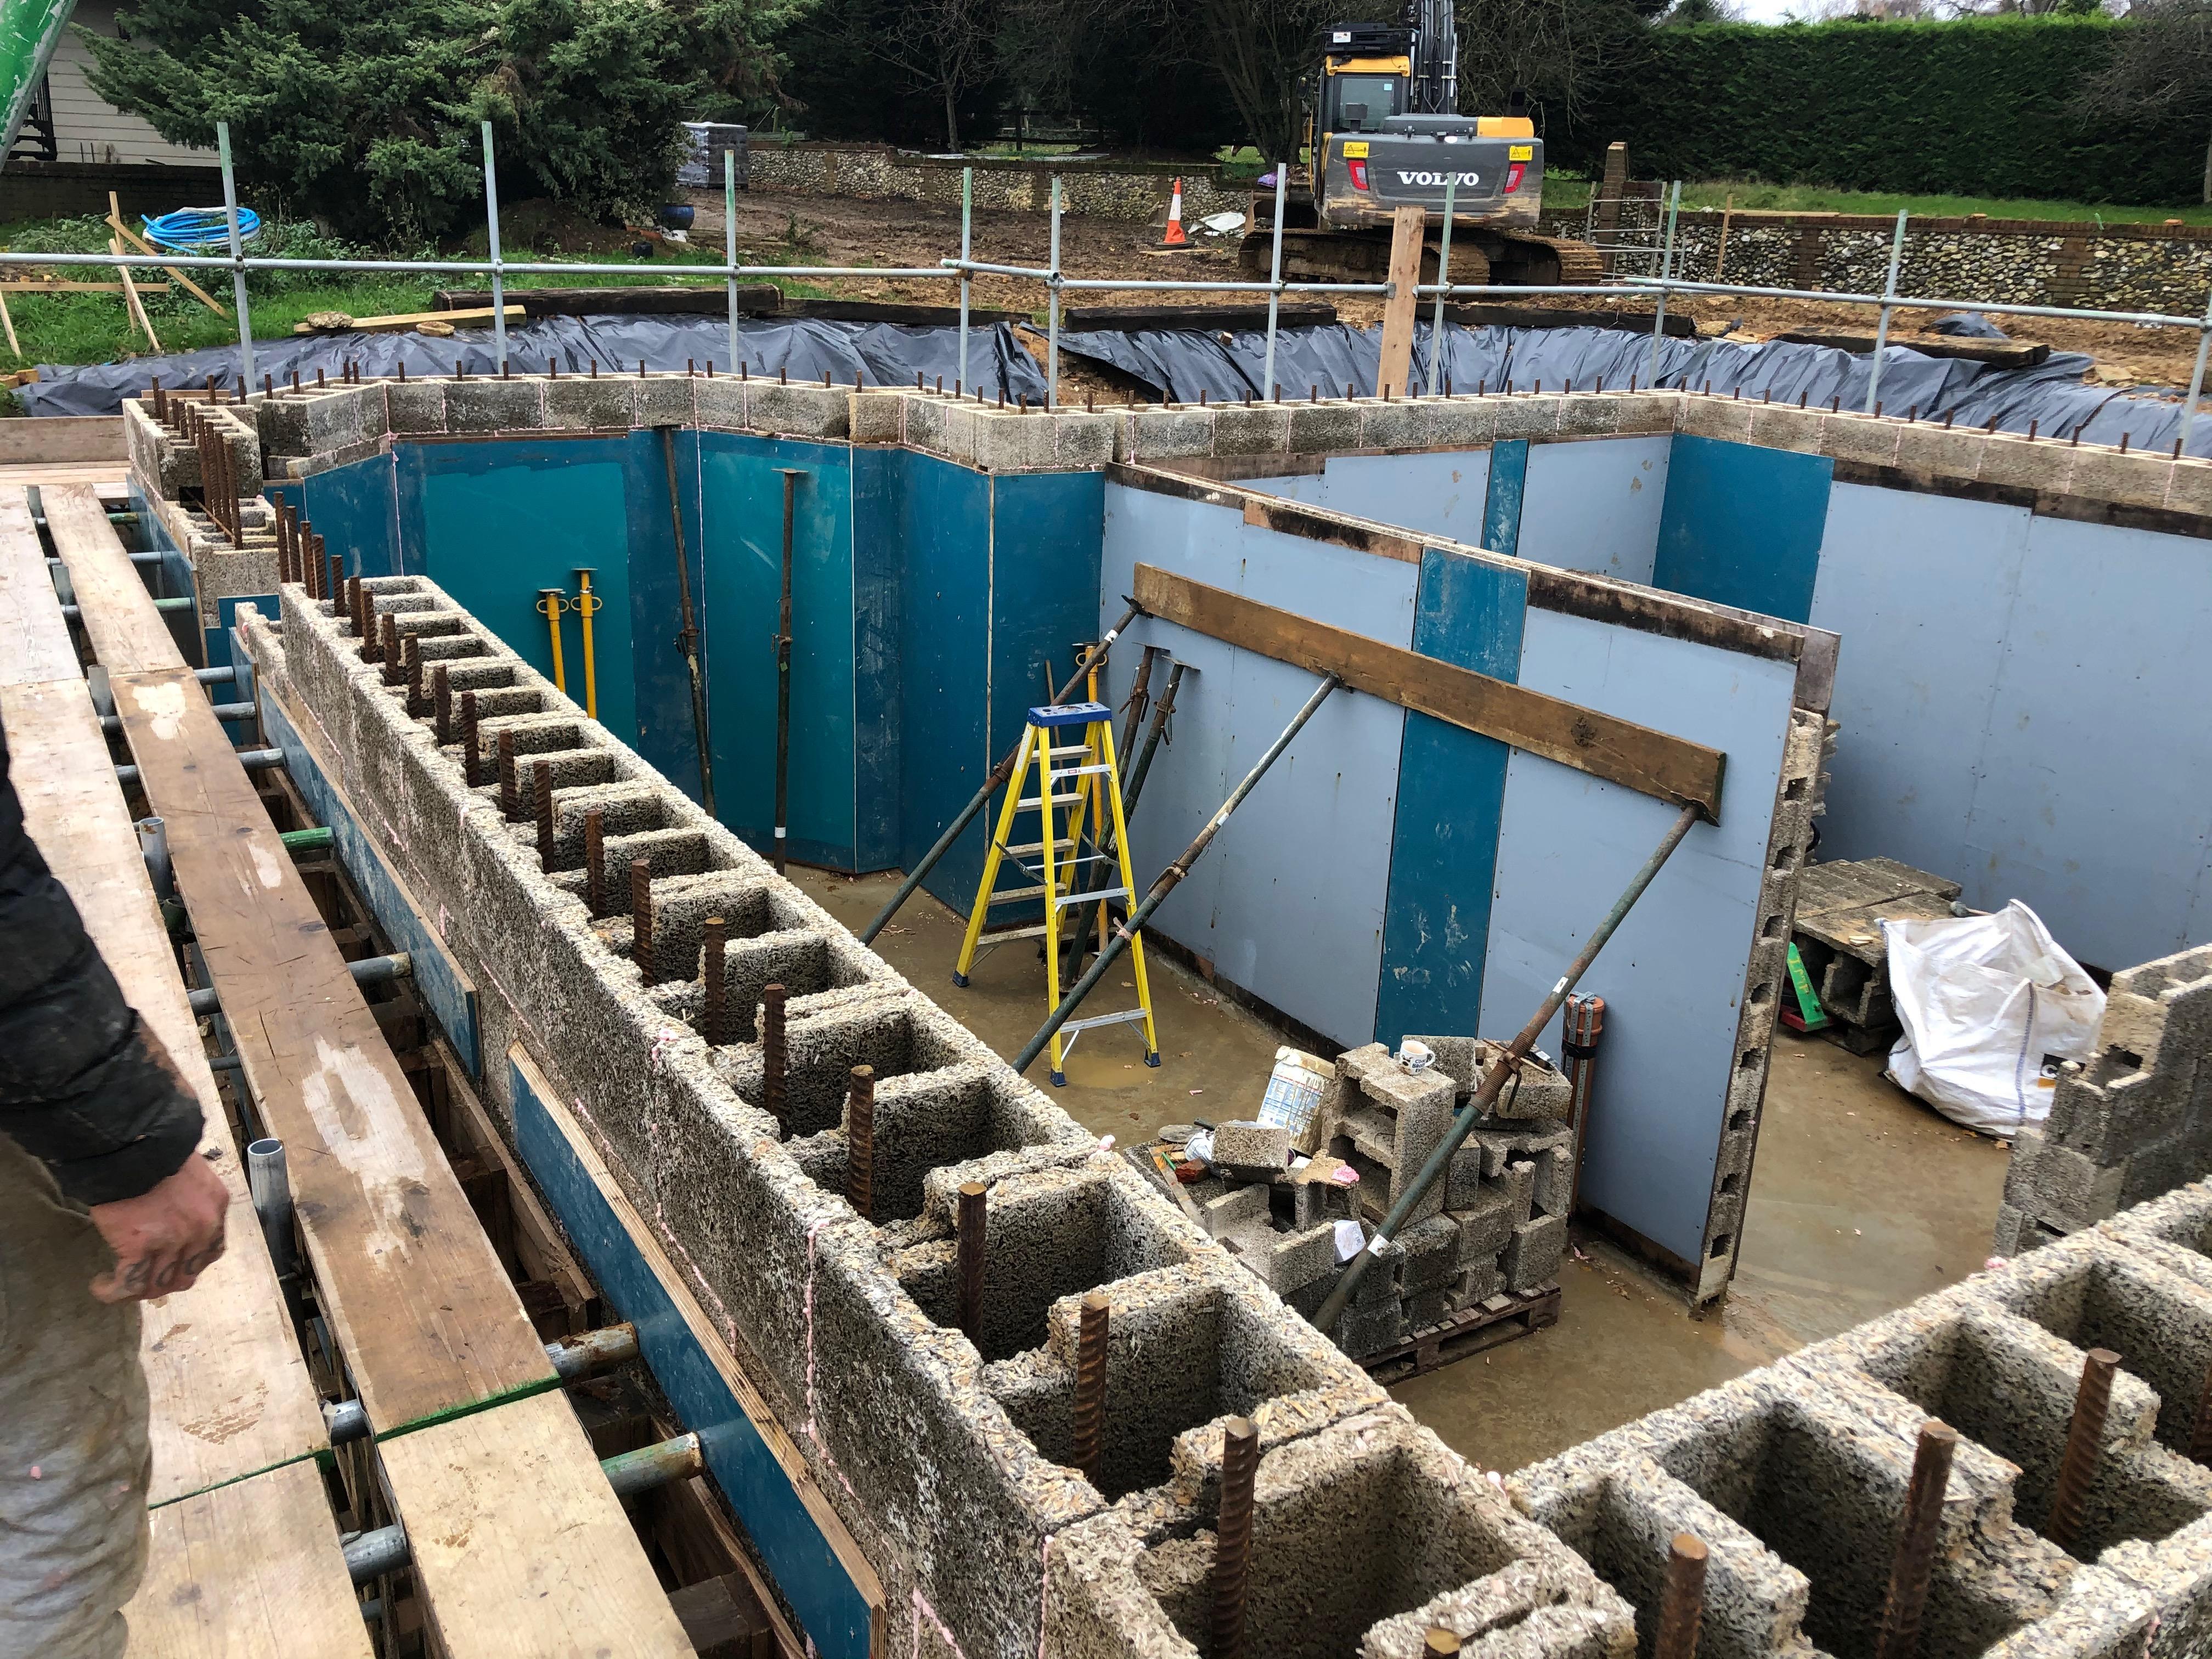
We're up to ground level on the Durisol build and nothing went wrong with the pour due to belt and braces by the other half. The rain has been never ending and the small digger ended up stuck in the mud. We have very sandy ground and it just sucks you in, managed to Lift it out from above with the digger. We are now putting in the step foundations as we are on a hill, the previous house had massive great lumps of concrete installed, obviously to stop the house slipping down the incline! Because of the awkwardness of these and the ground being in such a state, he's filling up jumbo bags with concrete mix and dropping it down into the deep foundations. Yes we could have pumped it in but there's no hurry and it's kept him busy whilst we are in the dreadful lockdown. My daughters main builder got ill and then the daughter and her husband got it, on the mend now but both my husband and l have no idea why we didn't get it to! Hubby is in the process of making a wooden template for the half round bay which he thinks will help with the foundations and the laying of the durisol blocks to get the shape correct, it's 4.6 across and looks very large but rather good. HVMR has enormous pipes...so glad we have a basement as all the equipement for the ground source and ventilation will be in here, I didn't realise how much pipework is needed. The daughter has had to use large pipes almost everywhere as the structural engineer wasn't happy with 28 pipes being put through a structural wall! Her standing seam roof is going on and it's about 1/4 done, it will take 6 weeks to install, a lot of work. Part of it will be gold, can't wait to see this bit, sounds awful but knowing her it won't be. New year will see her roof window installed, this also comes down the side of the building as well, it's been a nightmare finding a company to supply this, fingers crossed it goes well. Happy New year to everyone, if your just about to start your build then best wishes for an uneventful outcome, but expect your pocket to be quite empty by the time your finished!
 2 points
 -
In awe as ever at your skill for a first time roofer and tenacity. Holiday? I hear the IoW's nice at this time of year! ? Sounds like an exotic location to me from where I'm sitting.2 points
-
I last looked at this some time ago so I might be wrong now or out of date.. As I recall the process and VAT treatment is different depending on the order value. For small orders I believe they are meant to register with HMRC, charge UK VAT and remit this to HMRC. For larger orders I think they they are meant to ship it VAT free (no EU or UK VAT) as you will be charged UK VAT on arrival at a port of entry. Someone will call telling you how much VAT to pay and what their handling fee is. In other cases the post man put a note in your post box with a demand for the VAT. This is meant to happen already for orders from ourside the EU (China for example). I can't remember where the break point is but think its in the £50 to £150 range. My guess is some small companies may not bother to make changes for the UK market. They may just continue to quote "inc EU VAT" prices to everyone that visits their web site. If you pay that beware you might have to pay UK VAT as well.1 point
-
Just had a browse through the McAlpine catalogue and confirmed what I was thinking, its crap. Anyone want a brand new boxed slot drain?! Yeh it'll look sort of modern, any wetroom is going to look modern-ish, but no worries my Mrs will find some rustic junk to chuck in there!1 point
-
I cannot see how this will work, unless you are getting all your stone cut to a regulated size how will you keep a nice regular face, the stone will be all different widths which you then lay to a nice line by having more or less poking backwards into the cavity.1 point
-
Totally agree, but I was trying to address the more direct 'is it worth it' question from a monetary standpoint. For an existing dwelling, where there is already whole house heating and extraction, then the return would be much lower. Possibly negative as low airtightness would render the heat recovery element negligible. Maybe this is what I need for my fancy stairs1 point
-
Just make sure the plasterboard (should be 12.5mm) is the same as the blank length of the fixing or they won’t work. I never had a setting tool, just a spanner type thing that stopped the fixing from spinning.1 point
-
This is exactly what the contingent valuation considers... the harder to measure items that you are happy to pay for.1 point
-
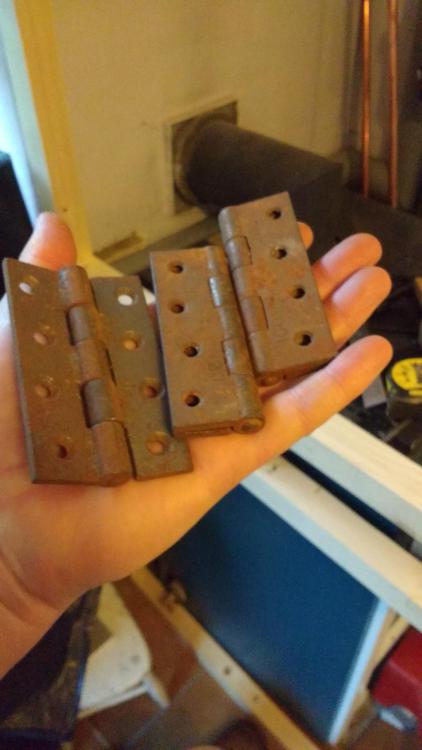
Found 3 old, plain steel, slightly rusty, 100mm hinges, they'll do for my "door". Really heavy duty. Might give them a quick citric acid bath as a treat. I always seem to make up a hinge jig per project, for whatever hinge I'm using and then scrap it! For use with my diddy Bosch router. Always come out a treat mind, even in crappy softwood or reclaimed rough stuff. Usually out of flooring t&g offcuts or MDF. Might try and keep this one and write on it what it's for then give it a coat of varnish.
 1 point
 -
I've finally got around to starting this blog. I'm hoping that it'll be easily updated and I'll provide lots of good pictures and info...we'll see how that goes. I'm at the point now where we have just taken our first big delivery, which is our insulated foundation system from Kore, this morning. So albeit, this process of building a house has been ongoing for some time, it has just become real that we are at the beginning of the build phase, which is very exciting. Some light background info - I've always wanted to build a house for the last 5-10 years, but it was a distant dream and wasn't quite sure how feasible it would be. I grew up in a rural house, my parents bought in 1983, modernised and updated over the years. It was a great childhood and spent many hours in the fields and in our garden, even just cutting the grass was fun (1 acre and a ride on mower). We sold that when I was 21 and ever since I've wanted to return to that life. I have two young kids of my own now and hence the want to return to the countryside to give them what I had was strong. I was always keen on building, swmbo, wasn't as such. So we searched and searched, but mostly the houses we could find that suited our needs were out of league (price!) and even if they were to be in our league there were things we would change or in the end it would be expensive to run. And hence that search helped my other half make the realisation that self build was our only option. My dad died in 2017 after a long illness with Dementia, a relief for him and for everyone else involved. We were very close and I took care of him day in and out, until he was in care. He was an engineer and had owned his own business since I was a child, albeit he lived a pretty simple life and was happy being at home in the garden he made and house he had renovated. Riding around on the ride on mower enjoying a quiet life...and now I guess that's exactly where I want to be. His passing left us with a little inheritance which has allowed this dream of self building to become a reality, I'm very thankful for this. I know it is something he would have been very excited to be part of and watch us do. So after messing around since 2017 and not being able to negotiate a plot or find one that was suitable (there's a lengthy thread on this!) I'd finally identified 4 acres in July 2019. It took a bit of time ( I had to confirm services and remove an Agricultural tie) but completed purchase in Jan 2020. I'll not cover the planning process in detail, but the plot had legacy planning permission which was 24 years old, but at that time the development had commenced and hence it was a straightforward change and submission of our designs. Building warrant was granted a week ago, with very little hassle really. I joined Buildhub in September 2019 or thereabouts. It's been a wealth of information that has helped me shape the design of the house and provided no end of guidance which I am very thankful for. It has allowed me to validate my opinions and approaches and learn from others to ensure i am following the right path. I started out prior to buildhub wanting a SIPS house, in fact googling that may have made me find my way here. Quickly I decided I wanted an insulated foundation too, I went around in circles a little bit with both of these decisions and reading others opinions on here. I even thought at one point they would both be too expensive for me , however I sit here writing this first post having taken delivery of my insulated foundation today and my SIPS kit is on order and due sometime in February. I don't actually need the insulated foundation till mid-late January but made a decision to get it in the country before Brexit issues occur and tariffs are possibly applied in January (rumoured at 6%). I'm very glad I made that decision as today our new strain of COVID has caused everyone to close the doors to us here in the UK, another couple of days and god knows when I would have gotten it. There is lots of other decisions and stuff has gone on in the background with planning and mortgages and budgets to get here, but that is mostly done and hence I feel this is the end of the beginning and now we can enter the start of the middle.... I'm very pleased and excited for the road ahead. I like pictures in blogs....here's a few of the Insulated foundation delivery today. Stored at a friends farm for the time being. It's being stored outside, has a few tractor tyres on it now to stop it blowing away and the main pallets are all strapped down. That's me standing on top.......1 point
-
Good luck. I hope you enjoy the build as well as the finished house. I am really pleased with our SIPS kit so far. The supplier was supurb to deal with and it is so much easier to work on the structure when you can rely on it being accurate.1 point
-
Cheers @wozza I’ll get some ordered ready for when I start upstairs ?1 point
-
It is a requirement in Scotland for rooms with a combustion appliance (in this case gas boiler and hob) If it is not a requirement in England, it should be, and why would you not want one? Particularly as you can get it built into the heat alarm. And it is there should the buyer wish to let it.1 point
-
All the 'humanure' info I got only refers to urine diverting, no sex segregation was mentioned. Everything composts just fine, given a very long time (don't go tipping the bucket for a year). You might be right about the garden size as my female Labrador never made typical bitch lawn stains, I suspect that happens when (any) dog uses the same spot constantly. Males don't really do that as most learn to cock their leg. I think the National Trust female bar might have been to preserve modesty, considering the logistical difficulties (in the absence of sheewees). Urine pH varies according to diet and metabolism, our urinary systems are similar, but sex hormones and the prostatic secretions play a part in odour, and as many domesticated species are not intact it's hard to be certain this isn't an urban myth. Yup, things we discuss...1 point
-
Fixed it obviously!1 point
-
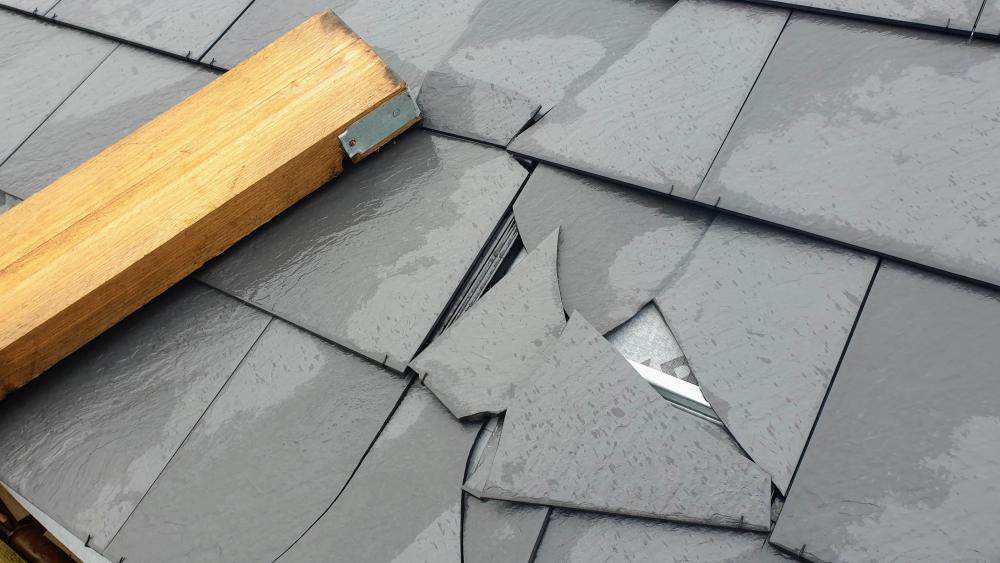
What about the cracked tile?1 point
-
It needs some practice!1 point
-
We just used an end cap tile on the ridges to slightly overhang the verge.1 point
-
Nothing sticks to cut gypsum in the core of PB It’s like trying to glue something to talcum powder. No sale.1 point
-
Don't forget the 25mm flat wood bit. (Though I'd use a 25mm holesaw).1 point
-
There is a BIG difference between the burn temperature and the body temperature of a stove. If you want to measure the burn temperature the normal place for a thermometer is on the section of single wall flue immediately above the outlet. Even that will be lower than the actual burn temperature. Our stove is a convection stove so the sides don't get particularly hot at all. It has an extra "plate" fixed to each side and the back that encourages more heat to leave the stove by convection up the gap. It also means it has some increadably low "distance to combustible materials" figures compared to most. It is that distance to combustibles you need to note for your chosen stove to make sure you can comply with it's requirements.1 point
-
I don’t believe my stove gets anywhere near those temps, but in a well insulated house it does not run fir more than a couple of hours at a time.1 point
-
You should be proud of this, cracking work!1 point
-
Dead right. I cannot see any value in swapping my cheap kitchen counter top to an expensive granite one, but people still do. And I bet I can cook better than most of them.1 point
-
Hello Jilly. Hope this helps. I have put my thoughts in line with your text and in italic. Update: I'm a bit stressed. ..I didn't get these replies until after the job was done and it was too late... Don't be, there is often more than one way of looking at things, and, you have all the resources of BH at your disposal. I chipped the cement off as best I could, cleaned the steel and painted with red oxide. Good approach but can see how you may still have a concern. However, the windows have been installed and there is a small leak at the bottom near this place, the fitters came back to seal again but its still leaking. They will come back (but Christmas is causing delays), and they are making an aluminium shroud for the outside. Maybe don't conflate the two things.. leaky windows with steel corrosion. Separate the two issues. I didn't realise about the bituminous paint thing (which the structural engineer specifies when you look through the detail). Yes they do as this is a common approach when you design / convert a farm building or an industrial building.. we know that this interface between the column, ground level, foundations and walls is a tricky area to detail. OMG, I can see this is my fault. Because there had been so many little problems with the builder I had decided to ask him to stop at the superstructure and I would go on to subbies, but this has left me wide open to making mistakes...like this. No Jilly it's not your fault. What you are doing in my view is exhibiting a good understanding of the build process, identifying previously unforseen problems before they really become an issue, which almost always occurs on renovations / conversions seeking advice, then a solution. As a further word of encouragement lots of companies would love (give their back teath) to have their graduate trainees exhibiting / questioning matters as you are doing. Is there some kind of desiccant that will dry this out? How can the steel be treated retrospectively?? Will BC make me take the windows out?? I hope the comments I have made above will give you some encouragement but now time for some substance! BC will accept a reasoned argument so no need to "take windows out" that is last resort stuff. But for all.. if you wind BC up then.. If any other members can chip in then thanks. Jilly as I said above. Don't conflate the two issues. Your windows and doors should be drained with small drainage channels and outlets. The amount of water that comes out these will be small but if these are not located / working correctly this is more likely to cause a problem with the glass rather than the steel. I'll leave this to the other members to comment on. I'll give up on the italic now. Turning now to the steel corrosion and the fact that this is a conversion. Often when you are renovating you have to take a pragmatic view. That post you have looks quite chunky. It also looks like an older type section. I suspect that the wall thickness of the post may be relatively quite substancial. The reason this matters is that the section can suffer quite a bit of corrosion before it becomes unable to carry the loads. Also, the corrosion that is happening is near the end of the section, this is where the bending forces caused by the wind and so on are less. Think of it as a ruler getting bent, the wind sucks the adjacent doors/ windows out, they are attached to the column and most of the movement / bending in this takes place in the middle.. the bending forces are greater here in the middle of the post. At the top and the bottom the column carries more vertical load (also shear load for the keen) but a locally thinner section here can often cope with this and in Jilly's case this thinning is cause by the rust. Yes that is a bit of theory.. but it's relevant. Simplistically when we design and consider older structures that have got a bit of rust on them we look at where the forces are. We look at the depth of the corrosion and reduce the effective section thickness in these places, then analyse that. Also, the rust provides a protective layer (sacraficial layer) that helps stop the oxygen getting to the metal that is still intact. We then look at the rate of corrosion and try and ascertain if this rate of corrosion will reduce the design life of the structure which currently for domestic housing is about 50 -60 years.. and that discussion is for another time. Jilly. In summary you may best just to leave this alone as the more rust you scrape off and mess about with it the more harm you may do than good. I think you should make sure that the glazing folk have set up the drainage channels outlets the correct way. Make sure you channel any water from a patio etc away from the house. If you wish and if you want to be sure you can drill a hole in the post to get the thickness (about 1/4 to 1/3 up the height of the column) , take some really good close up photos of the rust and so on. BH members will give you some pointers as to how you can check this out structurally / get an opinion on this. Also, take some photos and post a floor plan so that folk can see what this post is holding up. All the best.1 point
-
Gus’ Structural Engineering and DIY Part 01 Hello all. I’m giving the blog feature on BH a go.. lots to learn and a special thanks to the FMG / members who run / contribute to this site. This blog is built around the structural alterations and extension that I embarked on.. off.. on.. at the back of my house. I work in the construction industry, mostly in an office these days so this project has given me a break from the computer and allows me to keep my hand in on the tools. I have “experimented” at times. Some experiments have worked out ok, some less so. The blog is not chronological as you’ll soon see. As I go I’ll pick out some common elements that you may find on a self build / DIY project and try and show how I went about their structural design and so on.. Although it’s a relatively small extension many of the design principles can be scaled / adapted up for a new build etc. I hope this will be of interest. If anyone has any questions / advice then just post and I’ll do my best to respond. Please remember that if you are undertaking structural design / work or something that could be a safety risk then always get it checked by a competent person unless of course you are the "that person" before starting work. So here goes! As a quick overview the project involves taking a chunk out of the back of the house and building a rear extension. One aim was to make this as least disruptive as possible so we could keep living in the house with some normality. Other reasons were to save some money and get something bespoke to us. In the next posts I’ll cover some of the different aspects of how I went about the detailed structural design. Photo 01: Sun room sticking out – freezing cold – to be demolished but kept as a secure store room for tools for a while. Fig A 01. Eventually.. What’s going on here? Photo 02 The extension is getting roughed out over the sun room, the sun room was retained for a while to stop dust getting into the house, security and so on. For the eagle eyed.. table saw, yes I know the table saw is missing the guard but it is “under maintenance” The ladder (ex BT which some may recognise) was gifted to me by an old sparkie, who got it from someone, who got it from.. Photo 03: Old sun room down and preparing trench (under radiator and old back door) for temporary strip found to support props. Really soft ground just outside the original wall hence the temporary strip found. The old doors windows are fitted into the new structure to give a bit of daylight. The radiator still works.. as I’m a bit soft. Photo 04: Timber props and needles going in. Photo: 05 The upper side of the steel with the needles cut back. “Sadly” the old sun room is gone. The timbers I could reclaim have been.. the rest has gone on the wood burner. Photo 06: Needles cut back on the inside with restraint straps at ceiling level.. to be explained in following posts. That's it for now until I work out what to do next!1 point
-
Females should invest in a Shewee - brilliant invention (I've used mine for hiking Killi and Everest Base Camp) and I'd avoid portaloos at all times. Luckily our neighbours let us use their loo so we never had to use the site one ?1 point
-
It's basically a requirement of the 18th edition regs. The designer can avoid it if a risk assessment is carried out. Think though about how many things in a modern house could be fubar'd from a surge, be it from the supply side or atmospherics. From white goods to boiler controls along with the obvious mains connected routers, pcs etc. You might be able to mod your cu and do it up front or just individual circuits.1 point
-
It’s now in BS7671 SPD modules can be fitted in consumer unit protecting. Whole installation, retro fitted afterwards to protect whole installation.1 point
-
Oh gawd, I don’t know ? The main BR requirements for what I’m involved with haven’t changed ‘much’ so just tend to stick with stuff I know. If I am wrong, Building Control will soon tell me ? @alex199 Your opening dimensions appear to comply as they provide a clear openable area of 0.5. How high is the cill above floor level as it should not exceed 1.1m? As for the hinges, Paragraph 3.6d states... ”Windows should be capable of remaining open without being held.” So you would need to replace the existing hinges.1 point
-
Yes. Planners don’t like building forward of an existing build. How close is your side wall to your boundary/neighbours wall?. Your plans show windows on the first floor to the neighbours side!. Extending your side house wall next to your neighbour may be difficult IF you can get planning anyway.1 point
-
That is going to be a complicated extension, incorporating support for bedroom 5 that sits on the existing side wall of the garage. The planners may not like it extending further forward. If it's a recent development you may need covenant permission that might not be forthcoming. You will need to join it to the neighbours wall with their permission, or alternatively build your own wall very close to theirs with all the complications that entails.1 point
-
Welcome Adam I assume the desire for Net Carbon Zero is an environmental aspiration. It might be worth getting a handle on some figures. Concrete emits about 375kg CO2 per m3. EPS is about 66kg/m3. So assuming a passive standard ICF wall is 200mm eps /150mm concrete/50mm eps thats 0.15m3 concrete/m3 and 0.25m3 eps or about 73kg CO2 per area eternal wall excluding finishes or for 200m2 of wall area about 15 tonnes CO2 emitted all in one big bang at the time of building the house. Compare that to an equivalent twin wall timber frame 300mm cellulose built wall. OSB stores about 1 tonne co2/m2 - 200kg co2 to manafacture = 800kg Net negative co2/m3. Timber is also net negative, about -500kg/m3 Cellulose is also about -80kg/m2 Twin wall construction 10mm OSB 300mm cellulose 7% timber 10mm OSB works out at -16kg/Co2/m2 (OSB) - 22.5kg/CO2/m2 (Cellulose) -10.5kg/CO2/m2 (timber) Total Nett negative 48kg/CO2/M2 or about 10 tonnes of carbon stored in the house for the duration of it lifetime. Total Difference of about 25 tonnes CO2 Next build to passivhaus standards at 170m2 floor area and buy electricity from the grid at about 250gCo2/Kwh run it through a heat pump with an average COP of 3 and your carbon savings from change of construction type would heat your house for 116 years. Thats before you add solar PV, Decarbonise your foundations and roof structures, Consider the lowering carbon intensity of grid generation and consider improvements in heat pumps. The reality is that the concrete house will start the race over a century behind and never catch up.1 point
-
Hi and welcome. Before you decide on construction methods, research "decrement delay" There is more to insulation than just the U values and the performance of the "same" walls with PIR / PUR insulation (like you get in most SIP panels) and the "same" wall in say a timber frame using mineral wool or wood fibre insulation. Take a look at this thread recently Here he posted an analysis of 2 roof constructions that both had the same U value, but look how much quicker heat passes through the PUR one compared to the mineral wool / wood fibre one.1 point
-
Welcome. Decide on the foundation system first, it is where it all starts. Then go the timber frame route, things are much better when they are build in a factory.1 point
-
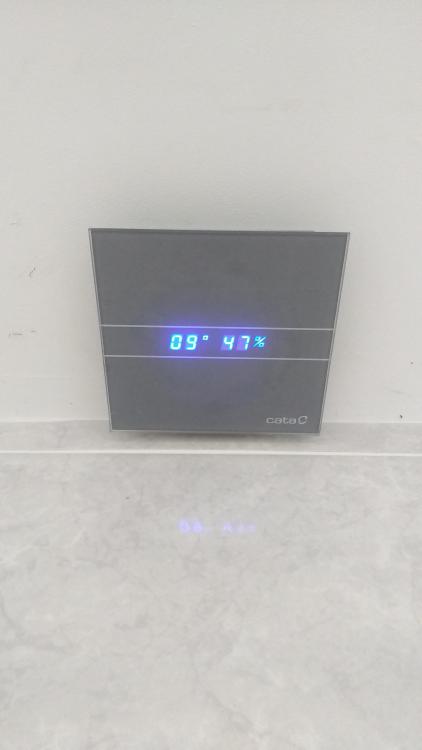
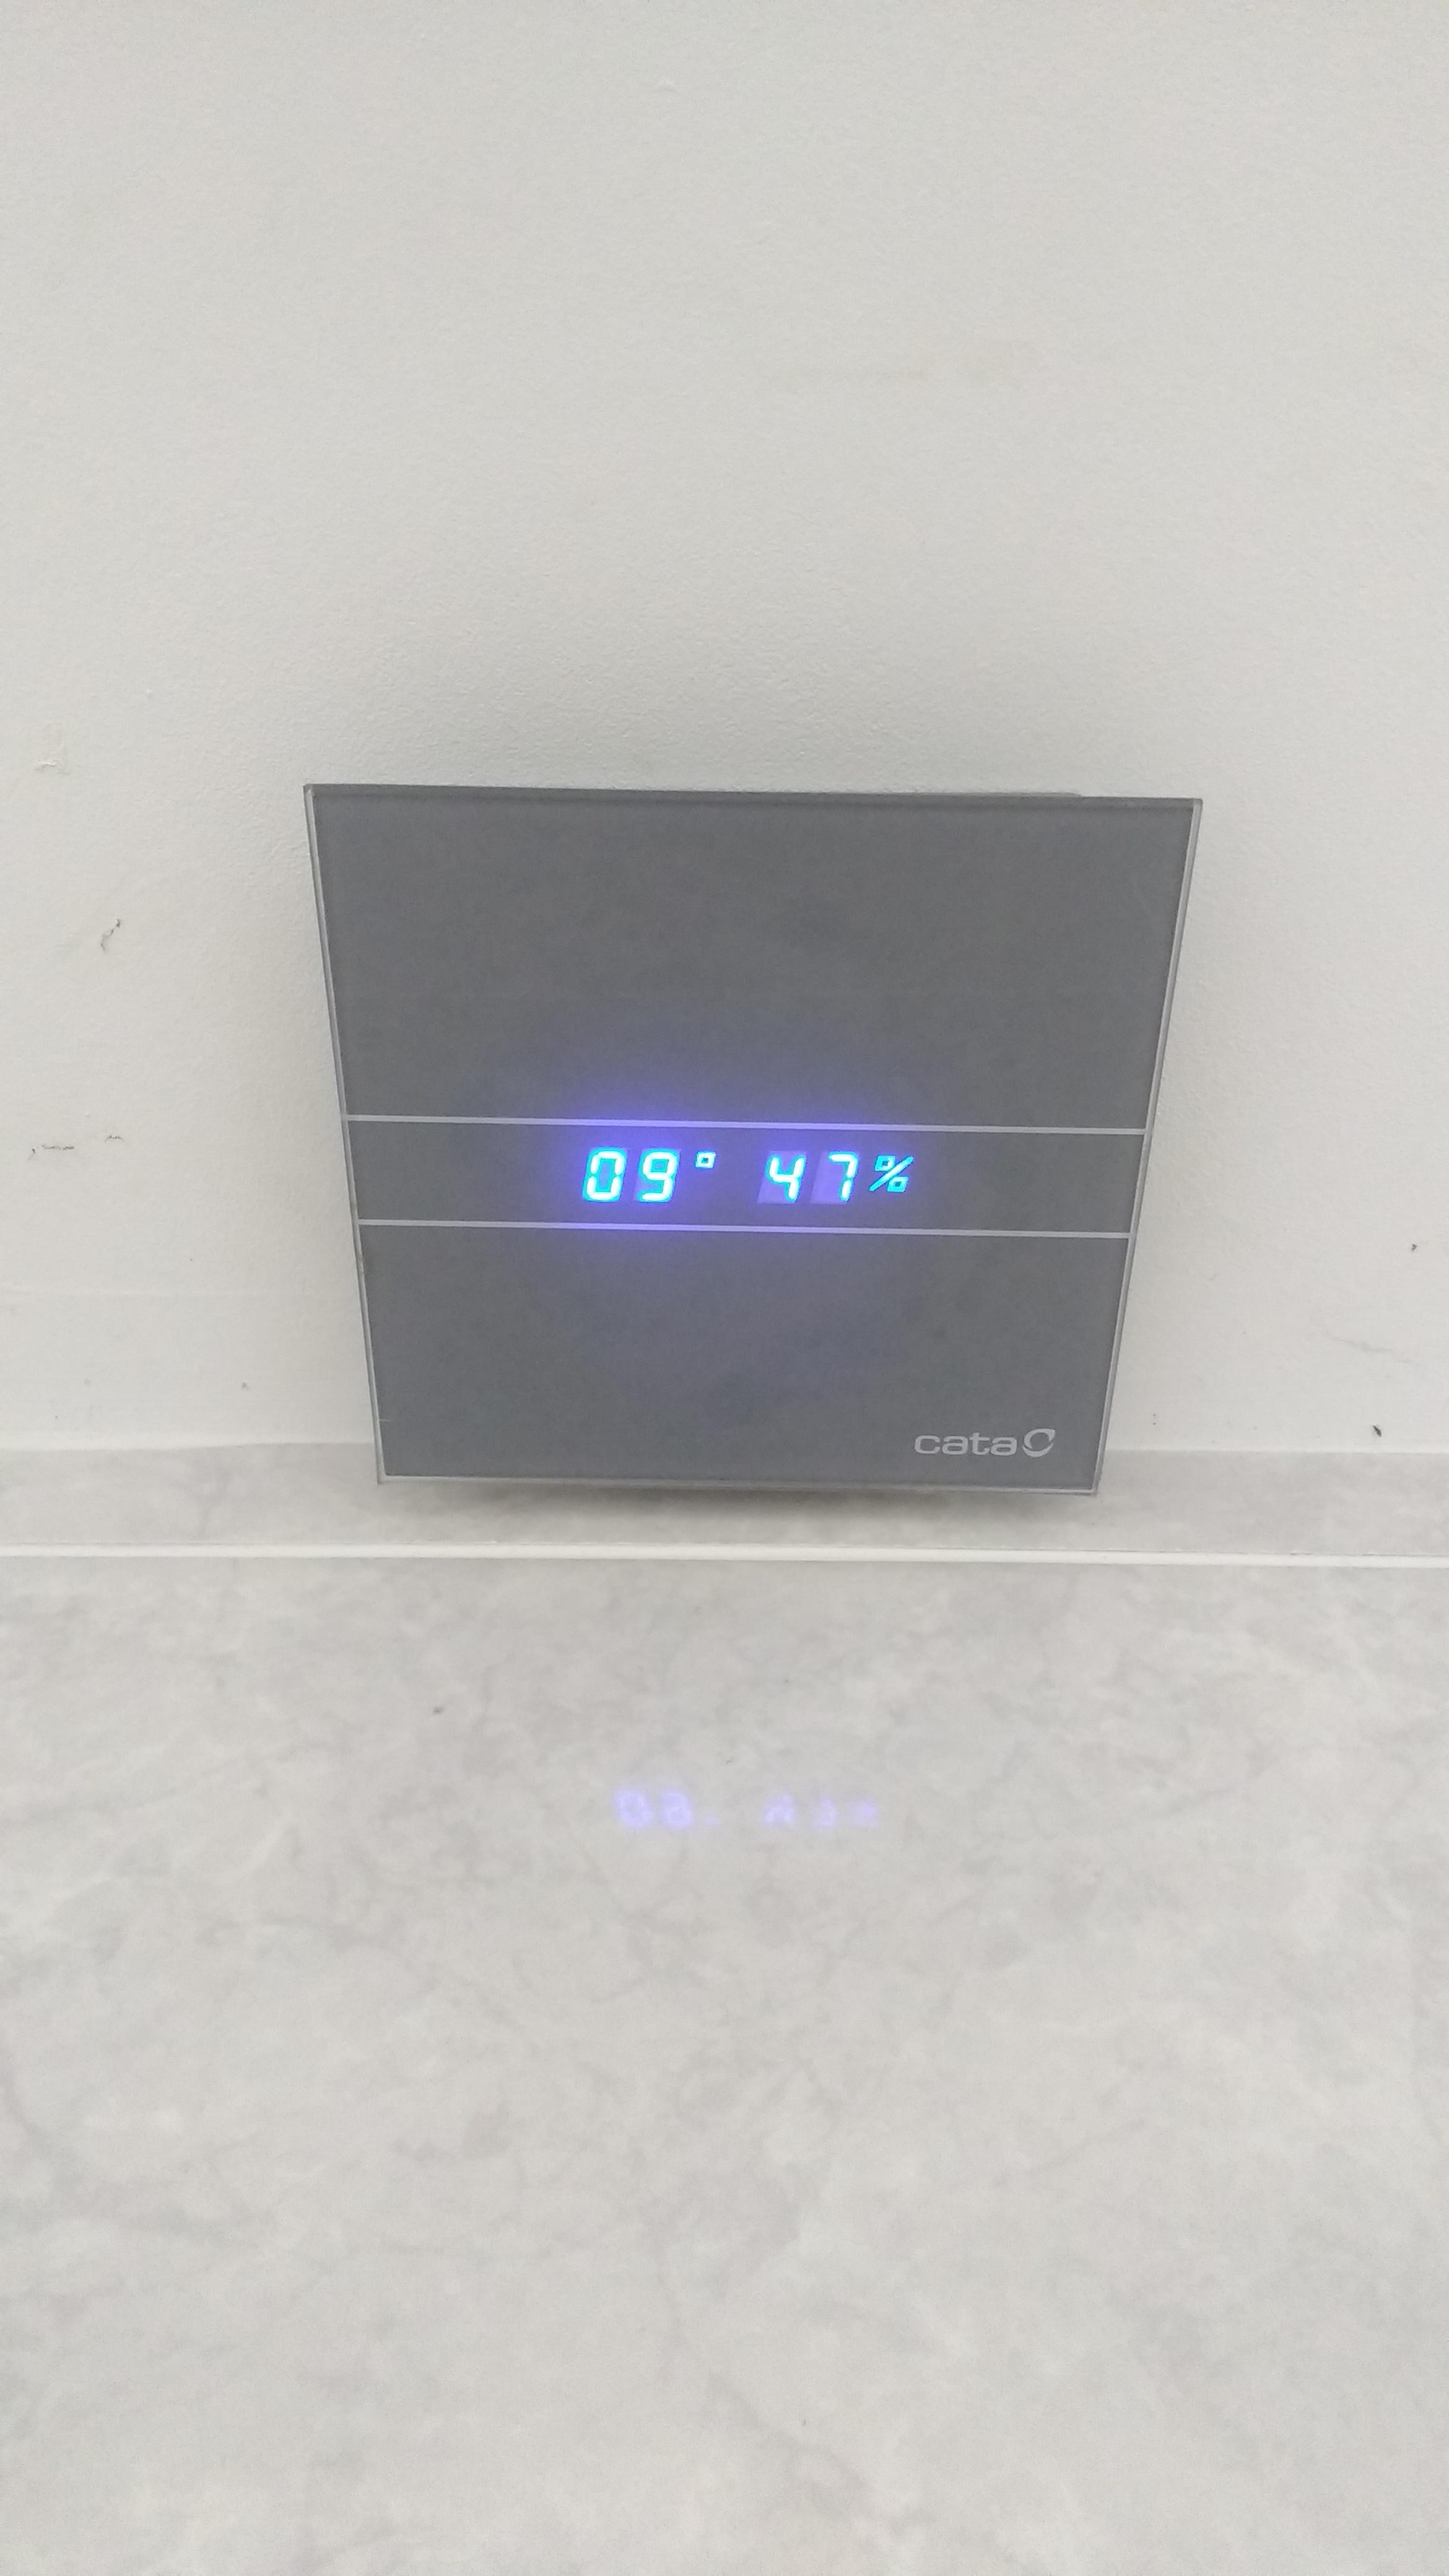
Dehumidifier. In our last place (old 4 storey town house), we pretty much lived in the basement and closed off the stairs to keep the heat in during winter. With 2 adults, 2 kids, a dog and cooking etc, the windows were running with condensation every morning. We bought a dehumidifier for about £100 or so IIRC, and left it in the corner doing its thing 24/7. Its amazing how much water they take out of the air. We still use it now in the new place occasionally if we've got a lot of wet clothes to dry.1 point
-
All the best to you both. Thanks for sharing, much appreciated.1 point
-
At the moment my project at work is the IT planning for our new 8,000 sqm factory, with a 2 floor office space. Under normal circumstances I work 3 days per week to allow me time to project manage our own build, but not at the moment. We get the water tight building handed to us on the 8th January, then I've got to organise the 1st, 2nd and final fix of all the IT infrastructure from cables to servers. When I tried to place the order for fibre leased lines I was told, there's no fibre on that road and you must have a PSTN line before you can have fibre. Well, as you can imagine that caused a lot of calls, effort and pushing. Now the PSTN is being installed on the 15th (I hope). I'm also waiting for the ducts from the roadside to the building for the fibre. This has resulted in me having to work full time. Then last Sunday I came back from the morning dog walk to find his foot pouring with blood, loads of it. So, padding and bandage applied and off to the vet. He had ripped out a claw and I just couldn't believe how much blood there was. Anyway the vet patched him up, with vet bills at emergency Sunday rate, but that was also another 1/2 day gone. So, my build has gone totally by the wayside, not so much of an issue whilst I'm in the planning phase, but a concern for the future if I'm needed on-site here, and on-site at the factory and then there are life issues as well. And of course I really must do some shopping for the little event in 2 weeks time. I can't see this situation improving much until everyone has moved into the factory at the end of March and the old factory is cleared out. The good bit is the overtime pay can go straight into the build budget which is pitifully low compared with what it should be. I was hoping not to borrow any money, but with only enough money for about £800 per sqm after very expensive preliminaries that is probably going to change. What I want to do is get water tight and do family room with kitchen, master and ensuite and then move in. If I could do this with our existing budget then we can rent our house out and get an income from that to carry on. We really want to avoid borrowing. Anyway, as it's now almost midnight and I have Gary Barlow just finishing his show in the background I must finish my short budget and get off to bed. Take care.1 point
-
I've only refurbed one room here and even being on this forum I didn't quite grasp the importance of air tightness otherwise I'd have designed elements differently. It'll certainly influence what I do on future rooms. A refurb is always imo harder than starting with a clean slate of course as you have to constantly work around other people's screw ups! It also took a visit to a highly insulated, low energy house and an understanding of it's construction to make me see (as I now do), the light. Basically I renewed the ceiling joists: I infilled with pir: Foil taped the joints: The went over the lot with a membrane: That shows the membrane concept. At that point it was pretty toasty and airtight. (Still cold bridges at the joists). All this is a bit moot as I have bfo cutouts for downlights, speakers and a ginormous, ceiling mounted body dryer. I've always had a plan to reinstate the insulation and membrane at these points but it's more work, a lot of which could have been avoided (not so much the body dryer mind). I maybe SHOULD have counter battened and used low profile LEDs. Lowering the ceiling a tad with counter battens would too have helped with tiling and decreased the room volume a bit meaning less to heat. The walls followed with battens infilled with pir then a taped vcl. Ceiling vcl joins the wall vcl joins the floor vcl: The only saving grace to all this is I hope to eventually have a warm roof and ewi effectively wrapping all my mistakes in a thermal envelope.1 point
-
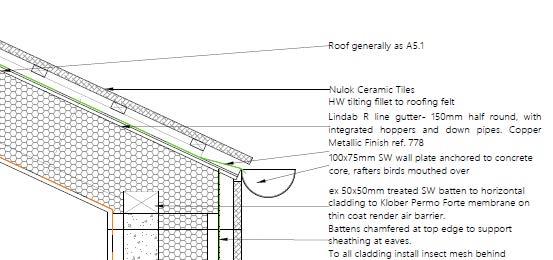
Here's one to keep our @Russell griffiths happy, and to help reduce @SteamyTea's Schadenfreudesucht. Please could you review my thinking, and see if I've missed something. Thanks. Two years ago, just after the roof was tiled with Nulock cermaic tiles, a bit of a hooley blew up: long story short it blew some scaffolding planks off the scaff and onto the roof. Live and learn. Next time scaff plank clips. ? Here's part of what the storm did. and here's how I repaired it The photos were taken when the storm was still pretty full-on: I was clipped to the scaffolding with a full harness. Nulok is easy to replace though - and I was keen to get the job done to prevent further damage. Fast forward two years. Drip, drip...... WTF !!! how's that happened then? Dry up to now why, how, bugger it ... Debbie looked at me and didn't say If ya can't take a joke, don't self build . (my signature line) There's not much of a drip. In the recent South Westerly storm that knocked us all on our heels, (warm wind), not a drop came through the roof - or perhaps better put, not enough water leaked in the roof to come through the roof build up . When its frozen outside, there's no drip. When there's cold northerly rain, there is a drip. The roof build up is; Tiles Metal Batten Felt Counterbatten 200mm insulation (between joists) 100mm underboarding insulation batten 12.5mm PB Neither was there a drip when it froze ... this morning - freezing - no drip before we popped out to the shops, but there was a drip when we got back. Temperature had risen by 5 degrees...... No rain - but there was ice on the roof when we left, - the roof was dry when we got back. As I write this, the damp patch has all but disappeared in the PB. There is no roof space, so I cant see the exposed underside of the roof from inside. Heres a cross section - Why did it happen now? A bit of head-scratching and came up with the following - what have I missed? The repair to the tiles was done under pressure: it was quite dangerous - windy enough to be fully harnessed and clipped on. The repair to the tiles took about 15 minutes. Nulok is very easy indeed to replace - throw the broken tiles off the roof, slide in a new one. They simply clip in. What I did NOT DO was inspect the underlying felt because I was worried about being blown off the roof. I bet I simply missed a small rip or two in the felt...... If thats correct, given sufficient temperature contrast, there would be condensation on the bottom of the tiles. And maybe there's a bit of ponding on the felt... and the water makes its way through the small rip. And because its small hole, it takes ages to show up. Maybe it took that long to trickle through over 300mm of roof build up. Anyway, have I missed something? Constructive comments welcome. @PeterStarck - what do you think? (I ask becaue you have Nulok) Tomorrow, scaff goes up, fetch a roof ladder (although you can walk on Nulok tiles) and then a wait until there's a long enough weather window to whip some tiles off to look-see. Bye bye 2020. Lets hope 2021 is better eh?
 0 points
 -
Best to build fail safe - semi non slip vinyl coved up walls and physically clamped to shower drain0 points
-
I'll be showering in there in a bit.
 0 points
 -
Looks good from my house. ??0 points
-
I thought that female pee was not suitable for compost. Number 2s are probably OK. Says the National Trust: https://www.treehugger.com/is-male-pee-better-than-female-pee-the-compost-conundrum-4857550 I have a (female) friend with about 9 female dogs who asserts the same opinion about canines. She paved her entire back garden 'cos female dog-wee would ruin any grass. Perhaps this is Mansplaining ?. Though, @Jilly, having had horses you may have a larger scale experiment. Was it a 'mare? F0 points
-
Well done, beautiful job, you should be proud of yourself. Love the comment about not being able to do the work of two 21 year olds ?, wait till you get to my age!.0 points
-
I have one but have never been brave enough to use it outside! ?0 points


This leaderboard is set to London/GMT+01:00