Leaderboard
Popular Content
Showing content with the highest reputation on 11/13/23 in all areas
-
4 points
-
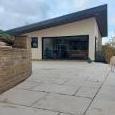
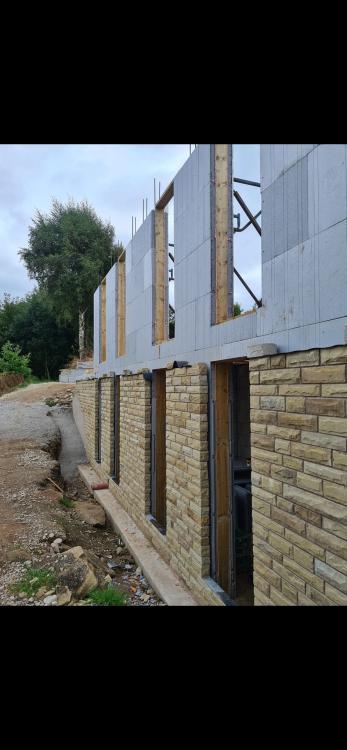
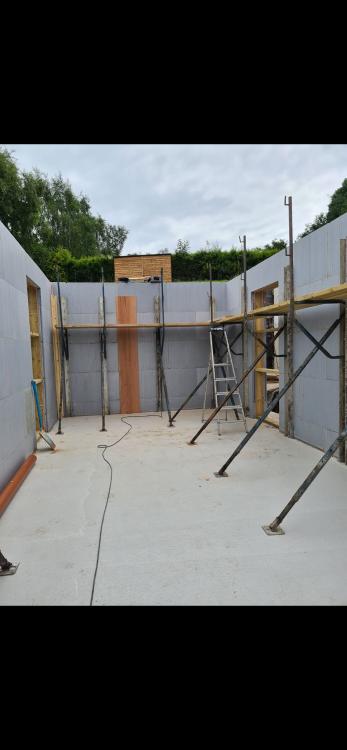
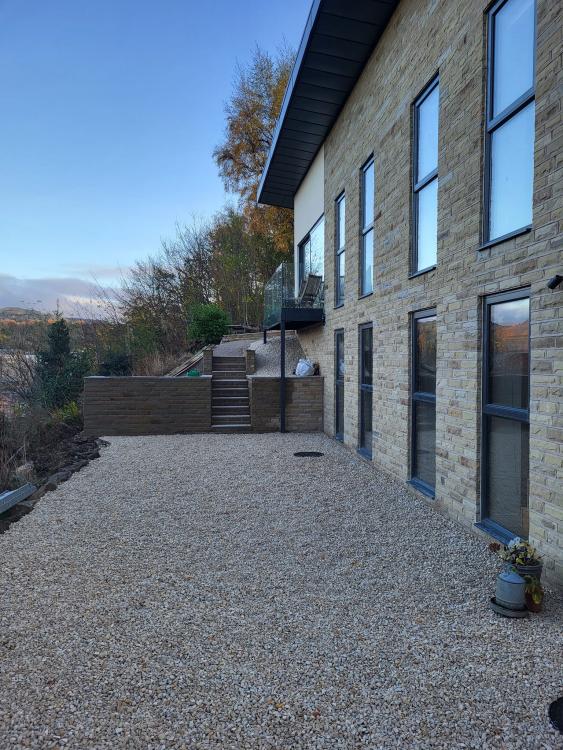
It's been a while since my last blog, but we've not stopped, the days are shorter and the weather skipped autumn🍂 and dived into winter with a few storms and loads of rain. Our windows are budget friendly triple glazed UPVC, and composite doors. The external EPS was sealed at the cill with EPDM airtight tape, the tape has reinforcement in it and can be moulded, it does crease but creates a water tight junction and sticks like the proverbial to the EPS. We created a cheek reveal with an additional layer of 50mm EPS and sealed the upvc frames against this, I then ran a bead of sealant against the face and edge of the EPS giving two seals. Then when clad a third seal. I used soudal air tight foam and I thinks it's LMA sealant, soudal's airtight solution. The winds gave good opportunity to test for air leaks when had several days of 35mph winds. This proved a good test with a smoke pen. The internal frame was sealed with soudal sf40 which adheres very well to the upvc and timber blocking, when cured it is like rubber. The cladding is larch boards in 2 widths 150mm for the bottom layer and 100mm for the top. We finished the top of the windows with a custom palistol coated drip The bottom of the EPS footing was finished with reclaimed slate. Inside we are having a cold roof. We needed to add 25mm pir under the truss cord to satisfy the tightened regulations in Scotland. We tapped the foil boards with foil tape, and the perimeter boards were pushed to touch the wall plate. Then used airtight foam between the PIR and internal IFC wall creating a seal. Under the PIR I used plastic membrane that I spray glued to the PIR, and this draped down the perimeter walls. The under ceiling was battened and counter battened, this created a service void for the cables and not penetrating the loft. The plastic was jointed with EPDM airtight tape on joins and walls. Cables were put inside Flexi conduit that was cut into grooves in the ICF. (All water pipes were run under the slab.) This picture shows the detail for the airtightness and the service void. MVHR ducts (7 plenums ) were run in the loft, and under 400mm of loft roll. The manifolds are also under the loft insulation. I made these airtight using the same EPDM tape. I made gaskets out of the plastic with a circle cutter and stretched it over the plenums, then air tight tape to seal everything to the plastic/ PIR. The walls also needed some IWI to meet the tighter regs, so decided to go with 25mm PIR. This also added another seal for the plastic airtight layer and walls. The poly steel ICF has these metal plates at 150mm ctrs that allow the cladding battens to be secured externally and the plasterboard internally, we used self tapping drywall screws and insulation discs to hold the PIR in place before installing the plasterboard. Picture for detail below. At this stage we've got a large airtight box. Now it's a case of installing the stud work. I lined the plant room with pre painted 12mm OSB, and the bathroom with 18mm OSB ( a Scottish building regs requirement needing the ability for future hand rails etc) Electrics are simple, a few Ethernet points and sockets and spotlights. One pendant over the dining( and if I get my way, and budget allows pool table). The only penetrations from the loft are a light, PV cables, TV aerial, and 4g antenna cables. These are in conduit and sealed both ends. All other cables run in the ceiling void or stud work. I've put a few sensors in the studwork for future Arduino projects to accompany the in slab sensors. The plant room is compact, and work in progress. The PV is up and running and to date produced just shy of 300KwH in 5 winter weeks With the first fix complete it was time to plasterboard, we got 80 boards delivered Wednesday midday, just as storm Babet hit, it was too windy to bring them in, I tried, I failed so it had to stay outside 😭, covered in plastic, tarpaulins, scaffold boards and the obligatory ratchet straps. 3 days of constant 35mph gusting 50mph gave opportunities to check for airtightness. I managed to install the flush shower tray during this downtime. Once the storm blew though we got the boards inside and cracked on, the open plan lounge, diner, kitchen was boarded first and as soon as it was complete I skimmed the ceiling, 11 boards was too big for me and my tennis elbow, that coupled with not plastering anything for several years. I split the room in two and used several layers of scrim tape to plaster up to, then remove the scrim tape and skim the 2nd part. It worked well, and it's painted and the join is seamless. The next few days we mixed it up skimming in the morning and boarding in the afternoon for the next day. Today is day 182 of the build, this is basically from the cleared site that was down to rock with the pecking already done. Currently the house is fully skimmed, most of the ceilings have been primed and painted white and we started the kitchen install today. All the bathroom is here waiting to be installed, and some appliances are here most arriving this week. This has been pretty much 7 days a week, with only around 12 to 18 days off to earn some money and pay off some labour debts. We're hoping to move in, in 2 weeks with a working bathroom and kitchen 🤞, the static has now reverted to ice box during the night🥶3 points
-
So, @DaveAF is the arbour still up - gales haven't dropped it for them ..... ? Locally there's a WW2 relic (coast-guard lookout) that looks much the same as the image you posted, is really Jerry-built, walls thinner, (single brick walls) concrete roof thinner and open to the full force of the winds in the bay (Morecambe). Over 70 years old. Both that concrete roof - and the one next to yours - will take some shifting.3 points
-
3 points
-
For a long time now i've known about Liniar's Glazing Flipper, basically a trim which attaches to the middle of the profile with a rubber flipper as the name suggests, which creates a barrier to the outer half (where the frame drainage holes are located) and the inner half, and always thought it was such a brilliant idea, since the drainage holes will allow air to move freely around the 5mm gap all around the glazing, bypassing all of that expensive triple glazing, and thats irrespective of whether the beading fits tightly or not...but of course with anything brilliant, you can never get hold of it. Then when i was looking for something else, joint backer rod (the stuff you use to fill a deep hole to stop you having to use so much caulk) popped up, and i thought now that would certainly do the job, as its flexible, waterproof, cheap and hopefully airtight when compressed (even if its not it should be far better than just an empty gap), so i've bought 10m of 10mm rod just to give it a go, and will report back if its made any difference. I'll put it on a window where i can do one pane and leave the other so its a reasonable comparison.1 point
-
Ok let's assume they do. Now lets delve a bit deeper into how you put something together. I said earlier that "It sounds brutal but if they have made alterations without consent then these don't count.." You may need to force their hand... but if you do then you need to do a bit more homework. Who decides the amount of light you are entitled to, how do they measure it and then judge what is a reasonable loss of light? We all have to live together so as development occurs some light is inevitably lost. Take London and say the Shard.. it casts a big shaddow.. some folk somewhere must be getting a little less light! But how do you decide what is a little less or swinging the lead? I have attached BRE 209 which I think is publically available. Start at page 15 Clause 2.2.7 and then read around. This bit deals with when you are pretty close to a boundary. This could be the key bit of info you need in that there is recognition that a lot of development results in a certain loss of light. In summary if you can tailor your design to comply with the recommendations of BRE 209 then your neighbour would have to put forward a counter arguement.. which could be expensive for them as they would have to come up with why they disagree with the BRE. I use this as in Scotland and it is referenced in the Scottish planning regs.. so you should find reference in the UK regs as the BRE serves all the UK. Also they would need to fesse up as to what they have been doing next door! If the loss of light impacts a bathroom for example .. then the game changes. If you can get a design that say complies with the recommendations in the BRE then you have strengthend your hand. But to cover yourself you could take out an indemnity policy to cover potential action by your neighbours. Ask your solicitor what this would cost for that piece of mind. You would need to jump through some hoops insurance wise, get someone to translate BRE 209 in numbers with a report. If they did decide to kick up a fuss and find out your insurance is going to cover the costs.. up to them if they want to lose their shirt if their case fails. If they win then you should be covered if you set the policy up right.. which will take a good bit of your time to explain to an insurer what the risk is you want them to cover... hence the homework. BE CAREFUL.. for these types of indemnity policies to be effective you must often not alert a potential complainant. A good example here is where you have converted your attic without BC / planning permission. If you let the council know that you have a problem and then take out the policy there is fine print that can make it invalid. @moncchichi be careful not to identify yourself or your site on BH which is a public forum. Hope this helps and keep us updated as to how you are getting on. BRE 209 Site Layout Planning for Daylight and Sunlight BRE 2022.pdf1 point
-
For clarity @Beelbeebuband I are saying essentially the same, just slightly different terminology. Basically wrong type of valve. I don't know if it's possible just to change the head, @Beelbeebub may know.1 point
-
Assuming you bought online/over the phone the distance selling regs apply and you have a bunch of rights. You can cancel your order *for any reason* up to 14 days from delivery for a full refund including shipping. I'd the item is faulty you have 6 months to return it even if you've altered it. You don't have to pay shipping. The item not being as described, would be faulty - ie if it says it has inverter drive and doesn't etc It sounds like a bit of a lemon TBH https://www.gov.uk/accepting-returns-and-giving-refunds1 point
-
Sorry but it's wrong and an installer who plumbed it this way doesn't know what they are doing! As various have said scheduling them at different times is a solution, but it really shouldn't be possible in any system with weather compensation or low flow temperatures for space heating and water heating to operate simultaneously as it defeats the whole design principle. Btw the comment applies also to fossil fuel boilers with weather comp (or that you want to run at low temp) There are of course various work arounds, of which not scheduling them simultaneously is one, but the householder shouldn't have to work this out for themselves. The common solution is a diverter valve (either-or) instead of the more common three way valve (ch or both), but you can also do it with two two way valves correctly wired1 point
-
A2A is probably your best bet, Avoid infra-red, it is only resistance heating after all. You could cost out storage heating, it is cheap and easy to install, though running costs are tariff dependant. I currently pay 11p/kWh at night and 40p/kWh during the day. But if you are installing solar, you can get them to contribute (divert) to the storage heater. What are you doing about hot water?1 point
-
1 point
-
True, I think it’s just simpler to find a Reed that will cope with the current to start the led driver, if not this is what I will do, I have ordered that one on EBay, only a fiver, worth the punt.1 point
-
Yeah on that piece. You could also use the CLS Timber idea, and make a huge modesty block, running full length of unit, screwed to the cross member (or even better, down through the cross member) and then all the way through into the wall with bolts. Unit would still be the weakest component, but you'd have a good job breaking it1 point
-
First two CV2 dMEV are now installed in the bathrooms. Sadly I discovered the underside of the roof felt was covered in condensation when fitting the second extractor today - I've already had ridge ventilation fitted to try and resolve this, so now I'm hoping reducing the general humidity in the house might also solve my loft issues. Brevis refused to sell me the vents so I've had to go through Brookvent, I'm currently waiting on a pro forma...1 point
-
>>> I cannot find another Reed switch that quotes the va switching For simple devices an approximation max VA ~= max W ~+ max Current x max Voltage and gets you in the right ballpark. I would generally allow a headroom factor of, say, x2. In fact, more modern things have VA > W as they have weirder power factors i.e. the voltage and current are a bit out of phase. LED drivers, PC PSUs, Wall Warts etc have 'dodgy' power factors <1. Simple resistive heating will have a power factor ~=1. You can kind of see that the reed switch is a bit small-ish physically which suggests it's a bit wimpy electrically. I see the RS menus don't let you search in max W/VA, so I can see how you got here . I guess you need 72W min / 150 VA min (0.65A x 230V). The highest one on Farnell seems to be https://uk.farnell.com/comus-assemtech/pra-sa-002/proximity-reed-switch-al-120w/dp/3762694?st=proximity switch - at 120W/VA - which is probably a bit low. Reed switches in general are usually smallish current but faster than a relay. Digikey / Mouser / Rapid etc? Maybe you need a different solution?1 point
-
Gut a length of wood. Ooh Er misses. 38x63 or whatever stupid measurement that cls stuff comes in, rip it to the same size as the service void on the back of the carcass. Laser line around wall fit batten to wall screw cupboards back to batten.1 point
-
There is and the first job is to read it. The local plan. Keep within the parameters and most problems go away. Planning officers work to the policy in front of them and personal opinions don't normally affect the outcome. Any objections are also liable to the published plan. Then present your proposal neatly and making it easy to deal with. I like to think of the first sight of our proposals eliciting a smile from the planner....' this is going to be an easy one'. Tidy, well presented and compliant. Vary from that and it may cause delay.1 point
-
i found a bomb shelter 2inches below the grass in my garden, but it was basically a bit of corrugated steel. Wouldn't fancy my chances against the Luftwaffe but i guess it made people feel safer. Think id take your neighbours bunker over that any day.1 point
-
Was thinking the same, those ledges on the remaining far wall would probably have supported bunks. Bit of a shame to get rid of it really1 point
-
Thank you. I would have liked a chimney as it would have given the house a bit more character, however, the builder talked me out of building a chimney. Trying my best to insulate and airtight the house but I think it's below par compared to what other buldhub members are using.1 point
-
This may help decipher what you should have got: https://www.labc.co.uk/news/understand-bs-5534-changes-roof-underlay1 point
-
The brand you originally linked to can take outside air in with an option kit, so acts as ventilation unit also.1 point
-
Thinking back now, I just carried the flooring on from the Utility in the next room, which has resulted in a full width tile on the right of the pan and a half width tile on the left. Ideally I'd have re-centred the tiles in the W/C so I had similar width cuts at both sides - like I did in the Utility room to begin with!. Hey ho.1 point
-
I don't think so, here's a video with one unit being opened up EXternal air is contained within the unit, rather like a room sealed boiler. That said, a unit that deliberately took the outside air and heated it up using extracted air from the room might not be a bad thing. Basically a standalone heatpump powered MHRV unit. Would definitely help with preventing humidity and pollutant buildup1 point
-
Lightning protection is a funny area, if you don’t have a conductor then you may get hit and it may do some real damage, But! If you fit lightning conductors you Will get hit often so it needs to be done right. No “protection” conductor is better than a poorly done arrangement.1 point
-
I bet no one else would ever notice, DIY is great apart from knowing about all the little things that could have been done differently. Stuff you never get to know about if someone else had done it.1 point
-
No that is too specific. Yours is a make it up as you go along box of terminals for a one off system.1 point
-
Actually I wouldn’t, why would I want to get worked up about other people builders.1 point
-
How tall are you or other users? Shower head needs to be above your head and valves/handset at a height convenient for all1 point
-
@craig is our glass guru. Do you know if the glass has a costing on it?1 point
-
Looks like Sunamp have a new iteration the Thermino ePlus and xPlus, coupled with a new “Optimino controller, which allows the heat battery to work with different energy sources by using a compatible Optimino key.” Specs look the same, hopefully this is a simplification of the range, as the naming conventions were a bit messy. No new manual available yet. Maybe the electronics have improved with this update?1 point
-
foam it, then trim it, then silicone it. how are they actually fitted in? if you open the window sashes are there big screws going through the frames? Window Sill | Window Board | Eurocell1 point
-
1 point
-
I used inline fans in our previous build Clear a shower of steam in seconds You can hardly hear them when sited above the bathroom ceiling1 point
-
I’ve got one of these camera - still going strong 4 years later - luckily it came with one of these sins so I’ve never had to pay for the data ! great cameras you anyone need something like this1 point
-
I'm a bit confused by your build method. You're using a non tenting breather membrane, but then adding sarking on top anyway? And why was it necessary to have horizontal joins? Bit late now but wouldn't it have made more sense to run the membrane vertically, and then use the counter battens to pin it down at the joins?1 point
-
Yes it is a mystery where all the water that is clearly there has been going all the years it has been blocked. Raising the water table in the field I would imagine to the point is appears as surface flooding then drains into the burn. As we have a dry day today, and it is still flowing nicely I decided to follow it with my divining rods. It does seem to go in a roughly straight line across the field for as far as I bothered to try following it roughly following a low point in the field, so it would make sense if it was originally installed as a land drain to dry that dip in the field. If so with a bit of luck that field will be less prone to flooding and less likely to flood into our garden again. Should i send the farmer a bill for restoring his land drain to operation?1 point
-
1 point
-
I modelled it not long ago because someone asked the same question. I think there was not much in it, and if I remember correctly, vertical had higher losses. Posted August 10 (edited) I have never seen it modelled, so hard to tell. Take a cylinder with a 0.5m diameter ad a 1.2m height. Assuming a U-Value of 0.2 W.m-2.K-1 Volume will be 235 lt. Surface Area will be 2.28 m2 Base of cylinder temperature, once settled, 36°C, top of cylinder temperature 60°C. Ambient Temperature 10°C. If one assume a temperature gradient of 20K.m-1 (about what mine is), then the power losses, when vertical, will be the sum of the top end, plus the area of the diameter (hoop), then the sum of the hoops, and finally the sum of the last band and the base area. Using a course 0.1m down the cylinder, the power losses are 18W, or if the cylinder is unused for a day, 0.44 kWh. Now lets turn the cylinder horizontally. Working out the surface area is not quite so easy here as for every 0.1m loss in height, the end area and the hoop area do not scale in a linear fashion, so I sketched it up in CAD, sliced it, triangulated it, then worked out the dimensions. Accumulative errors was between 1 and 8%, so shall use 4% as the error. The cylinder power losses are now 20W, 0.49 kWh.day-1. A difference of 0.05 kWh. The above is on a static model, but there will be some turbulence. With a mean temperature of 48°C for the vertical temperature, the mean density of the water is 988.7 kg.m-3, at the top of tank temperature, the density is 5.53 kg less, 4.48 kg more at the bottom. A total of 10 kg.m-3 difference The horizontal cylinder only has a 12°C temperature difference (because I used the same temperature gradient of 20K.m-1), so the density difference is only 5.6kg.m-3. Now without getting into Reynold Numbers and tangential surface areas, a simple way to model it would be to look at the difference in stored energy and the difference in mass as energy is the ability to do work, which can be reduced to moving a mass a distance. The vertical cylinder will have 233 kg of water in it, the horizontal one 232.4 kg, so 0.6 kg less. To move 1 kg of water, 1 metre, will take 1 joules of energy. So to move 232.4 kg 1.2 metres will take 279.6 J in the vertical cylinder. There is only 0.5 metres of height in the horizontal cylinder, so 116.2 J, so the turbulence losses will be in thee order of 42% less. So I would not worry about the cylinder orientation. I am going outside to sand some wood now the glue has set.1 point
-
Very happy with the product. And the help Will @ Pollysteel gave. Only issue(as you've read), was a slight movement of the corner block. I was never worried about bursts.1 point
-
1 point
-
MVHR...less dust in the house, less pollutants like radon, off gassing from furnishings and carpets, people on here with allergies report benefits, mould issues reduced, constant fresh air.1 point
-
Screw through that bloody great brace at the back of the cupboard, not the cardboard shite. Fook me do I need to come and do it for you. 🤦🏻♂️🤦🏻♂️0 points
-
Way too late for you but we put 18mm ply along the kitchen walls to ensure there was something to fix to. maybe on the next one?0 points
-
I would be more worried about your clothes line pulling the cladding off than taking photos of your neighbours garden…..0 points


