Jump to content

6 Months, so we got plastered


Jenki

1019 views

It's been a while since my last blog, but we've not stopped, the days are shorter and the weather skipped autumn🍂 and dived into winter with a few storms and loads of rain.


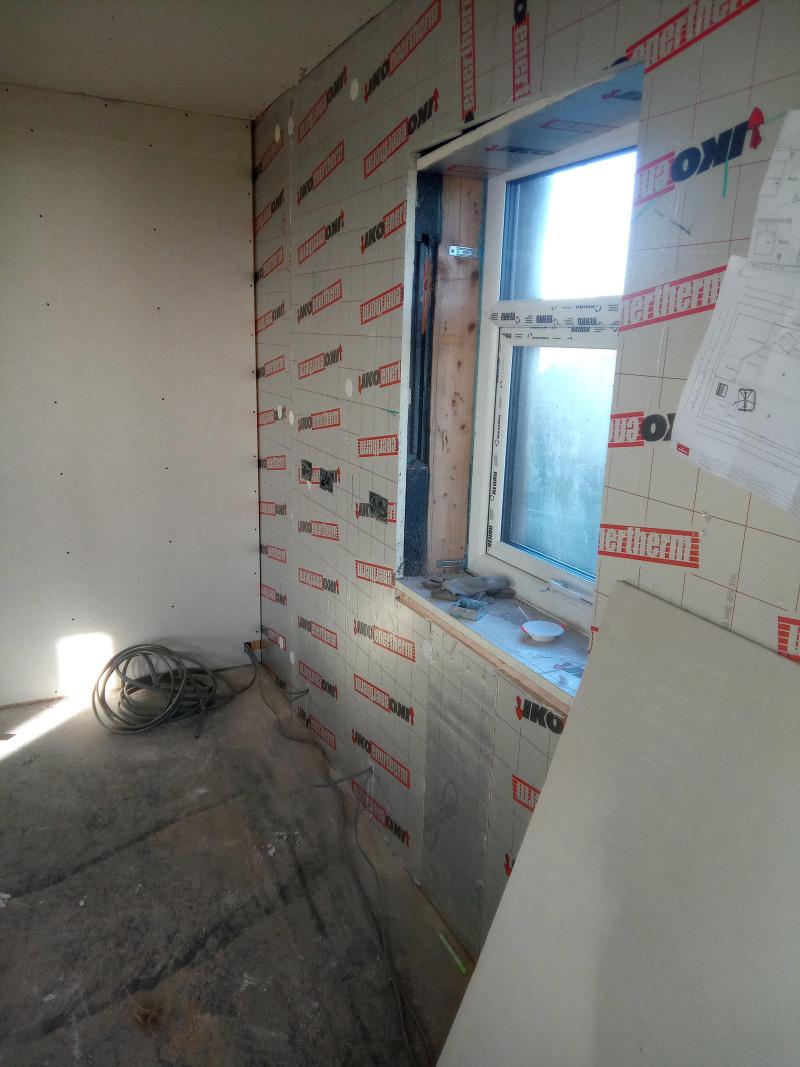
Our windows are budget friendly triple glazed UPVC, and composite doors.


The external EPS was sealed at the cill with EPDM airtight tape, the tape has reinforcement in it and can be moulded, it does crease but creates a water tight junction and sticks like the proverbial to the EPS.


IMG_20230908_135127.thumb.jpg.7a84b8174516abba813ae279b830c1ac.jpg

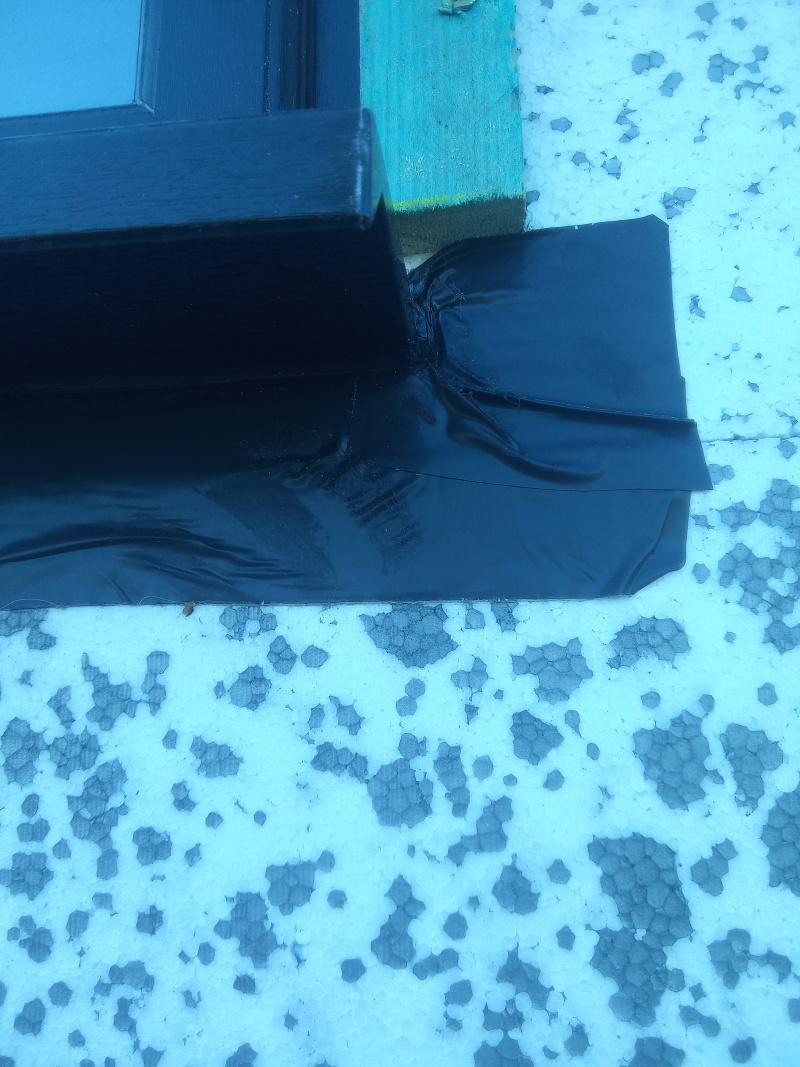
We created a cheek reveal with an additional layer of 50mm EPS  and sealed the upvc frames against this, I then ran a bead of sealant against the face and edge of the EPS giving two seals. Then when clad a third seal.

I used soudal air tight foam and I thinks it's LMA sealant, soudal's airtight solution.

The winds gave good opportunity to test for air leaks when had several days of 35mph winds. This proved a good test with a smoke pen. The internal frame was sealed with soudal sf40 which adheres very well to the upvc and timber blocking, when cured it is like rubber.


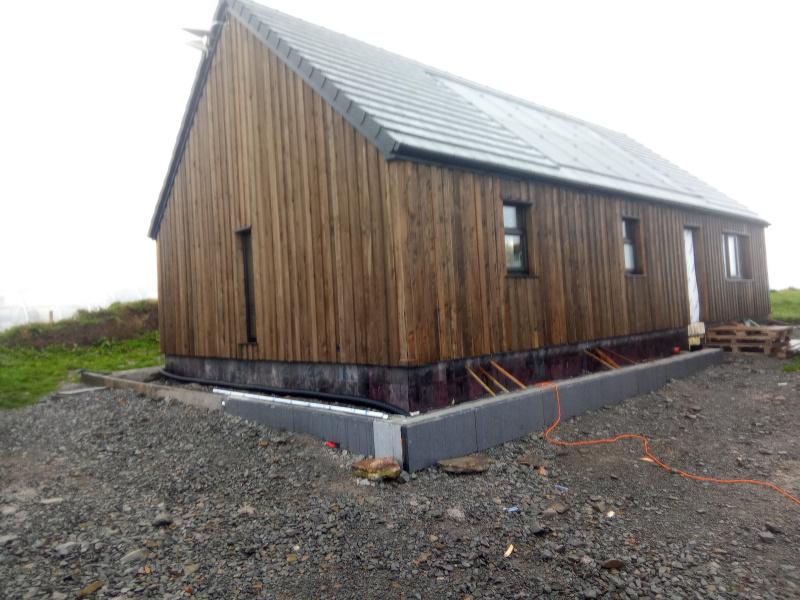
The cladding is larch boards in 2 widths 150mm for the bottom layer and 100mm for the top. 

We finished the top of the windows with a custom palistol coated drip


The bottom of the EPS footing was finished with reclaimed slate.

IMG_20231112_092511.jpg.a69776b84ece1636d4c19c9c18d5395a.jpg


Inside we are having a cold roof. We needed to add 25mm pir under the truss cord to satisfy the tightened regulations in Scotland.

We tapped the foil boards with foil tape, and the perimeter boards were pushed to touch the wall plate. Then used airtight foam between the PIR and internal IFC wall creating a seal. 

Under the PIR I used plastic membrane that I spray glued to the PIR, and this draped down the perimeter walls. The under ceiling was battened and counter battened, this created a service void for the cables and not penetrating the loft. The plastic was jointed with EPDM airtight tape on joins and walls.


IMG_20231112_092523.jpg.6d5c225c7bffdbe7f156d41943f0a3eb.jpg


IMG_20231112_092544.jpg.d436364c69768a349074fe84403f3997.jpg


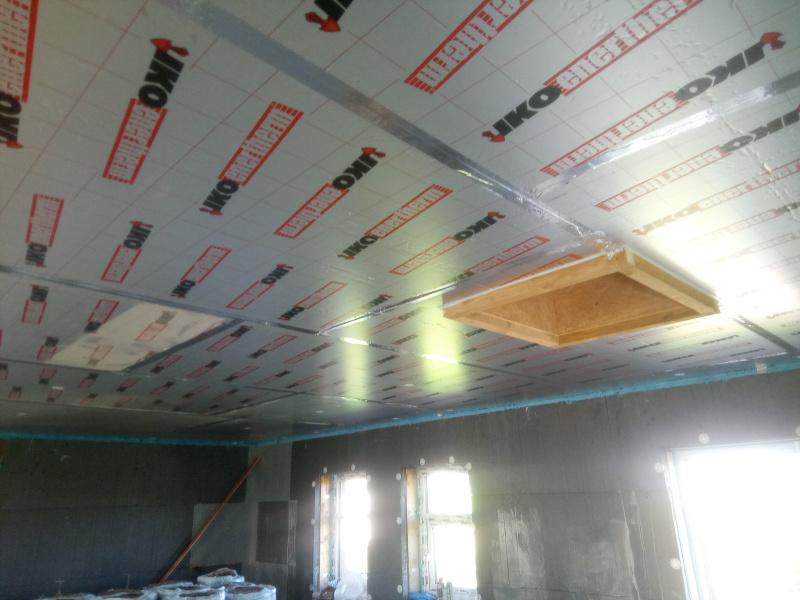
Cables were put inside Flexi conduit that was cut into grooves in the ICF. (All water pipes were run under the slab.)

IMG_20231112_092354.thumb.jpg.9eb022bdbf7a31ef54f728ec303c06a2.jpg

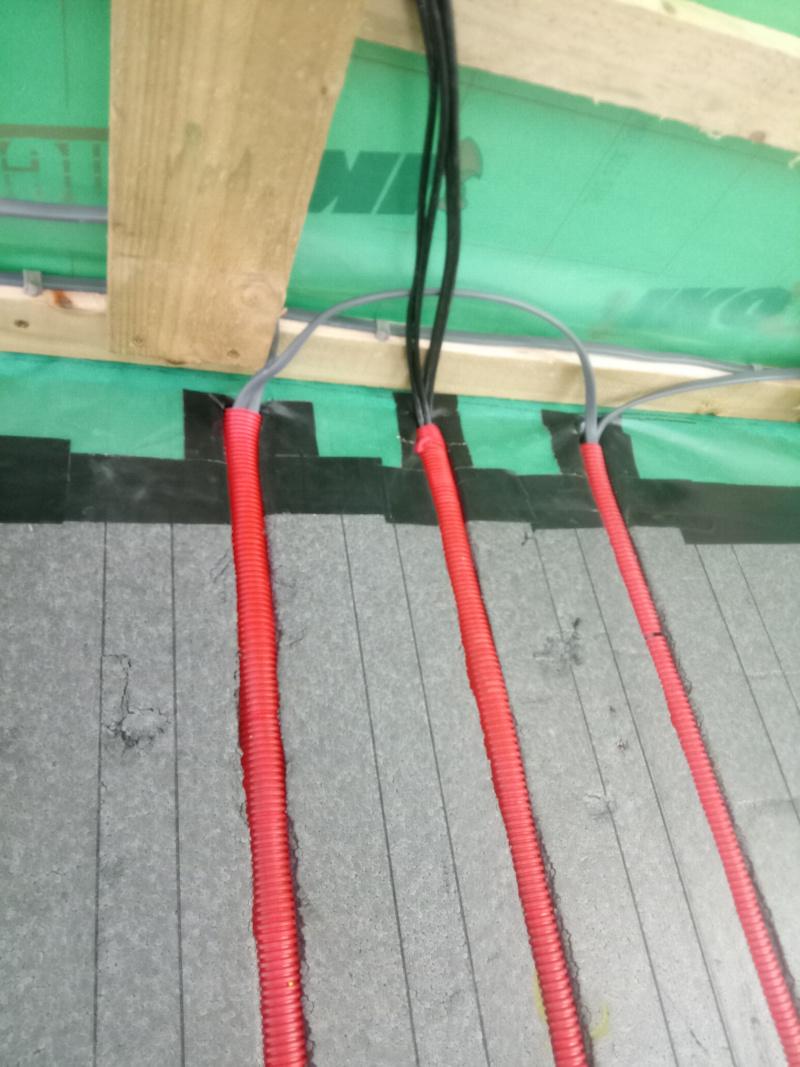
This picture shows the detail for the airtightness and the service void.


MVHR ducts (7 plenums ) were run in the loft, and under 400mm of loft roll. The manifolds are also under the loft insulation.  I made these airtight using the same EPDM tape.

I made gaskets out of the plastic with a circle cutter and stretched it over the plenums, then air tight tape to seal everything to the plastic/ PIR.

IMG_20231112_092329.thumb.jpg.65f5a676e5bf09febdad22a032e1972f.jpg


 The walls also needed some IWI to meet the tighter regs, so decided to go with  25mm PIR. This also added another seal for the plastic airtight layer and walls. 

The  poly steel ICF has these metal plates at 150mm ctrs that allow the cladding battens  to be secured externally and the plasterboard internally, we used self tapping drywall screws and insulation discs to hold the PIR in place before installing the plasterboard.

Picture for detail below.

IMG_20231112_092301.thumb.jpg.bf4c0bae5bdd1005a0da3b8ff524a9b2.jpg


At this stage we've got a large airtight box. Now it's a case of installing the stud work. I lined the plant room with pre painted  12mm OSB, and the bathroom with 18mm OSB ( a Scottish building regs requirement needing the ability for future hand rails etc)

IMG_20231112_092608.thumb.jpg.828f3b7b06121e93e9d7a5295e63ddaf.jpg


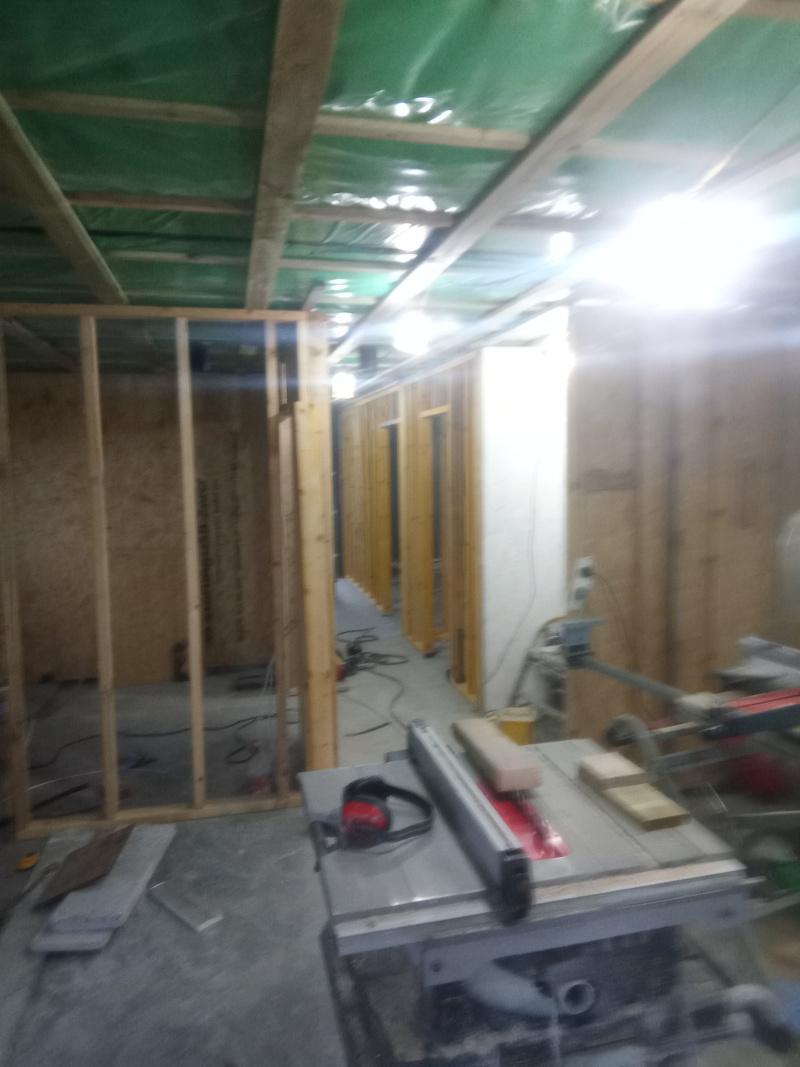
Electrics are simple, a few Ethernet points and sockets and spotlights. One pendant over the dining( and if I get my way, and budget allows  pool table).

The only penetrations from the loft are a light, PV cables, TV aerial, and 4g antenna cables. These are in conduit and sealed both ends.

All other cables run in the ceiling void or stud work.


I've put a few sensors in the studwork for future Arduino projects to accompany the in slab sensors.


The plant room is compact, and work in progress.IMG_20231112_092441.thumb.jpg.033f704bc9f184bb71a67d1c1096f922.jpg


IMG_20231112_092417.thumb.jpg.a7cca15197fb97dbee840ccb4320cb4d.jpg

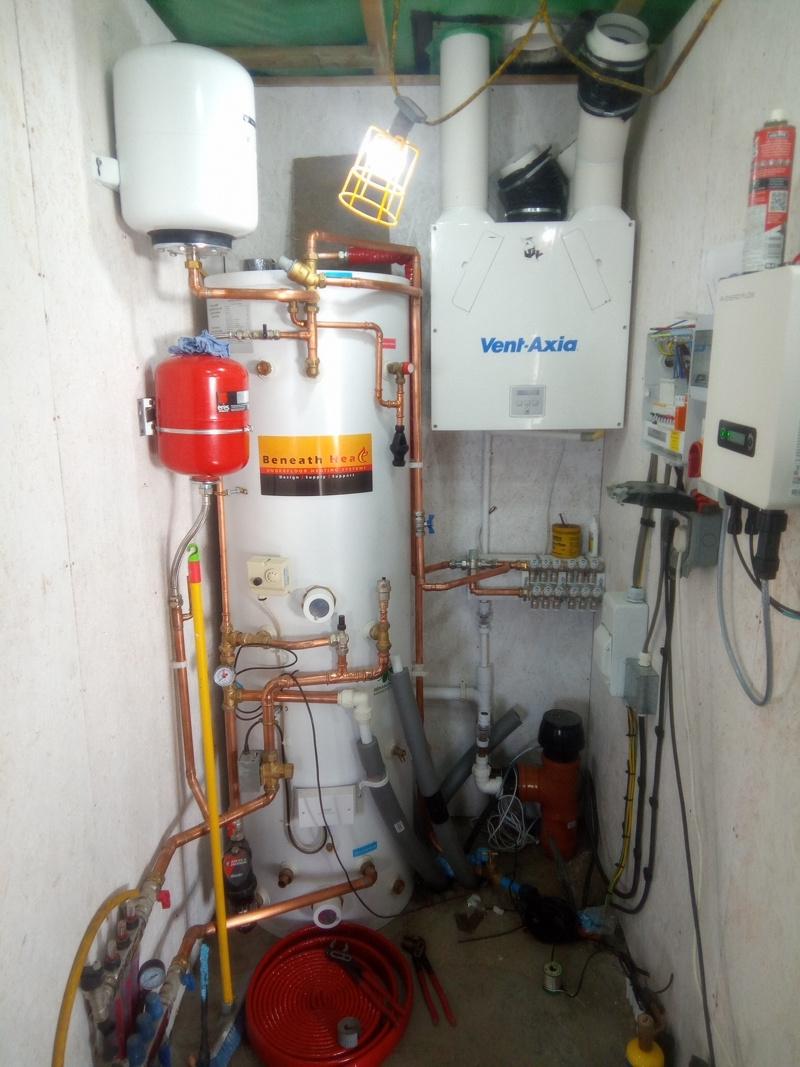
 The PV is up and running and to date produced just shy of 300KwH in 5 winter weeks

IMG_20231112_092456.thumb.jpg.0a951c83c7fe08a0e5a7b5420881a326.jpg


With the first fix complete it was time to plasterboard, we got 80 boards delivered Wednesday midday, just as storm Babet hit, it was too windy to bring them in, I tried, I failed so it had to stay outside 😭, covered in plastic, tarpaulins, scaffold boards and the obligatory ratchet straps.

3 days of constant 35mph gusting 50mph gave opportunities to check for airtightness.


I managed to install the flush shower tray during this downtime. 


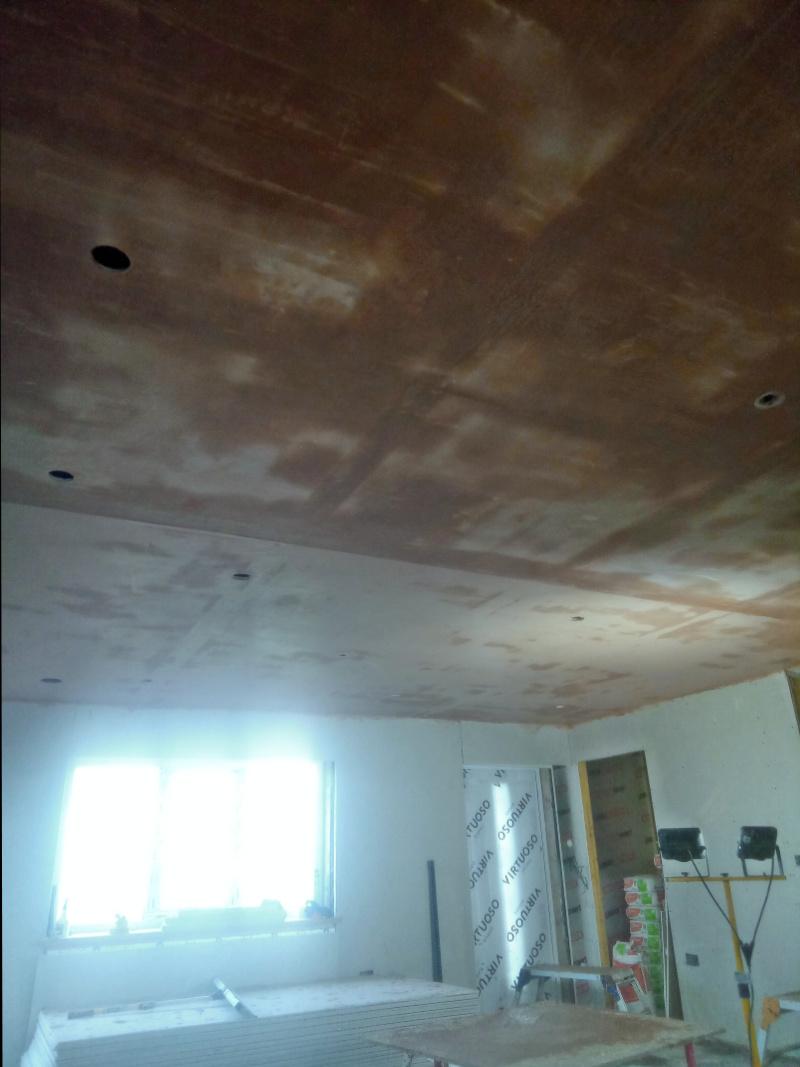
Once the storm blew though we got the boards inside and cracked on, the open plan lounge, diner, kitchen was boarded first and as soon as it was complete I skimmed the ceiling, 11 boards was too big for me and my tennis elbow, that coupled with not plastering anything for several years. 

I split the room in two and used several layers of scrim tape to plaster up to, then remove the scrim tape and skim the 2nd part. It worked well, and it's painted and the join is seamless.


IMG_20231112_092241.jpg.b13bc666b45686971d88ef7f0cf97b64.jpg


IMG_20231112_092225.thumb.jpg.108b7acc4bcdaf819402f5d1444b3955.jpg


The next few days we mixed it up skimming in the morning and boarding in the afternoon for the next day.


Today is day 182 of the build, this is basically from the cleared site that was down to rock with the pecking already done.


Currently the house is fully skimmed, most of the ceilings have been primed and painted white and we started the kitchen install today.


All the bathroom is here waiting to be installed, and some appliances are here most arriving this week.


This has been pretty much 7 days a week, with only around 12 to 18 days off  to earn some money and pay off some labour debts.

We're hoping to move in, in 2 weeks with a working bathroom and kitchen 🤞, the static has now reverted to ice box during the night🥶

  • Like 14

14 Comments


Recommended Comments

Good progress.  Could you explain the skim thing again to someone at numpty level?  It's something I am interested in as I would like to minimise wet trades on site. Cheers

Link to comment

Fantastic progress @Jenki  🙂 .I am still at planning stage but I have been following your progress through these months and I feel more confident that I will be able to do some of the work myself (whenever I am able to get through the never ending planning process)

  • Like 1
Link to comment

Great Progress. 


I thought that another 50mm of soft insulation in the attic would be easier that the 25mm under the trusses or is there some specific requirement i'm missing? 


Could you do a sketch of the Check reveals with EPS. I'm intrigued as the UPVC frames of our building are the weakest spots. Speaking of windows, what did you choose? 


  • Like 1
Link to comment

Well done you.  Must say I'm super impressed with how you've made your compact plant room work. 


I've just zoomed in on your cylinder and see it's just like the one I've got, but with a different sticker on it, right down to the buffer underneath.

Link to comment
6 hours ago, crispy_wafer said:

Well done you.  Must say I'm super impressed with how you've made your compact plant room work. 


I've just zoomed in on your cylinder and see it's just like the one I've got, but with a different sticker on it, right down to the buffer underneath.

Did you get it from the same guy on eBay? Just need to resolve my heat pump woes now.

  • Like 1
Link to comment
8 hours ago, Iceverge said:

Great Progress. 


I thought that another 50mm of soft insulation in the attic would be easier that the 25mm under the trusses or is there some specific requirement i'm missing? 


Could you do a sketch of the Check reveals with EPS. I'm intrigued as the UPVC frames of our building are the weakest spots. Speaking of windows, what did you choose? 


@Iceverge Under slinging the PIR helped with the airtightness ( I hope) I increased the wall height to give me room for the PIR and service cavity, still leaving me with 2400 ceiling.


Poor sketch ...>>>>

I went for triple glazed rehau Sys 70 UPVC. I've not drawn the cladding. The EPS is the ICF, to close the cavity I used 6x2 timber, the frames we're strapped to the timber.

I couldn't put horns on the cill, and I wish I could have found a solution, but I had to screws the cill to the frame from the bottom. So could not post the frame from inside with the horns on the cill. This is, I fear a weak point. I did have some driven rain (50mph winds), on 2 windows, come in prior to the cladding, but this is resolved, but came from this area.


Screenshot_20231114-2111532.thumb.jpeg.7ac55b2e16cdaf27cf6d85f2fe66c73a.jpeg

Link to comment
10 hours ago, Square Feet said:

Good progress.  Could you explain the skim thing again to someone at numpty level?  It's something I am interested in as I would like to minimise wet trades on site. Cheers

Skim? Plastering onto plasterboad with a skim of multi finish as opposed to tape and joint.

I'm no plasterer, but there was lots of water, and the messiest part of the build.


Edited by Jenki
Link to comment
1 hour ago, Jenki said:

@Iceverge Under slinging the PIR helped with the airtightness ( I hope) I increased the wall height to give me room for the PIR and service cavity, still leaving me with 2400 ceiling.


Poor sketch ...>>>>

I went for triple glazed rehau Sys 70 UPVC. I've not drawn the cladding. The EPS is the ICF, to close the cavity I used 6x2 timber, the frames we're strapped to the timber.

I couldn't put horns on the cill, and I wish I could have found a solution, but I had to screws the cill to the frame from the bottom. So could not post the frame from inside with the horns on the cill. This is, I fear a weak point. I did have some driven rain (50mph winds), on 2 windows, come in prior to the cladding, but this is resolved, but came from this area.


Screenshot_20231114-2111532.thumb.jpeg.7ac55b2e16cdaf27cf6d85f2fe66c73a.jpeg


Nice.


I'm an advocate of proper uPVC windows. Often overlooked because of poor imitations but those should be excellent. The insulation detail will perform well too. I'd be interested to see some thermal images. 


I'm not sure I'm following on your weak spot, sorry. 

Link to comment
7 hours ago, Iceverge said:

I'm not sure I'm following on your weak spot, sorry. 

When reading about ICF, I think @FM2015?described check reveals and window cills extending beyond the frame all help with keeping water out.

 As I fitted the frame from the inside ( to push up against the EWI on the sides and top) my cills finish flush with the side of the frames, so there is a gap which needs sealing. I used airtight foam, and silicon, but on the two windows I had issues with, I must have left a small gap, which the rain and with the assistance of 50mph winds pushed the water in. 

(I think the problem area was where the frame sits on the cill and has a small gap for face draining)

I'm thinking If I'd fitted the cill first with horns, I could have sealed this first with better access, then the frame after. But that would then have meant screwing through the frame into the cill, and I judged this would not be a secure a fixing.

I was concerned that the only seal between the frame and cill is silicon and a small upstand of UPVC on the back of the cill. 

It seems ok now. So I've stopped worrying about that and on to the next concerns🤣

  • Like 1
Link to comment

Looking at your build quality I think you will be getting an air test in the 0.2 region, I spent a lot of time detailing all those little junctions like you have, you won’t be putting the heating on much. 

Excellent job. 

Link to comment
1 hour ago, Russell griffiths said:

Looking at your build quality I think you will be getting an air test in the 0.2 region, I spent a lot of time detailing all those little junctions like you have, you won’t be putting the heating on much. 

Excellent job. 

Time will tell.... Fingers well and truly crossed.🤞

Link to comment
On 15/11/2023 at 06:34, Jenki said:

When reading about ICF, I think @FM2015?described check reveals and window cills extending beyond the frame all help with keeping water out.

 As I fitted the frame from the inside ( to push up against the EWI on the sides and top) my cills finish flush with the side of the frames, so there is a gap which needs sealing. I used airtight foam, and silicon, but on the two windows I had issues with, I must have left a small gap, which the rain and with the assistance of 50mph winds pushed the water in. 

(I think the problem area was where the frame sits on the cill and has a small gap for face draining)

I'm thinking If I'd fitted the cill first with horns, I could have sealed this first with better access, then the frame after. But that would then have meant screwing through the frame into the cill, and I judged this would not be a secure a fixing.

I was concerned that the only seal between the frame and cill is silicon and a small upstand of UPVC on the back of the cill. 

It seems ok now. So I've stopped worrying about that and on to the next concerns🤣


PXL_20231027_142611587.jpg

Link to comment

Create an account or sign in to comment

You need to be a member in order to leave a comment

Create an account

Sign up for a new account in our community. It's easy!

Register a new account

Sign in

Already have an account? Sign in here.

Sign In Now
×
×
  • Create New...