Leaderboard


Popular Content
Showing content with the highest reputation on 10/09/22 in all areas
-
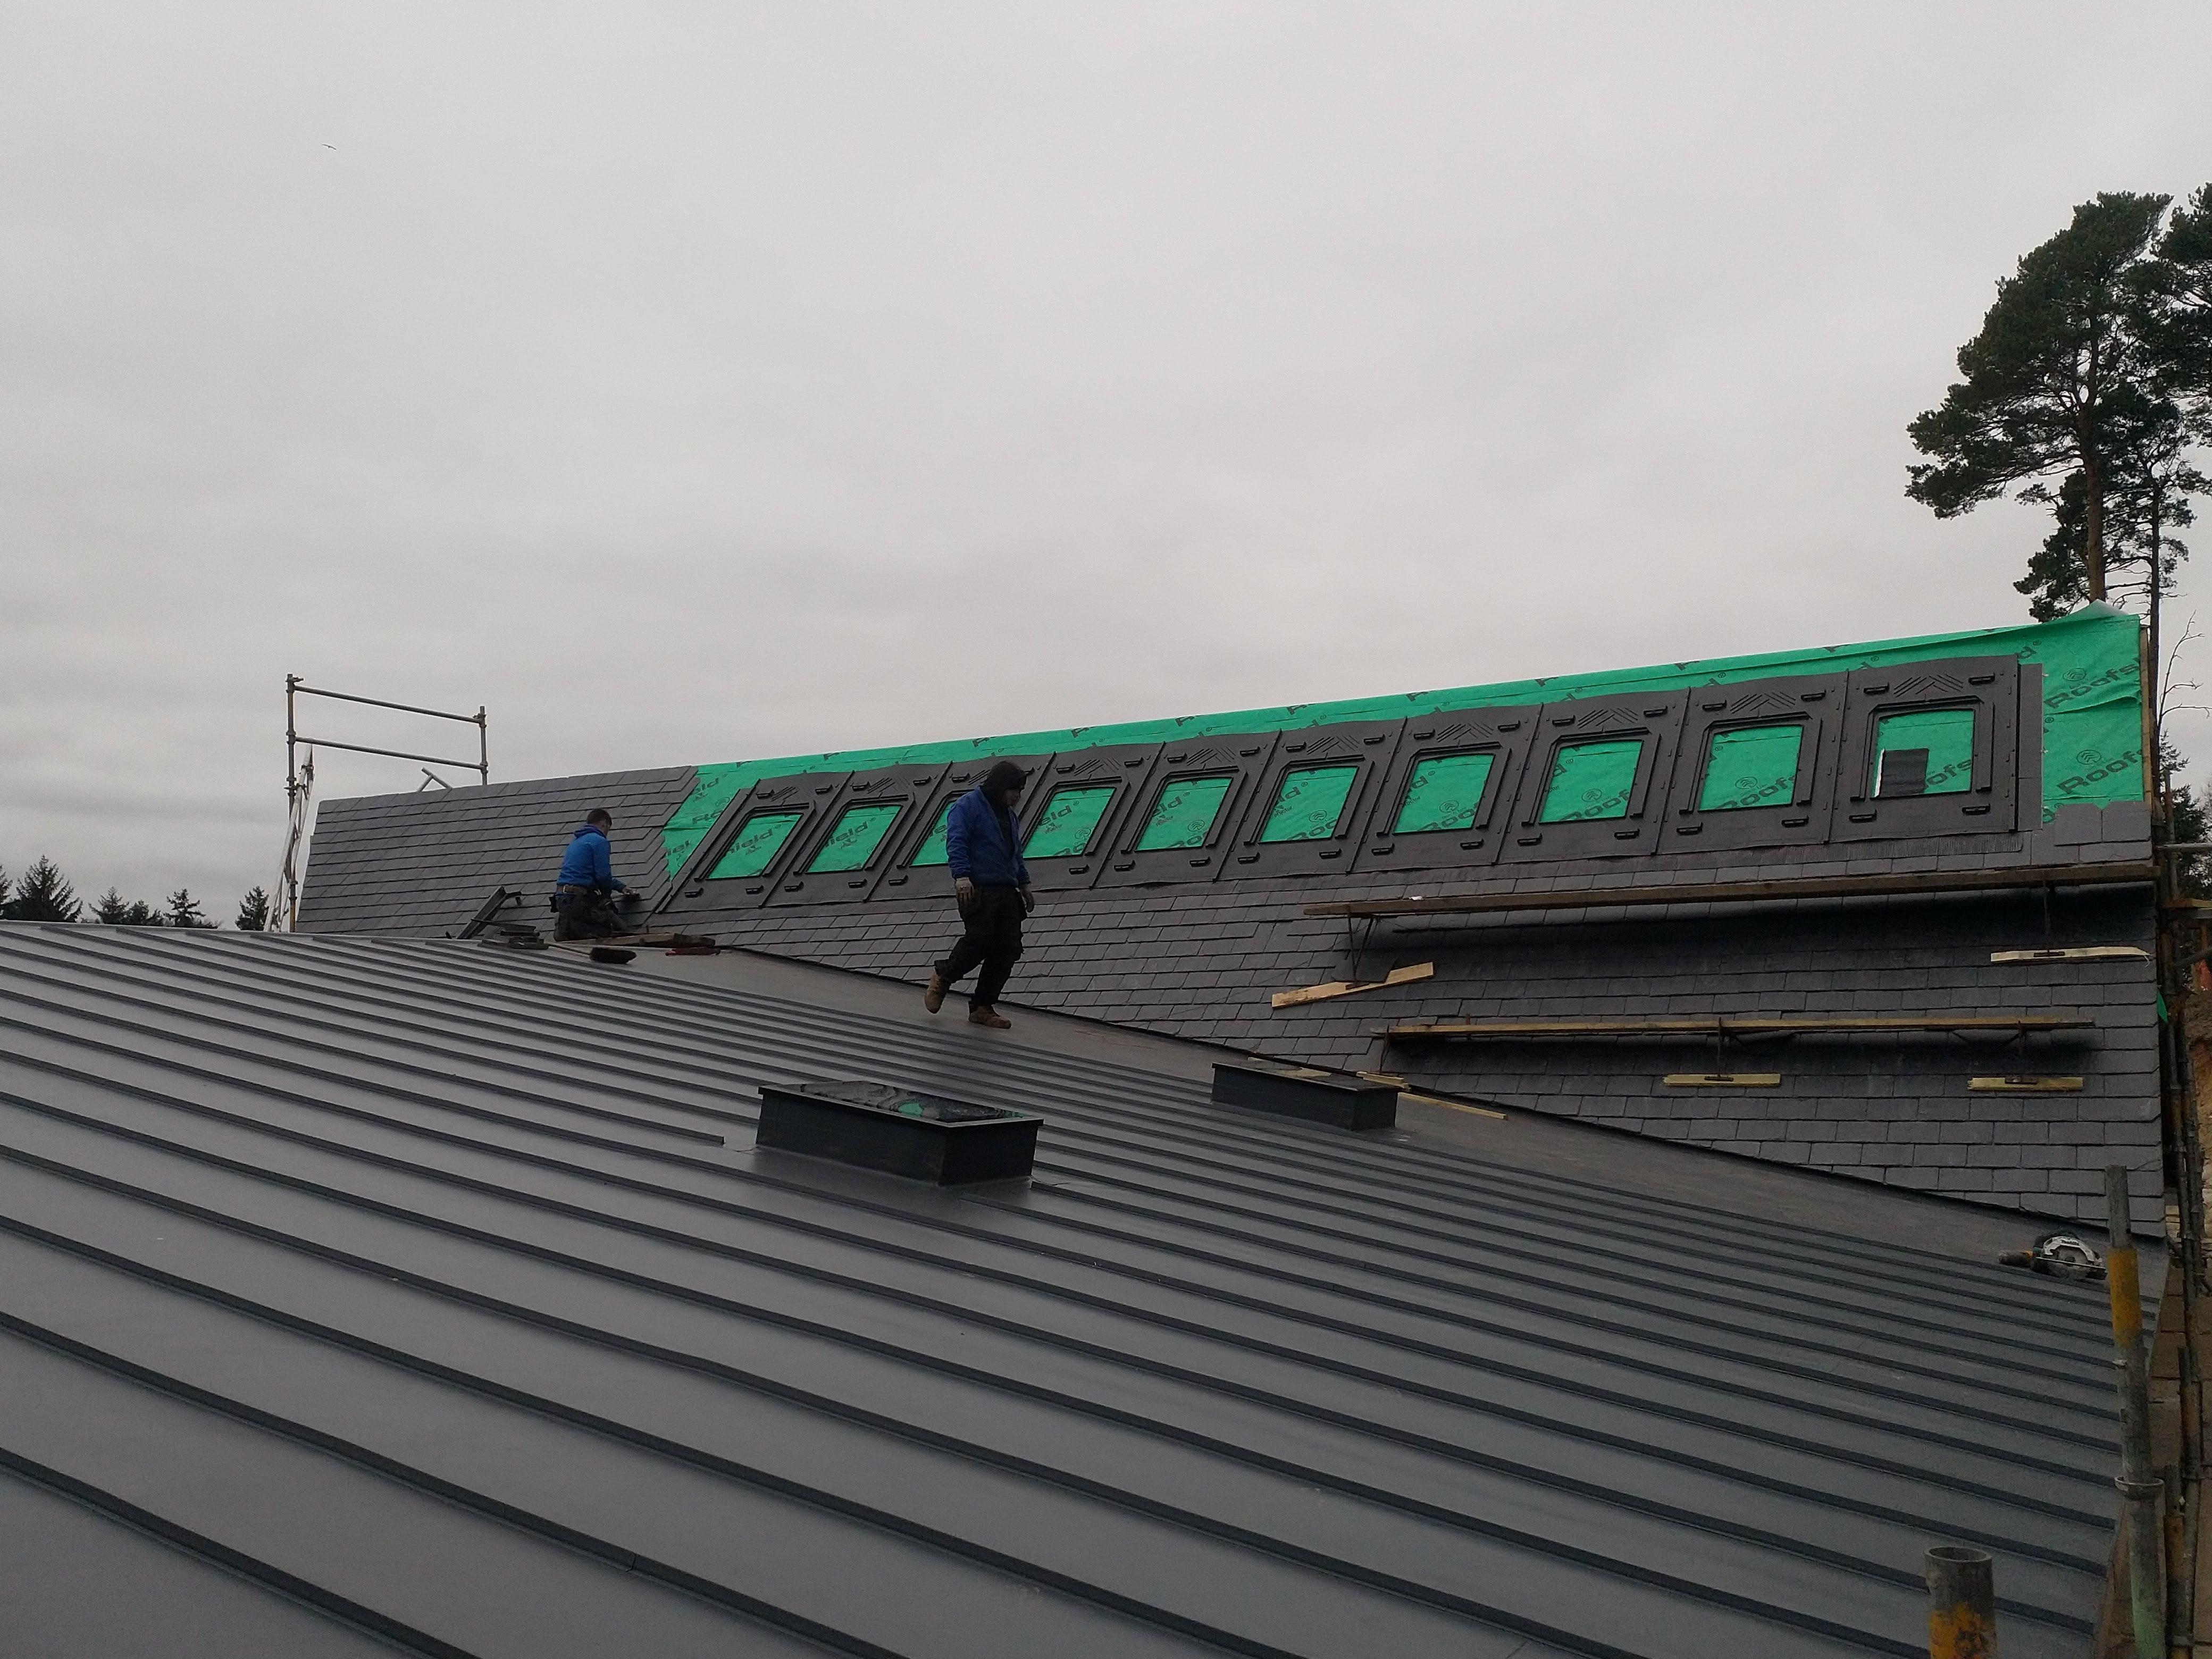
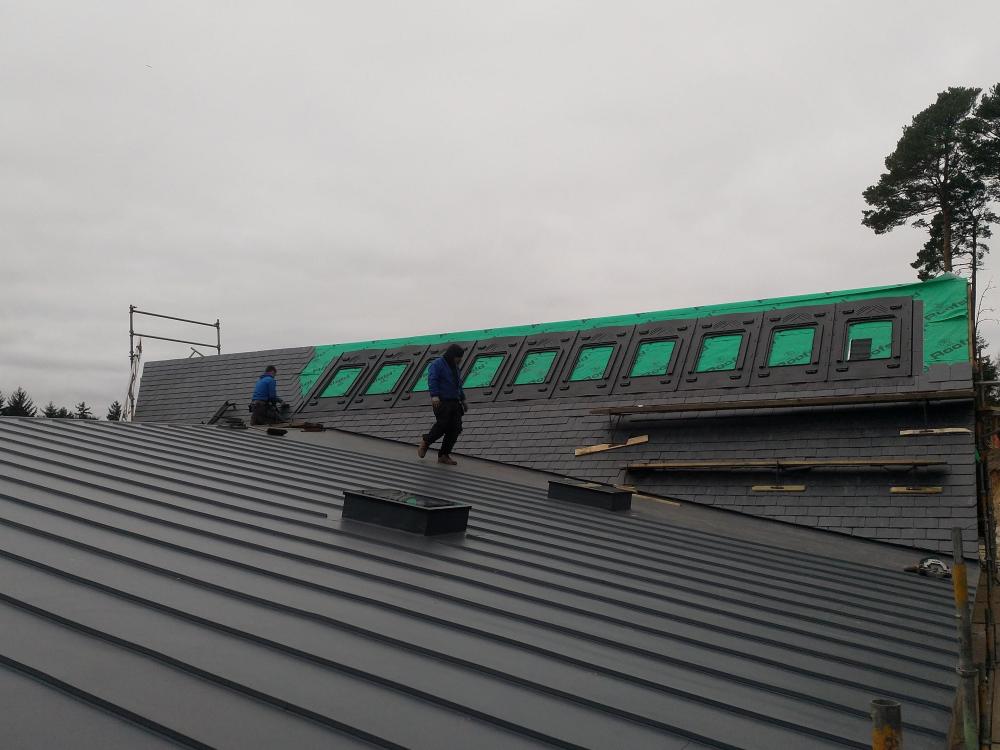
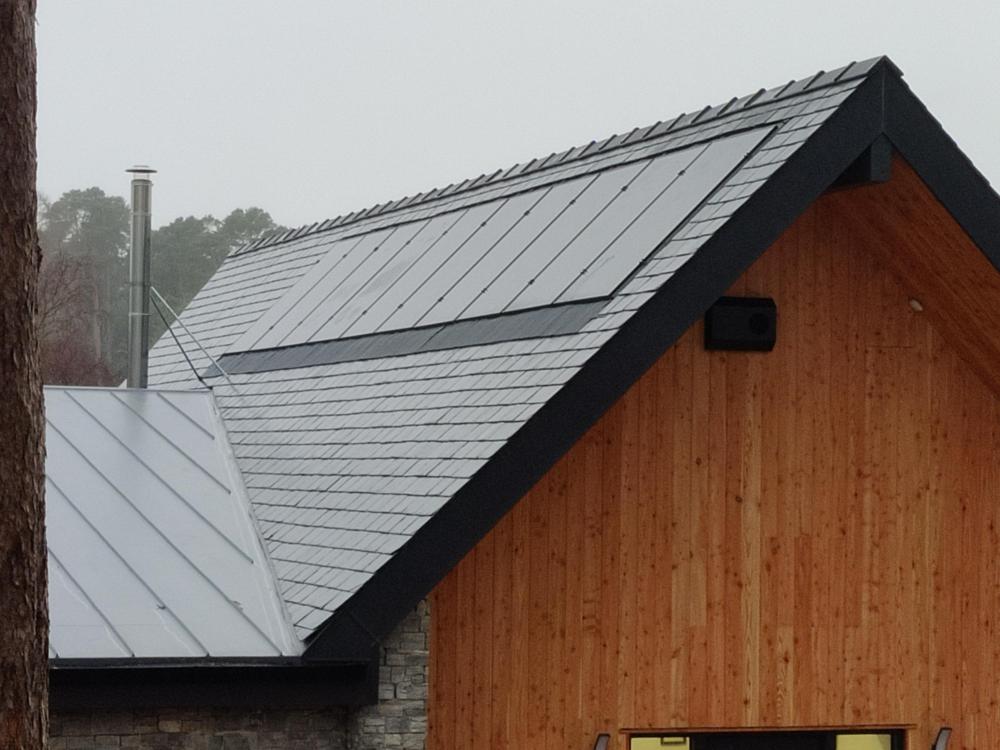
There is airflow. Both under the trays / felt and under the panels as well (there's a good 25mm + void and a continuous gap at top and bottom on the trays). The centre of the trays are hallow and therefore part of your vented roof structure under the felt. Not as much as rail mounted panels of course. But I think the drop in performance is marginal and only really comes in to play over a certain threshold (I'm not sure what it is). I went with GSE inroof trays in our natural slate roof and wouldn't do it any other way. The savings in slate and labour paid for half of the system. And it looks far better.2 points
-
Gas at 10p is £1650, energy in to house 13200kWh HP at 3.5 CoP 1320/3.5 =3771kWh 3771kWh at 34p is £1282. Best part of £400 a year saving2 points
-
Hi, As a small step towards repaying the valuable advice I have received on this forum I thought I'd share the attached document, which I hope will be useful and/or interesting to forum users. I am a planner by trade, working in local authority. My SB is on a relatively small, highly inaccessible plot neighboured by mature trees, and tightly bordered by existing houses. The plot was a 'detached' back garden of sorts that came as part of the deal (and something of an afterthought) when we bought our current house. Nobody had ever even considered the prospect that it could be a building plot, and for many years I discounted the idea myself due to the restrictions listed above. Five years ago, having outgrown our house and exhausted other options, I decided to at least try to self build on the plot. I obtained permission at the first time of asking (albeit not quickly and not without having to make a tweak or two). Everyone, without exception, from family to neighbours to building tradesmen to delivery drivers to other planners, have commented on how 'well' I've done to get permission. Some of them probably thought I'd made a mistake, or that the Council did, or that there was some old pals act involved because I am a planner myself (even though I don't work in the borough where I am building, and it really, really doesn't work that way anyway). They are all wrong. I obtained permission because I did the thing that planners spend their working lives telling others to do - I read the relevant planning policies, designed a development that was in line with them, then demonstrated as much in the application. That is what the attached statement does, it goes from global to national to regional to local policy, then explains the thought process behind my design, in that context. I cannot tell you how many architects, developers and would-be planning consultants fail to design development proposals specifically to meet planning policies, and then spend ages moaning, appealing, resubmitting, and generally wasting time. I can't promise that if you follow the thought process in my document you'll certainly get planning permission, but I hope you find it a useful insight into how a planner approached self-build, and specifically the matter of seeking planning permission on a plot that the rest of the world had discounted. Cheers 647910914_DesignandAccessStatementRedacted.pdf1 point
-
As promised another update, following many tweaks and a firmware upgrade from Solis. So the existing problems were: Whenever the battery isn't at 100% SOC, it pulls an amount of power from the grid, somewhere between 60W and 100W Even when the battery is actively charging, it still pulls the same 60-100W from the grid, regardless if there is enough PV power to charge the battery and cover loads at the same time. Once the battery is 100% SOC and im generating PV more than my load, I import 0W. Pulsating loads (such as induction hob) the unit can find hard to track, due to their pulsing nature, and the delay in reading the CT clamp and acting upon it. The firmware upgrade was to fix the pulsating load issue, it doesn't completely resolve it, however it is much better tracked now. Solis reduced the polling time for the CT, so it is polled more often than before. The problems with the excess import of between 60-100W remained, however Solis put some variables in the new firmware which allowed them to place an offset, we tried many different values and eventually stopped at a 65W offset, now the grid connection fluctuates between +40W and -50W which overall has fixed the issue as good as can be without draining too much of the battery power. Oddly since adding the second US3000C module, my overnight usage (no PV input) has dropped from around 0.35kWh to 0.2kWh, why i'm not sure but no complaints from me there!! Now have 6.6kWh of usable capacity, to note the original US3000C module had just dropped to 99% SOH, manual states to use the newer module as the master, which I did, so its now once again showing 100% SOH, and the 1% drop of the older module is handled internally. Upon connecting the new battery, the old battery appeared to receive a firmware upgrade, as it restarted a few times before staying on. Current yearly graph is looking good, still exporting a lot of power, but at least I'm using what i can now: Shown above is a daily example of the battery charging and discharging. This was after a particularly cloudy day which only just saw me reach 100% SOC for a mere moment. The negative battery power denotes power draining from the unit, with positive being a charge. This is the corresponding grid data for the same day. Previously (March 2022) I reported total import of 48.3kWh. Clearly its impossible to compare with another month, and we will have to wait til March has been and gone once again, however here is the monthly data from April onwards: April - 41.2kWh May - 18.4kWh June - 17.1kWh July - 18.9kWh August - 18.1kWh September (So far) - 18.0kWh The tweaks to the system were finalised on May 5th, just checked my emails from Solis and that was the last contact, so April shows another month before the changes. Full credit to Paul Carpenter, the European Engineering Manager as Solis for sticking with me on all these changes til we found the sweet spot! Hope this provides some good info for someone out there thinking of installing battery tech. I'll post another update at the 1year point, though probably 1year from the tweaks, so May next year, and then I'll also be able to comment on my AQ for the import.1 point
-
As per the title. The price seems low so I jumped at it. Pretty small resolution but hopefully good enough for DIY.
 1 point
 -
Was the wall skimmed before or after the electrician fitted the back boxes? In any event the defect is trivial, a little filler to replace the plaster that has chipped off and touch up the paint.1 point
-
Depends what the plastering was like. If the boxes were full of skim, it would be difficult for a sparky not to damage.1 point
-
Raised tie trusses might give you a lot of the effect for less cash but won't be truly vaulted. Otherwise you're stuck with collar ties or lots of engineering cals and most lightly steel.1 point
-
any cross sections drawings to help us see what you've planned?1 point
-
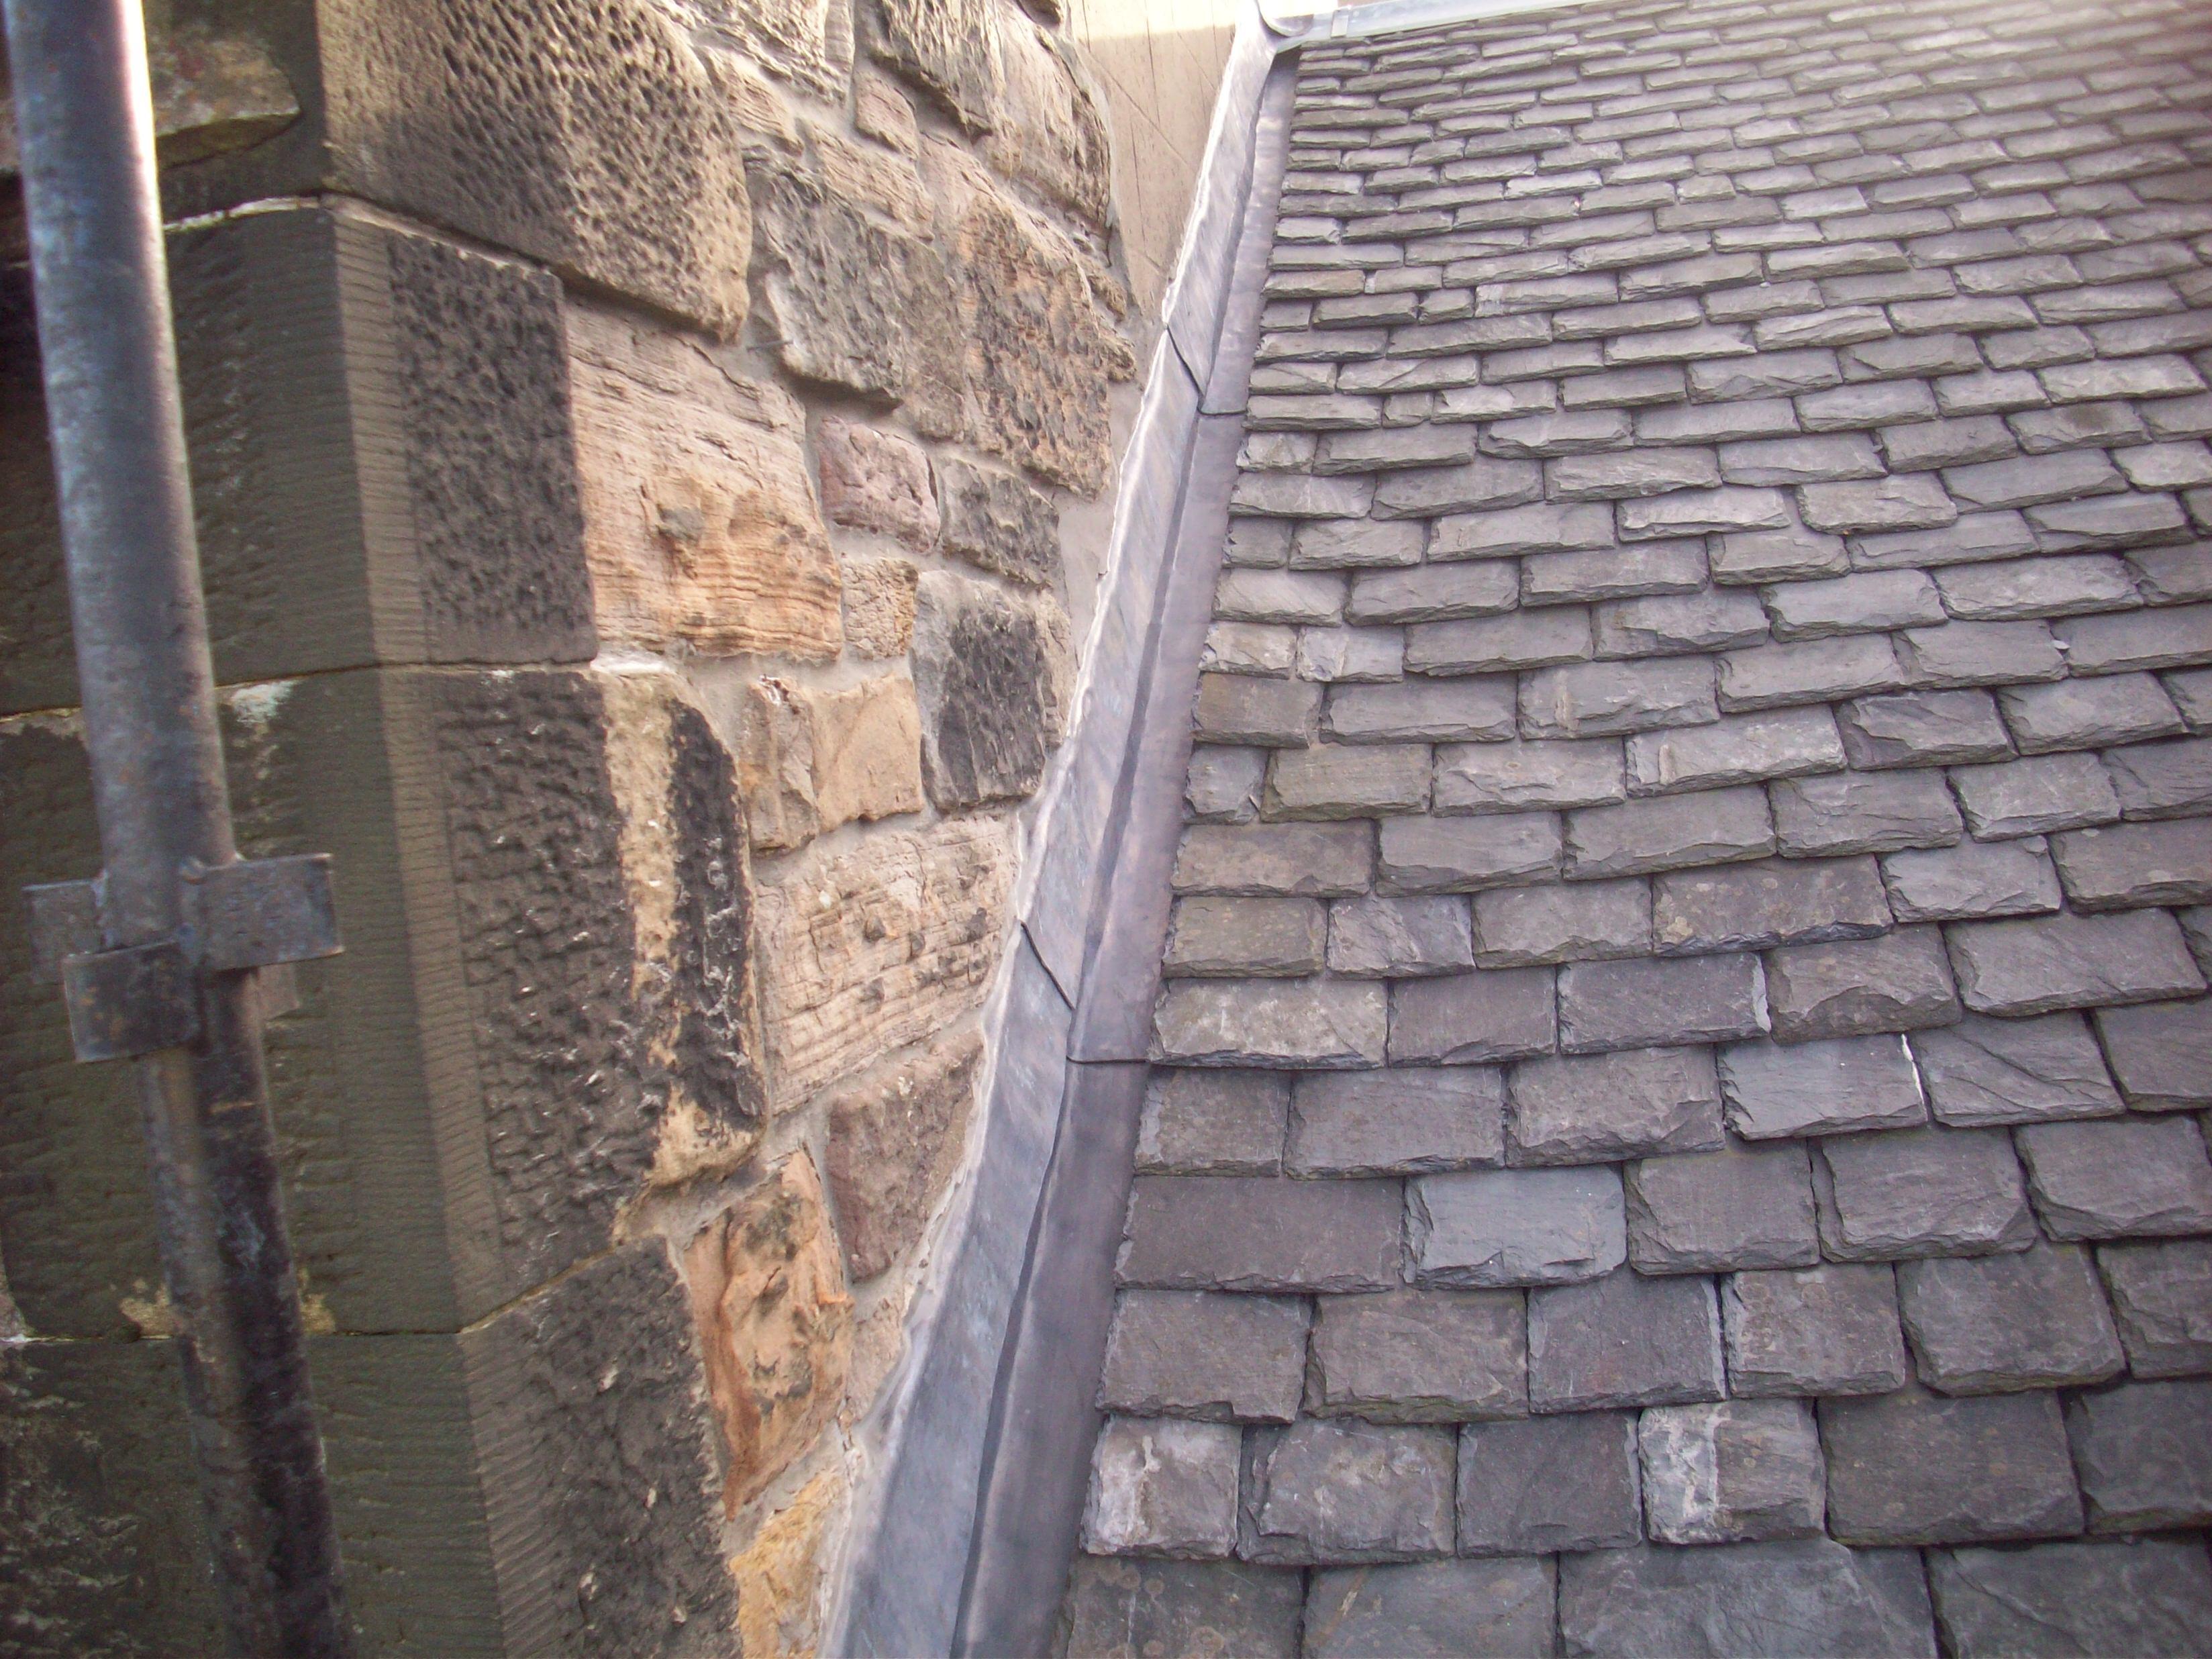
Thanks for all the additional comments and replies. Really helpful stuff. Definitely won't get him to do it then. Might have some more questions in the future about exactly how to do it, but will make a new thread should that need arise. Thanks again everyone PS - What a lovely looking roof/wall1 point
-
Long lengths no. My comment was in reference to a Watergate slated in (see picture), not long soakers. It would be near impossible to do what your roofer is proposing and I doubt it would work. No matter what happens that lead can't be used for soakers. Soakers should be code 3 with those slates.
 1 point
 -
No battens under mine, but the membrane has sarking boards below it. Scottish roof design with slate is different from the rest of the UK, due wind loading being higher. Still managed to get just over 3.1kW recorded at the hieght of summer from a 3.1kW system.
 1 point
 -
Speak to your solicitor. We found an ambiguous covenant on our property dating from 1920, it was hand written and barely legible and solicitor couldn't trace the originator of it... So we had to cough up something like £350 for an indemnity policy.1 point
-
Skimming would save a load of hassle.1 point
-
If this is a property you are thinking of buying you can normally obtain insurance at very competitive cost. Covenants not to build are very common but once the developer has finished and the company dissolved they are of little consequence.1 point
-
If the covenant is made between two named parties and there is no mention of successors in title, then if both parties are no longer in existence/living then the covenant would be unenforceable as there is nobody to enforce it. A Solicitor can get this removed from the deeds. However, covenants are not straight forward, so you need to get expert advice, which is unlikely to be available from an internet forum, given the lack of detail you have provided. You might wish to do a little detective work. If the property you are reasearching was maybe a housing estate development or a 'land grab' from a larger estate then you can download the deeds of neighbouring properties. The title deeds are available from the land registry site, but don't use any third party sites as they are a rip off. The fee, as I recall, is £3 for a downloadwd copy. The land registry title documents were digitised around 2000, so if the property you are searching for hasn't been bought/sold or been subject to a mortgage or charge within the past 20 odd years the deeds will likely still be in paper format. You will require a different route to get sight of titles in paper format. Sight of neighbouring properties title deeds may throw some light on whether any properties are linked to yours by way of covenants. That could add complexity.1 point
-
As the above replies, if your roofer thinks he's going to slide 1.5m of lead under the slates without removing them then he's not a roofer but a magician. The slates will need to be removed. I'm assuming this is remedial work? Then this will possibly be due to leaks? Then surely you want to ensure the wood (joists and battens ) are sound before spending money covering them up? If it's leaked inside, then you can be sure it was leaking for a long time before it came inside. As it's stone I'd opt for individual soakers as the upstands can be dressed individually to the stonework, same for the stepped flashing. That said a grp hidden gutter would work well with some stone dressing.1 point
-
If the grid has failed that catastrophically, maintaining an electricity supply is the least of your troubles. Finding food and drinking water and making sure you get it not one of the other survivors will be your top priority.1 point
-
Can’t you just get the artex skimmed ?1 point
-
I think you now have lots of options - fairly low cost for a key feature, and no need to upset your brickie. Thank him profusely for being willing / talking the initiative / listening to your suggestion to do a to do a one-off prototype (whichever is least untrue) to let you get it right before they were all built different to your imagined expectations, then move on with your selected option. In BH, you usually get very good answers by the (notes that himself did post 13) the 12th reply, or whatever, then we sometimes devolve into spats about detail. ATB. F PS We demand a photo of the finished hoose in due course. If you don't you will be haunted by the Ghost of Pevsner, carrying a clipboard and a plumb bob.1 point
-
Would really do a Nick advised or as it mild turn the flow temp down at the manifold temp regulator so all loops flow cooler. Down to 30 leave your thermostat and time as is, the next day bump up temp 5-6 degs, then after another 24 hrs set everything back to normal.1 point
-
Soakers are in effect another form of hidden gutter. Their job is to catch any water that is not caught by the lead flashing on top of the tiles, most likely blown under by wind. So they still need to form a proper gutter so water flows down and out at the bottom. So there will need to be some form of upstand or turn up in the lead to prevent any such water just running off the side. So I think it highly unlikely you will get the detail right, just by shoving some lengths of lead under the tiles in situ without removing any.1 point
-
After reading through this forum and others, seemed like 500mm width would be about right? I want it to last!1 point
-
The architect has drawn/described a bastard of an arch. It looks like a flat arch, its also part segmented but described as "gauged" which is probably the only thing it is not, as joints in gauged brickwork ~3mm-6mm Anorak-time, as a poster previously said the voussoirs (read soldiers) were traditional made from "rubbers", softer brick which would be rubbed down to achieve the required dimension of each individual voussoirs in the arch. Thin wooden templates call face moulds would be fashioned from a full scale drawing to provide a pattern of the required shape to rub the voiussior down to,1 point
-
22mm chip (tongue and groove) glued and screwed will give a very flat and ideal surface for tiling on.1 point
-
The worrying thing would be He isn’t saving time or money doing this He just doesn’t understand what the soakers are there for1 point
-
There is nothing technically wrong with it, that's how it's done most of the time in Scotland. Saying that soakers and stepped flashing looks much better.1 point
-
I would do the insulation in the floor, but personally I don't believe there is enough insulation going below the UFH to make cost effective to run as the downwards heat loss will be large. So would either increase depth of insulation or just stick with radiators. You can get a couple of nice radiators for same or less cost.1 point
-
The temperature sensor can be remote from the fan unit, it's normally a small box 75x75x25mm sort of size. This is my temp sensor the small white spec. Your fan unit does need maintenance but not the temp sensor.
1 point
-
I’d get someone else You are correct Short lengths that finish just short of where each slate is nailed Allowing the next slate to cover and so on Leaving the soakers stepped like the slates1 point
-
Bar bending and reinforcement quantities! Have written this as I hope it helps all who are doing everything from ICF, piled extensions or just using rebar. I often do these on small domestic projects. I sell this as an extra to the Client by discussing first what type of builder they may want to employ. Take two cases: 1/ A house extension.. a few piles with a ring beam. Here your local builder (or you) could maybe get a piling contractor that leaves the pile heads. These are commonly designed at SE stage to be up to 75mm out of alignment and still be code compliant. Next the builder has to figure out how to connect the piles to the ring beam, the shuttering to say get the concrete cover right and all the bars in the right place. Now your local builder may find this a challenge. I say.. hey I'll do the schedule and a shuttering detail. Your builder can then send my schedule to the benders for pricing, make the shuttering and I'll nip by and check it before you pour the concrete. If you want the builder to sort it all out it will probably cost you more than getting me to lay it all information wise out on a plate for the builder. All they need to do is send my schedule out for pricing.. no hassle for them and if no hassle less tends to be added to the price. Or you can get a ground worker that will sub out the piling and do the ring beam.. but someone has to coordinate all this and that is something that comes at a hidden cost.. and you have to take a leap of faith that they are doing it correctly. Better to spend more on good pragmatic design info than have a bad day when it comes to the concrete pour or worse.. once the concrete has been poured and you discover all is not as you expected. Stepping up to say an ICF basement. Here I would push the Client to pay me to do the steel (bar bending) schedule. In fact I would be reluctant to do the job unless I had sufficient design control over it and be able to check on site. What folk don't realise is that when you bend rebar it is not an exact science (bends vary a lot!) and that you need to be very careful to maintain concrete cover, the correct lap length and make sure the concrete can be well compacted at particularly the corners and junctions as that is where you often get leaks. The folk that provide the ICF stuff don't cut you much slack if your bars and in particular the bend radius is a little off. The steel fixer will use what they are provided with and while they will often do their best they can't make a purse out of a pigs ear. Remember that rebar is very heavy and if a rebar cage falls over it could kill someone. I want to make sure that the tying of the bars and temporary stability bracing will be sufficient for it to stand safely during the construction phase. ICF suppliers.. their interests / priorities are not the same as yours when it comes to rebar and so on. Yes some SE's don't do schedules.. years ago it was part of an Engineers training to design a concete beam / slab and produce the bending schedule.. I still remember learning how to do it. The main thing for me is that if I do it say for a basement or say ICF, a retaining wall I have to really look and draw/ model how it is going to fit and if it can be built /poured. It's almost like a last design safety check as when you have to sit down and do the schedule / shuttering you can spot things that you may have missed. It's like another design review/ safety check. If it can't be built as per the design then it's not safe. I could pass design responsibility to say.. well who is going to carry the can.. that is what you need to ask. The sad reality these days is that few designers want to carry the overall design responsibility as modern Clients are often not willing to pay for what they percieve as an extra. Why.. because modern professionals often don't explain (and have often not been taught how to) to a client how they can make savings at the end of the day. I minded to blame the telly.. too much Sarah Beany, Homes under the hammer and Grand designs etc .. well I'm not going to blame myself? If you have the skill to convey to a Client that your way is the most cost effective, efficient and delivers and the Client is not of like mind then you need to walk away from that Client, let them get on with on it. Projects like that often only lead to disappointment on all sides.1 point
-
Hi Jilly. Yes builder is onto something here. It might be worth seeing if you can fix a bearer to the external wall. Use that to support the high end of the roof. At the outside corners on some thing like this you could use a couple of essentially galvanised scaffold tubes to support the outside corners. If these look too slender then you could use a 76mm circular hollow section to get the appearance right. Your issue is going to be the ground if BC get involved. The loads are really small so you if you need to get this by BC you could say.. look this is a canopy, if so you may need to decouple from the dwelling and argue that it is akin to a smoking shelter and if it settles then so what. Here as the loads are so small you could go back to your driveway design and say.. hey the area under the canopy is the the same make up as the drive and this is designed for a 5.0 tonne axle load so the canopy on a concrete platt will be ok?1 point
-
Turn all other loops off during the day, drop the temp and run the new loop to “thermally shock” the new screed, and reverse for the evening. Do that once or twice and you should be fine to go full throttle as normal.1 point
-
Not good advice. Sorry. By the time you next look, they’ll have started to rust, irreversibly if this IS water leaking and not pipe compound / other contamination from the installation.1 point
-
Edit - somehow deleted the numbers bit. I've always calculated oil and ashp to be cost neutral on running costs. Fuel oil was up to 150p last year. It came down to a pound and is around 88p on the local buying group. It really depends on boiler efficiency but both come in at around 10p/kWh delivered. I've also got solar so actual cost is lower, but that can be ignored. I think ultimately, all the technologies work OK with similar-ish running costs. There's an expectation placed onto 'green' technologies that they have to be more cost effective than oil and gas. But really, we should be starting from a position of should we be digging up fossilised carbon and setting fire to it if we don't have to? Part of the payback for me is I'll be able to look my children in the eye and said that when I had an investment decision, I went for the most sustainable option available at the time.1 point
-
My advice to anybody embarking on a self-build is as follows: 1) Be very clear on your requirements. The following post may be of help on this topic: 2) If your requirements are not achievable for the budget you have available, then focus on what is the most important to you. Eg: If a comfortable house that is cheap to heat is your priority, then you could focus your budget on the fabric of the building and compromise on the size and / or the internals. This will to some extent drive what build method you choose. There is no one build method that is the best but each build method has its own strengths. My overriding objective was to build to a passivhaus standard, so I built using a timber frame as recommended by an architect, passivhaus consultant and builder who were experienced in passivhaus design and build. They knew how to design the frame to ensure it was cost effective, watertight and airtight. 3) Understand what your strengths are and how you can best contribute to the project. There are some very gifted people on this forum. Some have designed their own houses and others can turn their hands to many different trades. I can't do this but I have good planning and research skills which helped choosing the right people with the right skillsets to do the work and working out the cheapest place to source materials. 4) Professional Services are an added expense but if you choose well, they will reduce the chances of errors and can save you money. Finally, plan, plan and plan again. Make sure you know exactly what you want before you start the build. You may not be able to achieve everything on you wish list but it should be a lot better than what you can obtain on the open market. My build was started after a lot of research, but what I did may not be right for you, so it is best for you to carry out the research and come to your own conclusions. Best of luck and most of all, enjoy the self build journey !1 point
-
Fair play to your builder for having a crack on a trial window but it's clearly a specialist job. His effort isn't really that bad and with a little practice with tightening the bonds it'd look passable for 99% of casual onlookers. The trouble is that he will be practicing on your job and the end result isn't what you want. I'd put him out of his misery and order something premade. https://www.brickfab.com/product/prefabricated-arches There's an option here that would achieve 90% of the architects look off the shelf without having to dig up some perfectionist bricklayers. I mean that literally, most of them who did this are dead with centuries! I think your architect has to be held accountable here, you pay for their specialist knowledge of building. They should have a broad appreciation of every aspect of the house and be able to specify something that is affordable and practical to build.1 point
-
you're having those awesome twin stud wall (I believe called Larsen truss?) which I presume is being filled with some form of cellulose pumped in? if so, why have you not considered a passive insulated slab? would get rid of all of your thermal bridge concerns at the slab level.1 point
-
No, he (and others) are of the same opinion that architects rarely stick to budgets. Again No, as a professional in the building industry @PeterW has brought a wealth of knowledge to this forum. Yes ignore the comments that do not help you answer your questions 👍1 point
-
I am doing a 150mm cavity with beads on a project. The brickwork is getting a coat of StormDry. I will watch the bead installer to make sure they have got to all the voids. I may suggest to them that we will use a thermal image camera on completion.1 point
-
I've been looking forward to getting to a point where I can park my car in my driveway again, and finishing my July Post with a part 2 here to mark a finish to my Driveway project finally! Took a bit longer than the two weeks I was hoping!! I just finished adding up the damage and it was @ €7.2k all in all. I think the length of time increased the costs as there were days where I couldn't get to use the compactor and I had to get it back a few times to progress the project on. Some notes observations below: The big Diesel Compactors are heavy duty brutes but also take a specialist skill to start. They are all draw cord and they pulled the arms off me for 25 minutes before I gave up. I was shown how to start it but had to return it to my embarrassment and downgrade! Drainage took a lot longer than I imagined, plumbing in the drain channels was very difficult - I replaced both gully traps and one was encased in concrete by the original builder! Just getting the right couplings and things to fit took me a while to figure out. SDS comes in different sizes, SDS Max chisel bit wouldn't fix my SDS drill so ended up buying an SDS Max drill off Screwfix! I now own 3 angle grinders, started with none! A Screwfix one that won't let me change the grinder to anything else, then a 5" DeWalt, then a 9" Makita. I prefer the cut using this to the block cutter but the dust is gruesome! Grab Hire worked out well, took away 2 x 20 ton loads to clear the site and was able to drop two loads of MoT 804 exactly where I needed them. All moved by hand / wheelbarrow at that stage, was very difficult to find anyone hiring a skid steer for one day. Lots more sand and cement than I thought, all mixed with a wheelbarrow! Using a digger is scary when it starts tipping to the side due to doing something stupid! Two injuries: #1 drilling concrete screw into wall for new side gate, it got stuck and the SDS drill spun violently out of my hand, 6 weeks sprained finger didn't help! #2 seagull poo'd above and dropped inside my goggles, put them on and got acid splash into my eye. Now store goggles between jobs closed to the sky! Broadband issue is fixed - tree roots crushed the pipe on my neighbours property, stump was still there for years. I tried to find the pipe to create a new junction to my new house hear the boundary but only ended up finding the gas pipe by accident with the digger, just the tape over the pipe, where it shouldn't be - should be out on the road according to the gas map. Went to the other end near my old house and finger traced the pipe to a point near the new boundary and created a shore there. Thankfully after two years complaining a crew came recently out to remove said stump, run new draw cord and I'll have no issue getting broadband into my new house now, 1 less worry So I've to finish the very front and put up two more concrete posts and panels. I've to grout using Rompox jointing compound and see how long that takes. Hopefully it will keep the weeds away! But at least I can relax a little bit and use the driveway again. Would I go it again?! Well, I learned valuable lessons, to pace myself, what I can do when I put my mind to it, very useful for my self build next year. My body is certainly feeling the pressure and I'm glad I'm in my 50's and not my 60's!! I overestimated how much work was involved but learnt a lot in the process, not just specifics but about groundworks and hiring plant and grab hire which was new to me. I did get a digger & driver for a day and could see how they made short work of things compared to my efforts so picking and choosing where to spend money best is a wise course of action! Full costings below if interested! I Kept all my receipts for idle curiosity! All inclusive of VAT. Best of luck to anyone out there thinking of doing same! My Driveway area is 75m2. 7265.52 Total 1984.38 Tobermore Paving 210 Paving Block Cutter (€400-sale afterwards) 200 Recessed Manhole Covers 32.69 Spade 690.78 Sand, Easypost, Cement,Gravel 100 Diesel Compactor - unable to start, returned! 32.66 32mm plastic waste pipe as screen level 300 Compactor Rental 39.92 Donegal Quartz stone 89.95 Dewalt Angle Grinder 102.57 Sand/Cement/Gully 44.95 More Gullys 35.47 Lubricant / Sealant 147.08 Donegal Quartz stone & gravel 24.48 Plastering Sand 76.65 Sewer Gullys 11.32 Sewer Pipes 19.56 Sewer Pipes 19.19 Concrete Screws 200 Hire Compactor 500 Hire Digger 19.58 Plastering Sand 86.35 Manhole Cover 292.15 Plant Rental 69.65 Cement mix & misc 45 post and line levels 93 replacement wheel for wheelbarrow & cement 17.7 side gate lock and hook 5.99 petrol can 284.55 rompox jointing compound 12.45 tape 257.31 sds max drill 82.04 kpost 7.15 coupler 38.8 drain caps 15.95 sds max drill 37.25 bits and sockets 38.95 draper cold chisel 700 Grab Hire - removal of concrete/topsoil 300 Delivery of MoT 8041 point
-
Shit ton of of packers but it’s clear to see what’s happened. You’ll not see any difference internally but with the stone cill being removed you’re seeing the external cill being packed to support it and a shit ton of pu foam as a result. Unlikely there is much they can do about increasing window size without causing issues internally. What I would say is, who is dealing with the mastic on sides/top of window? Who is dealing with the finishing under the window? Warm Edge spacers are generally black but they can come in different colours but they do look like warm edge. I’d say it’s uncommon for stainless steel spacers these days. regarding bracket positioning, it’s about not bowing the frame hence being used at corners and under mullions /transoms. Ideally 150mm from corners but 50mm isn’t generally going to be an issue. Depends on type of bracket to be honest. Off the shelve or designed for this window system? Off the shelve will either have metal teeth that you twist into a groove on the frame. You will then have a screw hole to fix it in place and on the outer section of frame before the thermal break. You don’t want to go through the thermal break unless you absolutely have to. The holes in corners of glass spacer are where the gas has been inserted. If you have foreign contaminant inside the sealed unit, check the guidelines from GGF. I’d expect none on any unit and insist with my suppliers that the unit is replaced (even if guidelines say it’s acceptable).1 point
-
Looks like your window could have been a inch taller! I expect they measured the old ones and didn't account for the difference in cill profiles. Just trim back the foam and packers and point-up the gap (looks like you have a bit of pointing to do on the stonework anyway). I wouldn't expect to see anything significant between the glazing tbh.1 point
-
More packers than Amazon.1 point
-
That looks like a very high packed window, was there a stone window cill in under the old window?1 point
-
After following others journeys into the self build world for years, it looks like I'm finally about to embark on my own after several soft starts. The first major work is to realign the driveway and I've opted for paved over other styles and to do most of it myself. I got a driver & digger to take up the concrete driveway and grass and pile it up and hired a grab truck to take it all away. Less than two days later I was left with a barren front garden! Since then I've been figuring out a few details and grading the site to prepare for the required level of MoT. There was some damage done during excavation to be repaired which is underway. The current list of problems are: Get Earth Rod reinstated and connect house ground to it - Electrician Buy another wavin universal gully 110mm as the first was to replace one cracked during digging, this one is to replace the old one which doesn't have a swivel head and its at the wrong angle to the house and will make the paving cuts a lot harder to achieve and look wierd. The new ones let you turn the gully to different angles to run parallel to the house. Buy adjustable connector for linear drainage channel to connect to inlet of universal gully as they are nearly level but not quite. Trace broadband cable from house to a point where I can create an access point and run a pipe from there to my site next door (I tried digging to find it on the other side of the site to only find a gas main where it's not meant to be!). To dig this alternative position out tomorrow and see if it's viable. Decide if I'll keep the loose soil in the original broadband excavation hole or remove and replace with hardcore (I've asked this question under the driveways topic on this site) Hire concrete / kango hammer to remove concrete surround of manhole cover and replace with a recessed unit and gain access to drain on other side of house for linear drainage channel over there - the side of this drain has a mass of concrete beside it for an unknown reason. Dig out holes for more concrete posts to form new front boundary but mind electrical cable heading in same direction Assess how much MoT I'll need to build up 2 x 75mm levels on far side of site which was grass and will take the most vehicular traffic. The old concrete driveway sub base is still there and its nearly at the right level, won't need to do much to it except whack it a few times and it'll be good to go. Risks: We found the water pipe near the far side of the house but I didn't take a photo before covering it back over. Now I can't find it again. The builders dumped a load of concrete beside a drain that I need to plumb a linear drain into and I'm concerned I might hit it. I have to chance breaking that concrete. Concrete fence post holes vs main electrical cable to house Finding broadband line - it's a 1 inch black cable but so are the electrical and gas lines! I'll have to excavate the whole route of the broadband pipe to ensure I'm looking at the right one. There is tape to show which is which eventually but nearer the house they don't bother with this. Marking on pipe aren't clear what it's for either. Site Safety: I've Heras fencing up & warning signs and put a temporary post box and wireless doorbell on it to avoid people coming onto site unnecessarily and twisting an ankle. Dust is a big problem. We had some rain last night which helped. The new side gate is up and the back is secured again. Today I was replacing the cracked drain gulley and nosing around a few builders providers trying to find what I was after. I'm back to work next week so things will slow down. If I can get that broadband junction sorted out tomorrow that would be great, otherwise I might have to try dig more holes again! This is definitely the biggest project I've taken on to date. Bits of civil engineering, drains, electrical, using a digger, compactor, line levels and more skills besides! The head is definitely taking a bit of a beating but I've had some great answers to my questions on this forum which has been a BIG help! At night my brain is going 90 mph though so need to balance things. At least going back to work will be a distraction. I'm past the point of no return but do wonder am I mad and should I have gotten someone else to do this for me!?! But the budget wasn't there and I'm learning a lot. Expect the unexpected. What lurks under the ground level for decades can't be put into words...strange cables with no purpose, concrete and gas lines where they shouldn't be, aching arms and head! Would I go it again? Ask me when it's over! Hopefully my next post will be it completed but until then, good luck with all your summer projects and I am VERY sympathetic to anyone taking on a house, I'm aghast at just a driveway!!1 point
-
Tony, you have saved a lot of our members a lot of money. Thank you very much indeed.1 point
-
What ever you do smart, will be old hat in 10 years time and not supported. Keep it simple, and replaceable, but install cat 5/6 data cables to TV points.1 point
-
More of the same... When insulating the ducts I noticed that the top of the MVHR was not insulated so I have installed flexi conduit on the cables ready to throw fluffy over the top. This is the inlet pipe running under the ridge. 150 diameter with insulation held on with cable ties An installed air damper in red. More about these later.... Water coil with thermal lid. Lid made from PIR. Lids off: The coils had no condensation drain so I installed one in the bottom. I cut the bottom 100mm PIR layer so the bottom if the box falls both ways to the corner with the drain and painted the bottom with a protection coat of metal paint. White 22mm drain pipe sticking out with temp cap off. Water trap still to be fitted... Side view of MVHR unit. Note the black "Summer bypass" with the white block on the side1 point
-
I agree with the above, about negotiating with the DNO, as it's exactly what we did. We didn't mind having the pole in the front corner of our plot, and knew that the DNO would have had a real problem if we decided to tell them to just remove it, as it carries a 3 phase supply over our neighbours lake, so couldn't be run underground. During my discussion with the DNO they confirmed that it's pretty common for there to be no wayleave or easement in place, and I was told by SSE (our DNO) that they believe that many older agreements were lost when the distribution network was privatised; apparently records weren't always transferred and this was compounded by the Land Registry often failing to record agreements that were originally in old sets of deeds and conveyances. In our case I think we got a pretty good deal. The DNO agreed to move their pole and underground cable that crossed our plot at no charge. I agreed to pay to have an overhead cable supplying a neighbours house, that was running along the front of our plot, relocated underground, alongside other services that were going in a trench around our plot anyway (I just agreed to pay for the cost of the cable and the alterations to our neighbour's connection). We also gained easy access to a big supply cable that now feeds our house, which meant that I gained G59/3 approval for up to 12 kWp for any microgeneration we might have (I asked for 6.25 kWp and they volunteered up to 12 kWp). We ended up with no overhead cables crossing our land at all, and a pole in a location in the corner of the plot where it's out of the way, so all around I think things worked out pretty well. The only problem with the DNO was that they were very, very slow. We had to pay them upfront in full for the work we'd agreed to, and yet they delayed carrying it out for four months, causing us to delay the build by around a month.1 point