Leaderboard


Popular Content
Showing content with the highest reputation on 09/03/22 in all areas
-
Hey folks, just joining the forum as I've read many insightful posts and would like to ask some questions I have about my build.2 points
-
Welcome. Ah, flat roofs. There are many methods to use, but if you just get it GRPed, problems solved, forever.2 points
-
We got there at last! "Just wait" is the solution. Looking forward to seeing a full battery on a few hours
 2 points
 -
And make sure it's on a full mortar bed. If he's not used primer, he might be laying on dabs.2 points
-
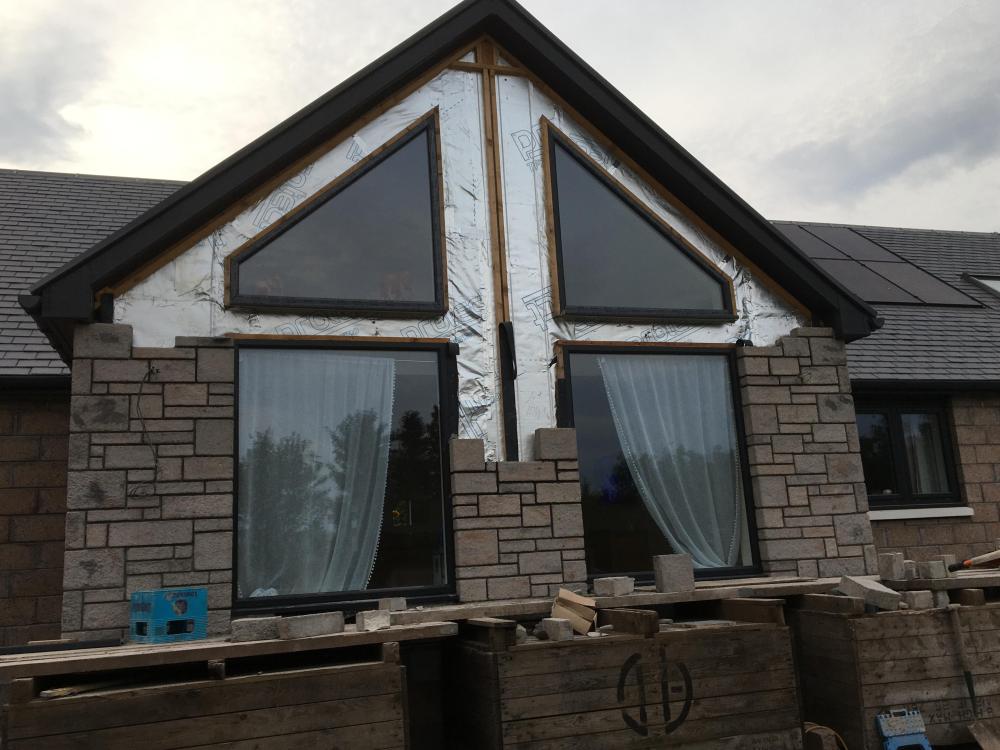
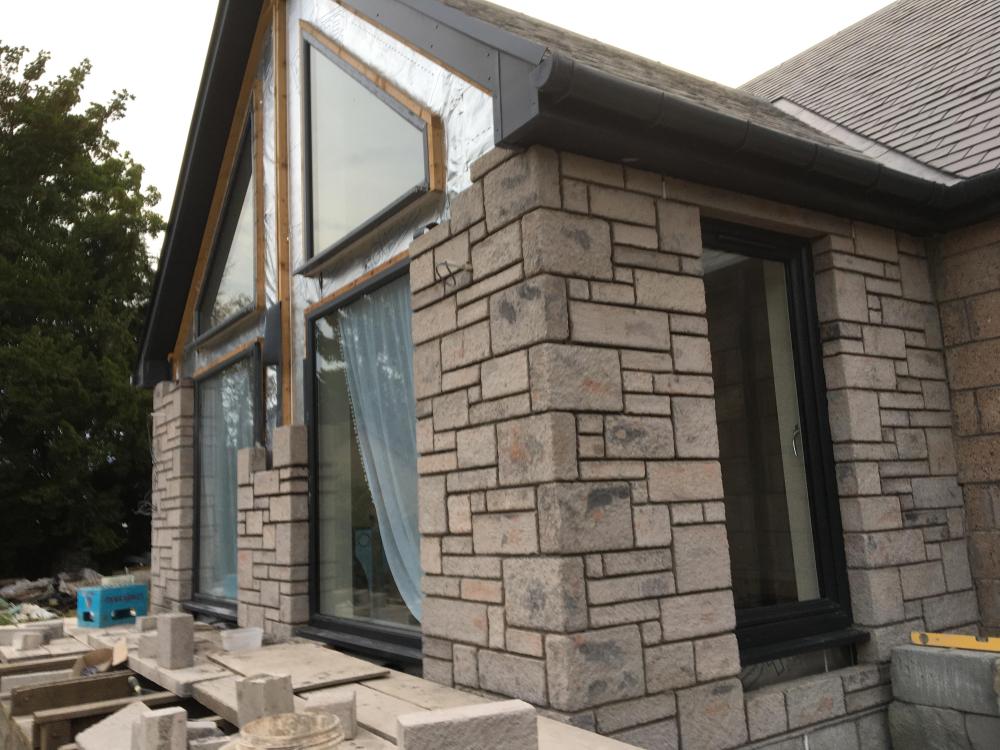
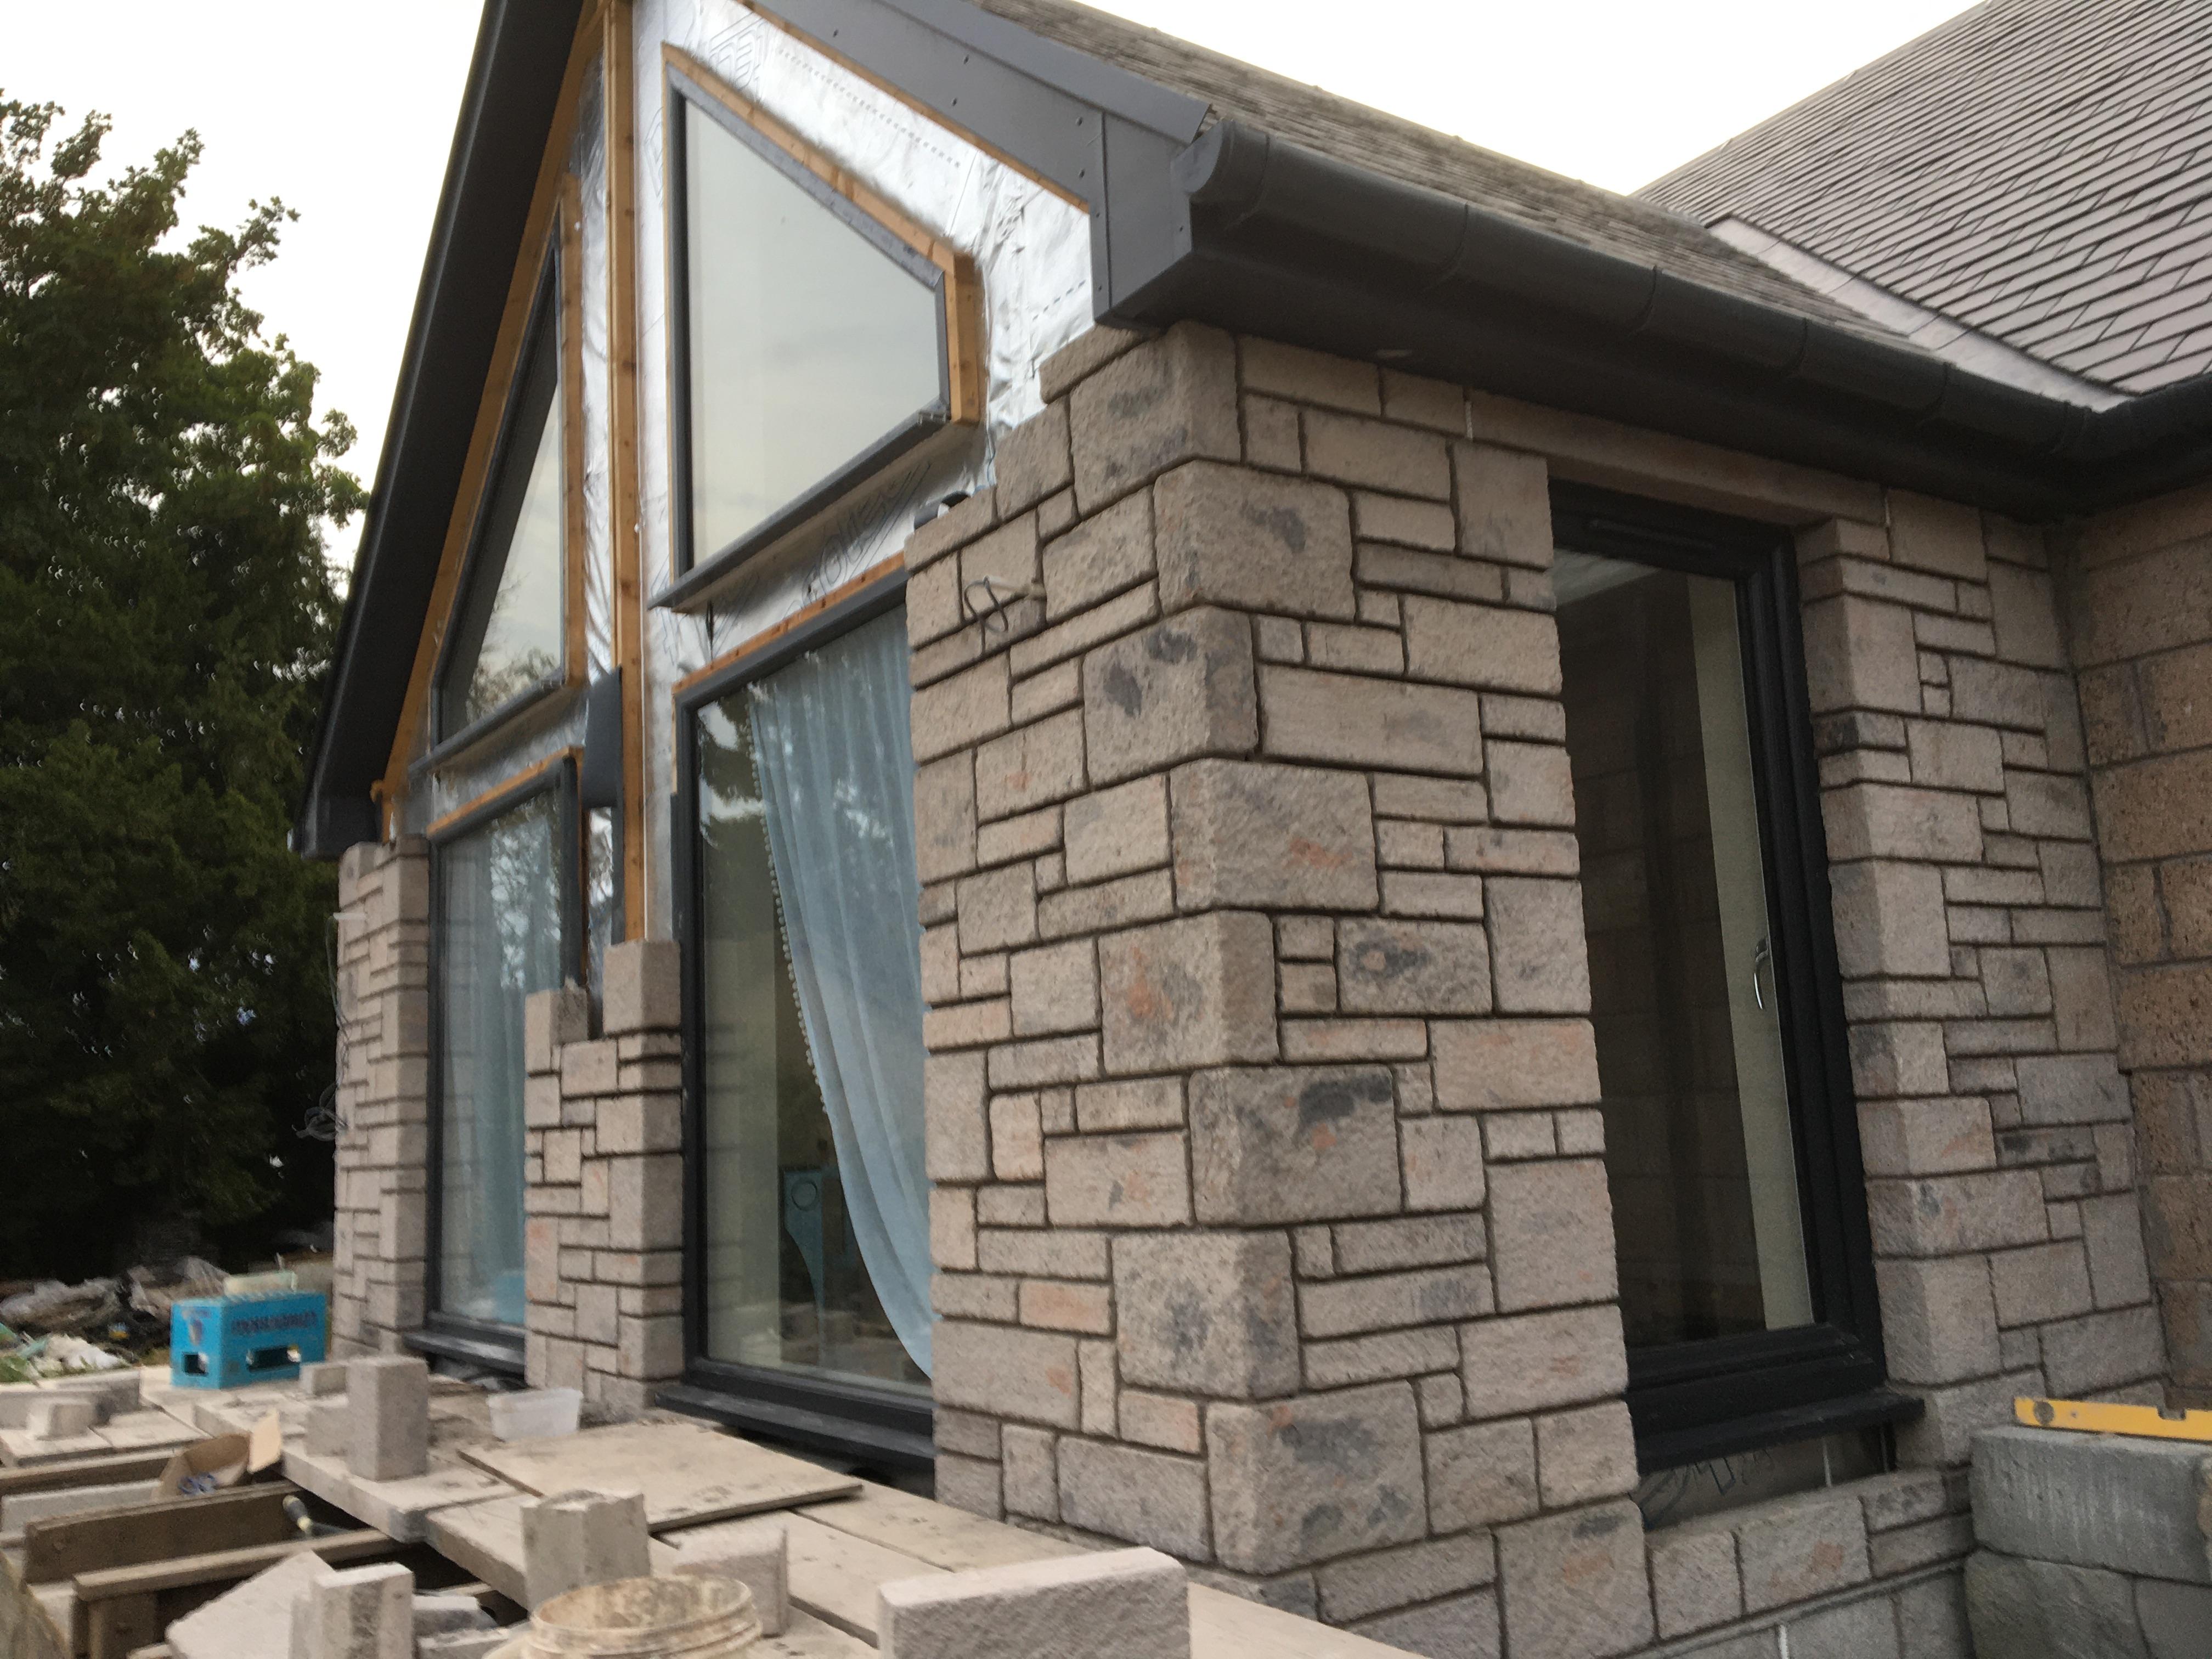
Options put forward are stop the blocks at the height of the fascias so there’s a straight line across an clad in anthracite grey the rest of the way up. Plastic fascia on the upper angles an couple of catnics and make super sized sills or a narrow lintel with a thin sill continue the blocks up to the roof line in three ‘pillars’ then put anthracite fascia between the upper an lower windows and on the two remaining angles Had also thought I could frame it out and put render board on the angled bits above windows and make thin blocks and stick them on kind of like you would with decarock but that still leaves the between upper n lower window to make something that will work suggestions welcome and needed
 1 point
 -
I had a few spare minutes on this lovely sunny Sunday evening and decided to spend it writing up a blog post for our basement UFH install and screed. We have a 250mm reinforced concrete slab sitting on top of 200mm EPS300 in the basement. The slab wasn’t very flat and so we decided to use a cement based liquid screed to give us a nice level base for our finished flooring. So we put down 25mm of PIR to level things out and also to allow the UFH pipes to be stapled to. I did some quick maths and I figured out that it was cheaper to use the 25mm PIR and UFH pipe staples than to use pipe clips fastened to the slab and a thicker layer of liquid screed and so an order was placed with our BM and it was delivered and fitted by my lovely wife and me. We found this is a pretty easy task to be honest and only found we had to put a small bit of sand blinding to level a couple of dips in one room. In the rest of the basement the PIR just took the bumps of the slab out. We taped the joints and foamed around the edges for a belt and braces approach even though there was a DPM going on top. Next came the DPM layer. We found this a bit of a pain to do! Not hard but trying to smooth it out and keep it square so that a constant amount was taken up the walls was just fiddly. In the end we got the laser level out and set it about 150mm above screed finished level and then used that to ensure we had enough DPM up the walls. Then we had to tape it to the walls but soon found that standard gaffa didn’t stick to the concrete walls nor the dense concrete blocks! We painted the concrete with a PVA mixture and that helped a lot for that but just didn’t work on the concrete blocks at all. Off to Google and this awesome forum and I eventually found Gorilla Tape which sticks well to concrete blocks and we were off and running! Following this we laid the UFH pipes. This was a job we actually really enjoyed. It was very satisfying creating those wonderful spiral shapes. We made some spacers and I was laying the pipe according to the layout designed by Wunda and my wife was walking behind with the stapler ‘kerchunking’ down the staples as we went. At the end it looked so good we were sad to think all our hard work would be covered up and never to be seen again. This was my first time running UFH pipes and also my first manifold fitting and I was very happy with how the manifold turned out. I filled the pipes with water and the pressure gauge showed that there were no leaks. That and the fact there water wasn’t pissing out anywhere! With the liquid screed booked in we needed to get a move on and get everything finished off and ready. The last stretch was to fit the temperature probes, perimeter expansion strip and create the expansion joints for crack mitigation at the doorways. Thanks to advice from this forum’s users I ran the temperature probes in UFH pipe with the end crimped down so as to not allow screed in just in case they need replacing in the future. I got the expansion strip from uHeat on eBay. It came with a plastic skirt and adhesive already attached so it was a real breeze to fit. Not much more to say about that The final thing was crack mitigation strips for between the doorways. After speaking to the screeder I decided to use 5.5mm plywood board. It was an inexpensive and simple solution. I was asked to cut them to size but leave them to the side of the doorways and the screeders would add them as they went around. Obviously I had to put them in place first to ensure I got the sizes right! So here are photos of our basement ready for the liquid screeders. On the day of the screed they turned up early before the screed lorry to setup their pump and check on my prep work. They said it was exemplary and that I wouldn’t believe the state of the prep work of some of the jobs they turned up to! They had absolutely nothing to do to the prep work which made them happy and made me happy that all our hard work was worth it. They put down their little tripod level thingies and waited for the screed to turn up. Once it did it was really quick work and very impressive. If it wasn’t for the fact that they ordered 6.4m3 of screed but the company only sent 6m3 they’d have been done in a few hours but, as it was, they ended up having to wait a good 2 or 3 hours for the last little bit of screed to turn up. They were not happy as, in the end, they had to spend the whole day here when they could’ve been on to the next job. But, at the end of the day we had a wonderfully flat looking basement floor. And 48hrs later we were walking on it. 🙂 All in all very happy with the whole process and I will be getting these guys back in to do our ground floor screed. thanks for reading.1 point
-
Figured it out- they must go other way in fact/ legs at back just need forcing in. Well they're in now anyway. Glass in/ beads on.. b'stards to get on mind you! I can relax with weather seriously closing in tmrw now. Nick of time. Very satisfying. Both recent jobs have been. Huge thanks again y'all. Within 5 pages too! This build lark is damn good for self-confidence & contentedness combined. Very rewarding. Zh1 point
-
That's a load of money. Tesla packs are 55 kWh and ~£5.5k (£100/kWh) but add £££ for the BMS and good luck with running into a 48V lead acid inverter https://www.ebay.co.uk/itm/354146011363 (stick one in the basket and wait for the seller offer) MG ZS are 2.4 kWh at either 12.8 or 25.6 volts (model specific) and a more idiot proof chemistry (LFP) than Tesla so easy to run into a 48V lead acid inverter and ~£400 (a little under £200/kWh) https://www.ebay.co.uk/itm/275376281563 IMO automotive gear is likely to be higher quality items than no-name Lithiums. More cost effective too. For @sanch3z I'd spend the money on as large a PV array as you can now; DIY installed; and worry about batteries at a later date. Don't touch SolarEdge with a 40' barge pole unless you are completely up to speed on the consequences of being locked into their ecosystem though.1 point
-
That's if you can get one. The second of my 'incidents' involved an old lady neighbour who had just returned home from hospital on a Sunday. After mopping up 🤮 I got on the phone and there was nobody available even for an emergency call out. Also she wasn't covered for saniflos on her household insurance so the carpets were replaced at her own expense. I still find it difficult to talk about my first experience but one thing is for sure they don't chop up beer bottle lids that one of my guys had deposited in the wretched machine.1 point
-
Yup. Very few don't have some flat spots / standing water.1 point
-
Can you show exactly where the sliding doors are going? If the'y're going in the room currently called 'lean-to', then as a thoroughfare to outdoors it's becoming a less convoluted route to get from playroom to outdoors? TBH, it would be the same if they were going into the rear wall ( top of the drawing )? You're not adding a maze of corridors! As it stands, you need to get through 4 doors to get to outside / rear from the current playroom? Can you get a second opinion? Offer to install linked ( mains ) heat / smoke detectors in those rooms for early warning?1 point
-
It is a very sad state of affairs when that statement is so true, that you simply cannot believe that anything a politician says has a shred of truth in it.1 point
-
a level gutter, depending on length and depth, will run before it overflows. if you can't see it from the grouind it's fine.1 point
-
Yup. EPDM seems to wrinkle up a lot, and doesn't look good when it does imho. Long linear wrinkles holding water when at its worst. GRP is stable, concrete solid, and has great longevity. Colours can be manipulated by simply choosing different top-coats. Needs to be done properly, and not by someone who is skimping on the product eg leaving you with a wafer thin end product. Ask questions, and get answers in writing.1 point
-
Our max system output is 4.5kW, but the 5kW inverter has been limited to 3.7kW by the commissioner, so G98.1 point
-
Those of us on oil have paid a heavy price for ever. the thought of it now being the cheapest is quite scary:1 point
-
Emails are not in the equation. I have never used an ISP's email. All the ones I use are based on domain names I own for my business or home.1 point
-
No I think my use of words are correct. You are not separating cooling systems, you are separating multiple pumps from interaction with each other.1 point
-
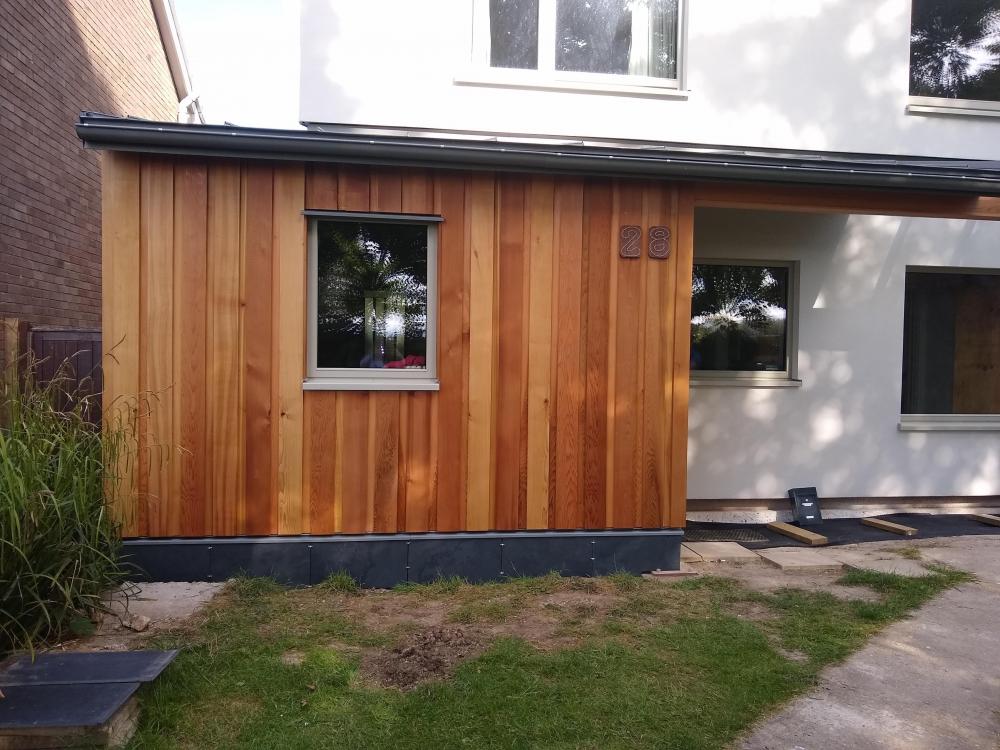
You can use a thin 2.0mm plaster stop bead to create a shaddow gap. You let it all settle down shrink etc and then mastic to air seal if need be. Have done this on my own house but did the plastering myself as it is really time consuming to set up the bead acurately. Could not afford it otherwise. Have to say.. needed a bit of time off after (sore body) so hat off to @nod1 point
-
We had india stone onto mortar and they didn't stick well in places. I'm going to have to use a wire brush in a drill to abraded the mortar down enough to get another layer under those that need refixing. I'm probably going to try BAL External Priming Slurry Bond.1 point
-
Since this thread has been woken up, I can report we have made the decision to dump BT and go with the local wireless broadband provider. It is wasn't an easy decision. In some respects I wish they did not exist. But the fact they do exist is responsible for BT/OR not making any more investment in the cable network, so if we stick with BT it would appear we will not in the forseeable future get anything better. But on the other hand, the wireless offering will give us broadband at 30mbps. Now that is 10 times as fast as we get at the moment, but I honestly don't think that fits the category of "super fast" broadband? So it is this or the rubbish (both in terms of performance and customer service) we get from BT. But it is not as simple to switch as you might think. I still want a "landline" (mobile is too unreliable here to rely on 100%) There is no way I want to keep any service with BT after the switch, so the "landline" will become a VOIP service by the same provider and they claim they will port our existing landline number. I am now awaiting the paperwork and a connection date before I can finally tell BT where to go.1 point
-
When you think of all the different types of cables used, how they are installed, when they are installed, then add in all the 'devices' connected to them, and the difference in business plans that run all the worlds servers and internet services, it is amazing any of it works at all.1 point
-
No, after. They say up to one month after so fairly relaxed.1 point
-
Is it?, including batteries!. I know very little about batteries, how does that compare to say a power wall?1 point
-
very likely IMO. I'm sorry but he should re lay them. He should have done his research before laying them. Its a well known method in the industry.1 point
-
Stop end beading1 point
-
You could put a separate pump in a sump in the ground, a 'package pumping station'. This would be room sealed, have an alarm if it stops working etc. Probably is more expensive than a saniflow but you mititgate against noise and may be easier to fix in the event of a failure. https://www.ttpumps.com/products/pumping-stations/package-pumping-stations/trojan-grinder1 point
-
I only watch it as a “do not do this”. I treat it as a comedy of errors, people with more money than sense (mostly).1 point
-
I have to say I can't watch it any more. Having struggled to build and keep on budget, people pulling extra money (sometimes more than our total spend) out of their arse because "this space deserves it" is just annoying. I do know someone who had meetings with the production team a good few years back when they were building some of the first "eco" houses around here. It seems like they did not go ahead because plans, budgets and skill sets were all in place so there was unlikely to be any entertaining jeopardy for telly.1 point
-
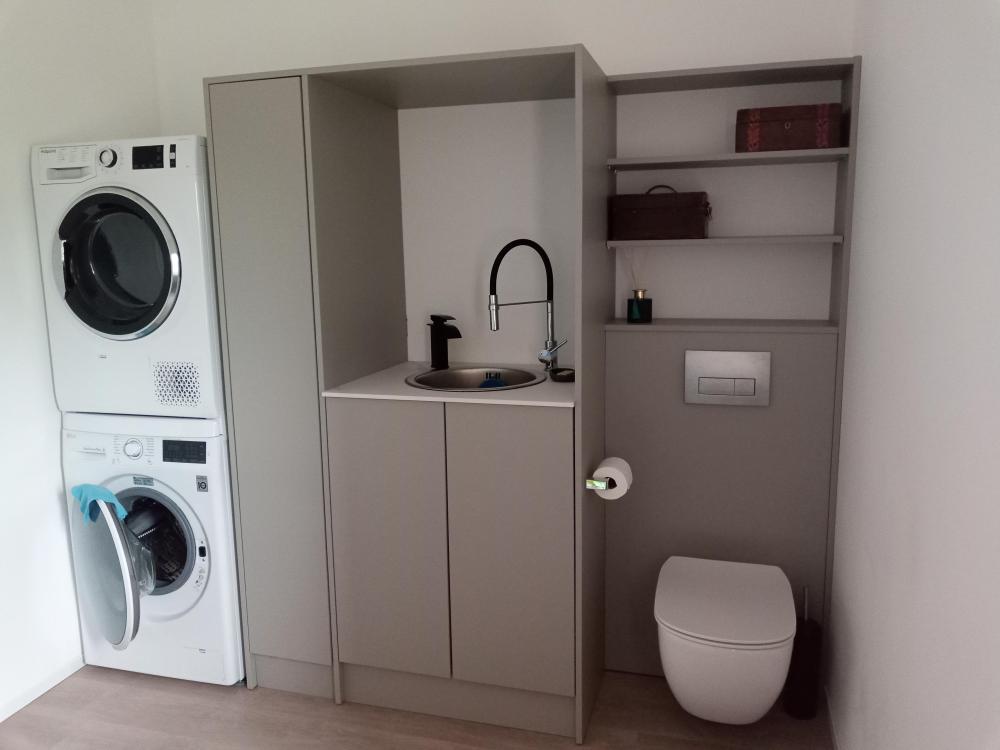
I've sprayed a little, but as an easy but slightly more costly option there are outfits like WoodByPost that sell edged sheeting that mean you can make your own stuff. Here's our utility room, all our own sizes and a fraction of the cost of bespoke.
 1 point
 -
Unless the notes have recently changed significantly, this isn't my recollection of what they say. The notes say that something along the lines of the completion certificate being the usual document that will be relied upon, but that the applicant may choose to rely on another document such as a valuation listing confirmation or a letter from their bank confirming that a final stage payment has been made. The three months runs from the date of the chosen document. Basing "completion" on the date of moving in or on which the property is added to the council tax valuation list is a complete distortion of the notes (note: not even the law) accompanying the form, but unfortunately this is what HMRC is doing. This has been repeatedly addressed by tribunals, the majority of which - particularly more recently - have ruled that the moving in or council tax listing date is not relevant to assessing whether the VAT has been reclaimed in a timely fashion. I should add that HMRC often aren't only relying on the valuation date. They're identifying the worst date they can reasonably infer from the facts. So they start with the council tax valuation date, because that's something they can easily and objectively determine from public records. If you can prove significant expenditure on building works after that, then they will likely move the date forward accordingly. I think that's what happened to us - we moved in and paid council tax for several years before getting a completion certificate, but had a couple of significant spends shortly before completion that I suspect dragged us over the line. This whole area is a disgusting mess. The only real way to guarantee that you get your money back is to finish the build promptly, see if you can get the council tax listing delayed until completion, not move in until you get your completion certificate, and then make the claim within 3 months of the completion date. Unfortunately, for a lot of self-builders this is a difficult if not impossible thing to achieve. Unless I've missed a recent case (possible, as I haven't been following it since we got our refund), this has not been tested in court. All of the relevant cases have been at the tribunal level, which means that they don't have the force of precedent. That means that the next tribunal is free to - and sometimes does - make a completely different determination on similar facts. Unless and until someone appeals it to a higher court, this is how things will be. In case anyone's interested, here are some notes I put together when I assumed we'd be arguing this in the tribunal. There may be more recent cases - if anyone knows, please tell me: Tribunal case: [2020] UKFTT 00157 (TC) - John McGarry and Monica McGarry Tribunal case: [2020] TC07553 - Simon & Joanne Cotton v HMRC https://www.accountancydaily.co/diy-expert-builds-winning-case-vat-refund HMRC vs Sansom – Timeline of events The Sansom family moved into the relevant house in 2013 (before work was completed), the final expenditure was incurred in 2016, however for a variety of reasons the certificate of completion was not obtained until June 2018 and the DIY claim was then submitted less than three months later on 1 September 2018. HMRC contended that the claim was made late, arguing that the completion of the building should be assessed by reference to a ‘multi factorial test’ and not just the issue of a completion certificate. https://www.casemine.com/judgement/uk/5e6881d62c94e041f1973047 - Proffit v Revenue & Customs - Latest case? Excellent outcome + refers to internal HMRC guidance about extensions. https://www.constablevat.com/diy-housebuilder-scheme/ - Summary of cases, including case where HMRC won. https://www.icas.com/landing/tax/the-most-expensive-tax-breaks - Another summary. https://www.rossmartin.co.uk/vat/vat-cases/4907-is-a-diy-claim-completion-date-decided-by-reference-to-the-certificate-of-completion https://www.taxationweb.co.uk/forum/vat-diy-rebate-rejected-t33423.html - Shows how the notes accompanying the reclaim form have changed over the years. Used to explicitly say that, in case of any doubt, applicant could safely rely on completion certificate + all building regs met. Because the form asks you what date you moved in on. You'd be game lying to HMRC in writing, given that they have the power to penalise you for making false statements. I saw one tribunal decision where someone had accidentally tried to reclaim VAT on a build where it wasn't appropriate (effectively, they weren't self-builders). It was a simple error on the claimant's part. They answered all the questions perfectly accurately, which was what allowed HMRC to correctly determine that they weren't eligible for a refund. For some reason, instead of just denying the claim, HMRC levied a significant penalty for attempting to falsely reclaim tax. The tribunal was damning in its decision for the applicant, but I'd still rather not have to fight HMRC. Plus as mentioned above, they can generally just look at the valuation date and infer that the house was complete then, without needing to refer to the moving in date. That said, I expect that if you give them a moving in date that's a lot earlier than the valuation date, they'll try to rely on the former to your detriment.1 point
-
We had our Kore Insulated Foundation perimeter rendered with EWI-050 Mosaic, this is their below DPC product. This was about two months ago. https://ewistore.co.uk/shop/external-wall-insulation/mosaic-render-ewi-050-25kg/1 point
-
Brick slips are slices of brick 10mm to 15mm thick which can be stuck to various substrates to give the effect of a solid brick wall. It certainly works as everyone thought our brick slips were whole bricks. https://www.wbs-ltd.co.uk/systems-solutions/system-finishes/15mm-brick-slips/ On the area under the porch glazing I stuck the brick slips directly to the EPS using gel PU glue. On the area under the front door you can see the EPS which was covered by the ramp up to the door. On the rest of the brick plinth the brick slips were attached using the Wetherby system on to BluClad board.
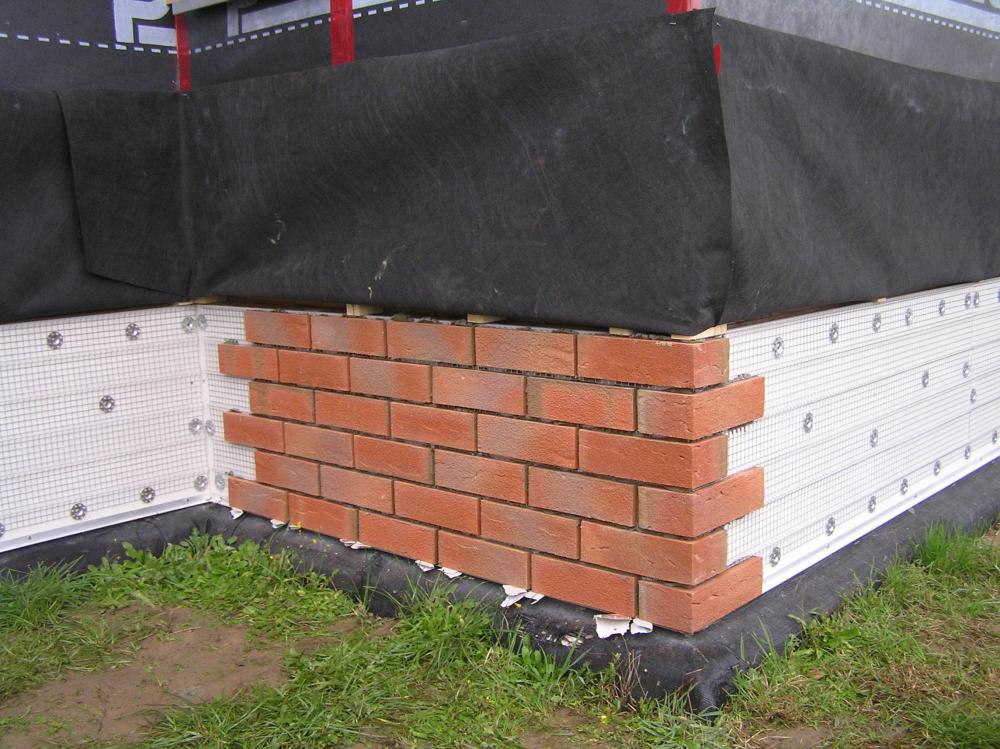 1 point
 -
ewistore.co.uk P.S. thanks for the reminder that i'd actually done this, forgot to put it up1 point
-
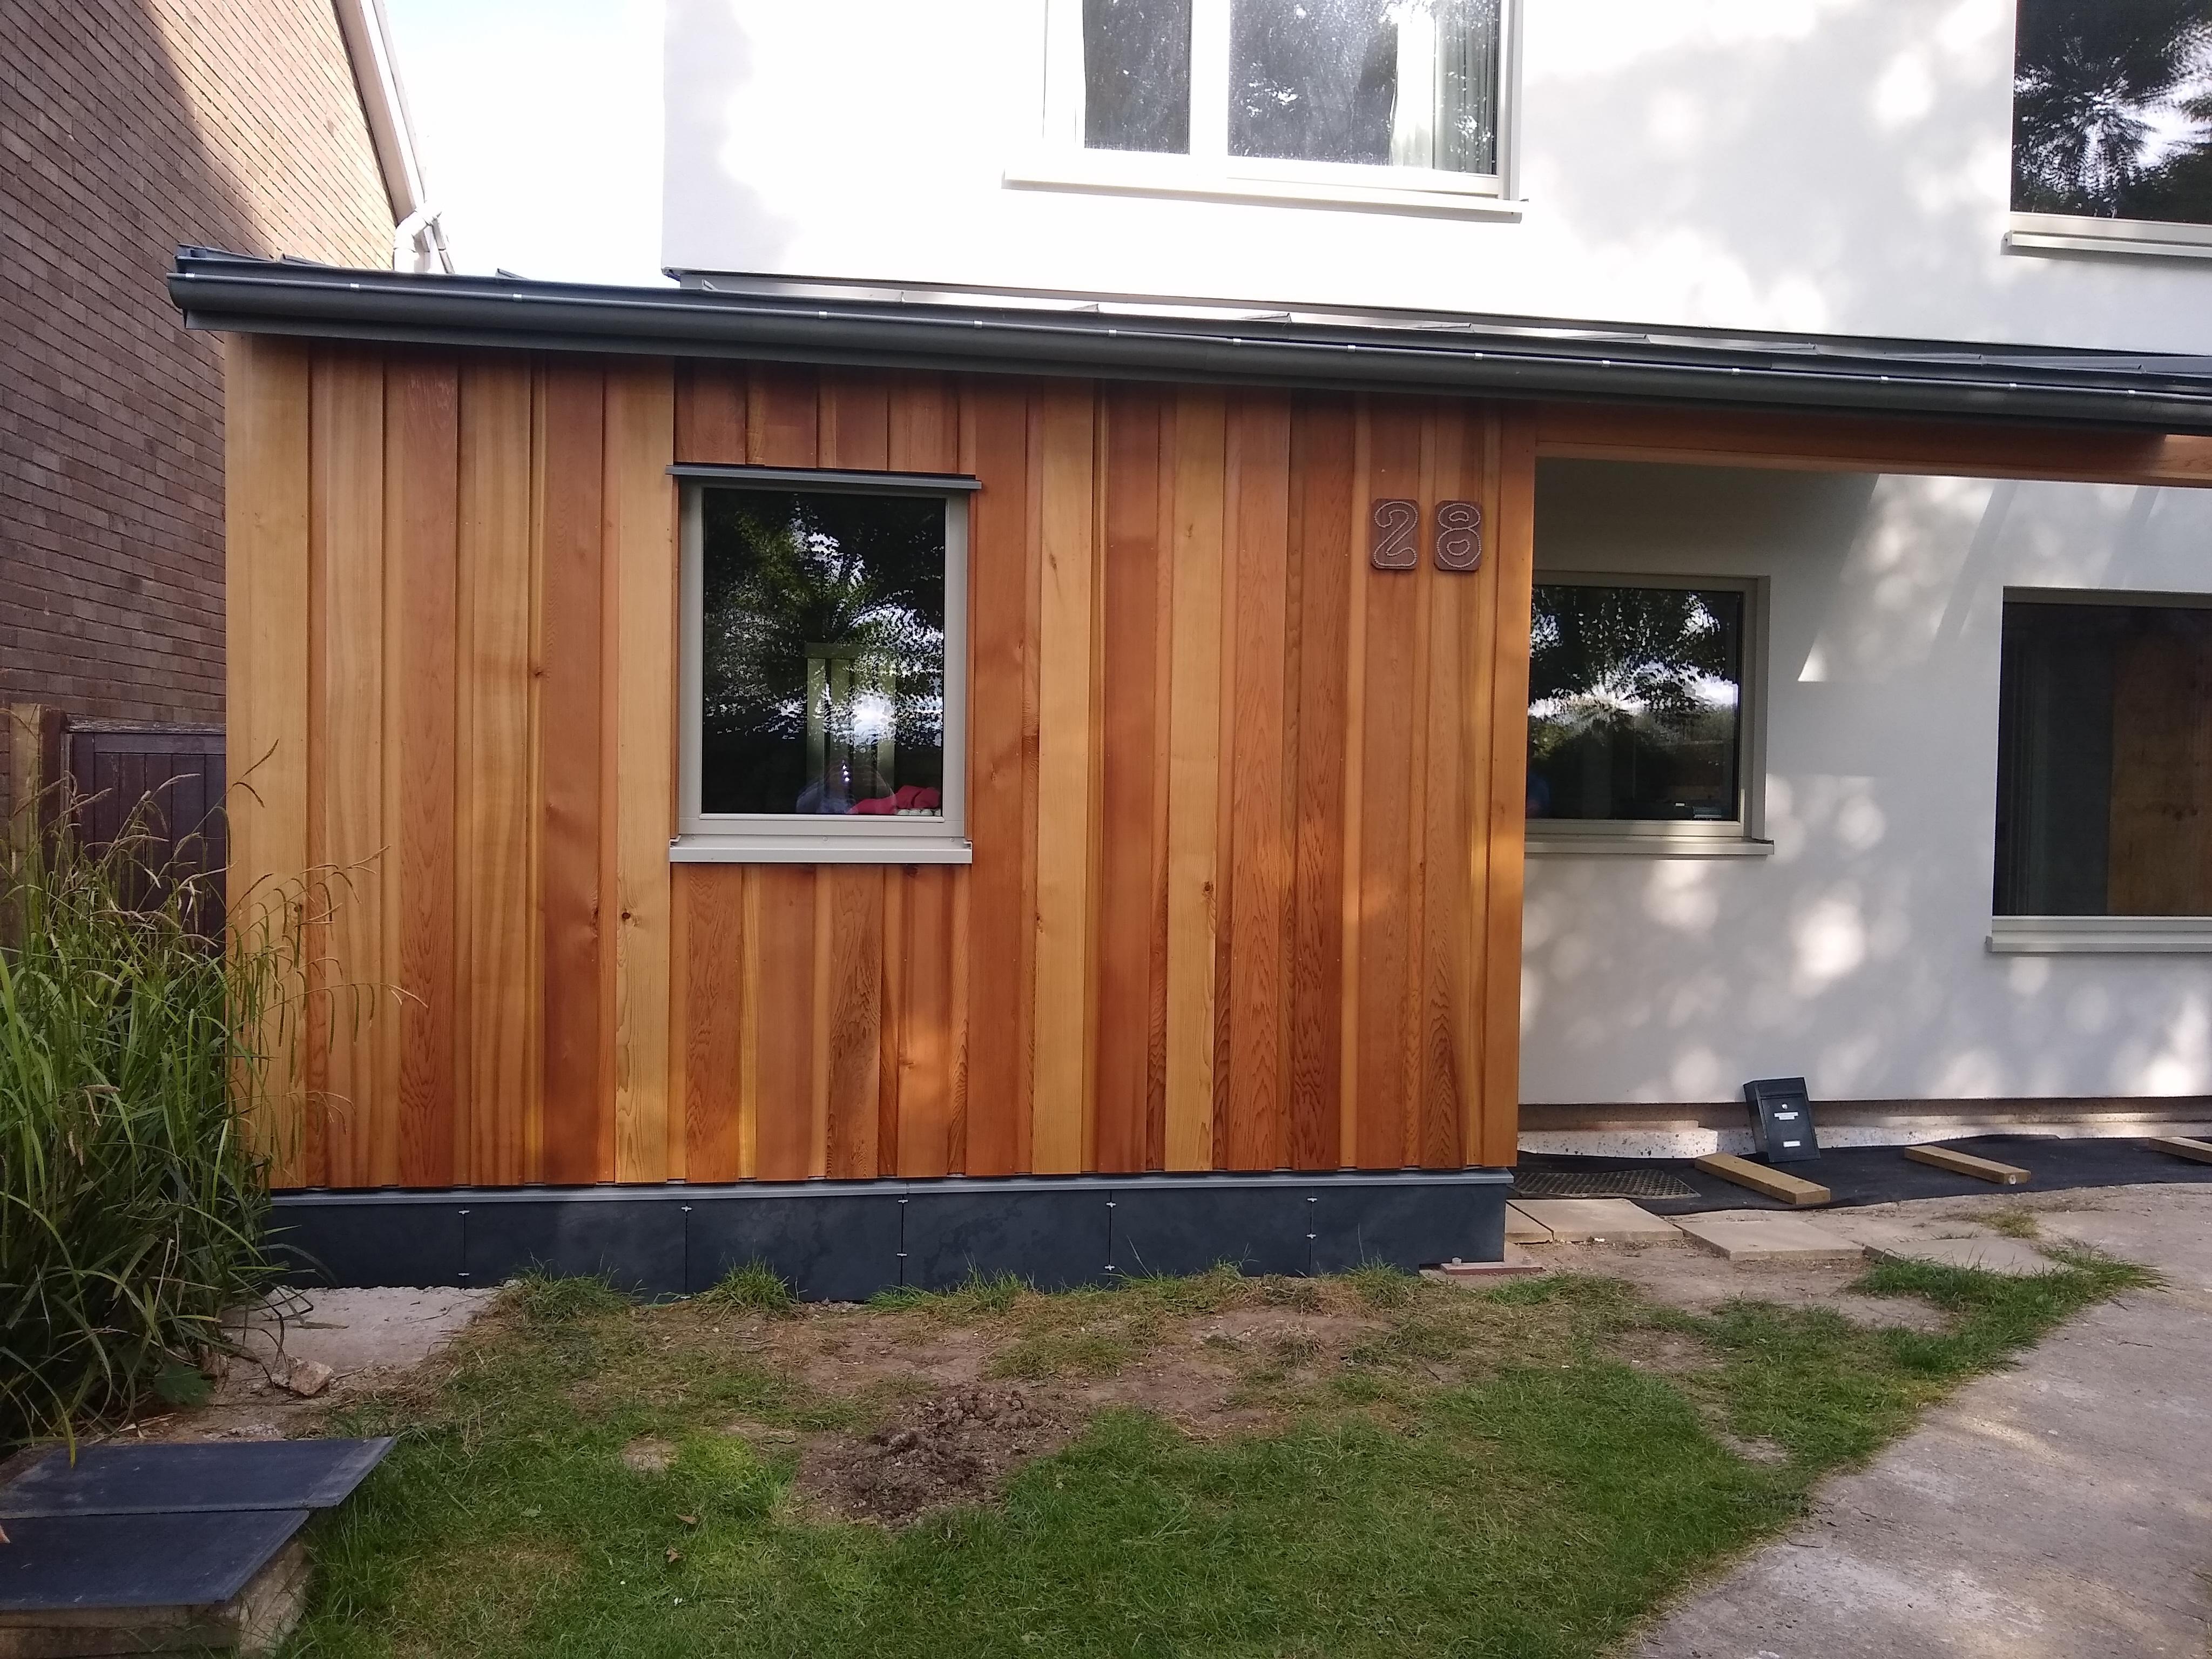
To finish my 22 days on site. I started timber framing, decided to start on the amenity block, as this will initially be for our washing machine and dryer, plus some storage. My aim was to get water tight -ish. before I had to get home for the weekend. The poly tunnel (constructed this visit) - is my cutting shed, I set up my chop saw and worked to my cut list. This was proof of concept on my build plans, and it needed tweaking, the roof to wall junction has been modified and will work, but I want a better / neater solution for the cabins. here's my first attempt with the Binno camera. amenity.mp4 The wind picked up (20mph with 35mph gusts, so I needed to get some structure and racking boards in place, so the camera set up didn't happen day 2. I left site with it wrapped, and with the vapor barrier on the OSB roof. (with some 6x2 to reduce the wind uplift. I'll need BC to have a look before I put the insulation on the roof, as I want the insulations and rubber to go on on the same day. This block and the cabins will be clad in Scottish Larch. There's a gap above the door, that needs the final framing to be finished, but generally happy with the result. so far.1 point
-
Is there anything to be said for a gargoyle?
 1 point
 -
We used Ubiflex which is fixed using their adhesive and looks really smart1 point
-
We used slate tiles - external tile adhesive directly onto the EPS. Only been done a few months so can't vouch for longevity, but seems pretty robust.
 1 point
 -
That’s shite ( no pun intended ) . Man up ; let people do a King Kong and suffer the result0 points
-
You don't want the water to weigh so much it pulls the gutter / facsia off. It can be a bit annoying if it gets used as a bird bath when you are underneath.0 points
-
being really pedantic, they are, just smaller triangles. don't worry about being pedantic there are far worse on here 😂0 points
-
I had 2 ‘incidents’ in my life with these and I swear I’d rather shit in my pants than one of these.0 points


.thumb.jpg.bac90f3bbf6868cf2118d010d936c99d.jpg)


.jpg.c21f3ac78c9b7efd90cbdcb312744dc5.thumb.jpg.7adcad4c0e384f5ecd7d56b0618df6e5.jpg)