Jump to content

Basement UFH and Screed


Thorfun

1876 views

I had a few spare minutes on this lovely sunny Sunday evening and decided to spend it writing up a blog post for our basement UFH install and screed.


We have a 250mm reinforced concrete slab sitting on top of 200mm EPS300 in the basement. The slab wasn’t very flat and so we decided to use a cement based liquid screed to give us a nice level base for our finished flooring. So we put down 25mm of PIR to level things out and also to allow the UFH pipes to be stapled to. I did some quick maths and I figured out that it was cheaper to use the 25mm PIR and UFH pipe staples than to use pipe clips fastened to the slab and a thicker layer of liquid screed and so an order was placed with our BM and it was delivered and fitted by my lovely wife and me. We found this is a pretty easy task to be honest and only found we had to put a small bit of sand blinding to level a couple of dips in one room. In the rest of the basement the PIR just took the bumps of the slab out. We taped the joints and foamed around the edges for a belt and braces approach even though there was a DPM going on top.


IMG_2417.jpeg.4c4da87e27f5a3cd01ee1a867cd04435.jpegIMG_2415.jpeg.2009c991419a3a8800c119c8a89bbb10.jpegIMG_2408.jpeg.5a1197c2803a6a978bcd36d6a3b43e9b.jpeg

IMG_2406.jpeg.c3e5c261e1e24b035b36797c466cb946.jpeg


Next came the DPM layer. We found this a bit of a pain to do! Not hard but trying to smooth it out and keep it square so that a constant amount was taken up the walls was just fiddly. In the end we got the laser level out and set it about 150mm above screed finished level and then used that to ensure we had enough DPM up the walls. Then we had to tape it to the walls but soon found that standard gaffa didn’t stick to the concrete walls nor the dense concrete blocks! We painted the concrete with a PVA mixture and that helped a lot for that but just didn’t work on the concrete blocks at all. Off to Google and this awesome forum and I eventually found Gorilla Tape which sticks well to concrete blocks and we were off and running!


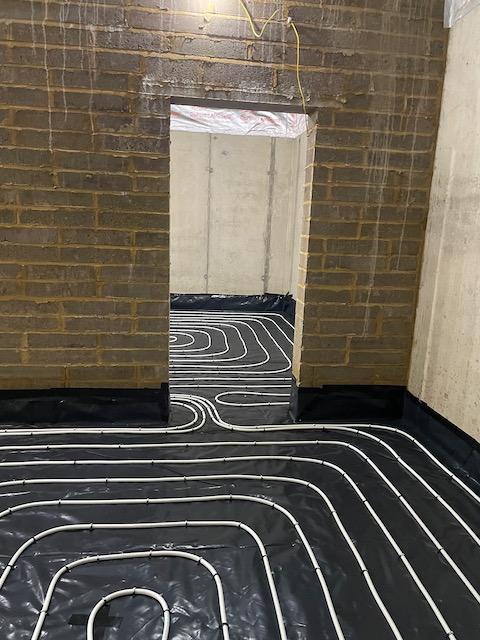
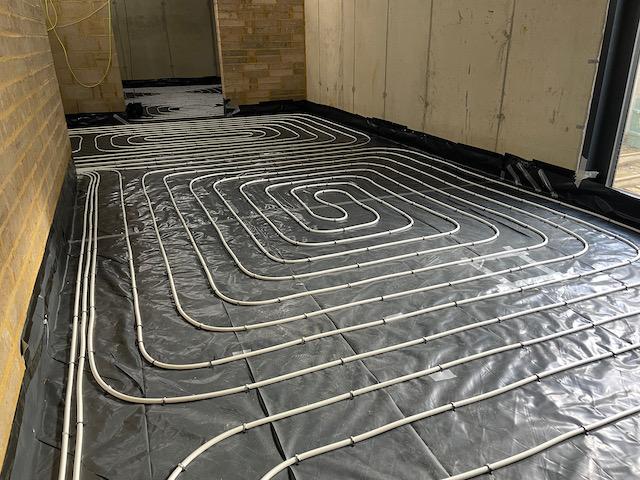
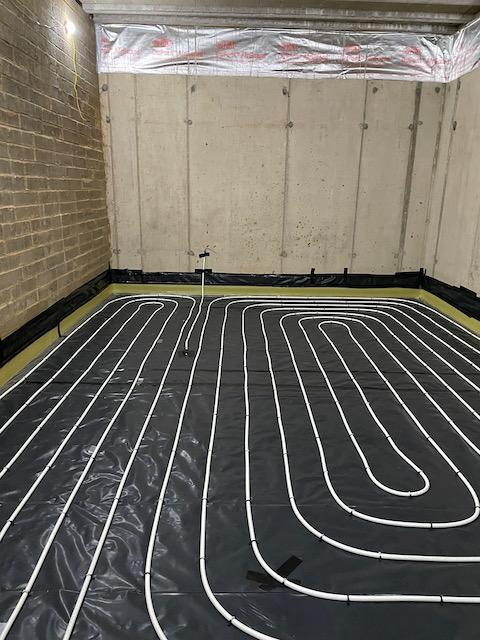
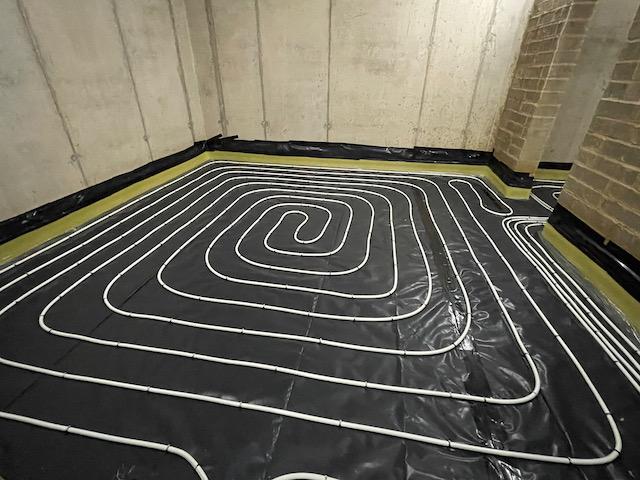
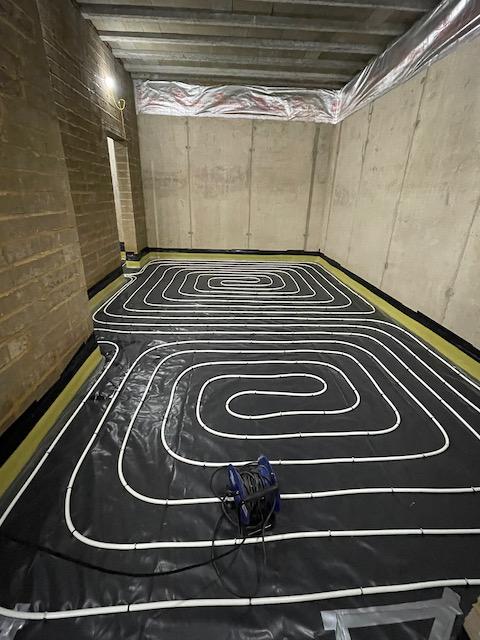
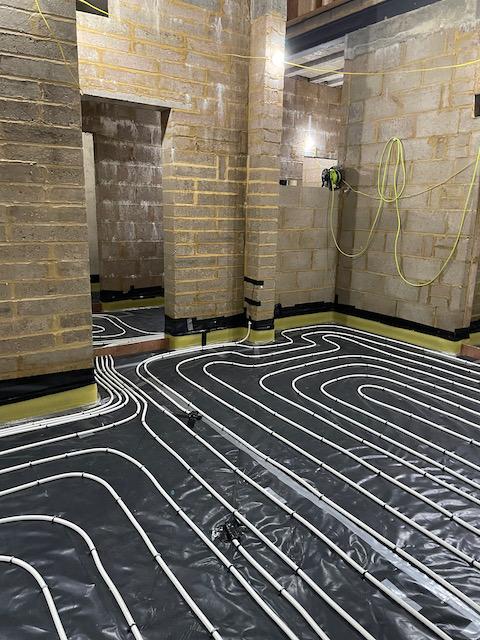
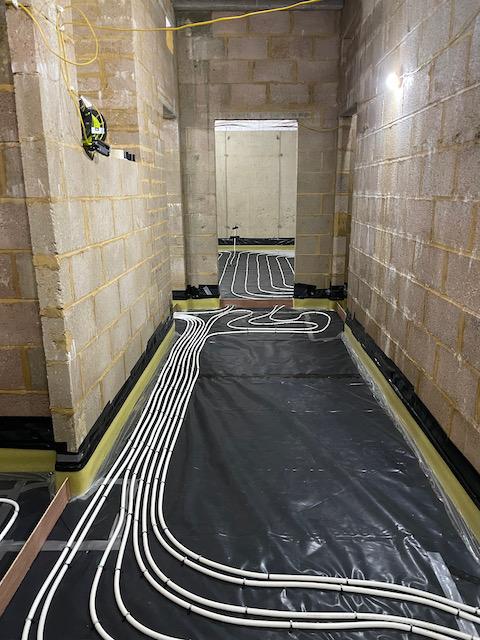
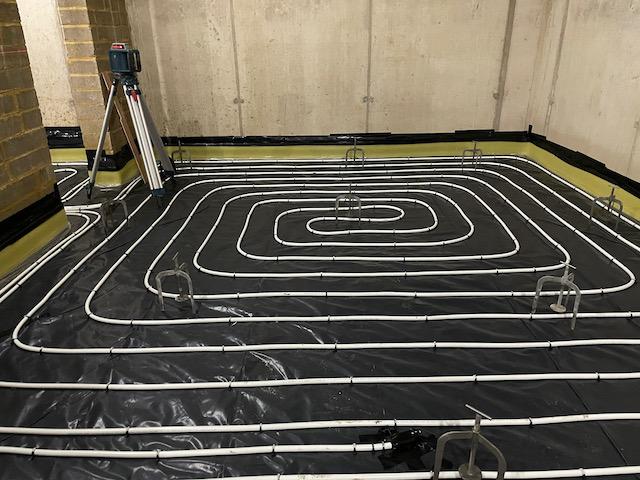
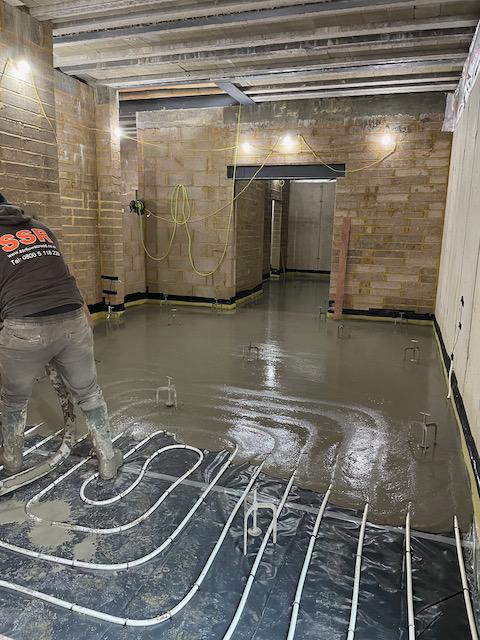
Following this we laid the UFH pipes. This was a job we actually really enjoyed. It was very satisfying creating those wonderful spiral shapes. We made some spacers and I was laying the pipe according to the layout designed by Wunda and my wife was walking behind with the stapler ‘kerchunking’ down the staples as we went. At the end it looked so good we were sad to think all our hard work would be covered up and never to be seen again.


IMG_2441.jpeg.873512164a4c6701c2d69dc8c6921017.jpeg

IMG_2439.jpeg.e3d0f2e14e2c2753db8050cb4cd0d5e1.jpeg


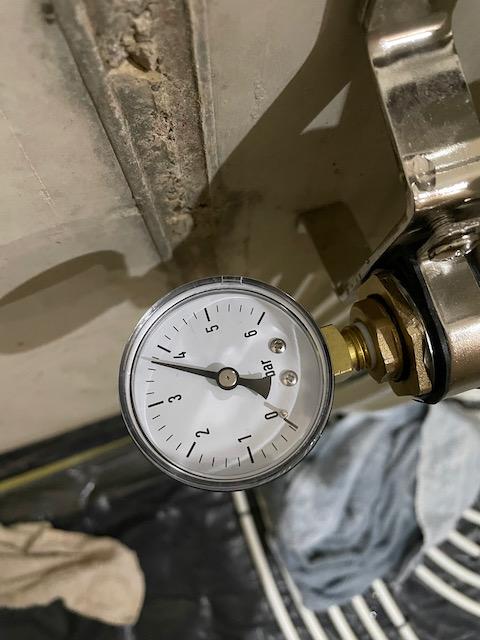
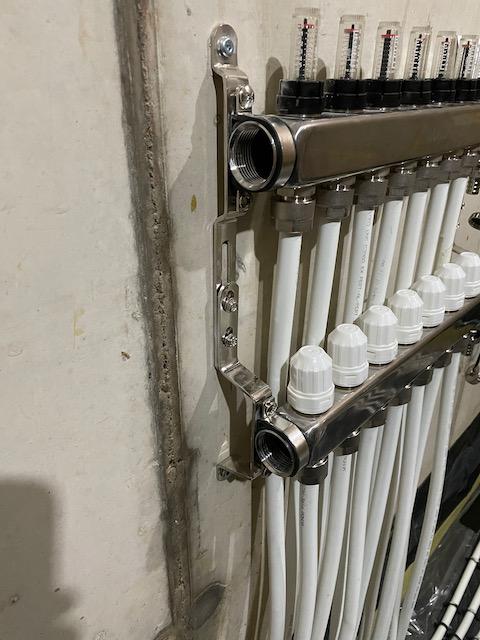
This was my first time running UFH pipes and also my first manifold fitting and I was very happy with how the manifold turned out. I filled the pipes with water and the pressure gauge showed that there were no leaks. That and the fact there water wasn’t pissing out anywhere!


IMG_2450.jpeg.1560101966e9bbaf62dd2cfdc41f897b.jpeg

IMG_2448.jpeg.c441cdb2ff081911a46512e72e78bf7d.jpeg

IMG_2447.jpeg.943cdc6b7d29ffa4b584b0b812b584b3.jpeg


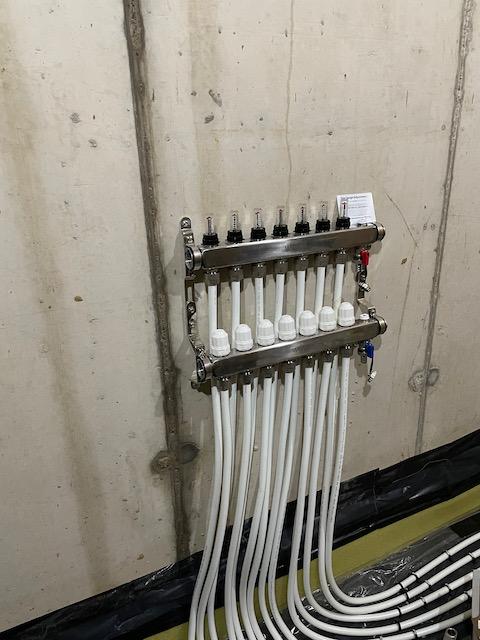
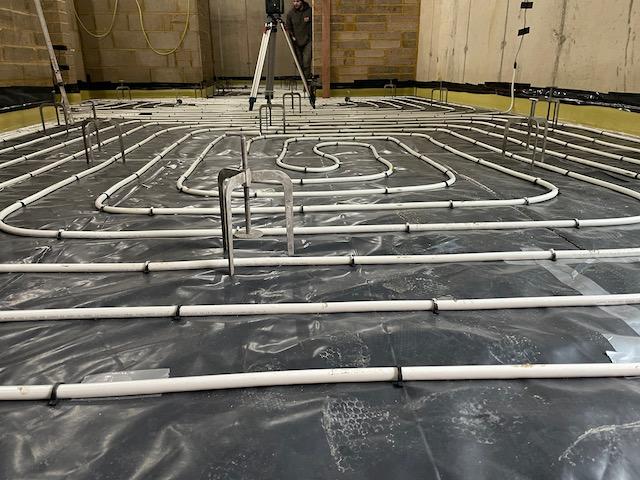
With the liquid screed booked in we needed to get a move on and get everything finished off and ready. The last stretch was to fit the temperature probes, perimeter expansion strip and create the expansion joints for crack mitigation at the doorways. Thanks to advice from this forum’s users I ran the temperature probes in UFH pipe with the end crimped down so as to not allow screed in just in case they need replacing in the future.


I got the expansion strip from uHeat on eBay. It came with a plastic skirt  and adhesive already attached so it was a real breeze to fit. Not much more to say about that


IMG_2510.jpeg.990a1fca89974db8d9504f744d0a37f4.jpeg

IMG_2442.jpeg.11e8c373bce3aa01bd36d1a4b3382b05.jpeg

IMG_2443.jpeg.e826e9b51b1e646e12cc16c458e9548b.jpeg


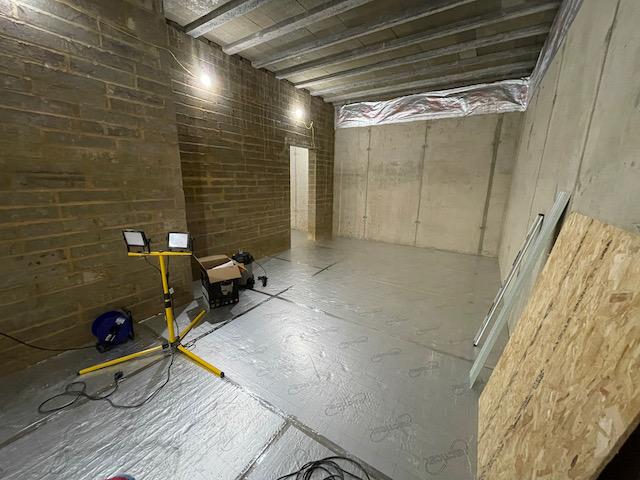
The final thing was crack mitigation strips for between the doorways. After speaking to the screeder I decided to use 5.5mm plywood board. It was an inexpensive and simple solution. I was asked to cut them to size but leave them to the side of the doorways and the screeders would add them as they went around. Obviously I had to put them in place first to ensure I got the sizes right!


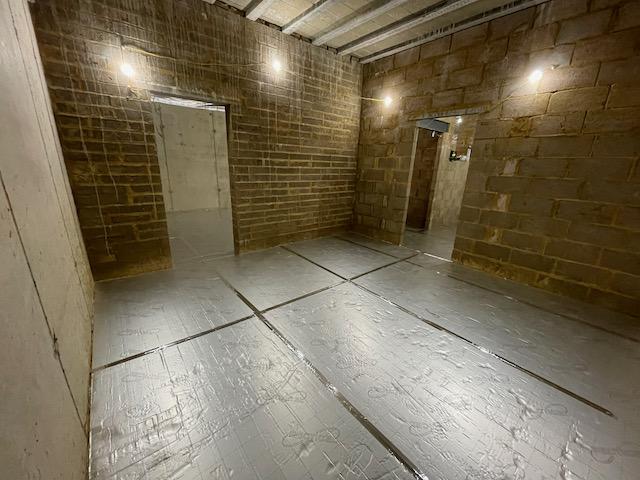
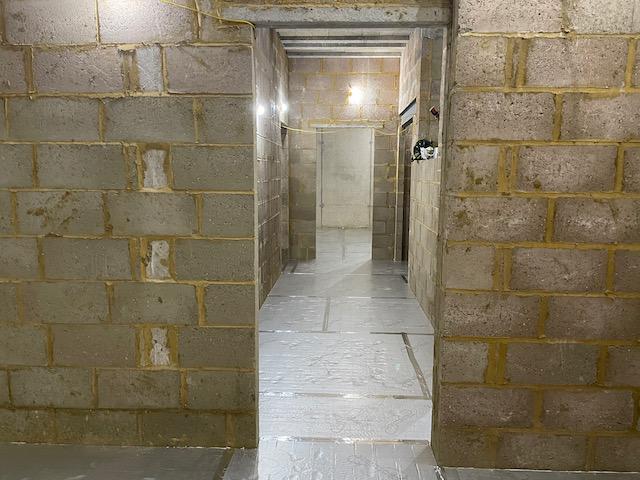
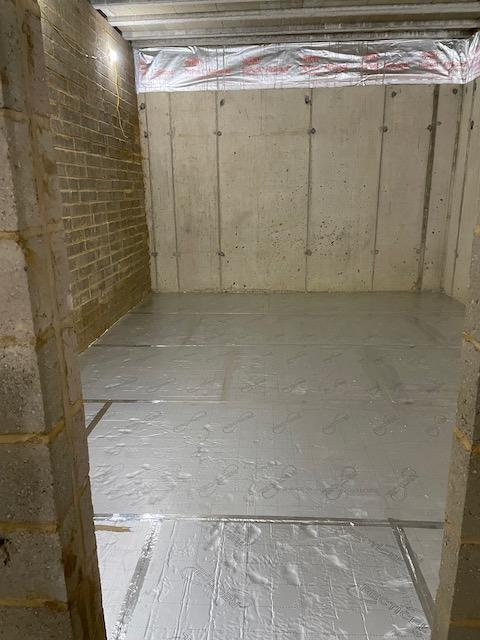
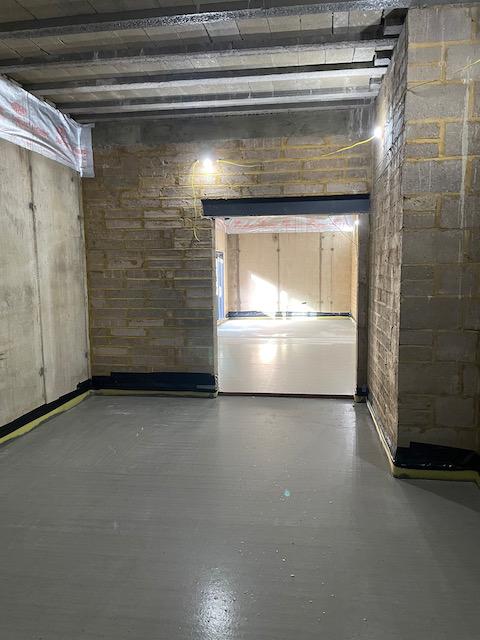
So here are photos of our basement ready for the liquid screeders.


466946143_IMG_2500(1).jpeg.226e022975d1d885409293a9a1790070.jpeg

502278376_IMG_2499(1).jpeg.aaf5b60fde466bca0593326245b308db.jpeg

IMG_2498.jpeg.4c4caa7f77347964b4a4df770698ebbe.jpeg

IMG_2509.jpeg.29f3cfa9b3b70f57dfbe43c3aeb6cad6.jpeg


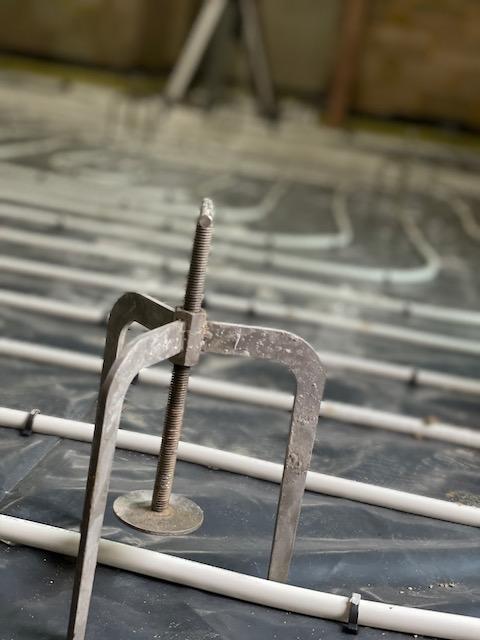
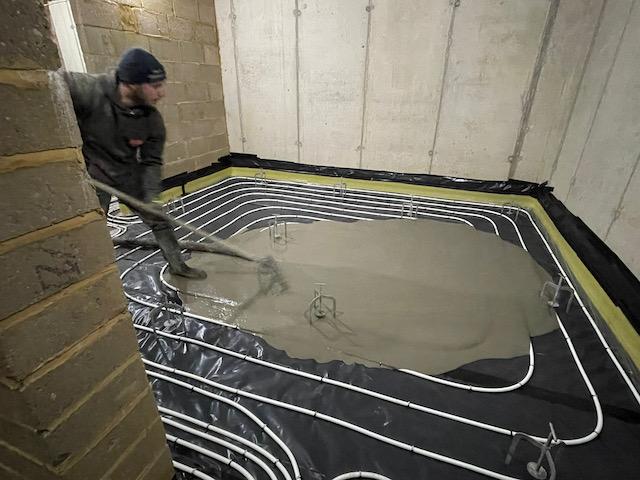
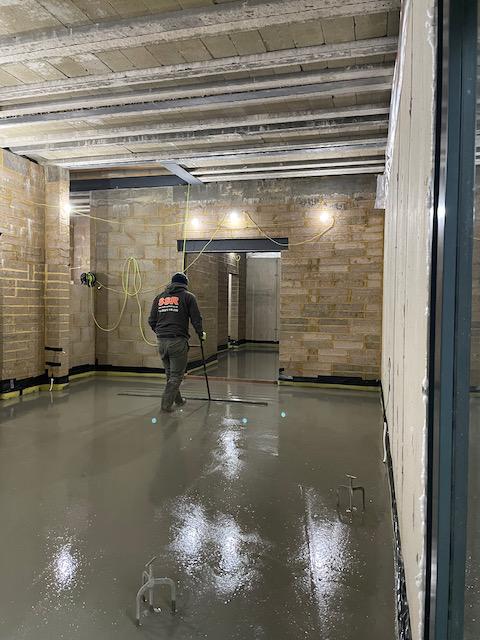
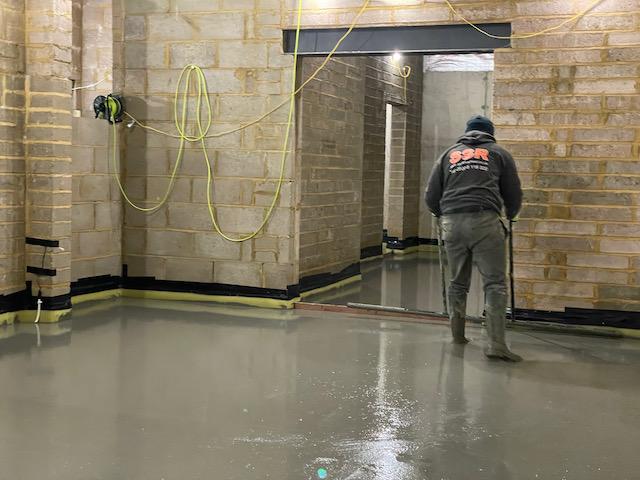
On the day of the screed they turned up early before the screed lorry to setup their pump and check on my prep work. They said it was exemplary and that I wouldn’t believe the state of the prep work of some of the jobs they turned up to! They had absolutely nothing to do to the prep work which made them happy and made me happy that all our hard work was worth it. They put down their little tripod level thingies and waited for the screed to turn up. Once it did it was really quick work and very impressive. If it wasn’t for the fact that they ordered 6.4m3 of screed but the company only sent 6m3 they’d have been done in a few hours but, as it was, they ended up having to wait a good 2 or 3 hours for the last little bit of screed to turn up. They were not happy as, in the end, they had to spend the whole day here when they could’ve been on to the next job.


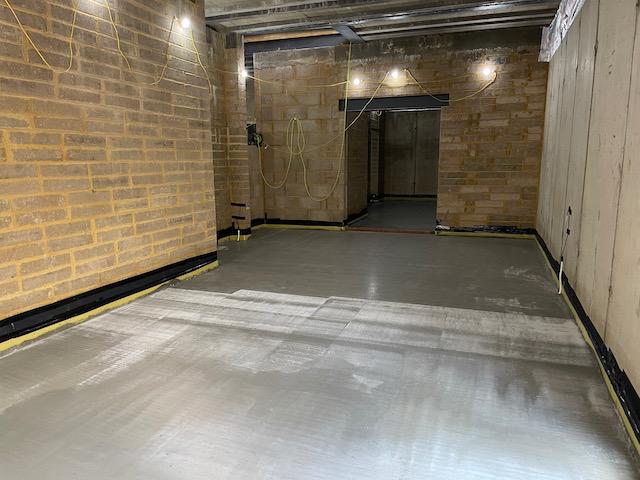
But, at the end of the day we had a wonderfully flat looking basement floor.


IMG_2520.jpeg.93f3ebe64acf79b2054ceee7fce8fc35.jpeg

image.jpeg.2ea248251b421f1463c0400a1040259b.jpeg

image.jpeg.aa75021368d8ec96c4548ec69bc86e88.jpeg

IMG_2527.jpeg.a9513fb1b7cb93ae63bdaafe1c2d8a4f.jpeg

IMG_2528.jpeg.5ae53200afb4489fddd12c86d8d8f8d6.jpeg

IMG_2529.jpeg.87017ce276dc70ff44880d94818b2c12.jpeg

IMG_2535.jpeg.1442712661b6711250ac4d7f9dd2c359.jpeg

IMG_2536.jpeg.0e928619e1405a7a57a705f493f6aa4a.jpeg

IMG_2538.jpeg.f1697c59962c725518f48371b0949409.jpeg


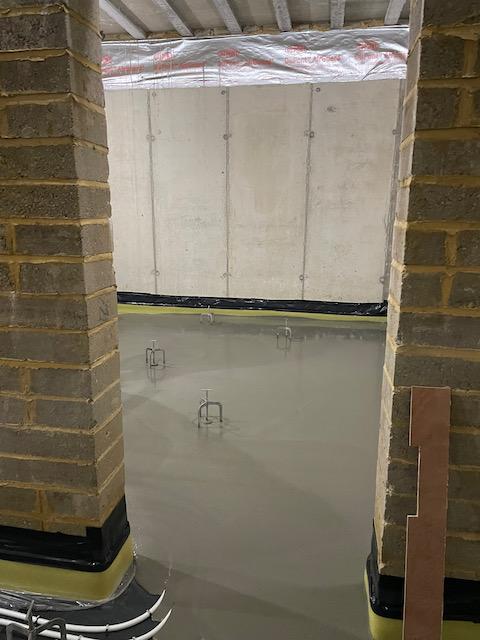
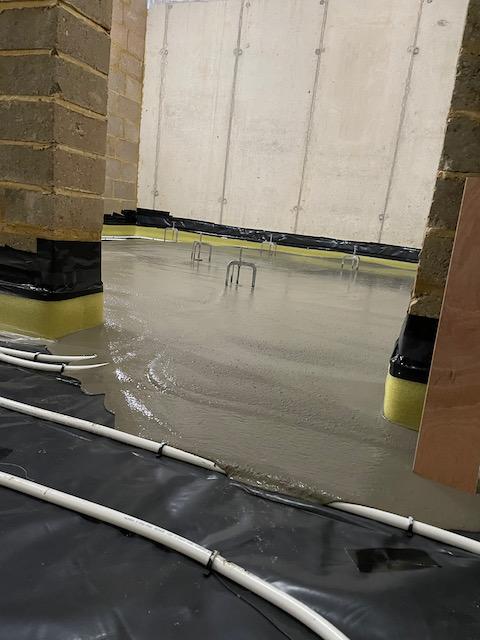
And 48hrs later we were walking on it. 🙂


IMG_2546.jpeg.cf2e4e750e1c0052cfa675977a3a5110.jpeg

IMG_2552.jpeg.4740dd8d9ffee1028ea4842bd91b6a88.jpeg

IMG_2555.jpeg.cb52a97d09b06fb8553c0b5eb618e5a4.jpeg


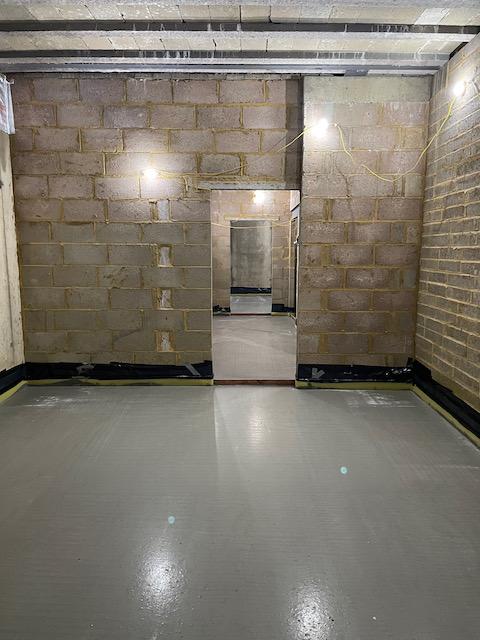
All in all very happy with the whole process and I will be getting these guys back in to do our ground floor screed.


thanks for reading.

Edited by Thorfun

  • Like 10

20 Comments


Recommended Comments

That looks excellent, and I bet transforms the place in terms of "progress". Are they coming back to remove any laitance from the top? 


(Also, your basement looks larger and taller than our vaulted main rooms! :D )

Link to comment
1 hour ago, SuperPav said:

That looks excellent, and I bet transforms the place in terms of "progress". Are they coming back to remove any laitance from the top? 


(Also, your basement looks larger and taller than our vaulted main rooms! :D )

it did make a big difference but that's it for progress in the basement now really. once the house is finished and we're moved in the basement will be worked on a bit at a time as funds allow but I wanted to get the basement to the stage it is now so that the plant room would be ready to accept equipment.


and, yes, the basement has tall ceilings (approx 3m). we didn't want it to feel like a cellar down there as there's not a lot of natural light and, in the grand scheme of things, digging down an extra 600mm to give the higher ceilings was not a lot extra so we thought it worth it.

Link to comment
5 hours ago, SuperPav said:

Are they coming back to remove any laitance from the top? 

forgot to mention that there is no laitance as it's a cement based liquid screed (Cemfloor)

  • Like 1
  • Thanks 1
Link to comment
4 minutes ago, Big Jimbo said:

Looks great. I expect you have moved on a fair bit since.

thanks. no progress in the basement except that one of the rooms is now a store room for stuff that doesn't fit in the existing house!


there's been progress above ground but I'll save that for another blog post. 😉 

  • Like 1
Link to comment

Great read, whats the logic of the temp probes in the slab? How will they be used and how do you decide how many to put in and where?

  • Thanks 1
Link to comment
43 minutes ago, Shaun McD said:

Great read, whats the logic of the temp probes in the slab? How will they be used and how do you decide how many to put in and where?

the logic was i was copying others on here! 😂


the temp probes will feed back to our home automation system to allow, if required, to monitor the temp of the screed and adjust flow temp/heating accordingly. tbh, i doubt i'll ever use them but for the small expense of purchasing them from ebay and putting them in while we did the UFH it was a bit of a no-brainer to have them just in case.


as to where and how many, i just put one per room.

Edited by Thorfun
Link to comment
17 minutes ago, Thorfun said:

the logic was i was copying others on here! 😂


the temp probes will feed back to our home automation system to allow, if required, to monitor the temp of the screed and adjust flow temp/heating accordingly. tbh, i doubt i'll ever use them but for the small expense of purchasing them from ebay and putting them in while we did the UFH it was a bit of a no-brainer to have them just in case.


as to where and how many, i just put one per room.


Interesting, I take it you will still have room sensors too? Do you have the zones valved to be able to turn them on/off based on the slab temp?

Link to comment
1 hour ago, Shaun McD said:


Interesting, I take it you will still have room sensors too? Do you have the zones valved to be able to turn them on/off based on the slab temp?

well, the Loxone light switches have built in temp sensors so I will also have room sensors. I'm treating the basement and, eventually, the gf ufh as a 'let's live in it and see how it goes' experiment. a lot of folk on here say that you only need a single zone for heating in a well insulated air tight house so that's how I'll run it for a year or so and see how it goes. if we find that we need individual control over certain rooms then I can add actuators that are controllable by Loxone to allow that.

Link to comment
59 minutes ago, Thorfun said:

well, the Loxone light switches have built in temp sensors so I will also have room sensors. I'm treating the basement and, eventually, the gf ufh as a 'let's live in it and see how it goes' experiment. a lot of folk on here say that you only need a single zone for heating in a well insulated air tight house so that's how I'll run it for a year or so and see how it goes. if we find that we need individual control over certain rooms then I can add actuators that are controllable by Loxone to allow that.


That seems like a solid approach, i will be going with a diy home automation setup through home assistant so will have room sensors also, but yeah slab sensors can be an additional data point and seem pretty economical. Likewise, I am a bit conflicted on zones as we have some north facing rooms which will get no solar gain, and other southern facing which will get loads of gain. I feel pretty stupid now thinking that I would need to have zones decided when we install ha, as long as we know which manifold loops go to which rooms then we can add one or many actuators at any time in the future and map them via home assistant to the room sensor! Keep it simple stupid ha!

I did have an open dilemma around buffer tank for UFH, which i think could be beneficial if we end up with zones, less so if we live with one open zone. Have you made a decision on that? 

Link to comment
22 minutes ago, Shaun McD said:

as long as we know which manifold loops go to which rooms then we can add one or many actuators at any time in the future and map them via home assistant to the room sensor!

this is my understanding but, as you'll find out if you read some of my other threads, i'm wrong quite often, especially when it comes to plumbing! 😂


23 minutes ago, Shaun McD said:

I did have an open dilemma around buffer tank for UFH, which i think could be beneficial if we end up with zones, less so if we live with one open zone. Have you made a decision on that? 

our M&E consultants specified a 12l buffer. when the heating engineers came to install it all i had a discussion with them about the buffer size as i thought it was small especially when reading about other buffer sizes on here. after our chat we decided that as they had a 100l buffer in the van going spare that they would install that as a straight swap for my 12l buffer as they had another job that required a small buffer so they weren't out of pocket at all. seemed like a bargain and win-win situation for me so i said go for it!


so that is how my decision on buffer tanks was made. not very scientific at all. hopefully it will all work out well in the end.

Link to comment
2 minutes ago, Thorfun said:

this is my understanding but, as you'll find out if you read some of my other threads, i'm wrong quite often, especially when it comes to plumbing! 😂


our M&E consultants specified a 12l buffer. when the heating engineers came to install it all i had a discussion with them about the buffer size as i thought it was small especially when reading about other buffer sizes on here. after our chat we decided that as they had a 100l buffer in the van going spare that they would install that as a straight swap for my 12l buffer as they had another job that required a small buffer so they weren't out of pocket at all. seemed like a bargain and win-win situation for me so i said go for it!


so that is how my decision on buffer tanks was made. not very scientific at all. hopefully it will all work out well in the end.


Yeah I would think this is a sound idea, any heat lost from the 100l buffer is ultimately still inside the envelope so its not like it is lost. Only consideration is the heat pump "ideal" volume of water size, which I have yet to try to figure out so. Either way, I am sure the buffer is valved, so in theory it could be cut out of the loop if needed, or have it paired with only specific zones etc.

Link to comment
Just now, Shaun McD said:


Yeah I would think this is a sound idea, any heat lost from the 100l buffer is ultimately still inside the envelope so its not like it is lost. Only consideration is the heat pump "ideal" volume of water size, which I have yet to try to figure out so. Either way, I am sure the buffer is valved, so in theory it could be cut out of the loop if needed, or have it paired with only specific zones etc.

maybe! i don't know. i'm working on the theory that it's better to have and not need than to not have and need. can you tell that we're winging it? 😉

Link to comment
11 minutes ago, Thorfun said:

maybe! i don't know. i'm working on the theory that it's better to have and not need than to not have and need. can you tell that we're winging it? 😉


Haha, Im guessing that like myself, you spoke to a few trade "professionals" and realized that winging it yourself may be more informed that some of the pros!

  • Like 2
Link to comment
57 minutes ago, Shaun McD said:


Haha, Im guessing that like myself, you spoke to a few trade "professionals" and realized that winging it yourself may be more informed that some of the pros!

and the very knowledgeable folk on here that give great advice or even another avenue of investigation. once you start on here you will soon realise the number of rabbit holes that you can fall in to trying to find information. but hopefully you come back out of the hole in a more informed position!

  • Like 1
Link to comment
2 minutes ago, Thorfun said:

and the very knowledgeable folk on here that give great advice or even another avenue of investigation. once you start on here you will soon realise the number of rabbit holes that you can fall in to trying to find information. but hopefully you come back out of the hole in a more informed position!


Fingers crossed!

Link to comment

Create an account or sign in to comment

You need to be a member in order to leave a comment

Create an account

Sign up for a new account in our community. It's easy!

Register a new account

Sign in

Already have an account? Sign in here.

Sign In Now
×
×
  • Create New...