Leaderboard
Popular Content
Showing content with the highest reputation on 04/18/21 in all areas
-
An important part of glazing is thermal comfort. Someone in the passive house movement (cult!?) figured 4 deg was the maximum difference between adjoining surfaces in a house for maintaining a scientifically calculated level of comfort. The attached image I found in a Smartwin doc suggests that for almost all of the UK double glazing is sufficient to achieve this. However, I challenge you to source a suitably high quality double glazing supplier that the price uplift to triple glazing isn't marginal.2 points
-
I think some companies make longer chrome tubes and matching brass innards for this situation. I'd wait until you can contact the maker on Monday. Edit: Fir example Perrin & Rowe make 19mm and 30mm extension sets for deep cavities. No idea if they fit Roper Rhodes though.2 points
-
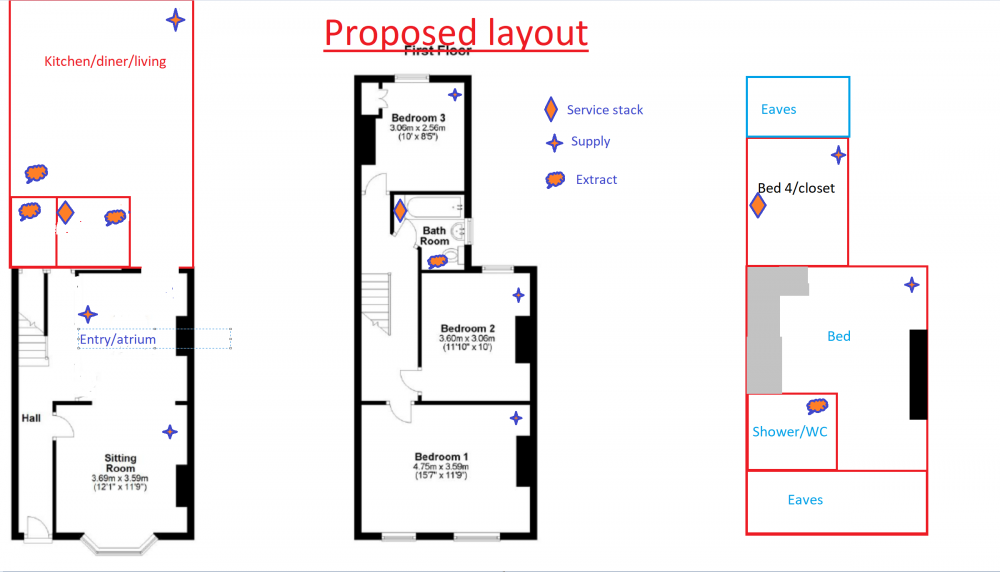
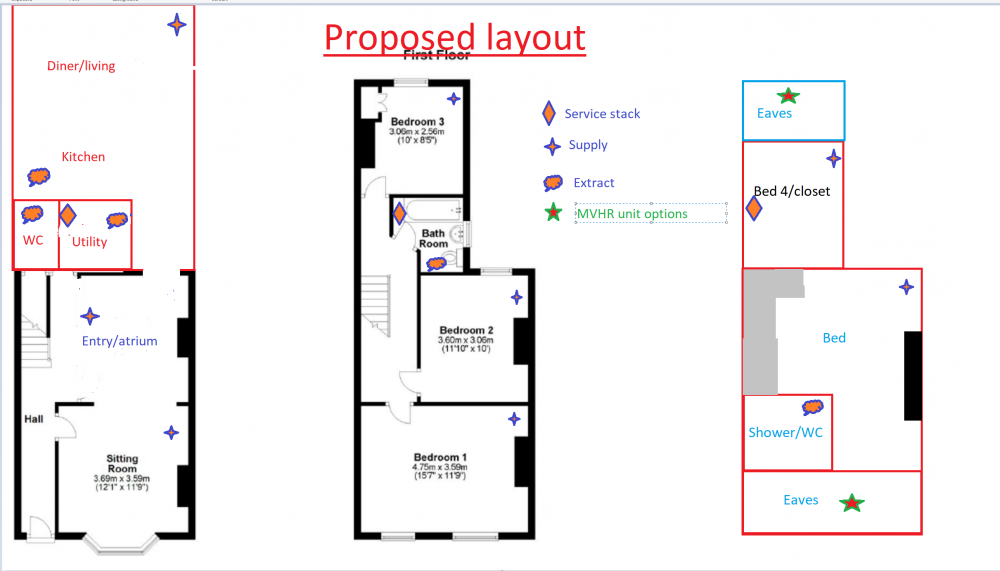
Hi all, This forum has been an amazing source of information as I plan our retrofit of a mid-terrace Victorian property. I'm not looking at MVHR. We are planning extensive renovation- substantial energy performance upgrade and ASHP alongside the decorative side. I highly doubt we would get any payback from MVHR, even given given my plan to buy cheap/second hand and DIY most of the install. The house has no mechanical ventilation as original including the bathroom and kitchen. The default, and budget) option would be wall or inline extractors. Trickle vents and PIV are other options I'm keeping in hand. The motivation is humidity regulation, meeting building regs including (rooms-within-rooms), and above all comfort. Despite original sash windows throughout, we still crack open the bedroom window overnight with a noticeable benefit to air quality. This problem will be worse post-renovation. I've attached the existing floor plan. We plan on wrapping around the kitchen so the rear will be warm and air tight. We plan on converting the loft to a dormer, possibly L shaped and the joist layout/type can be adapted to accommodate services. There will be eaves space which could house the MVHR above Bed 3 and in the eaves at the front next to the new master bedroom. The house will therefore be 4/5 bedrooms over 3 storeys with 1 kitchen, 1 cloakroom, 1 utility, and 2 bathrooms requiring extraction. About 160-170sqm in total. The chimney breast in the offshot is coming out. Those in the main portion joint to a single stack in the roof void. I have a few key questions which I hope someone can help with based on my planned installation of a radial ducted system: Is there any reason not to run semi-rigid radial ducts through the chimney stack in the main house? None of the fireplaces are in use. The chimney is currently uncapped but I would like to cap it and effectively turn it into a warm space to reduce heat loss and avoid condensation problems. I could run ducts through the loft floor, punch through the chimney breast, and drop down to the 4 rooms below. I can create a sizeable void next to the bathroom which lines up with the utility, creating a centralised. service stack Are there any decorative supply valves? I'm considering mounting the supply in the chimney breast but the round ducts would not ideal there or in the roof. Square plaster vents (as in the attached image) would fit better aesthetically, perhaps with balancing valves at the MVHR unit end? Would the entry/atrium be better as an extract to improve air flow through the other rooms such as the sitting room? Any thoughts on the alternatives for MVHR unit placement? I'm tending towards the eaves next to Bed 4 for noise reasons. This has access to the rear wall and roof for extract/supply. The eaves at the front would require supply/extract through the slate roof (which we are re-roofing regardless) I presume it makes sense to bring the eavches within the thermal envelope regardless- whether for MVHR or storage? Many thanks in advance.1 point
-
it's been a bit quiet on our blog so I thought I should update it. While we've been waiting for the groundworks to start we've been busy getting the site ready. This has included getting the new entrance to the plot created, getting the sub-base for the driveway in place and then topping it off with a layer of 6F5 as a hardstanding for the construction vehicles (after the build I can then remove the top layer to reveal the, hopefully, still in good condition sub-base to put the final layer on top of. well that's the plan at least!) and putting up the site toilet. Obviously the last job was the most important. Our new entrance to the plot is over a culvert and as it's connecting to an adopted road it had to be done by an insured contractor and so I had to fork out the cash to get it done. but they did a very good job and we're very happy with it. the culvert in situ with enough concrete on top to take the lorries and cranes for the build a nice base layer of tarmac finished, which will see us through the build when they will come back and put a nicely finished top layer on. nice sand-bagging. ? once, they'd finished the entrance we moved on to the driveway and hardstanding but, first, an observation....it's funny how things don't look as big on paper as they do in real life. that's exactly the conclusion I came to after I looked at the plans and thought "that driveway isn't that big I'll just dig it out myself and save myself a fair chunk of cash" and then went on to dig it out. it was only after I'd finished the 120m2 area did I realise how big the driveway is going to be (I swear it doesn't look that big on paper!). oh well, it's done now, at least we'll have plenty of parking. maybe I can rent it out and do a 'Park and Ride' in to the local town to recoup some of the costs. ? a big hole dug and covered in Terram (or an equivalent to be exact) 100 tonnes of beautiful primary Type-3 granite aggregate all compacted by that beast of a roller. Don't really care what everyone else thinks but I think I did a darn good job for my first driveway sub-base. Sadly it all got covered by another layer of Terram and then a load of 6F5 got dumped on top and it now looks like a building site hardstanding area (which is what it is!). here's a photo of the lovely lady of the house helping out on the roller. it was a bit cold out that day. And finally we get to the most important job, the building of the site toilet. Friends of ours got it from a local freebie site and used it for their self-build, we then dismantled it, transported it to our site, erected it, put a new roof on it and plumbed in the toilet and sink to our existing STP. we think it's a very luxurious WC for site use. it's even got a couple of windows so you can watch the work progress while you're doing your business. and that's it for this blog post. we are extremely excited as tomorrow is the day we've been waiting for and the groundworks starts in earnest. They'll be on site to set up and start digging out the big hole for the basement as the basement contractors are due to start on the 3rd May so we should start to see some real progress now! finally!! thanks for reading. ?1 point
-
Nope but make sure the ducting is well insulated and tilts down toward the wall inlets as they will draw in condensation on boost.1 point
-
1 point
-
1 point
-
PS I have four angle grinders, so I don’t have to keep swopping discs, couple of the grinders were very cheap, and it saves so much hassle. Be careful with them, wear safety specs and keep guard on, I have opened up my leg with a metal cutting disc as it got nipped and kicked back, I have used angle grinders for many years so it can happen to even the experienced.1 point
-
Use 1mm discs for steel - a 5 pack will cost about £6 from Screwfix As Roys says, keep that stone disc for stone finishing etc - get a diamond disc for brick / concrete. Almost any disc will cut plastic pipe fine.1 point
-
Thanks for all the input; I'll try Clancy D directly, it looks like they do works for Southern Water - I won't be too optimistic about getting a good answer. £10k for 100m of 11kw doesn't sound so bad, and nor does £8k for 110m; I'd estimated maybe £15-20k for the Electrical rerouting so it doesn't sound like i'm far off. For a borehole it's not so much the surface water is that the issue - the houses each side have septic tanks/cess pits and looking at the age of the properties I'm guessing they haven't been replaced any time recently; based on that, I don't think I can get 50m away from all of those and site a treatment plant of my own. Substrate is chalk so from what I've read if there is water it will be pretty deep. Perhaps it's a last resort if I can get someone to look at it without having to spend too much $$ prior to buying the land. Water to the mains is still preferred; as you've said it would make sense to put in a fatter pipe. I'm going to speak with the vendor and check they own the field either side, as it may be an agreement to be made to put our own pipe in. I walked the road today and while the verge is nice and wide the power poles alternate so I'm guessing some might be in the way; if we could put it on the field side of the hedge we could get an easier trench. Last point on drainage - I don't know for sure it will work, I'm being a dufus and assuming based on the neighbouring houses having private drainage and the planning permission having a biorock treatment system on it; I'm not convinced there has been a drainage study but I don't have all the documentation yet.. I'll try water and power companies again this week, speak with the vendor about access/trenches and also try Clancy D.1 point
-
I use four main types of discs. Thin discs with metal written on them for cutting metal. Fat discs with metal write on them for grinding metal. Diamond disc for cutting stone brick etc, zipped through a couple bits of plastic with it but not as a rule. Fat discs with stone marked on them (as in your pic I think) mostly for finishing edges on stone brick slate etc. For plastic pipe I tend to put in my chop saw, or I hacksaw or I use the plastic pipe shears.1 point
-
Most topo surveys for a single site we have are around 600 quid, we usually get a couple of quotes and they're never significantly different - definitely not 180 quid vs 600! They can be extremely useful if you're getting quotes for groundworks, drainage and foundations as you've got quantifiable information to reduce the assumptions contractors are making. Can also help with details of trees/walls/fences, setting out, ridge heights for planning etc. We'd always recommend that clients get one, for 600 quid in the grand scheme of things you could save that on the groundworks package with more accurate information! I have done a number of sites without them and it just means you have more unknowns to account for, but I have had planning insisting that ridge heights are set in relation to ordnance survey datum and also had roads insist that an access drawing is done with precise levels1 point
-
They are really handy if there are neighbouring buildings and you need an elevation in context. Also for drain inverts, cover levels and setting out points. 180 sounds very cheap1 point
-
1 point
-
1 point
-
'Kin lucky you can't solder and hadn't done it all in copper. Job for the pros that... ?1 point
-
Theyre economical and do a job. If my nan has had 30 years usage I'd say that's good enough for a lot of people. They recycle the old plastic frames now don't they? Bit like mvhr here, people spend big then will convince themselves it's justified. I know the good Windows are better, but not everything always needs to be the best of the best.1 point
-
A lot of the time you won't know whether DIY things are damaged till you unwrap. It's decent stuff but I would say the clue is in the name. Trying to do ordinate with pro fitter on timescale is asking for trouble1 point
-
1 point
-
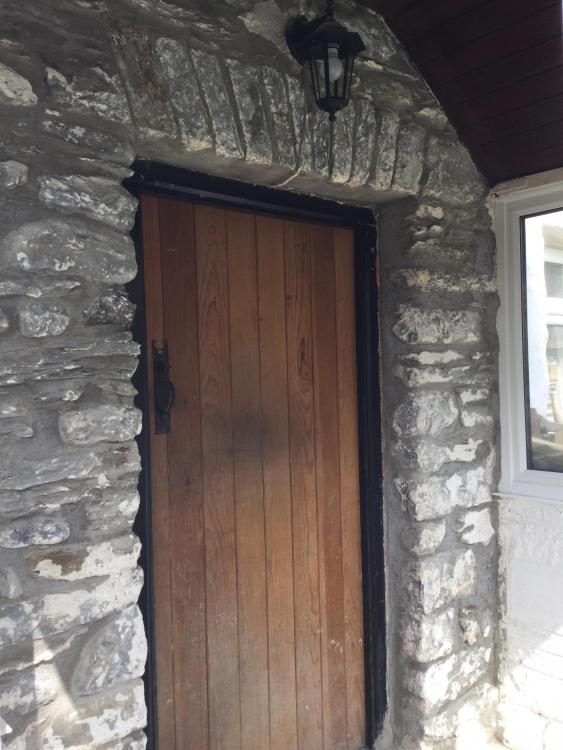
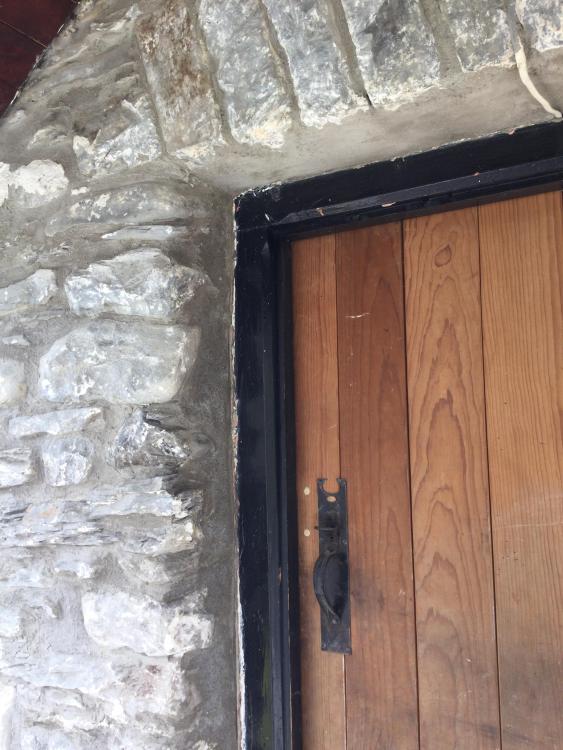
Job done. I had to wing the reveals, sort of done a render.. with mortar. Whether wrong i dont know, but it'll have to do. I couldn't understand how lime could provide 'cementing' aspects (i think cement is a verb) so how correct for me, for this job which involved alot of shoring up (stone at the reveal areas) as much as pointing, I couldn't really understand. So if its wrong I dont know, but its definitely better than it was & looks are ok. Getting the white off the stone tho, for a ' natural' look.. is a no go. Its 20 mins each stone all effort fkn exhausting & will still not fully remove. So i have no option but paint over. So may as well have been mortar not lime then i think (plus, mortar surely is far stronger). Thank god done! Thanks for help chaps. Zh1 point
-
Benchmarx are 18mm see here: Kitchen cabinets | Benchmarx Kitchens & Joinery DIY KitchenS have 8mm cabinet backs, Benchmarx have 12mm Benchmarx also now do a dark carbon coloured cabinet - (not yet showing on website) We have just had a very competitive quote from Benchmarx, I have compared Howdens, Wickes and Benchmarx and a local manufacturer (factory is at the rear of the showroom) like for like and for me Benchmarx is winning.1 point
-
+1 from me for air:air heat pump / air conditioner for an insulated outbuilding. Remember the condensate drain. Thinking out loud on build: I don't like the idea of trying to air-seal PIR foam to studs/joists using foil tape. It sounds like a monumental faff cutting and fitting and taping all that compared with using a dedicated air tightness/vapour retarder membrane on the inside then stuffing flexible insulation between the studs/joists. If you swap from block to timber frame then you've got 100+ mm extra depth available and won't need the high insulation values of the PIR. You probably want 195 mm joists for the roof for structural reasons so again don't need the high insulation values of the PIR. Walls Maybe don't build in blocks (slow, messy) then add a token amount of insulation externally. (and add a finish on top of that) Try: Inside: double plasterboard then horizontal battens to make 70 mm service cavity (lets you run cables, pipes inc waste pipes and A/C pipes, 205 x 60 mm ventilation ducts etc), mineral wool infill then an airtightness layer/vapour retarder membrane. (add extra horizontal battens where you want to attach really serious loads) Structure: 145x45 mm studs on 600 centres. 150 mm mineral wool infill. Outside: wind barrier membrane, vertical battens attached to studs, horizontal cladding The plasterboard provides your shear strength in this arrangement. Swap the airtightness layer/vapour retarder membrane for taped OSB if you need more shear strength. Or put an extra sheet of OSB behind single plasterboard to give shear strength and let you screw anything to any wall anywhere but note that this won't be an airtightness/vapour retarder due to all the socket holes etc. I'll be way faster, quite a bit warmer, and probably cheaper than building in block. A single storey frame that size goes up over a weekend with two blokes who know what they're doing. And when you realise that the bog drain is in the wrong place you've got enough room to sneak a bog pipe down through your wall at the expense of a little insulation. Sink drains run in the 70 mm service cavity. Roof If you do what you describe with the 6x2s, PIR, and plywood then your plywood is never going to dry. Why? Putting a sheet of plastic (air/vapour barrier) on top of grass gives you...moisture under the plastic from the moisture generating activities underneath. Do the same with your roof (EDPM or felt air/vapour barrier)...and it will rot. Your flat roof needs to be: - waterproof layer (EPDM better than felt) - support layer (OSB is fine) - VENTILATION gap - Insulated roof structure - Airtightness / vapour retarder It's fine to have an unventilated flat roof on a shed...because the entire shed is ventilated. It doesn't work for habitable buildings. For long life you probably want more like: - waterproof layer - 12 mm OSB (this is enough; go thicker if you'd like to spend more) - spacers (use 20x50 mm battens if you are creating the "fall" in the structure of the roof; use something fatter cut to an angle if you are laying the structure of the roof flat) - 195 mm C24 roof joists on 600 centres to span the full 4 metre width and avoid any beams inside (see span tables e.g. https://www.timberbeamcalculator.co.uk/span-table/flat-roof-joists?load=1&class=C16) - mineral wool between these - airtightness layer/vapour retarder (without holes through it) - plasterboard To save on height run all your cables and ventilation at high level in the walls, rather than in the ceiling. (anything that "crosses" joists should be run in the walls) Where they must go in the ceiling put them between the joists so that the plasterboard "pushes up" the membrane and the insulation slightly - fine for cables for lighting or alarms etc; don't try it for deep downlighters; and don't fit downlighters anyway wall washers will give you a nicer light) Alternative? Going for a shallower roof means a bigger fall (and letting it bend a lot) and/or internal structure (to support the shallower joists at midpoint). If you could tolerate a post where your "shelf wall" is, and making the partition wall between bathroom and gym structural, then you could have a "ridge beam" running from left to right and a very shallow dual-pitch roof with joists that are only 2 metre span. Then you're into C24 45x95s on 400 centres (or 600 centres if ok with it being bendy) rather than 45x195s. You could go with structural panels at that point; as they easily span 3 metres but are dubious at 4 metres unless you go for particularly fat ones. https://www.kingspan.com/gb/en-gb/products/insulated-panel-systems/insulated-wall-panels https://www.griffithsandson.co.uk/kingspan-insulated-seconds/66 They're fugly but if used in single pieces (no joints on the slope) you can go for a near flat roof that will outlast felt/EPDM, has U-value of between 0.15 and 0.5 (depending on which thickness you buy), and includes all the structure/airtightness that you need as part of the panel. Hide three sides from view by continuing your wall cladding up above the roofline. Either have the 4th side drain into a gutter on the non visible side or if you're braver build an EPDM box gutter on top of that 4th wall and again bring the wall cladding up to hide it. Sturctural Single sole plate and header plate on the walls. Line up your roof joists with the wall studs on 600 centres. Careful on BIG openings. You will need a structural header above the big door to carry the roof joists. Maybe 2x 195x45s in C24 - use something like this to check https://www.timberbeamcalculator.co.uk/) Push this to the TOP of the wall so that all the load is carried at high level by two pieces like this ||. Then have another piece of 145x45 mounted like this _ above your big door but don't put any vertical sticks between this and the roof. Why? These pieces || provide the roof strength. They will bend as the roof is loaded up. This piece _ provides the in/out strength for the door but has all the structure of we spaghetti in the vertical direction. By separating the loads you will avoid jamming the door or busting a window under a large opening in the timber frame. The other option is making a "solid" wall (with vertical sticks between your header and the the top of the window opening) then putting the window OUTSIDE the timber frame on an OSB or ply box. This way the wall can move under load, and the OSB/ply box will bend so that the window can stay the same size even as the size of the hole in the wall changes) (most fixed windows have 5; maybe 10 mm of movement between glass and frame before you run out of room and start loading up (breaking) the glass; most moving windows/doors can only allow 5 mm of outside frame movement before they stop opening/closing/sealing correctly; big timber frame openings will move more under load than you might expect; and not all window/door people that are used to selling to brick and steel constructions will give you the right mounting details for a timber frame) Floor If you have a raft already then gluing some foam and structure on top as nick suggests makes sense. If you're using an engineered wood finish (basically tongue and groove plywood with some veneer on top) and you glue this to 22 mm OSB (rather than gluing it to itself and floating it) then you have the equivalent of a 40 mm kitchen worktop to walk on. It won't move and saves the extra 22 mm OSB. Your bathroom might dictate otherwise. Are you going to have a drain in the floor there that you can hose down all the mud / sweat / human fur into? Does the steam shower need to drain into the floor rather than the wall?1 point
-
TL;DR But two things struck me, apart from the bollocks about fallen timber bring better burnt than add to the carbon store in the ground (wrongly called rotting). People tend to close curtains at night, so that can help energy losses. The big one though us that we need to reduce continuous energy usage, not only to save money, but to make implementing renewables easier and cheaper. The less we have to generate, the less we need to build. So decent windows, decent fitting curtains and leave trees to do what they do best.1 point
-
HepVO and cut a swept tee into the upright of the waste pipe, ideally with an elbow so the HepVO is running vertical.1 point
-
thats a standard measurement. You use spacers to get the correct gaps plus it allows rooms to be out of square. Also, the depth of a corner isn’t a multiple of 100mm so you need the adjustment1 point
-
I had to do a complete module on it as part of my BSc. And I was not studying building. Basic physics works every time, you can't fool nature.1 point
-
I use Lamtek for carcuses, any size and style then buy doors to fit , gets a away from multiples of 100mm for best use of space1 point
-
I fitted a German kitchen (Nolte ) Far cheaper than Magnet Wickes and similar price to Howdens German lookalike1 point
-
But even those you can get wrong if you use the standard fittings that mount on a plate inside the wall. Better to use the fittings that go on over the pipe from the outside and then you cut the pipe to length.1 point
-
I like Howdens, because they have a branch close to me and if there is anything wrong that needs changing even if not in stock they can usually get it quickly. Contrast that with the last kitchen I was involved in (I only did the electrics not the fitting) the customer had ordered it all from a big orange DIY store and it had all been delivered. When the inevitable happened and parts did not fit and the design was wrong, you could not just pop to the local branch and pick them up, everything had to be ordered with a corresponding time lag, resulted in a very unhappy fitter who could not finish the job and had to keep coming back when the parts arrived.1 point
-
1 point
-
Shouldn’t be cheap screws ( but could be ) I always buy Spax . Already thought to undo screws by hand - didn’t want to risk burring them . Once I can access all 4 - will unscrew them about 10mm or so - should be able to judge it better then .1 point
-
Quick answer to that is to book the fitter for 2 weeks after the delivery date. It is what they advise, as do Howdens, Wickes etc to cope with that very issue. No issue with MFC - the issue is BenchMark are bottom of the range and the cabinets are only 15mm. DIY - and other decent ones - are 18mm. You need an account to buy from Howdens at anything like standard pricing - and also wait for the March/November sales.1 point
-
That looks like it will come forward but I would carefully slack those screws off with an ordinary driver and not an impact as it looks like you used cheap crap screws and the heads will chew up if they aren’t done slowly. Also - you need to make sure you find a decent level and find how you can set that veritical (or aligned with the tiles ....) as a rectangular plate will show. You may want to just put one screw back in tight over the @Nickfromwales Space-O-Matic ply spacer (good idea to also drill a hole through the spacer so you don’t have it jacking up off the timber) and then put the shrouds and cover on to square it up. Then tighten up the mounting screws.1 point
-
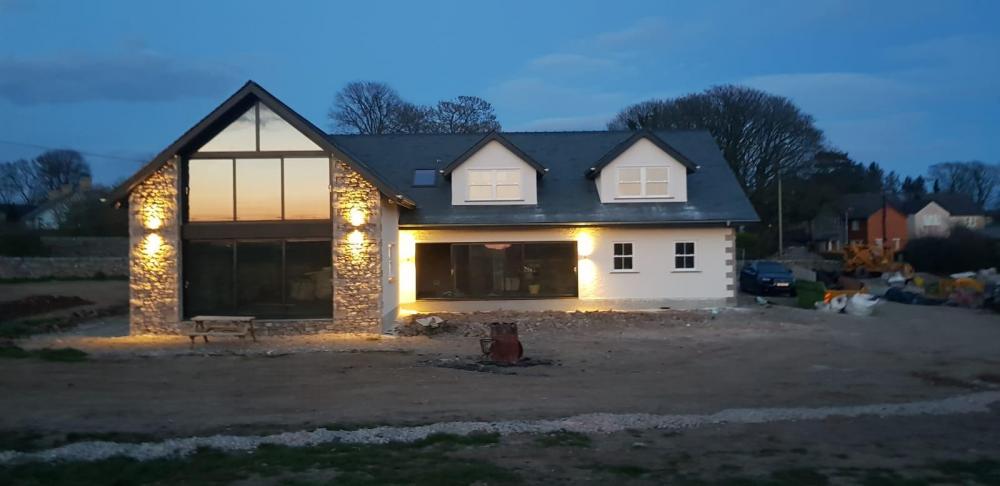
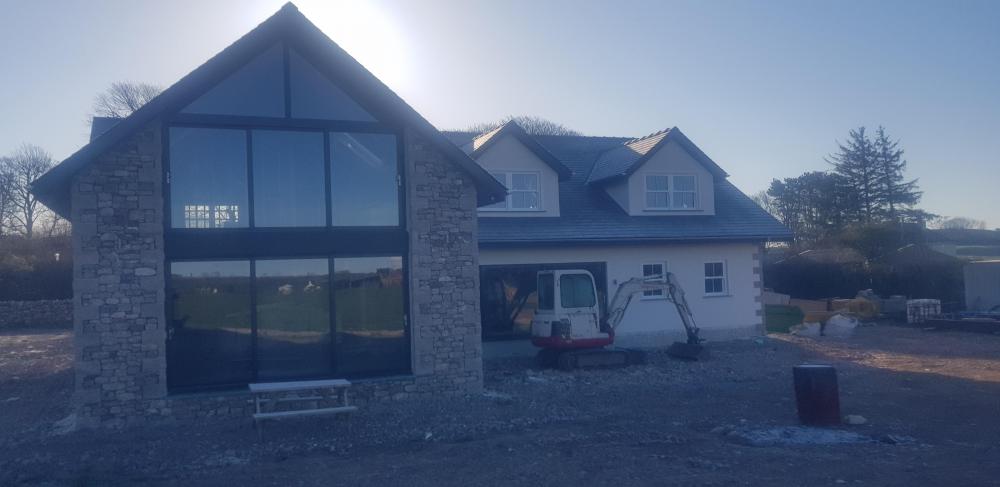
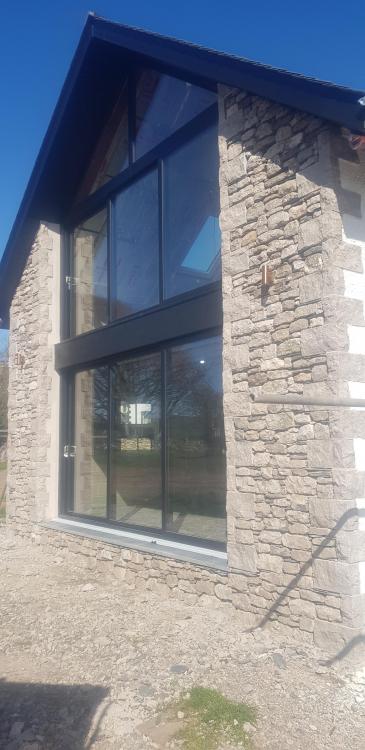
That's a hell of a lot of glazing on the NW facing rear elevation. Not sure how often you'll enjoy opening those massive GF patio doors in the UK climate.1 point
-
I think you need to look at the kitchen overall and design out such gaps1 point
-
Also still awake. Google suggest the extension kits are sometimes called "Deep rough in kits" or "deep rough extension" or similar. Example: https://www.nyrpcorp.com/bathroom-kitchen-shower-faucet-parts/shower-roughs/deep-rough-kits/ When we had a problem with our mixer the chrome part was ok but the brass spline was the wrong length. I ended up cutting and resoldering it.1 point
-
1 point
-
Me neither. Having a malfunctioning brain is a pita. Hey-ho. All you need is 4 small squares of 9mm or 12mm plywood, say 30mm square, turn a 4" screw into the corner of them ( like a bit of cheese on a cocktail stick ) and then use the 4" screw to allow you to insert the square and rotate it behind the fixing hole. Send the shower fixing screw back all the way through the shower and the plywood spacer and tighten up to the pinch pint, then relax it back off a bit. Repeat, and then let me know so I can get some shut-eye. Patience, so you don't fcuk the tiles up, would be best, so do it when you're sober and sane.1 point
-
1 point
-
Doesn’t need to be strong if it’s only a spacer as it’s in compression. I would mark round the face plate, draw 20mm in and then cut the tile away and pull the valve forward. Mucking about with those little cuts you’re more likely to crack the tile.1 point
-
1 point
-
Heat loss through frames is often greater than through the glass. Manufacturers who make triple-glazed windows probably care more about frames than those that only make double-glazed ones. Buy good frames.1 point
-
@JanetE Sorry, yes a patio brush - long handled and the wire brush has a tapered edge for getting between blocks.1 point
-
1 point
-
1 point
-
1 point
-
Unless this is a planning condition that you cannot alter it is worth avoiding timber frame with timber clad as it will lower the value, may put off future purchasers and insurance and finance will be difficult.1 point
-
0 points
-
Cup brush in a 115mm angle grinder would get that paint off I reckon. Googles, mask, gloves a must and a handle on the angle grinder. One stone at a time. Could look superb. You never know, you might meet a 21 year old nympho into oddballs who owns her own sandblasting company! ?0 points


