Leaderboard
Popular Content
Showing content with the highest reputation on 01/17/21 in all areas
-
You could look at it another way. And some evidence it actually works? Think about it. A man will drill some holes in you wall and inject "something". This something needs to permeate through the bricks and mortar to such an extent that they form a barrier impervioius to water. Its simply not credible. Get a brick drop it in a bucket of water for a week, then cut it in half. I bet you its dry in the middle. Thats a week in water. But a bloke with a mastic gun is going to squirt something into you brick to make it completely waterproof in a few hours. Doesnt look like the damp comes up far enough to be a problem?3 points
-
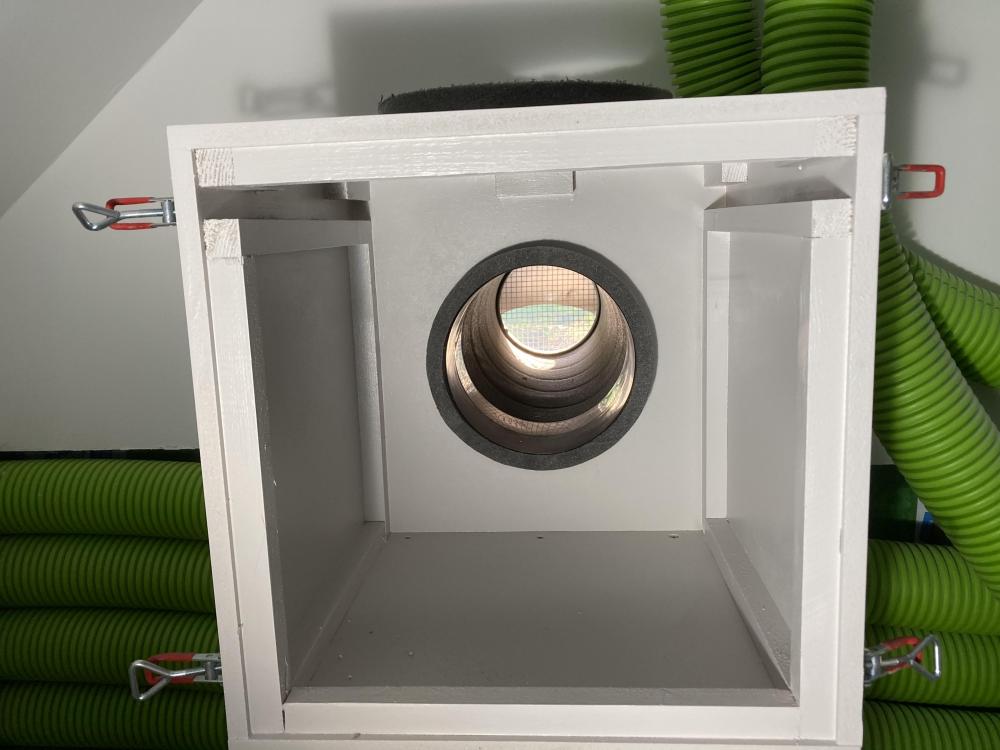
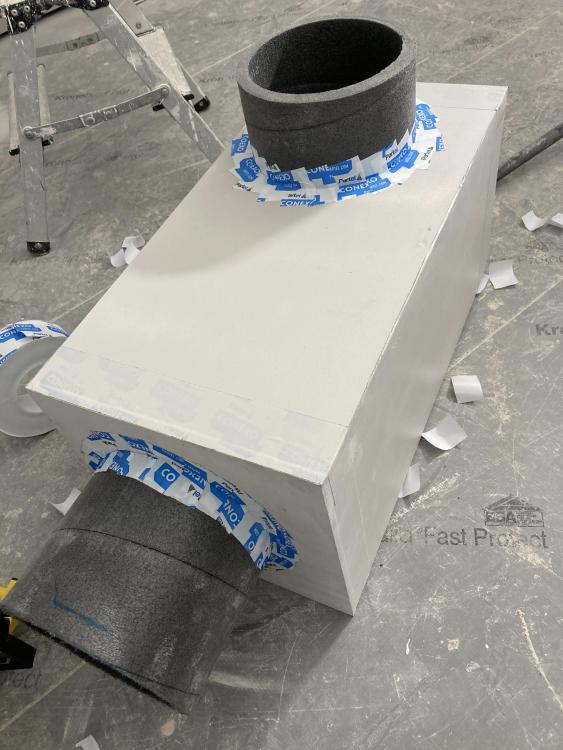
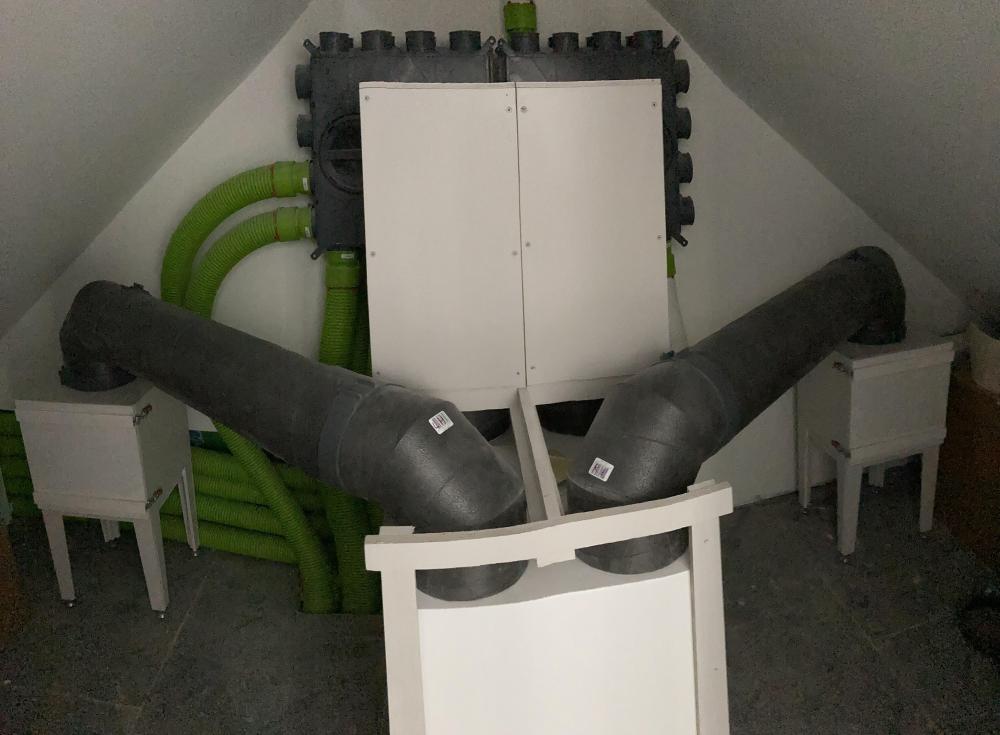
Finally the MVHR with added bits is properly fitted and the loft space in which it resides is taped and painted. The spiders are already on the advance through the grills on the intake and exhaust vents so hopefully my MVHR pre filter will keep them out of the MVHR itself. The pre filters are airtight so should be spider proof as well. The home made attenuators are easy to remove, which I’ll need to do to fit the restrictor rings to the manifolds and I haven’t airtight taped the fronts on yet. Not sure if I need to? The boxes are lined with acoustic foam, would that be airtight enough I wonder, and how would I know if it wasn’t? Just need some electricity to see if it all works as I hope ??3 points
-
This would have been a more convincing attempt at trolling if you'd toned it down a bit.3 points
-
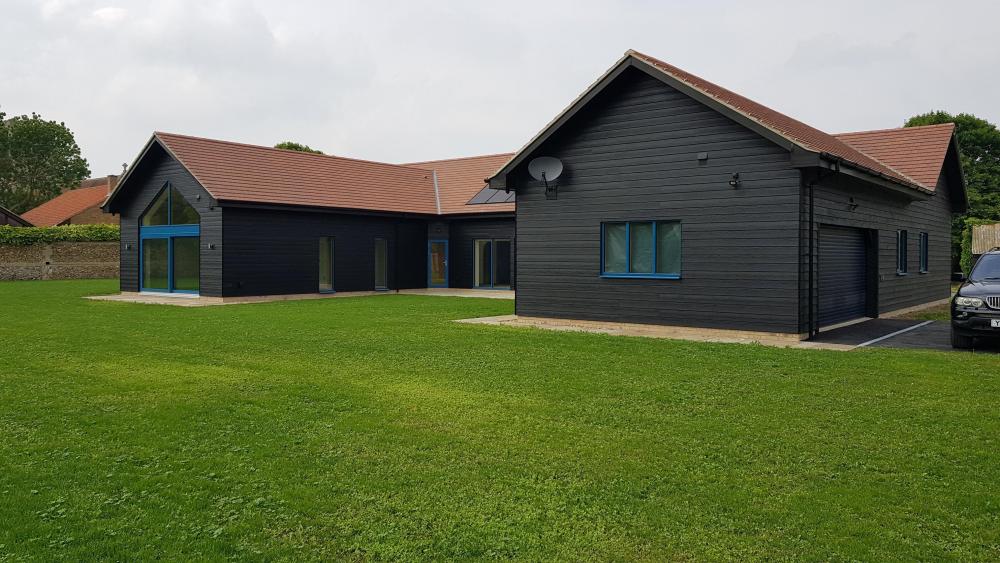
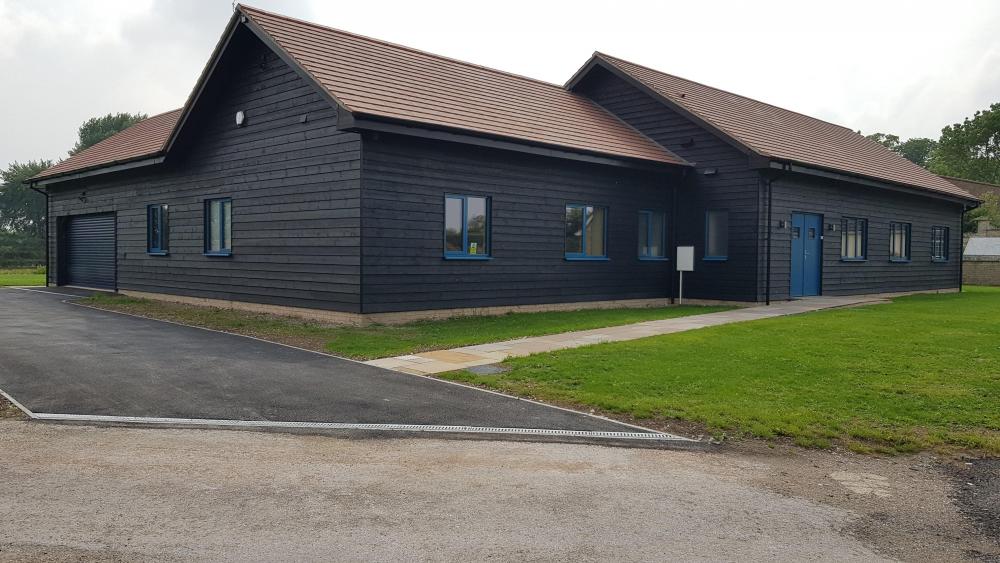
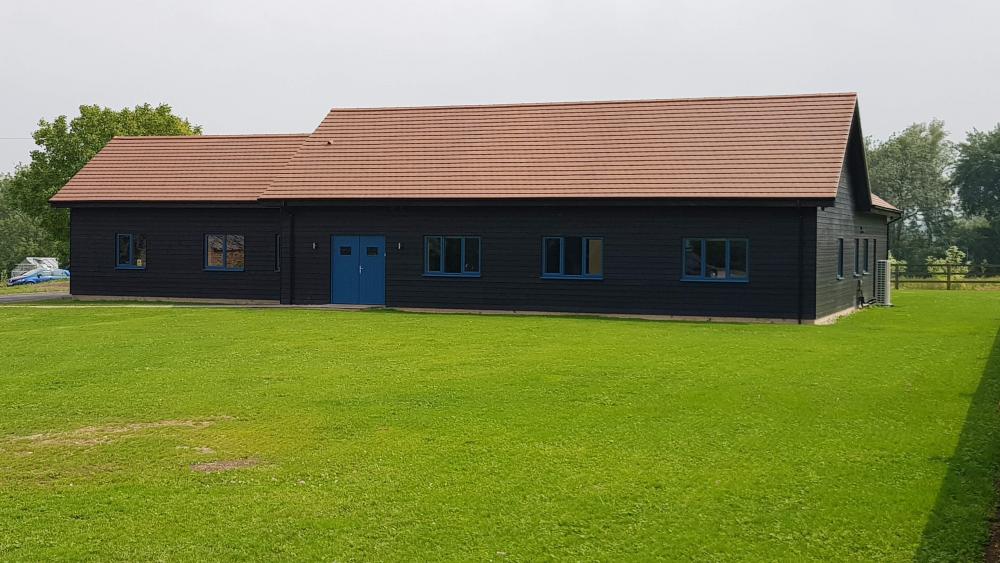
Hi, Just finished and moved into my self build project. A 323msq single storey barn style dwelling built to passive levels. After a 5 year plus planning battle due to it being in a small village (hence outside of development zone) and in a conservation area, we finally achieved permission back in October 2018. Kicked off with my chosen frame supplier backing out due to financial woes but we eventually got underway in May 2019 and were just a couple of weeks away from completion at the start of 1st lock down. But that's life. Finally moved in after selling the old house in September last year. Now trying to fine tune all the systems, MVHR, ASHP, 14 zone UFH, etc etc. This is how I've come across this forum and hope that I can find out if anyone has come across the problem I am tackling with Neostat V2. I'll post this under another title so it gains more accurate placing in the forums.3 points
-
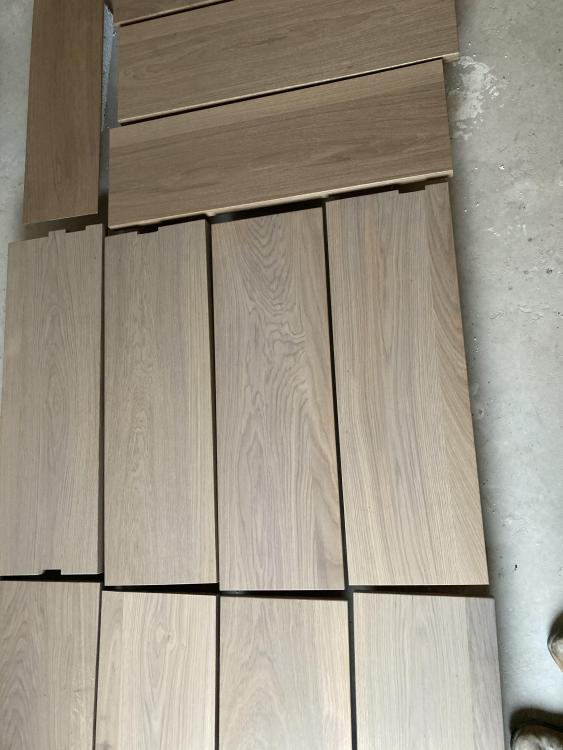
Just thought I’d share my OSMO experience so far. Our stairs treads are made out of oak/engineered oak and to try and keep them lightish and greyish and stop them going orangeish I’ve used OSMO’s Polyx Oil - light grey. It’s a bit nerve wracking, the product in the tin is most definitely grey, it looks like a grey primer paint. I had numerous trial runs on off cuts of oak before I had the balls to go for it on the treads themselves but I’ve achieved the look I’m after. Time will tell if it keeps the orange at bay. In the picture below the horizontally aligned treads have had one coat and the vertical treads the maximum of two coats.2 points
-
Bring back the Poll Tax/Tax per person?2 points
-
0.31 ACH 50 with sand cement plaster here. On my preliminary testing with my DIY fan all the leaks were around the windows, doors, wall to ceiling junction, and back boxes where the electric drilled. These were quickly fixed with airtight sealant and tape.2 points
-
Neither would I. And I have one. Jezza, ( @Jeremy Harris ) of blessed memory on this forum built a little out-house for his. Kind of puts 'smallest-room-in-the-house' into perspective. What's near mean? Noise travels on the wind. Downwind, ours is silent. Upwind we can hear it if we listen hard.2 points
-
2 points
-
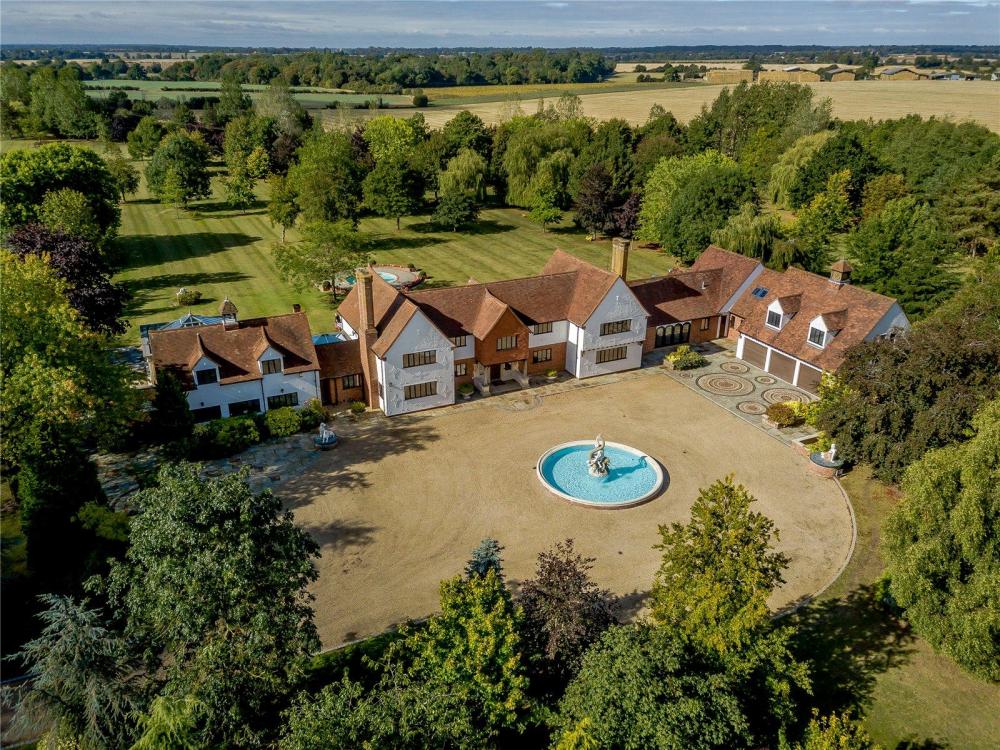
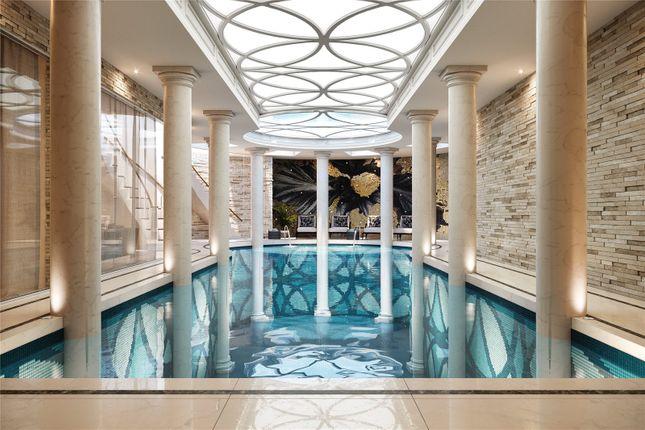
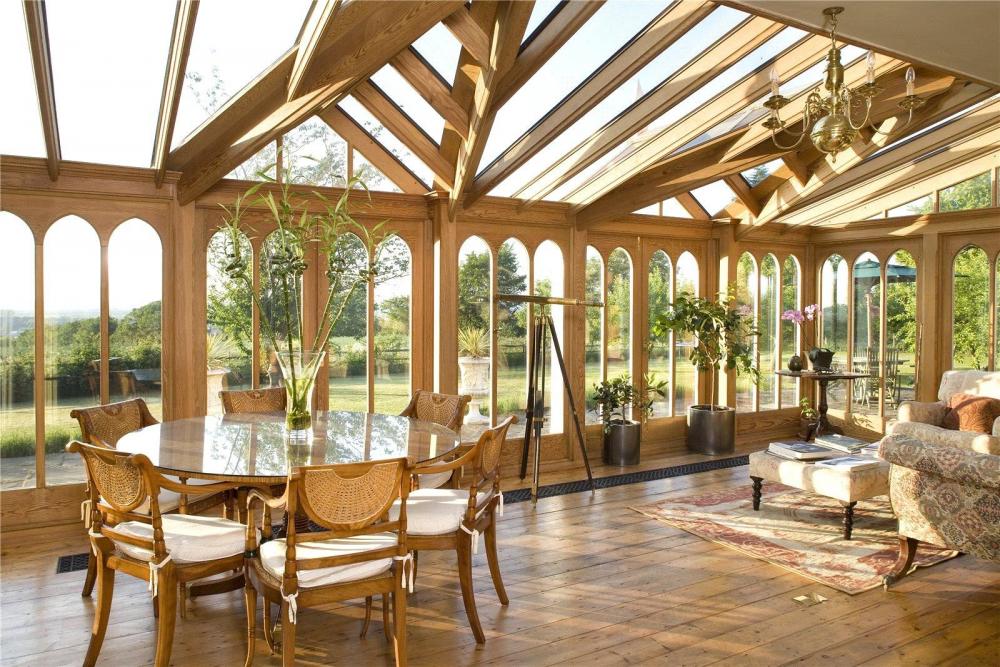
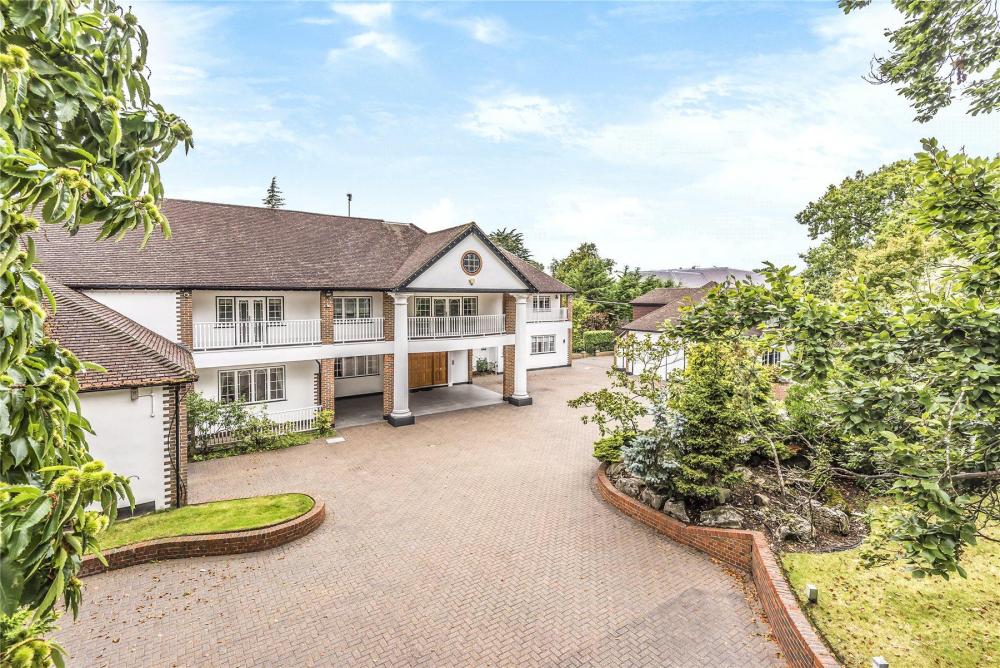
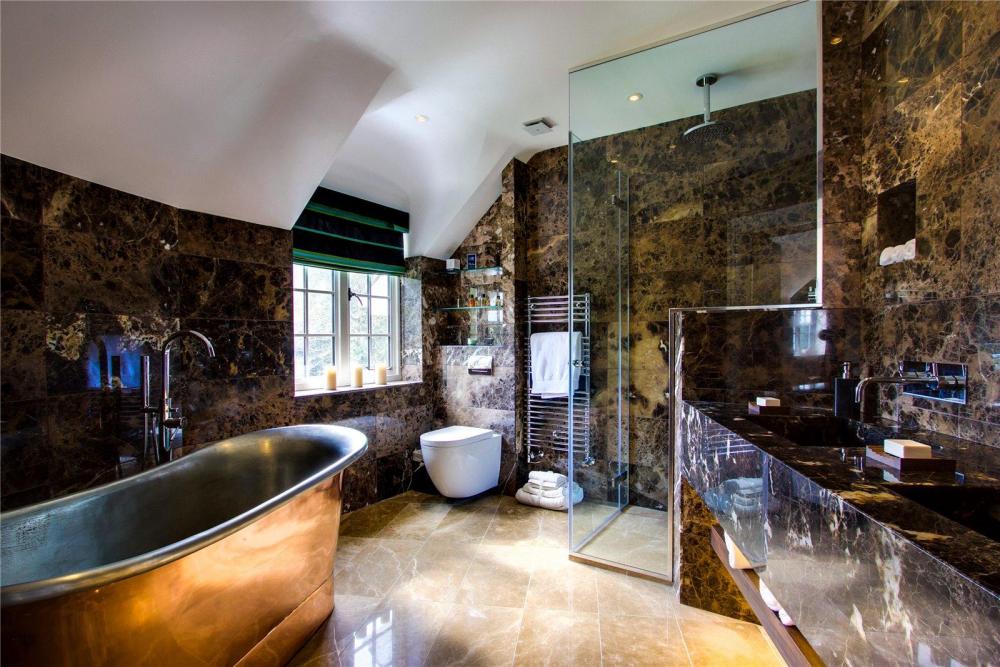
Hope everyone is doing well!! So, currently at 20 years of age, I've got a quite a few big ambitions in life. One of which is commencing a self-build project. I wanted some advice on what to expect, time length, the feasibility costs and if my plan would work. My project is quite large so any advice in any area would be much appreciated! I've attached a few pictures which would give a general idea of the type of "house" I'd like to build. After much in-depth research, a land with size between 6 -10 acres would be quite suitable. Current requirements: 1) 1/4 Mile driveway 2) 7 Bedrooms, 5 Bathrooms 3) 2 receptions 4) Library 5) 2 office rooms 6) Indoor Swimming pool/ Sauna etc. 7) Underground + Outdoor garage 8) Polo arena 9) 2 Acres Fishery Cost of project Land in Surrey/Berkshire/West Sussex : 7 acres approx. £250k - £450k Cost of House £650k - £800k? We do have a close friend who is an excellent property developer from scratch. Materials £120k? Swimming pool £100k? Foundations would have been laid before constructing house so would be cheaper? Landscaping £30k Per Acre of fishery £30k (x2) = £60k Underground garage £100k Driveway £20k Bathroom, Kitchen, and all fixtures £60k All legal work £10k Architect £15k Misc £100k Total: £1.5m - 1.9m??? For the pictures provided, it looks awfully cheap (relative move from London aha) Do let me know me if I've missed out anything else. About me: Finishing university, hopefully with a prospective career in fund management. I have also started a side business currently pitching for seed funding. Funding: Age 26 Estimated Annual income: Career (£130k - £200k in a Tier 1 Bank) + Business (£60 - £80k) = £170k - £280k + 97% Probability of my relationship evolving to marriage, her income would be between. = £65 - £100k Deposit: £700k [(Selling the family home (Adjusted for inflation) + from all savings)] House income: I do play a fair bit of Polo so I have a general idea of how to take care. I have seen a few homes for sale with fishery included where revenue is approx. £150k and yearly costs of £50k. These projected net incomes are of course, another 2-5 years after build. Polo arena - Conservative Net profit around £30k 2 Acres Fishery - Conservative net profit around £40k I really do appreciate any help!1 point
-
Thanks @PeterW. I’ve just emailed my photo to heritage house and asked if they could attend to do an urgent survey. They have an office in London, so fingers crossed they can.1 point
-
1 point
-
Can’t get what deep enough? the block of poly ? cut it. 200mm poly under reinforcement 40mm on top. Fill it with concrete dig out poly and your left with a big void work out tray location and trap, cut out mesh that is in the way fit trap to the 110mm pipe with a bit of 50mm between the two1 point
-
Shutter out for the whole tray area if not sure and concrete it separately once decisions have been made.. far easier than digging out concrete. +1 for the upstands.1 point
-
If you have your eye on a certain tray there may be some dimensions with it and some fitting instructions, but personally wouldn't fit anything without having tray to put in place. Regards James1 point
-
1 point
-
No you wrap the metal boxes then hand them over to the electrician to fit as normal it then only leaves the cable entry hole and 2 fixing holes.1 point
-
I think it is best to just monitor it day by day now that you have made changes. When I go through this kind of exercise I try and take a reading at the same time each day for a couple of days each time I change the settings. It might be the initial getting up to temperature as it seemed very high for a few days then dropped closer to what would be expected. I once calculated the weight of our house and the amount of heat required to get it up to temperature if it had been left and it is a lot. The slab holds a lot of heat.1 point
-
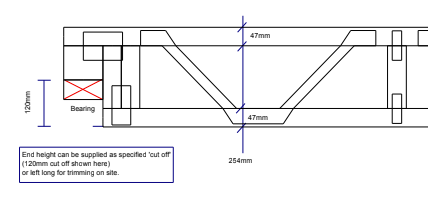
Thank you all for your very informative and helpful posts - certainly given me a lot to consider outside of the issue at hand. Once I have the floor joist final design I'll be sure to double check with my SE, same re the lintel point loads. I cut out the suppliers 'expert' designer and went straight to Wolf (Easi Joist). Having spoken to their tech lead he advised the follow solution was easiest. They can spec a top cord bearing joist with an additional block section below (basically a piece of 4x2!) I can spec any dimension but can simply oversize and trim down on site. A simple solution which is basically the trimmable joist I was looking for in the first place, but this way it is trimmable vertically rather than horizontally. If anyone else has this problem again it is called a 'top cord web post detail'.1 point
-
All the 'other stuff' in my house i.e. fridge, cooking, computer, lighting etc, uses about 2 kWh/day.1 point
-
My roof starts on Monday (tomorrow) It's been delayed, I had to change my supplier. We are going for greencoat aluminium , it;s around 220m2 at a cost of £96 m2. Original it was going to be done with a snapfit type system, but was told the roof was too complex for it so now flat rolled sheets are being using with roofer doing all the shaping. Getting so solar PV panels that fit between the panels, although it will probable take 100year to pay it off Flextron solor panels1 point
-
I laud your high ambitions but I think your budget is a long way short. The property market whilst not perfect currently offers nothing you're looking for less than about £10m. Despite ideas of self building being a shortcut to cheap luxury in reality you'll only ever save money by offering your own free time. On a project of this scale that contribution would be negligible. As a combined house build and business venture, financing it via traditional methods would be incredibly complex and perhaps not possible. That said these properties do exist so someone must be able to fit the jigsaw pieces together. Why not you. This intrigues me. If you can make this sort of prediction commercial you'll be able to build a dozen such houses!1 point
-
Same old same old. Improve your property, increase the value and cop even more tax.1 point
-
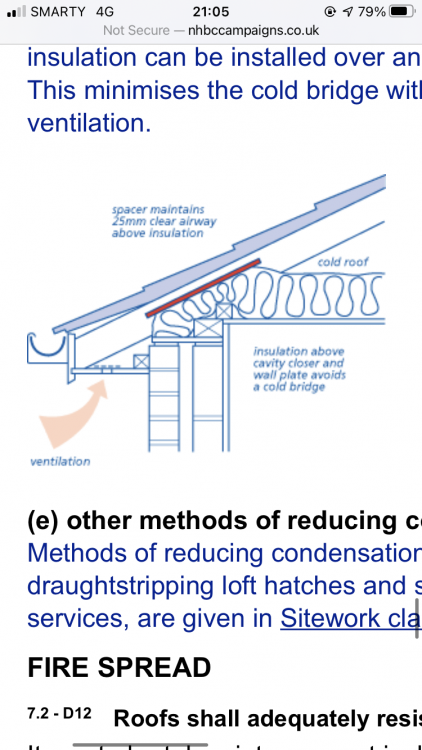
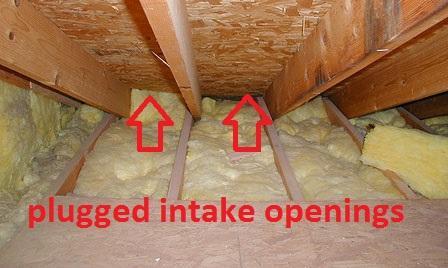
Have a look at the some of the images here. The "arrows" represent the airflow you want to wick away moisture. https://www.google.com/search?q=eaves+ventilation+airflow&tbm=isch&ved=2ahUKEwjE0a7Yl6PuAhVP_4UKHbviC_YQ2-cCegQIABAC&oq=eaves+ventilation+airflow&gs_lcp=ChJtb2JpbGUtZ3dzLXdpei1pbWcQAzoECCMQJzoCCAA6BAgAEB46BAgeEApQpU1Y1F9g8GdoAHAAeACAAXWIAYUHkgEDNS40mAEAoAEBwAEB&sclient=mobile-gws-wiz-img&ei=lUoEYISzDs_-lwS7xa-wDw&bih=512&biw=360&client=ms-android-motorola&prmd=simvn This grabbed from a US site:1 point
-
1 point
-
Very often an ASHP comes with it's own sensor to measure the tank temperature and it is a pre made length, often 10 metres. I think some people don't realise you can extend this which you may need to do if the tank is further away.1 point
-
Probably cause it makes the install harder for the ASHP person, like most trades unless advised otherwise they will take the path of least resistance and install what is easiest for them.. especially if there is no specification/ consultant/M&E drawings...1 point
-
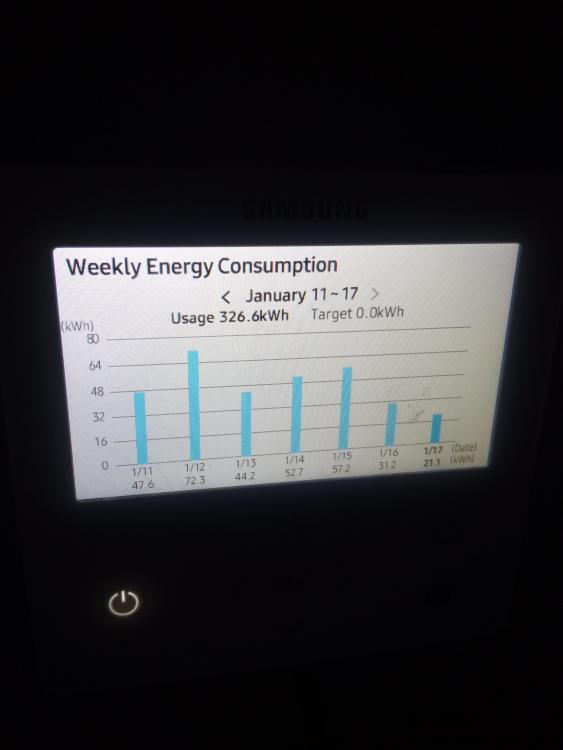
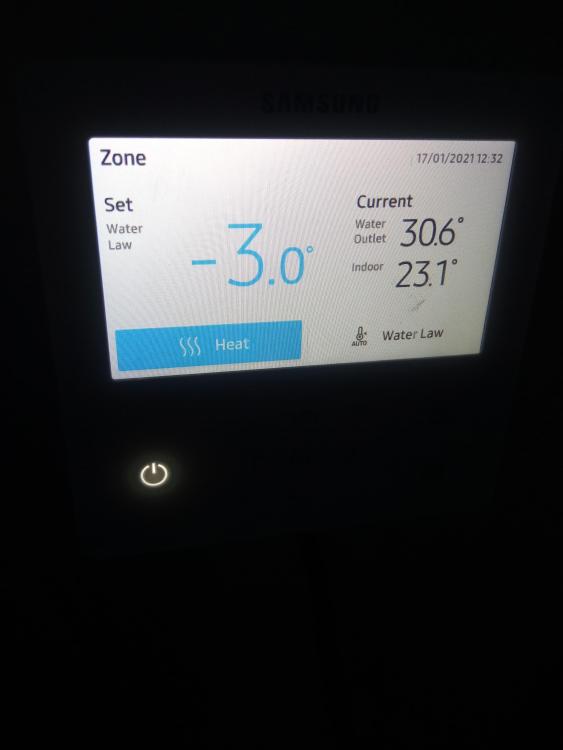
Seems yesterday the energy consumption of the ASHP went down. I'm now obsessed on this function! And this is the setting we have set on the water law now which I changed yesterday. I also did what @PeterW suggested and changed the 201* settings to 10 and -5. We have turned the room thermostats up to 20.5 degrees though as 19 was a bit chilly for us.1 point
-
Thanks Peter. I am meeting him next week so we have this as my first agenda item. Many thanks1 point
-
Welcome !! You’ve got some lovely 1980’s era stencil work going on around that ... Ask away on the questions - plenty of members north of the border here.1 point
-
Why..? All primary pipe work from the ASHP to the UVC and the buffer should be properly insulated and it will not matter how far it is if correctly sized. It is minimum 22mm, ideally 28mm if long distances. There are no maximums in the MIs for the ASHPs I’ve seen. Before you compromise your long term usage of the system, I’d ask why he thinks that first and ask for the evidence.1 point
-
I don't know if each LA has it's own rules but I got the drawings for our place, extended and reroofed in the late 1980s just by asking nicely about 4 years ago. Got paper copies, foc, taken from a microfiche. Tbh the quality isn't all that. I did thereafter ask for a scanned file that I could blow up myself. Although promised over the phone it never materialised. They were hand drawn planning drawings but have all the timber and steel sizes on. They reference "supporting calculations" which I couldn't get unfortunately. Until you ask etc. Don't forget many are working from home so something like digging through microfiche archives might not be seen as a priority.1 point
-
After some digging the answer for those interested is that they are the same product.1 point
-
As a very good alternative, I would throw fleming homes into the mix. I would have used them for ours but they don't do SIPS. However jad I been timber frame I would have chosen then. They erect also so no VAT outlay. If you look for @Redoctobers blog he had a house built by them. If you're going to extensively modify a standard design you are as well doing your own design. Fleming also have annin house design service.1 point
-
Also not a massive point, but although your materials might have come from a large company, at least your labour costs went into the local guy's pocket, rather than the Saint-Gobain, shareholders.1 point
-
Alternatively if it’s no use to you offer it for free on eBay, Facebook, Gumtree etc etc1 point
-
1 point
-
I just took my second drawdown with Ecology. Easy... 1. At any point during your build you can instruct a valuation. (small fee to pay). Ecology will get a surveyor to value the site in its current state and also a projected final value. 2. Within a few days, Ecology then tell you what your updated maximum drawdown/retention release is. 3. At any point after that, you fill out a form where you can request anything up to your max drawdown. 1 or 2 days later it's in your bank account. You can drawdown more than once for each valuation, you don't have to take the max amount.. Take as much as you need, when you want, up to the max amount based on the latest valuation.1 point
-
Ditto, I fixed my windows behind the brickwork, in the insulation zone and inner blockwork skin has a bigger hole so windows inserted from inside called check reveals (and I angled my reveals ?).1 point
-
Not ideal, but works fine in practice. In our case I was very careful to cut the rising stub square and clean. We had an inspection eye as the male/female connector plugging into the female/female coupler. TBH, I just added a bit of solvent at the joins and put my hand in to smooth this off. It's a vertical drop so I can't see any chance of leaking, and the female at the top of the inspection eye acts as the expansion joint. Not perfect, but an entirely acceptable botch, IMO.1 point
-
It sounds like more fees While warranty providers are reluctant to come out in person Your BC should confirm that the work has been carried out I don’t think there will be any way round them sending a valuer at your expense1 point
-
Even the Roper Rhodes are like that. They don't have rear bumpers and would need taller ones than at the front. "Splashing out" will stain carpet.1 point
-
Mine wanted to but I said no, sand cement parge/first coat then multi finish coat. Yes it’s windows, doors roof that is the biggest challenge re airtightness rather than the odd fixing.1 point
-
How are you storing heated DHW from a combi..? Or are you suggesting that you use the heating circuit to keep a local tank hot and then replenish it from the combo flow when it kicks in ..?? Not likely at all. A 250 litre tank at 60°C holds around 330 litres of shower temperature water when blended down. That’s around 14 minutes for a pair of showers running together before the tank is cold. In a 5 bed/ 3 bath I would recommend 400 litres in a UVC. Anything smaller and you will need a bigger system boiler with a higher output to keep up with usage. Secondary circulation loop would work here but you need to design in the outlets too - which need hot water “instantly” and which can wait. If you go the traditional route of running large bore to the bathrooms and then tee off from this for the shower / basin / bath you need to get the return as close to the basin as possible as otherwise the response time will be too slowed @Temp points out. Baths and to a point showers are less of an issue due to the volume of water involved, so consider a secondary loop run in 10mm that only serves the basins and kitchen / utility tap as that will be more than adequate. We changed a permanent running install to one that ran 5 minutes every hour in a commercial building and reduced the water heating costs by £100/yr using a £20 timer. A well insulated pipe doesn’t lose that much heat and usage will also ensure it stays hot.1 point
-
Hello all. A few thoughts. Before you start changing levels, methods of hanging joists, packing things etc it is really important to get a handle on the basics. Take a simple beam subject to vertical load. Often to perform it has to be kept vertical, not twist, or move sideways. We call this lateral and torsional restraint. Quite easily, if you muck up the restraints you can reduce the capacity of a beam / wall so much so that it will fail, sometimes even before the building is erected. I have seen this happen. Often a beam is designed where say floor joists are framing in above and provide this "lateral restraint". There are general rules that say for example that a mid floor joist can provide lateral restraint to a lintel or beam. But if you start to introduce packers and so on it raises some questions as you can introduce an extra slip plane, the assumed friction can be lost, thus the effective restraint is lost and this is not safe. I have quoted mvincentd.. it's a good photo. mv.. mentions a green roof.. which is heavy, hence probably the heavy twin engineered joists. Here you can see double joists framing in on the inner leaf of the lintel. The lintel is a cold formed steel lintel, say by "Catnic" or "Key Stone". For all. Please bear in mind the following: Catnic for example quote the capacity of their lintels base on a uniformly distributed load. That means that roughly the load is applied fairly evenly along the length of the lintel. Just as importantly they also specify what is called a load ratio. To allow the lintel to meet the stated capacity both the inner and outer flange loads have to fall within certain limits. In other words you can't put all the load on the inner flange and expect to get away with it as the lintel starts to twist too much. Having a cursory glance at the photo it seems that we have two double joists on the inner flange and very little load on the outer flange. All is not lost however if you want to go off piste and the load ratio is exceeded. You can contact the manufacture and ask them to check that what you propose is ok. The overall load may be less, while the load ratio may exceed the brochure limits they can check it will still be adequate. Please be aware of the consequences when changing the support details. Remember that the engineered joist manufacturer will often take no responsibility for anything other than their product.. be careful what you do. It's also worth thinking about how the lintel is supported at the ends. You can see from the photo that the double joists are more towards one side, thus the load at the right hand support will be more than the left. A consequence of this is that the lintel is subject to more of a shearing force at one end than the other. So again, it's worth checking this with the manufacturer. If you have an uneven load on the supports which the photo shows this is a flag for any checker. It's an aside, but you can see the wavy scratch marks on the block. Often folk think this is to provide a key for the plaster, but it also identifies the manufacturer of the block and the block strength. mv's photo is great. You can see the clear wavy marks, looks like there are four per block and the wave has a "defined shape". Thermalite/ Hanson have same photo and this looks like their High strength 7 block. So if you are doing a refurb garage conversion this info can be really helpfull when you maybe want to rest a beam / padstone on this kind of wall but don't know what strength it is. in summary please think carefully before you make what appear to be innocuous changes, or "take advice from the brickie". It only takes a few minutes to phone the Architect, SE or if you can't get hold of any of the former post here to get some possible pointers. Rest assured from their (SE etc) point of view having the Client calling them with the odd query is no problem as can often head off serious time consuming / problematic issues later.1 point
-
No idea, though you make a good brilliant point. I'm in a slightly uphill semi detached, and this neighbour is my attached neighbour slightly downhill and north from me. It is only just a hill though, hardly any incline really. So if there is a northerly wind, they would be getting all our dust. Luckily for me though, according to wise folk at google the prevailing wind direction is "west-southwest". Brilliant point for me to deploy if they keep pestering me about this. I hope not, as we are day 2 of a project that is due to last most of 2021!1 point
-
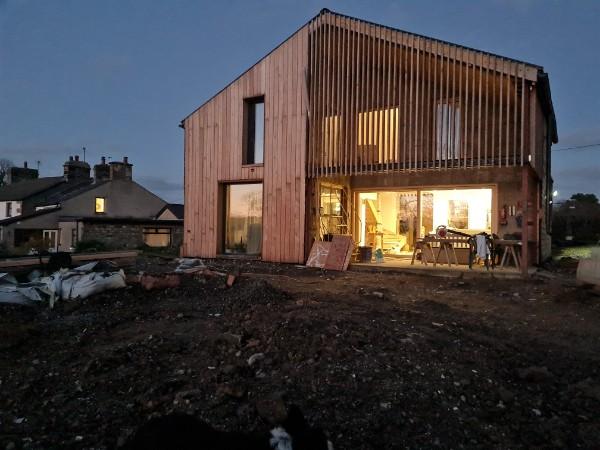
Over the last four years or so, we have had our fair share of ups and downs. But this is an up. And now, GCNs are very welcome. From a twinkle in our eyes in the little local-stone built cottage (to the left of the photo) to a contemporary orange (coloured) box... which will be silvery grey in a while. Like my receding hair. Lots more to do, but hey! SWMBO reminds me we started when POTUS was being sworn-in , and just moved in by the time he had been sworn at long enough to be kicked out. Is there a lesson there? Probably not.?1 point
-
I honestly wouldn't waste the effort thinking about this issue with fixings. I've pargecoated and direct fixed into the block with screws. I've also nailed/screwed thru airtight membrane to ceiling. The fixing traps the hole. I scored just over 1 on air test.1 point


.jpg.c21f3ac78c9b7efd90cbdcb312744dc5.thumb.jpg.7adcad4c0e384f5ecd7d56b0618df6e5.jpg)
