Leaderboard
Popular Content
Showing content with the highest reputation on 11/13/20 in all areas
-
Work out how much surplus you need to routinely dump and do the maths there. Pointless trying to dump a load of excess into a tiny ( 25L ) buffer. In honesty it’s rubbish as in the winter you’ll be lucky to see 25% PV output which will prob be enough to still be pulling from the grid most days ( so no surplus ). PV > heating = ?2 points
-
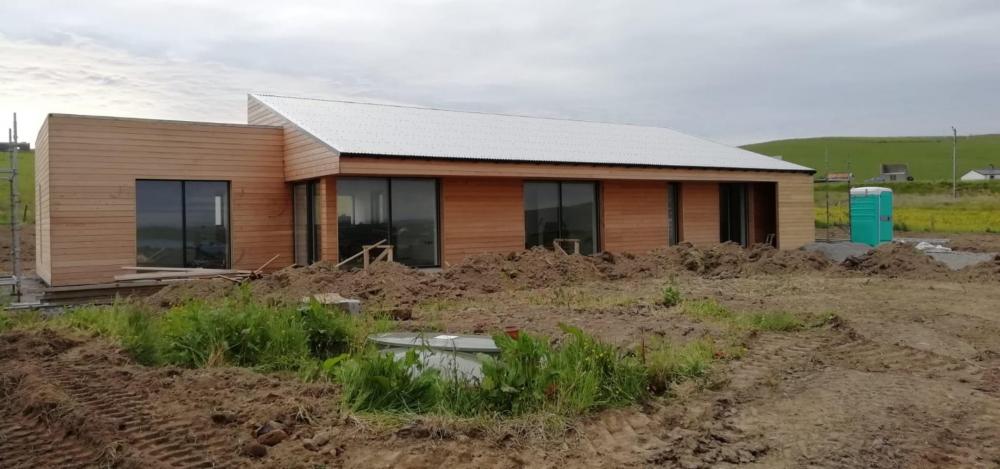
I've just realise that I just barged in asking loads of questions, so I reckoned I'd better introduce myself... ? I'm Marcel (as you might have guessed from my username), and my other half (Joanne) and I have been in the lucky position to be able to build our own house in Orphir in Orkney. ...well, I say we built our own house, we had someone do it who has more experience at this game than either of us does... We moved to Orkney 5 1/2 years ago after falling in love with it on a holiday a number of years before that. In 2014 we were both made redundant from the jobs we were at (don't worry, it was voluntary), and we had always had the dream of one day building our own... During the design and build stages, we've stayed in a few places, but we moved in in September. This is the result of our little project, minus the portaloo. It's a 2 1/2 bed ICF built larch clad bungalow, with an Air to water heatpump and MVHR. (edit because I hit Post before I was done... ?)2 points
-
Spot on @SuperJohnG it's always worth phonig up for a chat and asking for an explanation. For all it may be worth having a look about for Engineers who are local to you that can provide a similar service in case you encounter a soil / ground works problem. In this case if you have to have a few site visits then any initial savings may be lost? Also.. what is the cost of supervision. Often a local Engineer will just "drop in" to see how things are going! It's amazing how that can inprove the quality of the work.1 point
-
1 point
-
Hi Duece22 It would be worth posting a loft plan. I'm wondering why the steels are in tandem? For the self builder who is doing a one off project then maybe it's worth looking at the bigger picture. You may on first appearance have say an 20 -30% extra steel weight. Take a self build rate for beams / UC sections with not a lot of holes, welding (shot blasted and primed) at £ 3000.00 per tonne delivered (Westen Isles excluded!) to be on the safe side. While the steel may seem heavy they can be simple to install. If in a rural area your local farmer will come with a telehandler and lift them in for you. If you are DIY hands on then you can lift them with a chain hoist, or just lift one end a little bit at a time .. story for another day. UCs (often called column sections) are mainly intended to carry vertical loads, thus they are more squat.. they have a thicker web than a UB ..universal beam that is mainly intended to carry bending forces.. like a floor joist. However, you often see them used where you need to try and keep the floor thickness down say. Yes, you have a heavier steel section which costs a bit more as it is heavier. They key here is to not make it too complex. Yes, you may save on steel weight if you look to value engineer just the steel but as you make it more complex you reduce you options on the amount of contractors that are able to take the job on, or they add an uplift which more than offsets the steel savings. Duece, depending on your loft layout you could introduce a steel newal post at the stairs.. but the stairs look like a key feature... almost free standing and making a statement. Also that post and other load bearing walls would need foundations. If you take skilled labour at £ 900.00 to 1100.00 a week you can see how a contactor who may be pricing will just say... This is the 10th job I have priced that this week, I'll add a "couple of grand" to cover me.. as the beams now are slim, fancy connections and so on. I know it seems rough but go for simple stupid. You could look at designing the roof / loft so that you hang the structure below from it. This is technique used often.. but it adds complexity and introduces buildability issues that your local builder may be less familiar with. All the best.1 point
-
@WWilts that looks better, and I don’t know about yours but my other half would go nuts with people wandering backwards and forwards through the kitchen while she is concocting her latest culinary masterpiece (tell her I said that ?)1 point
-
@MJNewton It has been functioning fine since February at 30% so I will balance the system best as possible and input the needed figures for the BC. Back to the cedar cladding....1 point
-
Well after living with the cleaned system for nearly a week it seems we can have the stat down at least 7.5degC and still feel warm. Place seems to warm up quicker and rads are hotter. That being said the boiler still comes on frequently but I guess that's the heat loss via the fabric. I'll bend the float valve in the F&E tank tomorrow to stop it coming out the overflow. Then I'll add the inhibitor. Thanks btw to all who helped.1 point
-
If it’s only outflow from the system then gradient is irrelevant - follow the level of the ground and just put 10mm pea gravel all round it. If it does run all year round, you may want to run the last few metres in clay (UPVC is not UV stable) and also put one of these in the run just before you convert to clay. Make it accessible in a simple concrete chamber. https://www.plastics-express.co.uk/underground-drainage/Underground-Drainage-110mm/110mm-non-return-valve-28single-flap29-p-pte3481 point
-
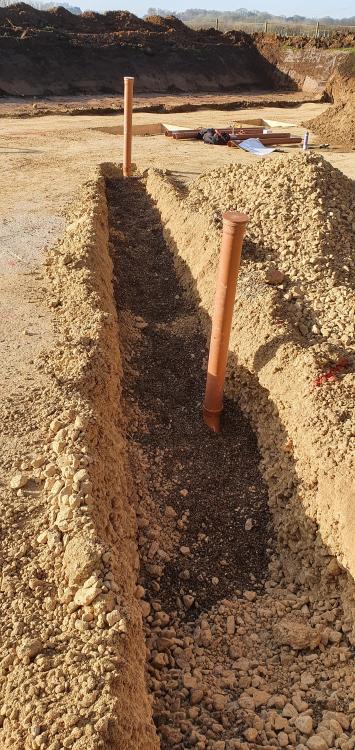
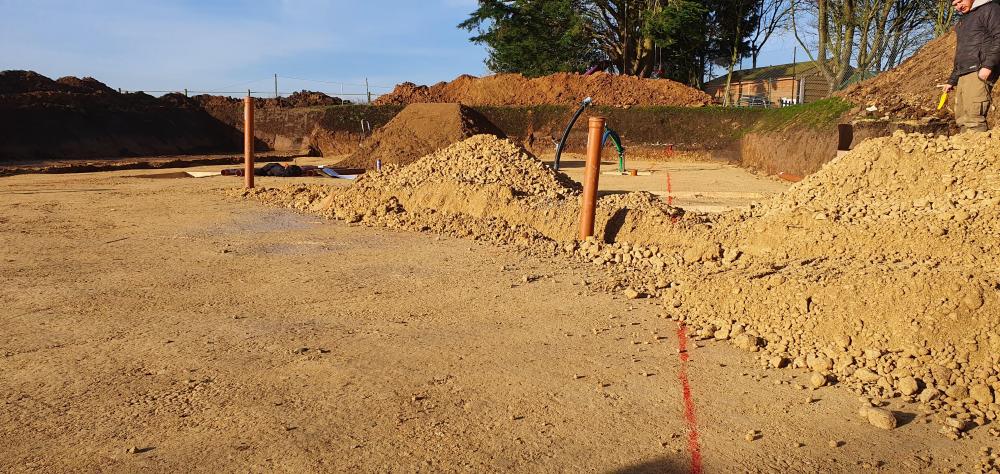
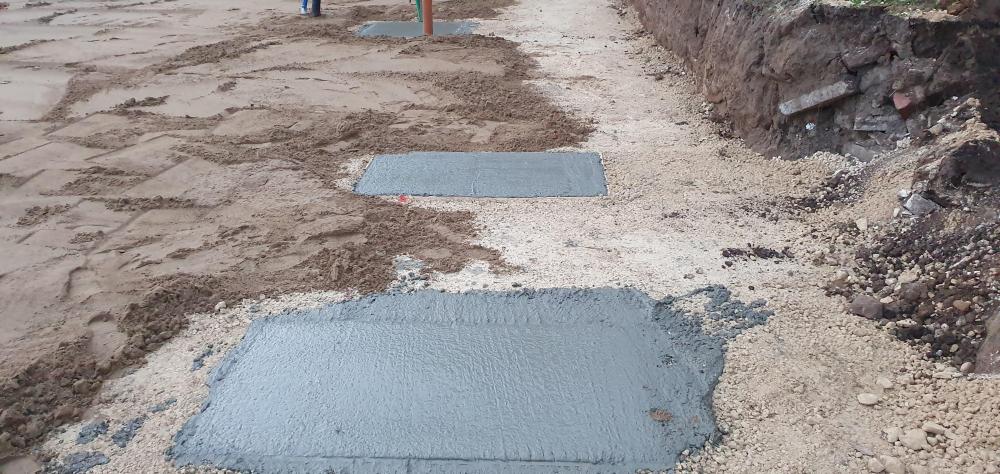
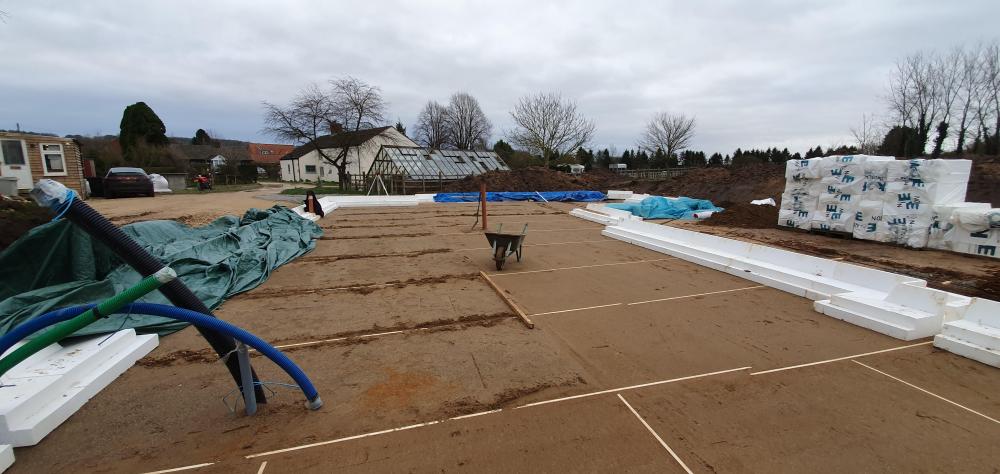
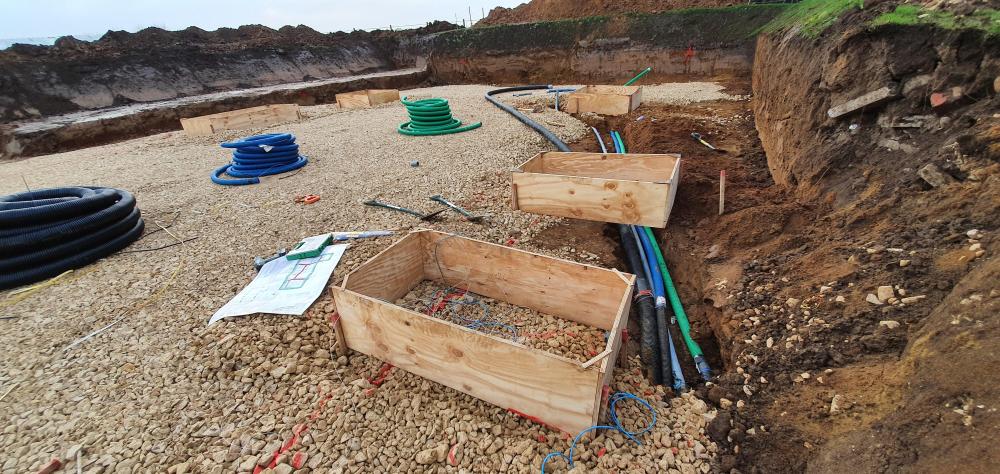
Drainage going in and sand blinding layer that followed. @SuperJohnG the sand blinding needs to be done to a tight tolerance otherwise the kore blocks just won't sit well against each other and you get gaps of a couple of mm between them, over an 18m run this soon added up so I had to take it all off and redo the sand. Much better second time around! Forgot to mention before, I hammered a wooden post in the ground to tie the ducts to so that as the stone went down they remained vertical. Be careful on your bend radius as they come through the slab, my electric duct caused me issues. I have a 5core 25mm2 cable in a 90mm duct, as I pulled the cable in it wouldn't follow the bend and just pulled into the sidewall of the duct. Tantalisingly close but I couldn't get a hand onto it, in the end I had to pull it all out and feed it out from the house end, other than a couple of wasted hours not a major drama but it could have been!1 point
-
Yeah, this is my inclination too. I get where trade recommendations for harling are coming from, it’s traditional, and what would have been in place here, if it had been a dwelling at time of construction. But at that cost.. a tray is going to be cheaper and will achieve same result. We don’t have any damp issues else where.1 point
-
Agree that 25mm will only be of benefit to affix the pipes with pipe staples. I’d bin the 25mm insulation and just use clip rails direct onto the slab, fixed down with a Spit nailer. Then sand and cement ( dry ) screed at 50mm thick.1 point
-
1 point
-
1 point
-
We've a basement underneath. This is essentially and intermediate floor. Only purpose of insulation is to prevent heat from UFH sinking in to the slab. My original point is that as heating will be so rarely used, I can live with this effect.1 point
-
What purpose is the 25mm PIR serving? In my uneducated mind, it's way too thin to have any value and if you're building a passive house the concrete slab is obviously already very well insulated so why insulate it again?1 point
-
Our lighting designer was so focused* on getting all the fixed-location lighting correct she really didn't think there was any point designing or planning for portable lighting too. So odds are, any we do add will be because of changing needs or something we totally overlooked, and by definition will then also failed to put the 5A socket in a useful location for it and I knew it would double stress me out planning location of those sockets and then beating myself up when I inevitably got it wrong. We have a perfectly good ring main with many outlets in every possible useful location anyway, so my thought is to rely on that for "unforeseen" lighting needs. I can control the wifi bulbs perfectly well from Loxone. For the so-called WAF, this means the table lamps can be controlled in exactly the same way as it would be via a 5A outlet, that is to say the same as all the other lights in a room: from the light switch. Or automated from motion, or from an app or by Alexa if that's your thing. But if that's too complex, they can also be controlled from a button on the table lamp too (if needed, by using a dumb bulb plugged into a dumb mains outlet via a dumb switch - I'm sure desk task lighting will still use this method!) so investing in 5A sockets is strictly reducing not adding to the flexibility in control. In my experience of renting out then selling my previous house, no one understood or valued the various dimmed 5A outlets I put in, so installing them for future occupiers / resale value is not of interest to me. This is all just to explain the thought process I went through to reach the conclusions I reached, not to try and persuade anyone else they're wrong. If you find 5A outlets useful, more power* to you :-) * - puns intended1 point
-
in my searching for the same i found a place that will cut the boards ready to go together. They have loads of board finishes as well. https://www.cutwrights.com/new/Home/ChooseYourBoards?searchText=Walnut https://www.jmfdoors.co.uk/ also found software then you design your units and it will export a cut list to send to the above https://wooddesigner.org/store/ I'll be using it on our next one for sure.1 point
-
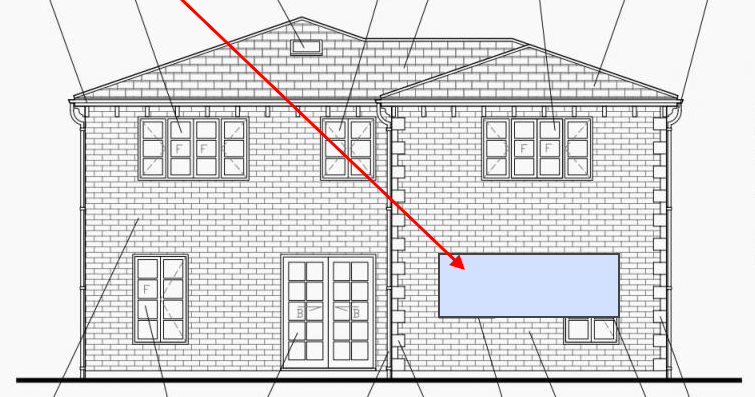
I'd do something like this: Whilst a long window may not fit the current aesthetic it would give you much nicer views out on to the garden. Access to the garden from the dining room is only a few short steps away from the kitchen so why compromise the kitchen with that tall window/door in amongst the worktops and cupboards?1 point
-
Now I *did* go for 5A outlets, but in every location there's a double 13A socket too so at worst they'd only become redundant. I've always been a fan of them pre smart lighting (we don't tend to go for room (ceiling) lights anymore), and I'm always mindful of the potential need to go back to that method of control one day... whether that's due to us selling up or - more likely perhaps - the wife not wishing to adapt to a complex, convoluted and sometimes uncertain method of 'just turning a bloody light on!'!... ?1 point
-
Page 13 tells you how to access installer settings : https://www.daikin.co.uk/content/dam/document-library/declaration-of-conformity/heat/air-to-water-heat-pump-low-temperature/ehbh-cb/EHBH-CB_EHBX-CB_4PEN383118-1C_Installation manuals_English.pdf It will simply have defaulted to end user settings1 point
-
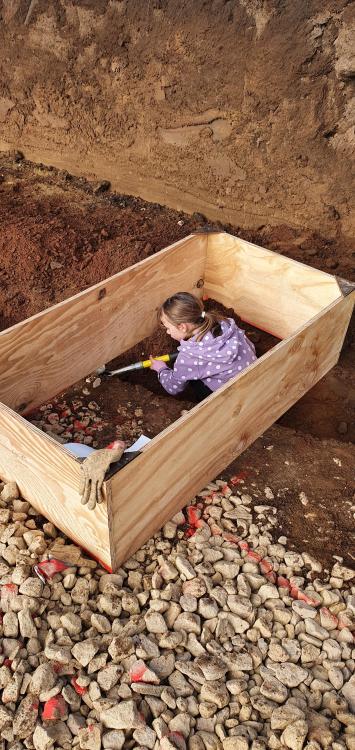
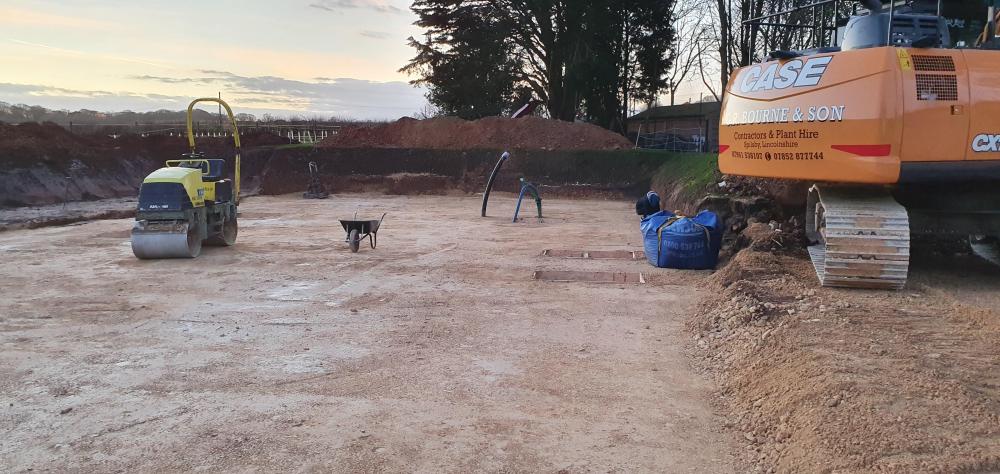
Got to put the kids to work every now and then? @SuperJohnG putting the ducts in was another PITA because I was worried I'd bring them up in the wrong place. If I'd got it wrong by 20/30mm they'd have been in the wall. As it is I'm not overly chuffed with where the water pipes are and its mainly a consequence of not having a fully planned out plant room. They are right next to where the UFH manifold now resides so I need to stick a 90 bend on it to bring it away and give me some working space. I still don't have my plant room planned out yet and MVHR is on my to do list soon. With the foul drainage, once the pad was all flattened I got the digger driver to nibble out a channel where they all needed to be. My biggest stress point with all of this stage was whether things would turn out to come up the slab in the right place. I was pretty much bob on for the most part but it was a worry throughout. I'll stick some pics on later of the drainage going in etc.1 point
-
1 point
-
It took us all day to set up our system. It isn't possible to set it up accurately if it's windy outside. I've never checked the CO2 levels but the humidity never increases for long before going back down to normal levels and our system has stayed at setting 2, out of four, for the last 2.5 years.1 point
-
Are you going to have a detached garage ? why not get the static and site it near the garage site, build the garage first and use it as a utility area, freezer washing machine wood burner, join it to the static with a lean to corridor thing. Place to dry clothes, keep muddy boots and have lunch on a day when your covered in mud and haven’t the time to clean up to go in the static. I have said it before, look up on you tube a couple called PURE LIVING FOR LIFE. pair of complete dorks, but they built a wooden box on the end of their trailer it houses everything I mentioned and has made their build and life in the van very comfortable.1 point
-
1 point
-
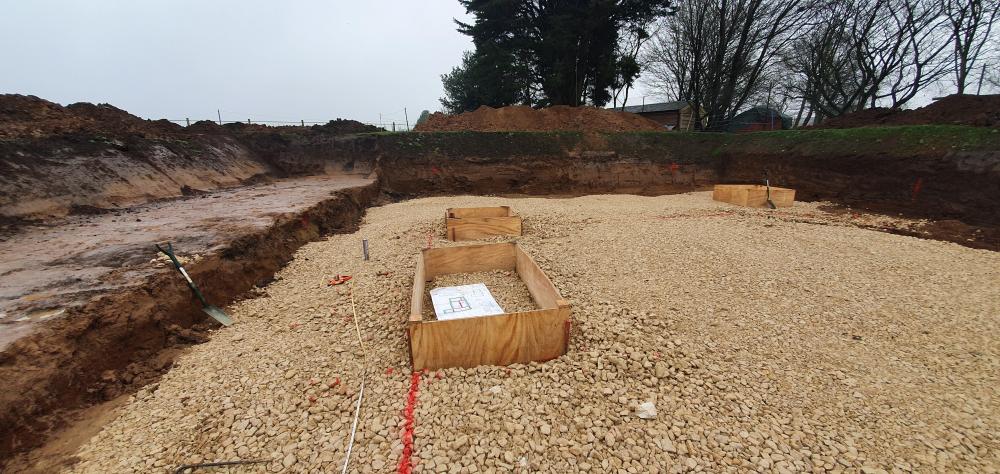
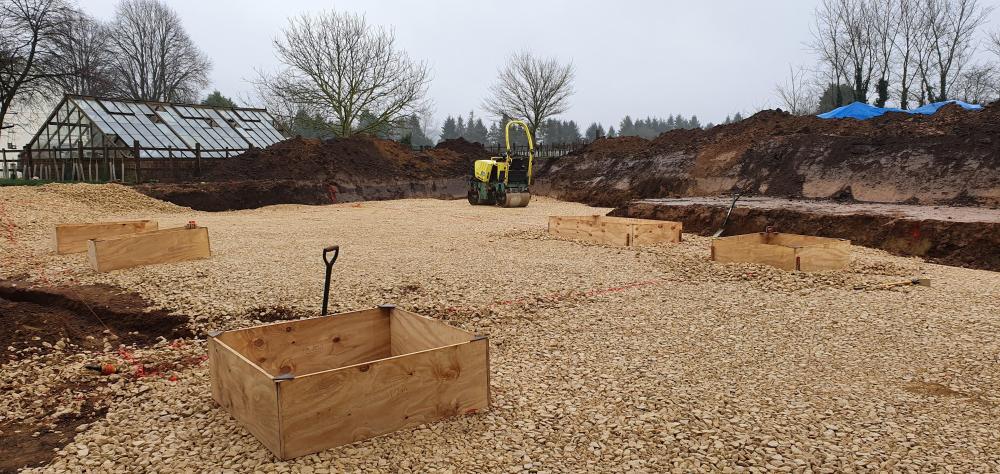
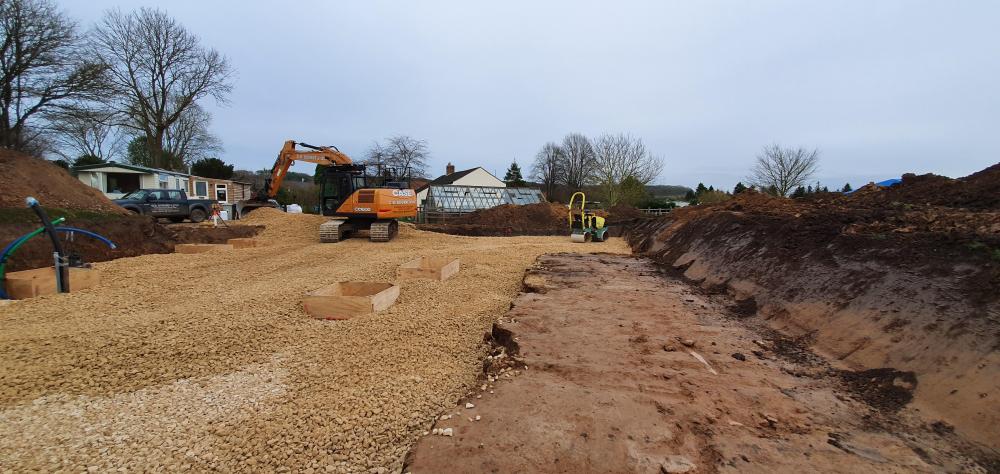
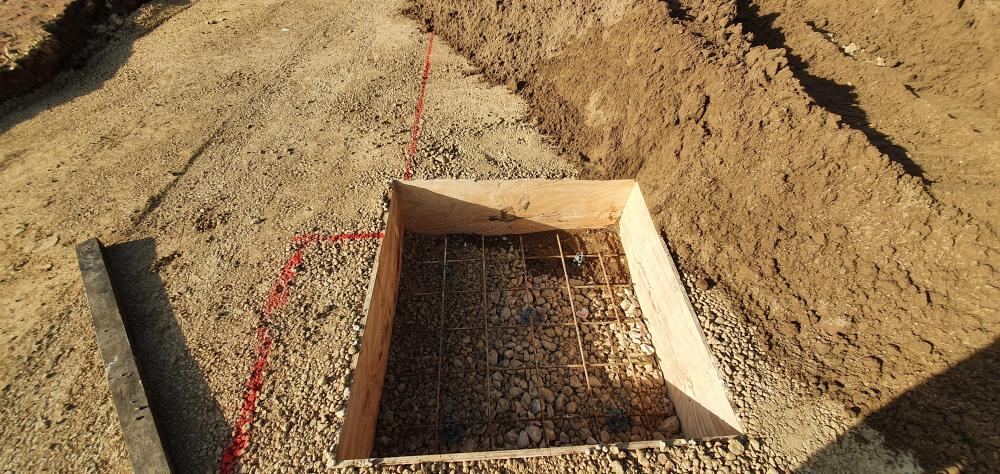
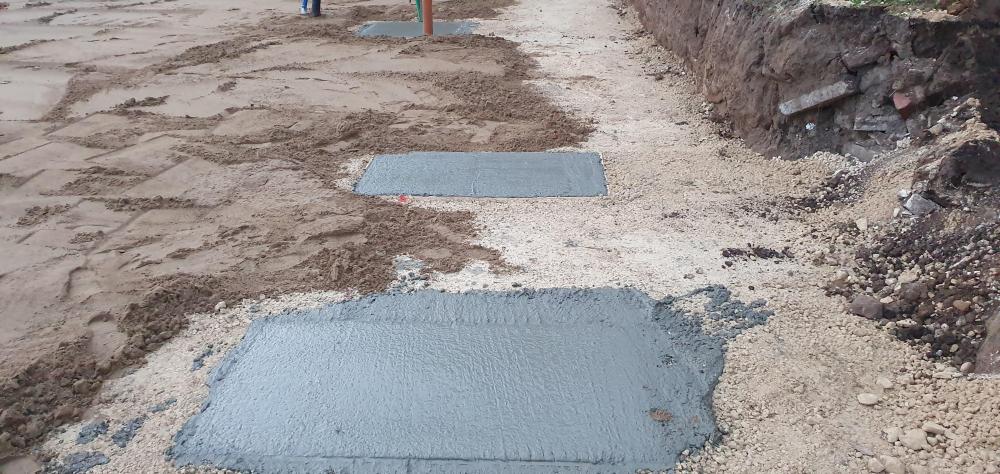
@SuperJohnG in the end I made some boxes up to size out of ply and put them in first. I screwed some stakes to the corners of them so could hammer them into the ground and use them to bring the boxes to the correct level. One they were at the right level I braced them internally so that as I whacked the stone around them it didn't cause the sides to bulge inwards. The biggest challenge was getting them in the right place. If you get some profiles set up it should be fairly straightforward for you. I took view that the pads are massive and there is likely some tolerance involved with regards to getting them exactly right so I got them within about 20mm which I felt was fine. I got the concrete into them one the pad was done as the lorry could drive right up to each box. A vibrating poker, a tamping stick and 0 mins later job done. I left the ply box in place. When I cut down through the insulation it was rather satisfying to see they were where I expected. Cutting down through 200mm of EPS 300 was hard going. I used one of those folding tree branch saws fir most of it. I made up a mortar mix, put a bed down, first layer of foamglass in another bed of mortar and put top layer in flush with the insulation. Any gaps around them from rough cutting I filled with foam. I'll add pictures once I'm on laptop.1 point
-
1 point
-
DALI/PUSH/1-10V dimming: What’s the difference and which to choose?.. https://www.theverge.com/platform/amp/2020/11/11/21559929/ring-video-doorbell-2nd-gen-fire-concerns-recall-hazard-screws-installation 0–10V, DALI AND OTHER LIGHTING CONTROL SYSTEM PROTOCOLS COMPARED https://www.cmd-ltd.com/advice-centre/lighting-control-systems/0-10v-dali-and-other-lighting-control-system-protocols-compared/ I'd avoid Push dimming.1 point
-
Any variation to the Planning approved drawings should go through the formal channels and re-approval process. Your architect/designer should be able to advise on the best way to deal with the changes as there are different types of applications, timescales and fees.1 point
-
Thanks Peter for 3) Seems to have settled down a bit now and not lost much today as I guess the water is too 'briney' for further salt absorption. 1) No further regens since yesterday as far as I can tell (hence no more salt loss) 2) Still dripping. 3) Thanks @PeterStarck for input above. Seems to have settled down a bit now and not lost much today as I guess the water is too 'briney' for further salt absorption.1 point
-
This is not in Scotland is it? Not a wiring system I recognise. 1-10V dimmers have as the name suggests a 1-10V output that connects to a driver somewhere. The alternative is mains powered LED dimmers, mains in, mains straight out to the lights. That would be my choice unless you are using a home automation system. Whether they are push or rotary is a different question.1 point
-
Thinking aloud, I was wondering if rather than treating the wall directly you might be better off creating an 'air gap' (eg a fence) of some sort? This could be attached to the wall for stability but otherwise not become any part of it.1 point
-
@dnb unless I am missing a trick John has not opted to 'just service' his calculated heat losses. His peak loss is estimated at 3.6kW for approximate dT of 20 degrees and 2ACH and opted to go for 8.5kW ASHP. I would say the estimation of heat loss is sound and the ACH which has a significant impact is, if anything, a conservative estimate. So there is scope for the losses to come down. An 8.5kW ASHP will be more than sufficient for the task at hand. The mean minimum temperature is 1.4 degrees for January, so you could argue a case for times when it goes sub zero. The model shows that even at -5degrees the loss is 5kW, so well within the capacity of an 8.5kW ASHP. Also it is unlikely to remain at -5degress for a 24hr period. Snails pace - my understanding of using the floor slab as a 'radiator' is that it does act at a snails pace. It will not react rapid the same way that pipes in a screed will do. It takes a long time to dump sufficient heat into it to reach your desired house temperature. Equally it will take a long time to lose that heat so it serves to iron out the peaks and troughs and maintain the house temp at constant levels, requiring periodic 'top ups' to maintain temp. One final comment ref the accuracy of the excel model used. Anecdotal evidence from members whom have completed their homes and modelled their energy usage suggest that the model is a very good starter for ten and is accurate enough to base your projected energy demand upon whilst designing your home.1 point
-
@SuperJohnG I must confess to not reading all the maths in great detail, but it looks to me like the heat loss numbers aren't too far out. The house ground floor area isn't too different to mine and the construction is comparible, and so is the heat loss. I too agree with @SteamyTea that the infitration losses dominate at least in the model. This is why the inside of my house is beginning to look like a very untidy satellite factory. The model is of heat loss. If you aim to just service this loss, then there's no scope in the system to change the temperature of the house at anything other than a snails pace. Imagine the house at say 18 degrees, and you want it at 20 when it is at your worst case design temperature, then the heat input will mostly be offsetting the losses and not acting to change the temperature. My rule of thumb was to double the energy required to hold a steady temperature in the worst expected case, so in your case something of the order of 8kW. I should point out that my "as designed" SAP calculation says will boil everyone in the house unless it's like Siberia outside. I remain unconvinced of this.1 point
-
Yes that's probably more realistic for air tightness, maybe check with supplier re what is achievable. You'll need to maybe think of heating all water on a cold day and base size on that for worst case. I'm no expert, just what I've done for mine.1 point
-
The simplest way to do this may be to obtain planning consent and sell the plot to others on the basis that they complete the project within an agreed time, then use some of the proceeds to do up the bungalow.1 point
-
HMRC will tell you there is no fixed time limit that you have to live in a house before it becomes your Principle Private Residence BUT that your intention at the outset can be taken into account. So moving house for work reasons after just a few weeks might be enough to avoid tax. However telling the bank you want a short term loan because you intend moving soon after completion might be enough for the tax man to decide you were building for profit all along. I reckon you should live in the bungalow while building the house. Move into the house and do up the bungalow quickly. Sell bungalow. Wait three years until you are exempt from the CIL and move house. I would avoid returning to the bungalow unless you can find a good reason - such as not being able to afford the house or a medical reason for avoiding stairs? Avoid renting out the new house before you live in it as leases are exempt from VAT rather than zero rated. This means you can't reclaim the VAT paid during its construction as you normally can. If the bungalow has been empty for more than 2 years don't move in until after work starts on its repair. That way the builder you employ to do the work can reduce rate VAT to you. Move in first and he can't. If HMRC decide you are doing all this to make money it can be taxed as Income Tax rather than CGT so the tax bill might be higher than expected.1 point
-
Your most efficient way regarding CGT would be to live in the bungalow Build the house Sell the bungalow and move into the house Six months down the line you can sell the house if you wanted to1 point
-
0 points
-
I must admit, I've often found myself explaining to people why there are 'really old fashioned plug sockets' in my 'new build' house! Even once I've explained I think they still go away wondering if I really know what I'm doing...0 points
-
Had an email about CT1 on offer here https://www.jjroofingsupplies.co.uk/ct1-multi-purpose-adhesive-sealant-grey/0 points
-
0 points
-
0 points
-
0 points
-
Slim people have slim baths Fat people have (expletive deleted)ing 6 yard skips to bathe in0 points
-
0 points
-
This week I have been getting price estimates for everything I need, the list is getting very long and it's taking ages as I'm trying to get multiple quotes, I may give up on that idea. I am also submitting this to estimating companies / builders merchants, but want the control of also doing it myself. This morning the roofing company man rang me, asked some stupid questions and didn't listen to the answers as he talked over me. He then said, I'll be there at 11. At 12:45 when I'd finished with the horses I rang him, he said "I'm just coming down the road" No apologies for being late. I'd wanted HID to be there, but he had a problem at work. I'd tried ringing the roofing company to change the time, but no answer, left a voicemail, no response. The barn is about 100m from the house up a slight slope, the reptile didn't want to go and look, saying that without the plans there was no point. Anyway, eventually he did agree to look, but the whole time he kept making stupid statements like "So, it's a roof for the pigs", even though I had told him it was being converted to a dwelling. He spotted that the 'L' had an asbestos roof and declared that he wouldn't go any nearer than 50' because of the danger. Then my phone rang and it was HID. I duly handed over the phone and a complete personality and attitude change happened to the reptile. He spoke sensibly, answered the questions I'd already asked, explained the process, suggested that we went to their factory to see how it works. He also gave a very general ball park figure of 30 - 40k, which is what I actually wanted. All this because he was talking to a man. Once the phone call finished he handed me my phone and said, just email me the plans and we will get a proper estimate and walked off. This all seemed to be because I'm a woman, who knows a lot more than HID about this whole process and what we want. This is quite a disappointment for me as I will never agree to using this company even though they are our most local zinc roof supplier at only 25 miles away. He also said that metal is no cheaper than zinc, I'm sure that's wrong and despite me saying that our planning specifies a zinc roof he kept trying to sell me a rubber roof. His timing to install was, "about a month", really!!! When I mentioned solar panels he said, just put them in one of your fields. I feel quite strongly about using local suppliers where possible, but this has left a bad taste in my mouth and made me very wary of having people to the site when I'm on my own, if I'm not going to be taken seriously. On a better note, the last gas check was done this morning, by a lovely man who even asked about my grandson as he remembered that I'd said it was due. I would recommend this company to anyone, and thankfully they were local. Once I receive the report then I can discharge the condition, tell CIL and start pulling things down. Now, another week, more planning, I'm so looking forward to when I can do something, even thought ultimately the plans should make the process much more efficient in the long run.0 points
-
0 points


