Leaderboard


Popular Content
Showing content with the highest reputation on 12/05/19 in all areas
-
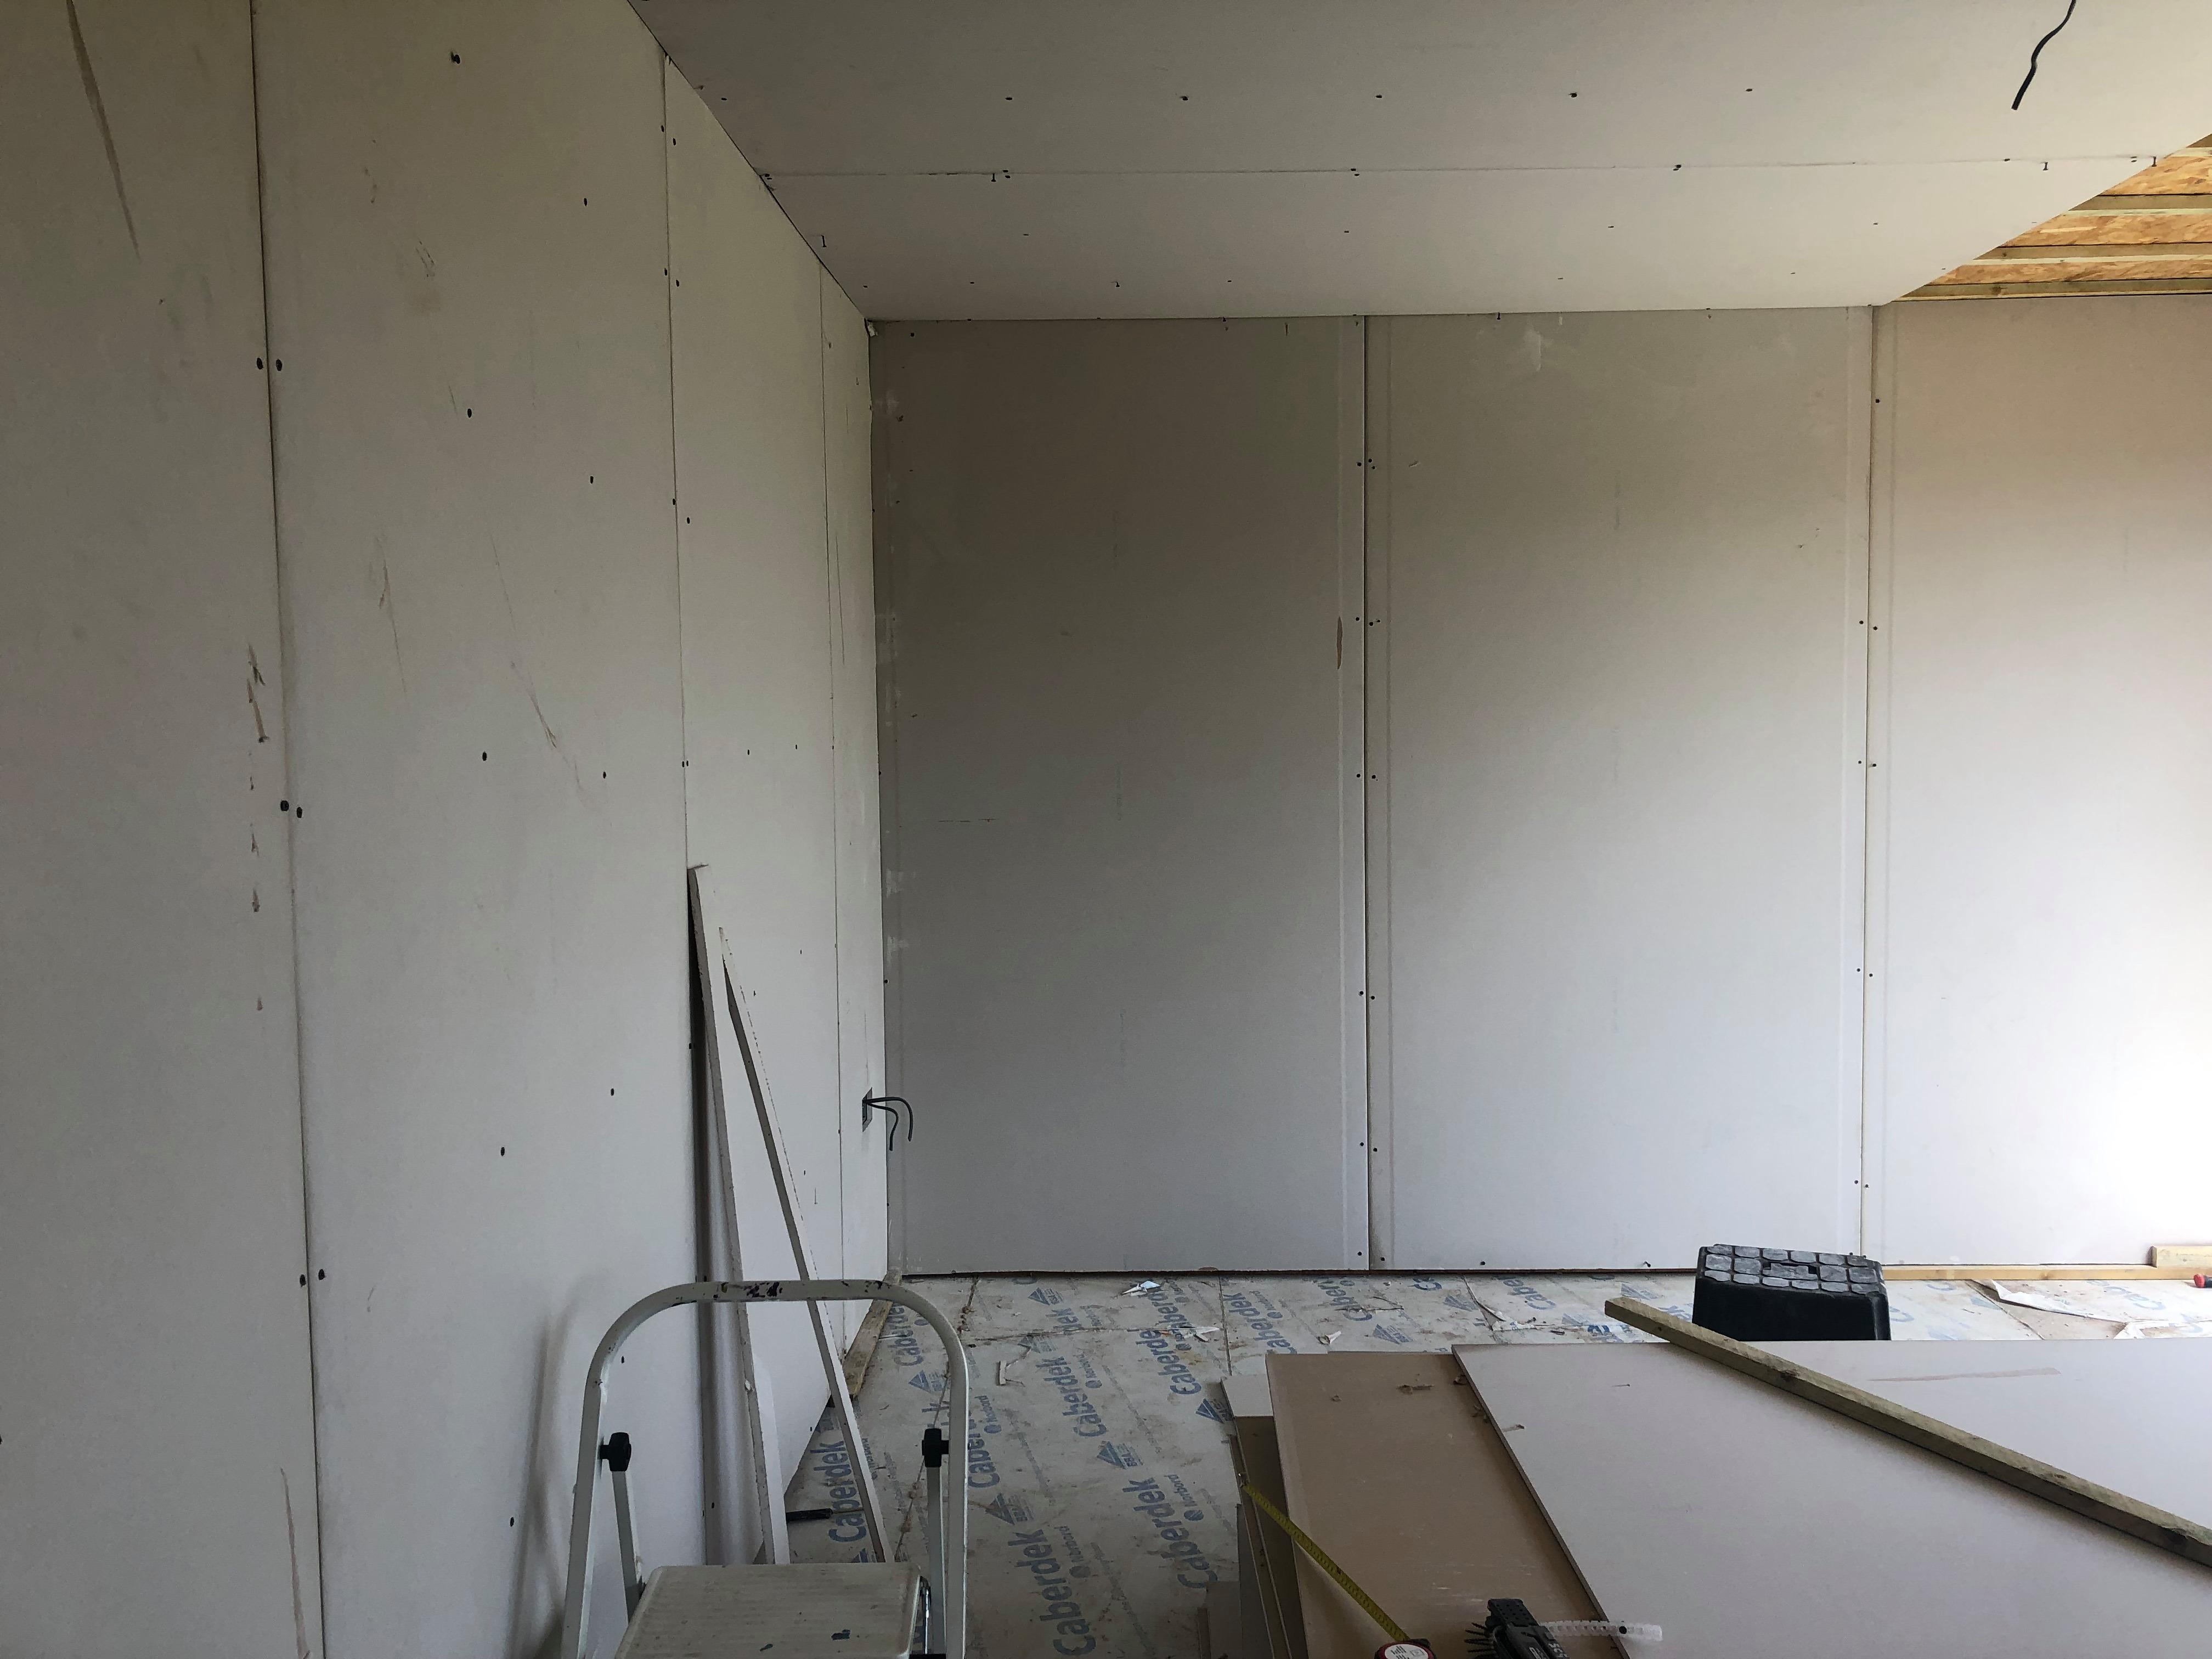
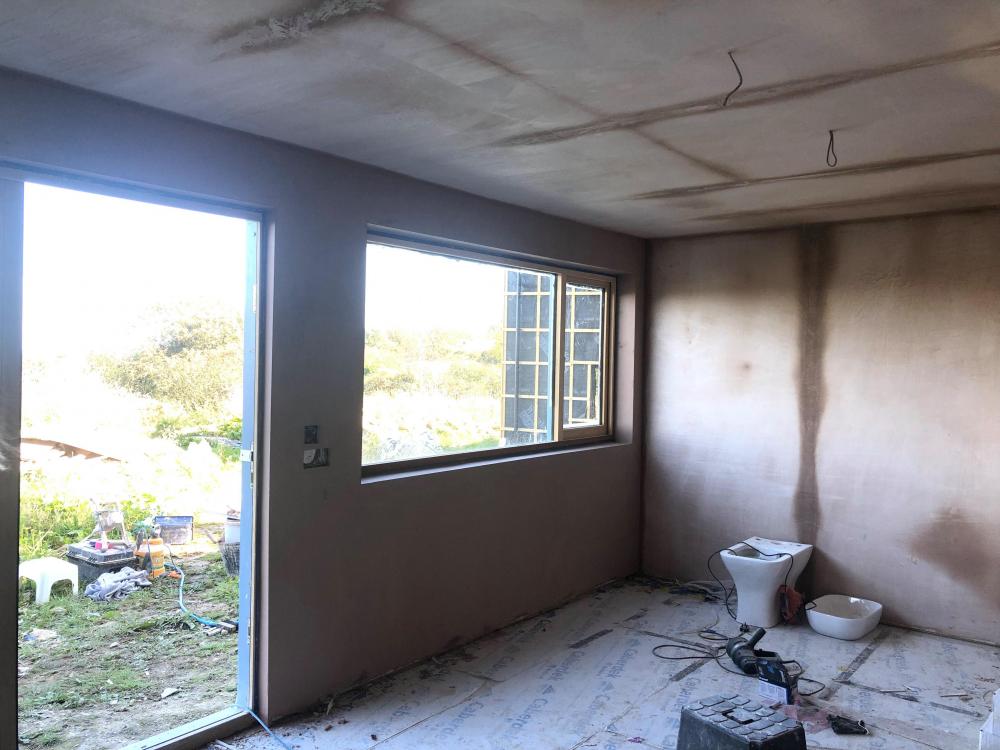
All plastered on the inside. Let the painting commence.7 points
-
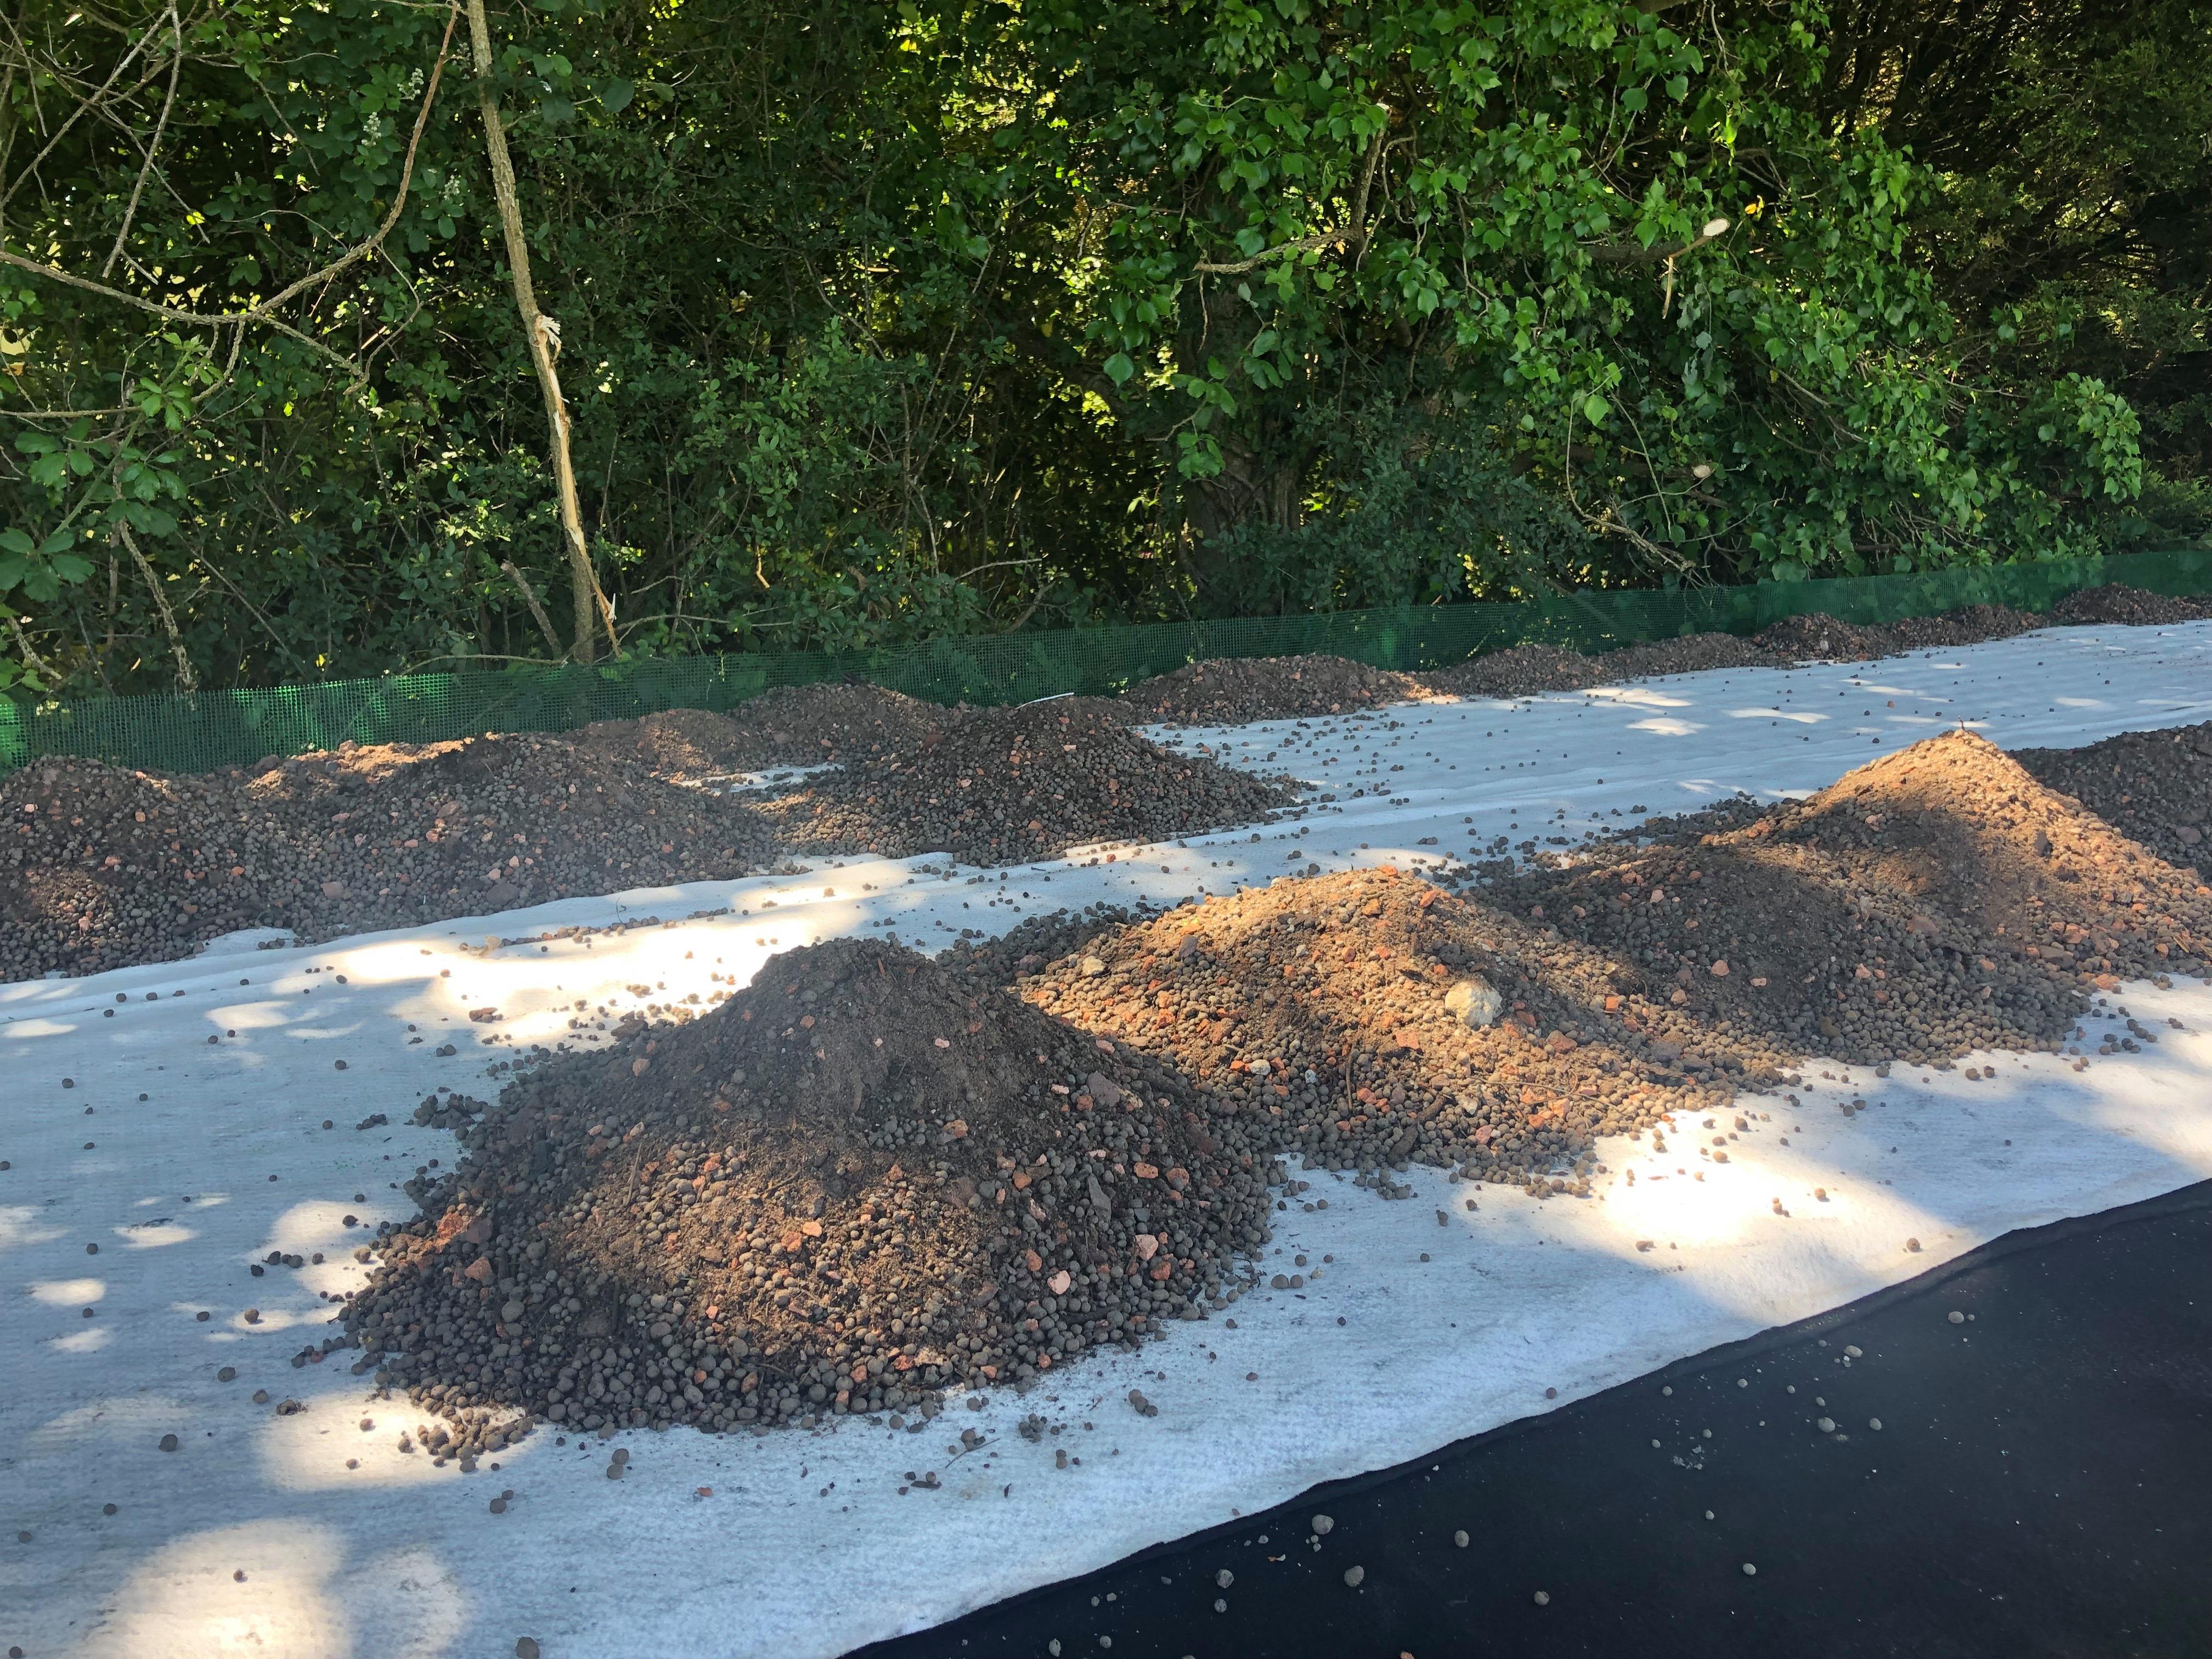
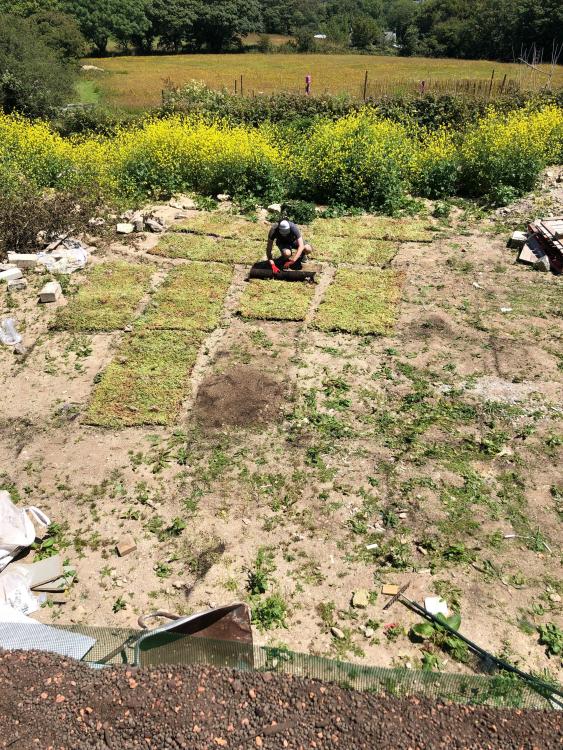
One of the more onerous (read expensive) planning conditions related to the driveway design and protection of tree roots. We were required to install a "no dig" foundation layer using Core geocells (or similar) after the planners were happy with the site fencing, but before the old bungalow was demolished. Typically the planners said "no" the first time we applied for discharge for no readily apparent reason. I re-applied having done more work for an unrelated condition and they said "yes". Braced fencing and signage seemed really important to the planners. So I have lots, all bought for bargain price second hand. We didn't spend much time on site in 2018 or the early part of 2019 because of a perfect storm of family things and working away from home. The winter of 2018 was not kind to the bungalow. there was a lot of rain and several periods of extremely high wind. This redistributed the roofing felt over the lawn and caused the very rotten parts of the structure to collapse. Everybody needs a site office! A bargain £250 caravan will do nicely for a while. Getting a good start on the driveway. Wooden sleeper edging in place and the first couple of geocell panels pinned down. The first (of many) loads of stone. And my old, but perfectly formed digger. (called Digby) A little while later we have most of a driveway. The other entrance is waiting for the land drains to be completed and for the small swamp to become less swampy. This is however enough access for the next stage of proceedings.2 points
-
Here are a few pictures of the site from the time we took posession and started to clear the undergrowth and satisfy the planning conditions. The driveway to be. It makes Range Rovers look small. Only a few bits of tree and detritus to remove! The boss hard at work during some tree removal work. The back garden being fenced off after felling a very large diseased eucalyptus. Another planning condition: Social housing for bats!2 points
-
Hello All, I am part way through doing a complete renovation on my house and recently found the buildhub forums, which have provided some great knowledge and inspiration. I am currently doing a complete re-plumb and after reading multiple threads on here and seeing Pics of NickTheWelsh Wizards manifold installs, i decided that was definitely the way to go. So, i've bought a load of Hep20 pipe and and several brass 4 way manifolds and have spent the last few days running all of the pipes for hot and cold water. Next i will need to run the pipes for all of the radiators. What is the buildhub best practice / recommended way of doing these? Do i run them all on separate pipe runs for flow and return from each rad back to manifolds in same way as the hot and cold pipes? Any tips on the best way to do it and which components to use would be much appreciated. Thanks in advance.1 point
-
Thank you for allowing me to join the forum, I can see already from a couple of posts that this was certainly the right thing to do. Our hope, that being my wife and myself, is to move up to the Highlands, find a plot of land and build a house on it. Seems easy....not! So I am going to rely, a lot I think, on the wealth of experience of the forum members. We had a preliminary search of the area surrounding Inverness, which is close to family and the Cairngorms for all the other stuff we do and decided that a radius of 15-20 miles from Inverness would be about right. My first question is does anybody have any advice, or experience, of finding land and going through the purchasing stage and applying for planning permission. From what I have seen a land owner quite often gets outlying permission for land that they want to sell which immediately adds a price premium. This is something I want to try and avoid! Any advice on land buying or contacts for land in the Inverness area would be greatly appreciated. Secondly we have looked at Scotframe as a supplier of a kit. Is there any experience out there of them and what do you think. Thanks in advance!1 point
-
Hi, i have been looking at the Bora hobs and had convinced myself that they were a perfect solution to a kitchen problem. Now I have seen this new item from Ikea and wondered if anyone else had? FÖRDELAKTIG Induction hob/integrated extractor. The spec looks ok but the price is temptingly low. Who makes these for Ikea, anyone know?
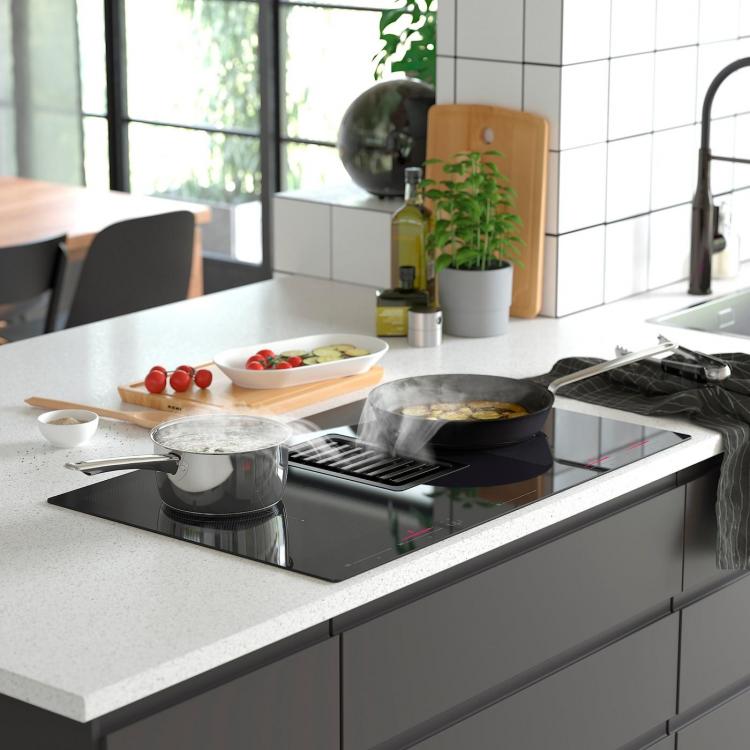 1 point
 -
That has been bigged upped to Property Development. In the 1960s and 70s, a self builder was someone that could not afford to buy a proper house.1 point
-
PCDB = Product Characteristics DataBase - performance characteristics used in RdSAP (epc's) and SAP1 point
-
Cheers I'll copy you entirely then with the sealant choice!1 point
-
Marine ply is better quality as far as I'm aware, 100% void free. WBP isn't.1 point
-
WBP = Water Boil Proof Plywood. Sometimes also called Marine Ply. Quality of this stuff can vary a lot so if your timber merchant offers several different grades pay for the best. I had some which was sold as WBP but delaminated quickly when damp. Concrete blocks should be fine. Our tray is a massively heavy Travertine tray that needed four people to get upstairs. Builder said it was the heaviest tray he ever installed. No sign of any movement after 12 years. However we have had water getting between tiles and tray. I noticed a damp patch downstairs a few years ago and for a horrible moment thought it was the trap leaking. Turned out it was just water that had escaped the tray through the door hinge gap. Sealing between tray and floor tiles was redone and it was sorted.1 point
-
Weather & Boil Proof1 point
-
Was told product is currently going through MCS and then PCDB (??). I will chase for specs in Jan now I have their email etc.1 point
-
PS We filled in the hole with a pressure treated wood frame (4x2) and thick WBP on top with a hole where the trap had to go. PPS You can set the tray into the floor a bit if falls allow but I would leave the top about 5mm higher than the finished floor level will be after tiling. That way the plastic door seal won't scrape on the tiles when the door is opened. Might allow a bit more just in case the tiles aren't 100% level ?1 point
-
We have same. Use a "top access" trap. McAlpine and others make them. The water seal in these is formed by concentric tubes instead of a U bend. The inner tube can be removed from above to clean the trap. Never need to access from below. Follow the instructions but the basic idea is... Plumb the bottom of the trap into place and support it at right height. Check the position by lowering the tray on top temporarily. Test for leaks. When happy mortar bed the tray. Then seal around the tray hole and screw the top part through the tray into the bottom of the trap. Check tray is level again. Later you fit the inner tube of the trap and the mushroom cap, bot of which can be removed for cleaning.1 point
-
1st June 2020 (pre-launch in April). Clik on tweet below and expand the replies to see further info on dates.. Also: https://www.vaillant.co.uk/downloads/aproducts/r290/r290-leaflet-final-aw-1604751.pdf1 point
-
Finished the piles this week. Just need to cut them level now ones we have the ring beam forms in place. Then fill the lot with concrete and piles and ringbeam s done. http://tintabernacle.blogspot.com/2019/12/piling.html?m=11 point
-
@Big Jimbo dont worry, I have dumb questions by the ton, I just spread them out across different forums and friends and family, so it gets picked up less. It s been written elsewhere , but yes, apparently cable ties are just as good as wire. Options to make cages are (to my knowledge_) -Wire -Dot Welding -Cable ties With these 3 options, wires are probably the cheapest and quickest . Dont think you can get cable ties cheaper than a few 100m of wire and pliers. And fiddling the cable ties together not going to be quicker than wires either. Many people also buy the pre made cages from Steel Stockholders . Probably cheaper that way if you ordering rebar anyways and take the time into consideration. Someone needs to tie the bars together (i get my rebar cheaper than any stockholders would be able to- so even with the exta work, still worth it_ )1 point
-
This will almost certainly be one of the numerous italian contract manufacturers. Typically Airforce, Faber or Elica. Wont be as good but at that price.....1 point
-
I was on the phone yesterday to Fernox confirming compatibility of their various products in our UFH (no radiator) system. The chap I spoke to recommended (assuming your satisfied that antifreeze levels are sufficient), dose with F1 inhibitor and F7 biocide. Why not phone their technical team direct?1 point
-
It’ll also heat the cylinder faster ?1 point
-
Get a 15kW boiler and set it up as W-plan ( DHW priority ) and the boiler will only ever do heating OR hot water, and never the two together ? edit: agree to oversize slightly and go for an 18kW unit.1 point
-
If it was designed so it could be swopped for a lift when you get old --that might be worth designing in just priced up a lift which would take a wheelchair ,assuming you have made the hole 1m x1.3m==£13k, but maybe worth designing in a space1 point
-
Yes, if you want to guarantee having 15kW available to heat the cylinder when at the external design temperature, probably -1°C/-3°C. The 3000W value for water heating is used by the Standard Assessment Procedure (SAP) boiler sizing algorithm.1 point
-
Yes, typo! I will edit my post to save others the confusion! Fancy a job as my editor?1 point
-
We live in a typical not so new build (2001) in the north west. We have this too. Only Remember this being a problem for the last year or so. The tap in the utility (little use) also gets black “bits” hanging out of the spout and the nozzles in the drench shower head constantly expel gooey black stuck and this is used 4 times a day. Ambient temps and the season make no difference. I friend moved up the road last year from a different county and the black gooey toilet line was the first thing he commented on. I have two exposed cisterns (back to wall pans) and one insulated concealed. Same phenomenon in all three.1 point
-
If the PIR is on the inside it will lower the temperature of the masonry and make it more likely to suffer from condensation, which could lead to serious structural issues if left unchecked. IWI tends to come with detailing for a vapour control membrane, but even then if it ever gets damaged, you could end up in trouble. Its all about the dew point within the structure, IWI moves the dew point further inside, EWI moves it further out. If you have PIR in the cavity I would imagine IWI is probably not a good idea, and EWI would be pointless since cavity PIR always comes with a cavity gap. Most people opt for EWI as you can also then use the masonry as thermal mass to help balance temperatures across the year. Sand/Cement render is very old school, thin coat render systems are very good at their jobs and if applied correctly they will last a long time, much longer than sand/cement render.1 point
-
Me too. Quarter-Irish Englishman with a Welsh surname building in Scotland as a hoped-for refuge from the decades-long slide of England into narrow-minded nuttiness.1 point
-
The Englishman here! Embarrassingly admit to being born in England but as the country seems to be suffering from a widespread mental illness at the moment we have decided to move up to the Highlands to be with my family and live a simpler life in Britain's most beautiful place.1 point
-
If possible,I’d set the mixer up so it’s tipping directly into the trench,with a water butt next to it & the cement bags stacked there. Much easier to barrow the dry ballast than to barrow the mixed concrete the same distance.1 point
-
You are in good company- that @Russell griffiths is famous for it.? For the MDF - use MRMDF (moisture resistant)1 point
-
How does it compare? Takes me about 10 minutes to order the tail end of a part load ( half price), and a further 20 to chat to the driver, 5 minutes to wash up the coffee cups.1 point
-
If say you get about 87.5 kg in a drum of dry materials. Just basing a 6:1 mix filling the drum. So around 8/9/10 for .4m3 based on weight Yes I would assume 130l is horizontal complete volume1 point
-
Can't see any issue with that, as its only 3 weeks and if you aren't in too much of a rush then it should be fine1 point
-
Just PVA any plastic conduit if you want to fill over it.1 point
-
Not at all easy to pull a new cable behind capping, but can be done with care, if it's a straight run. Chased and capped is pretty much the universal way to fit cables into brick/block walls, and if you think you may need extra cables in future, then why not put some spares in, and leave them coiled up in accessible locations?1 point
-
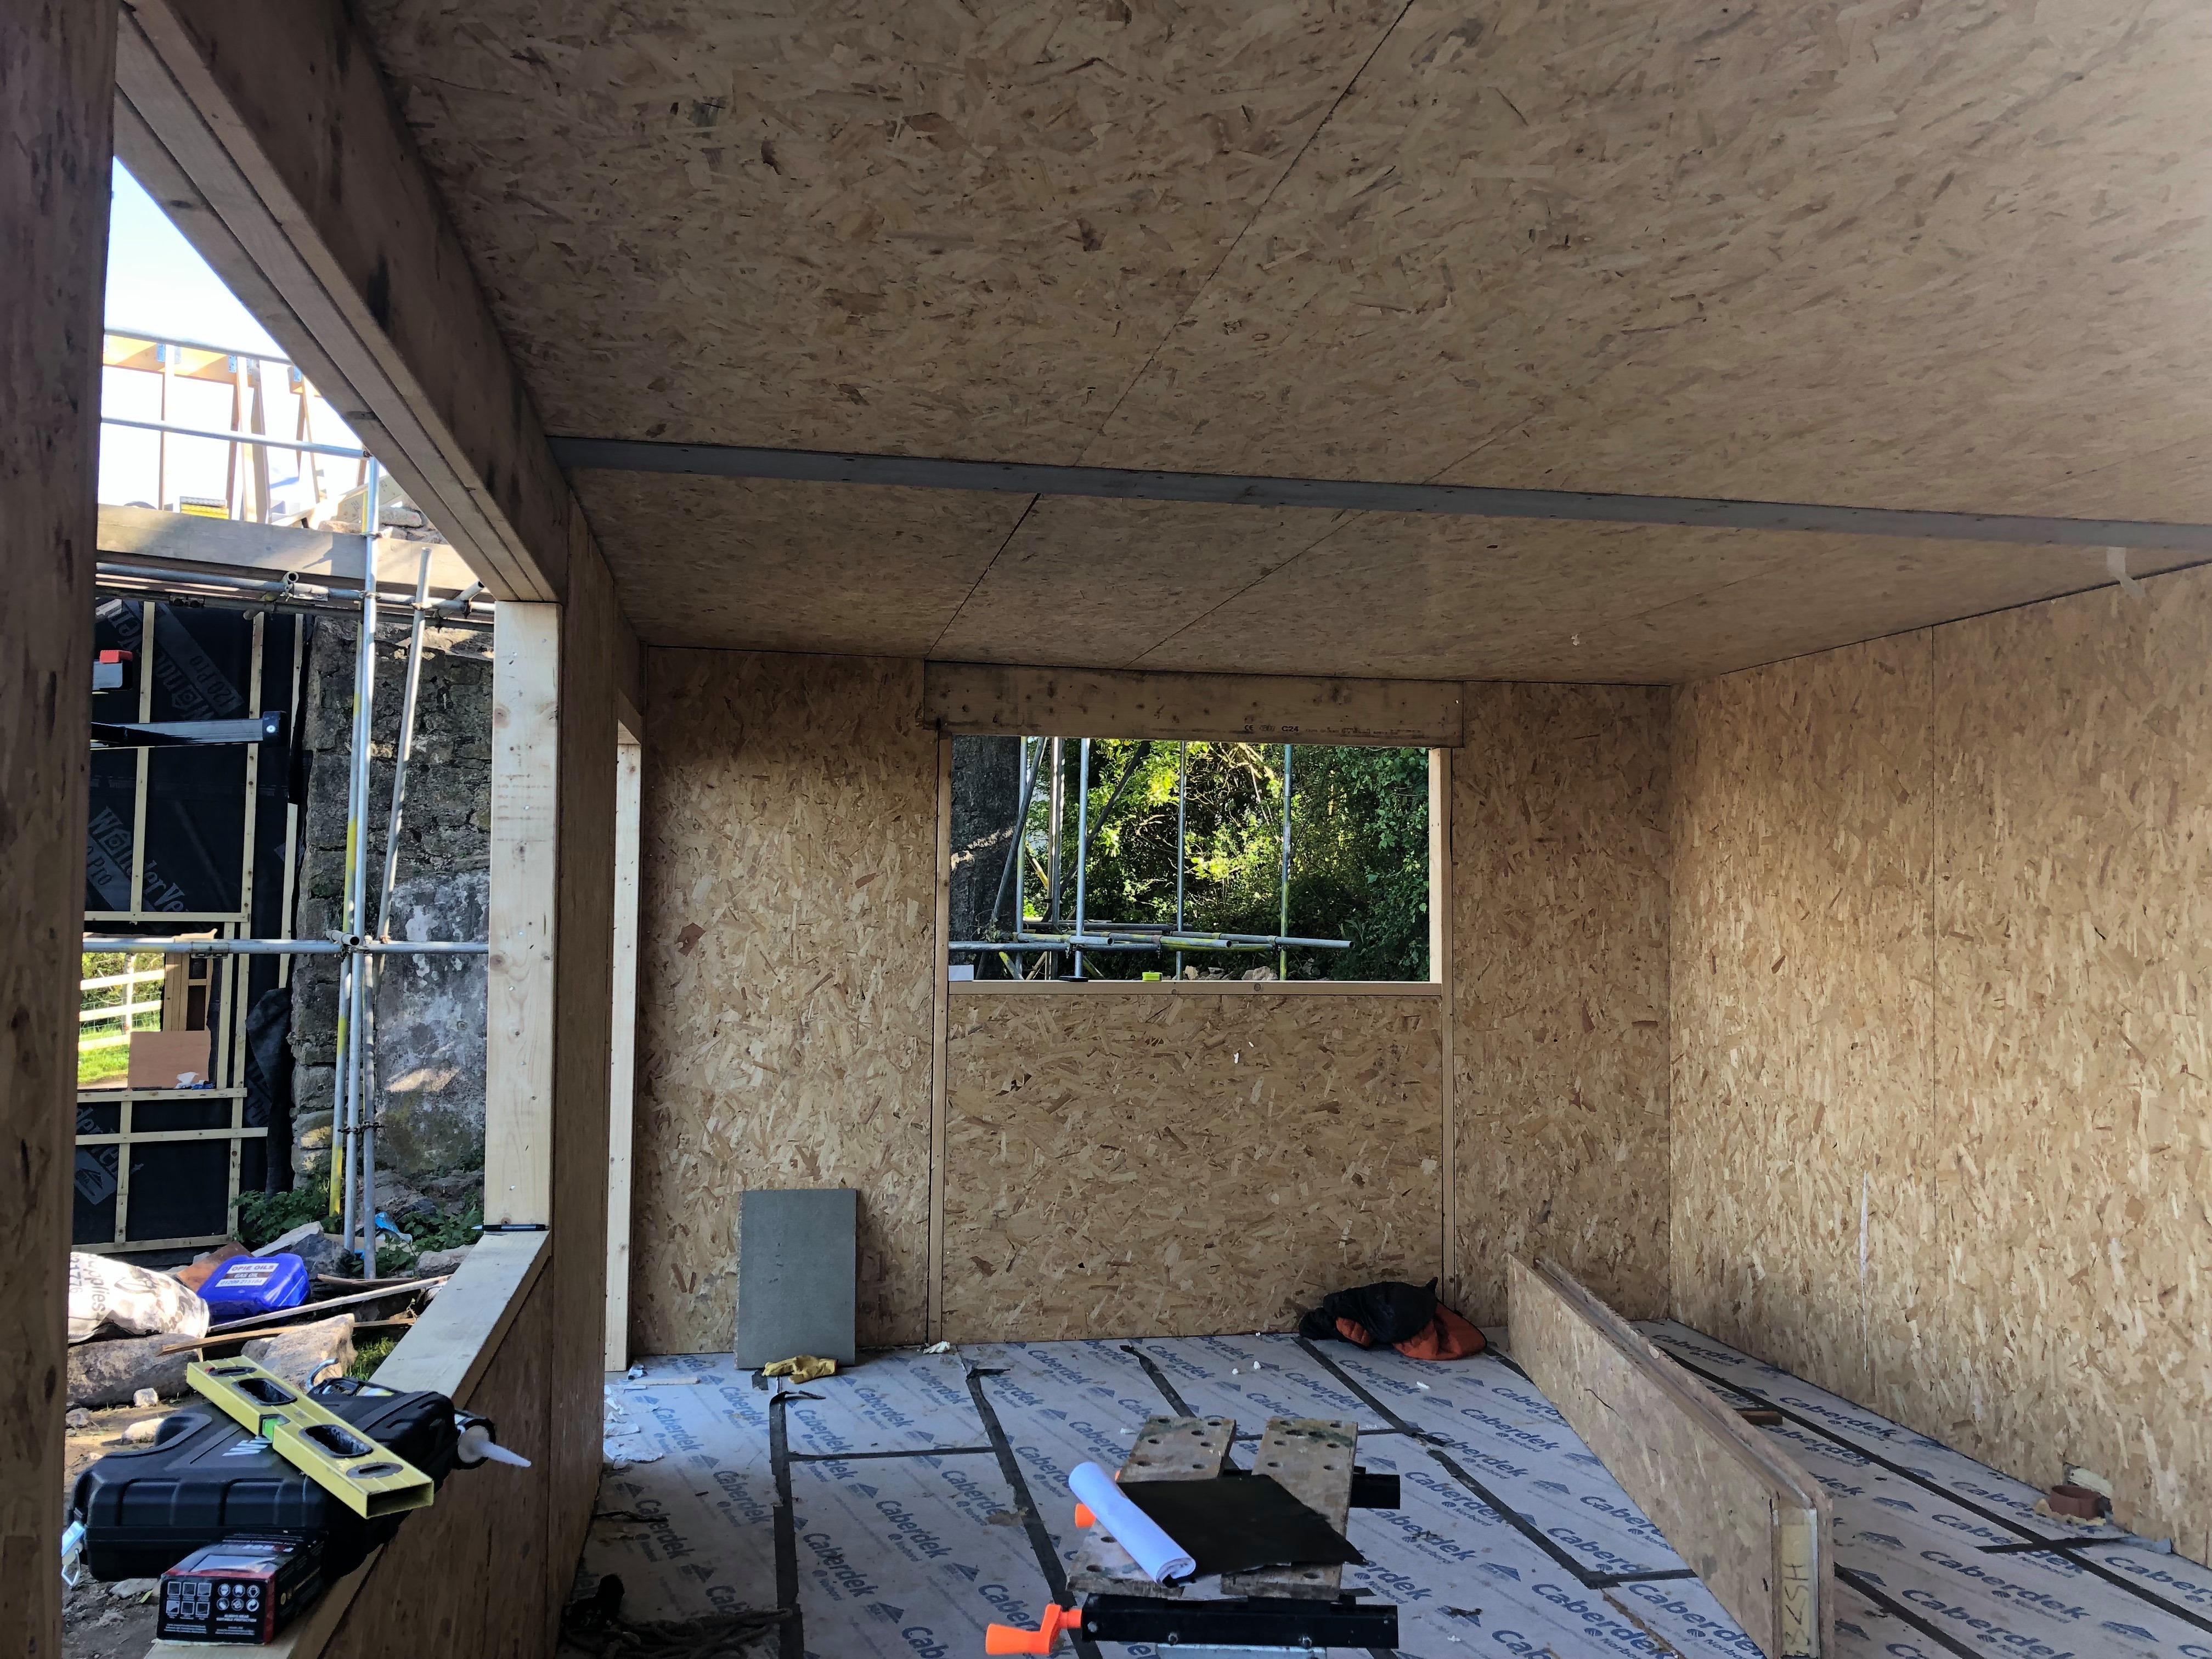
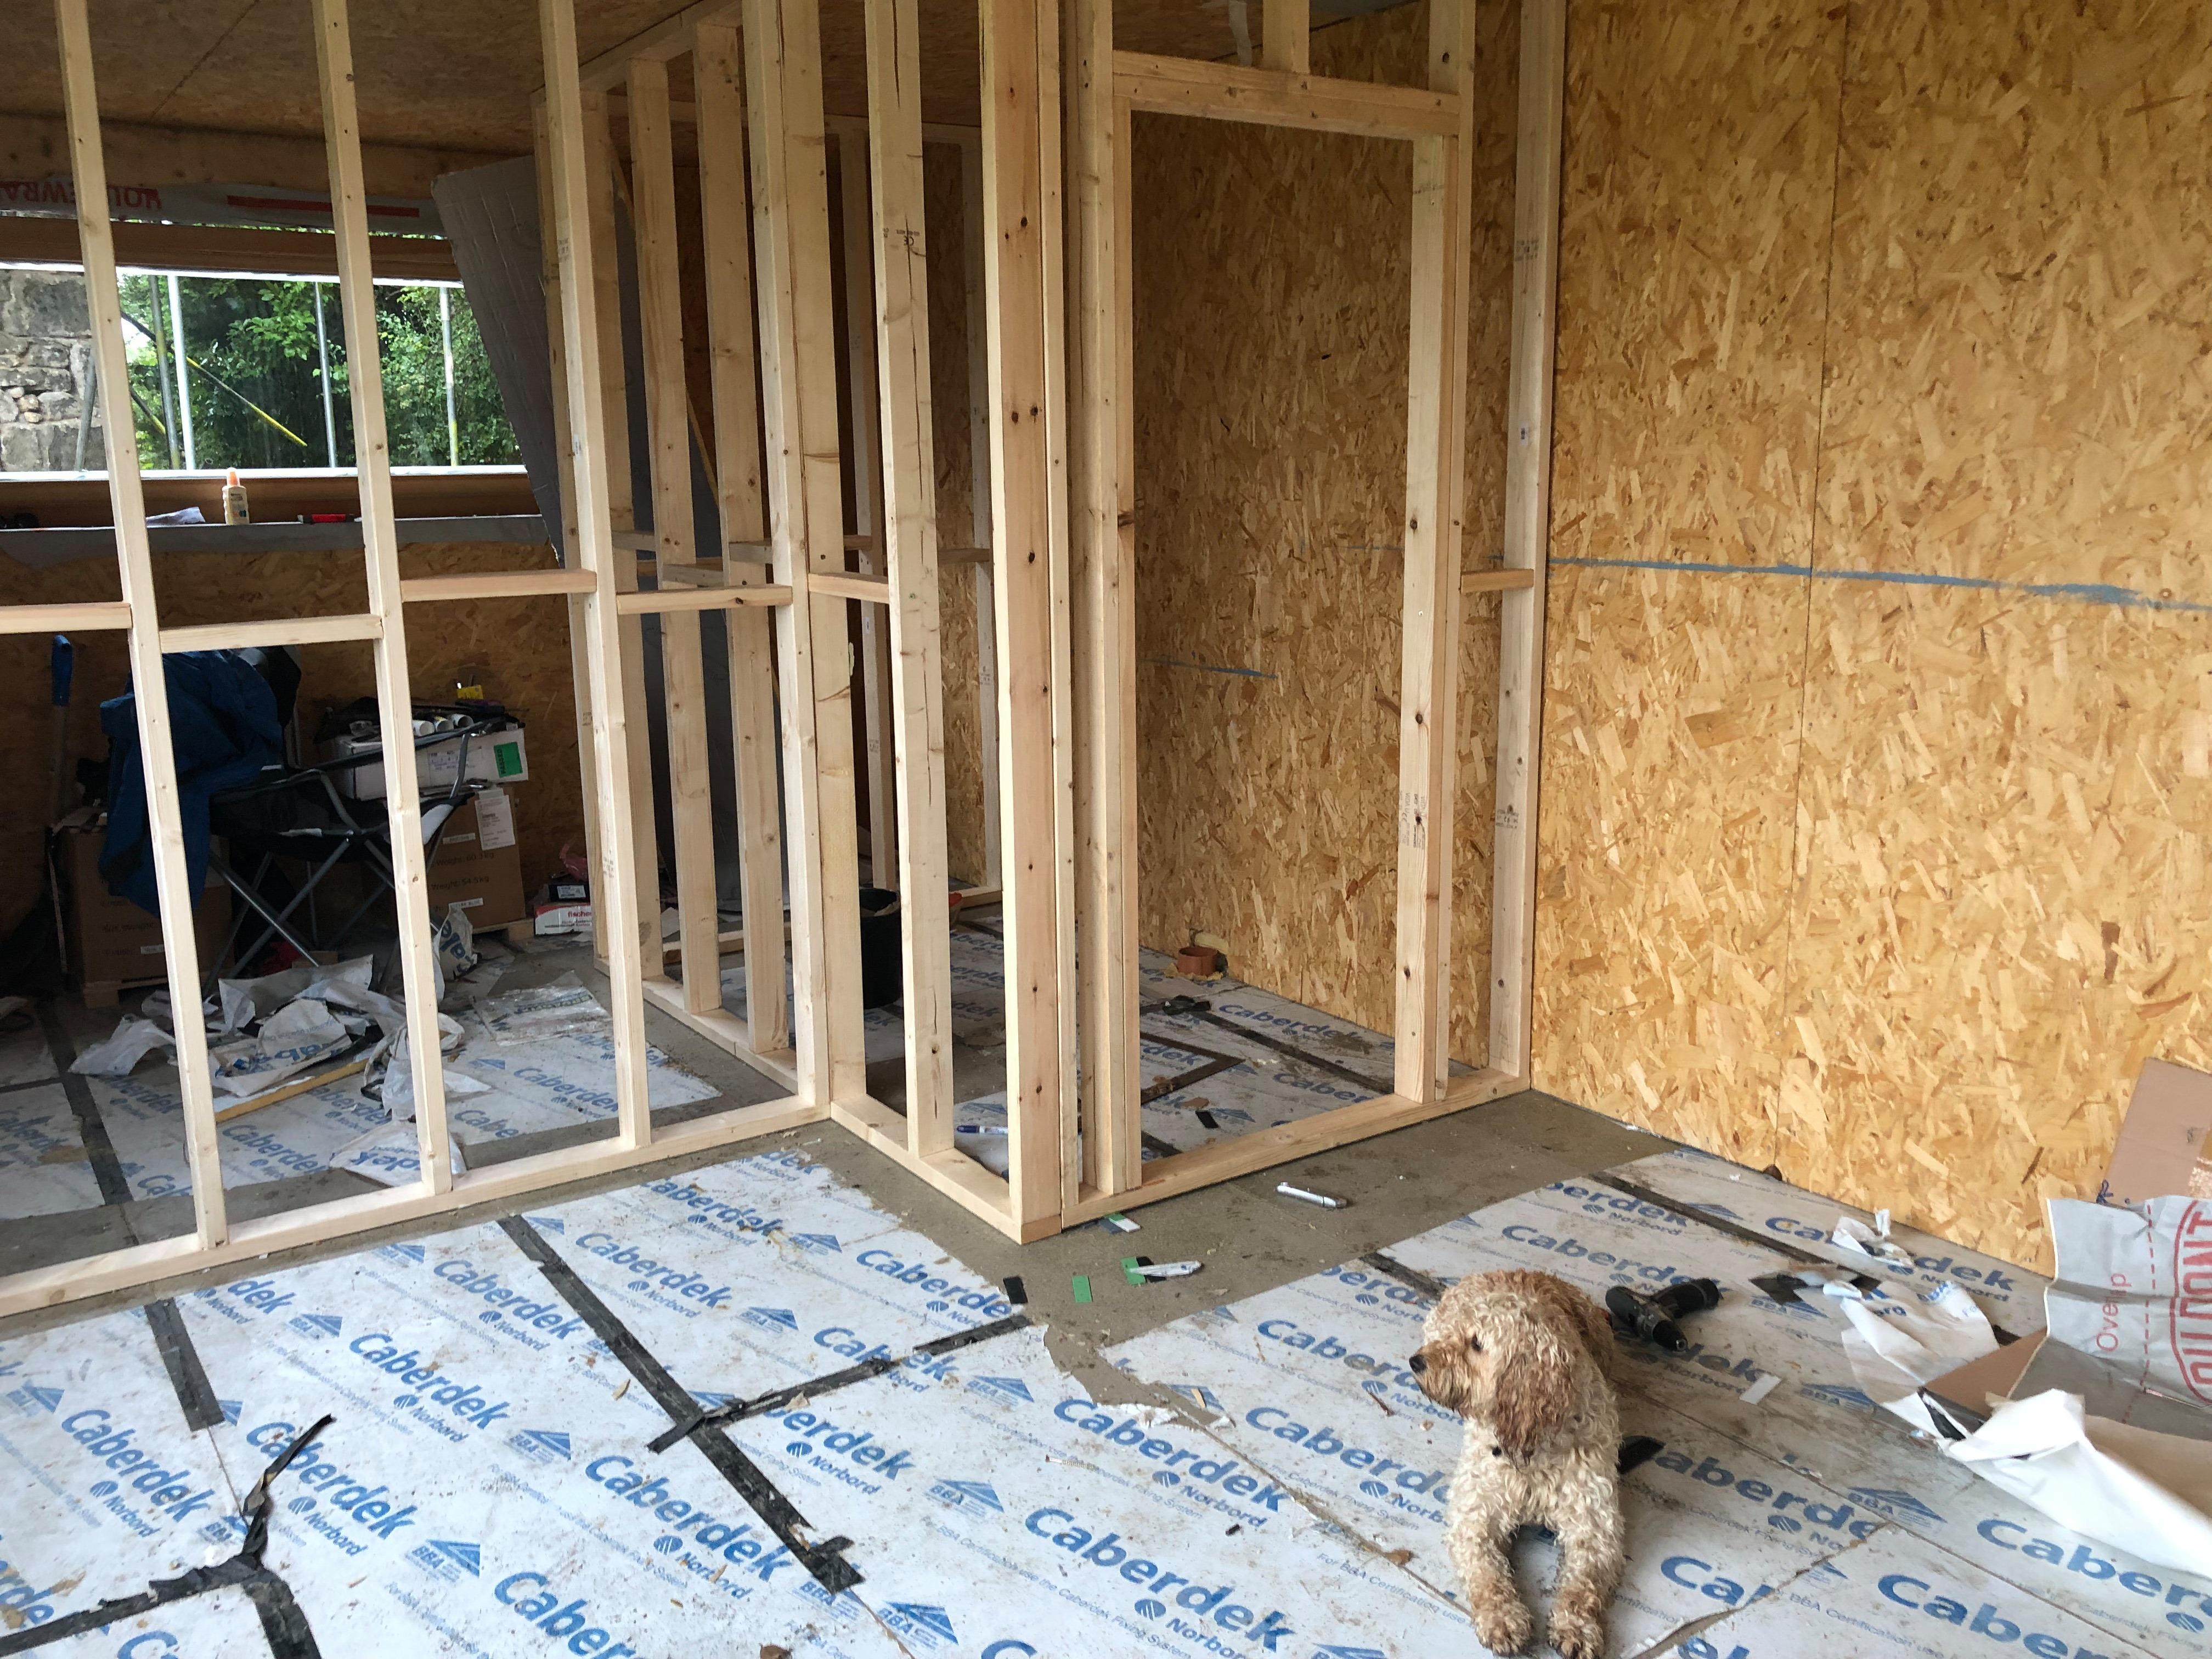
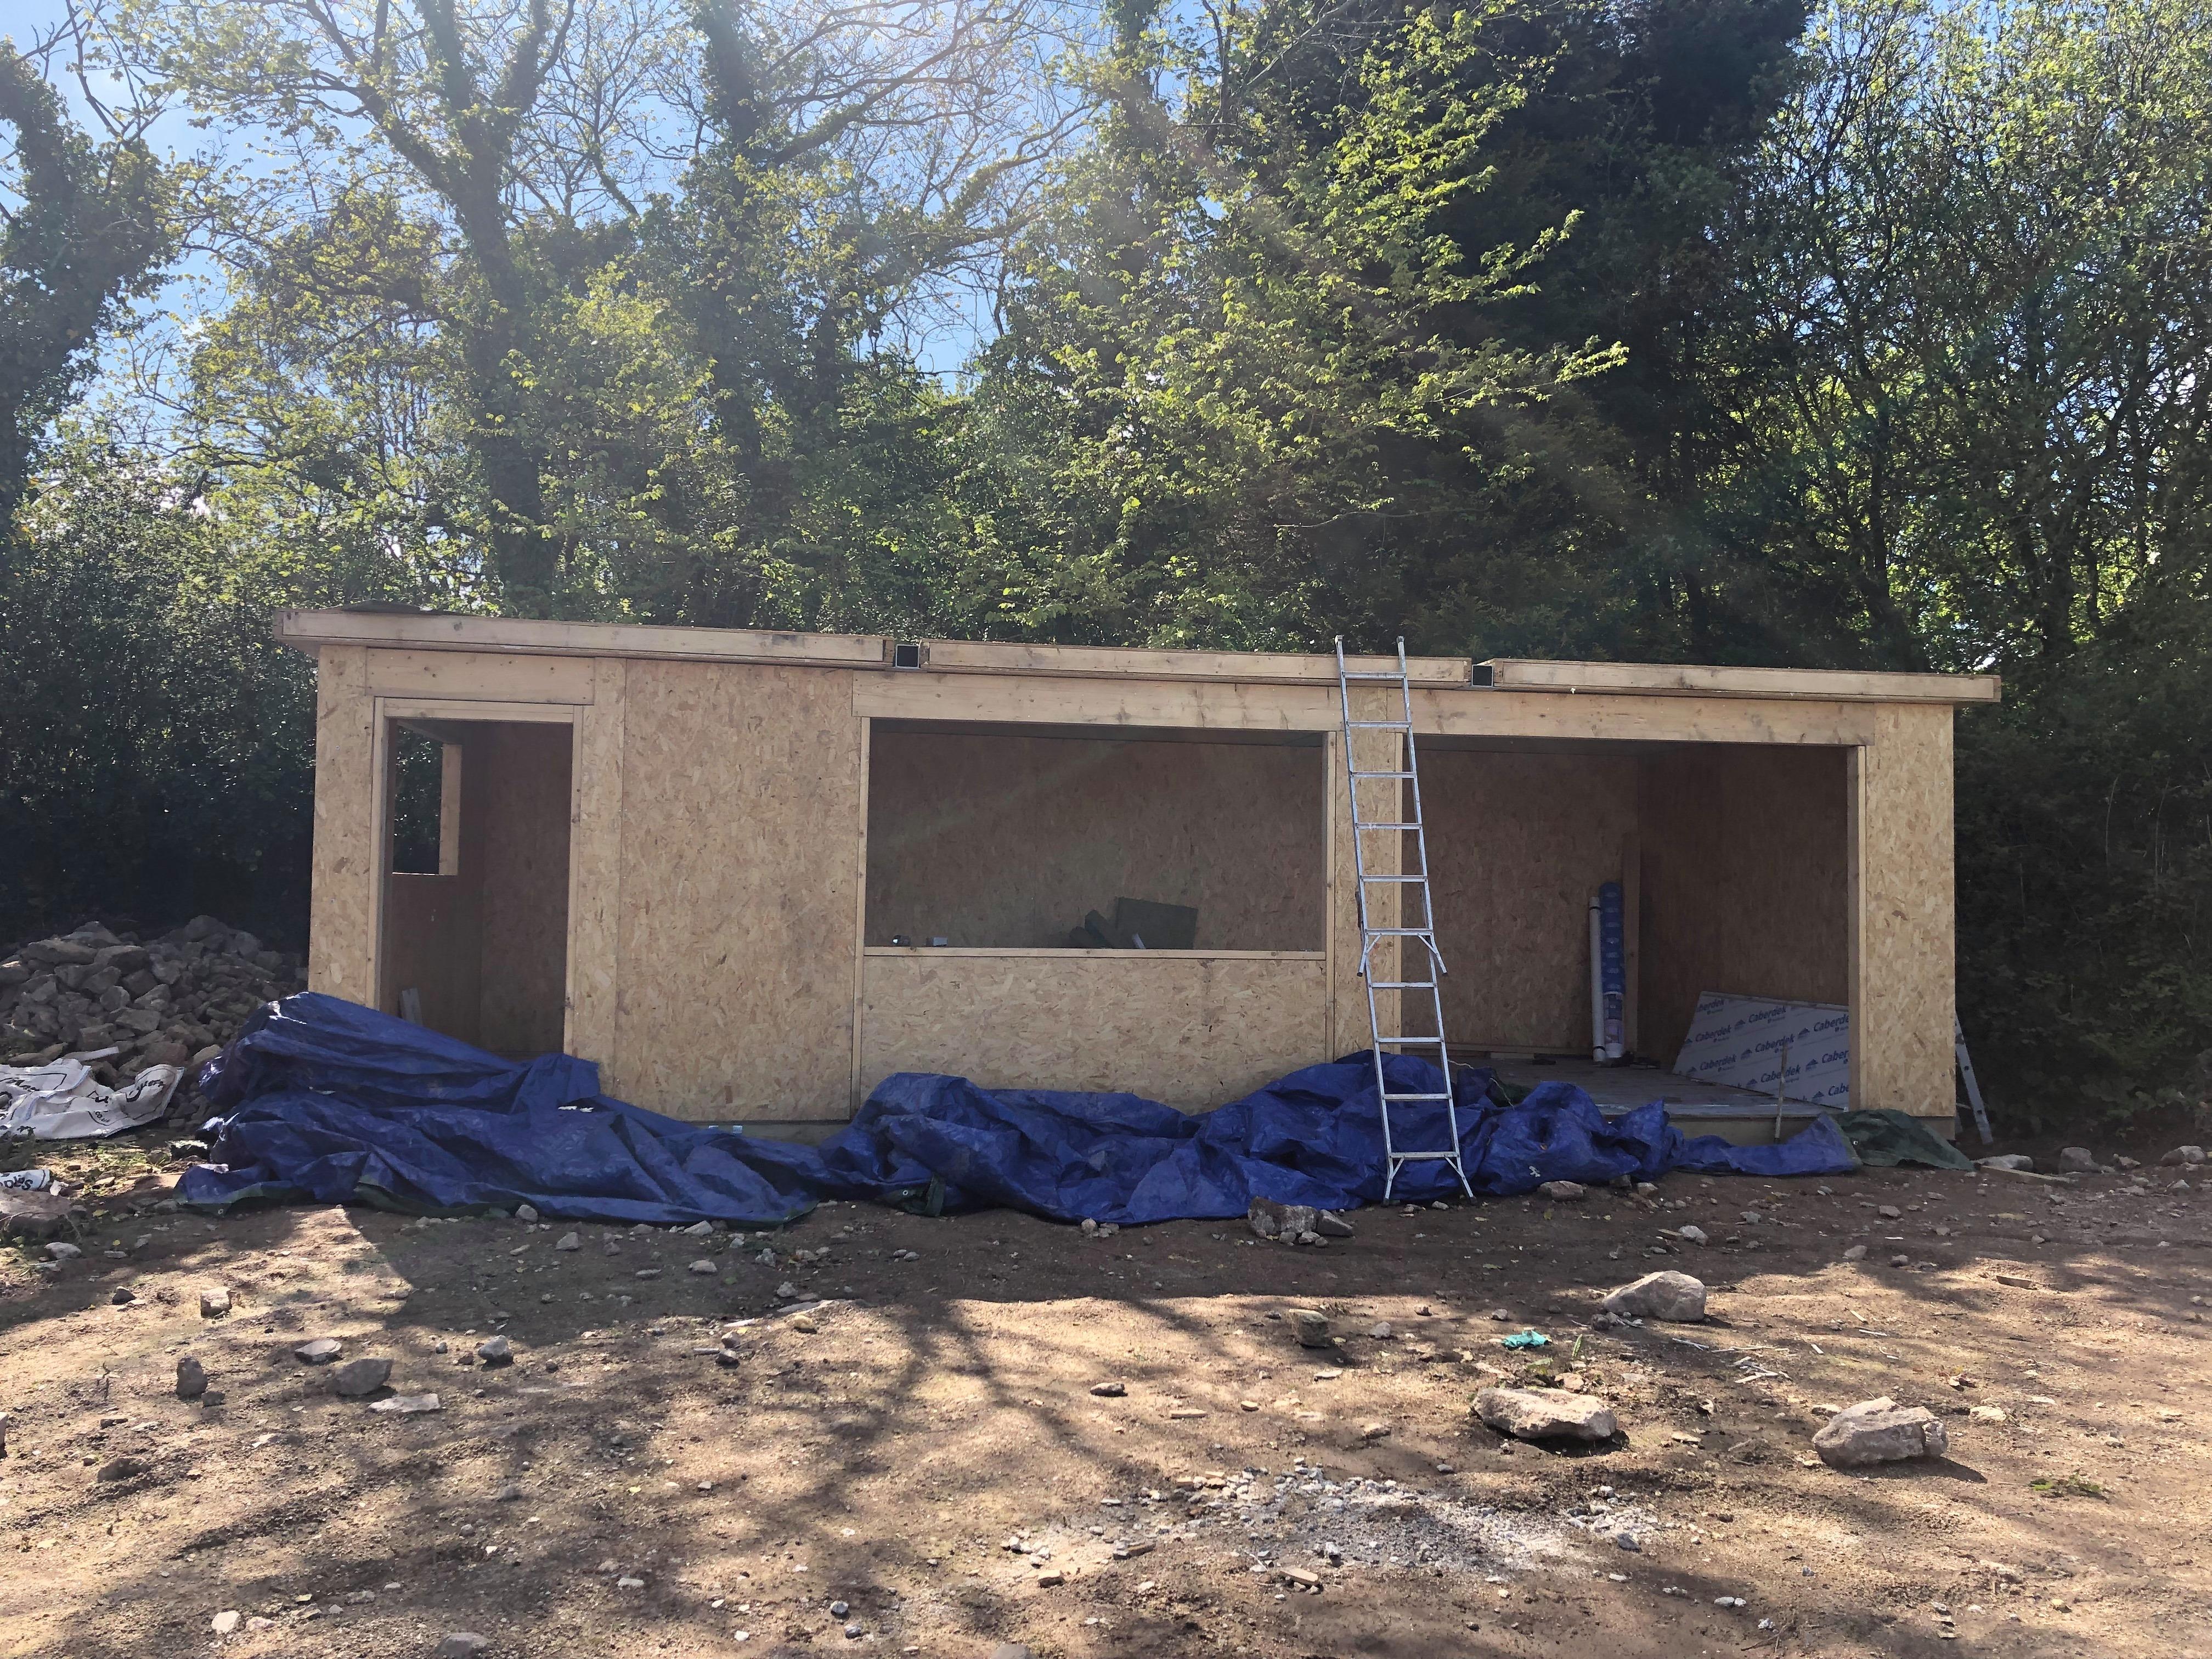
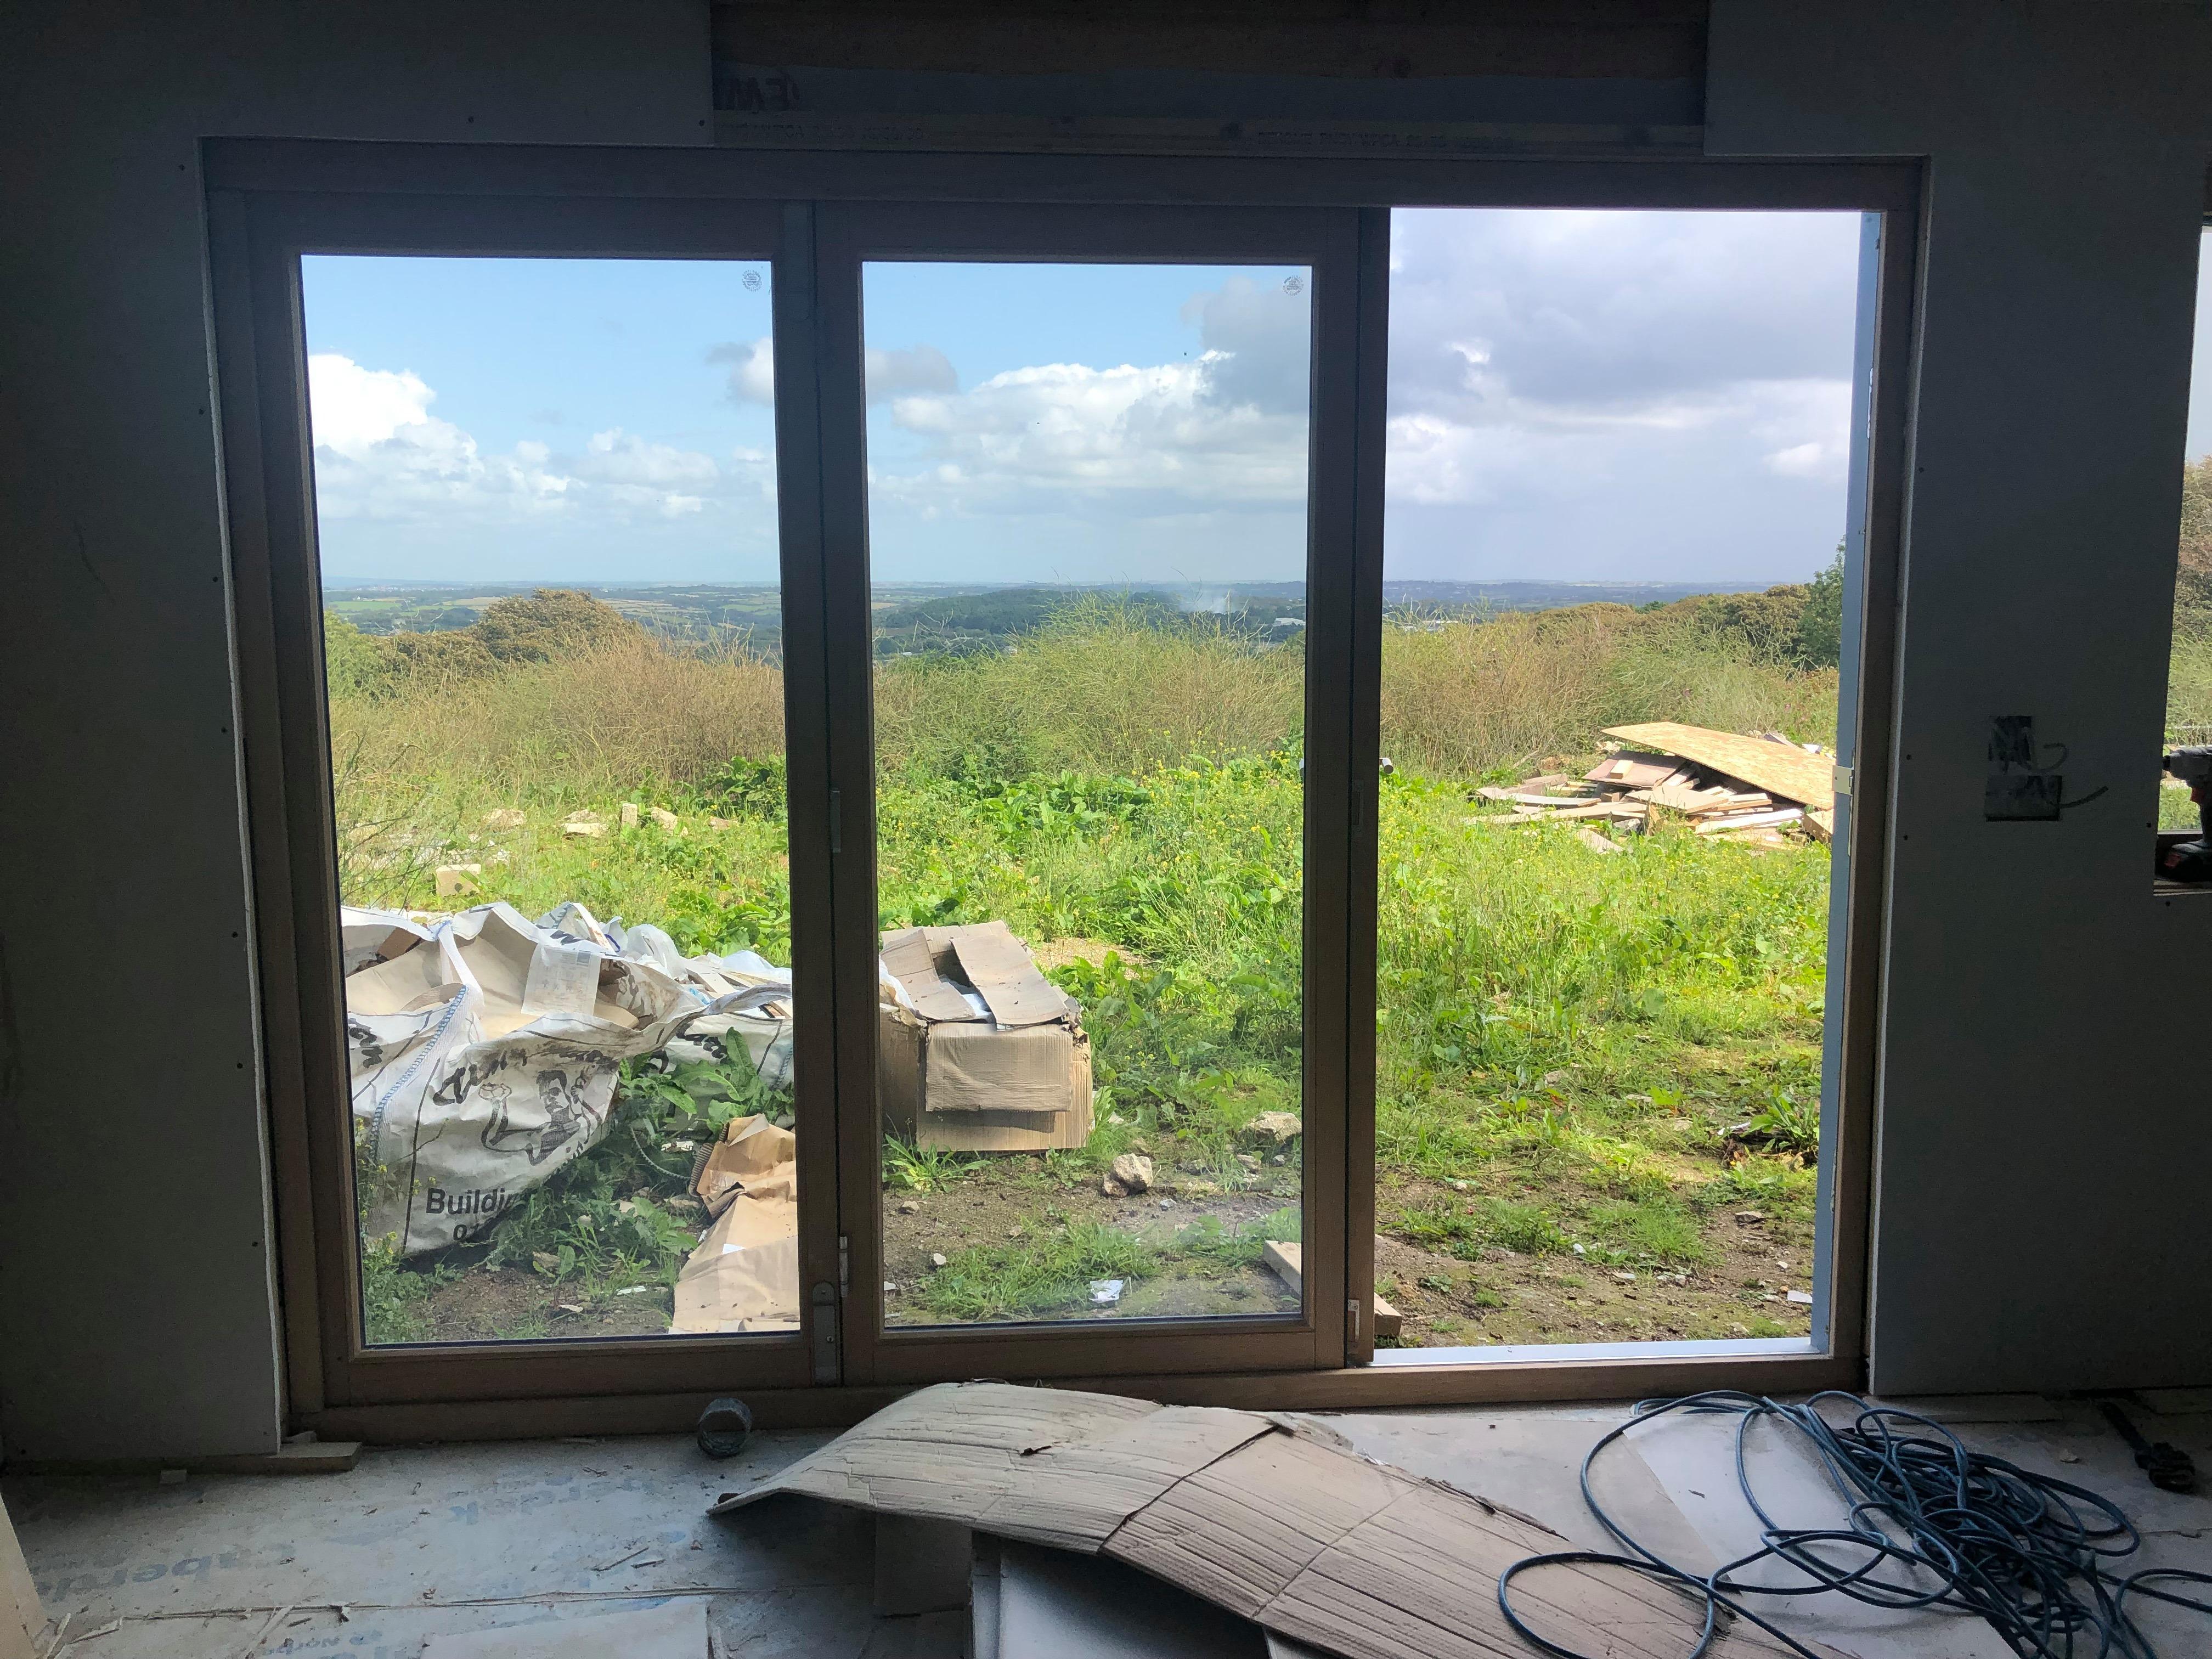
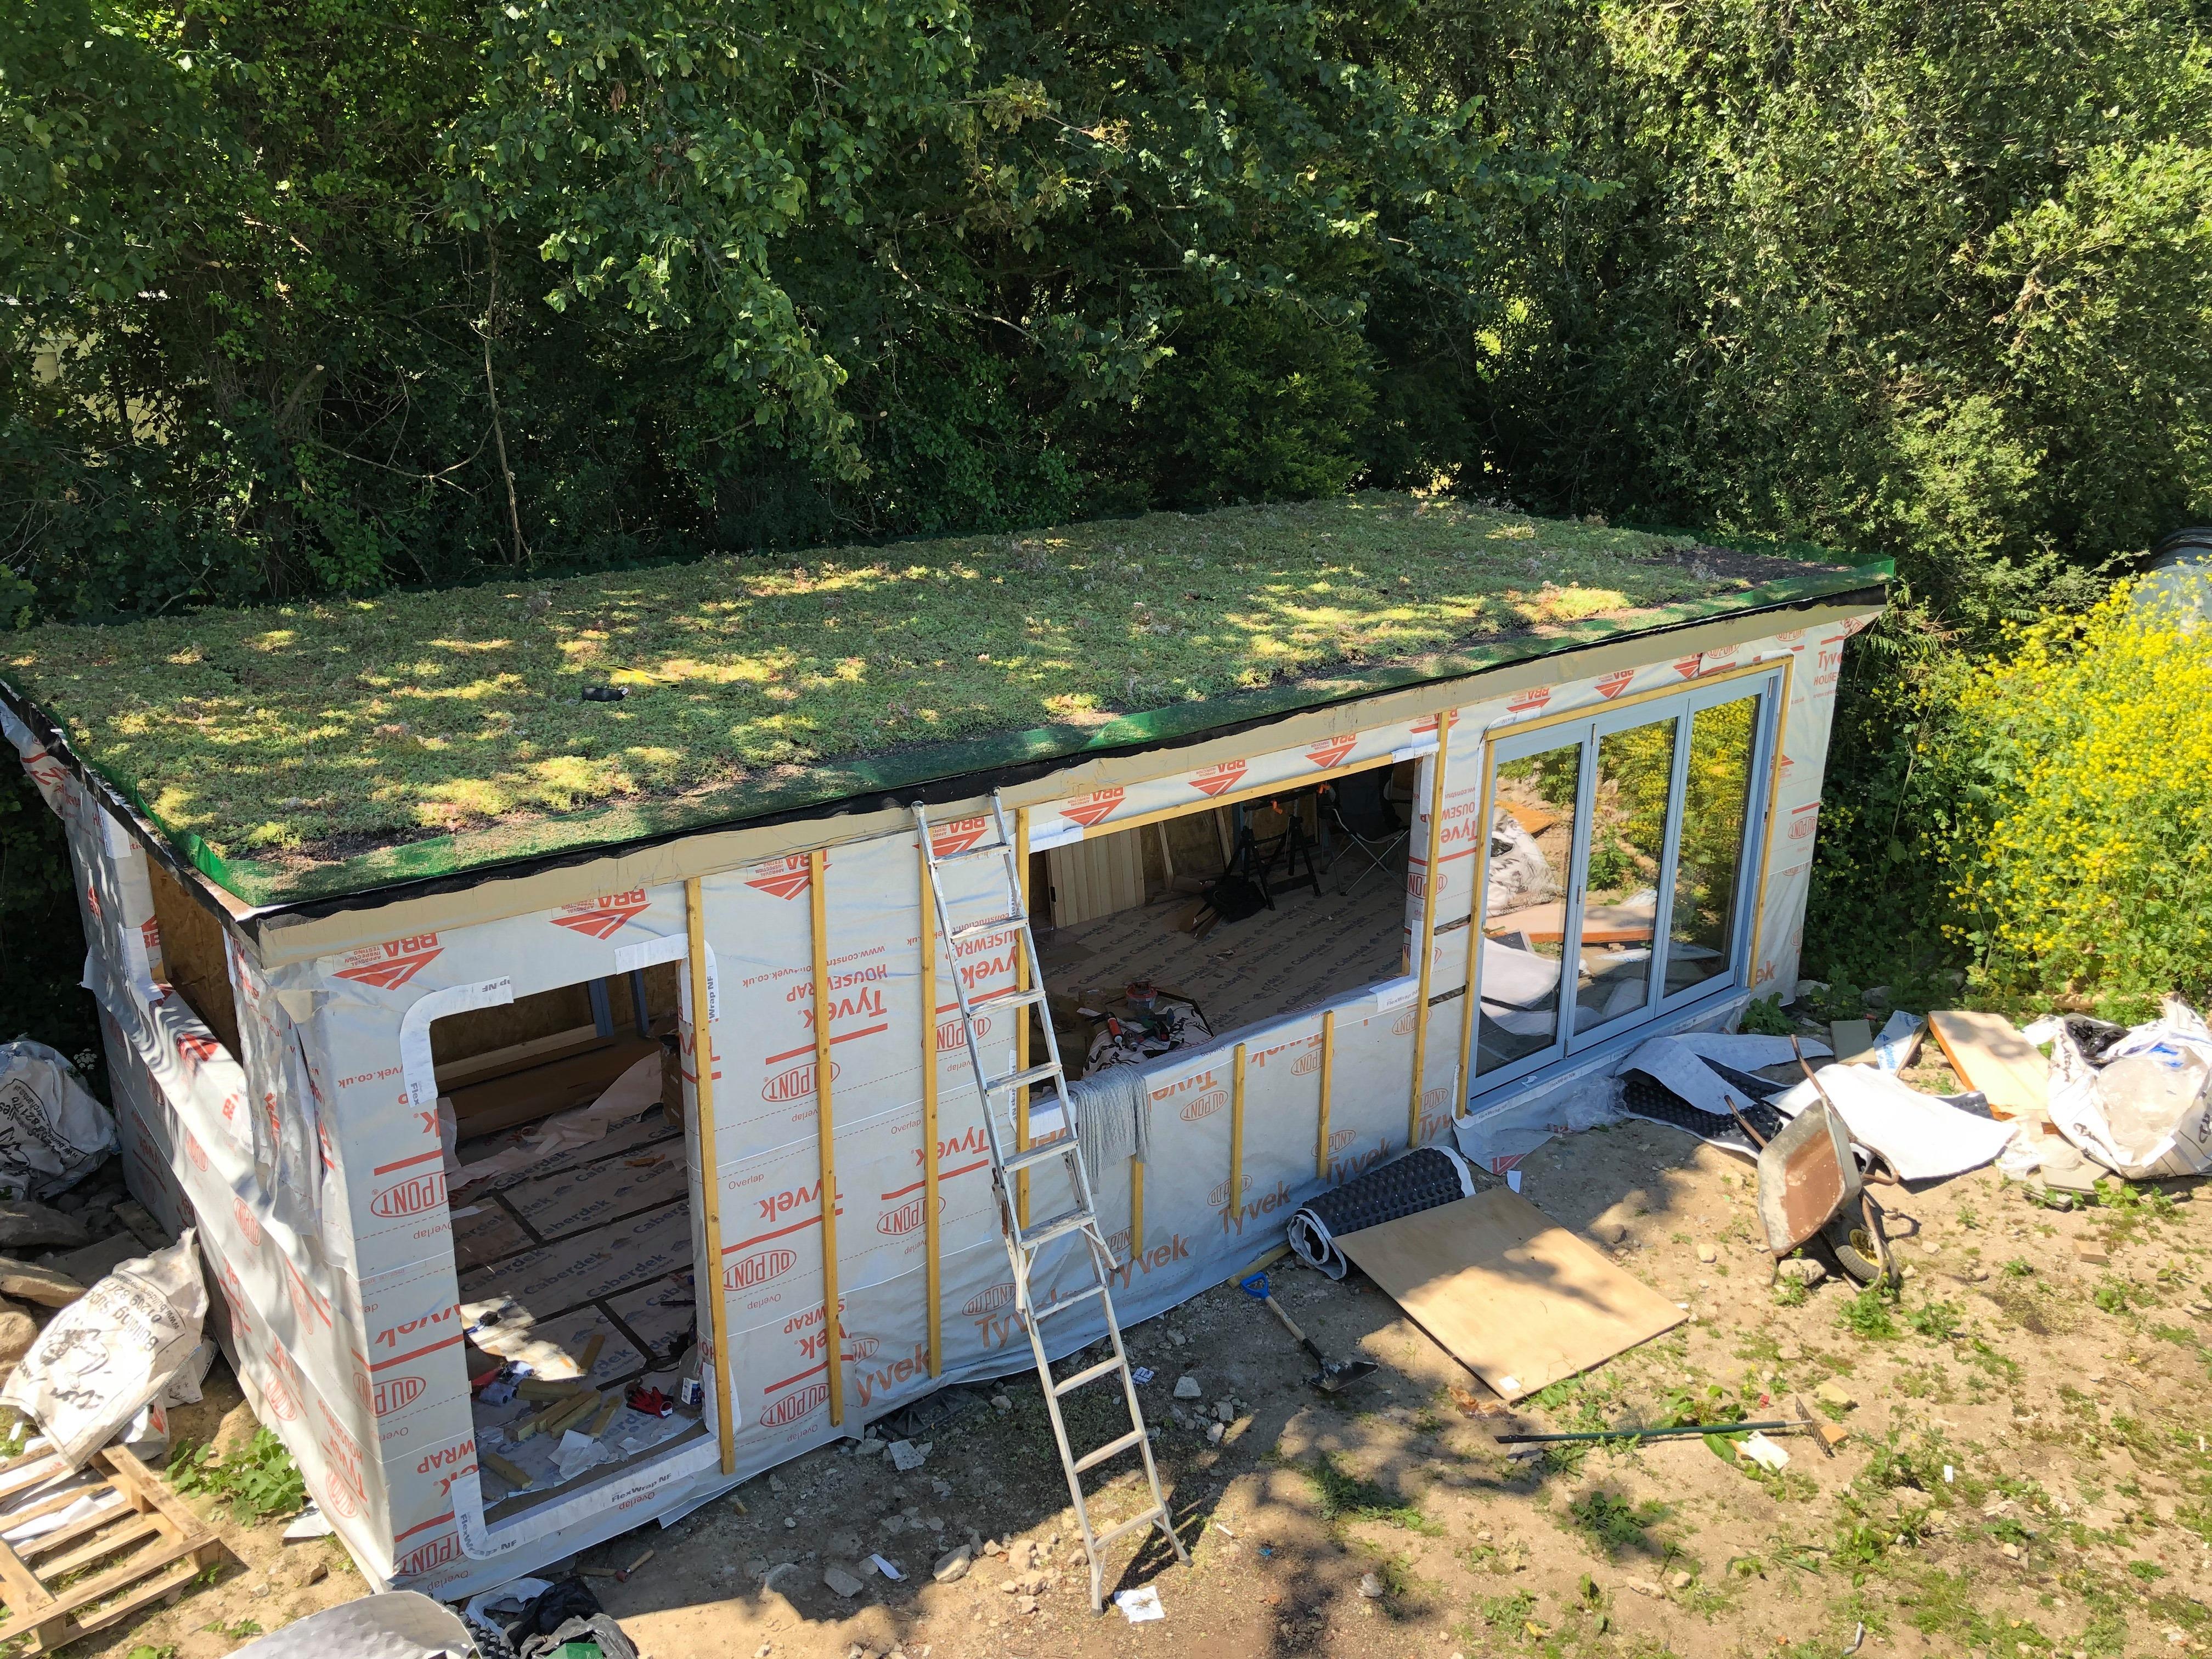
Sorry had to find these amongst the other crap on my phone! Obviously we haven't done the cladding yet. It was a family affair at times. It's sitting on Jackpad plinth foundations which I didn't get a photo of. We probably did a lot of things wrong, but we got there in the end and it's still standing. p.s. yes there were a lot more screws in the plasterboard than the pictures show ?
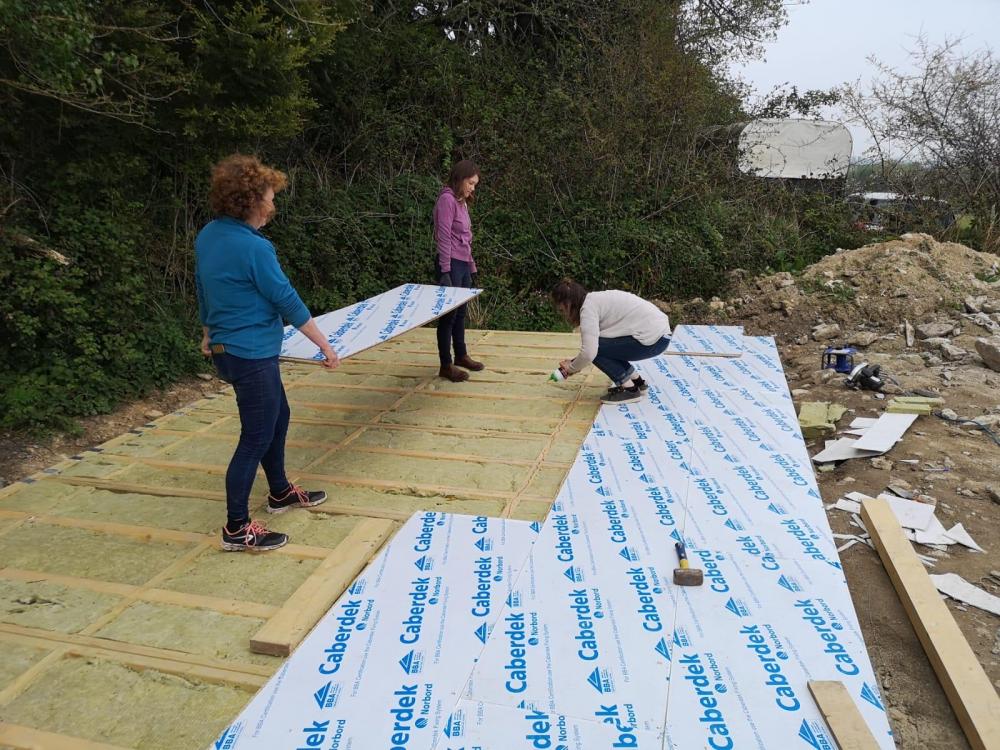
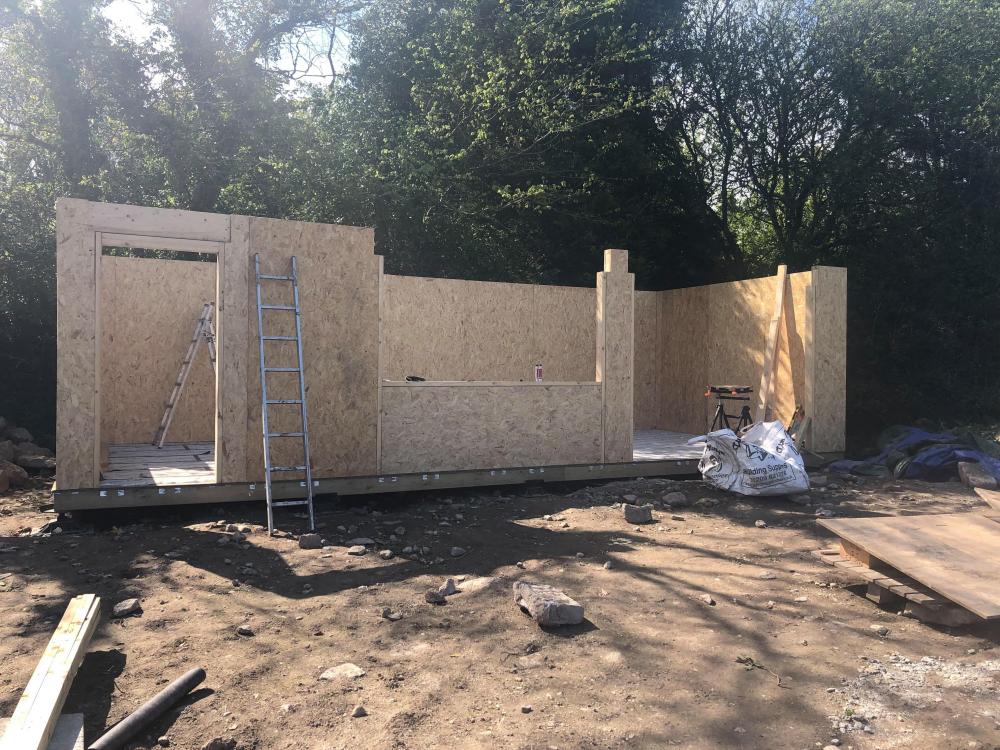
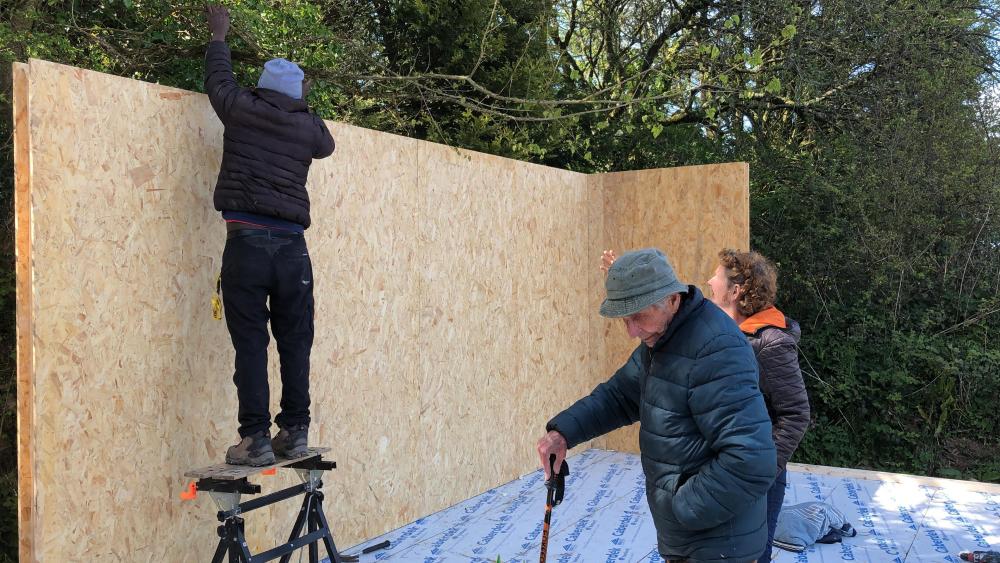
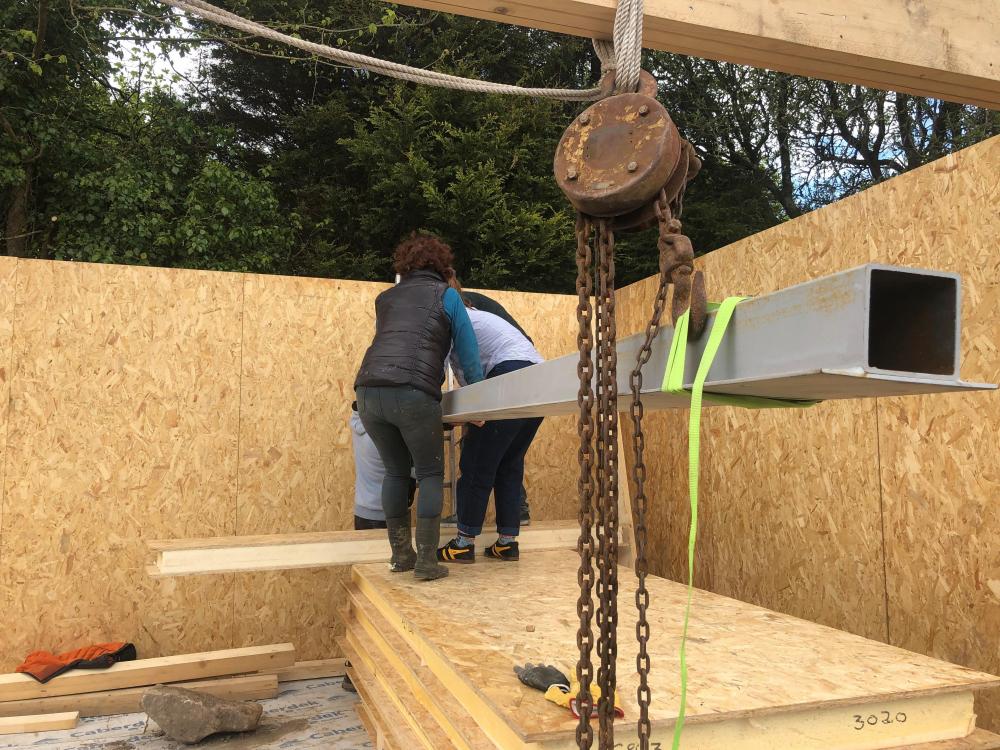
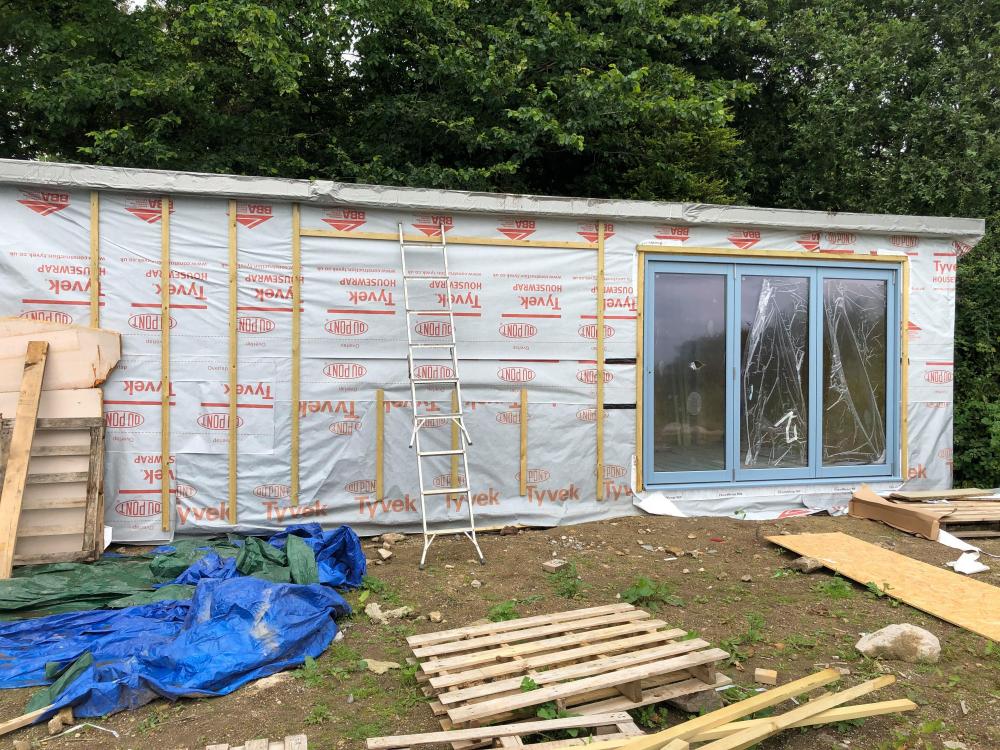


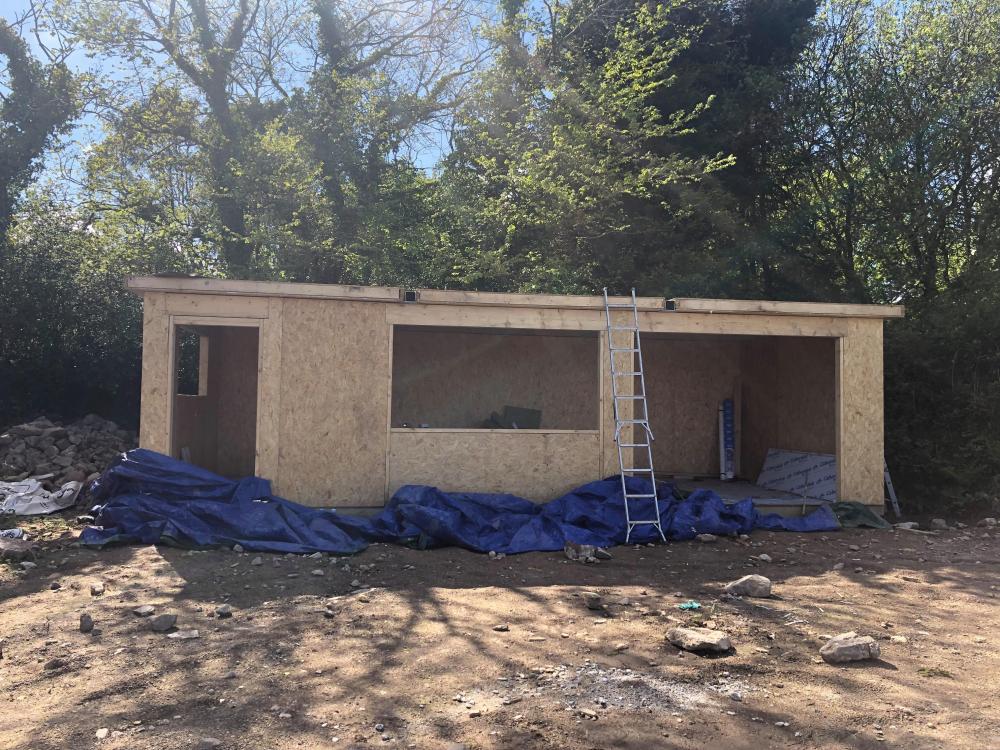


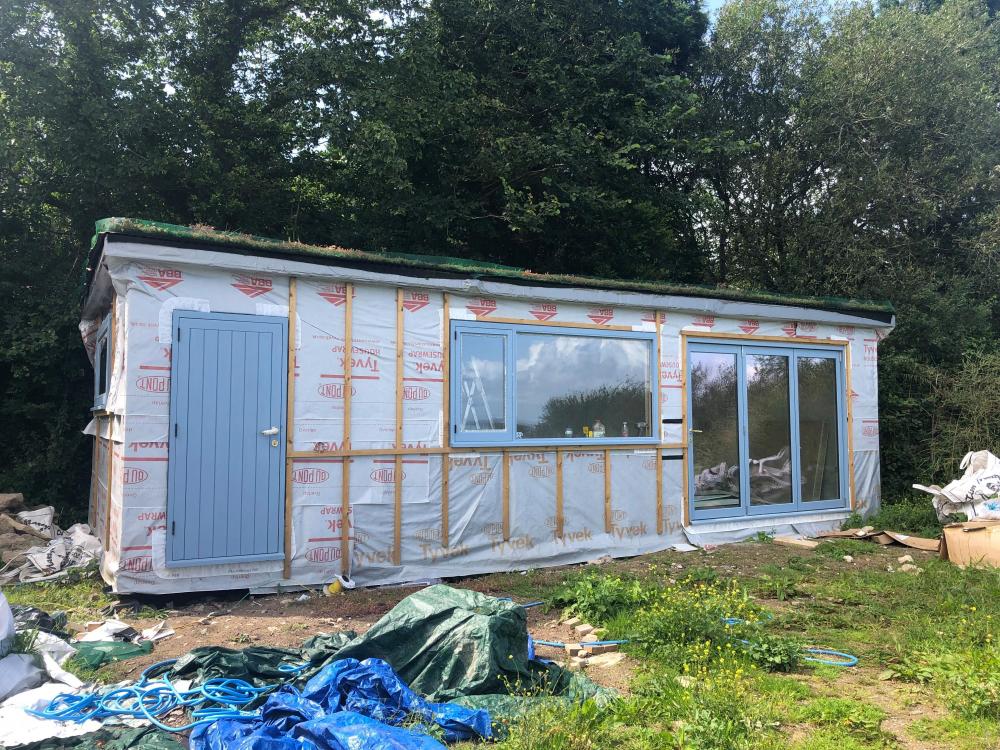 1 point
 -
The IMPORTANT thing before you do ANYTHING is to note that not all cables of the same colour do the same thing, so you need to mark EVERY cable in some way before you disconnect anything so you can always revert to how it was. There is a LOT going on there. You have two 3 core & earth cables, one being red / yellow / blue and one being Brown / black / grey. 2 way switching? I would be inclined to sink a round plasterboard box into the ceiling to give you space to terminate everything exactly as it is now, bringing one bit of 3 core flex out to your light fitting. something like this, https://www.screwfix.com/p/appleby-circular-dry-liner-box-35mm/90517 Once all your terminals are tucked up inside the box, I am sure the mounting bracket for the light fitting will just fix to the two screws with standard socket screws.1 point
-
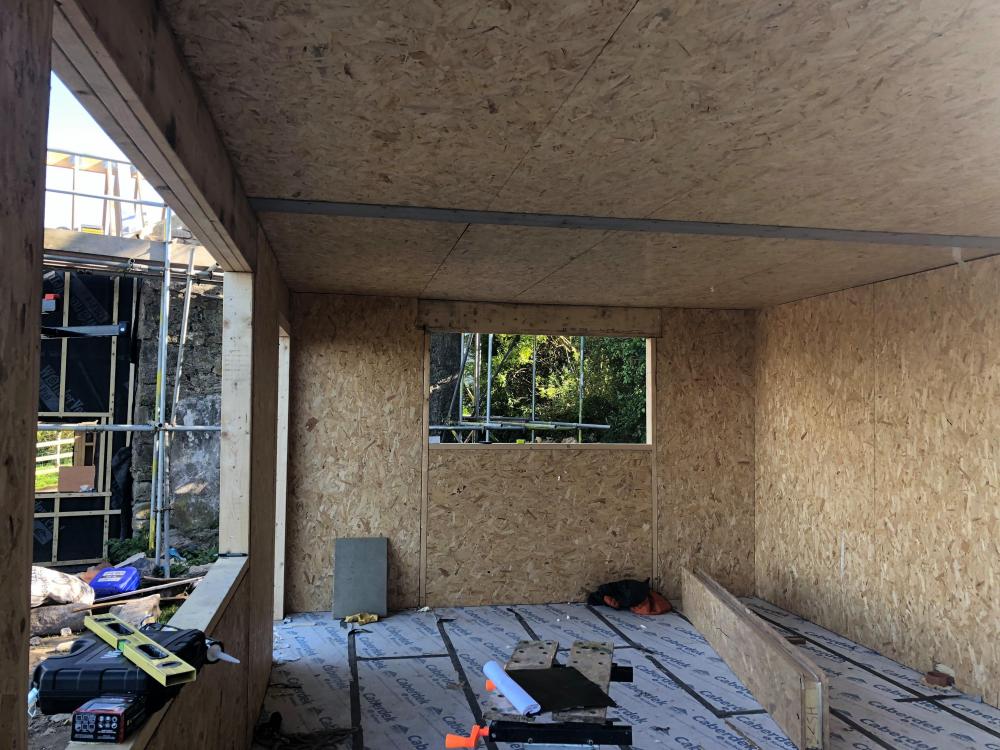
Nearing December. We would've loved habitable for Christmas but are a fair bit off. [shrug] Sitrep: One side of every internal wall PB'd Internal walls and GF ceilings all insulated. First layer of insulation in the attic complete. FF ceiling boarded out. Upstairs mostly firstfixed for electric, plumbing still a bit to do. First couple of sheets of PB (that soundblock is HEAVY!) hung on the GF ceiling. Oh, and I'm sold on MVHR. Was working on a diesel spaceheater for a customer last weekend. Ran it for an hour in the hallway. 17c downstairs, stifling on the balcony. 7c outside that night. Supply air 15+c. Impressive.1 point
-
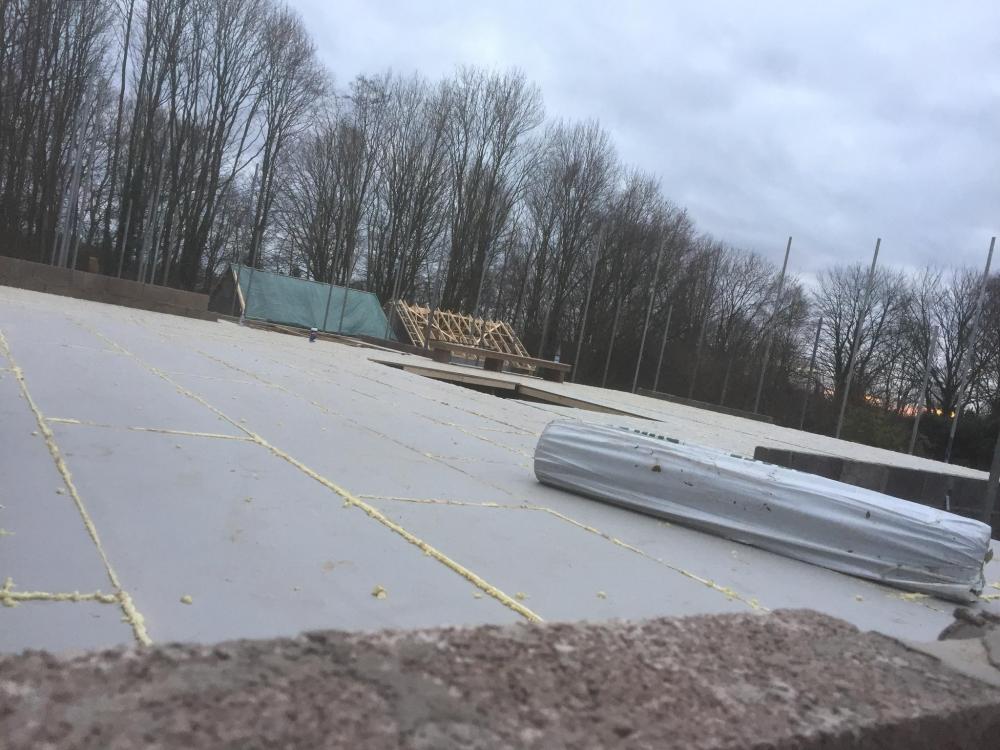
Mine was left exposed for about five weeks I also covered with Visqueen as it was Boxing Day when myself and my wife boarded nailed and glued it When I un sheeted it it was very dry Pretty resilient stuff
 1 point
 -
always start with --what price will it be easily saleable for when its done ? price of others that are similar locally,that have been sold recently ? just to check it is worth the grief of doing it . cost of somewhere to live while build is going on + add a good bit of extra time for builder not completing it on time ,for what ever reason1 point
-
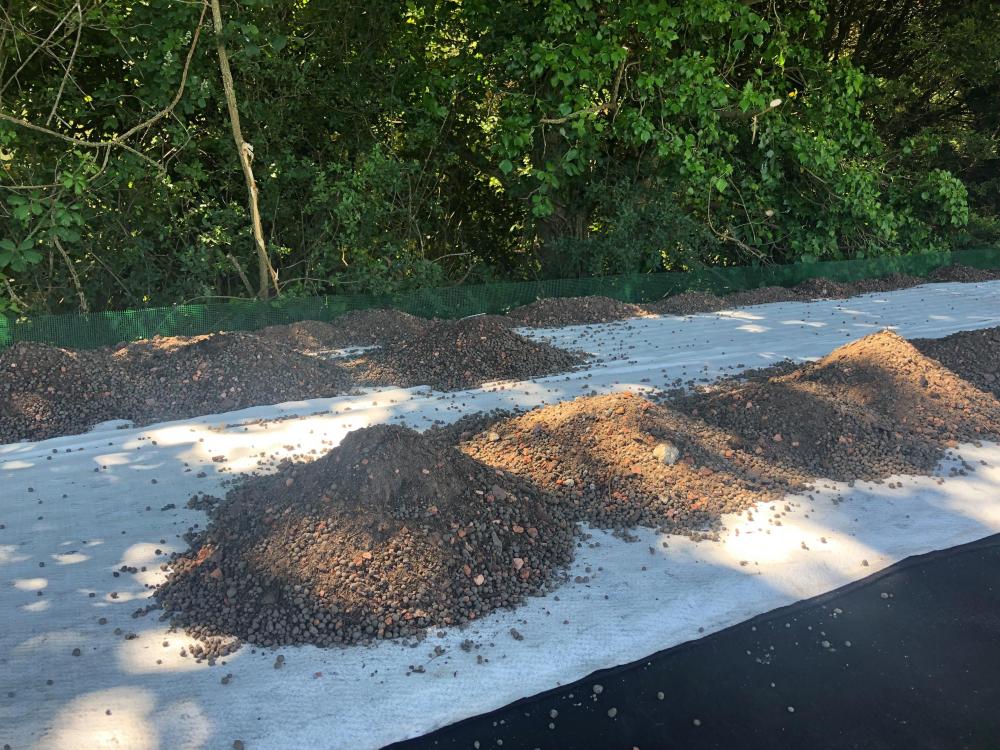
Another week of hard work by the builders and the foundations are complete. Type 1 up-fill (only 100mm or so required) was spread then compacted down with a vibrating roller. A final layer of quarry dust was added to finish the blinding. In keeping with previous comments about a clean and tidy site, you can also see the digger spreading type 1 around the foundations. Internal drains and ducts are added, DPC / Radon barrier laid and 150mm PU insulation fitted. Whilst doing all this, the concrete wagon stopped by and the strip founds for our garage were put in. The plumber subsequently put in the UFH pipework, over 1 KM of it! A track system was stuck down (black lines you can see) onto the face of the insulation and pipework clipped in. Individual clips direct into the insulation were used where required. The following day, an hour of light drizzle forecast, the main concrete slab was poured. Two wagons and just under 14 m3 of concrete with glass fibre mixed through. Again, a concrete skip and crane were used to move the concrete from wagon to foundation. You'll notice the twin (scaffolding pole) rails running the length of the foundation. They had simply been set as guide rails for the vibrating leveler to run on and were removed once the main vibration runs had been completed. The next shot shows the slab ready for power floating later in the day. Unfortunately, it kept on raining which meant a 0430 start the following day for my builder. He did a cracking job power floating the slab, which is now beautifully smooth and level. The final stage before building the walls can start, is painting a radon barrier ( the green paint you can see ) on the concrete core of the ICF block. Apart from a bit of unwanted news - 3 week delay for our windows due to a summer factory close down - things are moving in the right direction. The walls should go up this week so we are going to see big changes over the next few days.1 point
-
Being the poor sod given the task of getting a washing machine upstairs is all I need to convince me an upstairs laundry is a silly idea.0 points
-
What happens if you need to double flush (or even triple flush!) a stubborn lurker? Surely it will get poached?0 points
-
Can't form if there's ice in there! ? Major fuel savings having an ice cold bathroom I find, nobody wants to go in there to run hot water! ?0 points
-
Hello: glad to have you with us. There is a kilt wearing contingent , they'll all be along soon.0 points
-
That’s a bi5 hard to do when buying on line! I suppose you could do it on arrival and send it back if it fails test?!0 points
-
Oh dead oh dear. so..... Peter is a little accident prone...... He was on a Local authority tree felling course. This was before we were married, so very very young. In the way of the world as it was then, lunch was down the pub and he had a drink (never a big drinker, it always went to his head). That afternoon, the chainsaw slipped and went straight down onto the top of his knee - luckily it wasn’t particularly deep. He arrived at A&E and was promptly seen by my sister who was was on duty as a nurse - she sewed him up and phoned our parents to come and collect him. The Local authority banned drinking before work and at lunch for those operating machinery soon after. Several years later we were doing a large extension on our house. I was out collecting the windows and Peter was up a ladder, with an angle grinder, cutting into the brickwork for the new joist hangers. He blames it on being left handed but the grinder hit something hard in the wall and kicked back, swinging round on the handle. The grinder hit him in the chest on what would have been his bra line for his moobs (they didn’t exist then but certainly do now!) . I arrived home to find a very shaken looking brickie who had taken Peter to hospital in his pristine Jag. He was a little surprised at my “oh well, never mind” attitude. It is one I have learnt to develop over the years to stop panic setting in. Huge scar but just needed stitching again. Many years after that we had an allotment. It was a hot day, he was cutting the grass with his petrol mower. The mower needed re-filling but he’d forgotten he had a little fire going to burn some raspberry canes. Fumes, fire, a spark from the canes and WHOOSH. His arm is engulfed in flames. The only water available was from a well with an old fashioned hand pump. He used that to put his arm out. Put everything away and put the fire out, drove back home and asked me to take him to A&E. They wrapped the arm in cling film (who knew that was the best first aid treatment) and sent us to the the nearest specialist burns hospital (Kensington and Chelsea) on a Saturday afternoon! Luckily there was no home game that day as the hospital hires out some of the car park to Chelsea fans! We had a family BBQ planned for that evening, it still went ahead. So not only extremely accident prone, he has the luck of the devil as well, and of course no sense, no feeling!!!!!! He regularly asks for a nail gun for Christmas with an excited little glint in his eyes. It’s not happening. Our daughter is just as accident prone! I live in fear. Do I win?0 points
-
Don't antagonise your neighbour. You need to move the goal posts.0 points