Leaderboard
Popular Content
Showing content with the highest reputation on 03/05/18 in all areas
-
Jack up the left hand side of the house (Your left as you’re looking at the pump)2 points
-
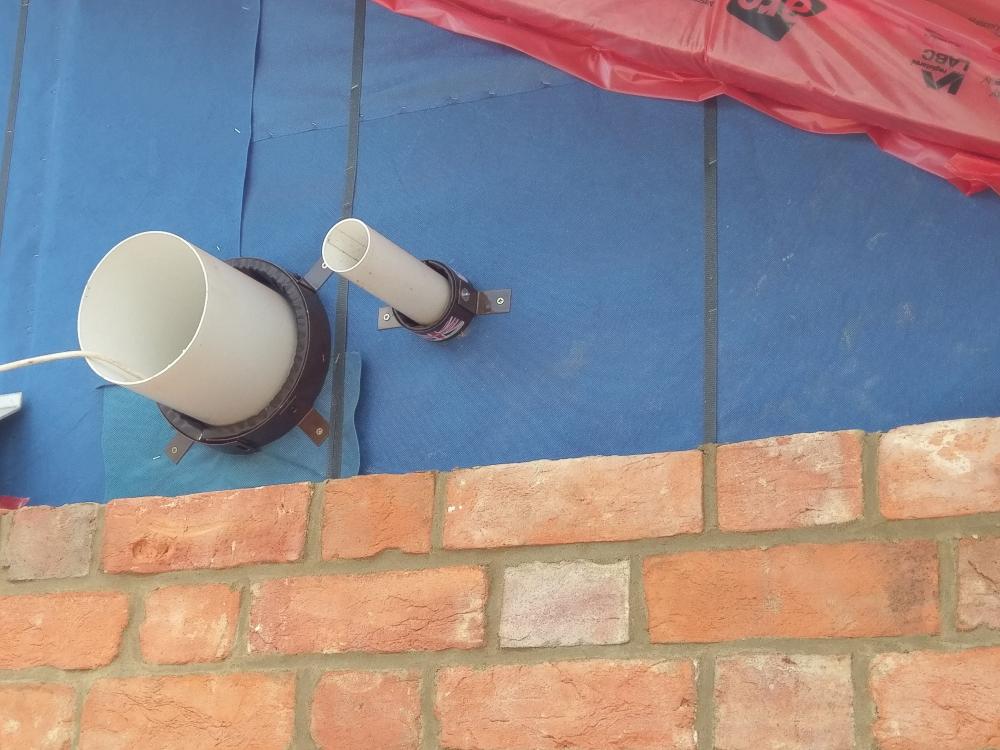
Apologies I didn’t take many pictures of the process. Initial Frustrations: Due to a delay in the First Floor (FF) Micro Screed, couldn’t access the house as planned (Thursday after arrival) but had to wait until the following Wednesday, I would have had the balancing complete by the Monday and had a week to do other small jobs, as it was I got the job finished, bit nothing else. First of all I fitted the ground floor vent terminals, this involved trimming the terminal ends level with the plasterboard Fitting the metal connecting terminal with the supplied Tek® Screws and inserting the terminal: Tek® Screws are a pig, you need to predrill the metal to use the effectively and I was using the builders impact driver Makita 18V LTX and it was still hard work. I locked all the terminals in the fully open position and inserted them, hold up and turn to lock in place, these are an update on the spring clip versions as apparently they don’t get a good seal, with the mechanically fixed base plate and a turn to lock valve they are more rigid, true but harder to install! Installed extract valve. Valve removed leaving housing Housing on adaptor. The first picture shows an installed extract terminal in the Airing Cupboard. The second one the metal connector plate (in the Dining Room) with the valve removed. The third one an adaptor plate attached to the duct terminal in a room that will have a suspended ceiling (tiles) so to be finished after all messy work, the duct terminal will be adjusted as required. Then I installed the FF terminals, I had help for this then access to the attic to connect up the external supply and exhaust ducts to the roof terminals, my builders had to cut 2 access holes in the plasterboard (attic already plastered) one to connect the FF supply duct (the attic has insulation between the rafters and below which follows the vertical chords of the attic trusses) so this duct has less insulation that the others but is still in the insulated area. The second to access the FF exhaust manifold, in the same area (but always planned) these will have insulated doors re-fitted. They also had to cut free the exhaust duct for the FF unit which the plasterers had plastered around, half covering (I ask you), ie 180mm circular duct with half the duct (a semicircle) inside plaster, half out! So I connected up the FF units and proceeded with that one, it made it easier accessing the manifolds before installing the GF ducts. We also had to build a small trestle to go over the FF exhaust duct to lie on to work in the exhaust manifold. Next, I fired up the FF unit and set the speed to 275m3/h, this was a challenge as the electrician had to make certain circuits live. In the CU the top Right is the lift (3-Phase) required for install T&C, the bottom 5 (left) are the MVHR and others on the circuit, 2 x downstairs power circuits and 2 others I don’t know and didn’t dig into. A lot of work still to be done there, but I had my power. The two MVHR units connected up (though the drains weren’t connected until Friday). I then did my initial measure, I have purchased a Testo 417 with hoods and UKAS calibration (belt and braces), whether I keep it or sell on, not sure yet. Initial readings gave a total extract of around 275m3/h but supply of nearly 375m3/h, so obviously my systems measure from the extract and just run the supply at the same speed, the calculation showed similar resistances for the system, so I had to adjust the system (use the imbalance) to even out the flows, initially I used a 100m3/h imbalance to even this out (reduced later on). I then proceeded to balance the terminals, as mine is the Ubbink system the balancing is done in the manifolds with restrictor rings, you have either no restrictor, or a restrictor with 0-12 rings removed (0 = max resistance, 12 = almost no restistance). The table below shows room, terminal, design flow rates, calculated restrictors and the final ones I ended up with. Design Flow Rate BR Min Initial Final Final Room m3/h l/s l/s Rings Removed m3/h Rings Removed m3/h l/s m3/h l/s en-suite 2 E1 45 12.5 8 6 6 23.0 6.39 48.6 13.5 en-suite 2 E2 6 6 25.6 7.11 en-suite 3 E3 45 12.5 8 6 6 24.1 6.69 51.3 14.3 en-suite 3 E4 5 6 27.2 7.56 Cistern E10 20 5.6 - - 12.0 3.33 12.0 3.3 Attic EA 25 6.9 6 10 - 22.9 6.36 22.9 6.4 A/C E5 25 6.9 6 5 5 27.9 7.75 27.9 7.8 Bathroom E6 45 12.5 8 4 4 24.2 6.72 48.8 13.6 Bathroom E7 4 4 24.6 6.83 mstr en-suite E8 50 13.9 8 7 7 27.9 7.75 54.7 15.2 mstr en-suite E9 6 6 26.8 7.44 Cistern E11 20 5.6 4 10 12.6 3.50 12.6 3.5 275 76.4 278.8 77.44 As you can see it was reasonably accurate. I had to reduce the resistance to the attic and one cistern and one other terminal, otherwise quite easy. So with the extract done I moved on to the Supply. Initially I went round and totaled up all the supplies and kept adjusting the imbalance until the total supply was about 275m3/h, which was around 70m3/h, then I set to work adjusting the flows: Design Flow Rate BR Min Initial Final Final Room m3/h l/s l/s Rings Removed m3/h Rings Removed m3/h l/s m3/h l/s Bed 2 S1 50 13.9 11 7 26.1 7.25 50.9 14.1 Bed 2 S2 9 6 24.8 6.89 Bed 3 S3 50 13.9 6 - 19.8 5.50 49.0 13.6 Bed 3 S4 5 6 29.2 8.11 Bed 4 S5 50 13.9 7 4 24.0 6.67 49.3 13.7 Bed 4 S6 6 4 25.3 7.03 Bed 5 S7 50 13.9 6 4 24.5 6.81 50.7 14.1 Bed 5 S8 7 5 26.2 7.28 Master Bed S9 50 13.9 - - 24.8 6.89 49.6 13.8 Master Bed S10 9 7 24.8 6.89 Attic SA 25 6.9 9 - 26.2 7.28 26.2 7.3 275 76.4 131.37 275.7 76.58 AS you can see the difference between calculation and actual is huge, take terminal S3, it has a relatively short run (compared to others) yet I had to remove all restriction and could only get 20m3/h, I balanced up the room with S4 but a total mystery. S1 was a significantly long run but require more restriction than calculated. I managed to balance up the system after several hours of too and frow, including slightly adjusting the imbalance to get the system set. The Ground floor was a similar experience, though with some terminals suspended in the air, the measuring hood neatly sealed over these so measurement was not an issue, and in fact I didn’t need a ladder to reach these ones so it made it easier. GF setting was 220m3/h (I actually set 225) and again the extract tallied up but the supply was about 40m3/h over so Imbalance require again. Design Flow Rate BR Min Initial Final Final Room m3/h l/s l/s Rings Removed m3/h Rings Removed m3/h l/s m3/h l/s Kitchen E1 80 22.2 13 - - 44.0 12.22 85.8 23.8 Kitchen E2 7 6 41.8 11.61 Laundry E6 50 13.9 8 4 6 26.6 7.39 50.7 14.1 Laundry E7 3 5 24.1 6.69 en-suite 1 E4 45 12.5 8 2 6 27.7 7.69 51.4 14.3 en-suite 1 E5 2 7 23.7 6.58 WC E3 25 6.9 6 3 5 26.1 7.25 26.1 7.3 Cistern E8 20 5.6 1 - 11.0 3.06 11.0 3.1 220 61.1 225.0 62.50 Again extract calculation and actual weren’t miles apart, except from I had to remove all restriction from the cistern extract, and subsequently most of the others to balance it out but relatively easy and logical. Design Flow Rate BR Min Initial Final Final Room m3/h l/s l/s Rings Removed m3/h Rings Removed m3/h l/s m3/h l/s Lounge (1) S1 50 13.9 9 4 25.7 7.14 51.8 14.4 Lounge (2) S2 7 - 26.1 7.25 Dining S3 30 8.4 - 3 30.1 8.36 30.1 8.4 Front Hall S8 25 6.9 9 3 26.2 7.28 26.2 7.3 Bed 1 (1) S6 45 12.5 6 12 22.1 6.14 45.6 12.7 Bed 1 (2) S7 6 0 23.5 6.53 Study 1 S5 35 9.7 12 1 35.8 9.94 35.8 9.9 Study 2 S4 35 9.7 - 2 36.1 10.03 36.1 10.0 220 61.1 131.37 225.6 62.67 Supply was another question, nearly a whole day to get this right: Study 2, the longest run yet only 2 rings removed, same for study 1. The Bedroom similar runs one with full restriction and one with almost none. The lounge S1 in longer than S2 though has more restriction required, nothing made sense, eventually balanced, but no rational explanation as to why. The only think I can think of (and this applies to the First Floor) the calculation programme works for the extract system, but for supply, the location of the duct on the manifold has a huge impact on the initial resistance and flow rates. Advice for balancing when doing this go for bold alterations in restriction, I kept nibbling on the GF and have ended up with lots of spare restrictors of various sizes, instead of a load of complete (new) ones. The final thing I did was remove all the vent terminals so the builders could fill in the larger holes and the painters get on with the final job.2 points
-
BEtween a cheap frame and the pan you have a potential recipe for a disaster. If you are putting in a frame always go Geberit. They look like very simple products on the face of it but somehow Geberit get it right much more often than others. Its worth the extra money. Any remedial work will cost several times the saving. I am not always going to recommend branded toilets, but I do think for wall hung pans, its again worth going branded to get better dimensional accuracy and smoother junctions where it matters. Ceramic is not cheaper for nothing. Its all made the same way till you find out that the rejection rate on some of the top brands is as high as 30% whereas the lesser brands and unbranded stuff will allow more rubbish to go through. I have visited a factory where they make this and I was astonished at the level of investment and automation.2 points
-
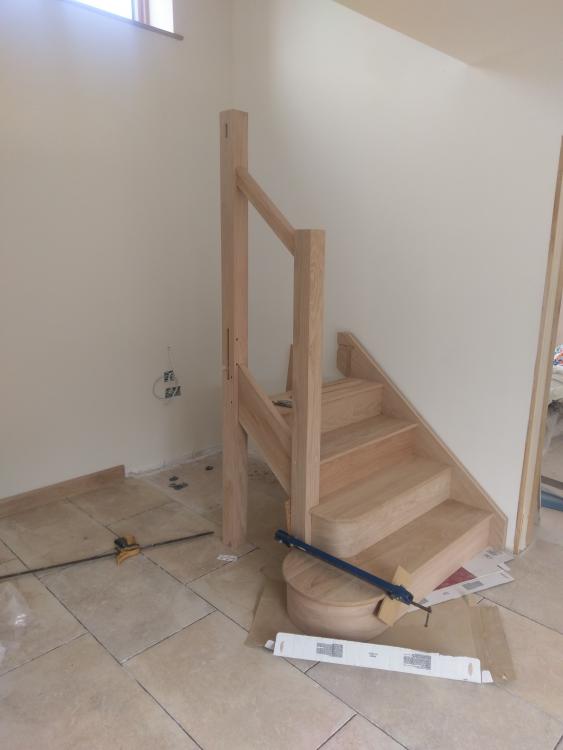
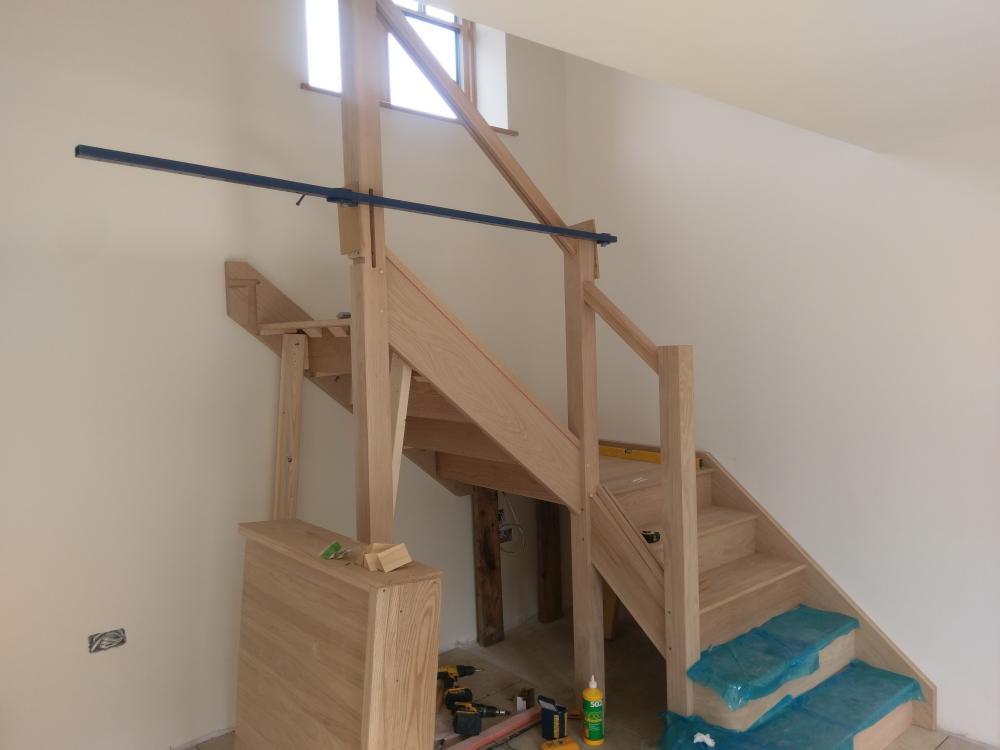
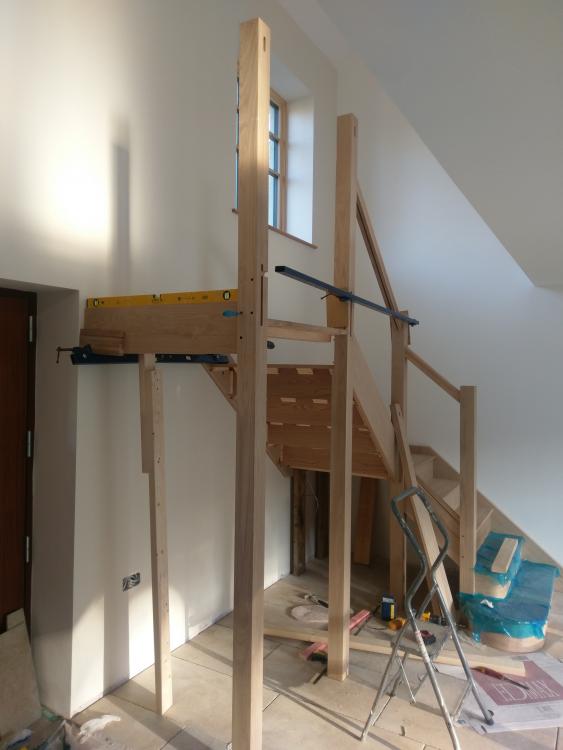
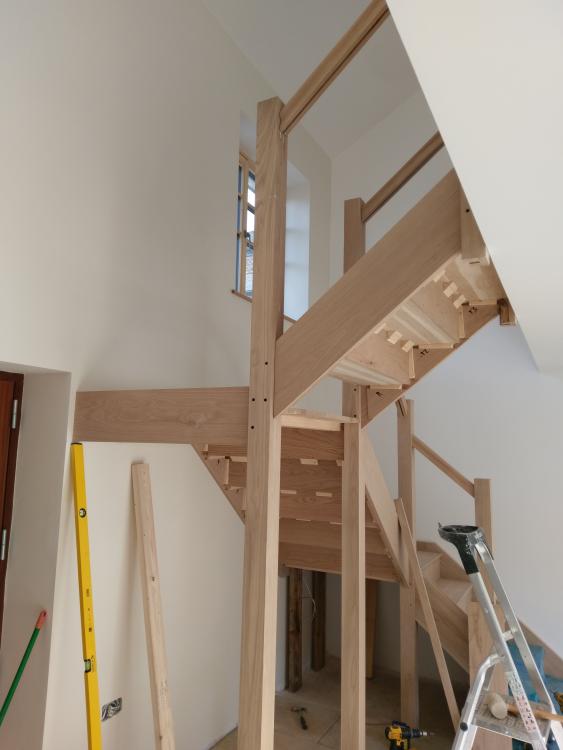
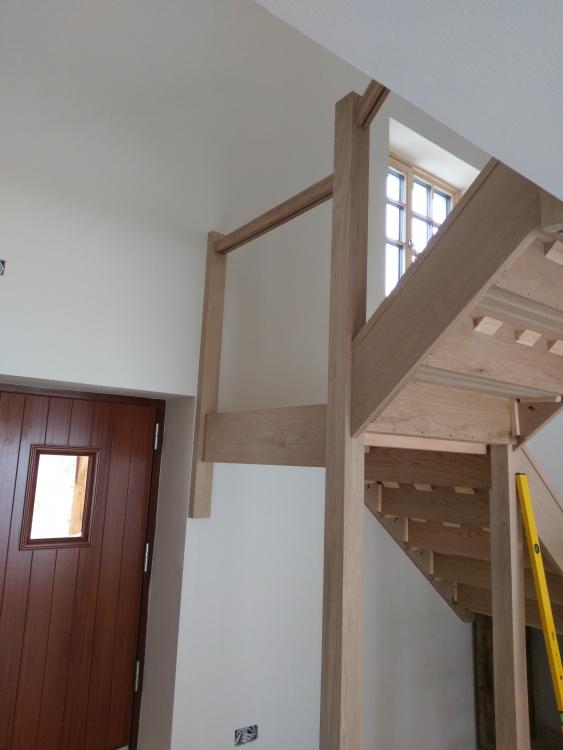
Staircase has arrived and I have now fitted it. We used TKstairs and have been very pleased with the outcome We opted for oak with embedded glass and had it part assembled Although it was heavy the wife and i managed it without help. Glass will be fitted once treated. Everything fitted and they even send precut oak plugs to cover the dowels2 points
-
1 point
-
That is about average for a senior at Scottish rates I believe. It seems they are generally more expensive than English.1 point
-
1 point
-
Hello you’ll have some spectacular views from your barn! Just out of curiosity,have you done a price comparison between a concrete floor and a limecrete floor?1 point
-
@DavidFrancis reading through the posts the article seems to have dubious referencing and numbers not tallying, didn't read the article tbh. looking at it from a practical side, one of the worst things you can do is cement render a sandstone wall whereas a lime render is fine.1 point
-
It's a 9kw Panasonic Aquarea ASHP. Our EPC is 96 and our predicted heat demand is; Space Heating - 3,415kWh/annum DHW - 2,290kWh/annum1 point
-
Submitted it online last Wednesday and had an email within minutes to confirm it had been received and another one last Friday to say my application had been successful and I'll receive my first payment on 28th May.1 point
-
1 point
-
There may not be that much difference in the breathability of lime-based mortar and cement-based. See this discussion (admitedly on render) http://www.greenbuildingforum.co.uk/newforum/comments.php?DiscussionID=10263 If you search for " Breathability: The Key to Building Performance" you will find the paper referred to. It is written by Neil May who is, inter alia, one of the "experts" at the Sustainable Traditional Buildings Alliance. (Never met the man myself.)1 point
-
I struggled to see what you want. You already have OPP to build 4 houses, and the plans though only outline looked fairly advanced. If you wanted to have one for yourself, then sell 3 of the plots and keep one for yourself. You talk of the "bungalow plot" but that is in the middle. If I were keeping one for myself, I would want an end one. If cash flow is the issue, I would sell the one nearest the road first as that is the simplest to get access to. Use the proceeds from that to put the access road and services for the other plots, and keep the furthest from the road for yourself.1 point
-
Would it not be just easier to sell the land and use this money for your own. You will have no hassle of building other people's houses which considering your going to be moving next door will be blessing.1 point
-
I rather suspect it may be for a senior solicitor, but it may be towards the top end of the band. Ouch. I am generally staying out of this because it is Scottish Property Law, which is beyond my ken, however just in case it is useful 1 - Your first set of photos here seems to include a clause where you can tell them which route to take over your land. If the bit they are parking on belongs to you or your neighbour and that applies, then you have that right. 2 - If you have a Right of Way to your garage, and parking is obstructing it, then you potentially have comeback. In English law the terms used would be things like "substantive interference" and similar. Down here you could stop on a RoW to unload and block it for a reasonable time, but not to sit in your car and eat your lunch. 3 - Have you considered a video camera discreetly trained in that direction for evidence - just in case? People on BH can recommend "site security" cameras which can be monitored remotely. The only issue would be power. I feel your pain on expensive solicitors with good reputations. Ours delayed the sale of our last house by 2 months by misfiling our deeds then saying they could not find them, so we went most of the way through the "possessory title" process, and then they found them again. Quite how you misfile a pile of papers about a foot thick with vellum (I think) and handwritten copperplate going back to 1800 or so is one of the irreducible mysteries of the universe. Ferdinand1 point
-
1 point
-
One thing you might find handy is suitably sized grommets: https://www.greenbuildingstore.co.uk/products/pro-clima-roflex-pipe-grommet/ Much neater than strips of airtightness tape, and less likely to fail over time imo.1 point
-
To make it easier for others to find https://apps.wigan.gov.uk/planapps/PlanAppsDetails.asp?passAppNo=A/13/787791 point
-
If ever anyone needs M12 galvanised taper washers give me a shout...or 1/2" Whitworth galv nuts and bolts...or inglefield clips...1 point
-
An "I" section beam, in this case Universal Beam. Think of the old RSJs shape though they had taper flanges. RSJ - rolled steel joist UB - universal beam UC - universal column All the above are "I" beams as in section they look like a capital i. RSC - rolled steel channel (tapered flanges) PFC - parallel flange channel RSA - rolled steel angle CHS - circular hollow section (aka tube/pipe) RHS & SHS - rectangular / square hollow section (aka box section) etc1 point
-
Never a truer word said... Ask me how I know... ? we found a way around the issues but life could have been easier!1 point
-
Here's another IOT style air pollution monitoring effort based in Germany, https://luftdaten.info/en/home-en/ They have a few UK contributors on the map: http://stuttgart.maps.luftdaten.info/#6/54.635/-1.782 Their sensor build page is currently only in German, Dutch, French, but lists the sensors used: https://luftdaten.info/feinstaubsensor-bauen/ SDS011 fine particle sensor (formerly PPD42NS) DHT22, temperature & humidity (optional) Update, from their FAQ using Google's translation: Until September 2016 we used the SHINYEI PPD42NS sensor. This uses the optical measuring method and a heating resistor. Currently we use the NOVA SDS011 as a fine particle sensor. It has the digital outputs for PM10 and PM2.5. This uses the optical measuring method with a built-in fan. Update, Found their English build page which include lots of photos and the wiring diagram: https://luftdaten.info/en/construction-manual/ And another set of English instructions on this blog post: https://www.byteyourlife.com/en/household-tools/particulate-matter-sensor-controller-project-luftdaten-info/7204 Update, while looking for anything in English, I found a Belgian project using the Luftdaten approach as a basis: http://influencair.be/build-your-sensor/ Update, and this spin off group in Bulgaria, https://en.airbg.info/how-to/1 point
-
If it's not too late I might have a 2005 Mk2 Ford Galaxy for sale soon. Only 215,000 miles. The special 5 speed gearbox (1,2,3,4,6) is in good condition :-) Doesn't drink petrol.1 point
-
Another vote here for TK. My main stair came from them semi-assembled and it was spot on. Also just ordered a smaller 3 step staircase for the split level and that's arrived today. It s a flat pack this time (cheaper postage) and even came with a bottle of PVA glue!1 point
-
1 point
-
1 point
-
Have you checked the lenders website (might need to go into the intermediaries section), most of them will include details of the type of construction they will accept. That should allow you to confirm that the decision is coming from the lender rather than Buildstore?1 point
-
OK then boys... (sorry @lizzie, @Hecateh, @Moira Niedzwiecka and every other woman in the world )..... How do you level a pump? Eh? Tell me that, now1 point
-
1 point
-
I’m shuttering off a 6’ square around it so I can screed the falls in after. I’ll cover the pipes with the concrete but try to leave at least 2” for the screed.1 point
-
As @recoveringacademic says the issue is intermittent use and the buildup of nitrates in the tank. I installed a big commercial Biodisk unit (18,000 litre) and it has a recirc pump on it that keeps recycling clean water into the main tank if the level gets too low - this reduces nitrate buildup apparently. You may be better with 2 or 3 smaller ones - or speak to someone like MPC Services who I can recommend as being excellent with this sort of thing.1 point
-
The plumber (jury is still out) had set all mine to high to begin with. There was a tiny plastic clip on the unit where the water comes in. I just removed it pushed it down a few clicks and put the clip back in.1 point
-
I found Buildstore very inflexible when it didn't fit one of their predefined boxes (though I am stuck with them). People here have found going direct to some lenders easier. Ask them to justify 'why' if your plan is an established route with certification, If they want your business (money) they will have to accomodate you. Be warned their inspectors don't understand innovative (mine had never seen/heard of an ICF), i would use other inspection regimes (I ditched them)1 point
-
I am pretty sure that all the main suppliers offer a table which matches their products to 'demand' . I understand that intermittent use is challenging for off mains systems. That leads me to guess that something which injects a small air 'trickle' through the liquor might well be useful. Paul Usher from Klargester has been a tremendous help to us: he was honest enough to (after two site meetings) suggest we didn't need one of his products. He also has (had?) a blog about off mains drainage. Top bloke. Ian1 point
-
It may just be a case of adjusting the turn screw that governs how high the water level gets before the float valve stops the water from filling any higher. Should be an easy fix tbh.1 point
-
The CFA and SFA piles work with a hollow stem auger and concrete is pumped through the auger as it is withdrawn, so there is no risk of caving in. The only issue can be if you come across a void which is too large to fill with concrete.1 point
-
1 point
-
Cool! He may hate you tho There may be enough to keep someone occupied for a month1 point
-
Cisterns are usually fine - they just need adjusting as @Nickfromwales says... add it to his list !1 point
-
One of these then... https://www.plumbnation.co.uk/site/abacus-direct-easi-plan-wall-mounted-1180mm-wc-frame/1 point
-
Will building control allow a shared system for multiple properties? I thought they discouraged that? The people that make mine Conder do large systems http://www.premiertechaqua.co.uk/products/wastewater/conder-saf-sewage-treatment-plant.aspx# In fact quite a few different systems are available http://www.drainstore.com/sewage-treatment-plants/26-50-sewage-treatment-plant.html1 point
-
If you get a BMW, no one lets you out of side turnings. It is the law.1 point
-
If you look here https://broadspeed.com you will get an idea of what you should be paying for these cars. The A6 Avant with a replacement imminent can be had with a £10k discount for example, most other cars mentioned can be had with around 15-20% off the list price.1 point
-
It was longer than I thought since I made a video, this should bring you up to about the end of Jan1 point
-
I bought a purple air monitor a few months ago. I doubt that JSH would be interested; apart from the cost it's very much an IOT device. It demands an internet connection so has probably got lots of security holes and it uses Google maps. They're system isn't setup to let you store data locally easily, which rather surprised me. I scrape data from the devices web-server and store it locally, but, for some bizarre reason, the data gets flaky if the internet connection goes down. Having said that, it does give quite interesting results and useful comparisons to other sensors; there are about 10 in the UK now. The main reason that I bought it was to check pollution from wood burning; our house is heated with a log boiler. Apart from lighting and refuelling there is no measurable increase in particulate levels over the very low background. The peaks when starting are usually less than the particulates I get when roasting coffee, and they are over much more quickly! IOW, burning wood doesn't have to be a source of pollution. Another thing that I've noticed is that sometimes you get an increase in particulate levels over a wide area (most of southern England) which has no obvious cause, but stops quickly if you have an air cleaning event like rain. I guess that this could be pollution imported from abroad. This shows most of the English sensors. https://www.purpleair.com/map?&zoom=8&lat=51.98340589327153&lng=-2.0000451278685887&clustersize=30&orderby=L&latr=3.271820379132471&lngr=6.25671386718751 point
-
Yeah, there are shedloads coming off lease. Here are some random thoughts: First of all, the model to go for is the 4hs (note the s). It has the cheapest insurance because it has radar cruise control, speed limiter button, lane-departure warning, and brake warning system. I don't think any of the pre-facelift models have parking sensors, but the 4hs does get a reversing camera. It suffers from the usual Japanese disease of going "bong" and "beep" for no obvious reason. One of the more irritating is that lane-departure warning, but there's a secret way to turn it off. I bought a high mileage 64-plate example, leased by someone who clearly didn't pay their own fuel and only cared about the BIK tax. I don't think it had ever been fast-charged, and rarely 10A charged, judging by the pristine state of the charge ports. And indeed, the battery capacity seems to be about 90% of spec (I've not dumped the ODBII data, but the dash computer consistently says I get 9–9.5 kW∙h of charge from empty). It always tells me I'll get 25–27 miles of pure EV range, which seems about right. I'm seeing 45–65 MPG on longer runs (without a recharge). I've not ventured into the Ecotricity fast-charger network, but now Vince has changed the pricing (again), I might. For the geeks among us, it's great to be able to completely control the regen (with the paddles). Some people like to dial it up to maximum and drive with just one pedal. But it's much more efficient not to use energy in the first place, rather than have to regen it, so I prefer to switch it off completely and think ahead, like the IAM driver I am not. It's a comfortable ride. The pre-facelift model isn't the prettiest thing on the road, and the facelift brought a nicer cabin, including heated steering-wheel. But they are of course much more expensive pre-owned. The paintwork is pretty thin. It's suffered from stonechips, etc. I might consider investing in a respray. According to Honest John, "Mitsubishi has built a battery factory in Cirencecester. If any of the cells become faulty they would replace all 56 (?) cells and only charge for the faulty cells - this cost was assuming the car was outside the 8 years electric warranty." Bought from Used Cars of Bristol, who seemed to be decent enough to deal with. Enough rambling. Ask any question and I'll do my best to answer.1 point
-
Nope. Wrong again. Standard Build here, trench fill with medium weight block and then EPS infill ground slab. Poured slab in a single day (10 cuM) at 11:30am, bull floated only as used self compacting flowing concrete and by 4pm we had done and levelled 94sqm of concrete. With the exception of a piece about 20cm long to the side of an existing internal wall which we had to float from one side via an existing doorway, the slab is +/- 3mm on level across the whole of a 22m x 4.5m L shaped slab. Total difference in cost from cheap as $h!t C25 to flowing was £24 per cube so an additional £240. No power float needed, and no hassle. And that was by me, my brickie and a labourer so not a skilled team. So you can get level, just sounds like you are employing the wrong team....1 point
-
Offence taken, deeply, sorry, but I don't take kindly to the implication that I'm some sort of thick fool who, quote "can't see the wood for the trees". It is offensive to me, and was directed personally at me by being a quote, just like this is directed at you. You aren't looking at things from a self-builder's perspective, which is always going to be a fair bit different from a mass builder's view. Our site was like a fair few self-build plots, awkward, expensive to clear and level, and a solo plot with no mains water or drainage. Straight off we had to look for a build system that would cope with the clay soil that was remaining after we'd removed around 2.5m depth of soil and undergrowth above to level the plot. Trench foundations were a non-starter, because of the ground conditions. If we went deep enough to use something like this, with clay boards, we'd have been below the local water table. We're adjacent to a stream inside an AONB, and opposite a listed build, all of which put tight restrictions on what we could and could not do. That's not untypical, a fair few self-build plots tend to be like this in some ways - they are usually being sold for self-build just because they are too damned awkward for a small builder to take on as a job he could do and make a profit on. Our build is 130m² over 1.5 stories, with a 6m x 4m detached garage at the other end. The total cost for the foundations, UFH, insulated, weathertight, frame (including the garage), guaranteed to meet or exceed passive house standards, including an air test that was below 0.6 ACH (I think ours was around 0.43 ACH, or about 1.22m³/m²/hr in BC terms) was around £63k. Taking away the detached garage cost, the house foundations, UFH, insulated, airtight and weathertight house worked out at around £423/m². To that cost has to be added the external larch cladding (around £7k including labour), the 3G glazing and all the external doors (around £8.5k including fitting), and the slate roofing, guttering and downpipes (another £8.5k) Before going down this route I explored other foundation options, in particular, given the challenging nature of the ground, and we were looking at around £12k to £15k just to put suitable foundations in. A passive slab won hand's down, on price, speed, giving us a finished floor internally, with no need for screeding, inclusion of UFH, etc. One major advantage we had was that our power floated slab, because of the passive design and the need to be absolutely flat to get the frame to sit square with absolutely no packing (any packing would have messed up the airtightness a lot, and needed loads of work filling and taping up things that wouldn't otherwise need it) resulted in us having a very flat and smooth floor that we could tile and lay timber flooring on to with minimal preparation. Before tiling (with large format graded 12mm travertine) our tiler spent around 40 minutes going around the ground floor with his laser looking for the highest point. He couldn't find one, and concluded that the floor was flat. That saved us 9 bags of adhesive for the travertine, at over £20 a bag, so was another small saving. You say that saving 26 sheets of plasterboard over the original estimate that included normal cutting losses due to things not being dead square, or the actual size they are supposed to be, makes, quote "zero difference". To me saving over £100 to spend on something useful, is worth having. As another example of a side effect of building a house in a factory to tight tolerances, as ours was, I was looking to buy a corner desk a few weeks ago. I had the drawings handy and they gave the depth of the corner, from plaster skim to the plaster bead on the corner, as 962mm. I checked this with a tape and it was 962mm, the damned house is built exactly to the drawings, even down to the allowances for plasterboard and skim. That's been repeated time and time again with significant time savings on things like fitting out the kitchen and bathrooms, where all the dimensions were within a mm or so of the design, which meant cabinets etc all fitted exactly. FWIW, we have no energy bills at all. The only bill we have is the Council Tax, and that's partially offset by the ~£1000 a year we get paid for the excess energy we export. We wanted a house for our retirement that had no bills, and we've got one. Finally, let's compare values and see how they stack up. I agree that the zero energy bills means sod all to the average buyer, but we did fit the house out internally to a fair standard, with solid oak joinery everywhere, even the skirtings and architrave, solid oak stairs, solid oak fronted kitchen units, Silestone worktops and kitchen/dining room internal window cills, toys like comfort cooling in every room, an integrated boiling water tap etc, massive shower, solid oak bathroom furniture, etc, etc. Build cost was probably on the high side of average for most self-builders, based on costs we've shared on here, at £1380/m², including the cost of the insulated and lined garage, with electric door etc. The plot cost £90k, the ground works (not including the house foundation) cost £56k, the borehole for water cost £8k, the electricity connection cost £3.4k. The total build cost came in at £270k and the market valuation last year was between £330k and 345k. Being a passive house reduced the valuation by 5%, according to our valuer, because in his words, he felt that "an eco house is in a niche market".1 point
-
I doubt the stove maker will be able to help. I think your best bet is to get the stove installed, fire it up and measure the air and surface temperatures where the lights will be installed. Then find lights that are rated for that environment. I doubt you will find lights that are specifically rated for use close to a wood burner, not because it's difficult to make lights to go there but because they don't test lights for suitability in in every imaginable location.1 point




.thumb.jpg.bac90f3bbf6868cf2118d010d936c99d.jpg)


.jpg.c21f3ac78c9b7efd90cbdcb312744dc5.thumb.jpg.7adcad4c0e384f5ecd7d56b0618df6e5.jpg)


