
Leaderboard


Popular Content
Showing content with the highest reputation on 06/15/23 in all areas
-
and the results are in.............. ........0.98ACH! i'm very happy and hit my target of 1ACH. could we have got it lower? maybe, but we calculated the internal volume at just over 1400m3 over 4 stories (basement, ground floor, first floor and loft) and it's got some interesting junctions between sections of the buildings so i think to get in below 1ACH is a job well done.3 points
-
So - Attempt #1 of trying to build my house failed - Made Ground (Poor soil bearing), a buyer who wouldn't grant me legal permission to access the mains water after I sold and changed their mind after I'd let go all the builders, and my planning permission extension was refused. Attempt #2: Re-Applied for Planning permission from scratch - preliminary decision due July, final decision August 2023. Place my house back on the market in the meantime somewhere between those two dates. Finally I need to find a solution for the poor soil / made ground. Today was that day! The Structural Engineer got the Ground Screw company to come onsite and put a 1.5 meter screw into the ground in 5 different places and do a pull test against each one. They each held over 4 tonnes of pull pressure which is good and the results will inform the Raft Design so I can get it priced. It was all done with hand tools with a motor assisting the Screw insertion / extraction running on 240v via an Extension lead. Then they put a tripod above the screw and a measurement device to determine the force trying to pull it out. Probably looking at 30 or so Ground Screws and a number of Screw Piles for point loads & using a laser level. Had a good chat with the team and they have 5 years of experience and have been to Holland where they source their system from. Due to the coastal conditions there they typically use 6 meter screws! Some soil conditions eat away at screws over time 30-40 microns per year which gives you 50 years guarantee on a 3mm thick screw to allow up to 1500 microns to be eroded. They had heard about some cheaper Chinese screws that were pulled after 3-4 months for a different reason and they had started to rust as their galvanisation was not thick enough. Very bad if that happens! The team do a lot of extensions, shipping containers and garden rooms but houses too. If the screw is exposed more than 500mm you need bracing - this can happen if the ground is sloped. The system should save on soil muck away and concrete costs hopefully. Cost wise I'm looking at @ 5K for the ground screws vs digging 2.2 meter strip foundations and muck away costs / concrete as the alternative. You can sit a foundation on top of the screws and this may mean you don't need a Radon barrier as there is airflow underneath? I'll go with whatever the Structural Engineer recommends though. Anyway, thought I'd have a big JCB onsite but this took about 4 hours with powered hand tools and gave me confidence in the system and the team behind it which helps. Educational Day all in all!!2 points
-
If it helps any, Octopus were by far the most sensible company I've dealt with re smart meters. Time for a 3-phase meter smart meter swap (from a previous 3-phase dumb meter) was 3 months. Some other suppliers don't even know what 3-phase is (or at least the call centre staff don't).2 points
-
OK for anyone in a similar position... After bu.......ing about with Eon for 6 months, who said it was possible but could never quite get round to it... It took 'a little reminding' but Octopus had a 3-phase smart meter installed for me (swapping out the old 3-phase dumb meter) yesterday - a little more than 3 months after I first asked. A successful conclusion (well Octopus say it can take up to 14 days to go live) to this 7 1/2 month project ...2 points
-
Make a conservative assumption and use the brickwork opening. But yes... this is why people pay architects to do this. It's the same with structural engineers and Part A (which is a dumbed down version of the British Standard and only refers to traditional brick and block structures). The detail is tricky and needs technical expertise and experience - else a lot of time and chocolate.2 points
-
upstands should have the same level of insulation as the roof. 99.9% of chippies totally ignorant of this fact including yours.2 points
-
Perhaps in a different form....."reasonable care and expertise." And then there are the exclusions....I had a roofer who was not allowed to work above 3m and there were more like that. You have probably been more professional than they, who had chosen the cheapest quote from The Sun.2 points
-
You could open the window1 point
-
This. Trickle vents are there for a purpose and, unless you still live in a very leaky house despite the new windows, you do need a means of background ventilation.1 point
-
That's also what I did. Used stone in both our bathrooms and was careful just to centre a 600mm wide piece on the pan. Stuck the stone to the removable bit of hardi backer board. Didn't bother to grout the joints either side but could do.
 1 point
 -
I've got ideas to half the cost that this is going to be. Don't commit. Interested to hear other comments first. BTW do you have good access ?1 point
-
I thought that was the case, but recently (last year or so) changed, so even replacements now need vents (if there is no other ventilation, of course)1 point
-
You have to do this as part of building regs G2 now anyway so you may as well follow that process as do it all twice 1/ put in Gigabit-ready Physical Infrastructure™️ (I.e. a duct) that new cable can be pulled through from the street if needed 2/ ask OR (and any other provider) for a quote to install gigabit internet. Doing #2 does not eliminate the benefit of also doing #1. Register with OR here https://www.openreach.com/building-developers-and-projects/fibre-for-developers/registering-your-site Building regs put a cap of £2000 on the amount you must spend to get it installed so you can guess how much OR typically charge.1 point
-
Thanks all, I was using the concealed cistern as its cheaper than the frames and was planning on doing the removable top and front panel... our priority is to make it child proof though so the top shelf will need to be fixed in some way probably silicone? and will look around to get a cut piece of granite.1 point
-
Hi John, 100l/min is just where the graph had an easy line to compare... 8.5kw mitsubishi, it lists 24l/min as flow rate. Pipe run max maybe 12m to furthest rad. Good point, i actually only have 3 steel rads so if i changed those for alu wouldnt need a filter. I've got one now anyway. Got a 24l expansion tank and filling system. The mitsubishi doesnt have an internal pump Yes flexi hoses listed got some 28mm 500mm versions for £50 from ebay1 point
-
The front dormer would require Planning. All houses have at least one principal elevation and the front would be considered to be yours. Similarly if you wanted to erect an outbuilding between the front wall of your house and the highway, that too would require Planning. Just remember that adding an additional storey via Class AA does not also allow you to add a front dormer. But I’m sure you were talking about doing one or the other and not a combination of both?1 point
-
For the cylinder. You need a 2 port if the max thermal cut out stat is tripped. A quirk, but if you have a 3 port you still need a two port to act as a dead stop. All unlikely with a heat pump, but thats the regulations.1 point
-
True! I just about remember those days (wasn't very old back then). But having a requirement specification document set that is so full of contradictions and needless complications (and apparently no requirement prescidence or hierachy) you can't make headway is just about as useless because it allows industries of charlatans to spring up that just add cost without providing value. As another colleage often said (of some of our more talkative staff) BS will baffle brains all day long.1 point
-
@SteamyTea I think part O should hav ebeen filed in PartB, ie; in the bin.1 point
-
My solution is to get proper fibre if you can (or 'fibre to the cabinet'' if you can't). Run it into a box next to the box on the edge of your plot ('kiosk)' that you're getting your 'temporary' builder's supply electricity to. Put your router/access point in there (with power from the box next door). Run wireless from the box and/or or CAT cable to your static. (Cable will be faster and more reliable.) You'll be doing a lot of online googling / looking at BH / placing orders etc Then run both your electricity and internet in ducting into the house when you're ready. Leave the 'temporary' boxes where they are. Same with water if you like.1 point
-
1 point
-
I would try a sample mix and see how it is. It would need a fairly thick layer.1 point
-
I might have ago at doing my own Heat calcs next.......Lots of fags but need to stock up on choc.1 point
-
your right its a mountain of paperwork. Same as the new EPC regs where the builder has to document key junctions and provide evidence, geo tagged or no EPC. I paid the guy who did our SAP to do ours. More wasted cash .....1 point
-
skim the wall?1 point
-
Had my smart meter installed by EDF before switching to the octopus! Unfortunately they haven't been able to read from it yet, but EDF could!1 point
-
Self builders, we cant afford to so blasé. Mistakes cost money.1 point
-
And @saveasteading, of those who never checked, how many were self builders? This job of ours teaches caution at so many levels, and at the same time offers so many examples of the opposite1 point
-
But there's a flip side, the optimizes add complexity and introduce new error modes. Like one string on my system loosing pairing with the inverter and loosing half my production for 3 months. So if you have the optimisers make sure to check in on then regularly. (It didn't help I couldn't rely on the total inverter output numbers as I added a SE battery at the same time so was expecting different numbers to previous years)1 point
-
Hmmm... weighing the job up .... If I understand you correctly, you'll have restricted movement for your digger: that shouldn't be too much of a challenge, especially not for a 6 tonner - its reach will be sufficient. If not : consider popping the gate and fence out and replace behind you? Slinging the digester from the ground to (say) a meter above ground for transit might be an issue (?) Do a quick Risk Assessment. Nothing 'heavy', but walk it through in your mind and prepare accordingly. Ground conditions? Too wet? Hmmm. Too crumbly? Planking and bracing. Job achievable in one day ? If not who's gonna fall in, when, and how do they get out? 2 shackles - one for the digger arm, one for the sling on the lifting points of the digester ( proper - expensive- shackles correct rating) A couple of 5 tonne (five dashed black lines on the fabric) slings - different lengths if you can Check there are lifting eyes on the digger arm (my digger had strict instructions NOT to use the arm as a crane :>( ) or the back of the bucket A steadying rope, and a banksman while moving (Dont move it on your own ) Space for ground anchors in the hole (otherwise the tank might pop out of the ground when the water table rises) Consider using concrete to anchor the ground anchors in the hole How are you going to make absolutely sure the tank is perfectly level ..... perfectly level Inlet invert - outlet Invert and subsequent run to drainage: double double check. ( I lost so much sleep over getting this right ) Windy day? Wait. Planks ready in the hole to microadjust the tank - I used scaffolding jacks and old scaff planks - well oiled jack - smoothe running. Ladder to get in and out of the hole safely All good fun. Love to see photos when the time comes. Bestaluck !1 point
-
Fab @johnhenstock83. @Nickfromwales i will make a note of that.1 point
-
No. One key issue that many overlook is the weight lifting capacity in relation to reach . Excellent. Step one achieved. Next : postitioning it accurately in relation to the hole. You'll have to think about where the digger will be stationed in relation to the hole - in other words , think about reach. My instinct is to suggest a 6 tonner for a day will do it (£300ish )1 point
-
That was a really interesting post thanks very much indeed for writing it. My only wish is that you had made this post about eight years earlier than today full stop because I would have had another strategy for my 'made ground ' build1 point
-
We used compacfoam to form the upstand. Robust and insulated.1 point
-
I'm switching to flexible octopus (basically their standard variable tariff) then having them fit my smart meter and then switching to Flux once my PV and battery system is in, although that could be several months away. 😞 I've got my referral code all sorted too 👍1 point
-
Very tight. ~120mm total for insulation + screed (to include underfloor heating)... I managed to pick up 75mm phenolic for £20/sheet from Secondsandco (link), so I think that's the best result I can hope for given the situation.1 point
-
Ah yes I remember that program. They had a bizarre hated of plasterboard, and always tried to avoid it. Even though it's about the cheapest sheet material you can buy, and it's easy to work with, helps with fire control, and it's very versatile. I wonder if a genuine 'how to build a cheap house' program would really be popular, because when budget is king you just end up throwing out the nice stuff like big windows or woodburners. FWIW our build, completed in 2018, came in at just under £40k ex plot (but inc services) for 43m² usable. Almost entirely DIY labour, but I did have to pay VAT. I used corrugated steel for the roof and am very happy with it. Box profile might have some technical advantages but corrugated was within the vernacular here and looks much better. I wonder what my build would cost today?1 point
-
There was a fair bit of load. Behind that wall is a big open plan space running gable to gable, there is a fair chunk of roof also. The first floor joists frame into the inner leaf, thus floor load also on the strongboys. The strong boys were supporting both inner, outer skins, the first floor and part of the roof. I had designed and specified props on the inside, steel needled with lacing and diagonal bracing between the props. The temporary works were also designed to resist a bit of temporary wind load on the gables. The props were resting on the edges of the concrete slabs, under the slabs was clay.. like soft butter, no appreciable strength at all. None of the props were in tolerance plumb wise as per manufacture's recommendations. If that was not bad enough they had then gone ahead and knocked out other walls on the inside, the folk were still living in the house. The thing is that to do it right would have cost another say £700.00 quid and an extra day and a bit time wise for a couple of guys. All they had to do was follow my drawing. The lacing and bracing is just done with standard scaffold tubes and couplings.1 point
-
I spoke to someone in a new build the other day and their entire downstairs engineered wood had to be redone as it was laid too soon after the screed. so could the concrete slab in the OPs case still have too high a moisture content and cause this?1 point
-
I would say yes, then wind direction had the same influence on both the inlet and outlet. I prefer wall outlets less to go wrong years down the line with roof penetration. You can have them close together if you use a directional inlet outlet.
 1 point
 -
because double the price isnt double as good.1 point
-
Parge first, as nothing will stick to the pores of the raw block face. Then you brush apply something like Passive Purple (liquid airtightness membrane) and leave to dry. Then you can tape to that. You may just as well brush on the thicker (non-sprayable) stuff as your airtightness tbh, as you can push the brush down into the internal angle where the wall and floor meet, plus it’ll stick to most stuff too.1 point
-
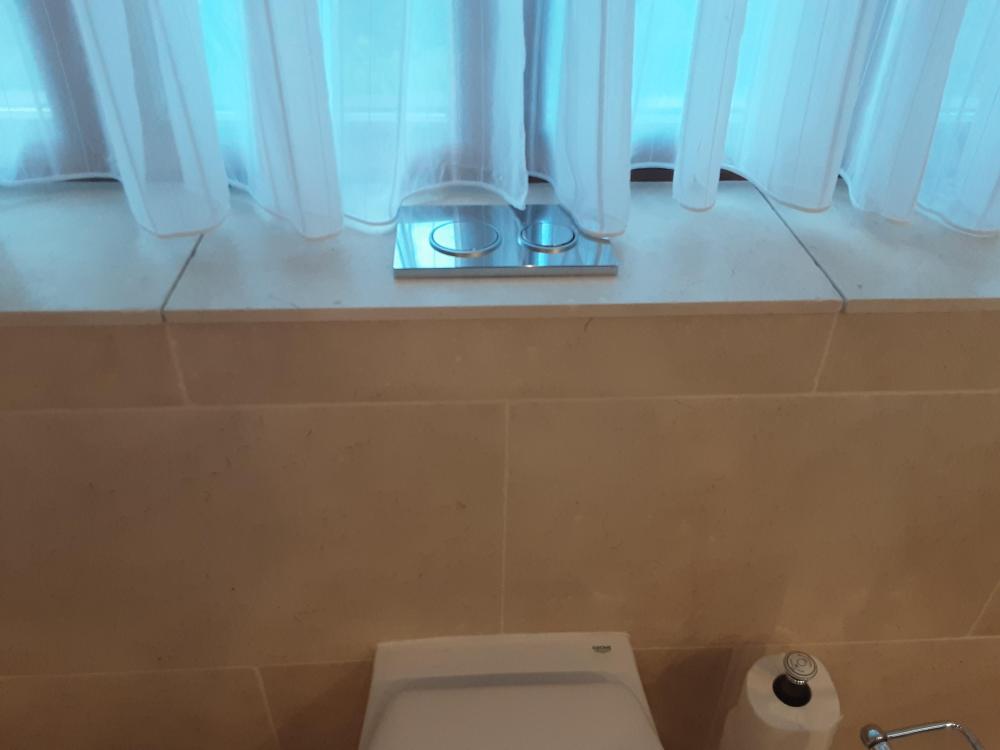
I done know @Dave Jones First, i dont have to have that bloody huge push plate right behind the lift up toilet seat. I tend to have a small button off to the side. I usually do the shelf in either Marble, Granite, or a manufactured stone. This provides a useful space for my expensive (Hugo Boss, etc) reed diffuser.1 point
-
Fit Geberit or Grohe. Everything else is crap. All the Geberit drawings are on their site. With Geberit it's all serviceable through the flush plate. https://www.geberit.co.uk/products/bathroom-products/concealed-cisterns/1 point
-
Hi @DarrenP I made panels related to the tile layout minus about a 10mm border with the tile stuck on the front and instead of grout I siliconed around the edges of the tiles so I could open again. Have a look at the depth of back to the wall frames for indications https://www.victorianplumbing.co.uk/bathroom-accessories/toilet-accessories/wall-mounting-fixing-frames M1 point
-
I wouldn't do taped OSB as an airrtight layer again. Fine in theory. If your builders are ace. And care. And the OSB is smooth rather than rougher than a badger's backside. And yes survives being beaten up. But in a practical application I think it's easier to achieve airtightness with larger rolls of soother membrane and fewer taped joints.1 point
-
Indeed Gus, very generous and informative. I would add that the basement and timber frame might be buoyant. It is building control who decide about a fire escape. If the basement is seen as a space that could be habitable accommodation in the future it will need building with a fire escape. You mentioned an outside door but not an internal staircase. I have found soil investigstion specialists quote prices all over the place. I would begin by phoning half a dozen at least. If you phone Gus and he can't cope with his workload he will stick a big lump on top. If he has nothing on he might knock 10% off. Your basement will displace water the area of the basement plus outside staircase times the depth beneath that where water flows through the ground. This might be 3.3m to base of excavation less the top of the yellow clay shown at 6 feet deep on the second log. It could be 1.5m but it needs to be known. The concrete is likely to be 300mm thick floor slab plus 300mm thick around the perimeter 2.95m or thereabouts high. Add all that up and, at 3.5 tonnes per cubic metre, it needs to equal the mass of water displaced. You should have 10% spare mass but I haven't included the timber frame etc. If you are nearly there but not quite; make the floor slab bigger (adding a heel) and backfill with heavy stuff that will press down on the heel adding mass to resist uplift. If you are nowhere near heavy enough then anchor piles that would need to be sucked up with the basement would tend to be the solution. I don't think you are remotely in that territory.1 point
-
Too right! Hi Alan. Hope this helps... there is a lot of prep work you can do.. seems like you have already started raking out a borehole log so well done. We call this a desktop study, often folk slag this off but what they don't know is that it forms part of the BS design codes to site investigation and good practice. Try and find out as much info as you can online, look at the BGS viewer to see what kind of bedrock you have and superficial deposits. Speak to the neighbours (very good to do as we weave this local knowledge into a site investigation report), well I do as it carries weight.. believe it or not. Ask say about flooding, were there any landfill sites, was it in a bad corner of a field that the farmer filled in? .. think of the things that might be relevant to your site, be friendly and get them talking. Sometimes they produce old historic photos and give you pointers, history of the site and real nuggets of info that can literally save thousands later on. Other stuff.. have a look at the services, if rural... then where are they, what services will you need.. drainage is a biggy. If in the town.. where do you think they might be and how deep to the sewer in the street, if rural have you available space for say a soakaway or easy access to a water course that does not dry up in the summer.. Next thing to do is to have several walk overs of the site and wander round about. Try and understand how the topography has been formed and importantly what has been changed over time. Are there culverts, how does the land drain, where are the water courses, are there big trees, if so which way are they leaning.. If you see the power company / water folk digging up the street stop and ask them about the ground! many of them are keen to tell folk what they know!.. sleep on stuff for a while.. be curious.. think of everything you can and try and work out why the things you observe are the way they are.. and write it down. The objective of the above is to try and encourage you to look outwith the site and understand what is going on round about. Do your best here and put all the info you have into a document with some photos. Now you have the makings of a desktop study and off the back of that you then plan the intrusive site investigation. Your SE and investigation company will meet you with open arms if you turn up well prepared and won't make a fool of your efforts.. if they do then find another SE GI company pronto. If you come to me and say Gus.. I want to build this house.. I'll say.. to do it right and do our best to avoid things coming back to bite us we need to start with the above. This way we take all reasonable steps to mitigate the risk to you and we can then focus our effort on the different designs knowing we have started out doing things the right way.. done the leg work. The above is the starting point of planning an intrusive investigation that reduces the risk of wasting money while at the same time providing useful design information that can unlock options for the building / basement.1 point
-
A mile may as well be a lightyear when it comes to UK geology. Speak to a SE - get them to advise on what geotechnical information is needed (risk of going straight to a GI company is you get overspec investigations). They may charge a few hundred quid to write a spec but they don't need to do a full structural design to know what ground info they will need. Then get the ground investigation done up front. It'll pay for itself - the same information will help on the foundation design with or without a basement. This will then help by either reducing the grounds works required, and/or avoiding abortive work early in the project, and/or de-risking the groundwork for the contractor when they price. I always always advise that for new builds, get a GI done nice and early.1 point
-
It depends what load each prop is carrying but probably not, the blocks especially would be vulnerable to a point load. Your builder should be able to make an assessment of the load, with the effect of the weight of any floors or the roof needs being considered. Note that Strongboys should be limited to 340kg (acrows are much stronger but due to the eccentric load on the acrow prop it is reduced a lot), which is around 150 bricks or so. Easily solved though, either remove a few blocks and prop off the ground or use thick timber sleepers to spread the load. Be cautious as a prop failure (at either end) would be Very Bad.1 point


