Leaderboard


Popular Content
Showing content with the highest reputation on 05/22/23 in all areas
-
I think it is a feeling of power and importance, sitting up there. They also seem to know a lot more about Engineering than I do. Did you know for example, that rollers are unnecessary and it it is ok to put in 500mm of fill as long as it gets tracked over? And that all drains go at 1 in 60, or " just off the bubble" regardless what a drawing might say....and that he can judge that by eye from his cab......and it is ok to refill an overdug trench and.....etc.3 points
-
And don't throw away the spare bit. Put another plug and socket on it and you have another extension lead.3 points
-
It wasn't ME who started this! A couple of members have been to my place and will likely agree the amount of work needed etc. After a hard 5 days last week I came home and as I pulled up in the drive could hear a digger. I walked round the back and SWMBO's first words were "Don't moan..." The house is surrounded by mismatched paths and patios in some cases patios over cracked patios! The common theme is that they either slope towards the house, are higher than the internal floor levels...or both! 😂 Really it all needs to come up. Anyway...we'd discussed extending the patio area a few weeks back. I suggested doing the opposite side of the house first so we could store various materials out of sight, sort the drains etc. It would appear that fell on deaf ears. On a whim she'd gotten her brother with his digger to, well...start digging! Various reptiles & amphibians appeared and were safely relocated. He then dislodged an old clay soil pipe along with the bees nest and got stung. The "Don't moan..." was because he'd also found the oil pipe! 😂 I did a 180 on the path and shot down to Screwfix for a few 10mm pipe couplers. Been pegging out the excavation tonight using the laser to see what levels I have. Paving slabs are coming free hopefully. Aiming for this to be as cheap as possible.2 points
-
Yes, this.2 points
-
Hi everyone, newbie here. We are embarking on a self build project - never done anything like this before and pretty much trying to get a handle on the various processes while dealing with info overwhelm. Would appreciate any help with looking at our building plans. We plan to build with ICF and possibly go for passive house certification. Our architect has no experience of either (wondering if this is a mistake), we all appear to be working it out as we go along. Any thoughts, guidance, etc would be very much appreciated1 point
-
Hello! Happy Friday everyone. Has anyone fitted a Murphy door before? We’d like one but can’t find any UK suppliers. Photo and link to show what I’m talking about. Thanks! https://murphydoor.com/
 1 point
 -
White, has a very horrible habit of turning yellow over time.1 point
-
What a load of sh*t. Build it out of cavity blockwork and attic trusses so that if you decide to put heating in you can insulate the walls at a later date. Get rid of all that steel and why on earth is there a raft? Standard strip foundations and a ground bearing slab. Use Keystone lintels over the openings. Two different sizes for floor joists shown on the drawings and putting a note on to say that the stairs will be designed by a specialist is a complete cop-out!1 point
-
I'll start off Durisol Advantages 1. Easy to DIY, just read the installer manual and/or go on the course. I did mine at the height of COVID, so no training available. No issues I just read the manual. If you one of those that knows better than reading a manual, the product is not for you. 2. Pretty good U value out of the box 0.14, for the 365mm thick block. 3. No special tools or props, or support system required, except adjustable props at the opening (ease and cheap hire locally) 4. Vapour open breathable walls, remains so with a cement/lime parge coat, while becoming airtight. 5. Little or no thermal bridges 6. Can build in just about any weather and pour concrete at just about UK temperature - well in the minus temperatures. 7. Didn't that much rebar, when compared to other systems. Disadvantages 1. Not air tight so a large coat or similar required internally. 2. Blocks are not fully square due the the tapers in the moulds. Once you realise it's easy to make allowances. 3. Only 6 rows of blocks high between concrete pours Some say during the build the house will get flooded as the they are open to water entry - our build started November and windows weren't in until April, we had no issue with water getting in after the roof was on. We also had 2 walls open and not covered externally for approx 2 years with no issue.1 point
-
And probably will be for another decade.1 point
-
I had no experience or knowledge. My architect had no experience or knowledge. Yet here I am 😊 You got this ! Plans please !!! 👍1 point
-
Squirt foam in, easy enough to poke a hole through it with a drill if you have to. You could get some white PVC and stick that over the holes. May look better.1 point
-
Sheesh so the digger ran over the cable so the hire company will invoice me for it. I will keep the damaged one, I take it the safest thing is to just lose the part that was severed and move the plug to the new end? Like joining it even covering with heat shrink tubes would be a bit crap?
 1 point
 -
It's a long time since I trained and we didn't really cover use of split concentric in any depth other than as a supply incomer. I would be pretty sure that it wouldn't have sufficient mechanical protection to avoid the need for an RCD at the origin, which you really want to avoid on a sub-main. The requirements that DNOs work to are different to those for consumer installations.1 point
-
Thanks. I’ve no fear about this part of the build as it’s my excellent groundsworker doing it not the HH contractor. You’re right about there being no grout under the baseplate. Fortunately the well was very flat and I completely cleaned everything out of it before they put the steels in. It’s been recommended to me to paint the steel below as well as the concrete going in. I’m at the builders merchant now.1 point
-
In theory I would say yes roughly. The isolator in the meter box needs to be fused. The sub-main cables will almost certainly need to be armoured to avoid the need for RCD protection. You can't use Henley blocks on their own as you can't have cable cores exposed outside an enclosure - they're only ok on the surface with meter tails because those are insulated and sheathed so have mechanical protection. So you'd need to put them in a metal enclosure (which will also allow you to terminate the armour properly) or use an enclosure with DIN rail terminal block rather than Henley which will achieve the same. You could connect that enclosure to the consumer unit with a short length of metal conduit to keep it neat and avoid an extra pair of SWA terminations for the link cable. One thing to watch (especially if extending back to the old CU) will be voltage drop. If you have the full house load on that cable you may need to up-rate it to avoid getting too much of your overall voltage drop allowance before you get to the old CU. It will depend on the design current, cable sizing and length of your existing circuits. The calculations for that can get complex once you start up-sizing cables. Definitely worth running it all by your sparky before committing as ultimately they'll need to sign it off. I'd also keep your own records of cable sizing calculations, photos of the install etc in case time passes and you find yourself working with a different spark down the line.1 point
-
I know but this is too expensive to fit a fancy device on every window. I don't think I need it on every window in the house. Maybe I leave one or 2 on each floor but I don't need like 10 of them. Besides probably the screw holes do not line up and I will have to drill two more holes and it will look bad. I want to fill the void with something then duct and aluminium tape and screw these plastics back on. as I said I had them all blocked over the winter and no mould or humidity over 52%. There are vents in the bathroom, a big one in the kitchen and a fire stove that most likely circulates all the air from downstairs.1 point
-
Here's one I found earlier
 1 point
 -
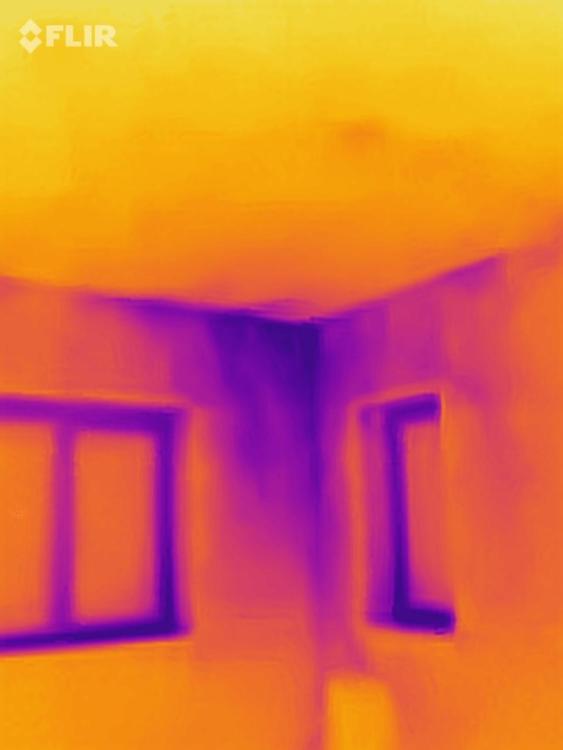
If you have a smart phone you could consider FLIR 1. Worked a treat for us.1 point
-
I have told staff to expect the operator to try these things on. They can be convincing. But the Engineer gives a 12 year warranty and the driver will never be seen again. Then I hear back that they did, indeed, try to lay fill in 300 layers and not even run the roller over it. At the risk of being preachy, because some first timers will get this bs: The whole point of a caterpillar track is to spread the load over a large area, and to not sink. So the pressure is about the same, perhaps less, than under a wellie. They are putting a light crust over loose fill. It may settle under completed paving or floor slabs to expensive effect. I fear it must be common. Put the pressure explanation to the reluctant operator ( think on why you have tracks rather than wheels) and see a momentary blank, then a slight self doubt, then a return to cockiness...."I've been doing this for years." "OK you aren't getting paid until you dig it out and do it properly" they do understand.1 point
-
He should write a guide to building with those skills!1 point
-
Pedantry is fine. A wee bit better and a bit more solid for getting a drywall screw through works for me.1 point
-
Stil not entirely clear what is exactly behind the exterior insulation at first floor level. Thus the pier could be propping that using part of it's depth, the balance stopping at door head level. Some closer investigation is called for. Building reg wise, if the pier is non-loadbearing then there's no alteration to the structure if it's removed. If the space is unheated and remains so then there's no change there either. It would appear therefore that your proposal is not "building work" as defined by the regulations. As to planning, isn't this an "alteration" to a dwelling house and so falls within Class A of the permitted development rights afforded said dwellings and thus doesn't require a planning application?1 point
-
Yeah, you're not the only one. It's a lonesome journey and worse when you get in your own head. I've just got into the same situation because as soon as I decided to put my trust in getting in some trades and paying someone instead of doing it myself, the carpenter has cancelled to sets of dates and gone awol when we had an agreed timeframe - now I'm stuck with a load of internal doors about to arrive and figuring out a load of bleedin' logistics and work schedule with me doing the stuff myself again. (expletive deleted) trades! As for the hole situation, I think it's easiest to drill a larger hole, adjust the fixings and then use an epoxy cement to set them correctly. Even with a press, if your drill bit is long and fairly thin, you're going to get some wander through a thick wall. I have a 1m 16mm sds drill bit for getting through my walls and it flexes like crazy. Even a 22mm diamond core drill rarely gives me a clean enough hole to insert a 22mm pipe afterwards either. But then maybe I'm just rubbish at drilling holes.......1 point
-
While he had the digger on site he should have flat packed your greenhouse 🤭1 point
-
As are drawings and safety notices.1 point
-
I am the electrician and plumber so I'll just have to moan at myself Still undecided on the service void1 point
-
Not something i would ever hire, this being one of the reasons. Unless you need it on a reel, it is cheapest to buy the cable and the ends. Cables, string lines, marker pegs and tapes are invisible to plant operators.1 point
-
Wish I had a brother-in-law with a digger!!!1 point
-
I want @nod to do my dot n dab.1 point
-
You should be able to re wire at the socket (reel) end, thus only loosing what looks like 600mm of cable, if you haven't told the hire company I'd be surprised if they notice, but I didn't say that 🙈1 point
-
Many on here swear by Parge But from an airtightness point of view it’s a waste of time It’s better to make sure that the continuous lines of dab are applied around all perimeters sockets and window reveals Acoustic sealant should be applied to ceiling edges also and before you start make sure all joist ends are pointed in tight Pink backed PBS for dabbing
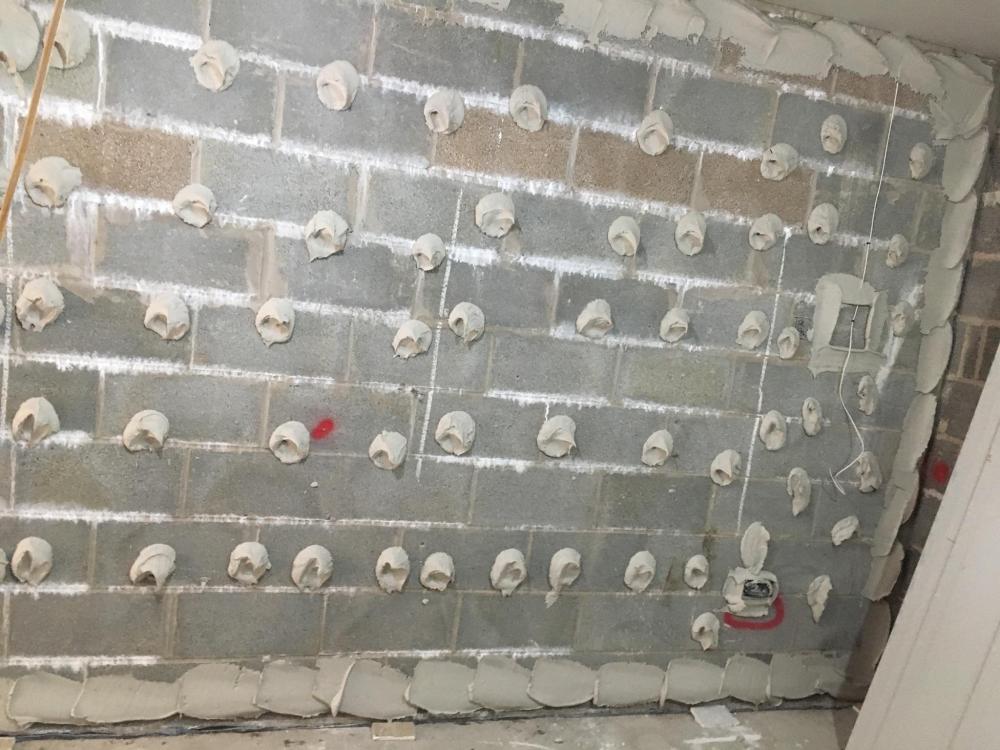 1 point
 -
Drill 10mm into the wall free hand. Then put the block in place and with 2x normal wood screws through it adjust them to push the block into level using a spirit level. Then finish drilling the hole correctly.1 point
-
I think/hope you already know this but G98 restricts your inverters export capacity, not the size of the array. Within the inverters limits, put a bigger array up and your G98 inverter can sit at 16amp(3.68kw) output for much of the day. Don't switch big loads on at the same time and there's not much in a typical house that will need more than 16amp.1 point
-
Get a long (greater than the wall width) bit to make a pilot hole with a slight fall to the outside. This will ensure both holes line up. Drill a piece of 50mm timber with 2x holes 125mm apart. Make the middle one perpendicular to the timber and the outer one slightly angled outwards. Peg the pilot hole to one hole of the timber and use the other hole like a compass for your stitch drilling. It will ensure a neat circle that will be slightest bit conical towards the inside making it easier to chip out. Then get hammer and chisel and get tapping. This can be tedious. Now repeat from the inside. I had 3 holes through 215mm block, 250mm cavity and 100mm block to do. They took an hour each with a cheap SDS.
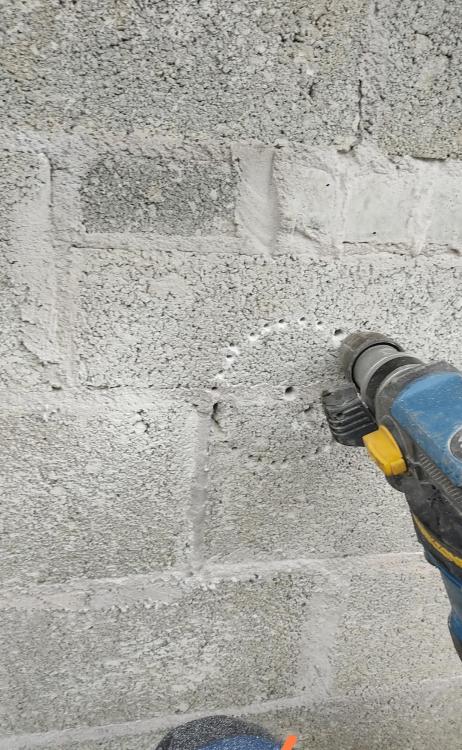 1 point
 -
I’ve forty years experience as a taping and plastering contractor Don’t paint directly onto to Plasterboard1 point
-
Feel for you. Much will depend on just what stage of the work you are at. Seems like the beam B1 is in place but no extension roof? I had a quick look at the extract of the calculations. I can't see page 7 but the loading used to design the beam looks about the right magnitude holding up a bungalow roof and the load from the flat extension roof. The mention of a second storey is probably just the SE maybe just calling the bungalow roof the second storey? The beam is checked for at least three criteria. Strength checks.. moment capacity Mc 429.9 kNm, buckling strength Mb 145.9 kNm both of which are greater than the design moment applied to the beam = 121.5 kNm Deflection is also checked against a limit of beam span / 360 = 19.6mm, calculated deflection is 10.883mm I get 10.9mm .. close enough. However B1 has plates welded to the top and bottom flange which stiffens the beam quite a lot. Thus you would expect that the beam deflection would be less still and if it is less still why are they (the plates) there? One reason may be that the SE has decoupled the calculations and assumed that as the loads are not over the.. call it centre of gravity of the beam and we are only seeing part of the calculations. This eccentricity causes the beam to twist more and the SE may have designed the plates to resist this extra twisting and left the remainder of the beam to carry the other forces. The main thing here is that I am not casting doubt on the SE's calculations but would ask out of curiosity if this is the reason for the plates. Also the plates are shown as the same width as the beam flange, nominally 173.2mm. To get the plate flush means cutting a long standard flat bar down lengthways.. more expensive and also if the plate is flush your standard fillet welds are not appropriate. You need to use partial penetration welds or similar which are more expensive. Normally I would use a standard 200mm wide plate which give loads of room for the standard fillet weld, especially as we know that not all beams / plates are truly straight. Again I would ask.. why was it done this way and are there other underlying reasons for this design approach that are not immediatly apparent. Now this is really a mute point as the steel is paid for and B1 is in place.. other than it will let your SE know that you are now better informed. It is what it is. It's a great pity that neither the Architect or SE alerted you to this low height much earlier. But what options might be available to raise the soffit of the beam. Well it could maybe go up quite a lot until the bottom is almost level or just above the ceiling of the extension. Here we would do a bit of joinery work to brace the existing roof trusses as we would be disrupting the joint between the existing roof ceiling joist and the rafter. Turning to demolishing and rebuilding the supporting walls. Ideally we want to avoid this as these walls are probably offering sideways (lateral) support to other walls so when rebuilding you have the problem of re tying your new masonry into the old. In other words you risk making matters worse. Under the padstones the inside edge of the wall forming the sides of the opening can flap about and that will be bothering your SE. If you can live with it can you narrow the opening under B1 by say 100mm each side. What you could look at is either introducing some good solid timber posts fixed to the wall or maybe a couple of light steel channel sections, timber is cheeper. Now we have stopped the supporting wall from flapping about and they will carry a lot more load... which means they may not have to be demolished after all. If the builder can give the SE the hand mixed recipe they used for the padstones and the concrete looks well compacted it will probably be the same strength as the existing brick and thus they could just stay in place and put another cut down lintel over the top once you lift the beam. That could be one solution worth exploring. I would aim to keep on good terms with the SE , builder etc.. but start asking a few informed questions. It may be that your SE comes up with some good / other solutions.. free of charge in the interests of good will. Hope this helps and things pan out ok for you.1 point
-
So they are offering 28 panels of 1.7m x 1.1m @405kW each... on the flat roof of a building that is 14m x 4.5m 12 panels on a building that is not built yet Then there was stuff about a 10kW single phase inverter. and a 5kW battery oh and a 5kW inverter for the 12 panels. Would this be a G99 application then? oh no it would be limited to G98. Would you not use the 3 phase then? That would not change anything. Then he said we can give 30% discount. I did say I thought this was solar and not double glazing we were talking about.... Lets see what the next one brings.1 point
-
If it is any consolation, I was disappointed my air test came in at 1.4, though the tester was having kittens saying it was the best one he had yet tested. The building still performs very well, heating usage is exactly in line with what the heat loss calculation says it should be. There are no noticeable draughts and it fits my basic test that on a windy day you can open 1 window or 1 door with no perceivable draught entering or leaving that one open door or window. (previous house with all the plethora of individual extract fans, window trickle vents, cat flat, letter box etc, if you did that there would be a draught blow through and likely an internal door blow open or shut) So although it would have been a "fail" that does not mean it is a bad building and was a waste of time trying or it is going to waste a lot of energy. The flaw in your argument is if you knock down and rebuild you would just employ a specialist to do it all properly. I only know of one timber frame company that will erect a complete frame and guarantee a particular air tightness figure. And that is for the bare shell. You then have to guarantee that all your following trades, plumbers, electricians, even joiners, do not drill holes in your air tightness layer and destroy your good air test. It is a sad reflection on the UK building trade that most tradesmen in the industry don't have a clue about air tightness and think you are being silly when you talk about things like that. You really are best seeing to the detail yourself, you have done a large part of the house already, just carry on. With a rebuild I bet you would either still be doing the detail yourself, or complaining that it has been done wrong and having that same argument.1 point
-
The French.1 point
-
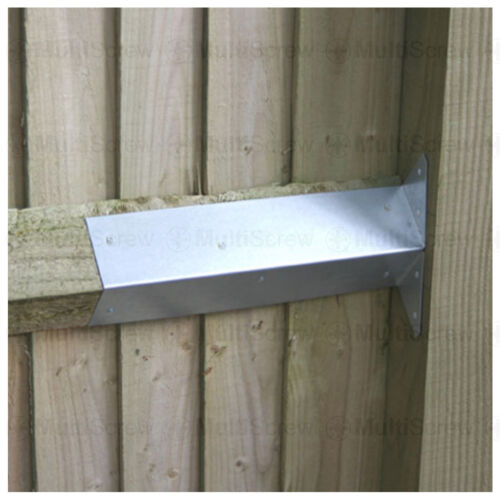
One option is to notch the posts so the rails go into the post. Taper the rails so they don't have to be a precise angle. Probably rots quicker... https://www.hooverfence.com/how-to-install-fence-panels-at-odd-angles Or perhaps bend your own arris rail brackets. Commercial ones are typically 90 degree..
 1 point
 -
featheredge it, angles are easy to accomodate.1 point
-
Maybe not the best fencing option for the job at hand. Or change the shape of the fence line so you close to 90 degree angles. Or use round posts at the corners and just notch a flat at any angle you want.1 point
-
It sounds to me that the contractor has done what many contractors do and overseen the extra time and cost involved in providing a feature such as flemish bond. I don't think it is anything to do with the bricks but its easier for them to use that as an excuse over ' Oh we didn't realise the extra work involved but have just googled flemish bond and oh shit that's going to cost us'1 point
-
QCAD was my weapon of choice for drawing the elevations. Insulation build ups came from ubakus (https://www.ubakus.de/u-wert-rechner/index.php?) which is free for most things, with a paid for option, but i just used the freebie.1 point
-
The decor in the room looks just fine ATM. It'd be a shame to loose much more space and have to redo it unnecessarily. You could strip off the roof from outside. Put 50mm of batt insulation between the rafters. Then add a layer of 18mm OSB. Tape all joints as an airtighess barrier. Important to seal this at the wall plate. Noggins and some sealant should do. 100mm PIR over the top, membrane, battens . 200mm screws through the lot. Counterbattens for new tiles. Should be no need to disturb the inside, no mess inside the hosue. No hauling materials up three flights of stairs. It'll need to be done in stages/or in good weather however. U value of about 0.18 which is quite respectable.1 point
-
I feel very sorry for those who feel that they have been ripped off and haven’t got value for money when appointing architects, architectural technicians and engineers. When I see the fees being charged and the level of frustration and mistrust I almost feel that there is an opening for a co-operative not-for-profit organisation that can help self-builders get their projects off the ground at a relatively low cost. I see that this forum is often a last resort for many self-builders who are trying to make sense of what they are going through in their self-build journey and in many cases the advice they receive can unfortunately often be too late.1 point
-
FFS, was it drawn by a toddler. Other stuff here https://www.belfasttelegraph.co.uk/life/house-home/ambitious-family-home-named-nis-building-of-the-year-2023/726998870.html The flower pots are wonky.0 points
-
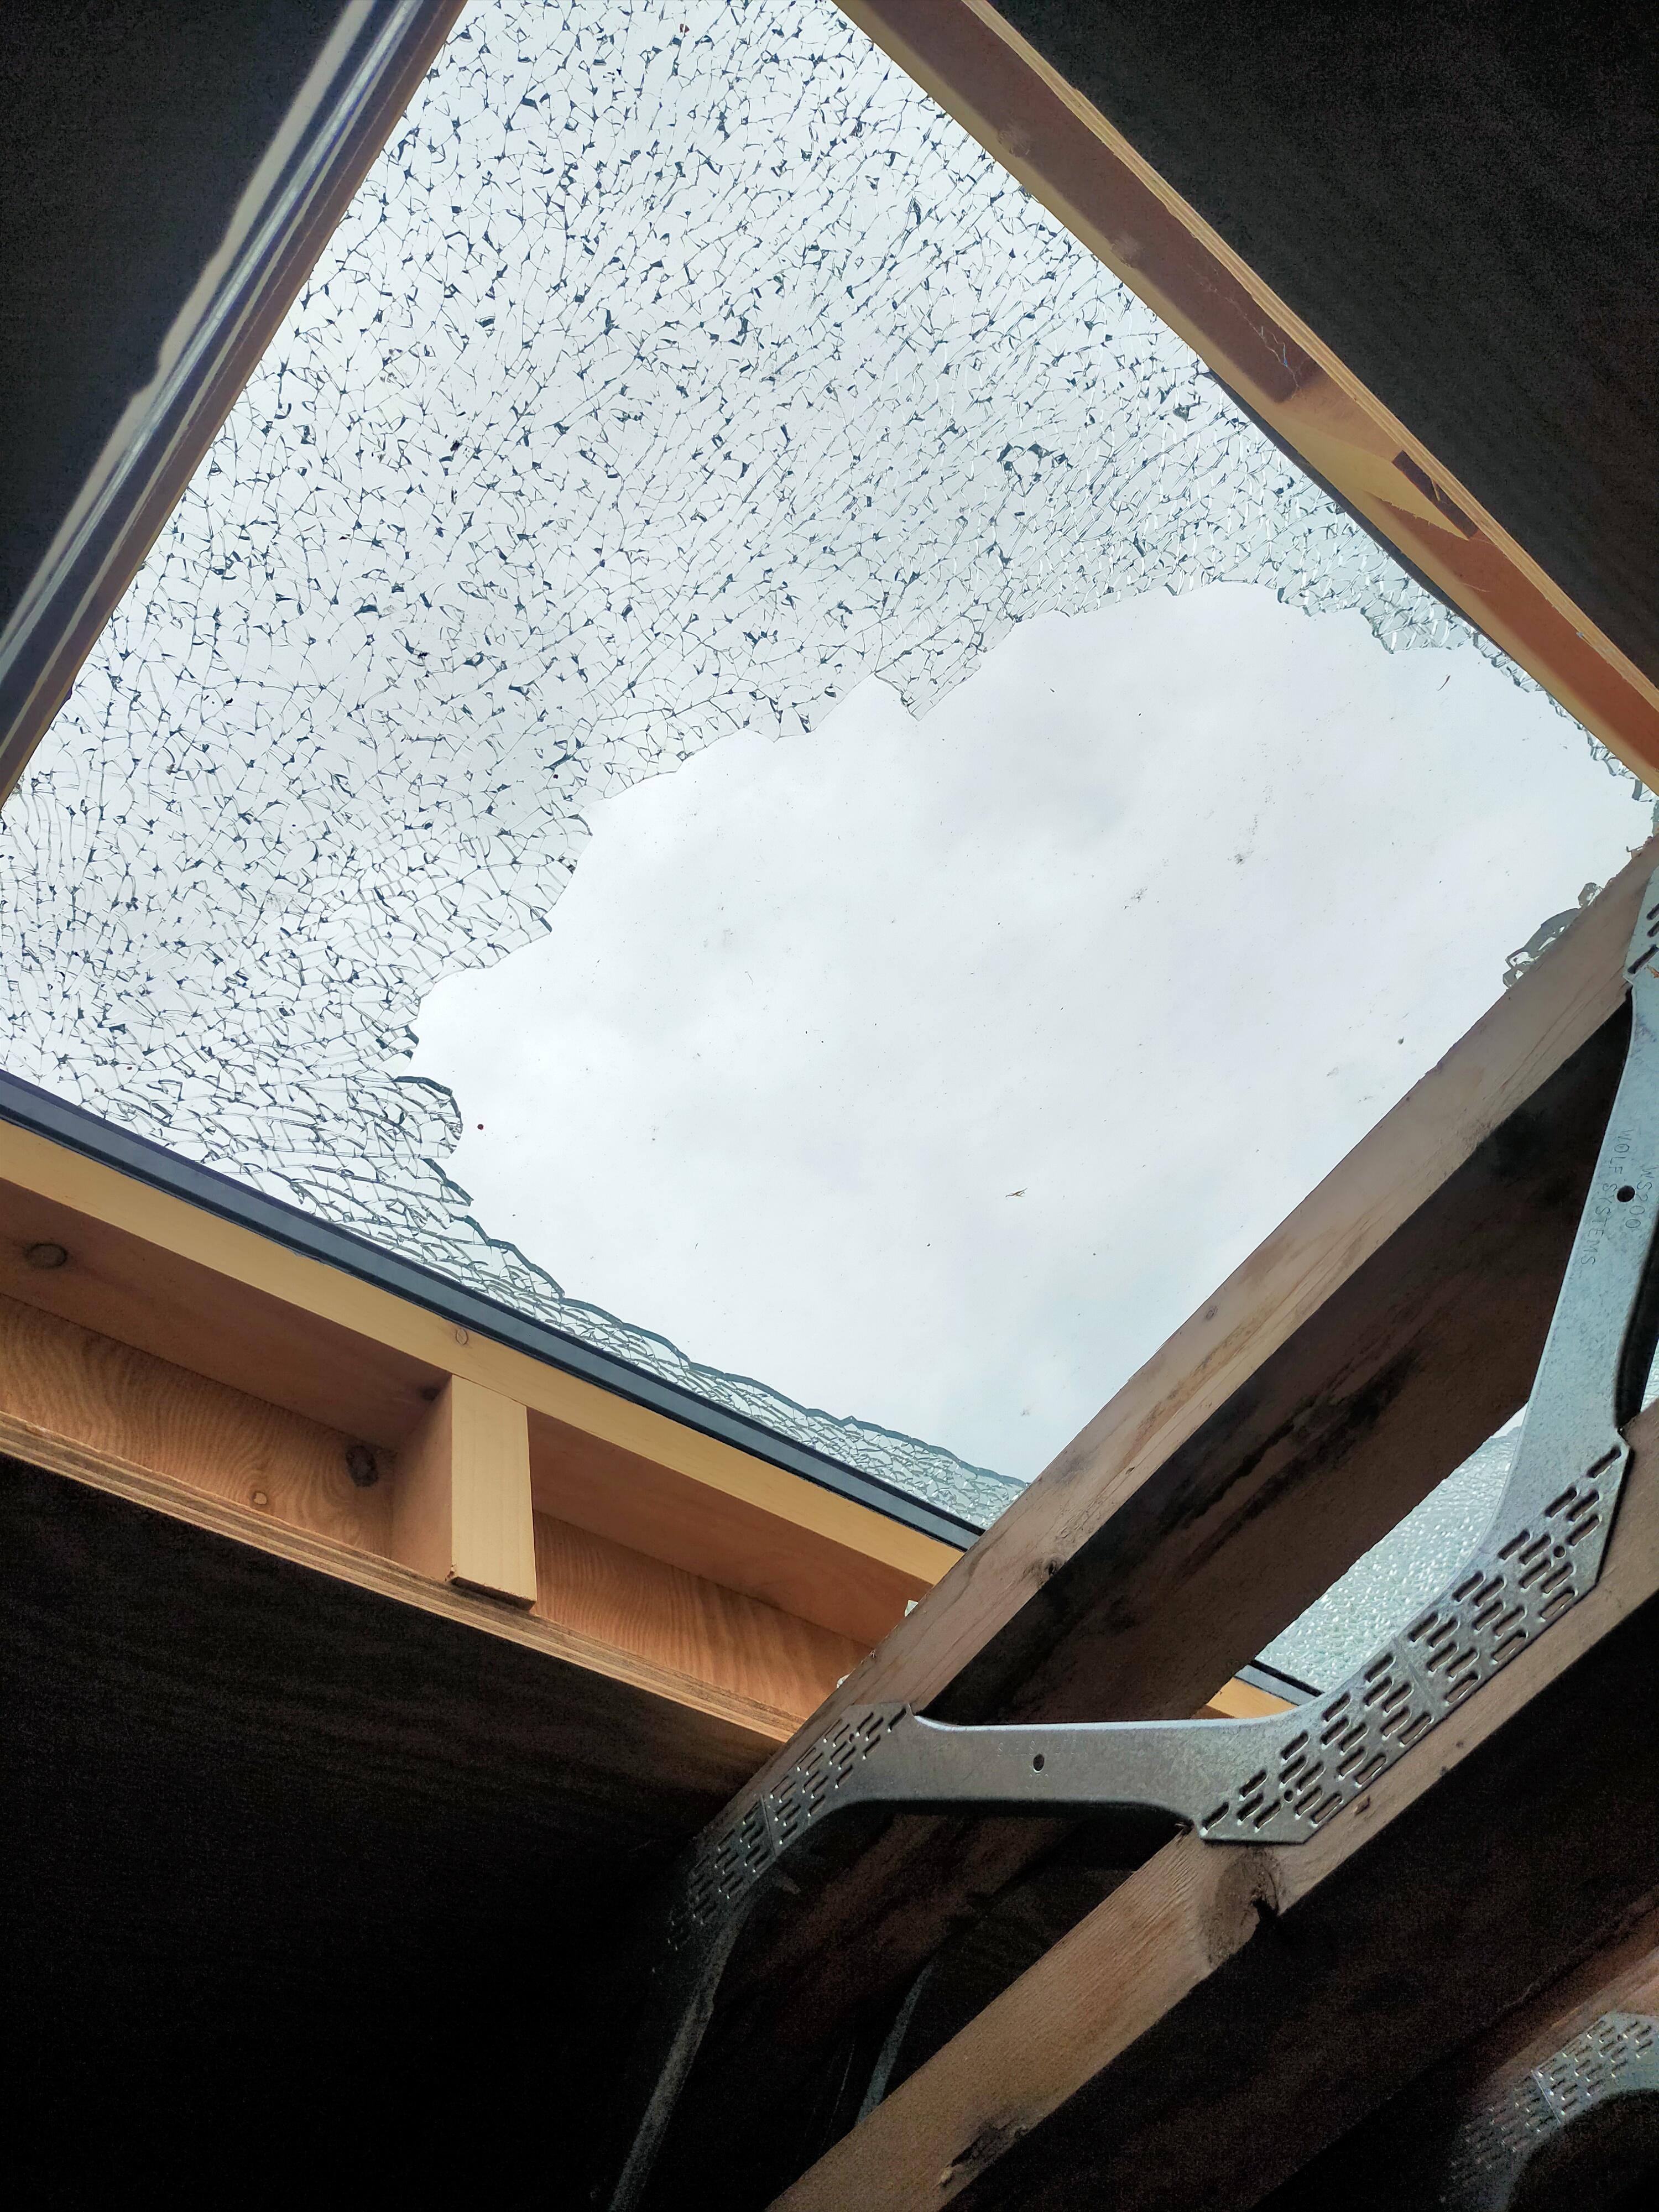
Anyone experienced this before?! I bought double glazed skylights from a local supplier and installed them myself around Xmas time. They rest on a standard timber upstand, are not screwed in place but do have two continuous beads of mastic around the top of the upstand. This morning I discovered that the inner glazing panel of one of the skylights had shattered. The outer panel is fine, which rules out impact from outside, and nobody was in the building yesterday, ruling out impact from below. On Saturday I used a hole cutter to create a vent in a vertical surface about three metres away from the skylight in question. That might have sent a vibration through the roof structure and cracked the glass perhaps. Timber does of course expand and contract, but timber upstands are standard practice and mine are perfectly ordinary. Any ideas on how I can go about replacing the unit? If I have to force it up and off I'm concerned I will damage the upstand.
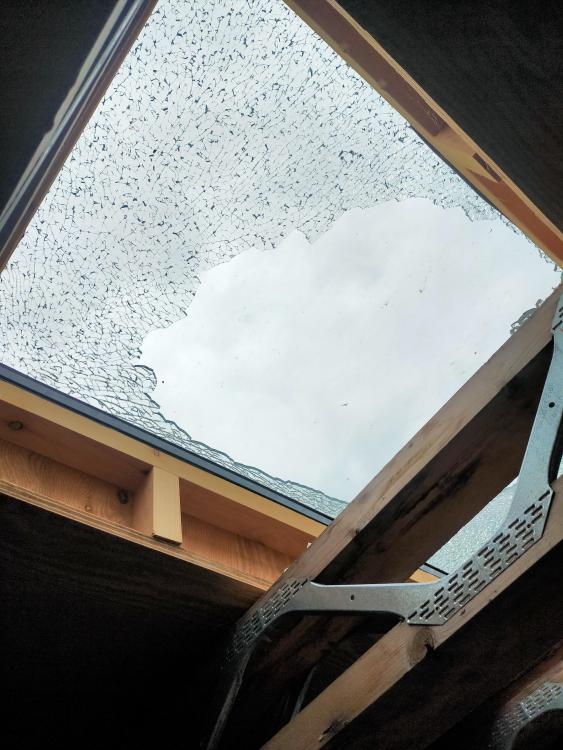 0 points
 -
0 points