Leaderboard


Popular Content
Showing content with the highest reputation on 01/30/23 in all areas
-
Fully loaded / no satellite manifolds is my go-to for every plumbing installation we do. I won’t deviate from that. I would drill at around a 60° angle and go for 5x 52mm core holes, with the holes ending up tight against the underside of the slab, and insert 50mm waste pipe into each hole as a sleeve. You’d leave a pier of 150mm of block remaining between each hole for ‘structural integrity’. You’ll get a lot of individual runs through the 50mm sleeve and it’ll be easier to drill fewer, larger holes, so maybe drill 5 holes. Use a 16mm or 18mm x 1000mm drill bit to get the angle correct, using it as a pilot / guide only, and have a couple of attempts ( if required ) until you get the entry and exit holes exactly where you want them. Remove the drill bit from the drill and re-insert it into the best hole, leaving it protruding by 3-400mm or more; eg so it gives you a line to use as a visual angle finder whilst you’re core drilling. You then just keep the drill at the matching angle whilst drilling, so you don’t go astray. Yes, starting off the core drill at an angle will be a bastard, so, you get a piece of 7x2” timber and pre-drill into it with a wood hole saw, 5x 52mm @ 60° and affix it to the wall. Start the 5 core holes off, drilling 100mm or so into the block for each hole, them stop and remove the timber guide. It’ll make drilling the rest of the way through easier as the dust / debris can fall out sooner. Bingo bango. When laying the pipes through, strategise installing the 10mm pipes first, 2 or 3 per hole, so they can be dressed in into clips. Then have the 15mm pipes lay atop those to make the bottleneck of pipes on the vertical wall better organised / flush to the vertical wall (as the bigger pipes will have the longer bending radius ).3 points
-
Just spotted this thread and showed it to my other half who still mentions her annoyance at me deleting the stove from our build. We’ve made every decision together but on this I was quite adamant I didn’t want a stove for exactly this reason. We only have one neighbour and she died last year and the house remains empty. Even when she was alive I never saw any smoke from the chimney. Fortunately the prevailing winds tend to blow away from our plot towards the neighbour so even if there was smoke it should be fine. But I can see it being a much bigger issue in more built up areas.2 points
-
1:1 white vinegar and water, put it in a spray bottle and fantastic for cleaning bathroom fittings and screens2 points
-
Yes, look very cool, but as @jack said, the price is insane right now. Was expensive before even Brexit - here's my cost trajectory: I bought 3 pallets of interior birch ply (1525mm x 1525mm) @ 15mm thickness for flooring just before Brexit - cost was about £18/sheet. Just over a year ago in December I bought Birch plywood for making the kitchen, this time exterior grade (2440mm x 1220mm) @ 18mm thickness at £84/sheet. My wife and I then decided to build a new bit to the kitchen a few months later. Then, just before the Russian invasion of Ukraine, the price went to over £240/per sheet for the same stuff (so we left this plan). It's now gone back down to £170-180/sheet and that's for BB/BB. I dread to think what S+ is going to cost. If you're into plywood, then I'd recommend you look into softwood such as Pine as you'll get it in a B grade face at a fraction of the price. Also look at some of the construction grades as they can be more rustic with knots etc. but still be a good finish. Clear Poplar ply is over £100/sheet atm for 15mm and over £120 for 18m althought the red faced construction poplar ply can be had for about £40/sheet. The problem with any timber interior finish is fire protection and you'll most probably be required by BC to treat it all and it's not particularly cheap. I like the plywood look and have a lot of it going in but don't do it for budgetary reasons, it'll be far cheaper to plasterboard and skim. I actually think it might be cheaper to do internal wood cladding! With wood wool boards you'll need minimum thickness of 25mm, especially on the ceilings and you'll also need to check batten spacing on both walls and ceilings.2 points
-
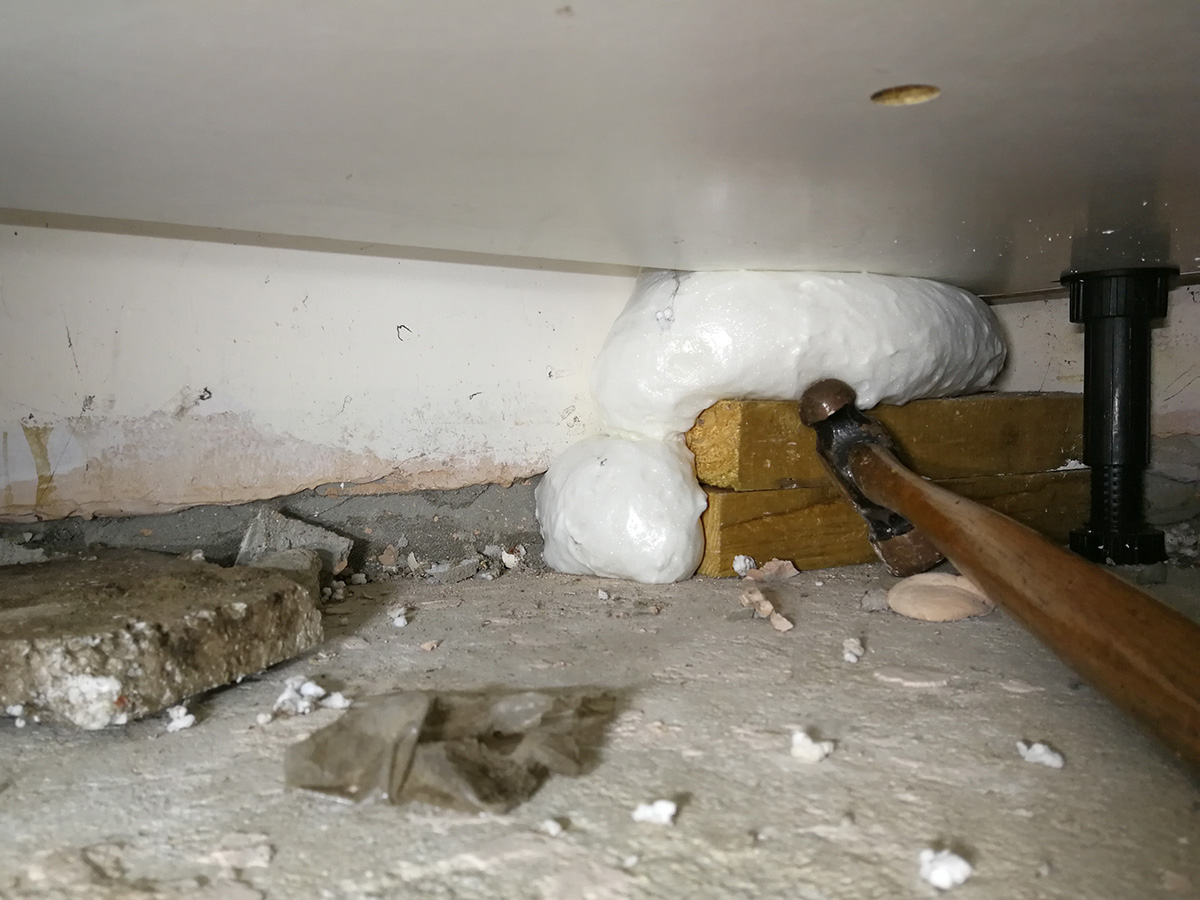
The deed is done I had to wait until the weather warmed up to be above the "min 5C" temperature for the foam, and used a disposable Soudal can as the straw it came with was small enough to fit through the air brick holes without drilling them out. It took the whole can to get it to seal this plus back to the airbrick so I imagine the cavity has a bit of fill too.
 2 points
 -
Sorry I meant over the internal side of the periscope vented below the floor beams. Thank you for the quote tip.1 point
-
Sorry I haven't mastered the quote function yet. yes correct ....you need to slit the board for the tie to sit in plus some more for the thickness of the tie then push it back and clip it on. All good until the boards are 5mm over sized and springing up off the board below because the plastic has delaminated from the PIR top and bottom and is acting like 2 springs. in 4 courses of boards you are 20 mm out of gauge then the fun begins ... chuck a standard joist height in of 2400 mm and you have another problem unless you have 300 mm joists and hit the tie course at 2700mm by which time your board will be at 2730 mm. OK I may have had a few bad packs on a site or two but the size of the first site has slipped my mind but the second was about 400 m2 of facework. I find that its better to ensure that the last 2 brick courses below the beams are in coursing bricks and set the vents out correctly to the facing bricks and use a 600 mm PC lintel in the top course over the vent. All done sealed and tidied before the beams go on and you can put your bet your bottom dollar that very few of the beams leave room for a vent to line up with the facework.1 point
-
If it's to paint over an affected surface Zinsser BIN is supposed to be good as it's shellac based. I've only used it on timber as a knotting barrier. Not particularly easy to work with but the results are tough. I've read it's good for going over mould.1 point
-
When the windows are being installed. It needs to expand against the wall, not have something compress the compriband. Sorry for being blunt but your installers an idiot and just doesn’t want to do it.1 point
-
Western Power are now know as National Grid. I don't know why.1 point
-
Also, another big one is that the U value of silicone is around 2.6 W/m2K, whereas Compriband or similar is around 0.048 W/m2K, which is substantially better. I'm not sure how you'd apply Compriband before the bricks a laid?. From when I've been looking into it on the house I'm building, it's either stuck onto the frame of the window just before installation, or pushed in after the window is installed.1 point
-
It's better than 'mastic' or silicone. Lasts longer , has a very wide range of movement, and is breathable.1 point
-
Give it longer on/off periods and it turns into a SBR (small batch reactor), as there's settling time then.1 point
-
Yes, no problem. Suggest drilling where there isn’t a knockout if possible. That’s probably obvious though.1 point
-
The brickwork will make a real mess of the compriband. It will expand really wide and the bricklayer will not have an edge to work to. Stupid idea. Just get the brickwork and window in and compriband the gap.1 point
-
My Graf plant runs 6 mins on and 4 mins off, or it could be the other way around. I was told this optimised electricity usage and stops the air holes blocking with crud if the blower is off for longer.1 point
-
I don't think it is a cause for concern, but your towel rail will be trying to heat everythinig else on that circuit1 point
-
You can screw them through the airtight layer as the membrane self seals (depending on the membrane). You can also put butyl tape on the membrane where the box is going to go for extra air tight security. The issue is if you remove a screw and don’t cover the hole.1 point
-
Try These then: They include the fire proofing as well: https://www.tlc-direct.co.uk/Products/FB4235.html?source=adwords&ad_position=&ad_id=&placement=&kw=&network=x&matchtype=&ad_type=pla&product_id=FB4235&product_partition_id=&campaign=shopping&version=finalurl_v31 point
-
There should be some insulation down there, the max U-Value for floors in 2001 was 0.51W/(m²K). Ours was built 1997 when the requirement was 1.2W/(m²K) yet the builder laid 50mm XPS over the block & beam. Wish it was PIR. And 100mm thicker.1 point
-
Yup. Bang a few extra 130mm x 6.0 screws in for belt & braces.1 point
-
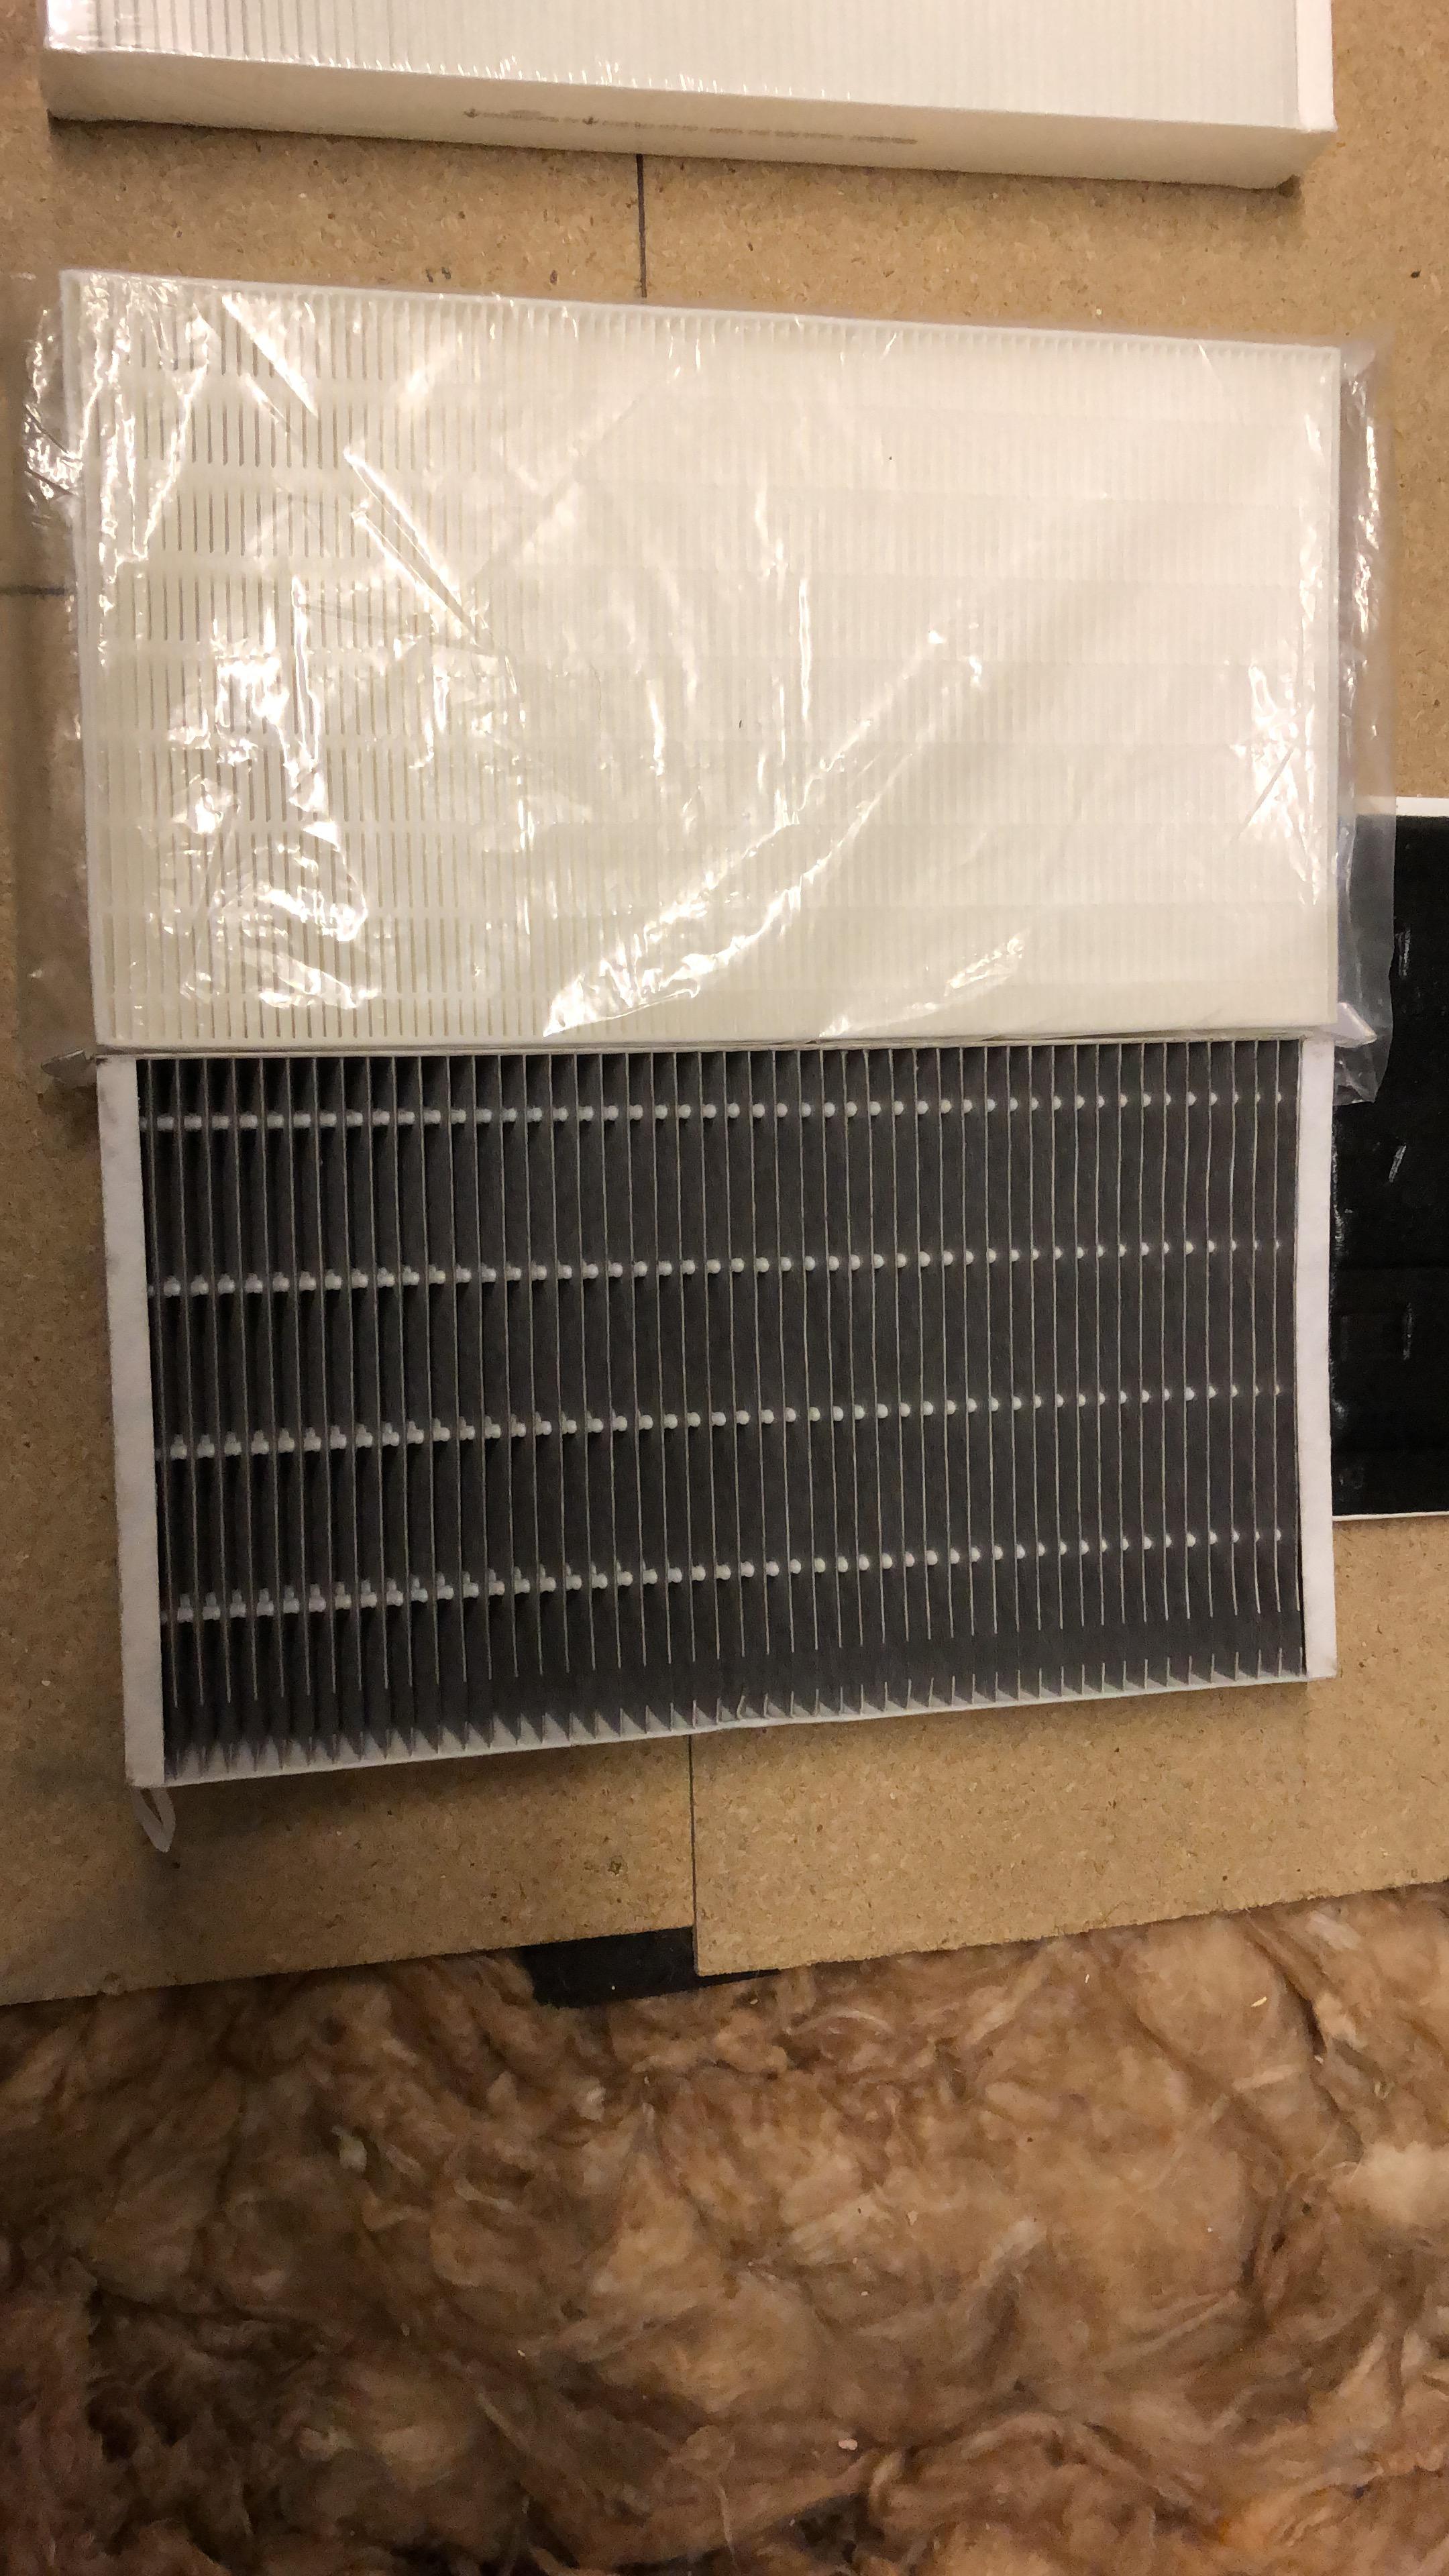
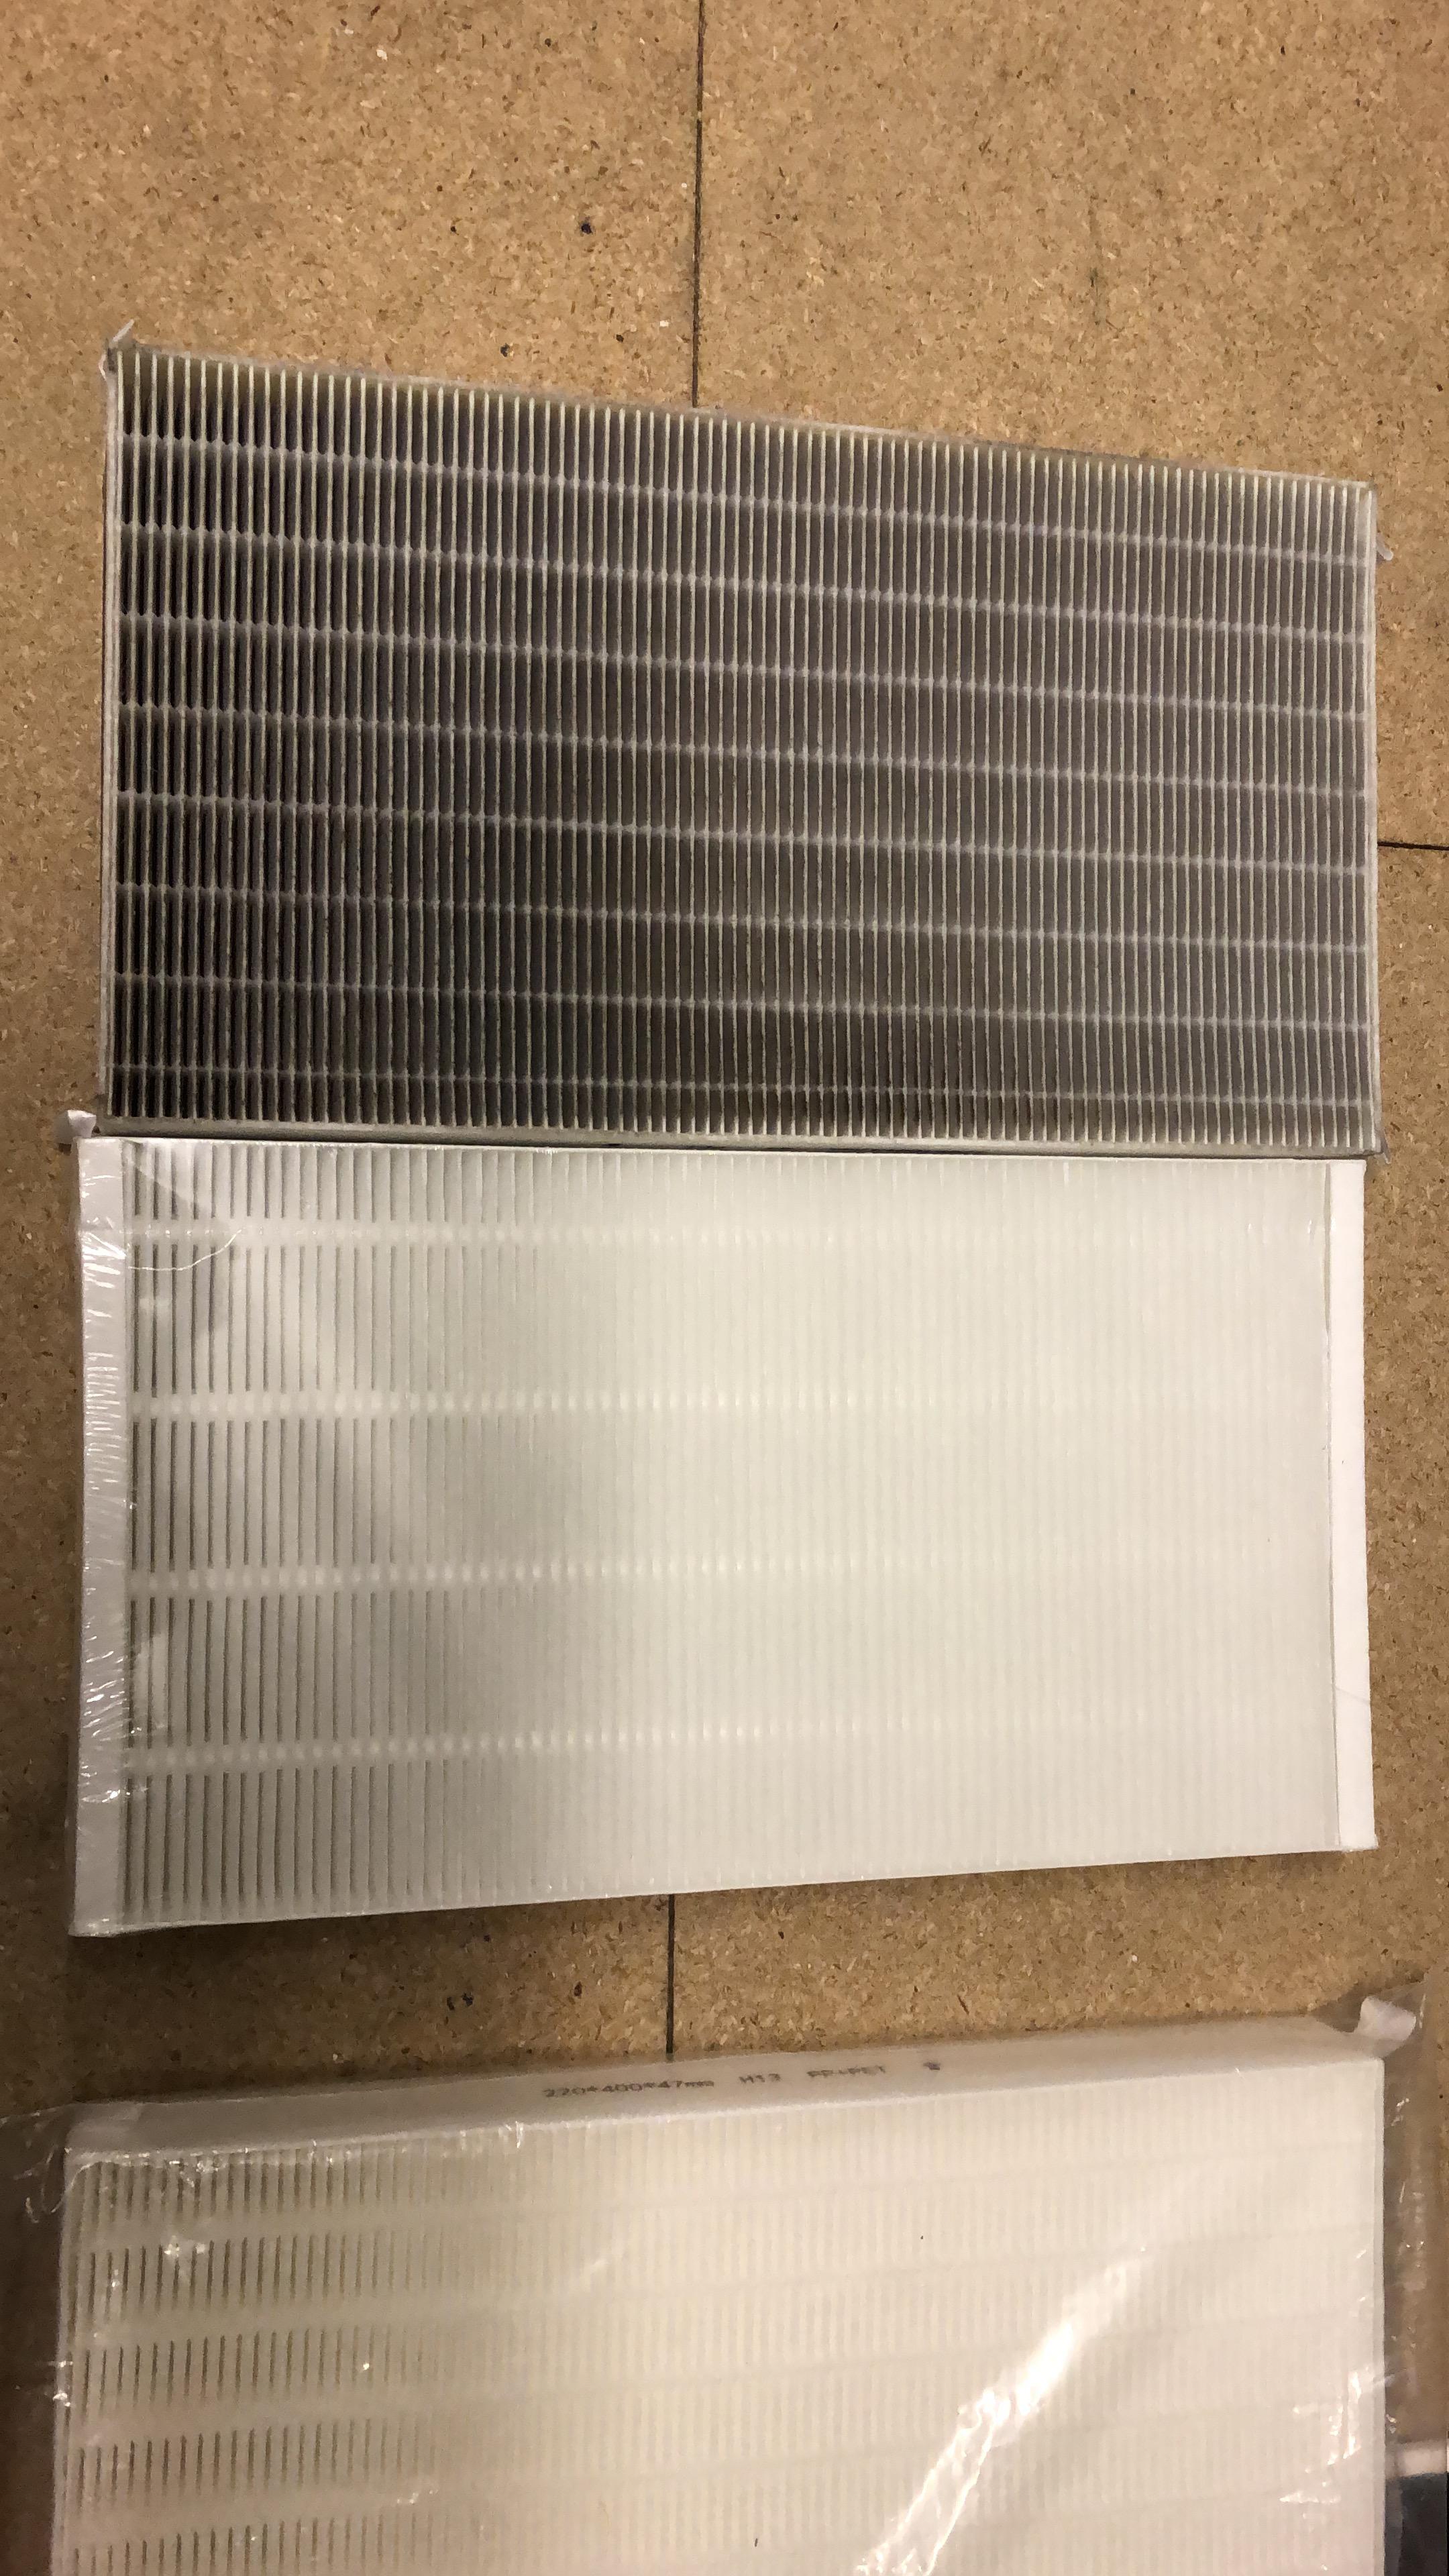
The Zehnder one was this: https://www.paulheatrecovery.co.uk/product-category/mvhr-ducting/comfowell-modular-air-manifold-silencer-system/ CleanBox has been fantastic, just swapped the filters over (not the carbon filter as thats still filtering smells fine), and now running a G4 and a H13 HEPA filter. Old vs New on both the ones i swapped:
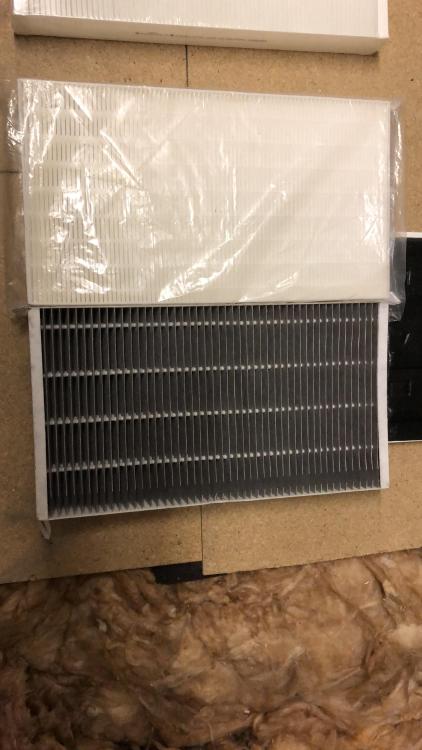
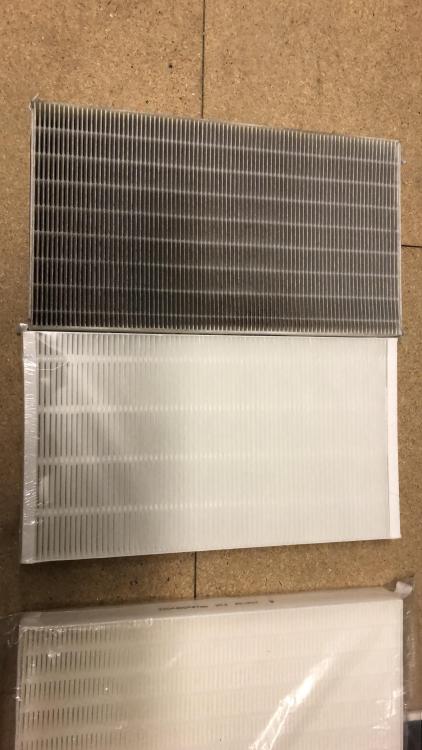 1 point
 -
We use lemon skin, when we've finished with it.1 point
-
https://en.wikipedia.org/wiki/Vinegar So many to choose from. White Distilled Spirit If I was on Instagram, I would be using the most expensive vinegar there is, and letting everyone know about it. But I am not, so would get this. https://www.amazon.co.uk/Vinegar-Concentrate-Stronger-cleaning-Weedkiller/dp/B09P12P21D Actually, I bought a new shower head from Poundland, for a £1.1 point
-
They sure knew how to make rafters big enough back in the day didn't they!1 point
-
Ducted units a possibility with vents into rooms from above, because the fan coil units are suspended from rafters, the condensate pipes will run downwards to a good drain location1 point
-
You can get condensate pumps that will allow you to route the drain along with the refrigerant and power lines.1 point
-
If you have good loft access a ducted A2A may be a good option... only one unit in the roof then large diameter pipes to each room with dampers to control which gets heat. Then only one connection from outside to inside - and one condensate run, probably from the roofspace towards the eaves and into gutters? Re your question - my existing units are positioned so they have a downhill run to an outside wall, in a loft space. It will be a challenge for the rest of the house and I think at least one bedroom unit will need a pumped/uphill condensate run.1 point
-
We've just completed a fairly similar below DPC build-up. Our cavity fill came up to the level the beams sat. The telescopic airvents simply sat in gaps in the slips under the edge blocks. Don't forget you'll need to line them up with the external brick bond, so the embedding them in cavity fill might limit your flexibility. Rigid insulation is hard to get right, but doable with care. Cutting around airvents and cavity trays is particularly time consuming, and I imagine many contractors would take short cuts. Our boards were flat edged and taped, and to be honest I feel tongue and groove would have made it harder, particularly with masonry build and wall ties etc.1 point
-
My builders used Xtratherm T&G on my extension, and they thought it was a revelation, made it so much easier, and no snagging your trowel in the fluff!1 point
-
We built the way that is being suggested. You may find that each trade that comes on site recommends another trade. We would stop and ask, at a single building site, for recommendations. Another route is to make friends of you local Builders Merchants. The guys on the counter know all the local trades and often have a nose for who is good and who is not. Our carpenters were well known for sending stuff back if it wasn't up to their high standards etc.1 point
-
Xtratherm tongue and groove boards are not easy to work with. They tend to be slightly oversize causing problems with vertical spacing or wall ties. Always allow a bit extra width on the cavity as well to allow for a gap between your retaining clips and the faced brickwork. We charge double for fitting these boards over traditional cavity bats and it’s still not enough.1 point
-
Make slightly oversized holes for the flexis, and use Illbruck foam around. Leave to cure and cut flush to PIR. Then foam for bigger / CT1 for smaller, inside the ducts, then tape.1 point
-
Wish I could take my own advice sometimes 😑1 point
-
Wouldn’t electric towel heaters give more flexibility as they’ll heat when required rather than when the heating is on?1 point
-
In my dealings with BC they like the main flow to be on the bottom so that it cleans any incoming from the branches. I don't see any issues with your suggestion, if anything it's removed some 45's so a good thing. It doesn't stop the s**t getting clogged in the joint though. I tend to think when using the rubber couplers it's better to have a bigger gap between the two pipes i.e. don't try to butt them up. The space will afford some self cleaning.1 point
-
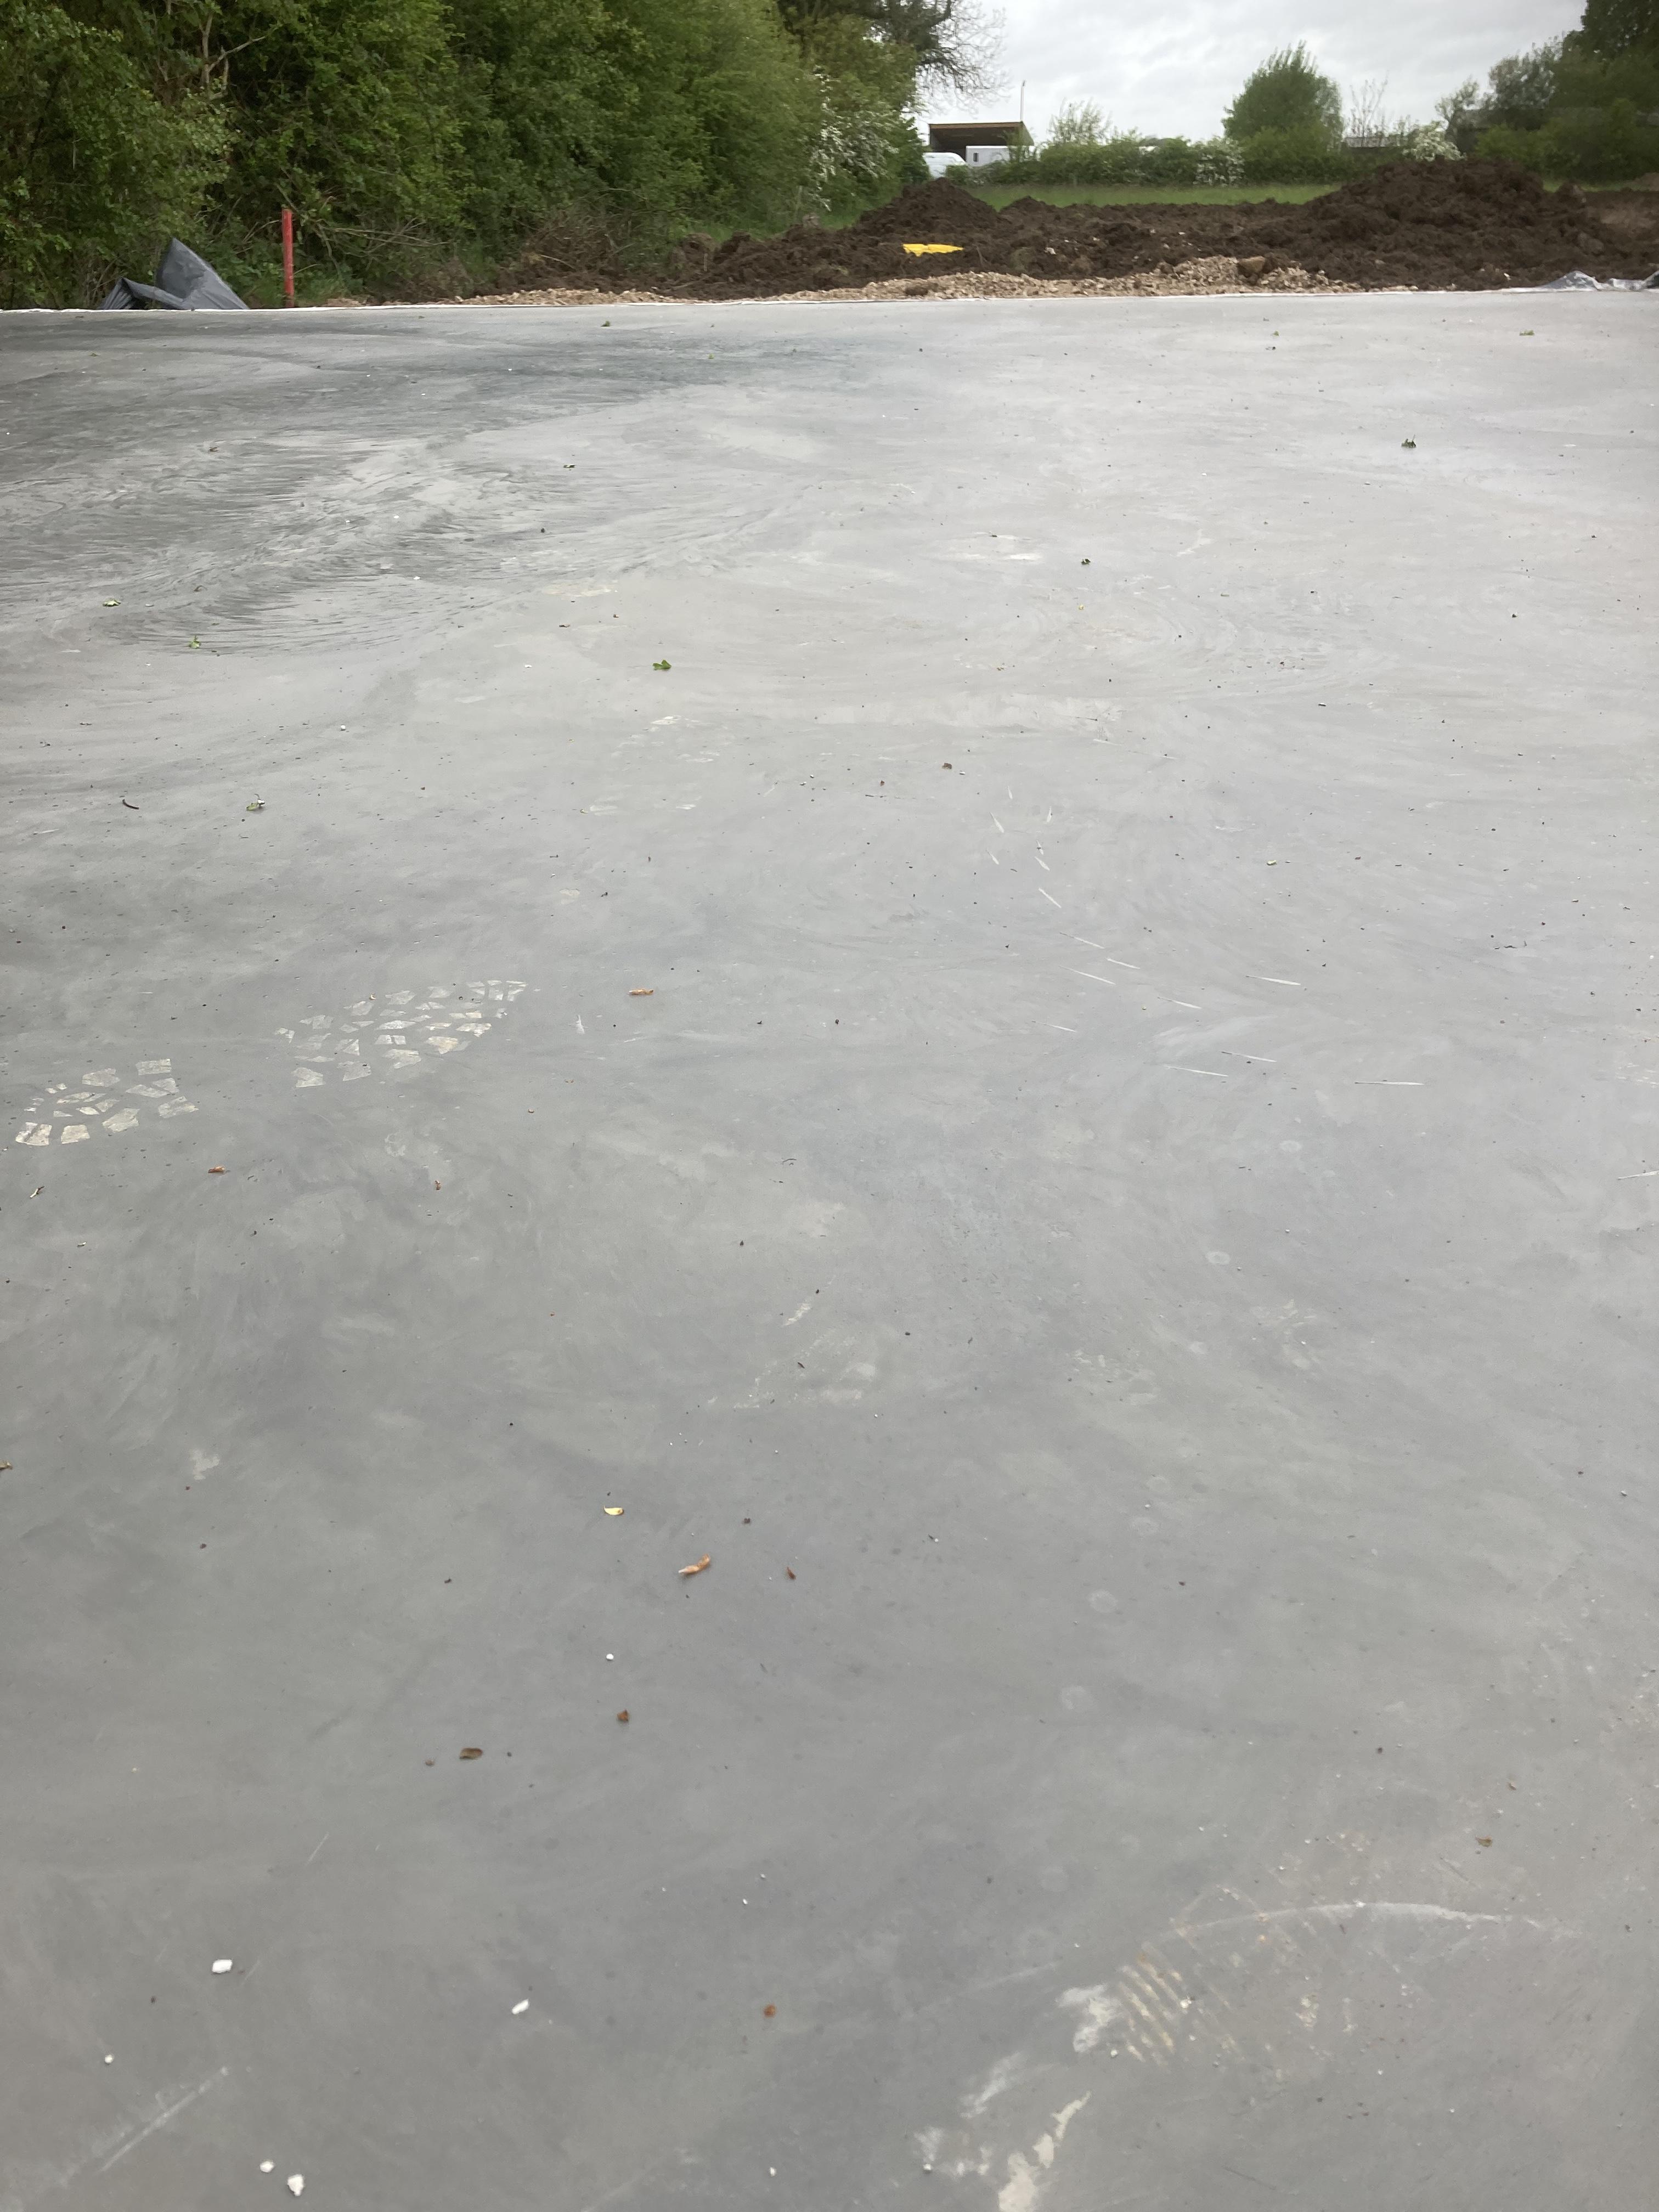
Why not hire a power float for the day Better finish than self leveling I polished our workshop floor the morning after laying
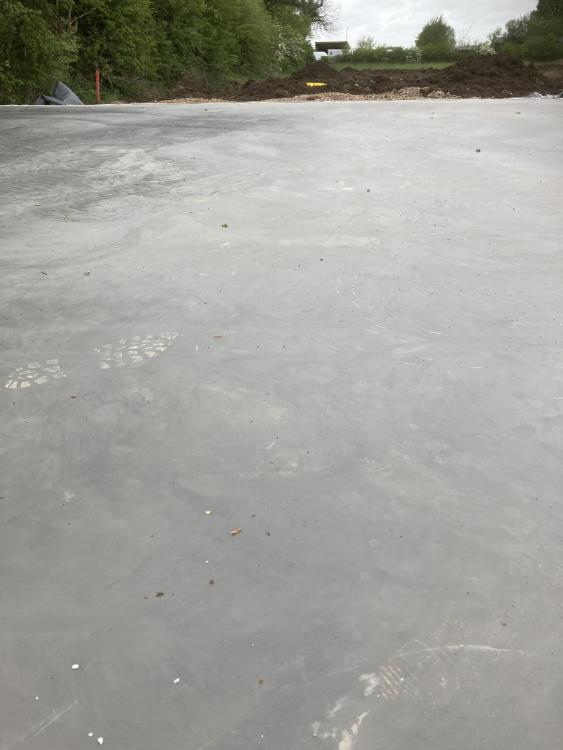 1 point
 -
Just found this as an approved retrofit application: https://source.thenbs.com/product/energystore-under-beam-block-insulation-system/bhJN6zXr5iSRNwvFAYrW9G/bSUUubuFs5fkWDGuLZbRzW1 point
-
Have a look here https://www.troldtekt.com/products/product-range/design-solutions/troldtekt-line/ and then this. https://www.instagram.com/thenordicbarnhouseproject/1 point
-
Just printed that out - it's going on the fridge. Wise words.1 point
-
If that is a 15mm pipe coming through the wall then it needs a 22mm conduit which any decent SDS will do in about 60 seconds, 10N blocks too..! (Just not padstones..!!!) Drill at 45° from the kitchen side and shove the conduit in and then feed in the pipes and it’s time for tea and biscuits Just follow the purple line and job done
 1 point
 -
But no mixing. The warmer water remains above the thermocline, at flow temp, and the cooler below the thermocline at return temp, the proportions of each body of water increase and decrease, moving the thermocline up and down the tank. No, the bodies of water at the two different temps do not mix. Their different densities keep them apart with the lower density water having the top spot. The volume of each of the bodies of water change in inverse relation to each other as either the heat pump adds more flow temp water to it or the HC removes flow temp water from it. Your version does destroy stratification where there would then typically be a linear temp gradient from top to bottom of the tank. My version requires stratification to remain in place, otherwise there is no point to a 3P or 4P buffer.1 point
-
Will do. I’ll be doing more pics and detail on the blog section of my site, the first piece is up if you fancy a look/read? https://www.passion4.co.uk1 point
-
Spoke to a neighbour who is an excellent builder but only works for big companies in the big smoke. He told me to employ each stage separately, a groundworker, get someone to do the blocks, roof etc and to use good people. Them spoke to relation who is a QS for a highly thought of development firm who totally agreed, he is giving me contacts including a site manager who is on a sabbatical from them for a few months. He suggested we employ him a day or 2 a week. I honestly think this is a blessing, it was just hard to see it earlier today.1 point
-
Thank you Nick! That is reassuring - thought I was overthinking it. I spent more of my time coming up with the best pipe layout around the house, most efficient manifold position etc - I should have prioritised a little better on how to best fit in these dirty great 125mm ducts to and from the actual MVHR unit... Regards Glenn1 point
-
No need to consider anything for the distribution ductwork, as that will just get damp ( moisture ) and then dry out again as the air keeps flowing after the shower etc has been turned off. If the MVHR unit supply air vents are on a gable with driving rain then it may be a good idea to have the first connected pipe rising slightly, but I've not ever really given this detail any further thoughts on previous installs, and I am still in regular contact with the clients. I'd say don't worry, but make sure all joints are made robustly / duct supported well etc, and use rigid insulated ducting to atmosphere. I'd also avoid the fleece type attenuators and use metal 'box' attenuators where possible ( if you are going to install something for sound / noise reduction ).1 point
-
Architects like spending other peoples money and often not practical to build1 point
-
But this week I had an altitude gap of 8' (2440mm), as they were both minus numbers, that is a 6' (1830mm). So I would conclude that GPS (on a phone) is not too good, or my house has sunk.0 points
-
Sorry I am having a blonde moment... Water closet in a passive house? Whisky Coke in a pot of honey? I can go on, so please enlighten me 😆0 points
-
No Joking apart those figures are amazing The household bills should be a fraction of what they are now for Scotland0 points