Leaderboard


Popular Content
Showing content with the highest reputation on 08/15/22 in all areas
-
I know this is an old thread but here is my take: + cultivate a thick skin - it's not actually about you ... it is all about helping people to design better houses that they like. + all clients are different. LISTEN to them and try to understand their stated goals and their unstated goals. Get a sense of what styles of design they like and what they don't. + self builders by definition are confident enough to build their own houses. Some of them might be great designers too, some of them might not. Be open minded. They might have great ideas that you have never come across. + get a list of trusted professionals in other fields engineers, builders, ground works, CAD people, lawyers etc etc etc. Agree on mutual referrals. + (once you've decided you can't help particular clients) - send 'trace my plan' only enquirers to the cheap trusted CAD guy. + if you hate your new clients or their sense of design, refer them to other architects who might be more suitable. You can screen for this somewhat in the initial telephone call. + if you only want to work with like minded design professionals rather than private clients, you probably need a job in a big architectural practice, working on commercial rather than self build. + treat any info your clients bring you (including their sketch plans) as input to the design process. + for the 'trace my plan' clients, identify 3 or 4 things (for free) that will help improve their design. Explain these things and see whether the clients like your ideas (and therefore want to engage you). If not, refer them to other people (but ask yourself, if you're such a great architect, why you can't come up with a few ideas that these clients like). You will establish your worth when e.g. (a) you suggest something they love and that they have not thought of before or (b) you save them a bunch of money or planning hassle or get a project approved by the planners that has previously been rejected. + treat you work as a collaboration with your clients. You are not the final arbiter of design, they are. They achieve this right by choosing to employ you and accepting your ideas or rejecting them. + realise you provide a collection of services of which design is only one part. e.g. familiarity with the planning and planners in your part of the country / access to other good professionals / steering through the planning process / project management / liaison with builders etc etc etc. Recognise that any project may need a particular subset of those skills - including, for instance, no design input at all. Imagine you were a GP instead of an architect. The analogous problem is that many of your patients can't or won't take your advice to sort out their lifestyles and therefore improve their heath. You know how to maintain a healthy body, but they have their own ideas and they don't seem to listen. You find that deeply frustrates you. You have two options - (a) either roll with it and try to find mechanisms to help them anyway or (b) find a job where you only deal with fit clients (sports medicine maybe). And, I hope you don't mind me saying this - lighten up - it's only a job after all. Do solicitors stress about whether clients 'truly value their legal input'? Or do they just do their work to the best of their ability. Alan5 points
-
I had a few spare minutes on this lovely sunny Sunday evening and decided to spend it writing up a blog post for our basement UFH install and screed. We have a 250mm reinforced concrete slab sitting on top of 200mm EPS300 in the basement. The slab wasn’t very flat and so we decided to use a cement based liquid screed to give us a nice level base for our finished flooring. So we put down 25mm of PIR to level things out and also to allow the UFH pipes to be stapled to. I did some quick maths and I figured out that it was cheaper to use the 25mm PIR and UFH pipe staples than to use pipe clips fastened to the slab and a thicker layer of liquid screed and so an order was placed with our BM and it was delivered and fitted by my lovely wife and me. We found this is a pretty easy task to be honest and only found we had to put a small bit of sand blinding to level a couple of dips in one room. In the rest of the basement the PIR just took the bumps of the slab out. We taped the joints and foamed around the edges for a belt and braces approach even though there was a DPM going on top. Next came the DPM layer. We found this a bit of a pain to do! Not hard but trying to smooth it out and keep it square so that a constant amount was taken up the walls was just fiddly. In the end we got the laser level out and set it about 150mm above screed finished level and then used that to ensure we had enough DPM up the walls. Then we had to tape it to the walls but soon found that standard gaffa didn’t stick to the concrete walls nor the dense concrete blocks! We painted the concrete with a PVA mixture and that helped a lot for that but just didn’t work on the concrete blocks at all. Off to Google and this awesome forum and I eventually found Gorilla Tape which sticks well to concrete blocks and we were off and running! Following this we laid the UFH pipes. This was a job we actually really enjoyed. It was very satisfying creating those wonderful spiral shapes. We made some spacers and I was laying the pipe according to the layout designed by Wunda and my wife was walking behind with the stapler ‘kerchunking’ down the staples as we went. At the end it looked so good we were sad to think all our hard work would be covered up and never to be seen again. This was my first time running UFH pipes and also my first manifold fitting and I was very happy with how the manifold turned out. I filled the pipes with water and the pressure gauge showed that there were no leaks. That and the fact there water wasn’t pissing out anywhere! With the liquid screed booked in we needed to get a move on and get everything finished off and ready. The last stretch was to fit the temperature probes, perimeter expansion strip and create the expansion joints for crack mitigation at the doorways. Thanks to advice from this forum’s users I ran the temperature probes in UFH pipe with the end crimped down so as to not allow screed in just in case they need replacing in the future. I got the expansion strip from uHeat on eBay. It came with a plastic skirt and adhesive already attached so it was a real breeze to fit. Not much more to say about that The final thing was crack mitigation strips for between the doorways. After speaking to the screeder I decided to use 5.5mm plywood board. It was an inexpensive and simple solution. I was asked to cut them to size but leave them to the side of the doorways and the screeders would add them as they went around. Obviously I had to put them in place first to ensure I got the sizes right! So here are photos of our basement ready for the liquid screeders. On the day of the screed they turned up early before the screed lorry to setup their pump and check on my prep work. They said it was exemplary and that I wouldn’t believe the state of the prep work of some of the jobs they turned up to! They had absolutely nothing to do to the prep work which made them happy and made me happy that all our hard work was worth it. They put down their little tripod level thingies and waited for the screed to turn up. Once it did it was really quick work and very impressive. If it wasn’t for the fact that they ordered 6.4m3 of screed but the company only sent 6m3 they’d have been done in a few hours but, as it was, they ended up having to wait a good 2 or 3 hours for the last little bit of screed to turn up. They were not happy as, in the end, they had to spend the whole day here when they could’ve been on to the next job. But, at the end of the day we had a wonderfully flat looking basement floor. And 48hrs later we were walking on it. 🙂 All in all very happy with the whole process and I will be getting these guys back in to do our ground floor screed. thanks for reading.2 points
-
Such lengths of 6mm flat bar if held at each end will deflect under their own weight. Just look around all the houses of the pre 70's build that had timber windows replaced with pvc or ali. Most have cracking brickwork where the support provided by the wooden frame has been taken away. Yes it is only a triangle of brickwork above the window but still a problem caused by idiots. A bigger question would be if this is being suggested as a fix then what else has he done you don't know about? You also don't say what else is supported above the window.2 points
-
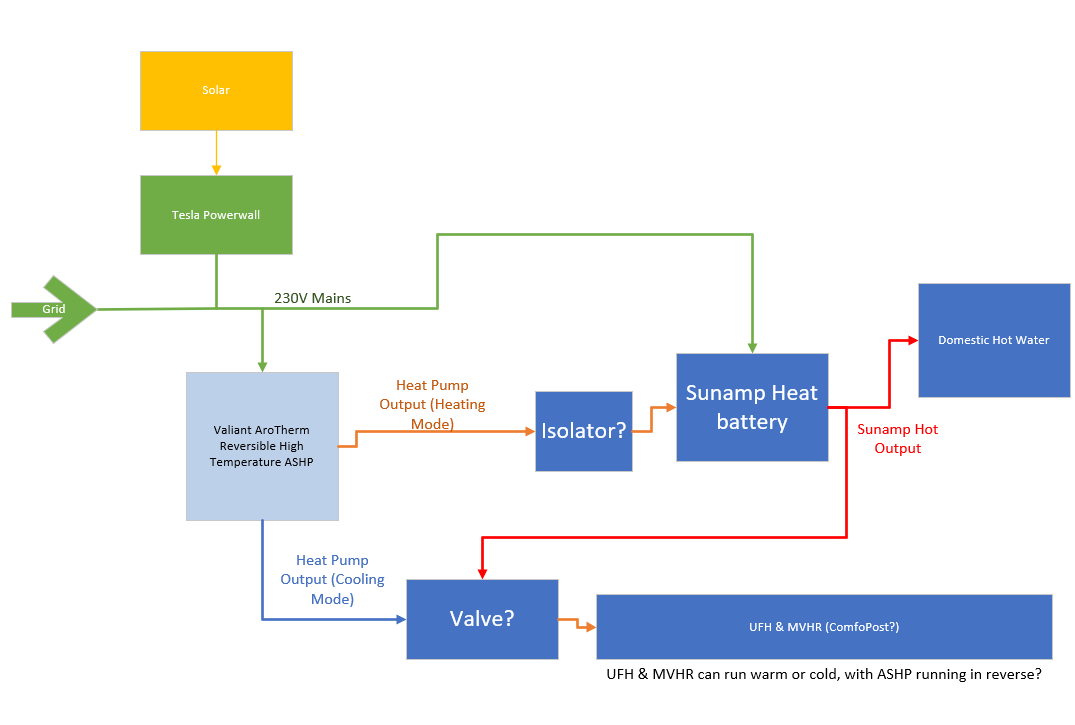
Hi all, We are looking for opinions and advice on the systems we have currently specified for our build. It’s a near-passivhaus build, with MBC timber frame on an insulated raft foundation. Our predicted SAP rating is 102. The Primary fuel will be electric, there is no gas in the village, and we don’t intend to install LPG or Oil. We plan on having a large solar array (just waiting to DNO approval at the moment) and Tesla Powerwall – using the Octopus Tesla Electricity tariff, so power diverters and smart energy management are off the cards. We are looking at having a Sunamp Heat battery, in place of a hot water cylinder, and heating the house will be Ground floor UFH, and potentially using the MVHR air. We would like to run the ASHP in reverse in summer to cool the ground floor slab and the MVHR – but would still need to run it forwards to charge the heat battery. The Sunamp would be the HP version, which has primary input of (High Temperature) ASHP, and a backup option of mains electricity. This suggests 2 possibly options for Hot water in summer: 1) Run the ASHP in Heating mode when necessary to charge the Sunamp – and disconnect the UFH and MVHR art this point 2) Always run the ASHP in cooling mode when actively cooling, and charge the Sunamp from electricity (surplus from the solar in summer). Sunamp specify ASHPs to work with the heat battery, one being the Valiant aroTherm which is reversible. We wonder if anyone has done this sort of configuration and can offer advice on how they achieved it / information on how it has performed. Is there a valve / manifold product available that could handle isolating the output of the ASHP from the Sunamp or the Heating elements depending on which mode is being used on each? Our main concern at the moment is that we like a cool bedroom (17 – 18 degrees) and want to make sure we can achieve this year round with the systems we install. Here is a simple diagram of the system we are trying to describe with this post.
 1 point
 -
Just be nice to the guy, tell hime the cost to save the place is vast and you will be demolishing soon as it is unsafe.1 point
-
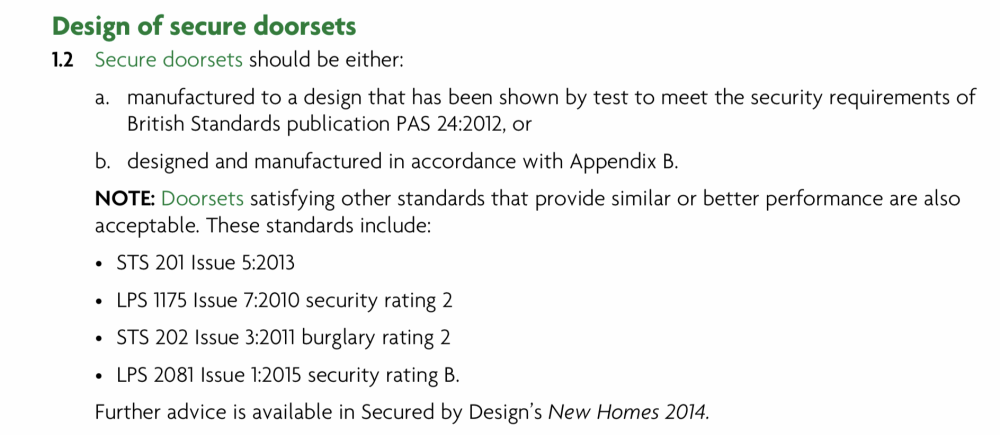
Bottom line, they don’t need to be Pas24 but your insurance will likely be invalidated if not “in line” with the standard set out above. You should now go with the standard, it wasn’t the case before but it now is. Go with the supplier advising you that you should, sounds like they know what they’re talking about. He’s right in that if they want in, they’ll get in. However, it makes their job a lot harder to get in. Better to be safe than sorry.1 point
-
I’m pretty sure your front door, back door and downstairs windows all need to be Document Q compliant. Which essentially means PAS24. The various standards overlap each other and are pretty circular. This cover frames, locks and glass. I would expect it to also be a requirement of your warranty provider. And in the longer term could be a feature of your home insurance cover.
 1 point
 -
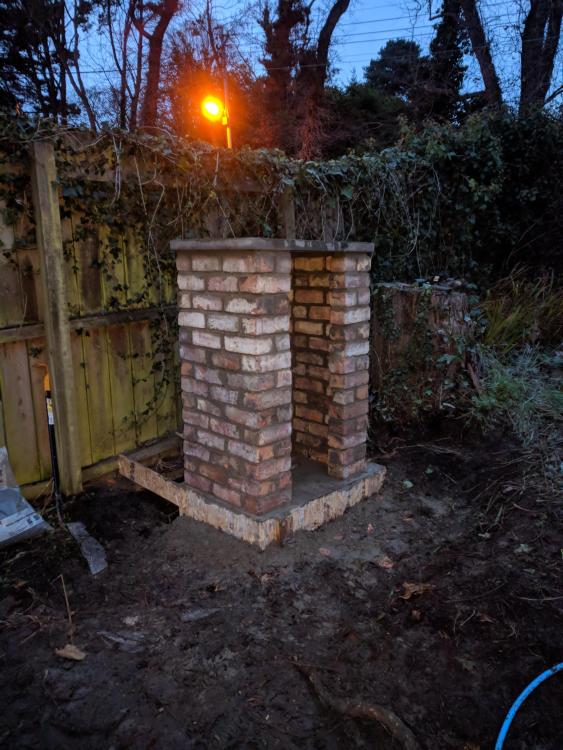
There is always motorway barriers! See if you can find my thread . . . We used 90 metres of them!1 point
-
All yours mate1 point
-
Crack The FCUK On Simples1 point
-
Easy for him to spend your money. I gave up with my QS once he started saying he’d charge me £775 to visit my plot. He lives an hour away at the very most. To get him to do just the order of cost was going to cost £1600 and I already have many of the quotes for the bigger items1 point
-
I plan on doing all groundworks myself and getting a builder in to take us from foundations up to watertight. I'll then be tackling the majority of 1st fix myself, getting the pros in where needed (sparky, plasterer etc).1 point
-
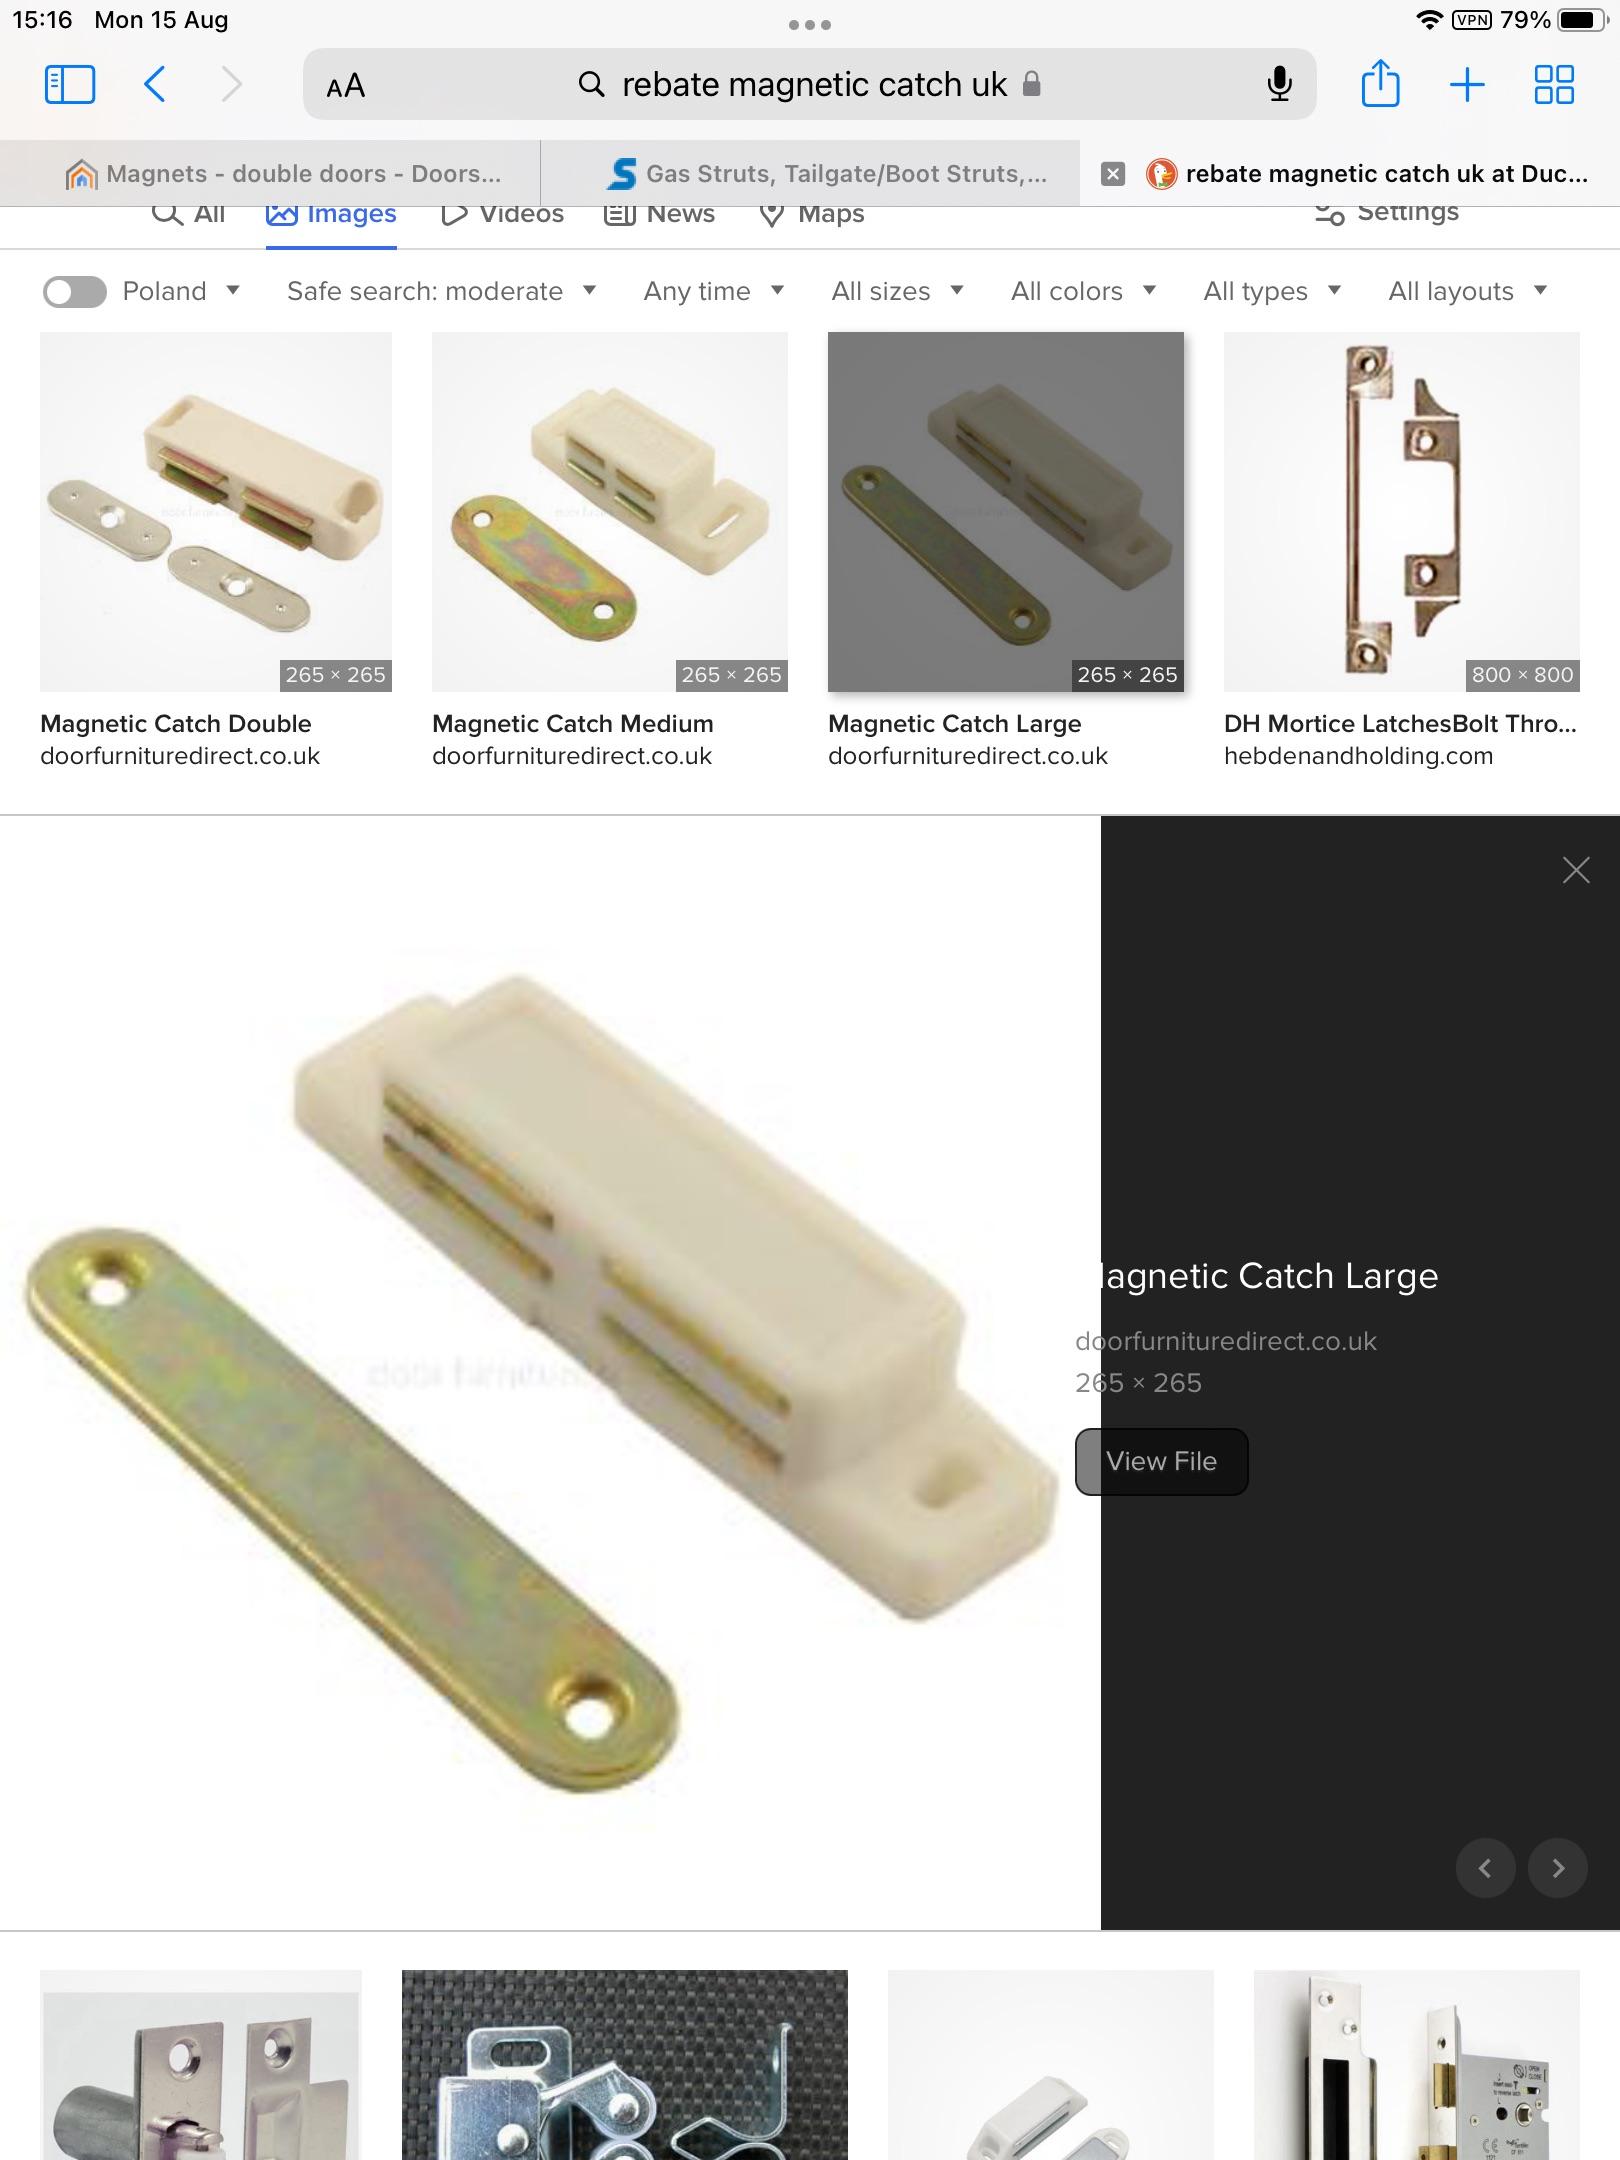
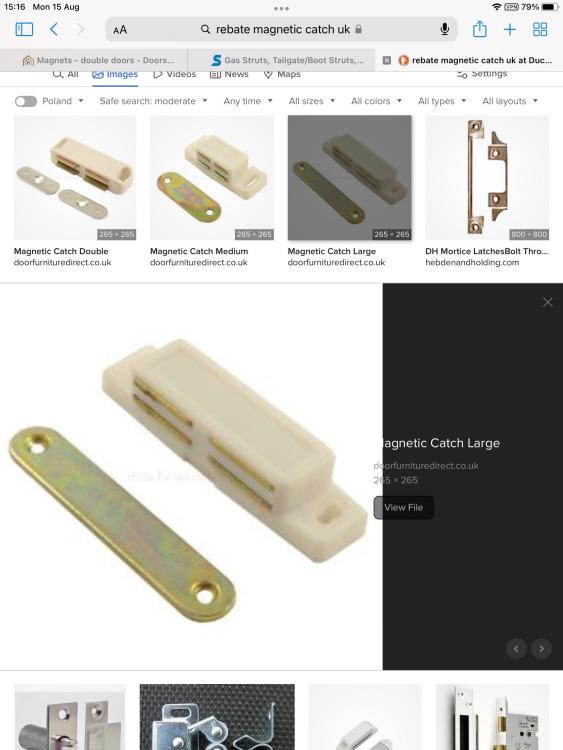
A few possibilities available, main point is very well fitted hinges so the doors have no spring in them. this allows small magnetic catches to be used that can be hidden in the rebate/stopper. Easier if frames are not rebated so you can add the stop after fitting doors and catches
 1 point
 -
Ok so know you actually said what you want to do. I lived in oz for seven years and built a couple of places. So dig a trench around complete perimeter 400x400 for a footing, add formwork so you can pour the floor slab and footing in one. Could look for a pic but I cannot be bothered. Plastic membrane across the whole thing. Termite barrier around any pipe penetrations. Walls 90x35 structural grade, cannot remember the number, get the blue stuff with termite treatment on. Frame walls at 400 centres, ensure studs line up with board sizes so 1200 and 2400. Double top plate divide long wall in half and put in a triple stud on both sides. Span side to side with a glue lam beam 225 x 90 or whatever you can find. Pitch roof as high as you can 10 degrees is fine for steel but the higher the better. Build a short stud wall on top of glue lam to pick up the centre of the rafters. Pitch rafters up from original house to front of new wall with the join in the rafters over this mini stud wall. Add gable ladder to both sides. Loads of insulation in roof. Sitting on ceiling timbers. Top hat on top of rafters, membrane, shines one with insulation inside, then tin. Crack a stubbie job done.1 point
-
The numbers @saveasteadinghas listed are the numbers I have seen for the u-value of a solid stone wall i.e. roughly equivalent to a double glazed window. Imagine your whole house was a sun room, it would require a a similar amount of heating without upgraded insulation. You can do the heat loss calculations and see how much heat output you need. The key to using an ASHP is keeping the heat output to a level where you can run the flow temperature as low as possible. This is where ASHP in badly insulated houses goes wrong, as flow temps rise, the COP of the ASHP falls and some houses designed for a gas boiler will need the ASHP to run at its max 55C output where the COP would be awful at low temperatures and costs would be high. Indeed radiator systems are often designed for 70C flow temps and just won't work with an ASHP that cannot provide this high a water temperature. So if the calculation suggest you can run a flow temp of 45C or ideally less then an ASHP is OK. If not then I would stick to a boiler. This would require digging up the floors and putting in insulation and UFH. Then you could have a low flow temperature with closely spaced pipework. It would not work with radiators. Also in passing you said that you hoped to use ASHP and PV. PV provides as good as no output in the winter when you need heating. 80-90% of our output comes during the summer when the heating is off. It can help with hot water at that time of year.1 point
-
Thanks for the tips and stuff, really enjoy reading all this design discussion. Since I first posted I got a new job with a practice that had a good design reputation and it’s been much better (for me!) I think the designs where I was before were attracting people with low expectations. Fine for them, but not where I want to be.1 point
-
I worked for a multinational conglomerate in their engineering division, essentially we designed solutions for clients, however, as part of the divisions within the firm we would sometimes spec our own equipment, this usually then led to someone from the sales department of said division calling us and wanting to get involved, we often tried to keep them out of it because we designed a suitable solution, not a solution based on a product we happened to sell. Anyway, we got involved with them and we ended up having some meetings with the client, an account manager flew in and we went to the meeting where I presented the solution, she just kept looking at me as if to say "what the hell are you doing" because I was using different manufacturers and advising against one system for another etc. Later in the car on the way back home I said to her, "I am an engineer, I will propose, to the best of my knowledge and abilities, a solution that best meets the British regs, and the needs, standards and budget of my client". She took it quite well and I also gave her technical feedback on their product as to why they were not suitable and she finally agreed with me, but I bet she is still trying to sell a product that might not actually be the ideal solution!1 point
-
Tricky one. As heating is exponential, time is important. But at the same time, the bigger the temperature difference, T1-T0, more energy is transferred at the start. So transfer efficiency is higher, because standing losses are lower. Now if say all the heat, the old word for work, which is really just energy, leaks out the object in a fixed time, say 18 hours, then bring it up to T1 quickly probably does use less, if you consider that below T1 it is of no use, think DHW. I have often wondered if, when using a ASHP, if it is better to start with a lower flow temperature, but higher efficiency, then ramp up the flow temperature, while taking a hit in the efficiency. Or just keep the flow temperature the same.1 point
-
Protective Multiple Earthing1 point
-
thanks. no progress in the basement except that one of the rooms is now a store room for stuff that doesn't fit in the existing house! there's been progress above ground but I'll save that for another blog post. 😉1 point
-
Then you'll need a kiosk to the DNOs specification and room for a full sized back board. You can buy prefab GRP boxes that are the right size. I built mine.

 1 point
 -
That is very pretty but the price!. 40% less energy consumption to bring a room to 21°C from 10°C How so? Energy in = Energy out. 40% quicker I could believe. Less energy, no. The electric fan is heating the space too, of course.1 point
-
Sounds very like us, we don’t advertise, we dont cold call, we dont follow up or chase anyone. I’m technical Director and have often been referred to as the Sales Avoidance Officer but our customers respect an honest opinion.1 point
-
All the options may do but may not be complient. The DNO may have someting to say about extended earths depending on what they have supplied you with. I would talk to whoever is doing your part P testing unless you are going to remove it by that time. Don't forget if you have trades on site using your electric it has to be complient. However if you plug it in then it is just an extension lead.1 point
-
As above, I extended a ring from an external socket using a pair of 2.5mm SWA cables, laid in a tench wihbhazard tap above. In the shed, I had a simple junction box and a fused spur for the lighting. Worked fine.1 point
-
Assuming just power socket(s) and lighting? If so, as per @ProDave, and just run it to a double socket, Use that double socket as a junction box, and branch off with 2.5mm2 ( regular twin and earth when inside is fine ) to a switched fused spur. Locate that where you want to be able to operate the light(s) from, and install a 3a fuse to comply. Run 3-core flex or 1.0mm2 T&E to the light fittings and job done. No need for a CU there then.1 point
-
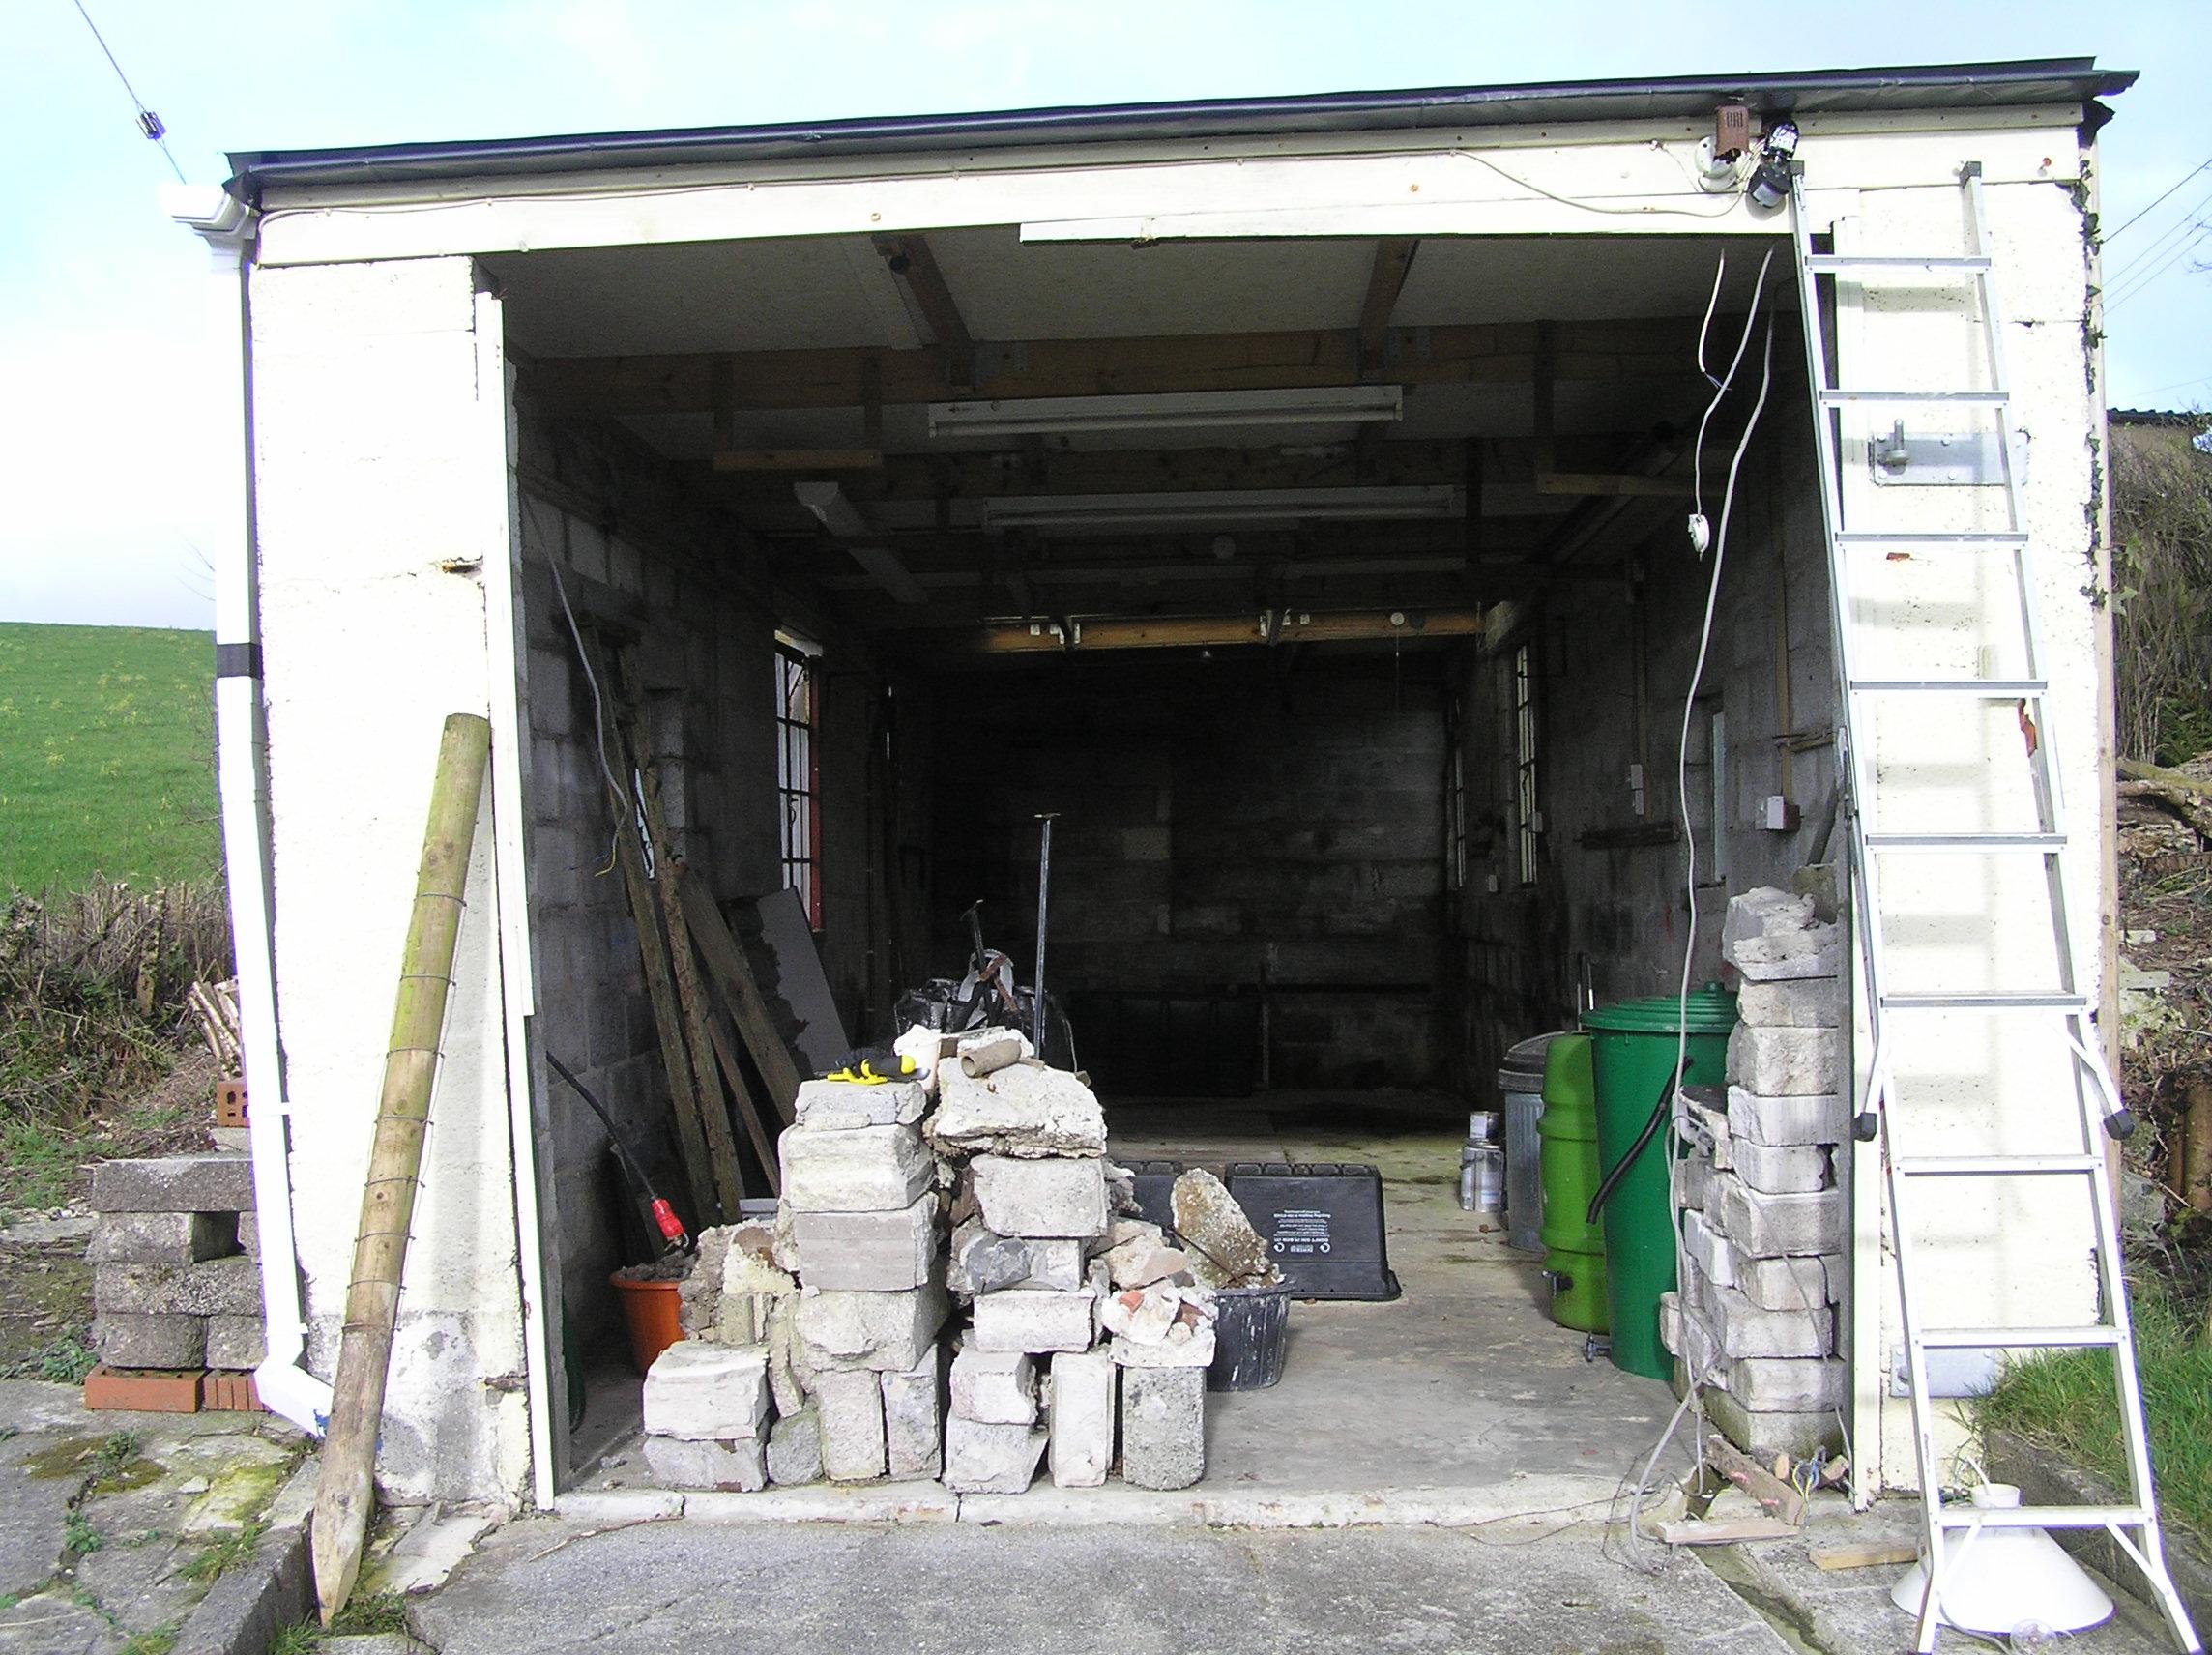
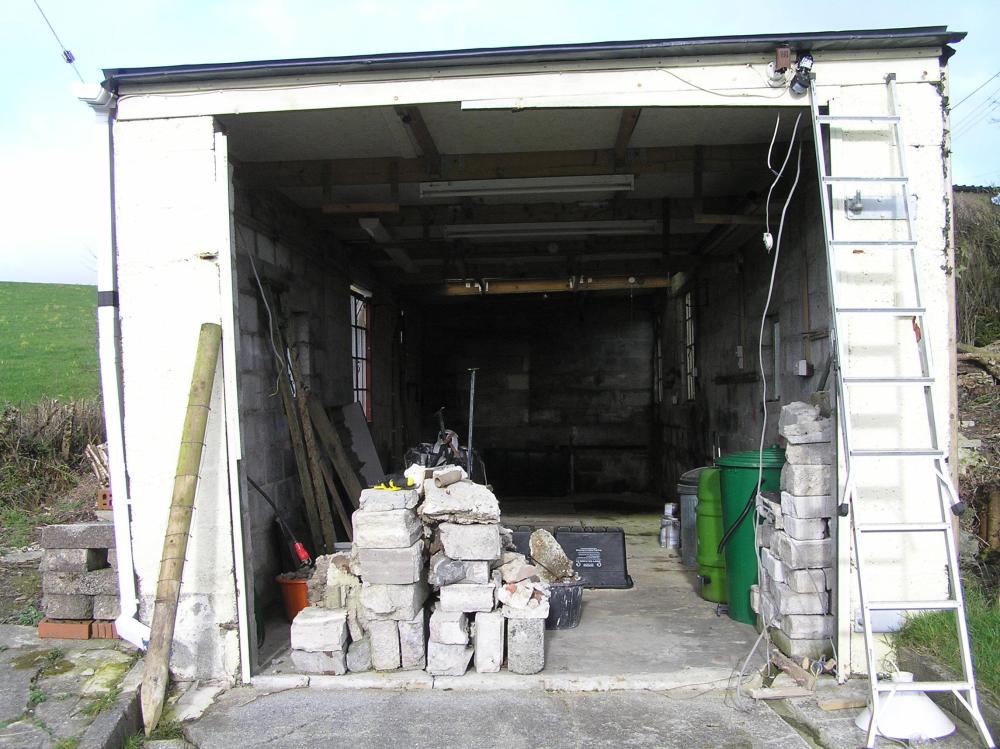
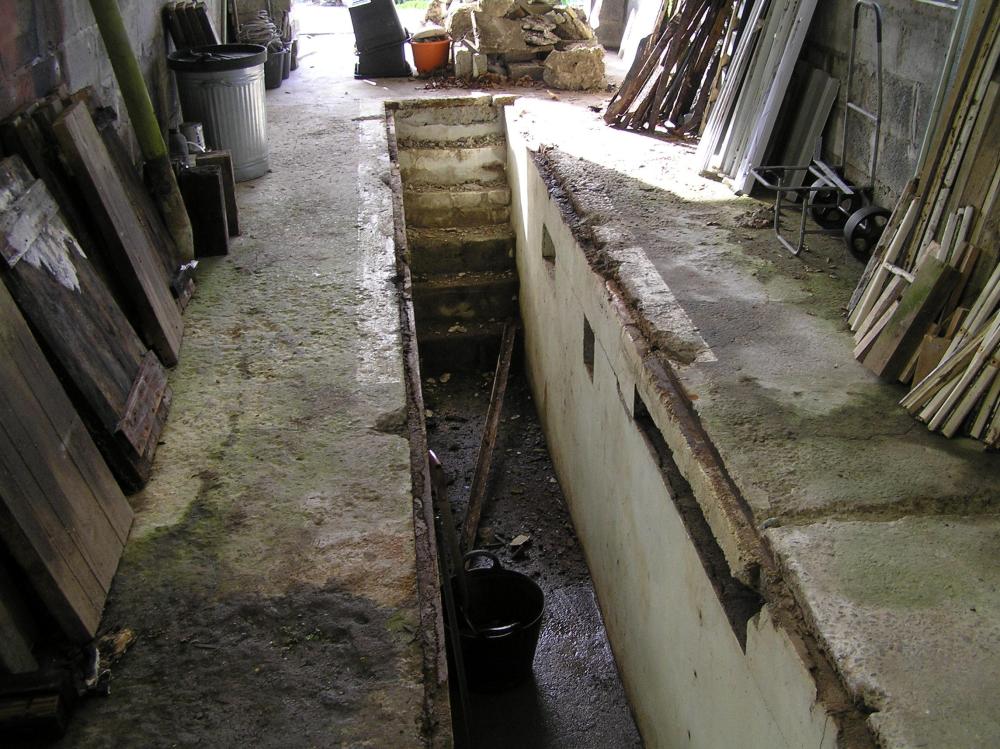
I recycled all the rubble from the garage blown down by Storm Eunice. I filled the garage pit that I didn't want, and used the rest in the gabions I put up to support the rear wall of the garage. I faced the gabions with sandstone found in the garden. BEFORE AFTER
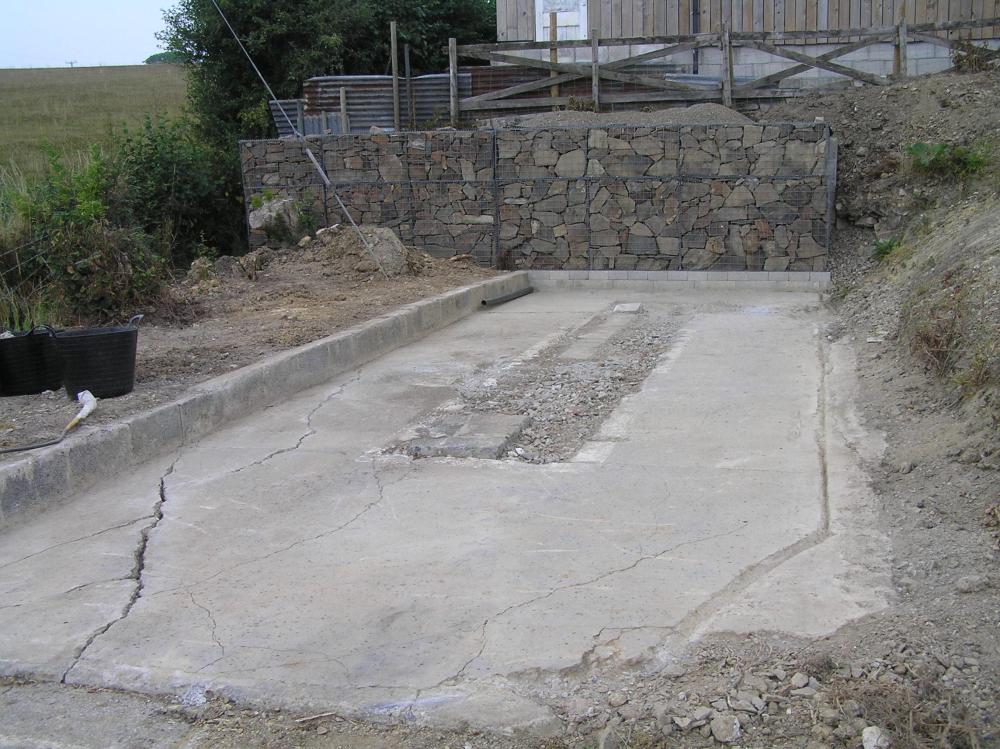 1 point
 -
Ignoring all the other users in the house, is gamer boy getting good gaming experience on the ADSL? If so I suggest getting another (wireless) service in addition to the ADSL. Gaming is much better over wired as it's lower latency. A point to point microwave network will give very disappointing latency for gaming. Reserve the new network for everyone else in the house, especially for video streaming, as that needs high bandwidth but doesn't care about latency. Dedicate the ADSL for gaming. (And perhaps IP phones calls). And locking it to ADSL means there's no risk of the Xbox consuming anyone else's bandwidth. And, if either service goes down (very likely in rural location) you have the other as a backup. And zero incremental cost to you.1 point
-
3 years is the standard clause for Class Q. I think you will need professional advice because Class Q is for agricultural buildings and if you aren't farmers, you may not be able to get it restarted/extended. That said, getting full planning permission may be possible if you have Class Q as a precendent. Finally - in a year you can get to substantial exterior completion and if it's got a roof, walls and windows, who is going to go poking around inside?1 point
-
But you need at least 6 of the solar collectors linked to give 70% saving in DHW in July. So realistically you could have 9 or 10, so are over £1k just for panels, which is in the 30 evacuated tube price range.1 point
-
You remove the screws to prevent them staining or ‘popping’ the plaster1 point
-
Forgot to add...the final duct into the gate pillar is only 32mm. I screwed up there. Should have made it "big" all the way. It was a fight to get the SWA and couple of smaller cables through the last metre. Hindsight! 😂1 point
-
Worth having a look on Gumtree, eBay, Freeads etc for a short length of ducting. Or approaching another, local self builder: https://www.gumtree.com/search?featured_filter=false&urgent_filter=false&sort=date&search_scope=false&photos_filter=false&search_category=all&q=ducting&tq=&search_location= I scored a length (20m?) of black DNO ducting for a tenner. Goes from my garage to gate pillar in a 700mm deep trench. In that I've an SWA, then a couple of 20mm flexible ducts for wired video doorbell, separate CCTV etc. Though a bitch to dig the trench by hand and a fight to get the duct through an existing, reinforced concrete slab, it's done, in and has some future proofing.1 point
-
According to recent discussions on here, only mains gas would be cheaper, prior to the current price increases and concerns. There is lots of good info on bh on this, including quite recently about ashp with PV., and that is what we will be doing. Just thought though, further to saying that ducted heated air works... it worked fine in a 10 hour office scenario, but maybe not so well in domestic, with varying room conditions.1 point
-
...There again, I enjoyed the magic roundabout when I should have been out discovering fags, birds and booze 🤣1 point
-
If your leakage rate is greater than 3m3/m2 @50Pa, keep your money in your pocket. As cost to run v savings made will not be a benefit to you. I would instead (irrespective of your leakage rate), look at a demand based MEV or dMEV, more cost effective to purchase, simpler to install, run and maintain and only ventilates at the rate required.1 point
-
That does look very impressive. Could your average sparky, tacker, plasterer and decorator achieve this without messing up and blaming each other?1 point
-
Just seen that Anycubic have the i3 Mega S on a back to school sale. @PeterW put me onto Anycubic when I wanted a printer for my lad's 21st. To say he's had fun with it and learnt, whilst at the same time producing practical prints is an understatement. With hindsight I might have gone for an Ender but at this price you can't go wrong. https://www.anycubic.com/collections/anycubic-mega-3d-printers/products/anycubic-i3-mega-s1 point
-
Flat bar is pretty useless as a lintel, all it will do is stop bricks slipping. A galvanised angle lintel would work well. if laying bricks from inside how would they point up etc? sort the access and do it right from outside1 point
-
The wall design depends on what it will be holding back, soil type, gradient, vegetation type and coverage etc. etc. 900mm is a low wall so fairly light construction should suffice, gabion wall would work well, easy to install and pretty fool proof1 point
-
No, you just need a warrantied waterproofing system. We used an external bitimous membrane system. They came out, supervised the start, inspected the final works. Mortgage lenders and insurers care more about water I guess than anything else.1 point
-
Material costs will only rise, Labour cost may decrease as the building trade goes tits up.1 point
-
forgot to mention that there is no laitance as it's a cement based liquid screed (Cemfloor)1 point
-
That chap the cameraman was following looked well insulated. "Jernay svollich" I think it is though I'm not going to Google the correct spelling.0 points
-
That's actually about 25km on the Ukranian side of the front line suggesting there has been a Russian breakthrough.0 points
-
Does CAT6 imply that you have successfully dealt with 45 lives?0 points
-
Ffs @Thorfun you’re taking forever ! 😁0 points
-
I’ve cat6 my entire build and am an ex software engineer and IT network manager . @Nickfromwales knows nothing . I’ll do it for 6k . 👍0 points
-
And my QS hasn't commented on this lunacy except to say I should just pay it. What a massive waste of time and money he has been.0 points
-
Sounds perfectly reasonable Just pay the man, he's got kids to feed !!! PS, as a BH Buddy favour, i'll come over and do the CAT6 for £9k, that's a saving of a thousand pounds Seriously....how do these people get any work? That's crazy money for this build....0 points