Leaderboard
Popular Content
Showing content with the highest reputation on 07/28/22 in all areas
-
It’s been over a year since we got our completion certification and we’re still mopping up tasks in the garden and generally cleaning up. It occurred to us that some aspects of the discovery process of the build may be off use to others on BuildHub. It’s too hot in here: Thermal modelling limitations. Our thermal modelling done as part of the design stage SAP suggested we had minimal thermal gain problems. However we suspected that thermal gain from our east facing windows would be a problem and indeed it has been. The first action we took was to put on a solar film on the outside of our east facing windows. After some research we opted for Johnson PD75 which claims to reduce thermal gain by 40%. It cost £1,170 so seemed like a good place to start. Well, it may have helped but by mid May it was clear it was not enough and we would need something more. We looked at air conditioning units and decided we would retrofit some. We hadn’t planned on this and the thought of messing up the clean lines of the build and the pristine plaster work did not appeal. Purely by chance it turned out that the false wall in our bathroom built at the request of my wife and much muttering from me (who needs somewhere to put a wine glass while your in the bath) was a saviour. It meant we had a service void from ground floor to second floor in which to route pipes to the internal units. We contacted Mr Harris and he kindly lent us the pump gear required for installation testing, so far so good. We identified the units with the best energy efficiency only to discover you are not allowed to purchase them without having confirmation the installation will be done by a certified F-gas installer. We wanted to do the main parts of the installation ourselves and just have the F-gas engineer do final test and connection. Sounds reasonable but we had a lot of difficulty finding anyone. Mr Harris came to the rescue again and recommended Artech Air who were unbelievably helpful. We ended up with two Midea Blanc units, a 2.5 kW for our bedroom and a 3.5kW for the open plan living area. Result – bliss, and a very reasonable bill for £1,800. In the long term they will add to the comfort of the house all year round. On a slightly different subject MVHR summer bypass. It sounds perfectly reasonable, don’t heat the incoming air form the outgoing air in once a set temperature threshold is reached. The incredible heat of the last month has made us completely rethink it’s use. If the air inside the house is colder than the outside air, then cool the incoming air ie you don’t want to bypass the heat exchange. Also when it very hot between 9:00 and say 20:00 don’t run the MVHV, there is plenty of air in the house and we certainly never felt stuffy. We set the MVHR scheduler to do this for us. Similarly in winter it goes off at 22:00 and back on at 07:00. PV We didn’t put any PV on when we built, the house should need such small inputs it simply didn’t make sense in carbon or cost terms, or so we thought. Two things changed our minds, the air conditioning and we bought an EV. Doing anything more than 4kW is a pain as it involves more certification and silly cost items like Southern Electricities £300 fee for observing testing on equipment that was already certified on the MCS database. Again we had not planned this in so it was a retrofit...grrrr. Very annoying as we were pretty smug about having thought through the whole build. Fortunately our standing seam roof made it as easy as it could be to fit panels and hide all the wires. With the panels added we are still in surplus on the air conditioning units, not cooling for free as we had to pay for the panels and inverter, but no additional utility cost. Bye the way this was done before some nameless psychopath started a war and energy prices rocketed. The house now sits at a very comfortable 23c while not drawing any energy from the grid. We even have enough surplus to charge the EV between 10:00 and 15:00 on sunny days at a very slow 6A. We also opted to put in battery storage which we ordered in February and has only just arrived, it should have been 8.2kWh but in the delay they manufacturer introduced a 9.5kWh version for not a lot of extra money. We’re not up and running with the battery as the manufacturers decided to change the inverter battery connection cables with the new model and there are no cables shipped with the battery. I must confess I found it very hard to see the funny side of this. House wiring We did this ourselves and got it tested and certified, but made no provision for an EV charger, inverter and PV. Fortunately we did put ‘Routabout’ access points into our floor intended to allow access should anything go wrong. We also have loose lay flooring which has made the four times the utility room floor has been up no drama. Providing access to fix and change is something definitely something that should be done early not as an afterthought, when we put the traps in we had no idea how useful they would be. Fixings and fastening Our build is ICF and while it’s great in may ways it does present some interesting challenges when it comes to mounting anything on the walls. The ICF system we used came from JUB and has a very tough vertical nylon strip every 150mm about 30mm from the internal surface. With a course thread screw you can hang things like TV’s but not heavy stuff cupboards. For heavy items it’s a case of drilling into the ICF concrete core 75mm internals and 170mm externally from the ICF surface. This makes for a significant cantilever, internally this is fine you just use big fastenings. Externally the problem is two fold, 1700mm cantilever and you don’t want any thermal bridging, this makes using big fastening as real no no. We ended up using four fastening types: Internally we used cheap and easy to use concrete frame fasteners for heavy stuff. For lighter stuff on plasterboard we used GripIt fastenings which do the job remarkably well. The largest size claims to be able to hold 70kg, but I wouldn’t trust it with anything like that. Externally we use Fischer ‘Thermofix’, expensive and not available in this country. Fischer say they don’t sell enough here to make it worth there while. It seemed lost on them that we were buying from Germany along with every other UK user of the fastening. For light external fixing we used pasta twirls supplied by JUB. Useless for anything heavier than a letter box. DIY cabinets We found we couldn’t always source ready made furniture that was the size we needed. Some friends run a bespoke kitchen business and pointed us a site “wood online” who make up panels to your specification complete with edging. Using a ‘Pocket hole’ jig and these panels allows you to create you own furniture simply and quickly at a fraction of the bespoke cost. We also found some very neat panel clips for panels that need to be removed for access. Garden We finally got round to sorting out the garden. It’s small, just 11m by 5m and like a lot of self builds it had been used as a storage area (dumping ground) during the build. As we’re getting on a bit we wanted to make it low maintenance and low water. Raised beds and a patio area seemed to fit the bill. As the house is a contemporary build and we wanted to the garden to complement the house which is white and two shades of grey. For the patio we have used 600 x 600 porcelain tiles for ease of handling and laying. Getting a patio right is not the easiest of jobs and I was not looking forward to. With the patio base prepared, materials were order, tiles on Tuesday followed three days later by 5000kg of limestone chippings. Of course it just happened to be one of the hottest weeks on record…returned the rapid set tile cement and bought standard set. This still went off at a frightening rate. Trying to get a large are flat and true is not as easy as it sounds even when you’ve done all the preparation. With the first slab set to the correct run-off the other tiles were laid using it as reference. Despite our best efforts to get it right, the first tile was just off and as a result by the tile the 8th tile in the row was reached we were using a significant amount of tile cement, about 10mm deep. The four 20kg bags of cement that should have done the whole job disappeared quickly and another 7 bags were required to complete the job. The hoop and wedge helped keep everything flush and the result is perfectly acceptable. Lesson learnt, do buy the expensive laser measuring and levelling gear at the start of the build, it’ll pay for itself many times over by the time you finish. I’ll know for the next build, however my wife may well threaten divorce if I mention the idea….6 points
-
Sorry - I must have been commenting on what you actually wrote. 🙃😁 By the time I have Rishi's Dishy £550 plus the FIT, I may make a profit his year.2 points
-
I don't think so. The bimetallic action is a mechanical movement resulting from differential expansion of two dissimilar metals bonded together. A bit like how a plank of wood will curl up when only one side gets wet. Both metals are subject to the same temperature. However, the kind of probe shown in your photo looks more like a bulb and capillary thermostat. These have a bulb in which a fluid expands in response to temperature and operates a diaphragm switch via the capillary tube.2 points
-
Um. I'm biased but I''ll try to give good practical advice. I admit that my attitude to painting pebbledash is roughly the same as having a leg off with a rusty nail file and sulphuric acid. I have a T who has been campaigning for it since about 2011, and I have so far held firm; I like making tenants happy and this has not been easy. The issue as I see it is the difficulty of doing it, and the need to repaint it periodically. IMO it is the unnecessary creation of unnecessary work. However, given that you are committed to painting it white, the basics are that you need to make sure that you are utterly tight against water ingress at the top, and probably need paint that will let any moisture that does get in get out again, and use paint that is going to last the longest possible, and consider maintenance, and that you are both sarisfied. On colour for the brickwork and your direct question , if you do it all white it you need to be sure it will work well as a "face" for the house and you will be happy. I would look around at other local houses to see what you both think works. I think in these circs I would leave the brick as brick, and consider painting the eaves triangle at the top in a brick colour or something smart - or perhaps cladding it with something 'plastic wood' in a suitable colour. One way to check this is to print out a photo processed to look like a line drawing, and colour it in on paper or on screen. You get something suitable to do that by taking a photo and running through an "edge detect" and "monochrome" pair of filters, plus perhaps a "sharpen" filter. Stuff up at the top wants to be maintenance free, as you cannot maintain paint from a ladder without risk. So you will be into professionals or at least a scaffolding tower once every decade roughly. I would do it differently, but so would we all and that was not your question. I hope that helps a little practically. Aside: do you need planning permission ? Sometimes it does apply to colour. Or are there covenants? Checking around the area may give an impression on this. Ferdinand2 points
-
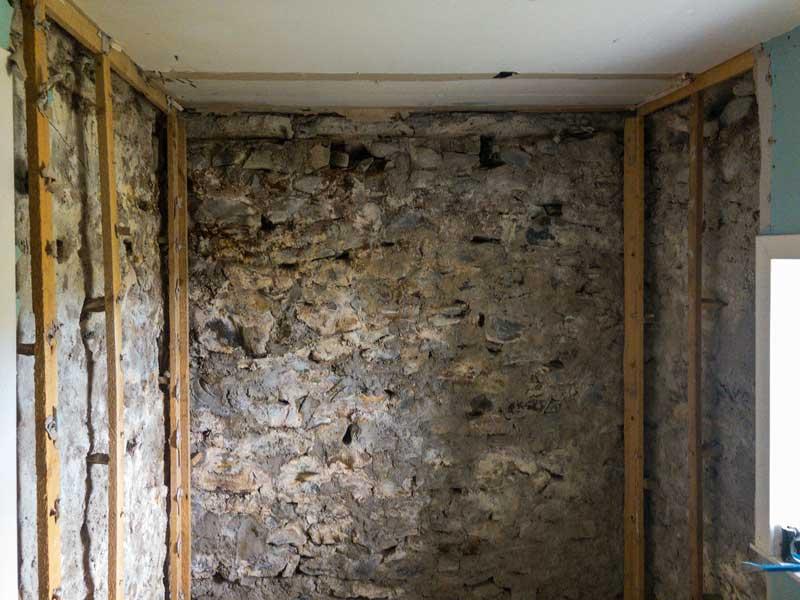
There is a good local archieve, but unfortunately not much is know. They are looking into it for me though… I’ll pursue the CoS as well, but initially, they didn’t seem that interested. Intersting removing some of the plasterboard in the porch. There was a mix of some walls in stone, some in concrete block, and some a mix. Looked like some evidence of maybe some earlier/lower roof rafters? Maybe an early form of a concrete wall plate sitting above this? Feels a shame that it would need to get covered up with insulation to make it meet standards if you want to live in it! I will be doing a photo diary of sorts with it all, but electric is not connect as yet, so that may have to wait a little while. I’ll stick it on my design blog if anyones interested in following… https://www.passion4.co.uk/ Having met with a local person regarding warrant drawings etc. external insulation was not recommended. Good to hear some local expert insight. This makes the next big challenge (of many!), designing a tiny bathroom/entrance area whilst trying to navigate local accessability space allowances. I’ve been advised this is probably not possible! The ‘nuclear option’ is to convert one of the main hall windows into a front door/entrance. I’m loathed to go this route, because if you did this, you could just design and add a big side extension to the building and make everthing simple. At that point, it might as well be someone elses project…2 points
-
2 points
-
2 points
-
I'm using professionals for the stuff that can be seen and doing the stuff that's hidden myself. that way no one will ever see my bodges. 😉1 point
-
Odd that they show it reducing your monthly payment (implying your direct debit will go down when prices go up). It would surely make more sense for them to show your DD staying as-is and then take the £400 on top, would give a much more realistic picture and make the debt balance look a bit less scary.1 point
-
1 point
-
If budget isnt an issue I recommended filling the CU with an RCBO for each power circuit instead of one RCD feeding lots of MCB. That way you aremuch less likely to loose power to the computer or TV when a heating element (toaster, kettle, oven etc) gets leaky. Edit: Ours is a 16 way metal Eaton MEM EAM16. Supplied by our electrician.1 point
-
1 point
-
I didn’t include the standing charge tbh . But all the export has mitigated that cost .1 point
-
Coming back to this, does it include the standing charge? Or is the English as bad as the Maths? 🤠😛😁1 point
-
reading through your quotes makes me thankful I decided to not use a main contractor for our build! at £3k/m2 our house would cost us £1.35m. I'm hoping to get it in for half of that. granted I am doing a lot of the work myself so it's taking quite a long time but I'm thoroughly enjoying the experience and learning new skills. project managing the build takes up a lot of time but I enjoy talking to the trades that I have on-site and learning from them by asking questions. I've found that if you show an interest in someones work they're more than happy to talk about how they do things. obviously, you're not a very hands on person @puntloos and so that is why you will end up having to pay the main contractor to do the work. it's just the way of things. you can do it a lot cheaper but it will require a lot more work on your behalf. I understand the 'hand it over and get someone else to do it' mentality, it just didn't work for what we wanted to achieve with our budget. I wish you the best of luck on your project and look forward to seeing the progress.1 point
-
One of my mantra,s is “doing it right in the first place cost much less than putting right afterwards (and easier)”1 point
-
Having managed big IT jobs in the past the lesson you learn very quickly is to talk every major aspect of the job through with the folk doing it making sure everyone knows exactly what is being done and how it’s going to be done and never assuming they ‘know’ even if they are the pros that do know.1 point
-
I would download the install instructions and see what the manufacturer says, with reference mounting and none combustible materials. Then go from there.1 point
-
Assuming there will be a couple of inches behind the stove then a cement board over the plasterboard will give piece of mind1 point
-
Thanks for the reply. The important thing is that you have thought sufficiently and will be satisifed with your decision, without surprises in the future.1 point
-
1 point
-
Nothing. Surprises. Me. I don't know how people just leave their builder to it. I've seen drawings held upside down, walls started in the wrong place, windows wrongly measured, all sorts. It's a very steep learning curve, I stay around and discuss everything without trying to be difficult, but I've had to learn how to keep everybody calm so they can work well. I've finally found a small builder who accepts this (and my little quirks like 'no dust in the house please whenever possible, cos I've got asthma') and we work well together and he's happy for me to share my research without his masculinity being threatened. I'll be good for the next one😂1 point
-
Perhaps not even an effect: https://www.mcgill.ca/oss/article/critical-thinking/dunning-kruger-effect-probably-not-real1 point
-
through the tongue for us. chippie says not an issue as the T&G holds it all together and stops the boards curving round. ours are still being fitted so no pictures oh how they age.1 point
-
If your electrician doesn't know what he recommends, maybe you should be looking for a more experienced electrician.1 point
-
The pebbledash render above the bricks will be painted - that we are all in agreement on.1 point
-
Unless you have ground investigation information, it can only be a specification based on informed guesswork, not a 'design' as such. For a that best guess for traditional foundations (concrete strip or trench) I'd maybe charge a few hundred pounds - basically looking at what information is available on the British Geological Society, maps and borehole data, specify minimum width and depth of the foundation based on provided loadings and any tree influence zone. (edit - plus reinforcement design for pads etc) Because traditional foundations are specifically covered in the Building Regulations, the main person will ultimately be the Building Control officer. They are able to instruct wider or deeper foundations within the limits of the Building Regulations. Thankfully they should also have local knowledge of the ground. (edit - but they won't do the foundation set out for you especially with an oak frame with point loads to consider) They might say traditional foundations are unlikely to work. Then other common options for domestic construction are rafts or piles. For a relatively straightforward reinforced concrete raft foundation, I'd be looking at best part of a thousand pounds, mainly because the drawing work is more intensive. If it's pile foundations then you are best going direct to a specialist contractor who can do the design and install.1 point
-
Those national house builders who are renowned for poor workmanship and corner-cutting? Perhaps not surprising if they aren't getting good results. Hopefully you plan to build and insulate better than these builders. I think the main point people are making is that nothing he says seems to make sense. He's flat out wrong on the hydrogen boiler theory, and his comments about ASHPs are completely at odds with the experiences of most BuildHub members. These numbers don't add up unless they're running massive arrays. To give you a concrete numerical example, I live in the south of England and have 8.5 kW of PV on the roof. I average maybe 150 kWh/month in December and January. That's 5 kWh/day, although the median is lower than that. Put another way, that's 5 hours of a 1 kW electric heater. I'm pretty sure any dwelling in Scotland is going to need a huge amount more energy than that to remain comfortable through winter. As an example of how bad things can get, here's December 2021: Output rises above 4 kWh/day only a handful of times, and is regularly below 2 kWh/day. As another comparison, my electric car has a 38 kWh battery (that's actually on the small side - Teslas have between 50 kWh and 100 kWh batteries). Assuming 100% efficiency, my panels could charge my car 3-4 times a month in winter, assuming I don't use the energy for anything else. To achieve even these theoretical numbers, I'd need a battery system connected to the PV array, because the array itself rarely outputs enough power in winter to charge a car (car chargers have a minimum charge power of something like 1.2 kW, so if you can't get that from the array or a connected battery, the difference will need to be made up from the grid). And that's based on an 8.5 kW array in the south of England. The same array will do considerably worse in Scotland. You really need to do the numbers based on heating demand calculations for your proposed property. Edited to add: I forgot to include this link, which you might find interesting: http://euanmearns.com/solar-pv-potential-in-scotland/1 point
-
Why such small pipe? I'd worry about blockages due to leaf debris.1 point
-
Not sure how UFH under a structural floor works but nothing wrong with noggins to fully support a removable section1 point
-
On the topic of balance, what I've gathered from this forum and talking to a lot of other professionals is a fabric first approach. Invest in the building blocks and these will add value to the place in the long term. While you may not care about a concrete tile, the person you're going to try and sell to in the future may not want concrete tiles on a £2m+ house (or some other similar detail that may put them off like uPVC guttering). The areas where you can spend a lot of money very very quickly like AV, home automation, expensive kitchens and bathrooms - are those that will not necessarily add that much 'value' when considering resale in the future, apart from the value that they give you when you're using them. Kitchen styles and designs will change in the next 5 years and you will most likely want to change again, so not worth going over the top. Same with AV kit, depreciates over time and newer tech will make the current stuff obsolete in 5 years anyway. Obviously a lot of this is based on you wanting to get your money back. What you consider as essential, the next person may not and won't be willing to pay for it. If you don't need to sell and this will be a lifetime home, and you can afford to do it - then go for it. Its your money, you're allowed to build exactly what you want and that's the whole point of the self build method.1 point
-
Excellent. Gus's points are very good. What were they building with in those days? I don't think concrete blocks were around yet, so stone seems likely. And yet it has that coloured render. More pictures would be good. When I started researching stone steadings, I knew there was a lot to learn. It has been fascinating and also very important. If you can find local information that would be a good start, from talking to people / asking at the library or whatever.1 point
-
We're currently looking at IDs. We've had the initial blurb from one who only works on projects that have a minimum budget of £40k per room, not including kitchens and bathrooms! We don't have a quote from them yet, but for a full house brief, I suspect it'd easily be into 5 figures...1 point
-
Thats the key. Self-consumption. In our case roughly 14kWh. If I see that, during the working day our SunAmp is fully charged, (I try to arrange things so that it doesn't ) then I have a long hot shower. How mean can you get? Not because I'm dirty, but because I begrudge producing power thats consumed by others. And that , as they are charged for it, I'm adding to the DNO's income.1 point
-
Agree and disagree - if I ask for a specific slump on the spec then I expect it to turn up like that, and if it doesn’t meet spec (ie it’s too stiff) then that suggests I should send an 8 yarder back to the batching plant ..? That would be an interesting discussion … Its also marketing bo**ocks words - they don’t actually have answers so they use the “as much as” and “potential” “possibly” and “up to” which means they don’t actually know. Given the slump is pretty much the standard water/cement ratio, on a standard gen/c25 mix going into floors and foundations you would hardly notice the difference. On a bridge it may be a different matter.1 point
-
Why do plumbers fit them like that every place I have owned has been the same. I lined two sides of my cylinder cupboard with Celotex, then filled the 'corners' with mineral wool. Celotex lid for the top. Pipe insulation does not have to be pipe shaped. Boxed in mineral wool works just as well, sometimes better. Thermal losses are not like water leaks, you don't loose a disproportionate extra amount of energy on a tiny length of uninsulated pipe. Unlike a water leak which seems to squirts further the small the hole is.1 point
-
Don’t use drain chemicals they burn the rubber seals on joints and seen it melting pipes several times in the past, also if you get a splash back it will burn through burn into skin through clothing. Have 20 years experience running my own cleaning clearing and repair business just hate the stuff should be banned from selling the stuff.1 point
-
Big thanks for providing this post and link saved us thousands as our solicitor was demanding we paid the tax on our plot until I sent them the link you provided. thank you1 point
-
The Scottish equivalent of Stamp Duty & second home tax is the Land and Buildings Transaction Tax and the Additional Dwelling Supplement. https://www.gov.scot/policies/taxes/land-and-buildings-transaction-tax/ LBTT applies to all land and property but only to transactions e.g. change of ownership. The Additional Dwelling Supplement applies only if you are buying a "dwelling" - it does not apply if you are buying an empty plot, even if it has planning permission https://revenue.scot/taxes/land-buildings-transaction-tax/lbtt-legislation-guidance/additional-dwelling-supplement-ads-technical/ads-legislation-key-terms#LBTT10015 - NB it might apply if the plot has a building to be demolished/refurbished, and costs more than £40k. If you already own the plot, building a house on it that you will also own is not a "land transaction" so there is no LBTT or ADS. The only tax that will trigger when you build the house is council tax. As others have said there may also be CGT when you eventually sell either your existing or new property, depending which has been your main home. You will be able to offset most of the cost of building the house as well as the original plot purchase, so you're only paying tax on your "profit". It would be worth keeping good records of your build costs so you have evidence for CGT deductions later. Assuming the rules don't change, you will not pay any LBTT if/when you sell either : it is paid by the buyer. Disclaimer: I'm not a lawyer or an accountant!1 point
-
It is something that has to be done sometime. Many architects consider it someone else's problem, and most builders consider airtightness not in the least important, or a route to condensation. Don't fall into the trap that 'the professionals' actually know what they are talking about. Much of it is sales led.1 point
-
Next question: related to MVHR. To what extent is your builder comfortable with the concept of air-tightness? What experience does he (she) have? And if none, then how are you going to manage that education process ? For me, it was an impossibly steep learning curve. Please excuse me if this is a bit 'forward', but here's a list of resources about air-tightness-champions (I loathe the sobriquet too) Airtightness search results (Before Gollum gets me, there are search engines other than google)1 point
-
Come on guys, everyone deserves a lunch break! I wouldn’t want to work for some of you, standing over the shoulder ensuring you start at 8am. what about when they are thinking about your job at night, ordering material, picking up before you get on site. too many spreadsheet warriors!1 point
-
1 point
-
You really are a marketeers dream aren’t you ..?? They said smart meters were coming back in 2007 and it took 10 years before anything really developed. Even the tariffs today are limited...!! At this rate you’ll have an Octopus Agile tariff to charge the wall and the car, just in time to drive down to @Onoff for the official opening of the bathroom .....1 point
-
Funnily I've just been watching this series on heatpump design on the Institute of Refrigeration website: https://ior.org.uk/heat-pump-design-course The guy running the training says in the introduction. AND NO..a heat pump is NOT a reversed refrigerator. • IT IS a refrigerator. I suppose that clarifies things except a lot of people might think it's going to make their house cold......0 points
-
Leave well alone, you’ll make it worse not better. A disaster it is not, and all it requires is your absence Get down off your roof and go to the pub. That’s an order!!0 points
-
Perhaps, but incredibly, while we were discussing how to make it right, they showed some pictures of a recent install they did in Nudura where they used all the right tapes/trays etc! So why the 🤬 didn't they do the same for me? 🤯0 points
-
0 points
-
0 points
-
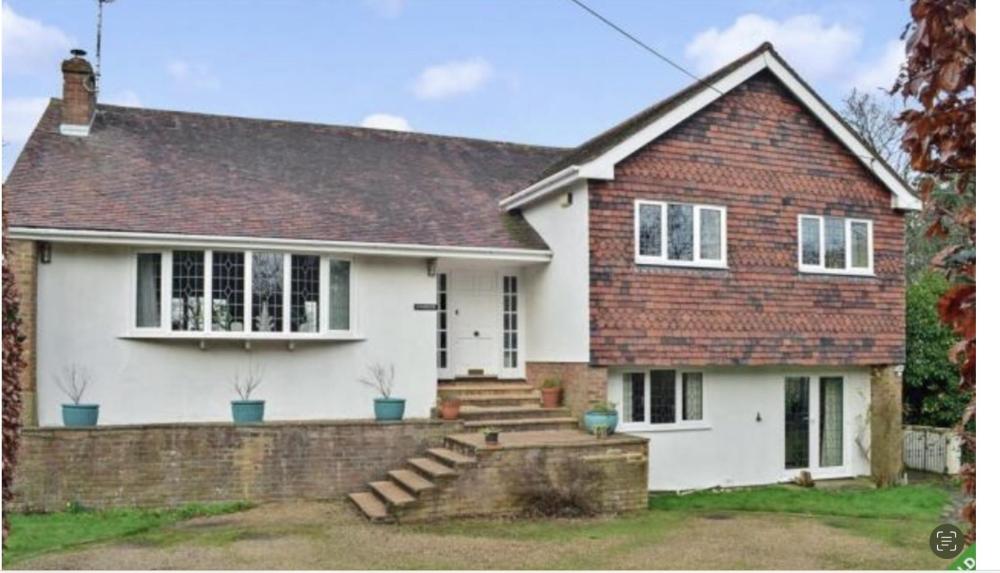
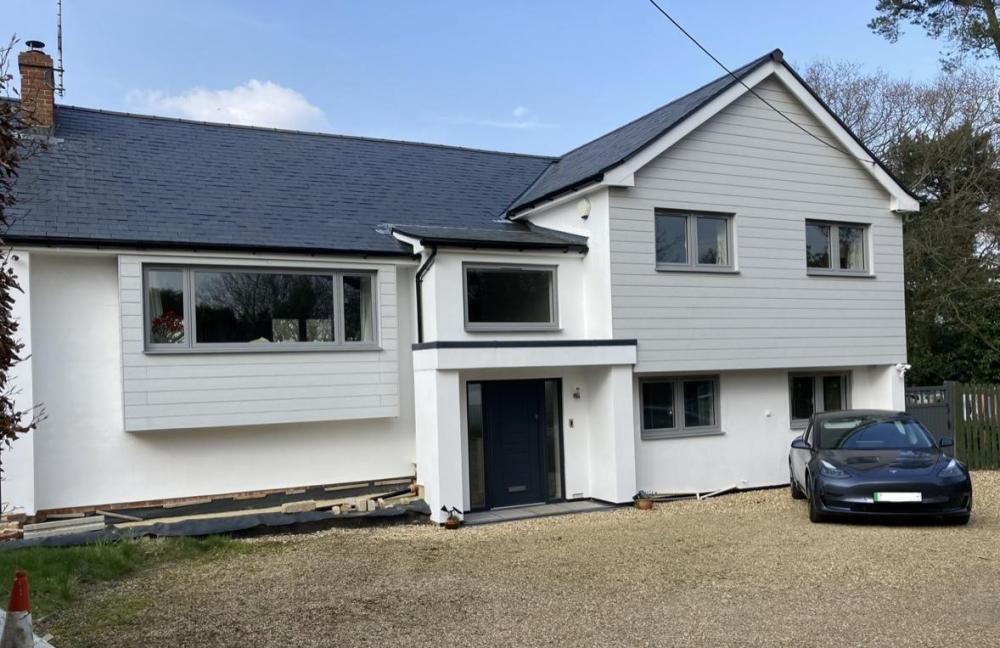
The floor layout is still bonkers IMO. Am I reading it that to get to the kitchen you go up 2 steps from outside to the front door, then down 4 steps, then avoiding the new diagonal steps you turn right, go up 3 steps, turn left in an inner lobby then through a door and the kitchen is at about the same level as where you started?0 points








.jpg.c21f3ac78c9b7efd90cbdcb312744dc5.thumb.jpg.7adcad4c0e384f5ecd7d56b0618df6e5.jpg)


