
Finishing off

Entry posted by Simon R in Finishing off
2486 views
It’s been over a year since we got our completion certification and we’re still mopping up tasks in the garden and generally cleaning up. It occurred to us that some aspects of the discovery process of the build may be off use to others on BuildHub.
It’s too hot in here: Thermal modelling limitations.
Our thermal modelling done as part of the design stage SAP suggested we had minimal thermal gain problems. However we suspected that thermal gain from our east facing windows would be a problem and indeed it has been. The first action we took was to put on a solar film on the outside of our east facing windows. After some research we opted for Johnson PD75 which claims to reduce thermal gain by 40%. It cost £1,170 so seemed like a good place to start. Well, it may have helped but by mid May it was clear it was not enough and we would need something more. We looked at air conditioning units and decided we would retrofit some.
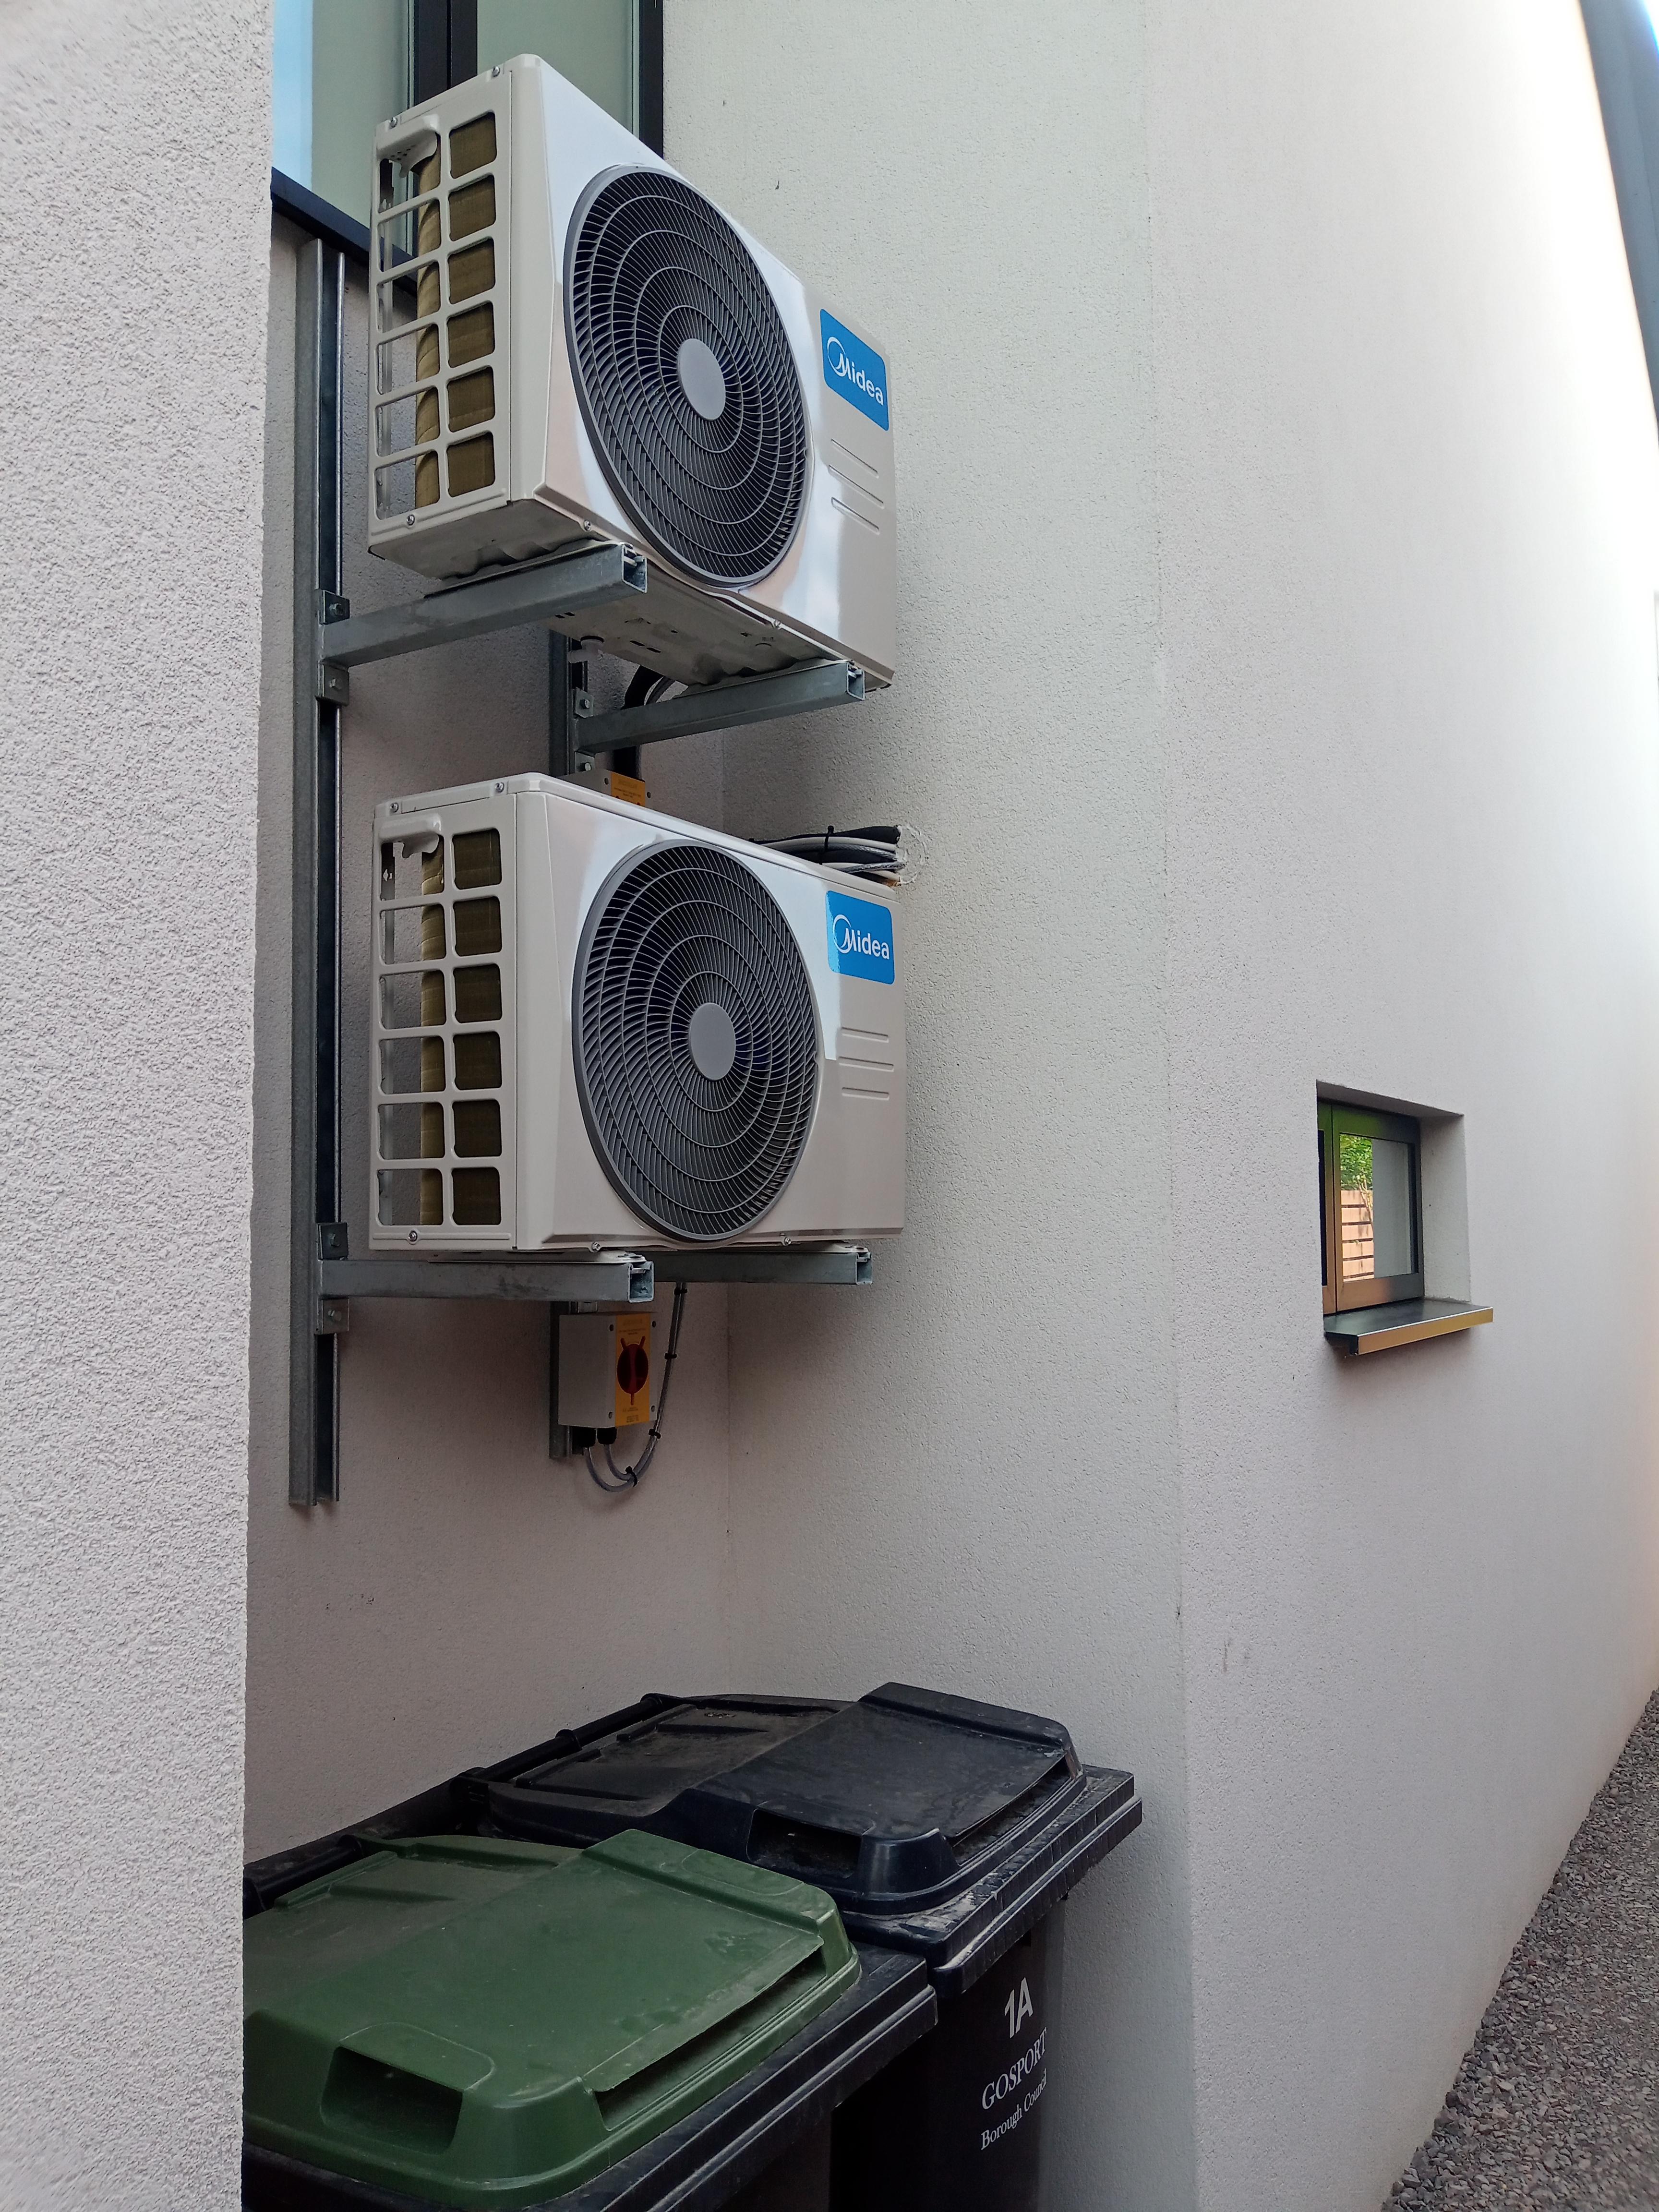
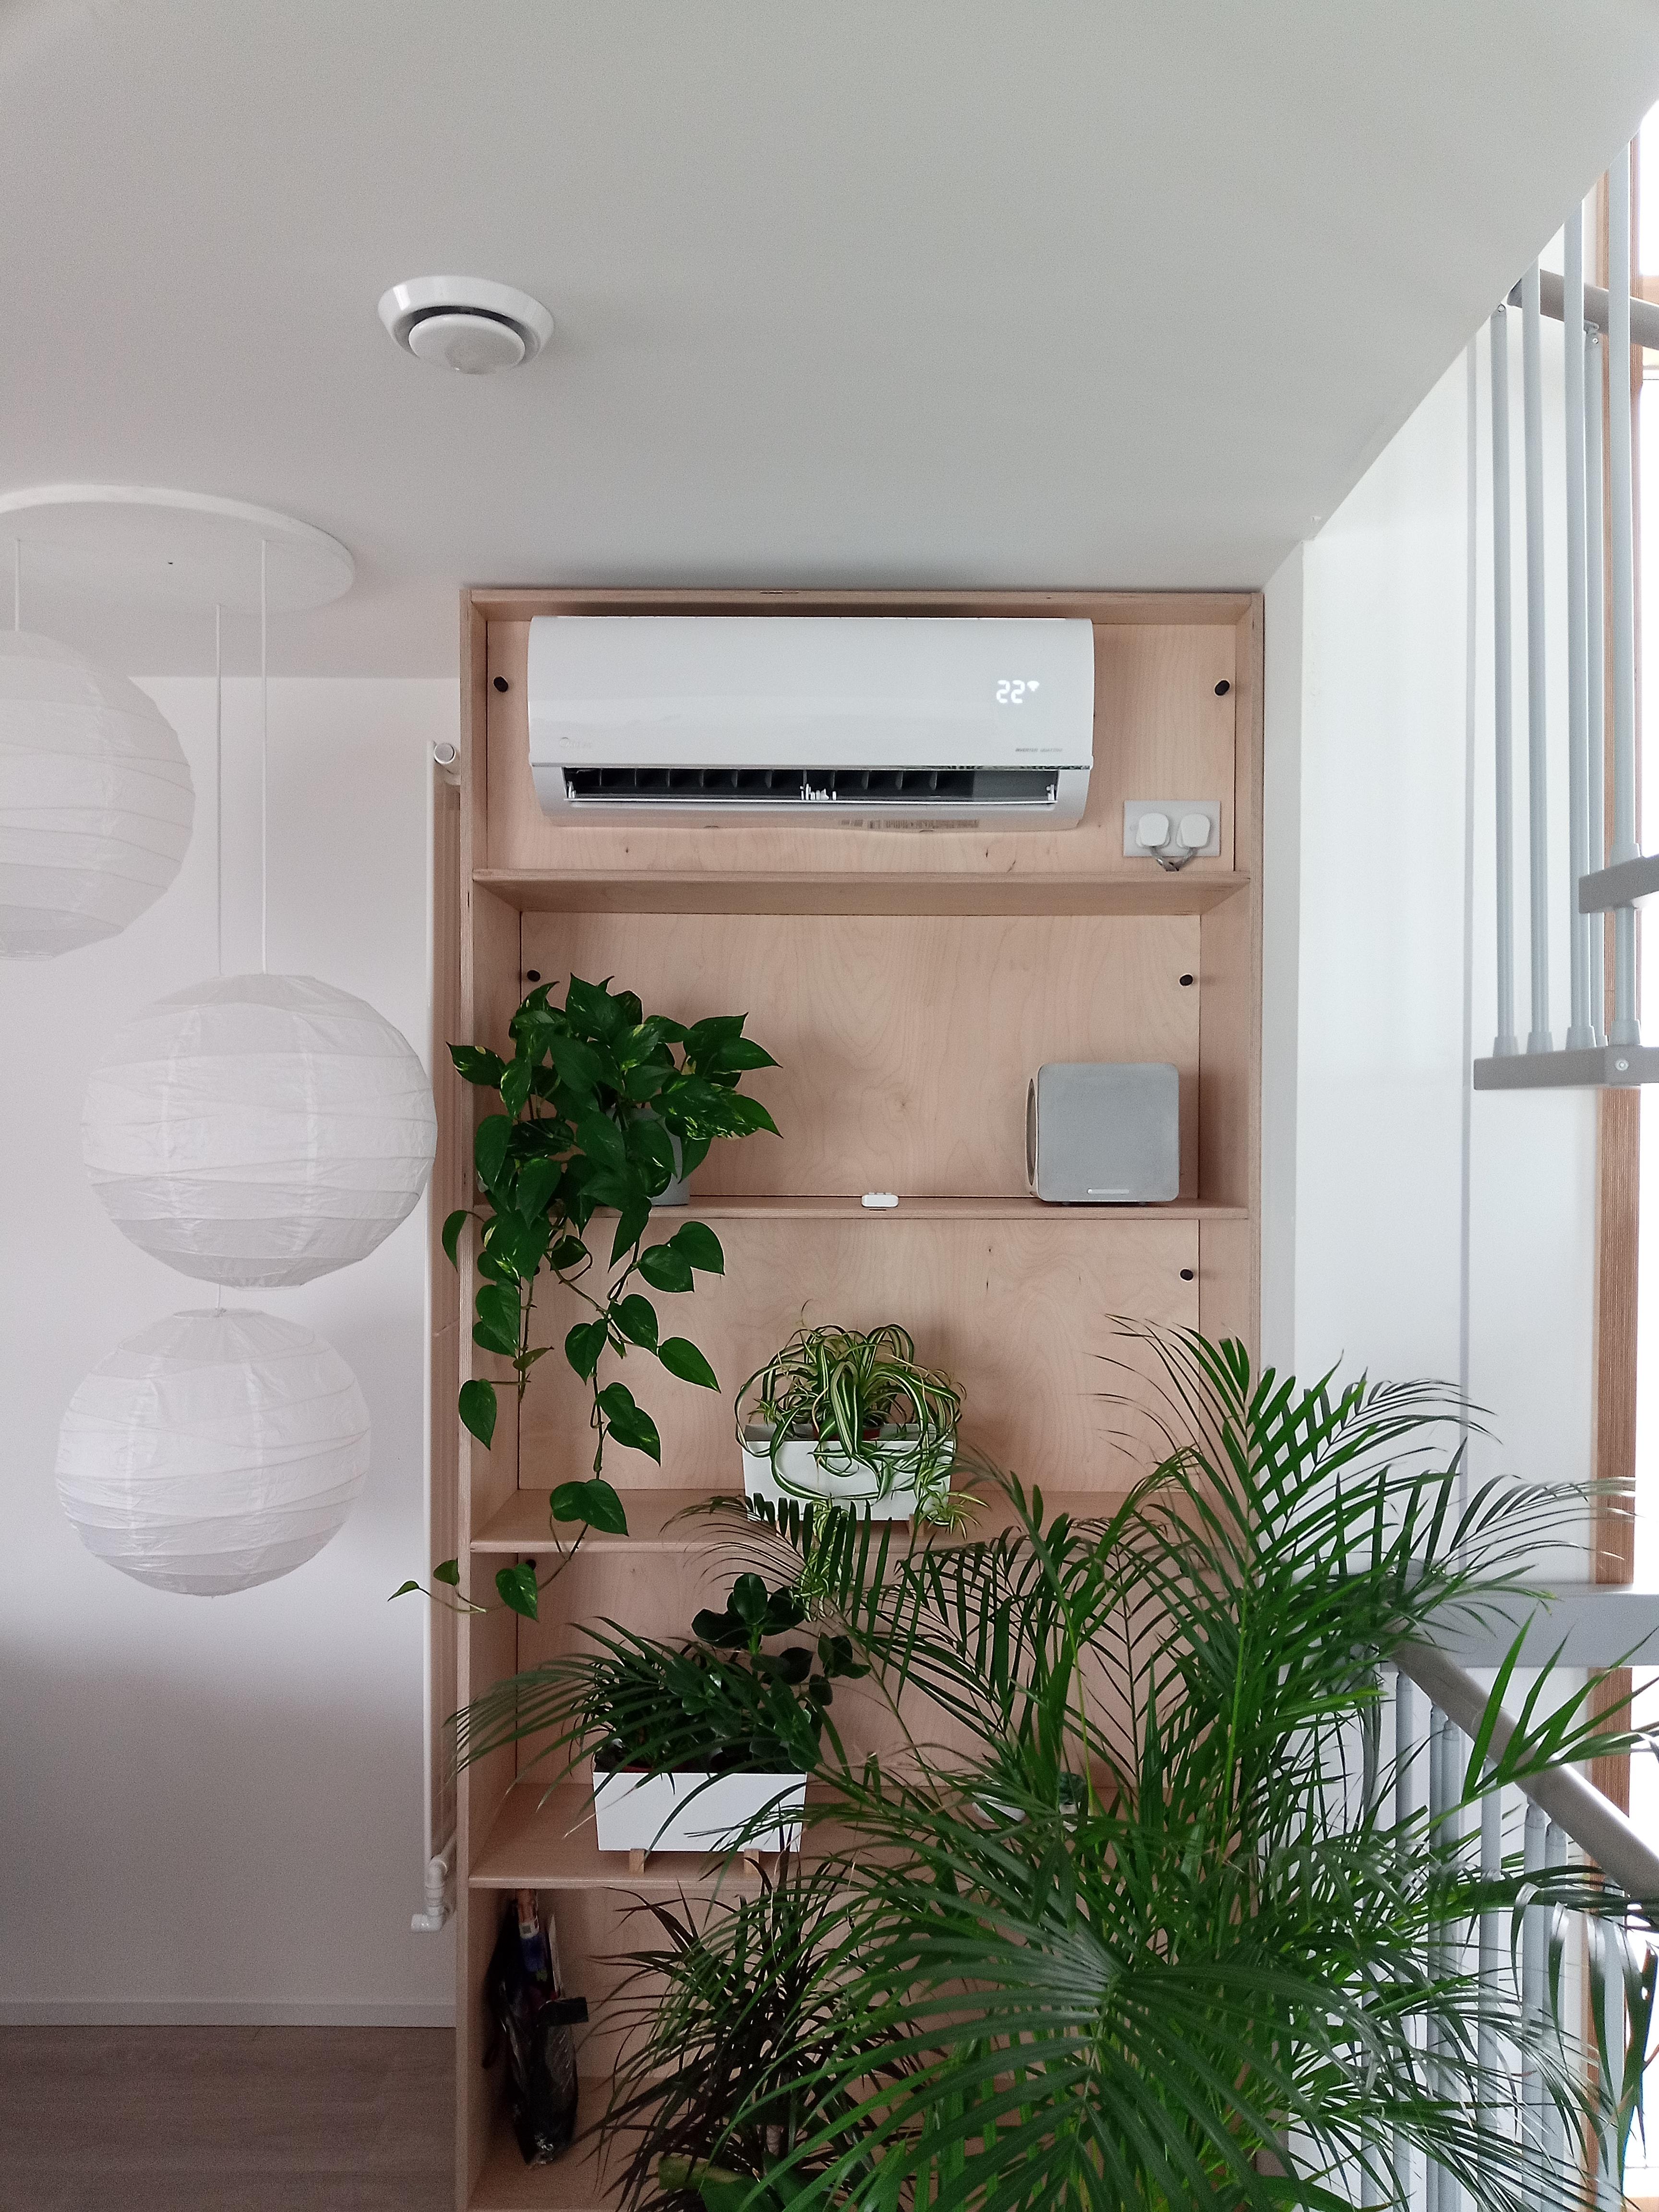
We hadn’t planned on this and the thought of messing up the clean lines of the build and the pristine plaster work did not appeal. Purely by chance it turned out that the false wall in our bathroom built at the request of my wife and much muttering from me (who needs somewhere to put a wine glass while your in the bath) was a saviour. It meant we had a service void from ground floor to second floor in which to route pipes to the internal units. We contacted Mr Harris and he kindly lent us the pump gear required for installation testing, so far so good. We identified the units with the best energy efficiency only to discover you are not allowed to purchase them without having confirmation the installation will be done by a certified F-gas installer. We wanted to do the main parts of the installation ourselves and just have the F-gas engineer do final test and connection. Sounds reasonable but we had a lot of difficulty finding anyone. Mr Harris came to the rescue again and recommended Artech Air who were unbelievably helpful. We ended up with two Midea Blanc units, a 2.5 kW for our bedroom and a 3.5kW for the open plan living area. Result – bliss, and a very reasonable bill for £1,800. In the long term they will add to the comfort of the house all year round.
On a slightly different subject MVHR summer bypass. It sounds perfectly reasonable, don’t heat the incoming air form the outgoing air in once a set temperature threshold is reached. The incredible heat of the last month has made us completely rethink it’s use. If the air inside the house is colder than the outside air, then cool the incoming air ie you don’t want to bypass the heat exchange. Also when it very hot between 9:00 and say 20:00 don’t run the MVHV, there is plenty of air in the house and we certainly never felt stuffy. We set the MVHR scheduler to do this for us. Similarly in winter it goes off at 22:00 and back on at 07:00.
PV
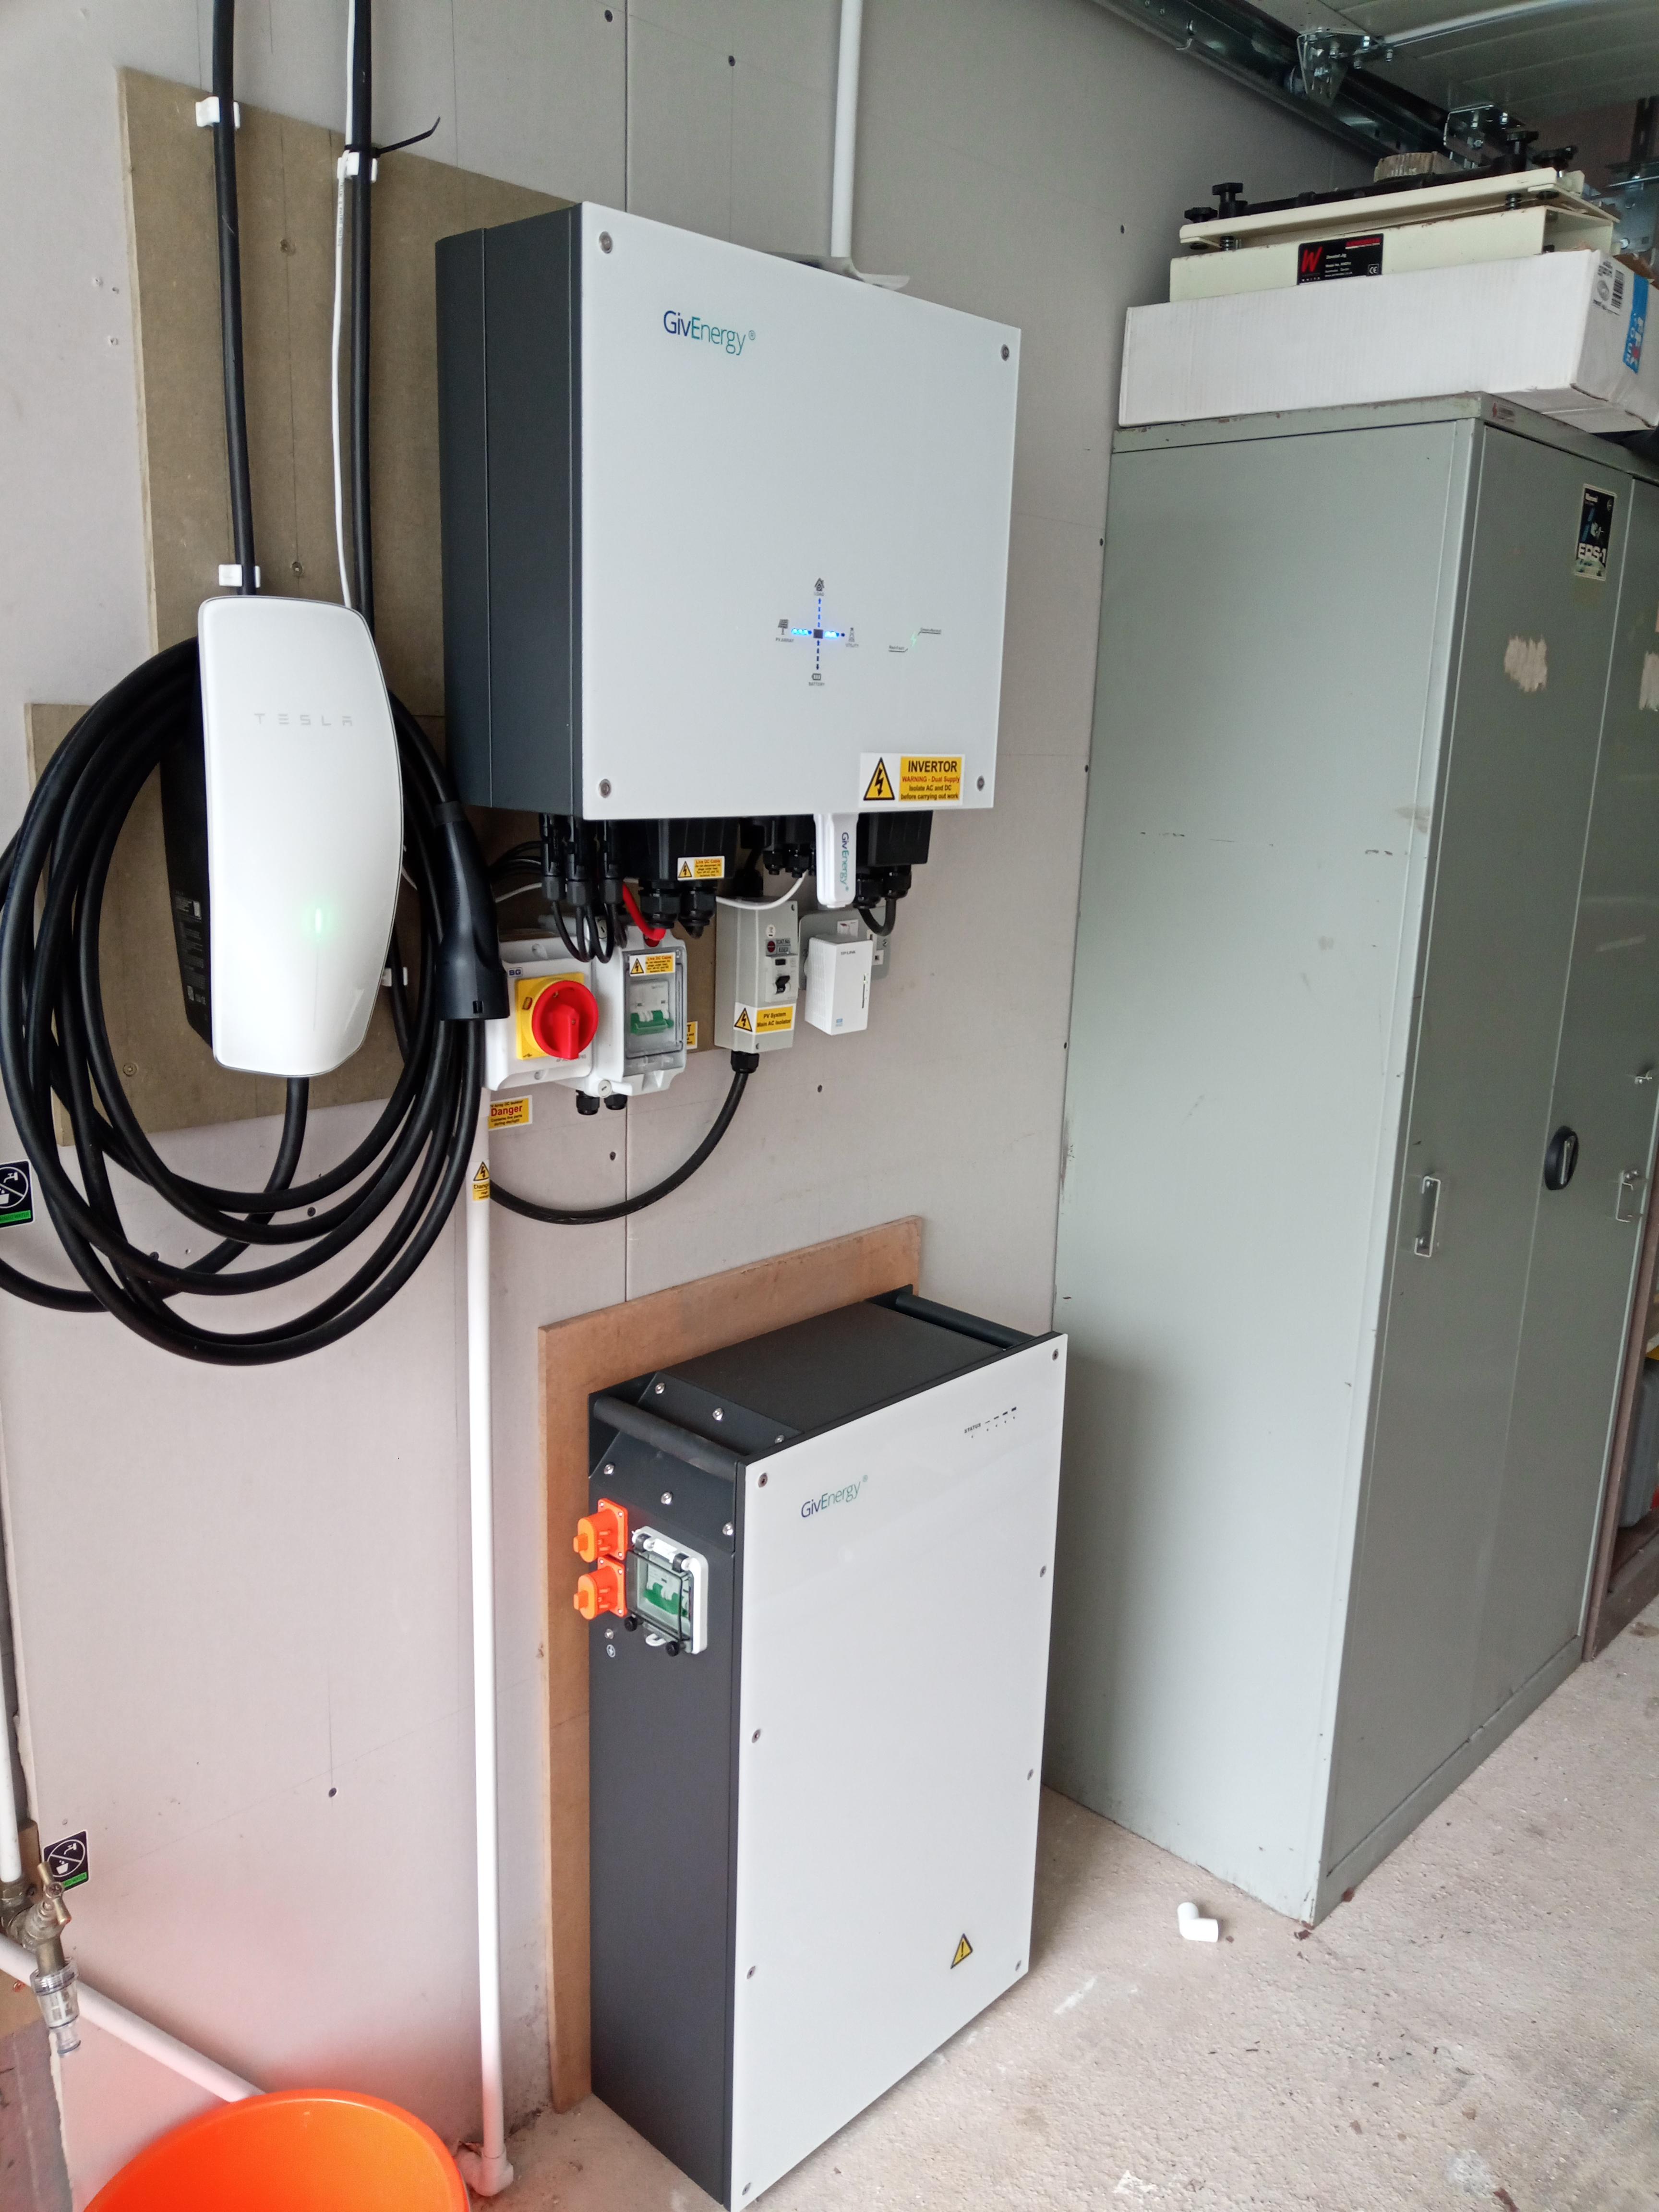
We didn’t put any PV on when we built, the house should need such small inputs it simply didn’t make sense in carbon or cost terms, or so we thought. Two things changed our minds, the air conditioning and we bought an EV. Doing anything more than 4kW is a pain as it involves more certification and silly cost items like Southern Electricities £300 fee for observing testing on equipment that was already certified on the MCS database.
Again we had not planned this in so it was a retrofit...grrrr. Very annoying as we were pretty smug about having thought through the whole build. Fortunately our standing seam roof made it as easy as it could be to fit panels and hide all the wires. With the panels added we are still in surplus on the air conditioning units, not cooling for free as we had to pay for the panels and inverter, but no additional utility cost. Bye the way this was done before some nameless psychopath started a war and energy prices rocketed. The house now sits at a very comfortable 23c while not drawing any energy from the grid. We even have enough surplus to charge the EV between 10:00 and 15:00 on sunny days at a very slow 6A. We also opted to put in battery storage which we ordered in February and has only just arrived, it should have been 8.2kWh but in the delay they manufacturer introduced a 9.5kWh version for not a lot of extra money. We’re not up and running with the battery as the manufacturers decided to change the inverter battery connection cables with the new model and there are no cables shipped with the battery. I must confess I found it very hard to see the funny side of this.
House wiring
We did this ourselves and got it tested and certified, but made no provision for an EV charger, inverter and PV. Fortunately we did put ‘Routabout’ access points into our floor intended to allow access should anything go wrong. We also have loose lay flooring which has made the four times the utility room floor has been up no drama. Providing access to fix and change is something definitely something that should be done early not as an afterthought, when we put the traps in we had no idea how useful they would be.
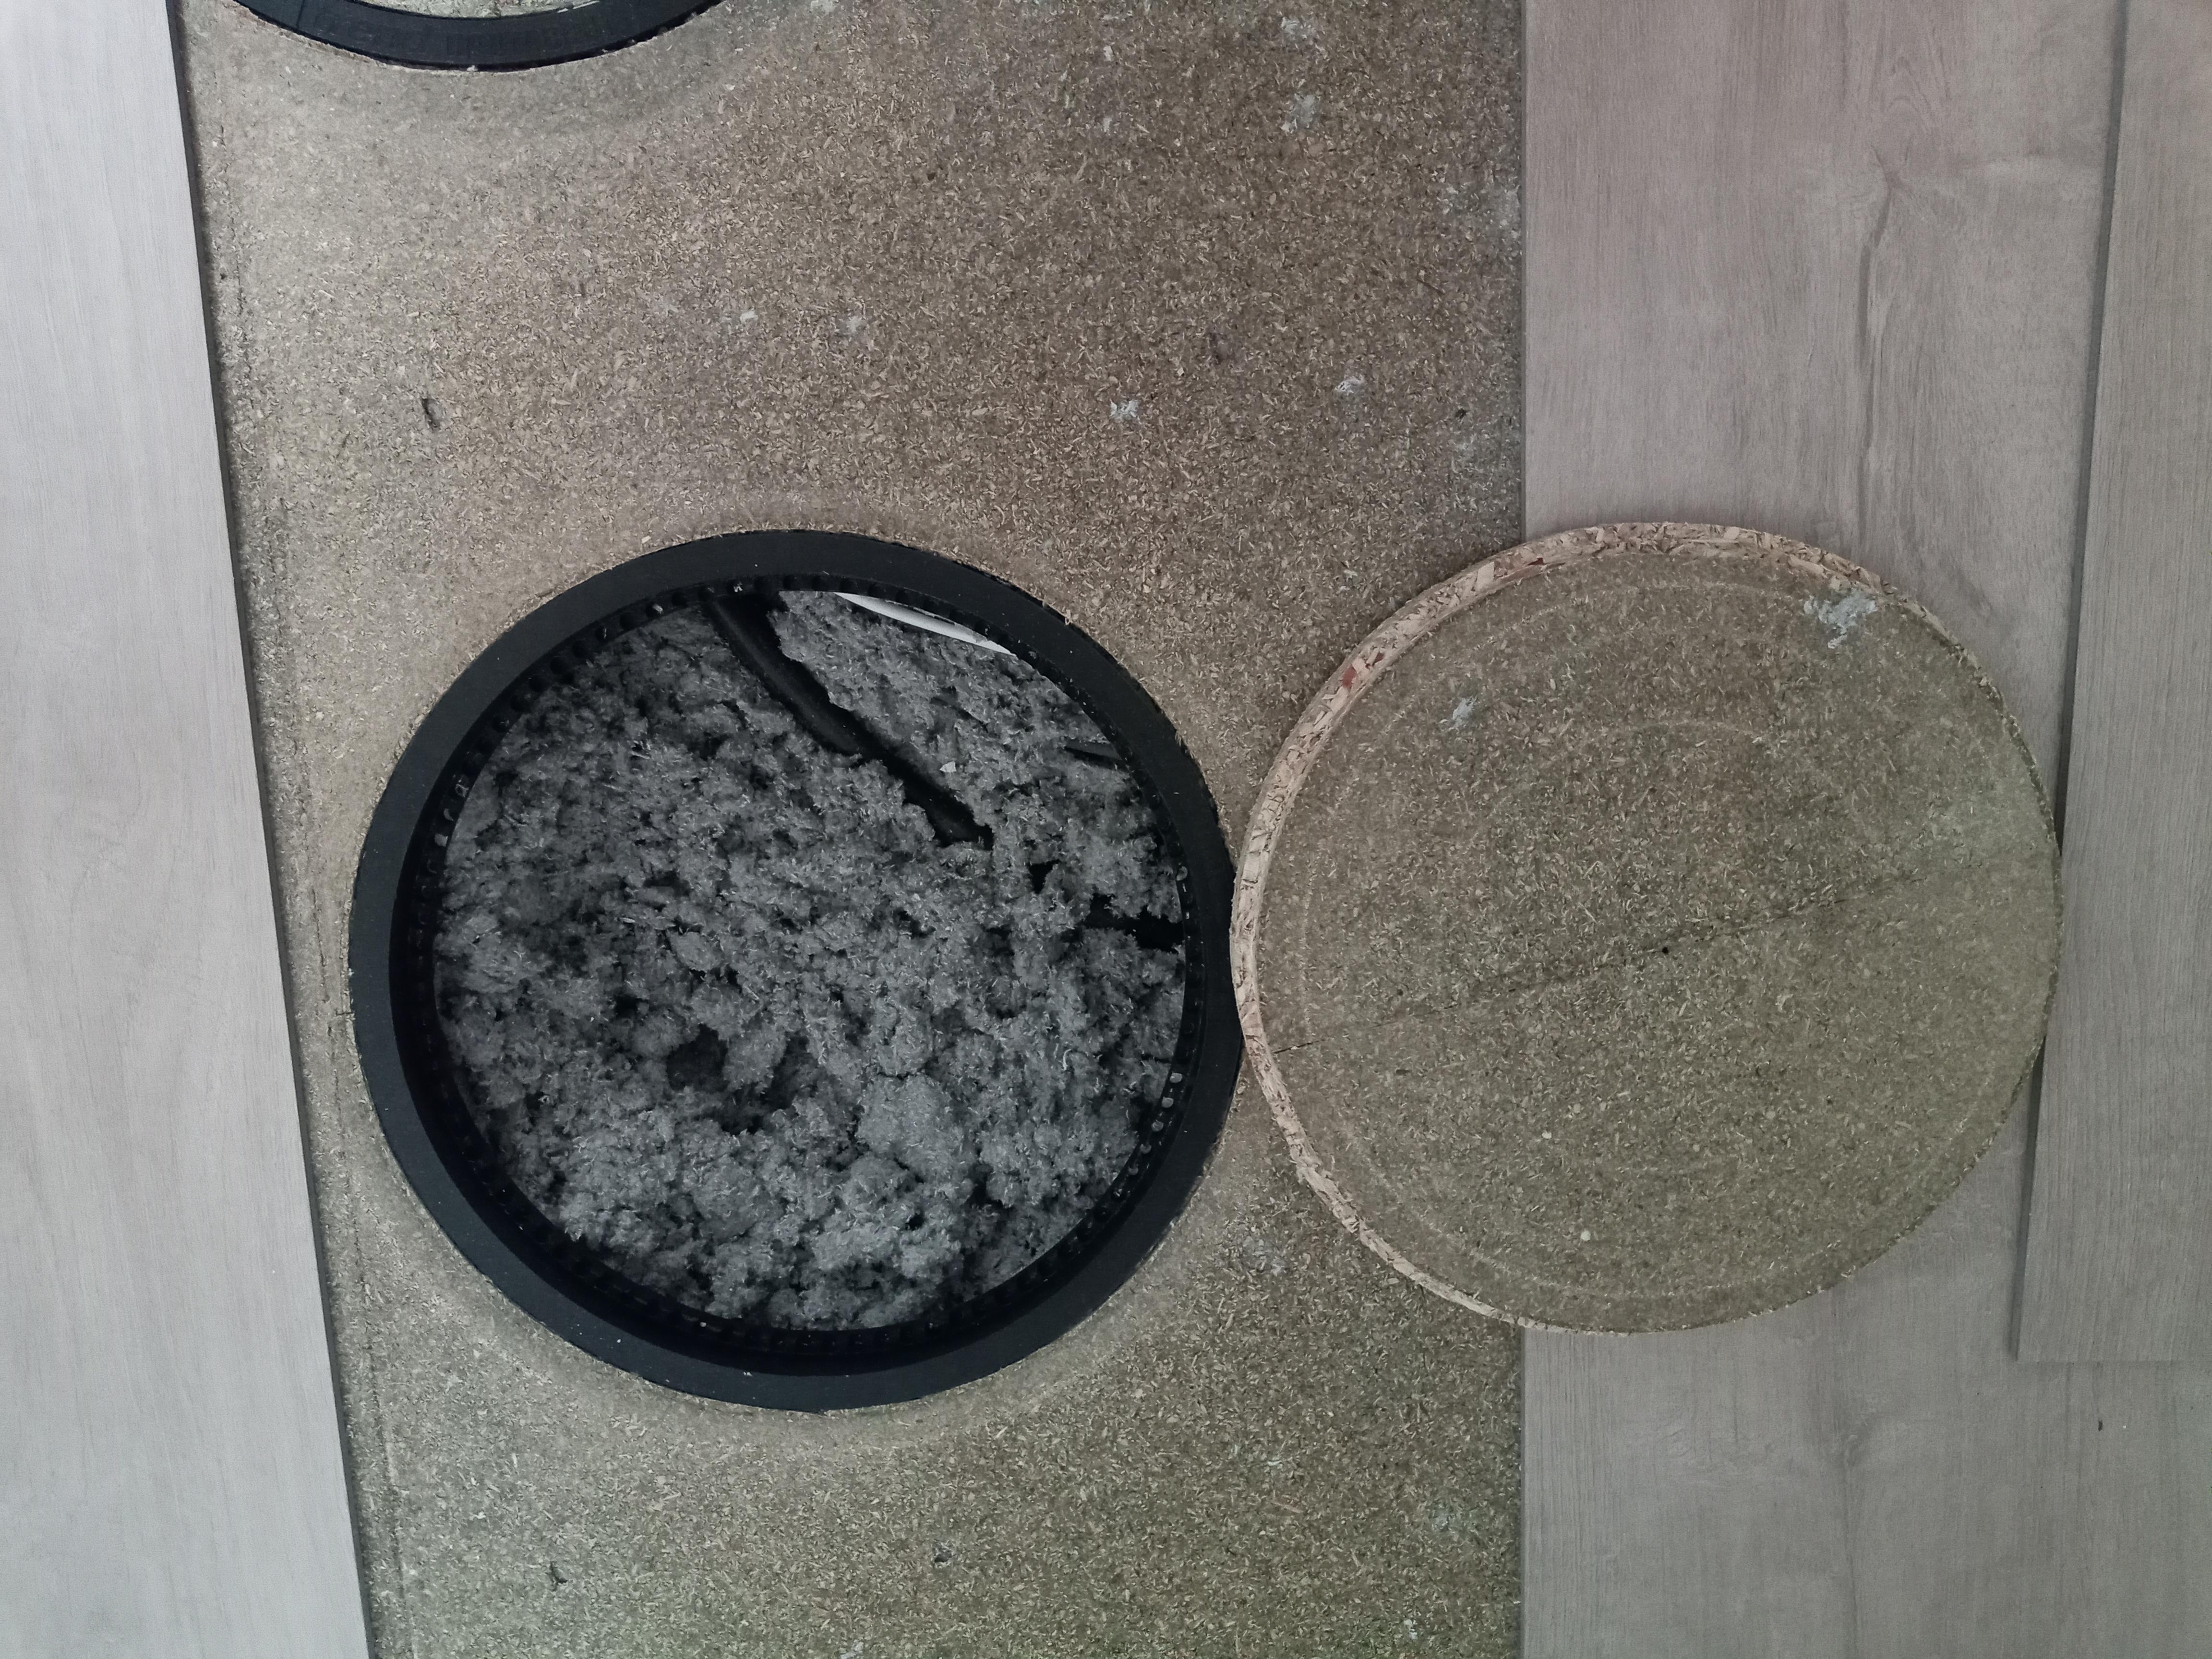
Fixings and fastening
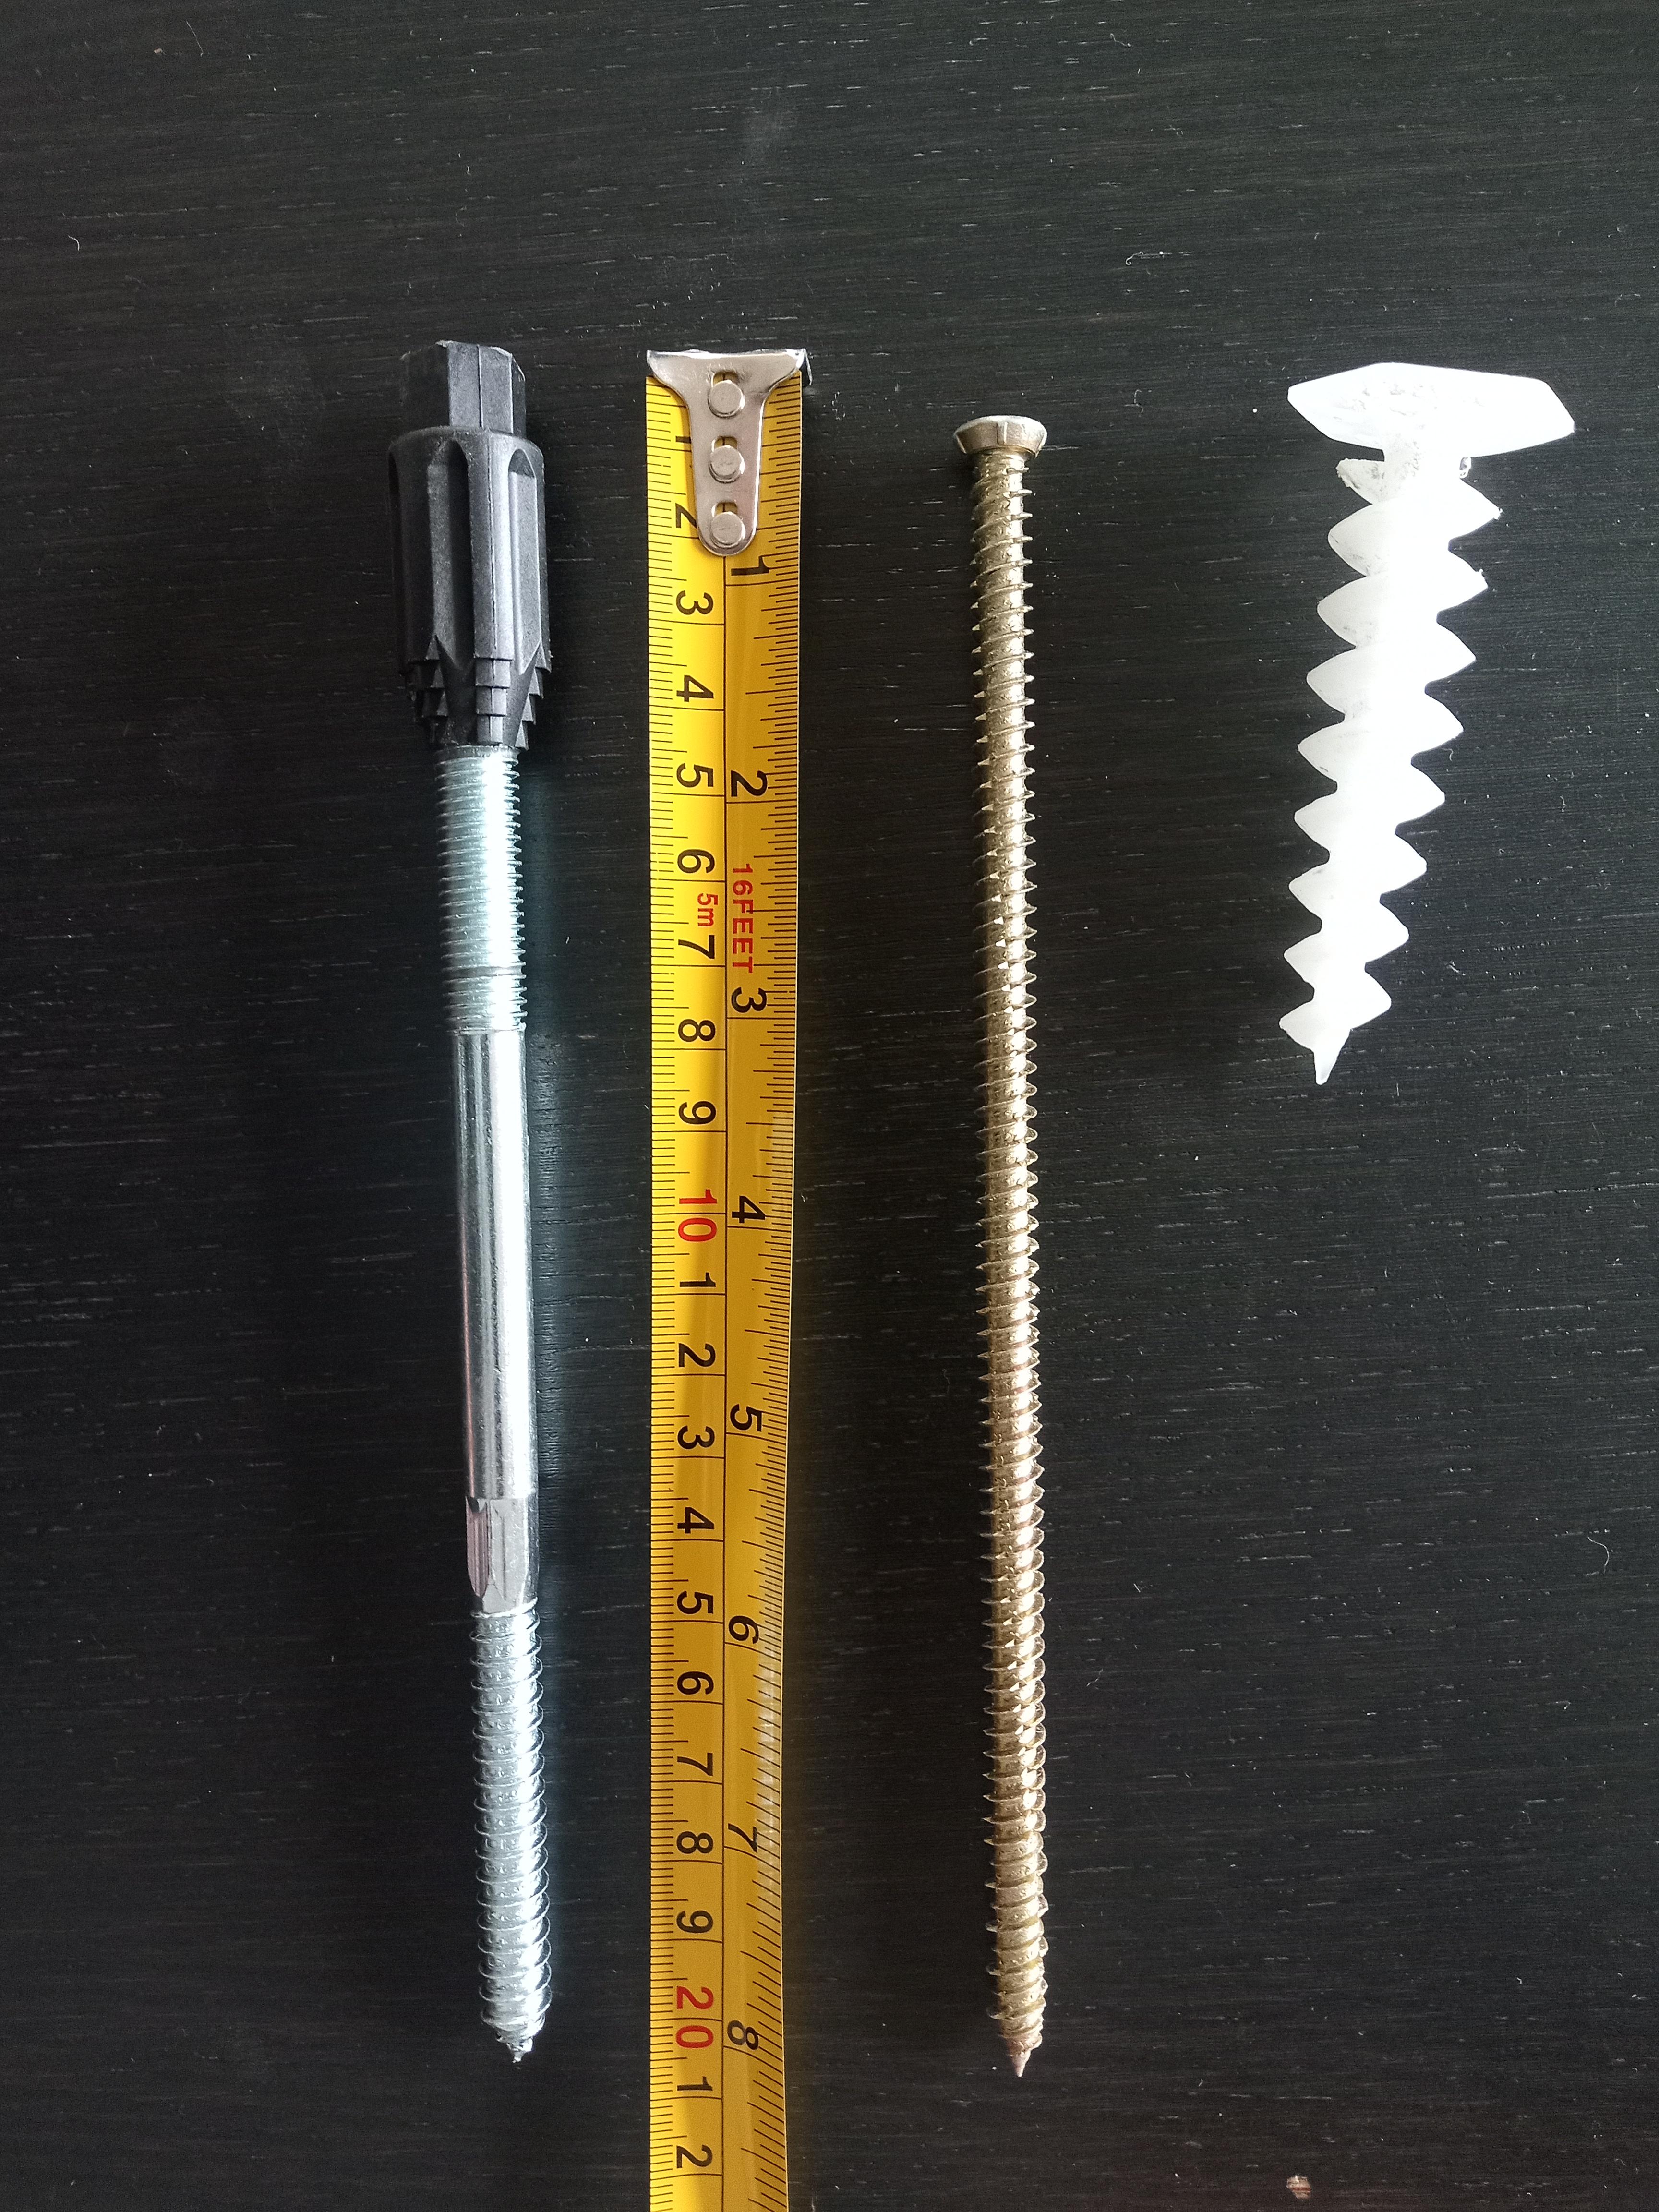
Our build is ICF and while it’s great in may ways it does present some interesting challenges when it comes to mounting anything on the walls. The ICF system we used came from JUB and has a very tough vertical nylon strip every 150mm about 30mm from the internal surface. With a course thread screw you can hang things like TV’s but not heavy stuff cupboards. For heavy items it’s a case of drilling into the ICF concrete core 75mm internals and 170mm externally from the ICF surface. This makes for a significant cantilever, internally this is fine you just use big fastenings. Externally the problem is two fold, 1700mm cantilever and you don’t want any thermal bridging, this makes using big fastening as real no no.
We ended up using four fastening types:
-
Internally we used cheap and easy to use concrete frame fasteners for heavy stuff.
-
For lighter stuff on plasterboard we used GripIt fastenings which do the job remarkably well. The largest size claims to be able to hold 70kg, but I wouldn’t trust it with anything like that.
-
Externally we use Fischer ‘Thermofix’, expensive and not available in this country. Fischer say they don’t sell enough here to make it worth there while. It seemed lost on them that we were buying from Germany along with every other UK user of the fastening.
-
For light external fixing we used pasta twirls supplied by JUB. Useless for anything heavier than a letter box.

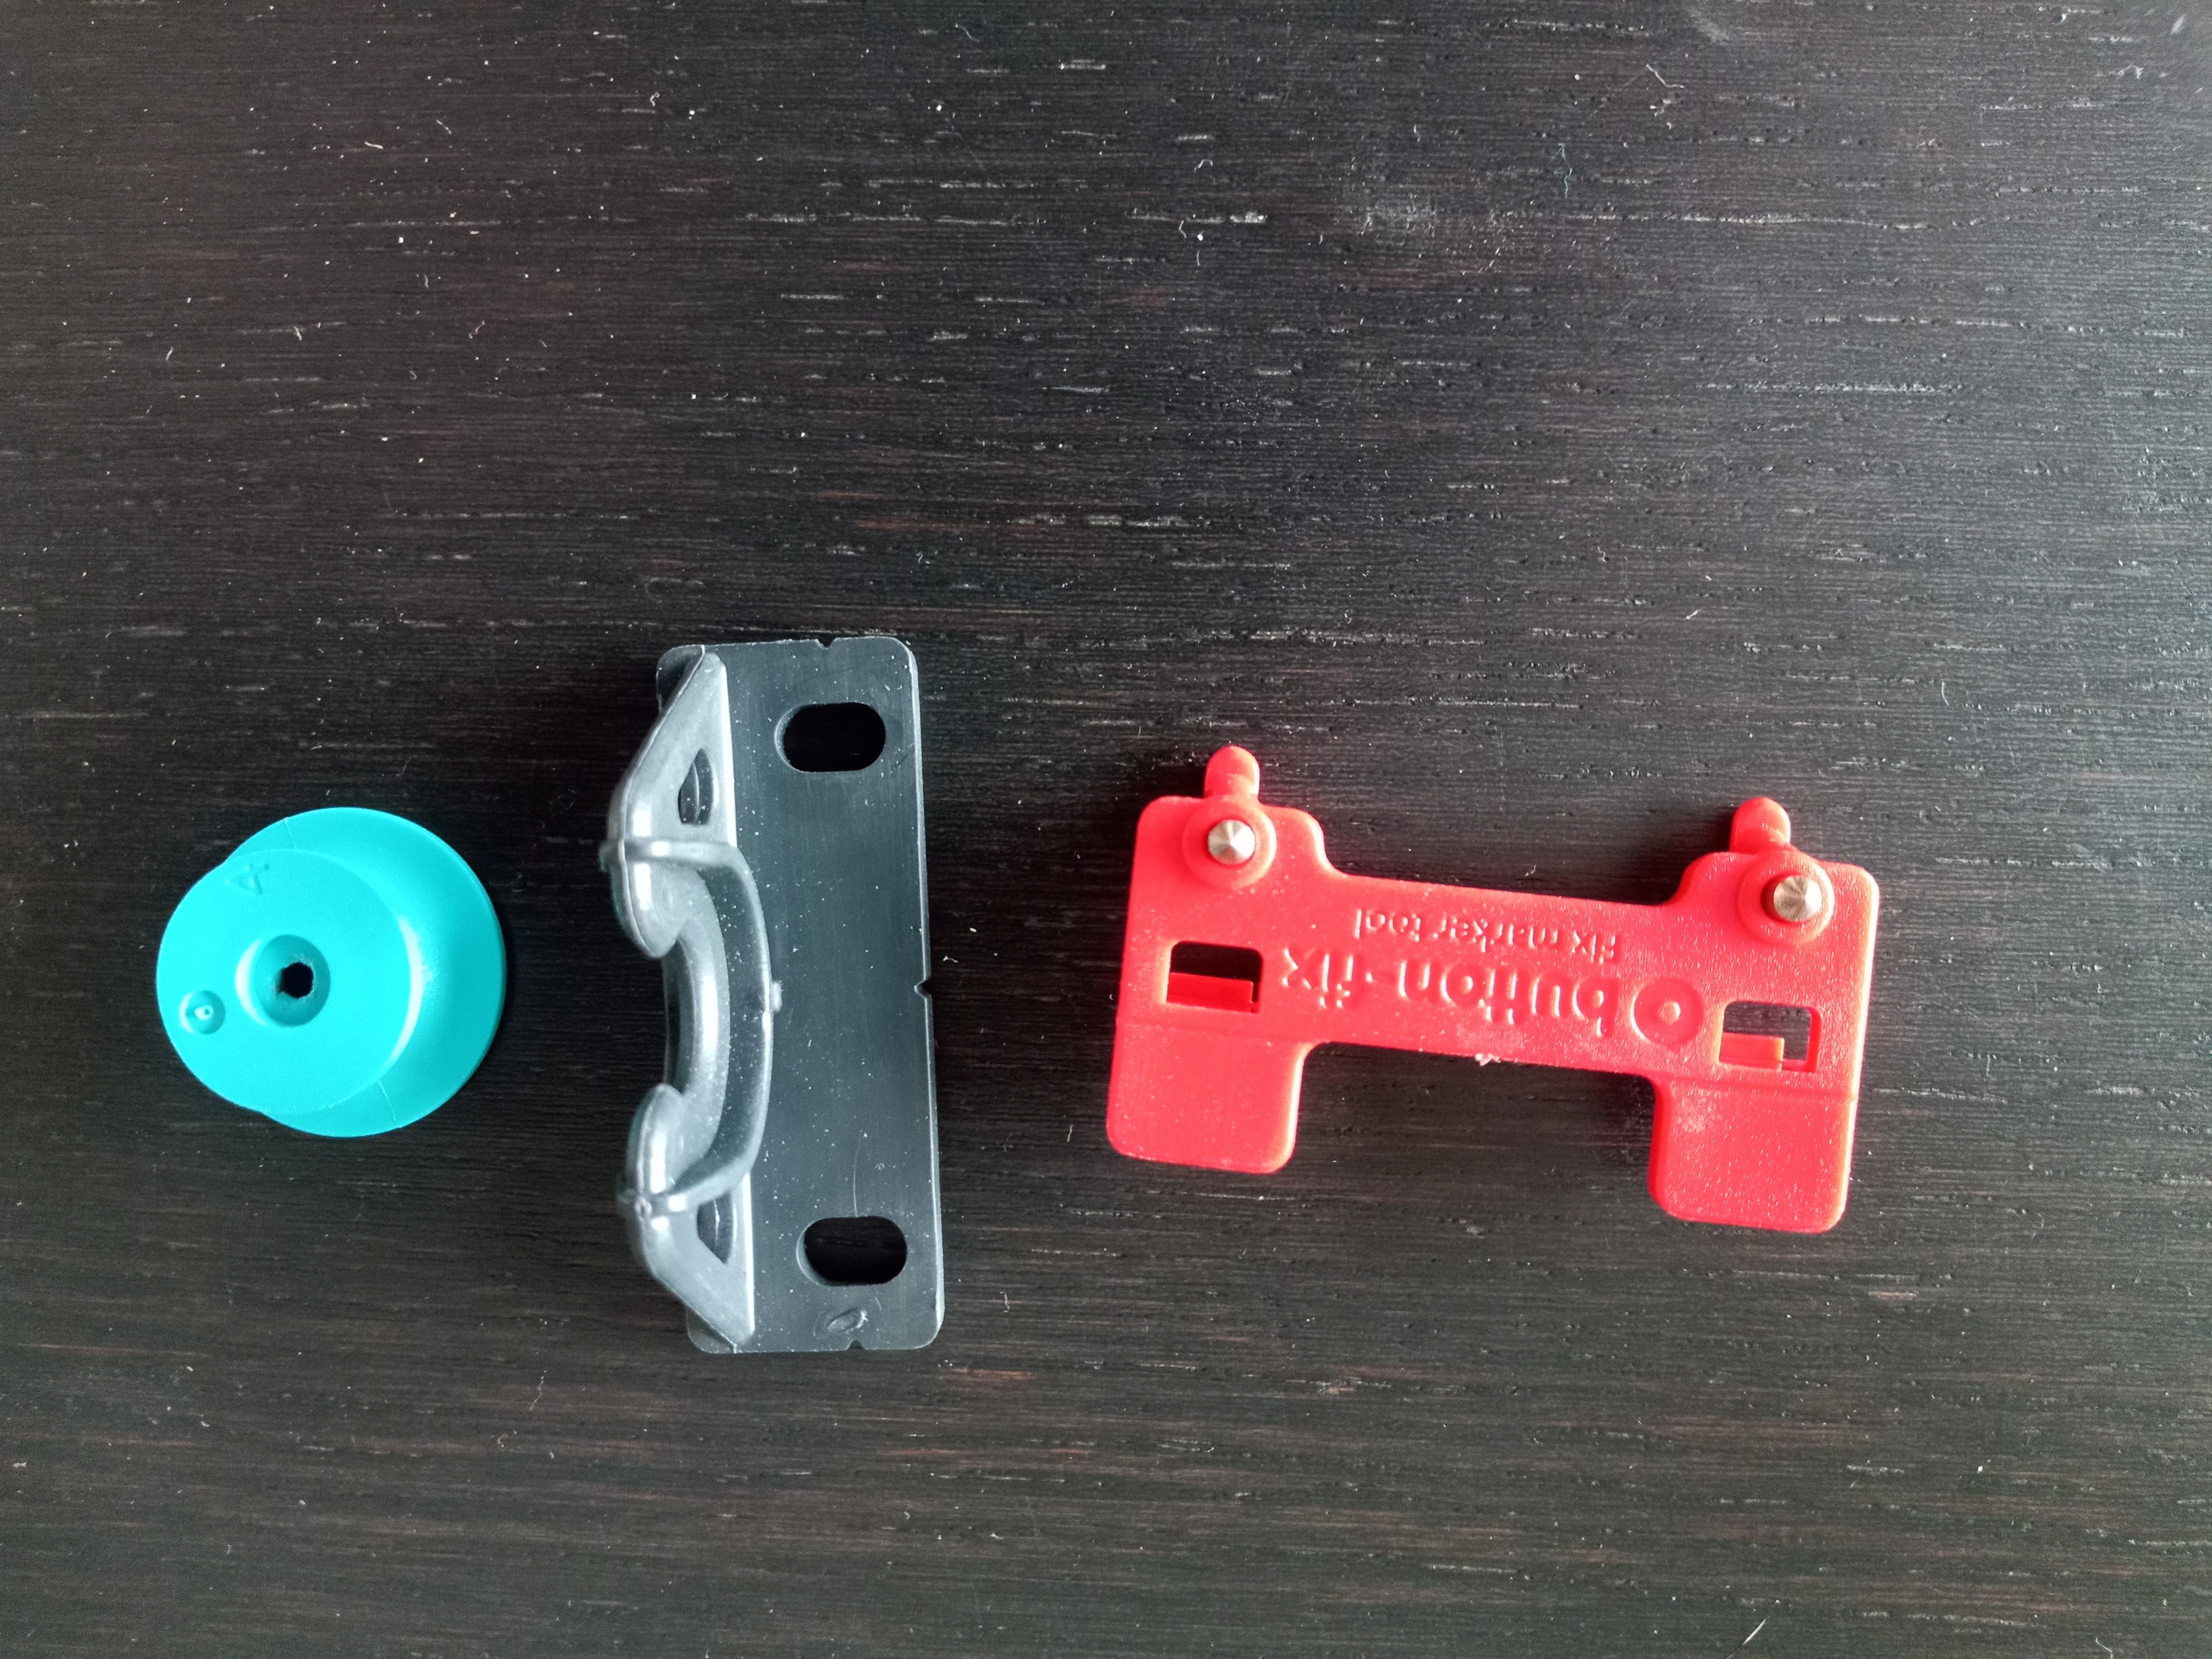
DIY cabinets
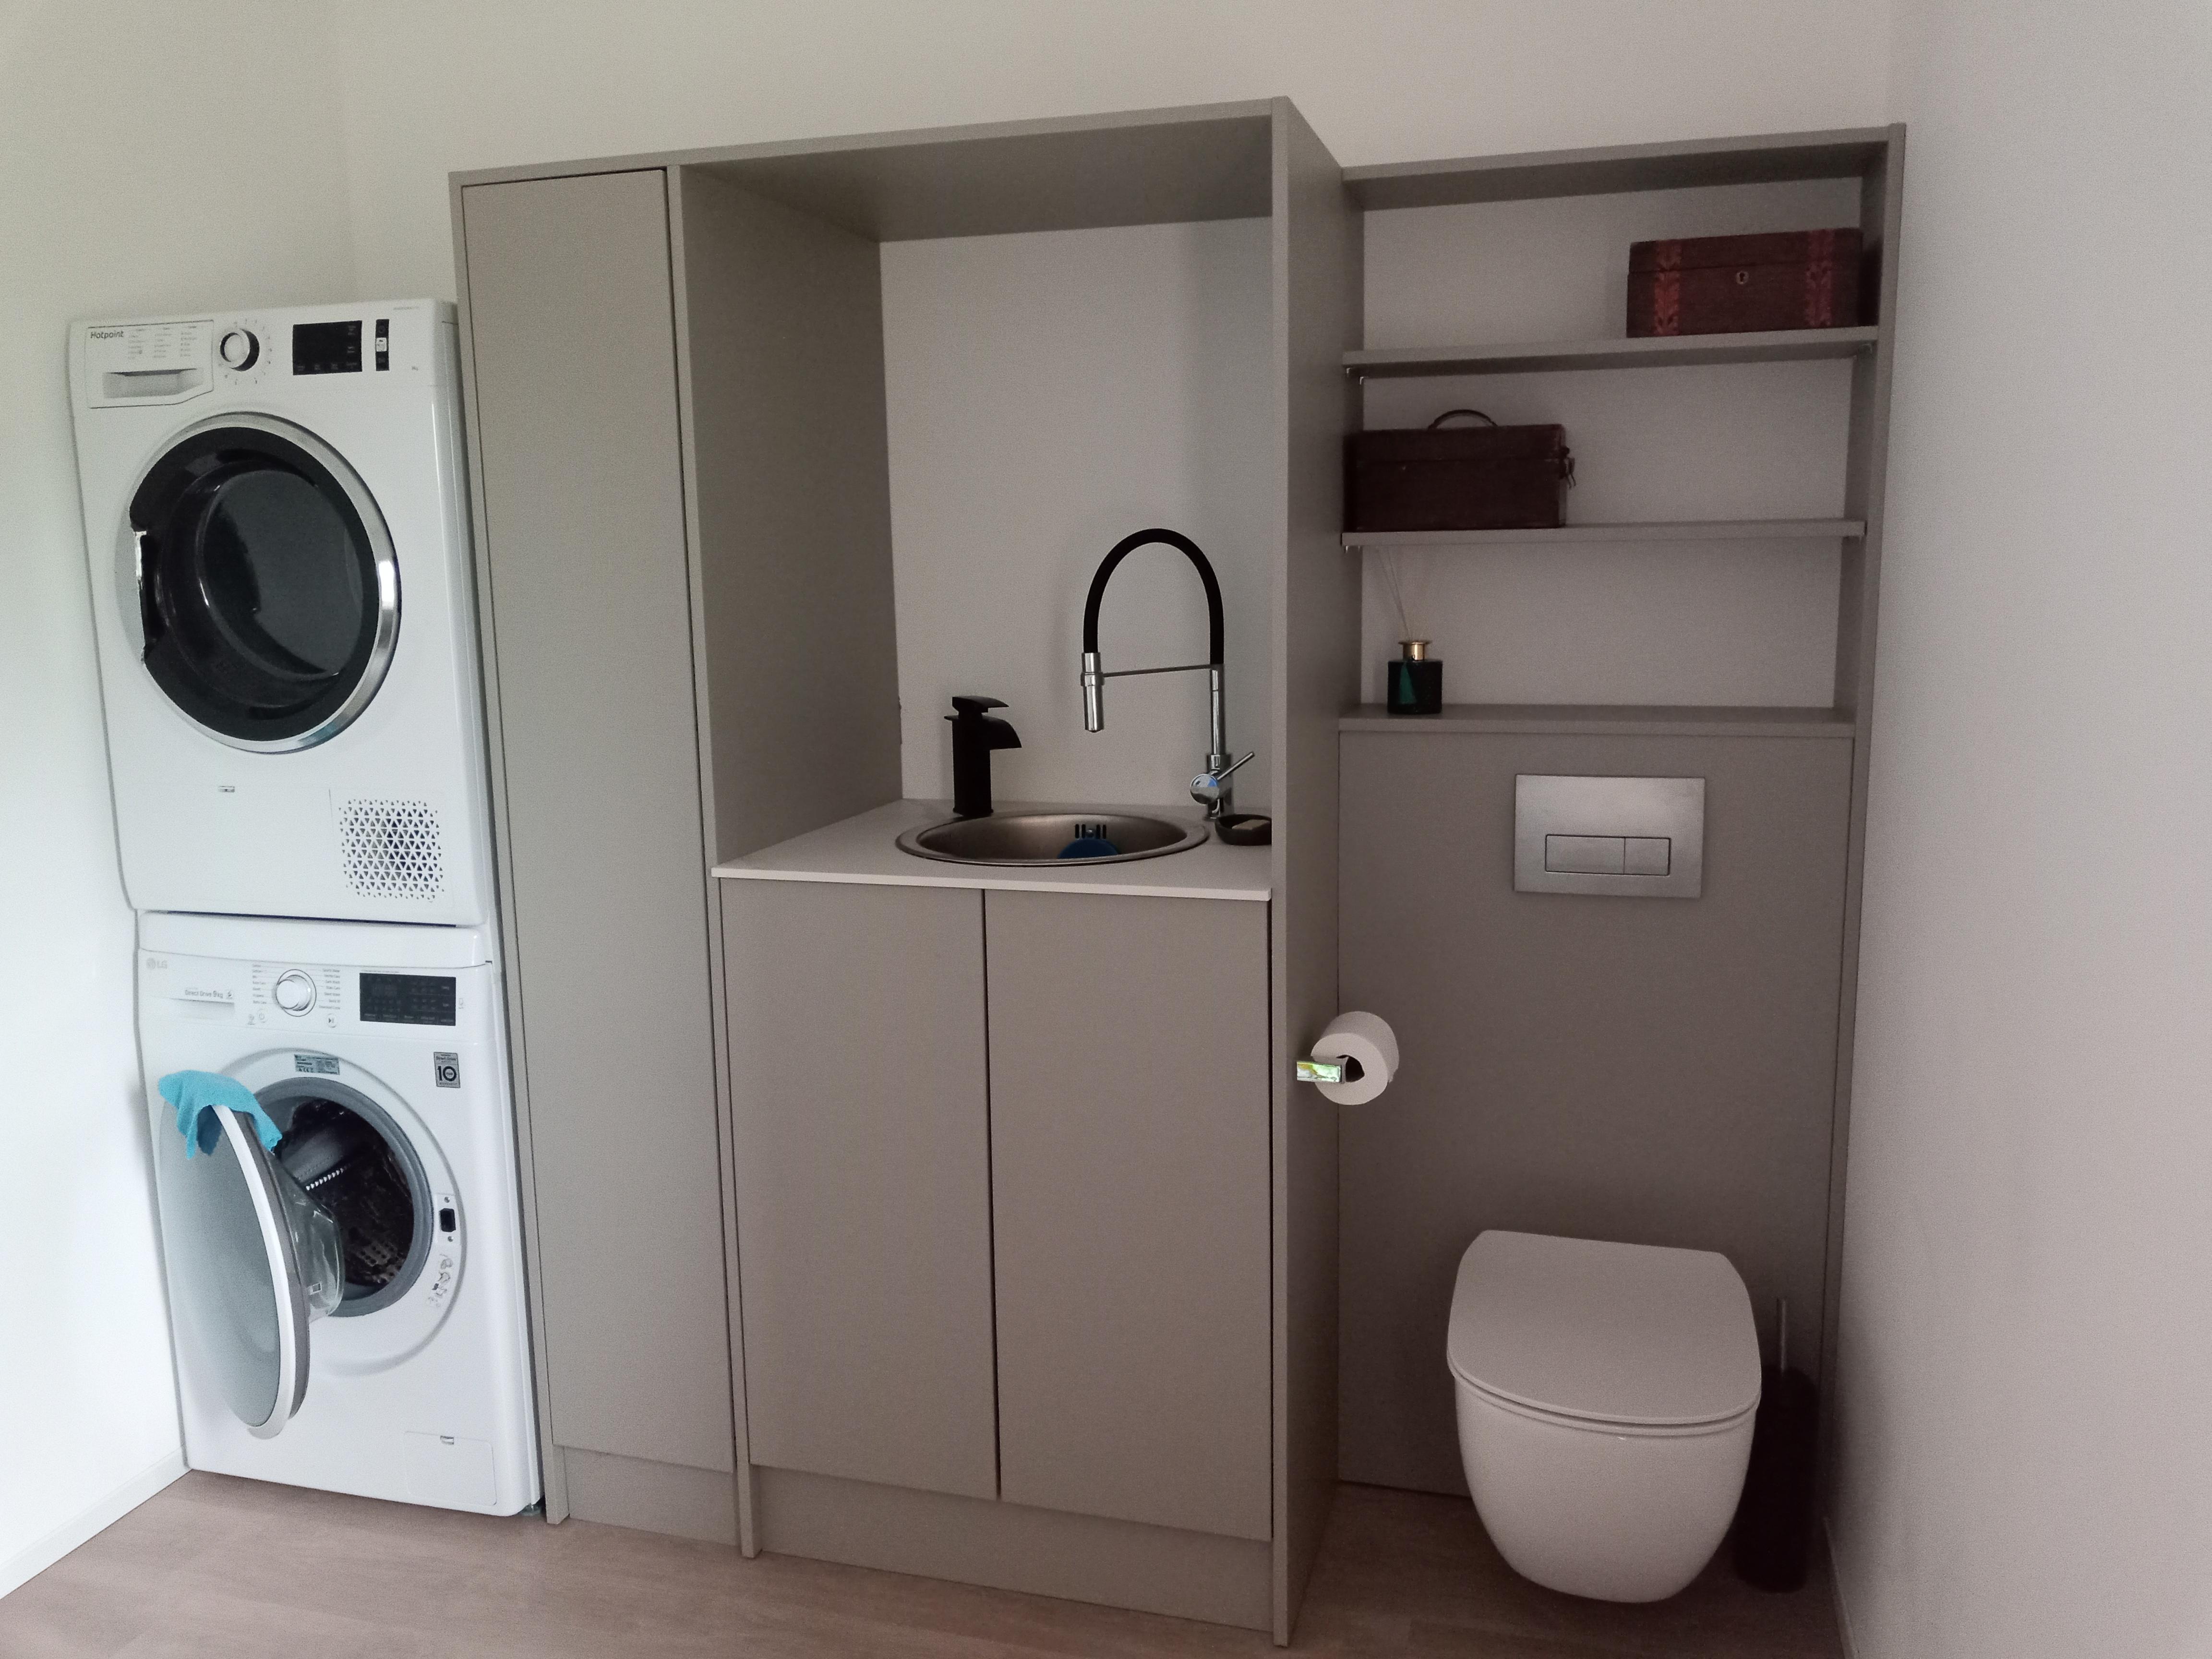 We found we couldn’t always source ready made furniture that was the size we needed. Some friends run a bespoke kitchen business and pointed us a site “wood online” who make up panels to your specification complete with edging. Using a ‘Pocket hole’ jig and these panels allows you to create you own furniture simply and quickly at a fraction of the bespoke cost. We also found some very neat panel clips for panels that need to be removed for access.

Garden
We finally got round to sorting out the garden. It’s small, just 11m by 5m and like a lot of self builds it had been used as a storage area (dumping ground) during the build. As we’re getting on a bit we wanted to make it low maintenance and low water. Raised beds and a patio area seemed to fit the bill. As the house is a contemporary build and we wanted to the garden to complement the house which is white and two shades of grey. For the patio we have used 600 x 600 porcelain tiles for ease of handling and laying. Getting a patio right is not the easiest of jobs and I was not looking forward to. With the patio base prepared, materials were order, tiles on Tuesday followed three days later by 5000kg of limestone chippings. Of course it just happened to be one of the hottest weeks on record…returned the rapid set tile cement and bought standard set. This still went off at a frightening rate. Trying to get a large are flat and true is not as easy as it sounds even when you’ve done all the preparation. With the first slab set to the correct run-off the other tiles were laid using it as reference. Despite our best efforts to get it right, the first tile was just off and as a result by the tile the 8th tile in the row was reached we were using a significant amount of tile cement, about 10mm deep. The four 20kg bags of cement that should have done the whole job disappeared quickly and another 7 bags were required to complete the job. The hoop and wedge helped keep everything flush and the result is perfectly acceptable.

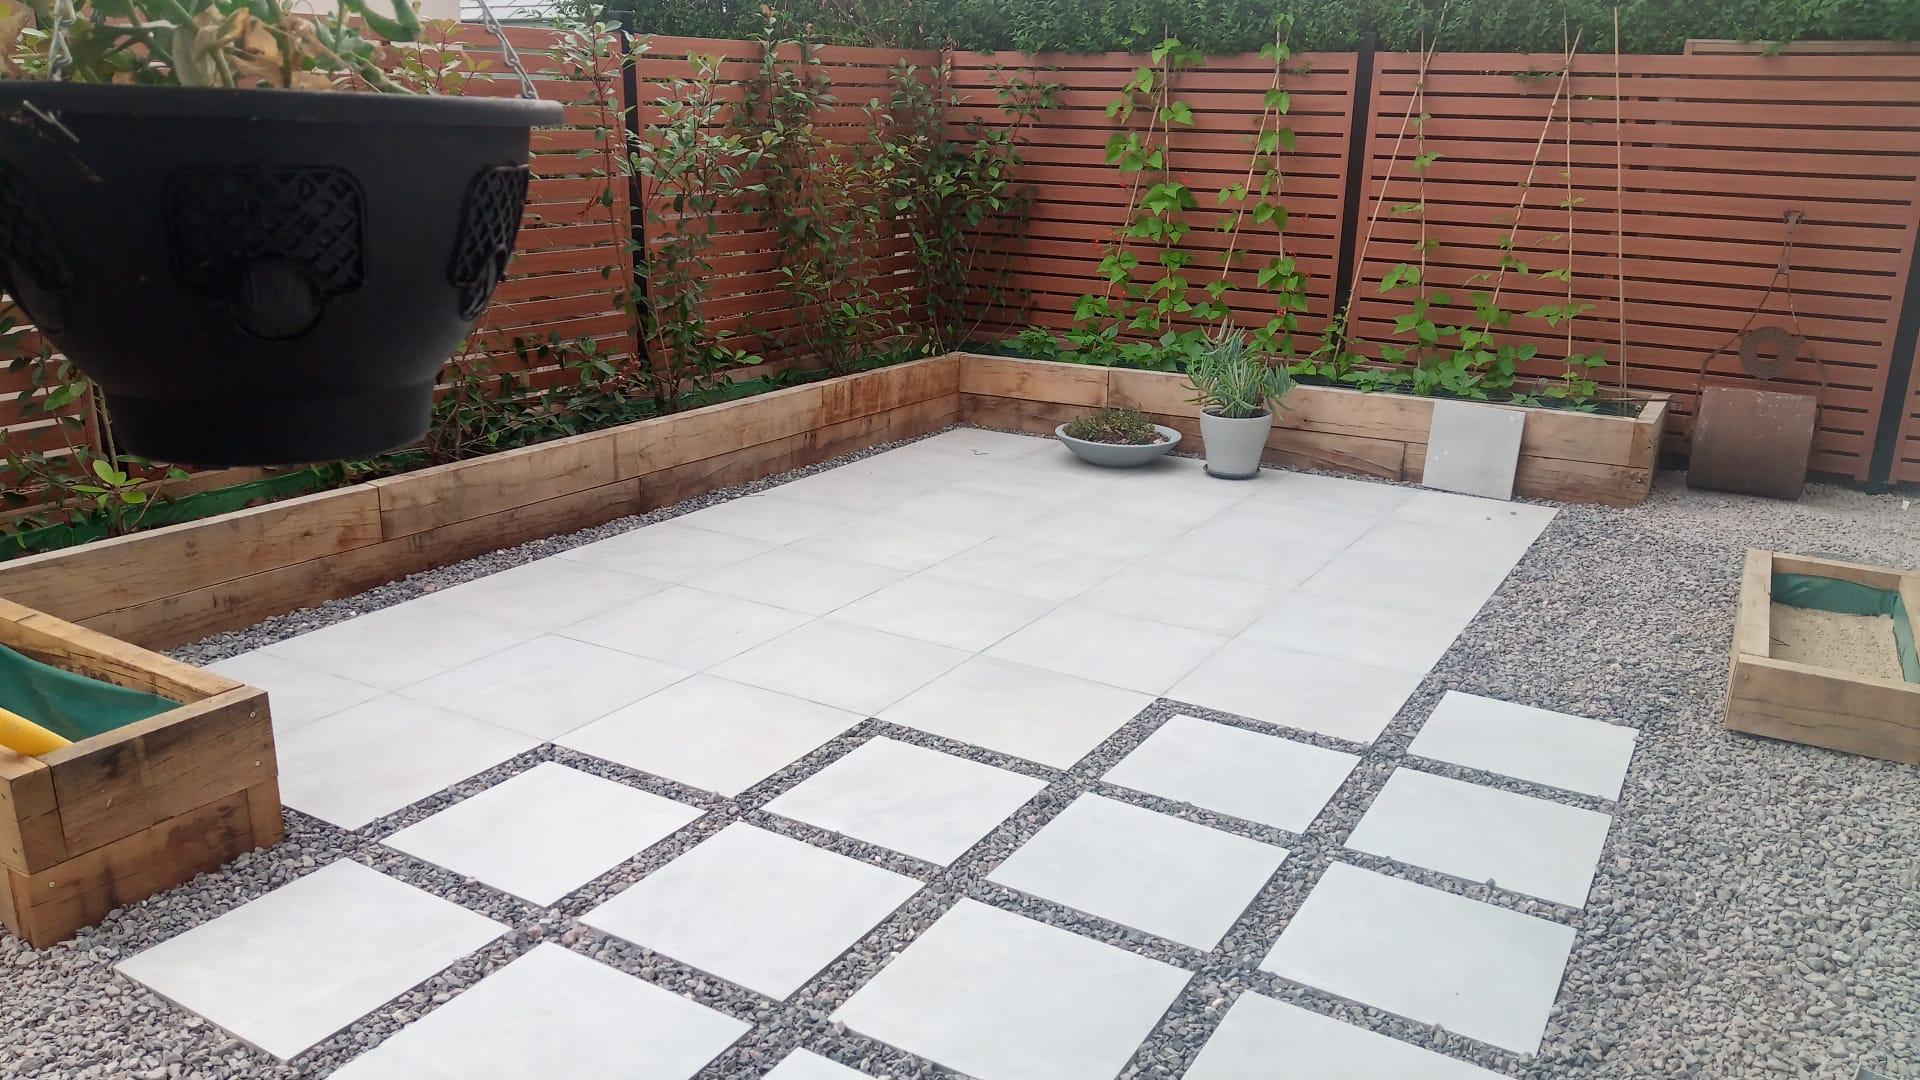
Lesson learnt, do buy the expensive laser measuring and levelling gear at the start of the build, it’ll pay for itself many times over by the time you finish. I’ll know for the next build, however my wife may well threaten divorce if I mention the idea….
-
 12
12
8 Comments
Recommended Comments
Create an account or sign in to comment
You need to be a member in order to leave a comment
Create an account
Sign up for a new account in our community. It's easy!
Register a new accountSign in
Already have an account? Sign in here.
Sign In Now