Leaderboard
Popular Content
Showing content with the highest reputation on 07/28/21 in all areas
-
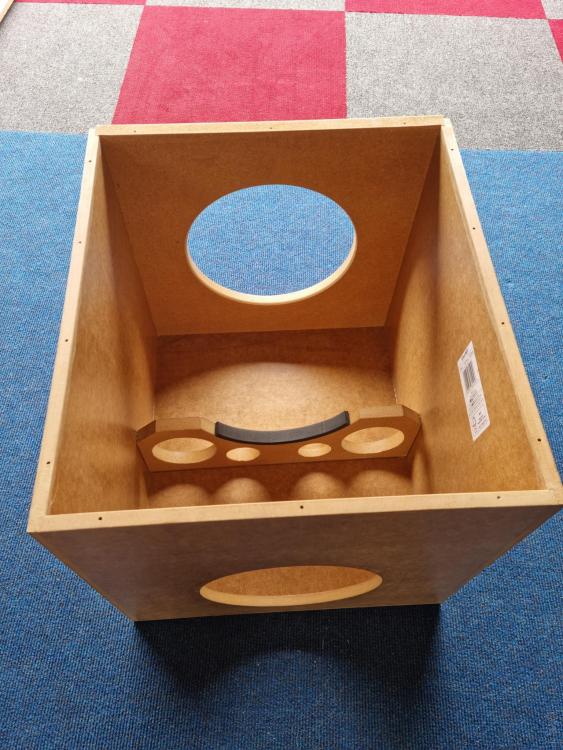
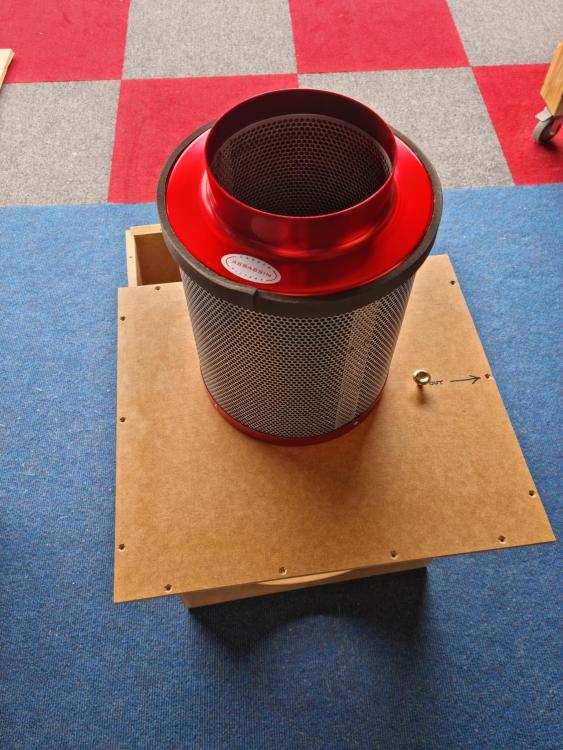
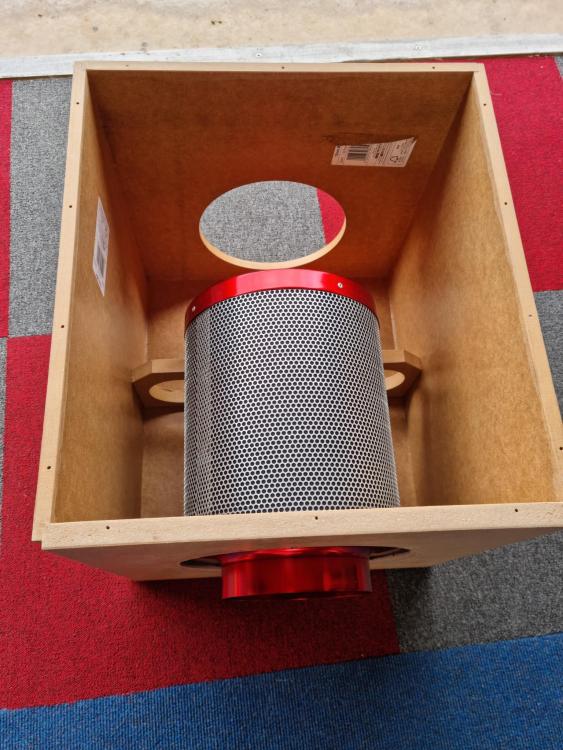
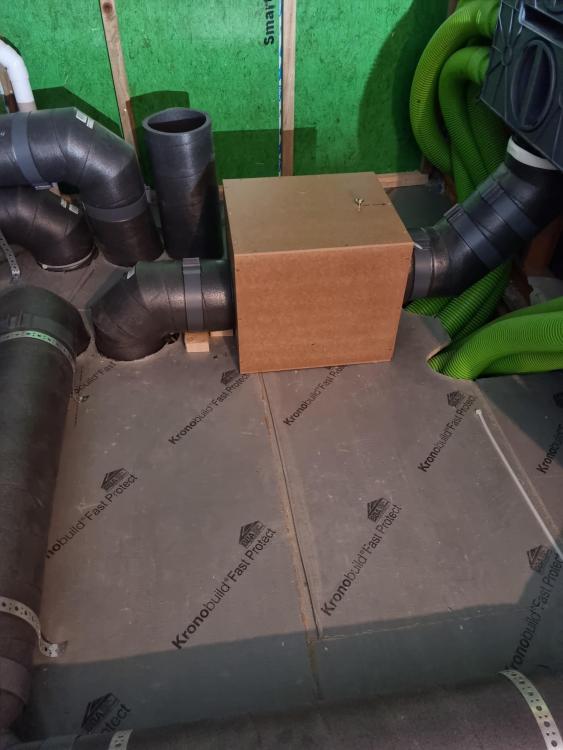
Having lived with MVHR for 9 months I have just completed a DIY active carbon filter as my neighbours just like stinky bonfires too much. Whilst you can easily shut it off when you're at home, it is a horrible surprise to come home to find your home smelling like a bonfire. So I began to research active carbon filters and found those commercially available ones were stupidly expensive and the cost of replacing the filters was also the best part of an arm too. I began therefore at the actual active carbon filter and found that these are many and varied and a huge range of costs. Looking at what I had room to install I decided to get as large a filter as possible and at reasonable cost. I chose one designed for plant nurseries as they are both compact and low cost and got one rated at 600m3/hr with an estimated 3 year life. Again I found a variety of prices but being an experiment, I decided on one costing just over £40 delivered. You can find similar for up to 3 times this. Pictures show the construction of a 450 x 400 x 400mm box in 12mm mdf mainly, just the end out with 18mm to give a greater rigidity for the filter mount/seal. Installed it today and already tested tonight as just had to shut windows due to stinking bonfire again! Running at 220m3/hr currently with no smell whatsoever. Well pleased. Total cost less than £70 for materials. Being retired I don't count my labour. Monitoring the MVHR it has given some additional load/back pressure as expected, increasing the input fan speed by between 50rpm and 500rpm depending on m3/hr selected. The higher rate when running at 330m3/hr. At 100m3/hr its around 150rpm up. MVHR is Brink Flair 400. If this continues to perform, I might go for a higher cost filter with less back pressure when I replace it or see if I could squeeze two of these in parallel into the space I have. Should be possible. Just another 30 quid for more mdf and a few more hours making it. I rebated and glued joints to keep it airtight apart from the lid which is rebated and just screwed down. Hope this might inspire others to give it a go. Filter from Future Gardens, Assasin 600m3/hr. MDF from wherever you can get it. Just two quarter sheets. Plus a few hours design and sawdust making on my cnc router table but could be done using a hand router and table saw if you have a good eye for square and straight edges... ?2 points
-
The dry laying is nonsense An easy way for a novice is to fix a Baton to the floor Say half a tile away from the wall Then fix anther baton 90 degrees to the first you will be able to mark where your tiles are going in pencil on the two batons Leave these in till the tiles are solid enough to walk on Then do your edge cuts Your adhesive need to be the thickness of the tile Put a 3 mil coat of adhesive on the back of each tile (Back Butter) Dont use rapid set adhesive2 points
-
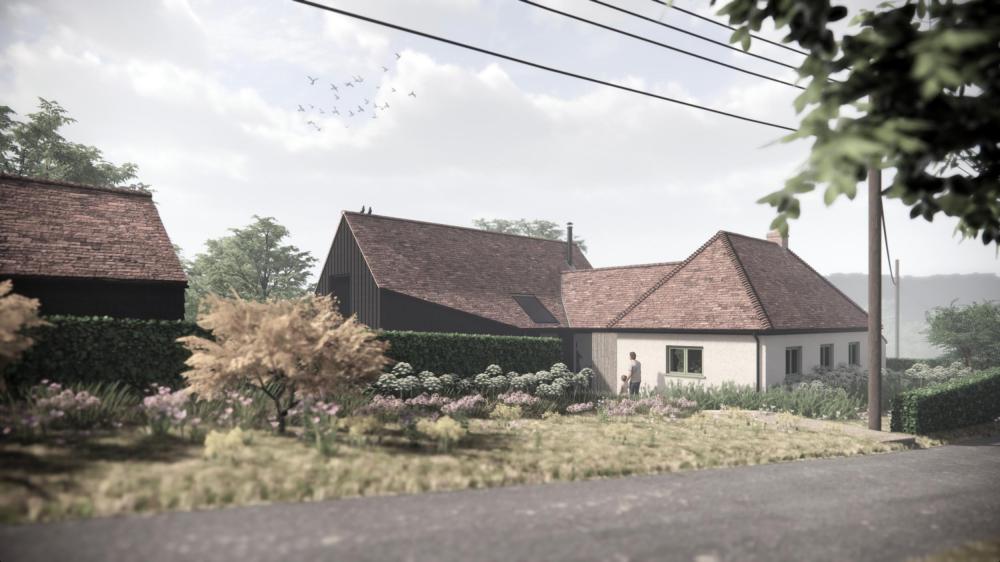
Hi all, I've been meaning to say hello for a while - hoping I could share some more detailed info of the project we're just embarking on! I'm an architect and have finally got into a position to undertake a self-build. The project is an extension and renovation of an 1860's cottage which is rather small at present. We will be going from 55sqm to circa 135. First phase is the extension and we are adopting PH principals (airtight, triple glazing, reasonably well insulated, MVHR) - phase 2 will be the refurb of the existing cottage element later down the line (over insulating, new windows, doors etc). I'm enjoying the chat and info here already. Through the job we're generally presented companies and products via CPD and sales - it's nice to see and hear people recommending products from experience, likewise suppliers etc. I'll be managing and undertaking a lot of the build myself. Contracted works so far are groundworks and timber frame (stick build on site). For anyone on Instagram - https://www.instagram.com/crouch_bungalow/ I'll hopefully start a blog soon. Let's see how much time I have... Cheers. BP1 point
-
Had full house render in april 21, front and side of semi look fine but the back was done in full sun and dried too quick giving an awful finish Called the plasterer back to rectify but still looks botched. Is there anyway it could be given another coat and finished properly?1 point
-
1 point
-
1 point
-
As an rank amateur I'd use a levelling clip system next time without a doubt. @pocster used them recently on here for his walls and floor and it all came out lovely and straight and level.1 point
-
Down form near Plymouth, I nearly choked on my hob nob when I worked out it was £17 a ton delivered. A pile of 20T of stone is a site to see, especially when you know it has to be shifted to behind a retaining wall.1 point
-
Just more contact with the floor Best way is to put a tile down that isn’t buttered Pull it up and see how much area of the tile is left clean of adhesive Most of the floor tiling we do is car showrooms and hotels A lot of heavy traffic1 point
-
Mine was one of the Kingspan badged Misubishi Lossnay units that was sold on ebay a few years ago when I think Kingspan abandoned that market. I only paid about £400 for it. I would have to look up what capacity it is. I have two 75mm ducts to each terminal and at normal speed it is inaudible. At boost speed, used when showering, it is a bit noisy and I would not want to have to run it at anything like that speed all the time. It performs very well, the air in the house is always fresh and heating bills are low so the heat recovery must be working.1 point
-
1 point
-
Perhaps a different character of area? We are totally ex-mining, but I think green improvements may be starting to be recognised - and plenty of new housing has been built over the last 15 years, which must help. Here we have hundreds of acres of country parks nearly right round the town now.1 point
-
1 point
-
What board ..? Insulation ..? 20mm is ok as long as it’s compacted and levelled and not just chucked down.1 point
-
Maybe someone else would like to chip in but 20mm is probably okay. Google search for "maximum thickness sand blinding layer"1 point
-
probably fine, maybe erring on a bit to thick. Split the difference?1 point
-
This is your issue. Our stone baths were 180kg each. The temp MDF stairs were held up with 4 screws at the head. I ended up using a genie lift to get them to first floor level and even that was a bit heart stopping at times.1 point
-
I will make ( apologies @joe90 ) a crane out the back for this type of thing . An eBay winch can do 150kg ; used it to get a shower tray in - so will reuse ; eventually…1 point
-
Always write to the planner to correct any errors in objections. Do it asap to give them time to consider, and it even saves them the time of reporting on any discounted arguments. so planner will be happy to get it...esp if your message states the point, and the proof of why it is wrong. keep it polite and professional, esp factual. eg here is our proposal plan and we have shown the boundary on it, and here is copy of deeds showing same boundary.1 point
-
Either a sand blind or possibly some 25mm EPS would protect the DPM. Could fit some perimeter insulation (blue roll) to protect it if the walls are very rough. How much height do you have and what floor coverings do you need to allow for?1 point
-
Says who..?? Sand blinding over the concrete then build an insulation upstand.1 point
-
This place has a public price list https://ampair.co.uk/wp-content/uploads/2020/06/AMP-AQUAREA-PRICE-LIST-20-FINAL.pdf (page 31). Good luck actually sourcing one. Learn from my mistakes: 1/ size the FCU(s) appropriately to use the full capacity of your chosen ASHP without causing it to short cycle. I went for a PAW-FC-D15-1 which is way too small for a 8.5kW ecodan. 2/ pay attention to the "water pressure drop" figure. I really have little idea what this is for, but if you intend to have >1 FCU (or add more in future of different sizes) I believe matching them all with same/similar water pressure drop figures will make balancing the system much easier. (Else, perhaps one could use a manifold with salus autobalancing actuators or similar to manage water flow through them, but that's yet more complexity. - again the PAW-FC-D15-1 I have is very low water pressure drop compared to any other, so I would have to bear this in mind if adding more (or, throw out my current one and start over) - aside: why would water pressure drop vary depending on fan speed? Something odd going on in the thermodynamics I don't understand there. 3/ installing a large buffer tank would also help match smaller FCU(s) to a larger ASHP1 point
-
1 point
-
But what is the point of designing what the architect wants if it is so far off what the client wants. It should be a 2 way interactive process perhaps with a day spent together drawing sketches and agreeing a compromise between what the client wants and what the architect thinks is possible, then go and detail it to that agreed compromise. To just design something completely different without even discussing it is just wrong. This has nothing to do with 7 years training, it is just bad business practice. I am an electrician, I try to fit what the customer wants, if there is something about what the customer wants that makes it particularly difficult I will discuss alternatives with them and agree between us what I am going to do. It would be equally wrong of me to put all the lights and light switches in a different place without discussion because that is what I feel is best.1 point
-
1 point
-
Put a small 3 phase board in the kiosk leaving plenty of room for the supply head and meter. Power to builders is via one or more 16A commando sockets fed from 16A rcbo's in the board. These must be earthed to a local TT earth not suppliers earth. Supply to house can be single or 3 phase using appropriate size SWA and mcb. EV chargers can be fed direct from the board in the kiosk, earthing depends upon charger used. Sewage pump can also be fed from the board in the kiosk.1 point
-
1 point
-
1 point
-
Yes and short cycling is symptom of low demand where the HP cannot modulate down far enough to make only the heat that is required.1 point
-
If it’s not detailed who will be looking at the riser, no one will be taking responsibility. so best to ask the question now1 point
-
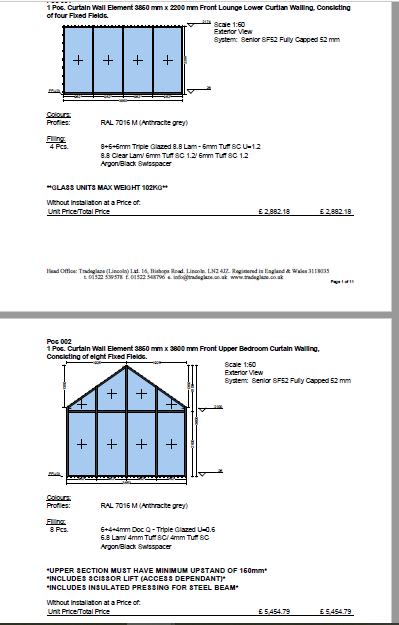
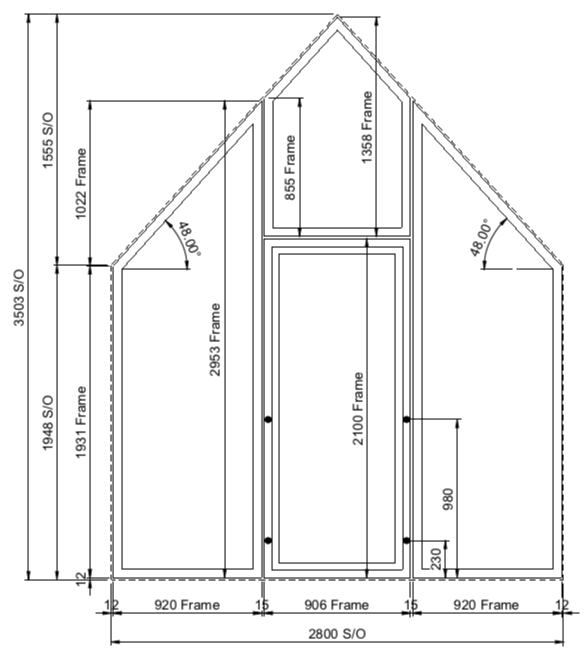
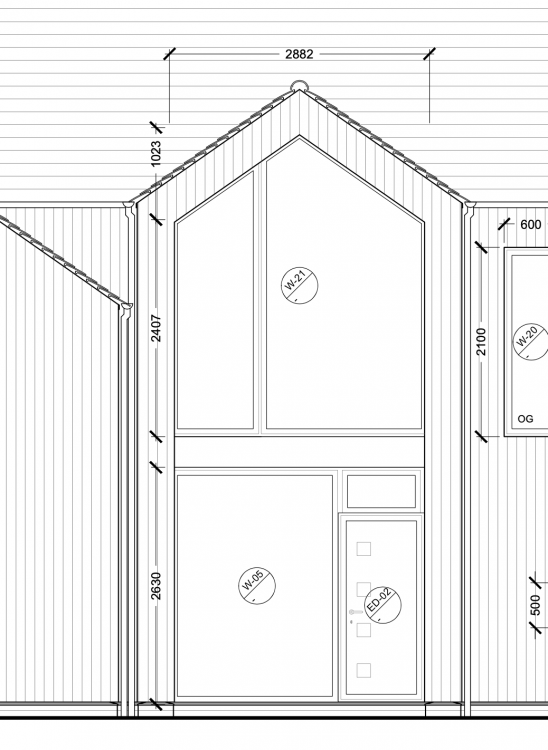
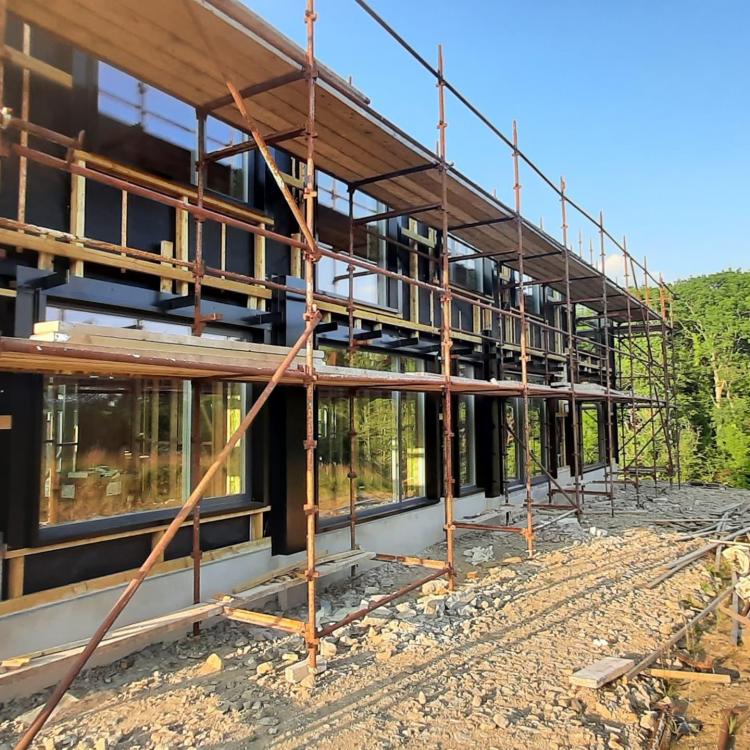
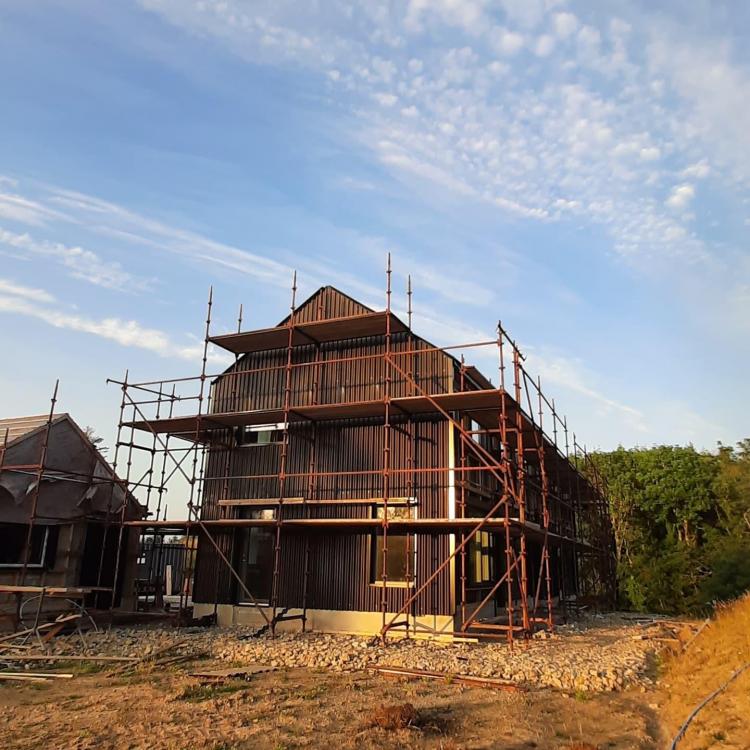
Hi Nick, I just had a look - There is a company in Ireland doing it. It's going to a bit of a pain to have fit it retrospectively - we had modeled lower gain glass but we started to run into problems with heating load going above pH levels. I guess if I wasn't going to stick to pH recommendations for glazing proportions then I should have been willing to accept the need to heat the house by a tiny bit more. With reduced solar gain in summer my cooling load would have reduced and the total energy use would have been similar. Oh well. I'll get brackets for brise-soleil fitted and I can decided next year if I need the canopy itself. The brackets are black against black cladding so shouldn't be seen even if no canopy fitted. Pic below of downstairs brackets1 point
-
Simple point. Building a new wall costs pretty much a fixed cost per linear metre of wall. So the more area you enclose per linear metre of wall, the lower the cost per square metre of extension. The right hand bit, where the new wall is, is very close to the existing wall (no scale on drawing though) So the wall costs as much but the cost per square metre of that small enclosed space is higher. Then add on knocking down that corner of the existing house, and the cost per square metre of that bit of the extension is a LOT higher and the build is a lot more complicated. And that's before you even think about how modify / extend the roof structure, for which we really need a photograph of the back of the house as it is now.1 point
-
Some species of bamboo can grow 4m - 5m high. You can plant them within thick and deep plastic containers that you almost entirely conceal within the ground, with just a couple of inches of the container sticking above the ground (which you can camouflage by choosing the container to be black or dark green). In this way, you control the bamboo's spread. My parents did this and it has worked fairly well, but you really need rather large and deep containers.1 point
-
are these a problem for roots?, I have heard of clay drains being a problem because the roots can enter the joints but cable and water pipes would think ok!!! ?1 point
-
They only one I read is Passive House+ magazine: https://passivehouseplus.co.uk. When they review a house, they give a list at the end of all the suppliers, which is useful.1 point
-
0 points
-
0 points
-
We have Mick George up here trying to drive the competition into oblivion. And it is unfortunately slowly working - short term gains and long term pain I suspect. As for MG - you pay for 20T of stone and get 19 (never had a credit note) that he digs out of his own quarry and ships in his own trucks that occasionally demolish parts of your building - what's not to love.... 20 lines for orders 0 for any comeback!0 points

.jpg.c21f3ac78c9b7efd90cbdcb312744dc5.thumb.jpg.7adcad4c0e384f5ecd7d56b0618df6e5.jpg)

