Leaderboard
Popular Content
Showing content with the highest reputation on 04/27/21 in all areas
-
Tiles don’t come out of the boxes perfect either, unless you’ve spent a few extra quid on rectified edge porcelain, and then they’re not always completely perfect / flat on all 4 corners. Asking a tiler to do half bond ( staggered joins ) like you’ve done creates a pita of a job tbh so put the micro detailing to one side and tell him you’re happy with the job. Explain fully to him that you expect him to go above and beyond in the house, eg so he has a fair opportunity to stop and survey the other areas, and ask him to make recommendations for any areas which need self levelling, prior to tiling, so he has no come backs if he’s not maintained standards. Tiles are not supposed to end up like a single sheet of glass, they’re tiles. Imperfect, irregular, and lots of them.3 points
-
2 points
-
That's been my motto too, although I did get some friends over to intall my 200kg and 300kg 1st floor windows. You're actually not too far from me. I've got two hoists, one electric, one chain knocking around. Let me know if you want a hand and when and I'll see if I can make it over. I'm sure we could figure something out. My main problem throughout the whole of my build has been how to get things up inaccessible banking!2 points
-
Having finished mine off recently, I would definitely: 22mm hot and cold manifold. Isolated feed to all outlets from there - I went 22mm to 1 shower and bath and 15mm to everything else but that was cos I didn't have 10mm, probably makes sense to where flow not needed. Armaflex lagged everything - I used the self-sealing split stuff, really good but does need taping too where you go round corners. Probably overkill and took ages but hey, it's done now Continuous runs of Hep2O from manifold to outlet (or very close) - no way I would do anything different or use any other pipe. Absolute no brainer I feel here. Long 28mm runs to/from ASHP - due to circumstances these were needed but hell to work with, definitely design out if possible in future... Think that's the main bits from my recent adventures in plumbing.2 points
-
I have used 10mm to basins hot and cold and the water supply is more than sufficient and the hot water is there in seconds and little losses etc . 15mm to showers, bath and kitchen sink. I only lagged 22mm DHW tank to manifold (regs are 1m I believe). I would not change anything if I did it again.2 points
-
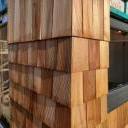
Hi there all. Long time lurker here so thought it was about time to sign up and participate. Based in Leicester. No building background, but I have just about finished a garden office (screw foundation, timber frame, 80mm PIR insulation, UPVC window and door, EPDM roof, cedar shingles) where the only thing I paid someone else to do was the electrics. Because, you know, the law. Now hoping to self build a timber frame kitchen extension. Terrifying, but I know I can count on you lot for some sage advice. Thanks all!1 point
-
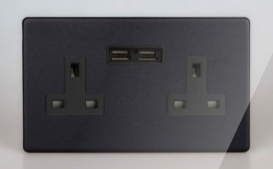
I'm considering installing these as our main sockets: They are made by varilight, so I'm hoping the quality is okay. But is the absence of on/off switches an issue, whether from a Buildings Regs or safety point of view? The only place where I think it would be safer to have a switch might be where we plug in kitchen appliances like blender, toaster, food processor... just in case there's an accident/fire one can switch it off. Although in those circumstances presumably one could just pull the plug out from the socket almost as quickly. Maybe @ProDave or one of the other electrically gifted members can weigh in on this...1 point
-
That is the cases with most companies, and cholorination is a pain in the arse which takes 3 days of site visits for the cholorination team and then a set samples sent of to a certified lab which takes 3 or 4 days to come back before you can connect, some will also ask for pressure testing !!!!! 32mm is plenty for a single house 100m of the main.1 point
-
From main to house is 130m for me, and we've run that in 32mm and have good pressure. IIRC 32mm is as large as you can go before you need run some disinfection process (possibly with water samples sent off??) before the connection is permitted. That helped make my decision!1 point
-
Well here the "main" that serves 12 houses is 50mm and WELL over 100m long, so i would say 50mm for one house is over size.1 point
-
A really good devise for lowering stuff is a “clogg” or “figure 8, it’s an abseiling devise that acts like a brake, let’s you lower yourself or a heavy weight with ease, just need a bar or something from that wall over to your walkway.1 point
-
1 point
-
Really depends on what these sections are, I would guess ? two long “strings” and bolt on steps!!!, @pocster can you not ask your supplier what these sections are and individual weights1 point
-
1 point
-
1 point
-
1 point
-
yes, friends and customers have an old well established plant hire company, also sells small tools etc and they have had their best year since they started1 point
-
When we enquired and explained we were self builders, they said they'd happily open an account. In the end we've gone with a local company as they are well priced, fully supply and fit and have personal recommendations.1 point
-
1 point
-
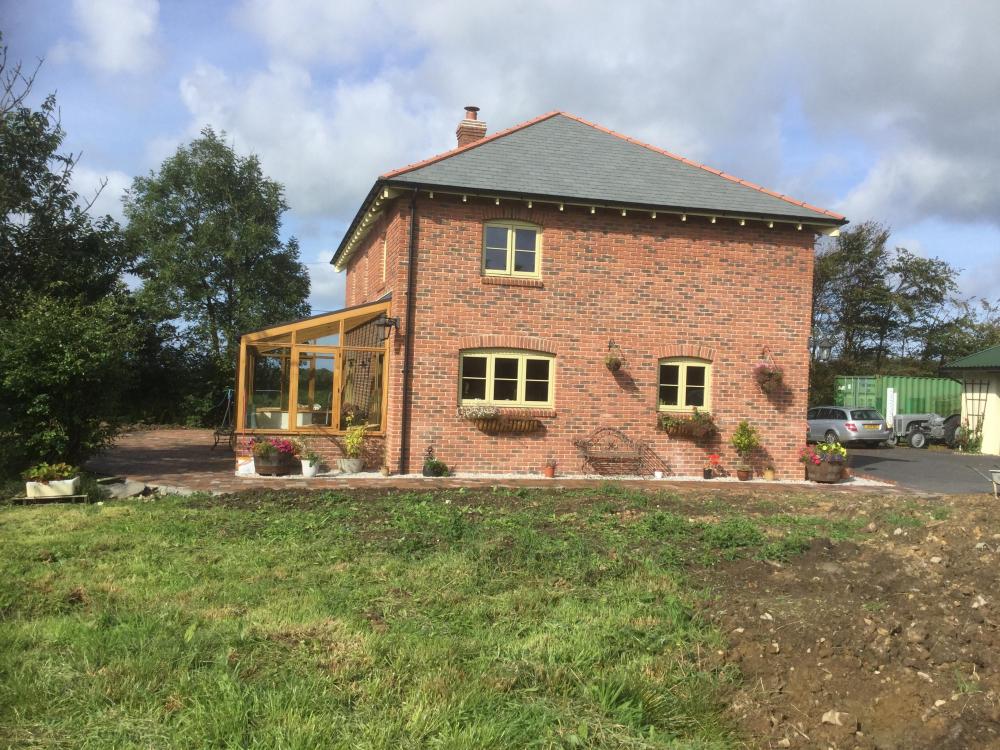
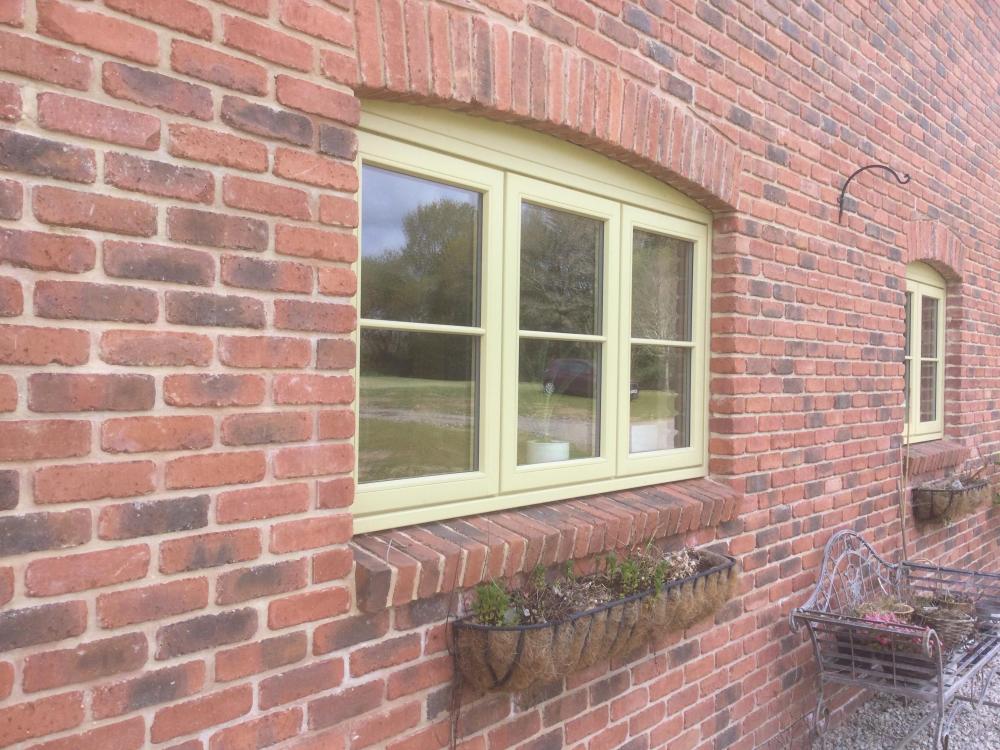
We have “antique” bricks (tumbled so the corners are knocked off), we had mixed sand and lime to replicate old lime Mortor and we think it looks really good. I specified brick cills and the colour of the windows was completely wrong ? we wanted “national trust olive green” but there is more than one shade. We chose RAL 1000 on the iPad (big mistake) windows arrived on site bright yellow and I had a fit!!! But now the house is complete we love it and everyone says how nice it is (too late to change it).1 point
-
So even though it's a closed spigot, I presume you can trim the end off and connected it up to JG coupler/bend/tee etc? I see what you mean about not being able to demount... think I'd stick in a coupler and a short section of pipe.1 point
-
15 to baths and showers, deffo, and 10mm hot and cold to basins is plenty. Most basin taps have flow restriction by design / regs, so pointless giving much more unless they’re very long, convoluted runs. Sinks ( kitchen and utility ) I’d typically do a much x 10mm hot feeds and 15mm cold feeds and attach the appliances to the 15mm colds that service the sinks. Topology affects this basic go-to plan of course and there is never a one-stop answer / solution. Introducing a HRC for long hot runs affects things further.1 point
-
1 point
-
Have you submitted your building regulations application ..? Have the council accepted the application and started the plan review ..? If so, the building regulations in place at the date of acceptance are those that refer to your build irrespective of how long it takes to complete.1 point
-
Looks fine Any leveling or straightening Has to be done prior to the tiles going down1 point
-
1 point
-
1 point
-
At this point not, I don't see a use requirement for myself. The Q350 increases flow rate when it detects increased humidity (it's enough to boil a pan in the kitchen). There's a Python module here: https://github.com/michaelarnauts/comfoconnect That could be used to integrate if you wanted to. The reason I want to use that (eventually!) is to pull the stats into InfluxDB rather than control it per se.1 point
-
Our study/home office has a cupboard and we chose to put the CU in there along with the telephone line, modem, DECT base station and the burglar alarm panel. The meter cupboard went on an outside wall of the study. We didn't want the meter cupboard to mess up the appearance of the front of the house and the above is around the side but still accessible, so if they do send a meter reader he can get access without us being home. The location of the CU around the side also made it easy for me to run a cable out to my shed 8n the back garden later.1 point
-
1 point
-
Have you tried Advanced Foundation Technology, and their Groundshield products? My experience with them is they turned the Drawings and Structural calcs around very quickly. The EPS sheets and preformed sections come from Derbyshire I believe. They'll install all over the UK as well as "supply only". If you supply your own ground workers and just have Olof onsite for the Install and pour (incl. UFH), costs are very competitive.1 point
-
Hi so sorry for the delay in responding - we went with Allan bothers in the end and are delighted with ours1 point
-
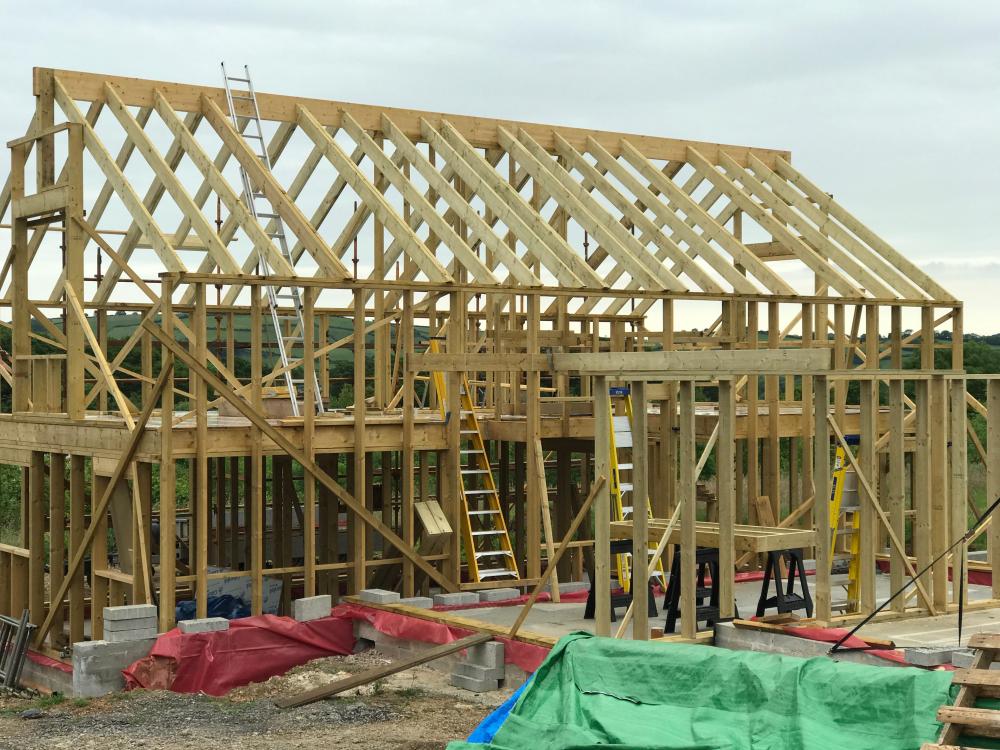
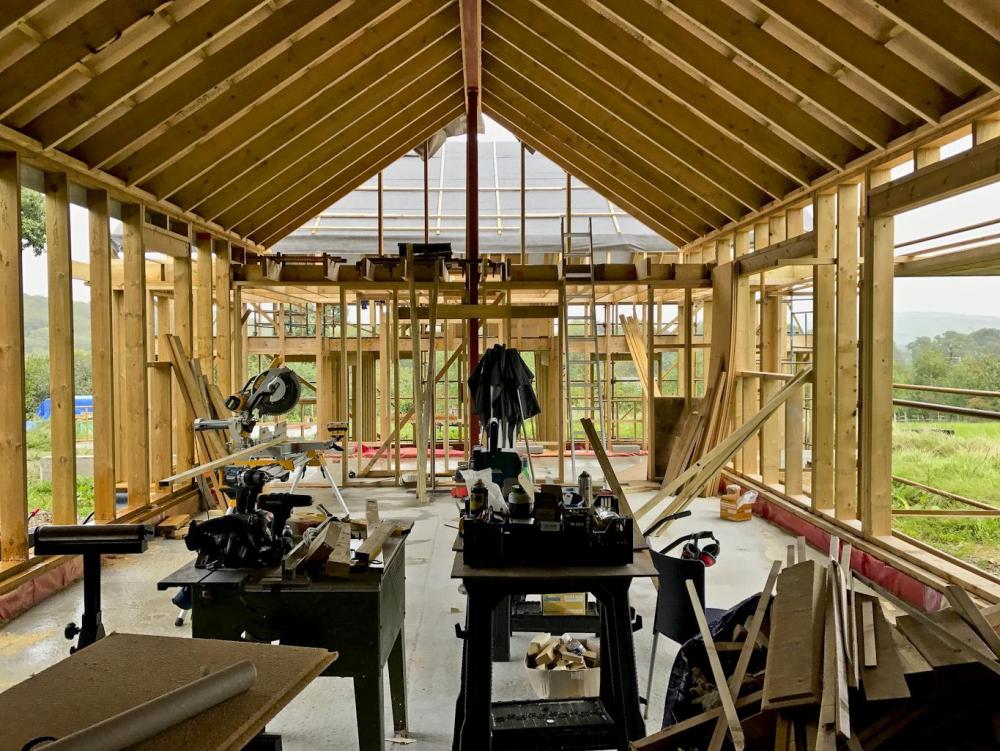
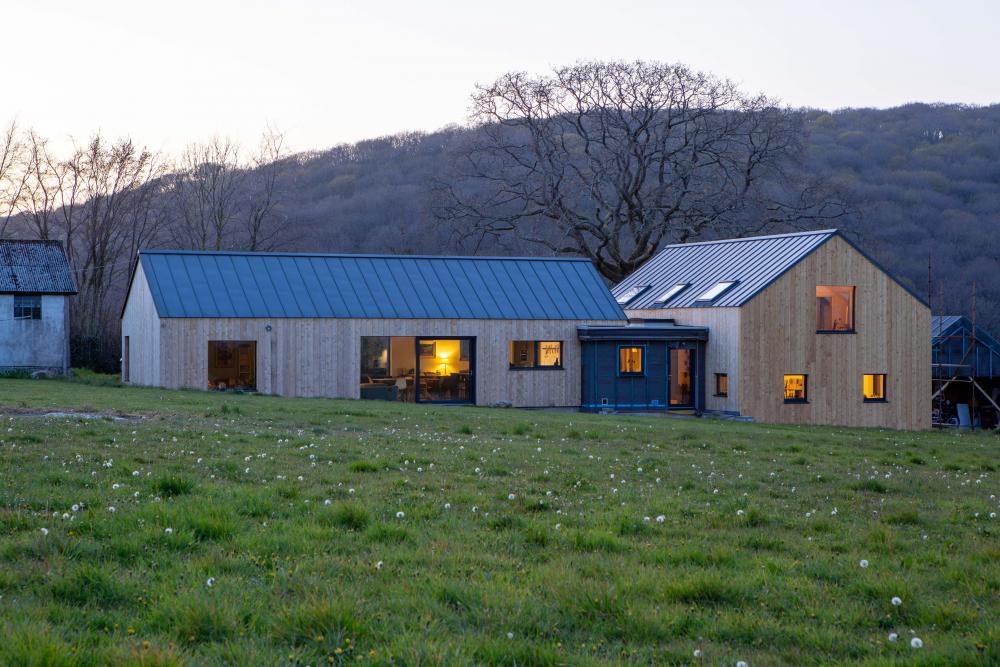
Over the last month we've spent our time removing bits from the barn that will either be returned, replaced or disposed of depending on there condition and the LPA requirements. This means that the yard is filling up so deliveries and other storage is now being put in the fields. That's okay with a very dry April, might be more tedious if we have a very wet spell. I removed the roof from the barns where there was a low ridge height, but that also included the insulation (lucky piggies), rafters, joists, wall plates, lintels (angle iron), gutters and fascia boards. This resulted in a number of bruises from hammers, crow bars and wood. All when they moved unexpectedly, luckily being a weak woman the crowbar was not much bigger than a pencil so only gave me a small bruise. If it had been one of the big ones I would possibly have ended up in A&E. I don't think I've ever seen so many nails. Being rural we've been able to burn wormy wood and the rest I have chopped up for the wood store, the insulation has been stacked along with the roof sheets ready for the future workshops and garages. Once hubby has a dry and insulated workshop he will never come in the house ? I'm also very glad of my work factory boots with steel toecaps with the number of times I've dropped things. It certainly looks very different now, lovely and light. We have left the shed at the end intact as we are going to use if for secure storage and tea room for as long as possible. Ultimately that will be our utility / plant room so we won't do anything until we have to. The back of the barn had an overhang which has been removed, this was pretty low so although it was included in the dwelling dimensions we decided not to bother as we were not allow to increase the ridge height enough to make it useful. This is where all the drainage is going to go, the internal walls have been set up to fit with the current window openings, not always central in the room, but good enough and easy and meets the LPA requirements. We do need to create one more window opening for the family bathroom. This back wall is to go up 1 block to allow for lintels, although the first window is quite small so the lintel is only the thickness of a brick so it will be pushed up so that the top of the window is as high as possible. This side of the barn is the south side, unfortunately, as it faces a 45 degree 12' bank then the end of our land so it doesn't have an exciting view. I'm planning on gabions, but at 24m long the cost might be prohibitive for now, a future project. In the meantime I'm clearing the bank of weeds, dead trees, shrubs, rubble and a number of tennis balls lost there over the years. Hubby has been working on the L part of the barn which had a cement fibre roof, which possibly contained a small amount of asbestos, and a metal frame. The roof sheets are now cleared, double wrapped and stacked ready for the company to collect. The metal frame had to be cut up in situ as it was fixed so firmly, but that is now down, cut up and gradually going to the tip. It is much easier to destroy things with crow bars, saws and grinders, when we rebuild we shall have to be much more careful. During May our plan is to start work on rebuilding the external of the ensuite / wardrobe room. We will level the existing blocks, then add another block to the top as well as the window lintel. As we won't be replacing the roof for a while we will leave the wall flat until we can measure the new pitch accurately. The unwanted internal wall will be removed and the floor dug out. This will be done in 2 stages, firstly the floating floor to level with the rest of the barn floor then the lower floor. The floating floor is all we are doing at the moment as the whole barn floor needs to be dug down to install insulation and UFH and we will do that dig out in one stage when we are ready. We will then follow the same process with each 'room' on the low side of the barn. How long this will take really depends on all the other demands on our time. Once this side is done and all unwanted walls knocked down then we will start on the other side and follow the process all over again. So far progress has been pretty obvious, and as we have a nearby footpath we have provided lockdown entertainment for many of the locals who like to question us and comment on what we are doing. Since last week and less restrictions the number of people has reduced by 90%, something that I'm pretty glad about. I've had problems with images today so I've just added them all together. I'm still chasing for Building Regulation drawings, something that will soon become more urgent. Thanks for looking and feel free to ask questions. Jill1 point
-
Check the drains outside, my builder had a callback on a house he built last year with a similar problem and it was found to be half a housebrick in a 6 inch drain some 50m from the house. He thought with his plumber it was a faulty AAV but after much head scratching and a cctv survey found the above.1 point
-
1 point
-
The phrase "patented" when used by a UK-based company does not mean "there were patents, but they were in other countries, were in the names of another entity, and lapsed over 10 years ago". Patents are by definition public documents, and anyone saying they have a patent while refusing to give details is either lying or woefully ignorant about what having a patent actually means.1 point
-
You're better off using a pre-insulated twin duct. I used Rehau Rauvitherm twin 32 dia pre-insulated. Plus a duct for power to ASHP and another for data/comms1 point
-
When I was researching into how to install MVHR around eight or nine years ago I made a list of rules I found relating to connecting the unit to the outside. I'm sure these are not exhaustive and nor are they prescriptive, but it's what I used to install mine. 1. The inlet and outlet grilles should be 3m apart to prevent cross contamination of air. 3m was the distance I found mentioned most often. 2. The inlet and outlet grilles should be high enough (2m) to prevent interference by animals or children. 3. The inlet and outlet grilles should be on the same wall so they are affected equally by the wind. 4. The free flow area of the grill including insect screen should be at least as great as the cross sectional area of the duct. 5. The duct should be smooth wall to reduce air flow restriction. 6. Any ducting bends should be large radius of curvature or two 45 degree bends to reduce air flow restriction. 7. The ducting should slope downwards slightly to ensure any moisture drains to the outside.1 point
-
68mm , 900m they still connected me to at the main with a 32mm join . pressure is just right. 50mm would of been fine as well tbh0 points
-
0 points
-
0 points
-
I am known for not abiding by health and safety regs but I would want at least one another person with me (if only to dial 999 for an ambulance).0 points
-
That’s about 14stone each, a well built bloke, (but stiff), should not be a problem for 2 or three persons. Sorry I am busy that day/weekend/date!0 points
-
@pocster I will pray for you and your stairs. When you achieve this feat, do update us on your success story as I'd love to know what you end up doing. I have a 140kg stone resin bath coming next month and no idea how the builder will get it from the kerbside delivery point to the first floor bathroom.0 points
-
0 points
-
0 points
-
Fill the void with EPS, place steps on top and then pour acetone on EPS to dissolve it and let the steps down that way.0 points
-
Flood the basement until it’s at the level of the lip and float everything on a raft. Then pump out the water and hey presto the equipment is now at lower ground level ....0 points
-
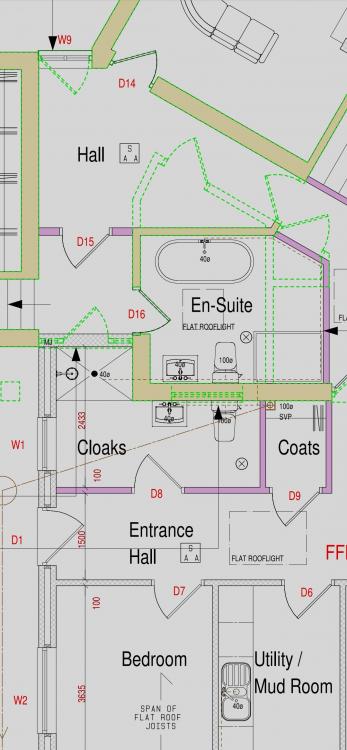
After the same issue last night I've just plunged the shower with the plunger @newhome recommended. Plot thickens ... Best way of me describing is by highlighting the plans with the areas. In the ensuite where the bath is, is where our shower is as we switched them round. When I plunge the shower the toilet in the cloaks makes a gurgling sound and water rises and falls so what I'm doing in the shower in the ensuite has some impact on the toilet in the cloaks! The toilet and sink in the vanity unit in the ensuite - the same room as the shower is not impacted at all strangely.0 points









.jpg.c21f3ac78c9b7efd90cbdcb312744dc5.thumb.jpg.7adcad4c0e384f5ecd7d56b0618df6e5.jpg)


