
Leaderboard


Popular Content
Showing content with the highest reputation on 11/27/19 in all areas
-
That doesn't surprise me. Self-build for me was as much about learning new stuff as it was about building a house. It was an interesting challenge, and one that paid off in terms of the performance of the end product. The fact that we saved many, many thousands of pounds in fees was really a bonus. Others may have a different view, and just want to pay several people lots of money to do all this stuff, which is fine, but the chances are they may then spend more money on the build than the house will be worth.2 points
-
No you should be absolutely fine Back before all these design programs Your joiners title would have been Forman Sort deliveries out coordinate trades 20 years ago most large sites where run by a former Brickie or joiner2 points
-
Actually it didn't pour and it was really great weather on Monday for the main slab pour which was a real help for the guys. They poured the 300mm thick slab - all 79m3 of it - all in one go, so it was a long day and the kicker took a lot of time as it was levelled with a trowel. It caused a few traffic problems when the first lorry was a long 8 wheeler and blocked the road, but after that 6 wheelers meant that cars could get past. As it is waterproof concrete and is covered by a 20 year warranty the waterproof guys had one person in the concrete plant mixing in the chemicals (dont ask - certainly not green in any way), and a second person on site monitoring the pour and checking it went in OK. As it turned out - perfect! Our contractors on site worked really hard and kept up with the deliveries and apart from not getting a break until 2:00pm (we brought them well deserved doughnuts!) it was all done and tamped down by about 4:00pm. They were able to walk on it the next morning and then proceeded to remove all the shuttering and timber formwork and started to build the shuttering for the walls that will get filled with yet more steel and more concrete. We can really start to see it taking shape and get a sense of the height of the walls. Also there is a really good solid base to work from and with the pump running the water is much more manageable. In the picture where they are pouring the last of the concrete you can see all the water that was on the membrane floats and gets pushed to the last corner where they have to bail it out so the concrete doesn't get too wet. The upside of doing a pour like this is, oddly enough, the cold and wet; doing it in the summer heat and dry means the concrete can go off really quickly and be difficult to work quickly enough. There was some mud on the road as a result but in comparison with the local farmer cutting his maize its nothing - the rest of the road by his fields is a real mess, and I dont think he has any intention of clearing it up like we will. So just some pics this time as the camera batteries had a funny five minutes and we failed to catch the epic pour on video - we joked that we might ask them to do it again - they said if we paid for more concrete - so photos it is!1 point
-
Dunno anything about blockwork but I've been pretty happy with my IM360. Not used any other type of nail gun for comparison, mind you. It's advertised as being able to drive 90mm ring nails where most others can only manage 75mm ring or 90mm smooth. It does comfortably when it's just OSB or whitewood but they need tapping in the last few mm when there's a significant amount of ply involved.1 point
-
Digging around live pipes can be a very steep curve. ?1 point
-
The chance of getting that stop bead in accurate enough to get a decent square door is zero and how do you neatly fit it around the top of the door. These sorts of details are always much harder to build than to draw and more often than not end up with the plaster cracking around the door any way and looking bad. I have used a shadow gap detail in this sort of situation dozens of times in commercial jobs. Use the detail above but with a qic trim d12. Job done. Also use a 3d adjustable hinge as you will make life even harder with a soss hinge.1 point
-
If it’s 3-4 days to get the insulation in 3-5 days for the steel 2 days for the ufh i would get everything on site do you ground preparation and then be very ready to start again on the 2nd jan, by the 20th you will be ready to pour, no point having a spoilt Christmas rushing around with a pump that has broken and trying to find a hire shop that is open. Now im very gung ho, but it would be a shame to spoil everything over a 3 week delay.1 point
-
You normally board the ceiling first, easier to cut walls neatly to ceiling, awkward to cut ceiling neatly to walls. Unless your having coving then you can leave a right ol mess as the coving covers it all.1 point
-
Have you seen the MATT RISINGER videos on YouTube, lots of hidden door details.1 point
-
BC have not mentioned that here. They passed our plans with a stove without comment. Our stove is room sealed. The room (kitchen / diner aka family room) has both mvhr in and out (one at each end) and having just balanced it recently I made sure the inlet and outlet flow rates in that room are the same so there is no net flow into or out of that room. If you open the stove when burning no smoke appears to spill out, so I guess that is a pass for the spillage test then.1 point
-
Here are the filaments I've tried.. ZIRO Fluo orange PLA (nice bright orange) had two reels. https://www.amazon.co.uk/gp/product/B075M47QR8/ref=ppx_yo_dt_b_asin_title_o06_s00?ie=UTF8&psc=1 SUNLU Black PLA+ (The "+" means its a modified PLA, not sure if there is any advantage though) https://www.amazon.co.uk/gp/product/B073PB9XWY/ref=ppx_yo_dt_b_asin_title_o03_s00?ie=UTF8&psc=1 AMZ3D White PETG https://www.amazon.co.uk/gp/product/B072JCPJRJ/ref=ppx_yo_dt_b_asin_title_o00_s00?ie=UTF8&psc=1 Rigid Ink Black PETG https://www.amazon.co.uk/gp/product/B0164CNSAQ/ref=ppx_yo_dt_b_asin_title_o02_s00?ie=UTF8&th=1 All of the above have worked ok for me. Not always first time. I've had to experiment with the setting many many times. I keep a notebook and try to write down settings that work. I've also tried these filled filaments. The results were interesting but I cant say they were stunning. Perhaps more work needed on my part. Haven't purchased a full reel yet. Formfutura Bronze filled PLA (sample only) https://www.amazon.co.uk/gp/product/B01IBMXNWU/ref=ppx_yo_dt_b_asin_title_o07_s00?ie=UTF8&psc=1 Proto-Pasta Magnetic Iron filled PLA (sample only) https://shop.3dfilaprint.com/proto-pasta-magnetic-iron-175mm-samples-1495-p.asp?_=&variantid=1500 Have previously posted some photos of prints from the above. It can be tricky getting some filaments to stick to the bed and not move about which wrecks the print. You can adjust the bed temperature, head gap, print speed, height at which fan turns on etc etc. I've tried various internet tricks and covering the glass bed with this blue tape seems to help. https://www.screwfix.com/p/scotchblue-masking-tape-41m-x-50mm/8177x?ds_kid=39700029430360586&ds_rl=1249416&ds_rl=1241690&ds_rl=1245250&ds_kid=39700029430360586&ds_rl=1245250&ds_rl=1249475&gclid=Cj0KCQiA2vjuBRCqARIsAJL5a-JIJ9YCmdON9oqo72yvwGl6Ur3ghanoUmDMhNggR0QWQYN8UhxvbM8aAuINEALw_wcB&gclsrc=aw.ds I have also used the "Pritstick method". Also works but takes longer than tape.1 point
-
I managed to download it for 99p and have skim read it. Brief review is that I didn't find much in there that was of use / help to me. Very high level, wishy washy concepts (you need a 'superstar project manager') but not that much around practical techniques, detailing etc. It does read a bit like an advert for why you should have an 'independent energy assessor' involved in every single aspect of the project. The mesh energy hierarch is an inverted pyramid of where you should focus attention / budget. Location (orientation), fabric, airtightness, renewables, appliances, usage in a nutshell (the first being the greatest). I couldn't fathom how this was a mesh, but knowing it's the name of the author's company, it now makes sense.1 point
-
Ive had several different makes via Amazon. Mainly because there are usually at least a few reviews. Will try and post a list of what I've used when I get home.1 point
-
Nearly ?, about 1kWh/m2/year less will leak out of the heated space but allowing for the inefficiency of the boiler you will probably use (about) 1.25kWh less of gas per meter squared per year of wall area.1 point
-
Hi @andyscotland make sure insurance is mentioned in the contract drawn up by the architect.1 point
-
The arrangement is normal. Worth making sure that all the subbies have insurances if you are worried on that score.1 point
-
Very soon after the frame goes up, before any first fix work.1 point
-
That’s how I used to work, I subbed out to other trades (that I trusted) but project managed and acted as main contractor. Ask him to provide references from previous customers, go see other customers to ask about their experience. Also read the contract the architect draws up.1 point
-
I'm not sure if that's a typo or a misunderstanding: 0.032 W/m·K is better than 0.036 W/m·K as less conductivity (greater resistivity) is what you want.1 point
-
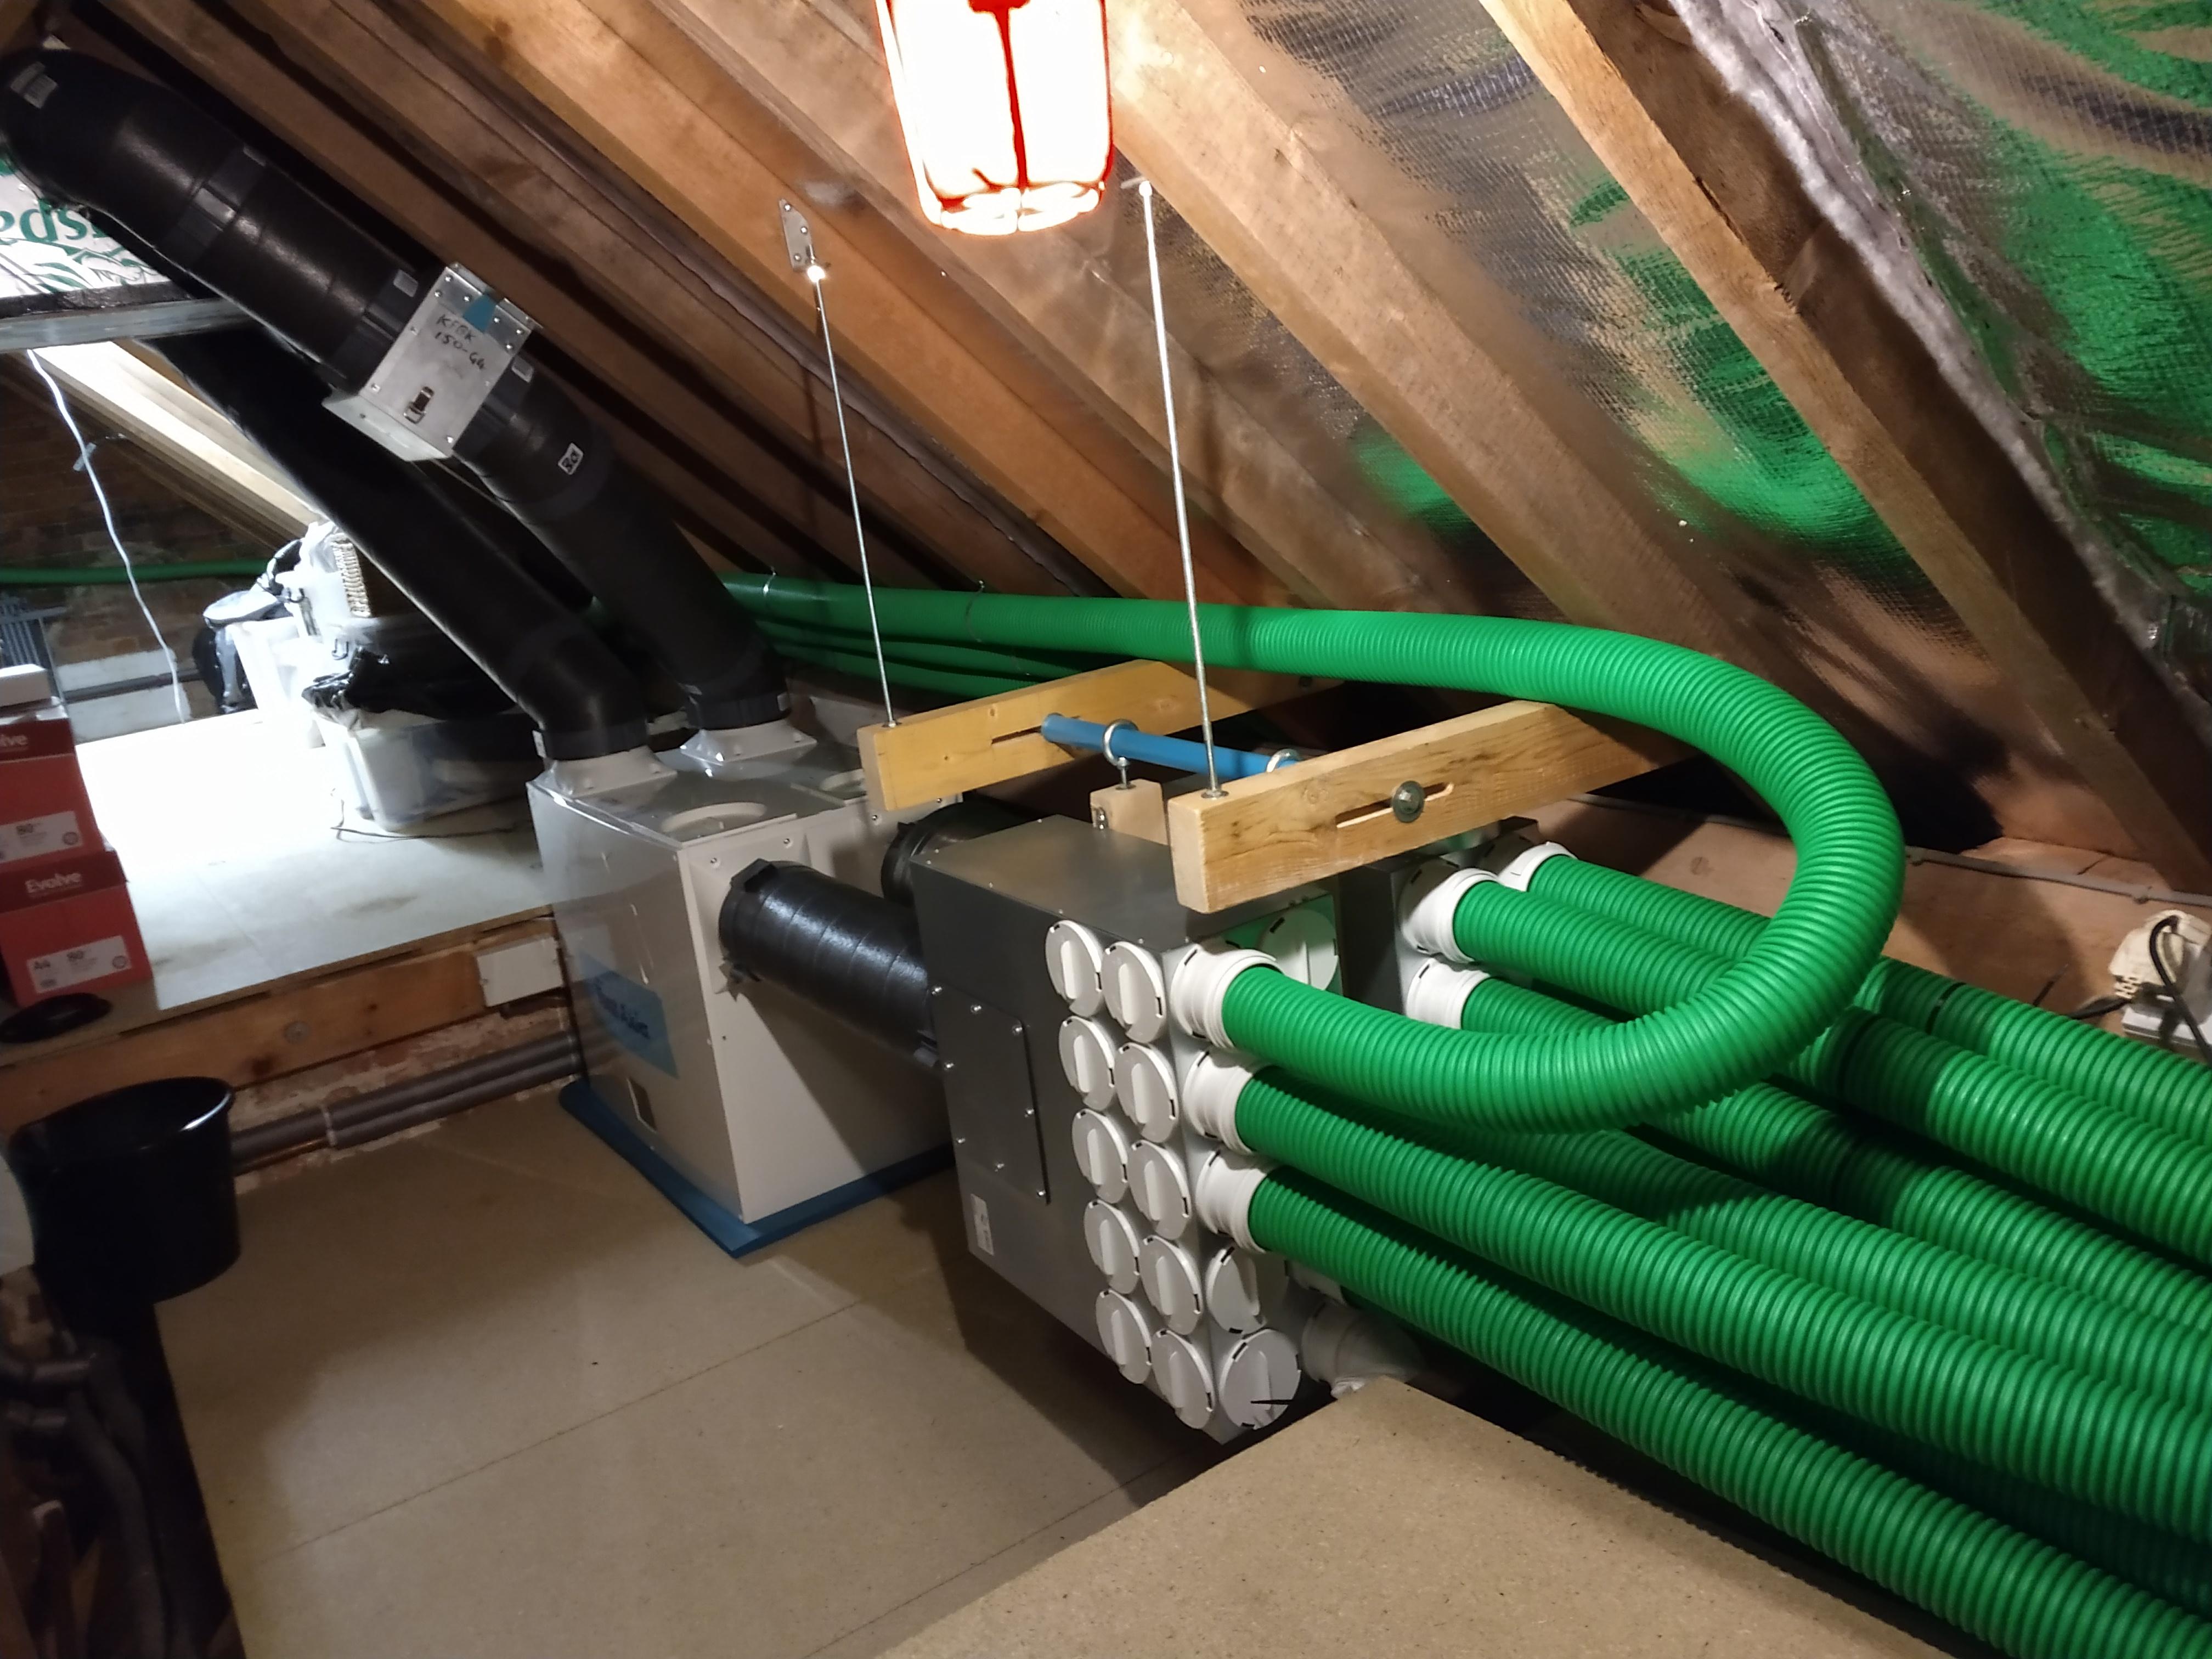
Excellent, that's the neatest installation I've seen.1 point
-
As Sensus suggests, you might like to think about the log burner. You might be able to put one in a closed loop ventilation system, perhaps?1 point
-
Window cills .old granite worktop .and oak fire door. And oak for the doors and door frames.and honey and hive parts1 point
-
This quite common But first of all you need to realise what ever he calls this arrangement he’s not a main contractor He’s project managing the job for Indeed a main contractor would be responsible for trade rates and poor workmen ship Under this arrangement with him being paid a wage you would have to chase individual trades for any problems that crop up at a later date But in saying that I’ve seen this work on many small jobs1 point
-
My son's mate's Dad does this as a bit more than the hobby from which it grew. He has his own hives plus others that he sites on sympathetic owners land locally. He then manages the hives. Makes for some interesting flavours if say the hive is sited in an apple orchard when that's the predominant flavour. Just over a fiver for a jar too. He sells to local delis, garden centres etc.1 point
-
Celotex say 120-150 kPa in here depending on version. https://www.just-insulation.com/downloads/celotex-rigid-insulation/celotex-certification/bba-certificate-flooring-14-nov.pdf1 point
-
I was short of a couple of sheets of eps 100 for our slab & couldn’t get any locally so I called the SE, he was happy with PIR, but it had to be covered so the concrete didn’t attack the foil.1 point
-
Nick, Thanks for this, all very helpful. I've done a bit of work on the boiler anyway, so am *fairly* confident. I've had the DHW Heat Exchanger out a couple of times (once to clean it and once to replace it), I'll take a look at this over the weekend. ?1 point
-
Our main kitchen and living area is basically the same size (but 5m wide at kitchen end) Would like it a little wider but we can make it work. The key is management of foot traffic in the space... We've positioned doors so there is no through traffic at the far end where sofa, TV etc will be. That dining space will be one of the most trafficked areas in the house... They'll most likely have to have a small dining table that's pushed in against the wall 90% of the time. I'd be tempted to put kitchen in the middle, and dining where kitchen was. But all depends on how they using dining space.... I find most people don't use big dining areas anyway.1 point
-
Take the slider off the pole then add a couple of layers of insulation tape to the face of the clamp block and then refit it. It will take up the space between the pole and the clamp.1 point
-
We do a a few months longer, as foundation will only be going in early March, but yes similair situation. I was committed to the idea of Sunamp initially, but M&E guy talked me out of it, and the lack of tested LT monoblocs didn't help, so our spec now contains UVC. If there is a PCM49 available prior to installation that i'd be very keen to switch to Sunamp though. My info was from conversation with Sunamp rep 7-10 days ago.1 point
-
I was going to suggest a cable tie or 2 Caravan fittings tend to be even cheaper and nastier than ordinary domestic fittings.1 point
-
Here's how I've done mine, semi-flexible silencer only on supply for now. I have space to do the same on extract at a later date if needs be.

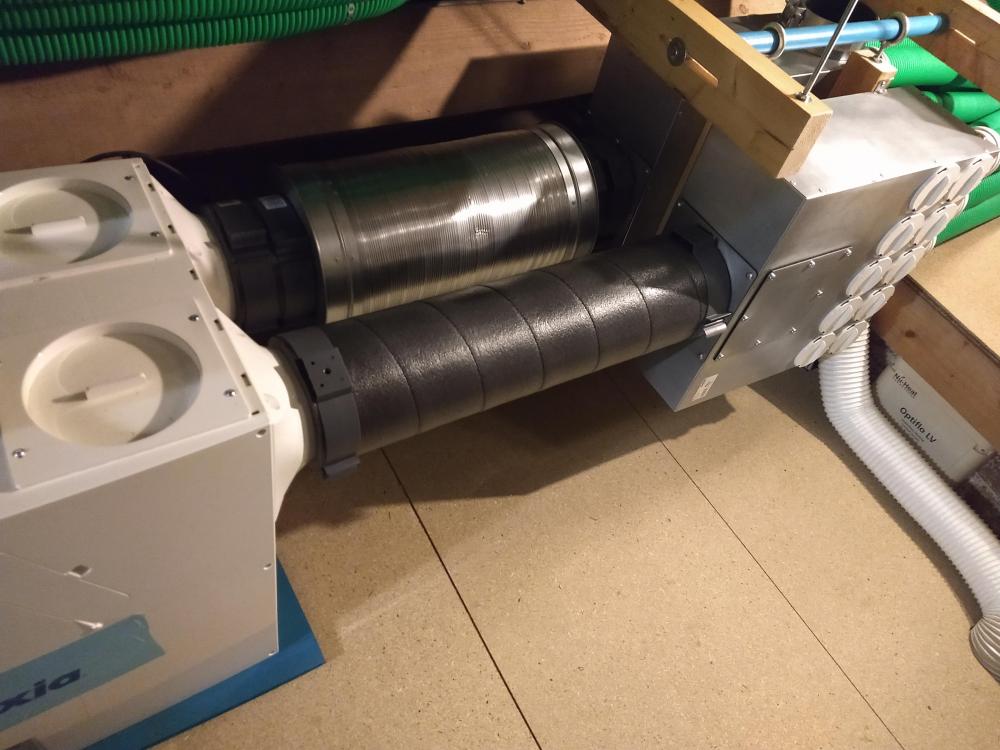 1 point
 -
Like I said before, I would throw it back to the utility. Say you installed the new connection EXACTLY to their drawing and ask them to explain how you shut off the water to replace your leaky stop tap. You cannot be the first to make that call to them.1 point
-
Then I would go with the squeeze tool. BUT first buy one of these https://www.ebay.co.uk/itm/atplas-boudary-water-meter-box-25mm-telesscopic-more-than-ono-07712477650/153732276868?hash=item23cb286284:g:gK0AAOSwq~BdzDYx Then dig a hole big enough to squeeze the pipe, cut it, and insert the boundary box before unsqueezing it. Then you will have the outside stop tap you crave. That's a 25mm MDPE push fit connector each side. Don't forget the inserts. I actually have three of these, one feeds my outside standpipe, one feeds the static caravan and one feeds the house. Upstream of those at the plot boundary I have the very similar (different make) one supplied by Scottish Water. So I have two places outside I can shut off the water. To anyone reading this, if you also have a water company insane enough not to supply one of these as standard, then go and buy one and fit it before you get connected.1 point
-
Who ever makes your chosen roof tiles will have a vent tile to match. Put a 150mm to 100mm reducer on and then put your extract/ intake on. Attach with tape/cable ties.1 point
-
Self builders: 56 hours a week continuing unprofessional development.0 points
-
Kindle probably just figured someone so experienced and with such a busy practice wouldn't have time to read it anyway ?0 points
-
Oh god, my brain can only think of one thing at once, I’m still procrastinating about floor insulation. Wall covering will be something to over think about @AnonymousBosch next year.0 points


This leaderboard is set to London/GMT+01:00