
Leaderboard


Popular Content
Showing content with the highest reputation on 11/06/19 in all areas
-
Good news! I today obtained planning permission and so I am starting my build blog. Thanks to everyone on BuildHub for your help and support so far. I have already learnt so much from this forum, all the way from questions when I was viewing the plot and every stage since. And an especial thanks to all the Buidlhubers that I have had the pleasure to visit so far. You have all been warm and welcoming and your advice and inspiration has been invaluable. Thank you! Thank you! My plot is in Cambridge, quite central, near the banks of the river Cam, just behind a row of college boathouses. It is opposite an ancient common and in a Conservation Zone. It is a garden plot that constituted the end of the long garden of a large late Victorian villa. Access is from a narrow access road (not owned by anyone) which runs behind the the boathouses. The plot itself sits behind a mature horse chestnut tree, whose roots I must preserve. The plot is is about 300 m² and is in flood zone 2. The dwelling will be a modern bungalow, 2-bedrooms, near passive house, with a green roof and clad in buff brick slips. Here is the timeline until today: 10/3/18, first visited the plot, advertised in Rightmove as a house. 13/4/18, my offer to buy it was accepted. 24/4/18, I made my first visit to BuildHuber to start my long learning journey 29/4/18, visited my second Buildhuber 31/5/18, the plot already had planning approval but before buying it I started a process for a re-design with the seller 4/7/18, visited my third Buildhuber 26/7/18, visited my fourth Buildhuber (and watched her build, with five additional visits to date) 19/8/18, visited my fifth Buildhuber 6/9/18, I finalised price negotiations with the vendor 18/9/18, plot topographic survey 26/11/18, submitted for planning permission 17/12/18, completed on the purchase of the plot 7/1/19, planning application formally accepted by council 11/2/19, visited my sixth Buildhuber 26/2/19, consultations revealed I needed to redesign the pitched roof to be a flat green roof to meet SUDS requirements 12/3/19, met the tree officer with my arboriculturalist on site 30/3/19, taking advantage of a neighbouring development having the road open, I installed a temporary electricity supply to the plot 2/4/19, engineers supplied drainage calculations including green roof 6/6/19, vendor approved the revised design with flat roof (deed's required it) 20/6/19, visited my seventh Buildhuber 29/7/19, visited my eighth Buildhuber 23/8/19, visited my ninth Buildhuber 19/9/19, council advised that my application is scheduled for the 2 October planning meeting 24/9/9, council advise that my application was bumped to the 6 November planning meeting 6/11/19, planning application approved unanimously, with two councillors choosing to comment that they particularly liked the design. One objector spoke against. Next step: build a house …6 points
-
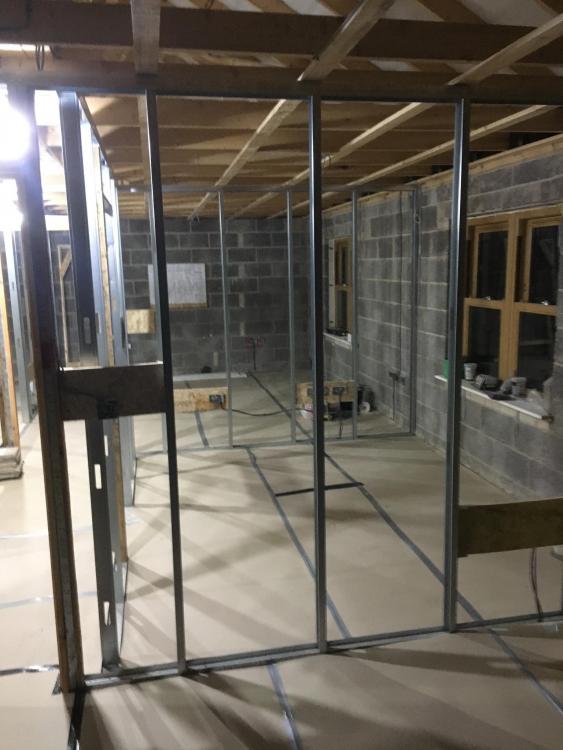
Right, I started on them tonight - well, finalised a plan, clearance after the insulation is 40mm - bought 47mm Appleby boxes, they have small holes all the way around them, I am going to rip or buy some 40mm battens, box will be secured to the stud on one side and a batten will be fixed to the other side which projects up/down to noggins etc. The boxes will be sat to sit proud of the stud @ProDave to force them being neatly cut. Good thing is I will be there and the guy doing it will take instruction - I am actually labouring with him as it's over the weekend. I suppose I will be on electrical cutout duty! I have pinged the laser around and marked my mounting heights at 400mm, 175mm above counter in the kitchen - this worked well with some noggins -1200m for switches. I agree with you, @Onoff the issue is the install in the first place and I would be using my DeWalt Oscillating tool with the big half circle blade which makes really nice net cuts in PB. @CC45 hit the nail on the head, I think this is a 'my house' situation - my plan would not be viable for most electricians who would just get annoyed if I made them do this. Thank you all for your input. I'll post some photos once I get onto this - need to go and solve something with the building control officer who tonight emailed about lateral retaining straps...2 points
-
If it's just copper pipe tails, then15mm push fit end caps / stop ends. It's worth having a bag of them anyway, really handy when your doing your first for and want to test sections of pipes.2 points
-
You could put a scaffold clamp on the tube good and tight before casting the concrete around it.2 points
-
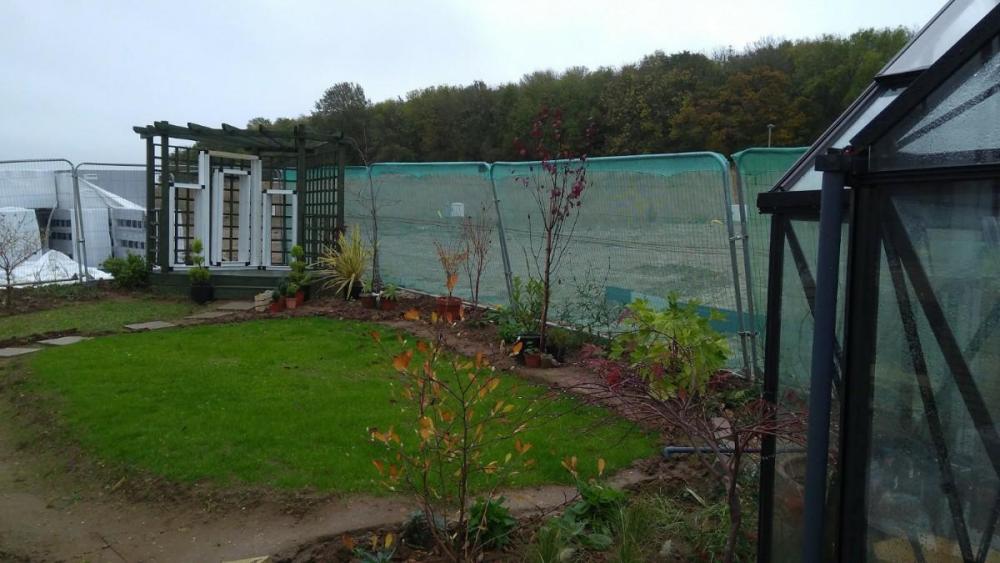
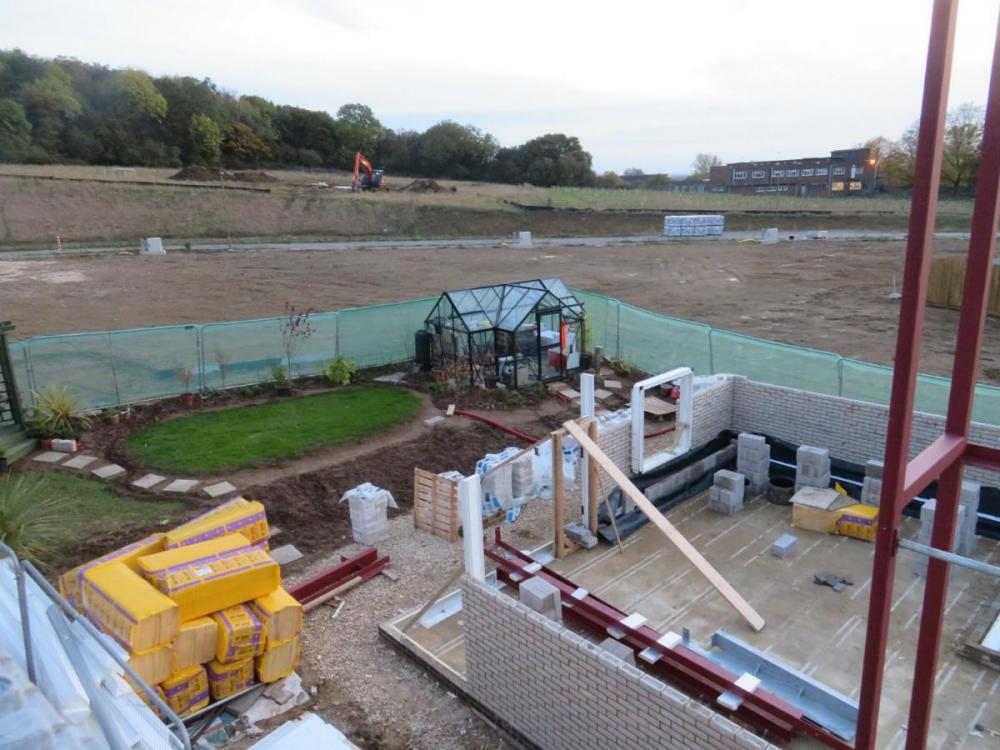
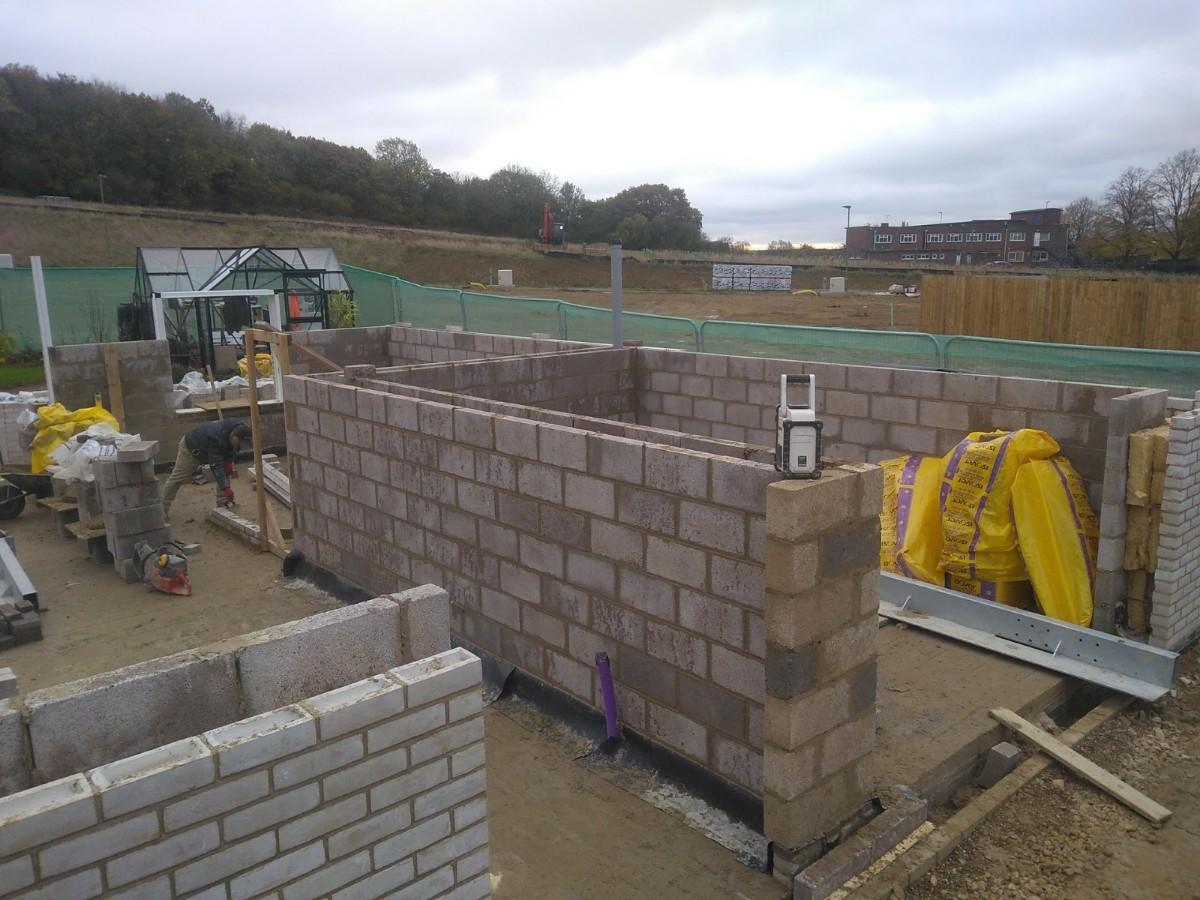
We've been on site for 2 months now. Here's the original introduce yourself thread. Introduce Myself It's been mostly quiet while we waited 6 weeks for our bricklayer who was delayed on his previous job. We think we put the time to good use by doing the garden. The grass seed has turned into a very healthy lawn, the wildflower area is growing something, probably weeds, we have a greenhouse that doubles up into a very comfortable welfare area, a fully plumbed toilet in the garden shed and a gazebo for project meetings next summer. However all the professionals who have visited the site laugh and say they've never seen a garden before the house site. Our bricklayer has been on site for 2 weeks and we are ready for the first scaffold lift. It's going very well, the bricklayer is a perfectionist, the weather has been tolerable and we are very happy with the layout of the house so far. The white bricks are very easily marked and we will end up with a more natural white house than the toothpaste coloured cube we were expecting. That's probably for the best in hindsight. We took the advice from here to use a lime mortar mix to keep the colour light and that's going well so far. Scaffolding arrives tomorrow, joists and first floor next week, crane to lift the steels soon after and then we can think about ordering the windows. Current decisions revolve around whether to go with single ply rubber or fibreglass for the flat roof and terrace and what cladding to use. I'll start a new thread for those.

 1 point
 -
My guess. During heavy wind driven rain, water flows off glazing, over cill and then drips clear of wall. Without a 100mm extra each end some of the water flow will escape over the cill ends and run down the wall.1 point
-
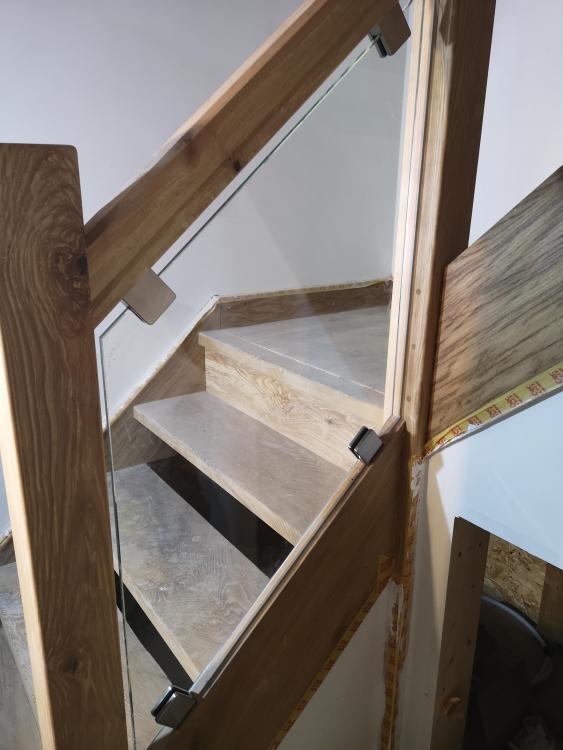
Did get the first bit of glass in yesterday though ?
 1 point
 -
I've got about 35 alu cills going spare, 180mm deep... free to those in various lengths if desired. Didn't realize they had to extend past the external face by 25mm ?1 point
-
Can second the lorry curtain, it is heavy as f**k. I exhausted myself manouvering ours around. I've cut it up into 4 smaller sheets to be able to manhandle them better1 point
-
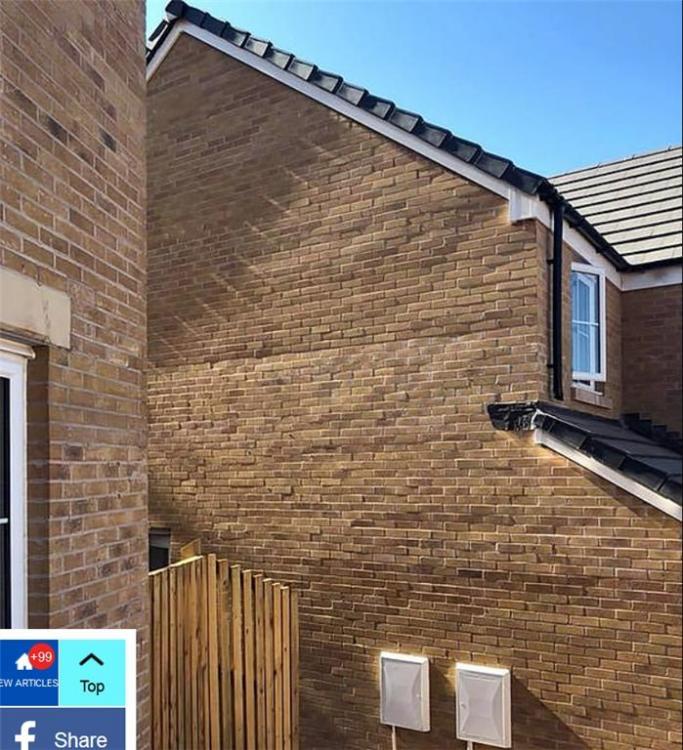
I live near the GD "Rusty House". I have not noticed any streaks but I think this risk was largely designed out. They have even done boundary fencing in the same stuff. I they have perforated panels. I think it was expensive. I am not very keen on the look. The guy who installed it found it a pain to work with. I have read that the material can sometimes suffer from premature failure due to corrosion.1 point
-
I use metal back boxes - I like the solid feel of them when putting plugs in/out but they do take a lot more time than drylining boxes. If it wasn't my house I'd use the plastic back boxes.1 point
-
My outside tap uses a buried hep20 plastic to copper 90’, no probs (yet ?).1 point
-
Who is fitting the plasterboard? Do you trust their workmanship? Properly fitted metal back boxes on noggins with properly and accurately cut holes in the plasterboard is fine. If you can trust the boarders to cut the holes as they fit the PB then do it. If they won't cut the holes as they board, then don't (or choose other boarders) AND it is vital you get the noggins parallel to the wall. A wonky noggin deeper into the wall at one end will yield bad results. It is largely bad experiences with bad boarders that makes me favour dry lining boxes.1 point
-
I used metal back boxes for the same reason as you
 1 point
 -
Just what is it that you have against plastic plasterboard boxes? I use them almost exclusively. SO much easier. Now it may be you have used them before and found some of them fall apart, or are fiddly in the extreme and irritate you. If that is your reason, then you have obviously not tried Appleby dry lining boxes yet. And if you really must have metal, have you considered metal dry lining boxes made by Click Mode. All the benefits of a metal box, all the ease of a plastic box. I dislike metal boxes because 9 times out of 10 the joiners don't cut the hole when fitting the plasterboard and from an electricians point of view it can be a right royal PITA cutting the hole for a box that is already in the wall. If you do go ahead and fit flush boxes, set them 10mm proud of the timber frame to force the joiners to cut the hole as they fit the plasterboard.1 point
-
I have plenty of copper to Hep2O, in for 20 years now. 4 stone ago they were accessible to me....1 point
-
@andyscotland you definitely want to do the top coat as continuous coats. But it's the fastest and easiest part of the job. You'd have that area painted in less than two hours.1 point
-
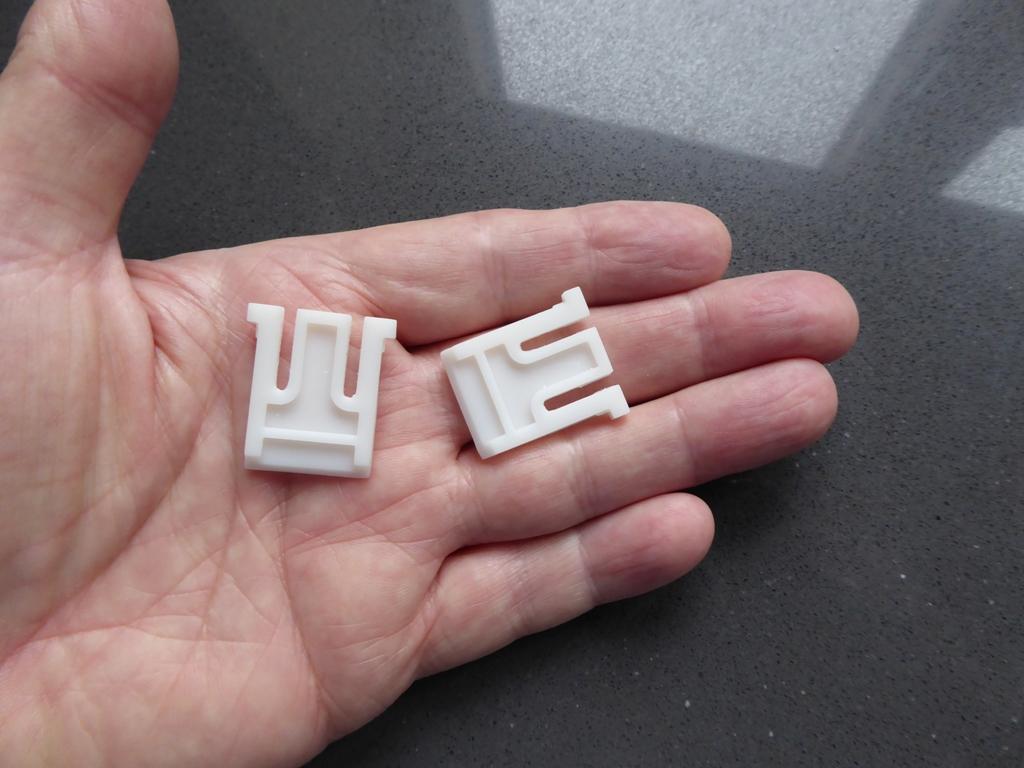
With a bit of luck you may be able to see the result tomorrow - managed to catch the post OK. Looks to me as if directly exporting the .stl file from AutoCAD works just fine.1 point
-
They seem to have printed OK, just a small bit of "flash" where they were sat on the printer bed, but otherwise OK.
 1 point
 -
As said- Hep2O push fit end caps, but will only fit on clean cut pipe that has been cut with a pipe slice. Invest in a 15 and 22mm one of each and they are invaluable.1 point
-
My neighbour used a pop-up gazebo. You only need to cover the sections you are working on (for the rest of the roof, use flat tarps with 2x4s under to keep off the deck), and remember the chemicals cure reasonably quickly so you can move it as you work.1 point
-
But will not rip.1 point
-
We used a scaffold foot stood on a first pour, then added a clamp and filled up the hole iirc. It was the anchor for a 6m tower for a 1m satellite dish.1 point
-
In that case they’re too special to use and should be put away, only for use on special occasions ?1 point
-
Simples, it all goes in the dishwasher! ? Anything that really isn’t dishwasher friendly such as a flask is washed under running hot water but I don’t use stuff like that every day anyway. For surfaces, I use a spray and a damp cloth. I don’t need a bowl of water for that.1 point
-
Very nice build, I love the two tone between the larch and render - is the idea that the larch will go grey/silver as it ages? When we were renovating our farmhouse I went to farm auctions to buy old bits of timber. Most of the lintels and beams we had to replace were all made from these salvaged bits picked up for a few quid. Go to a salvage yard and they wanted £100's? Cheers, MM1 point
-
I think it was stated in the spec so gas can dissipate into the ground in case of a leak1 point
-
I haven’t decided on a board yet, but whatever it is will be taped and jointed and a fst applied look up level 5 finish on drywall, too many people over here think you need to skim to get a good finish, what utter rubbish do you think a $5 million house in the states has a poor finish because they don’t wet plaster.1 point
-
Try it I'm sure you'll be ok1 point
-
Ever thought of a Jean Pain style heap?1 point
-
I know someone that wanted to build a massive extension to a house in green belt that met with lots of objections. He had 2 applications running concurrently. The objectors never noticed this, so the second application had no objections because they had all objected to the first one and nobody noticed the different planning application number, so the second one passed. It made the local paper as there was outrage at what happened and I suspect procedures changed after that.1 point
-
We have 2 compact ones. There is only 2 of us in the house so one goes on every day or two, if people come round we can use both. We tend to use the same stuff most of the time so it rotates from the clean to the dirty one. I wouldn’t go back to one.1 point
-
I would argue that if you have double Ds in constant rotation, it would reduce the amount of cupboard space you need. My old dishwasher and the one in the new house both have very shallow drawers at the top specifically for cutlery and do away with the need for a basket in the main internal area. Far more efficient use of space .1 point
-
I’m only supplying them, they’re going to fit them. Every Pound counts, as the budget is tight.1 point
-
Yeh and if finish isn't good it Gives them a get out. Like when bad skimming because of bad boarding. Let them put them on.1 point
-
When I was researching into how to install MVHR around eight or nine years ago I made a list of rules I found relating to connecting the unit to the outside. I'm sure these are not exhaustive and nor are they prescriptive, but it's what I used to install mine. 1. The inlet and outlet grilles should be 3m apart to prevent cross contamination of air. 3m was the distance I found mentioned most often. 2. The inlet and outlet grilles should be high enough (2m) to prevent interference by animals or children. 3. The inlet and outlet grilles should be on the same wall so they are affected equally by the wind. 4. The free flow area of the grill including insect screen should be at least as great as the cross sectional area of the duct. 5. The duct should be smooth wall to reduce air flow restriction. 6. Any ducting bends should be large radius of curvature or two 45 degree bends to reduce air flow restriction. 7. The ducting should slope downwards slightly to ensure any moisture drains to the outside.1 point
-
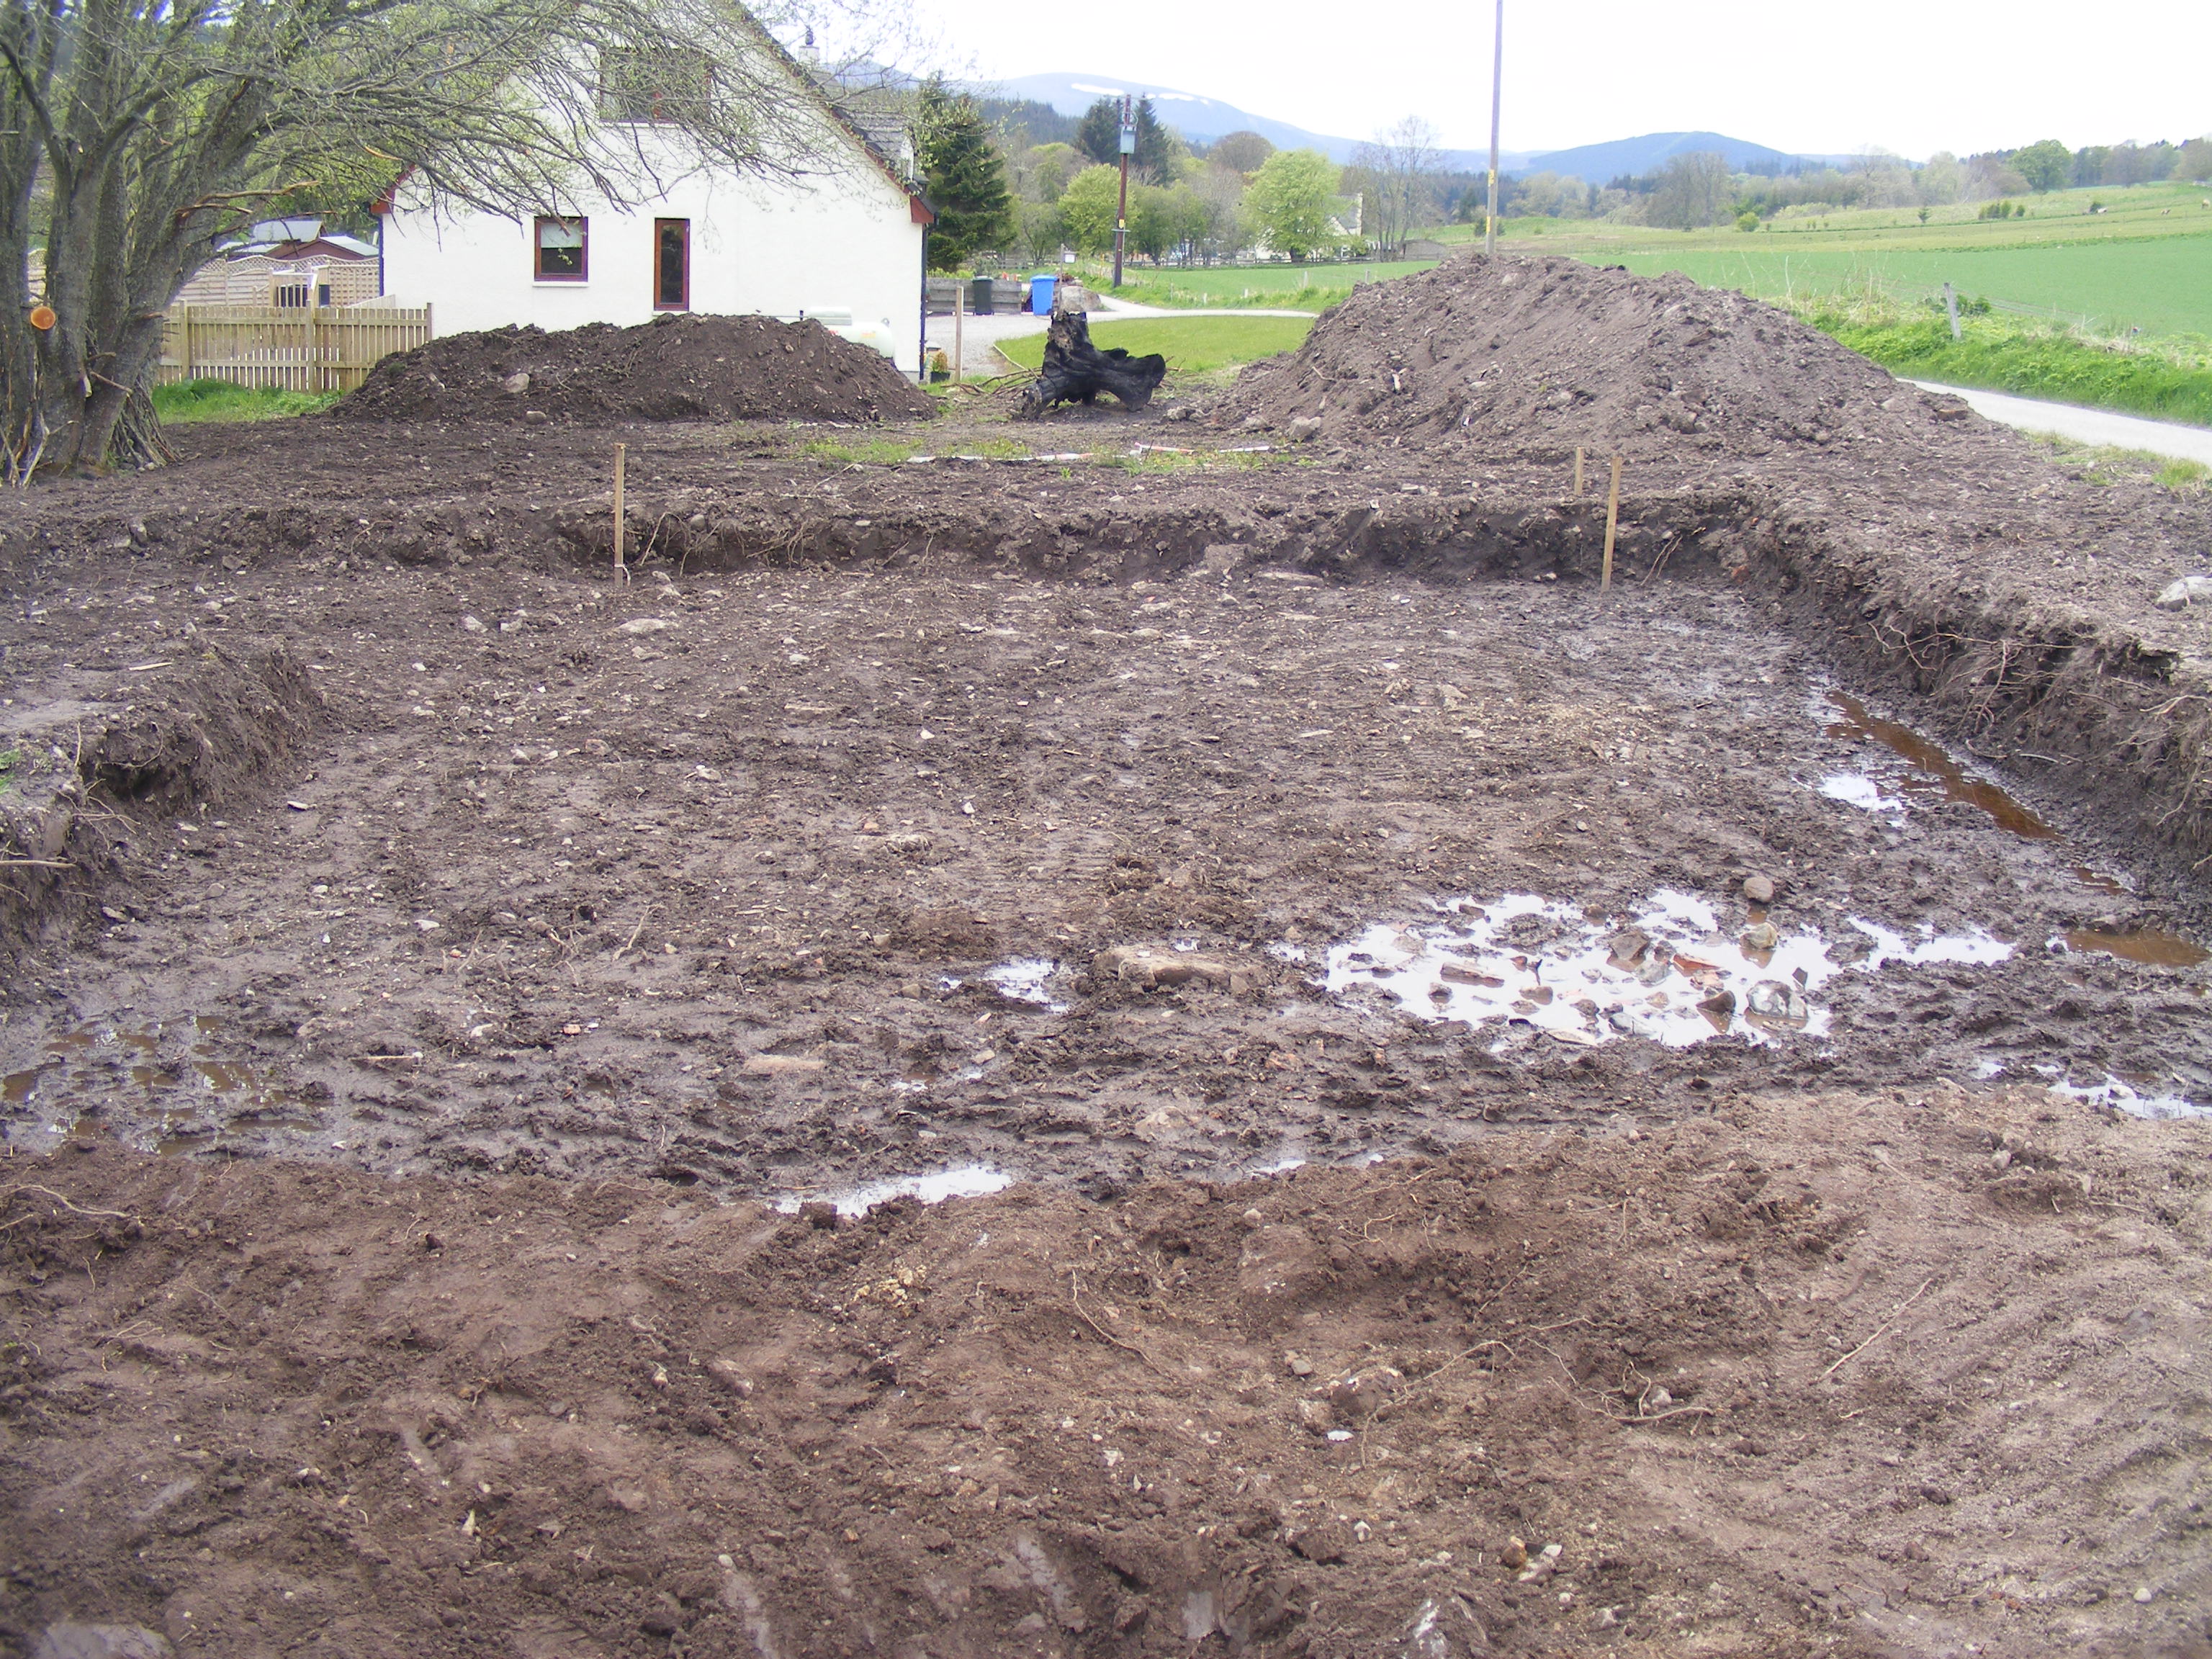
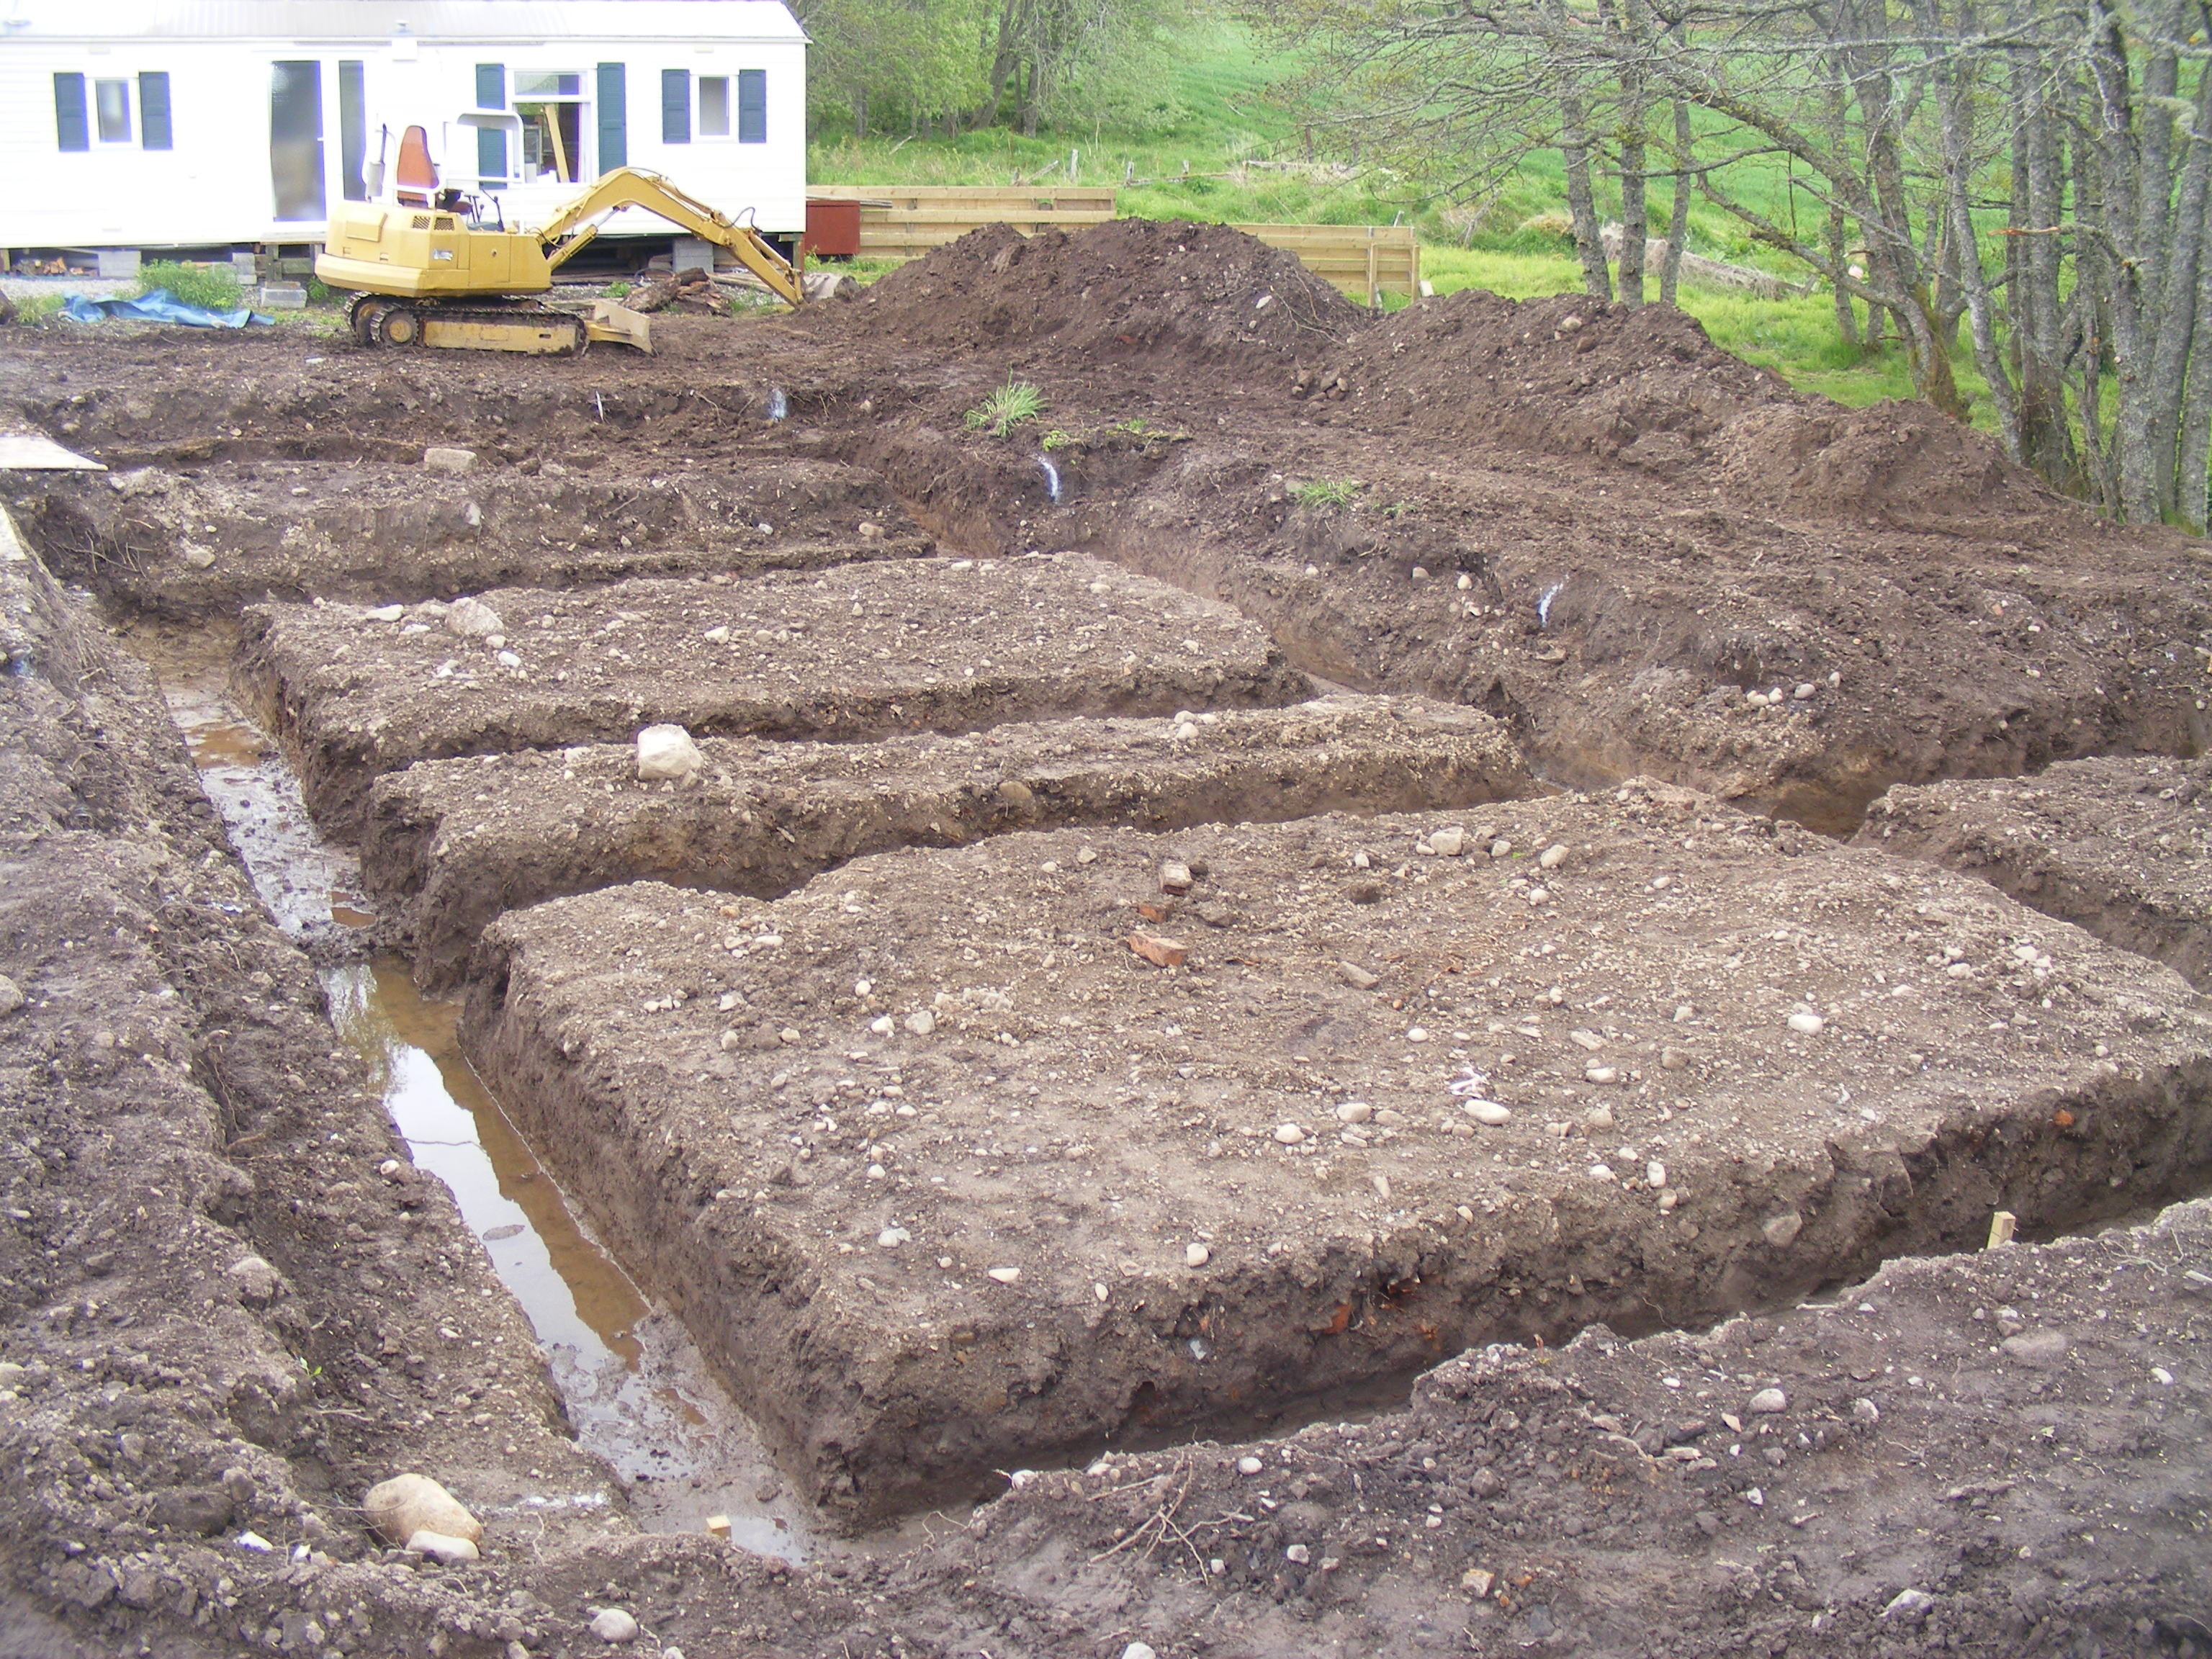
Mine is an old 3 ton Komatsu I dug off nearly a metre of top soil, shifting probably 150 tons of soil in the process Then dug the strip foundations And the deepest job, was digging a hole abourt 2.5 metres deep for the treatment plant, here we are almost at full reach down into the ground.
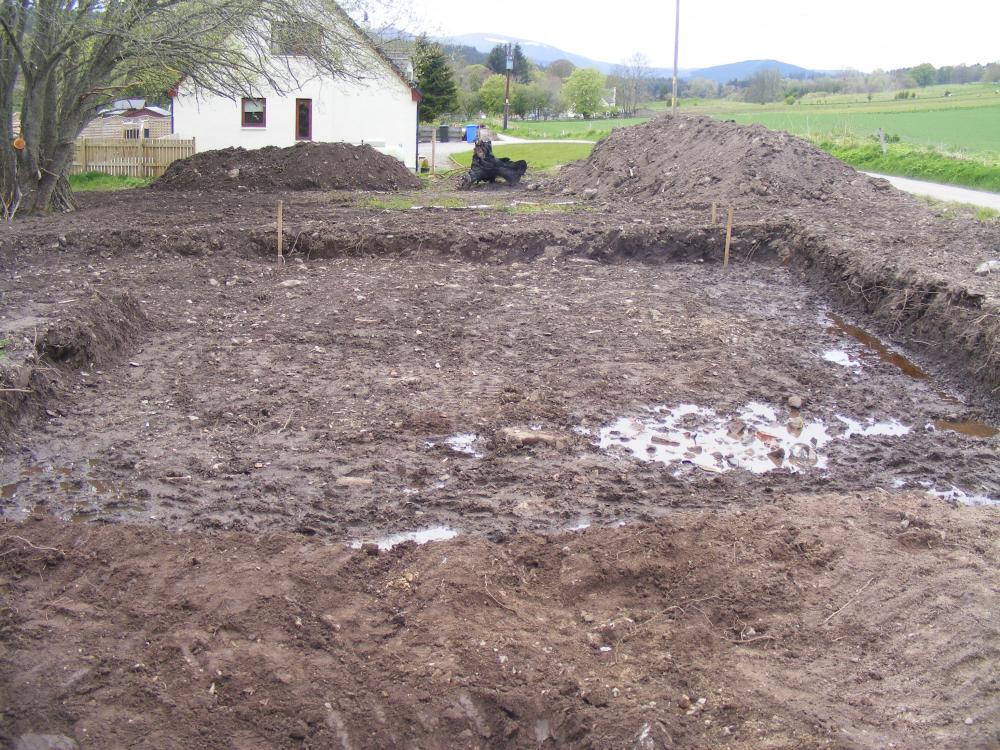

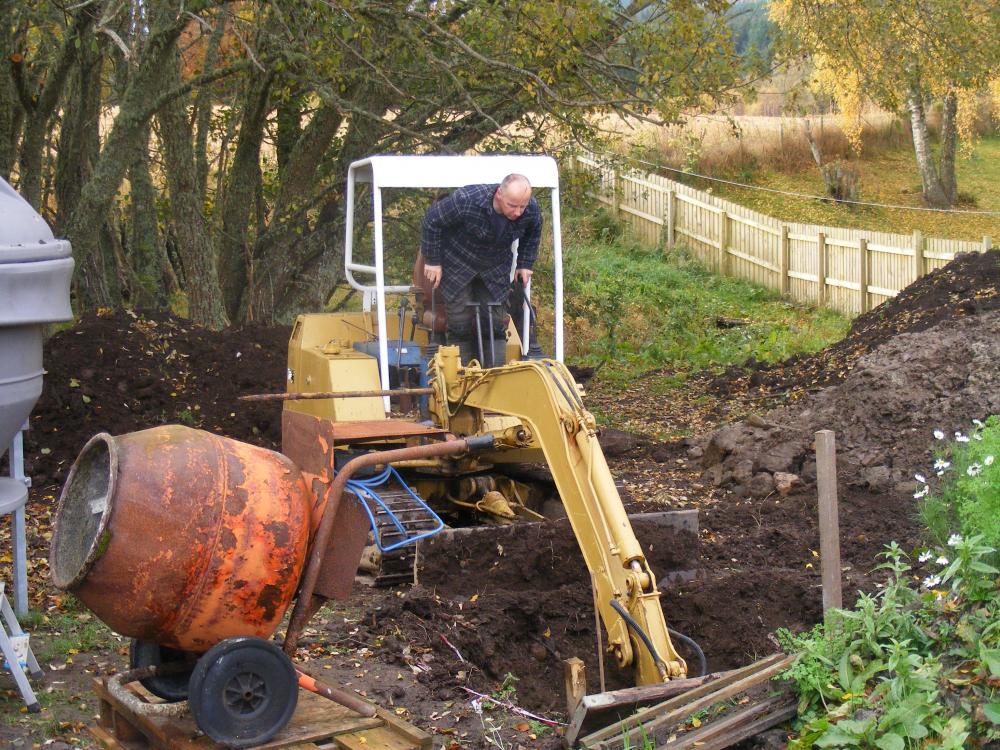 1 point
 -
It sounds like you want to do both 2 and 3 to me so why not give it a bash. Have you considered using home grown stalagtites somewhere in the build?0 points
-
I think you should use brass angle, it would be nice if you can keep a high lustre finish on it by polishing it weekly. Or you could do it like a normal person and just mortar them in and get on with the next job.0 points
-
Celcons are supposed to be good at freeze thaw but anyway I'd be worried about op building inspector. Do you think it's like their equivalent of the "long weight" or left handed screwdriver. They get back to the office and say get on this tony guess what I've got this geezer doing on one of my rounds0 points
-
That’ll leak tomorrow ?0 points
-
well seen he didn't do this one.
 0 points
 -
I'll have to check later...could be me (again) that I sent you an earlier, un radiused model...0 points
-
A tale of four ovens. Oven one is a combo microwave and oven. Used lots, reasonably filthy. Oven two is a full size oven with a hide & slide door (blame Bakeoff for that). Used for most general cooking & baking, moderately filthy. Oven three is a steam oven (although it turns out ovens two and four are also steam ovens, who knew). Mostly (i.e. only) used for steaming broccoli for roast dinner (about once / twice a month outside of summer. Quite clean but has a definite whiff of broccoli. Oven four is the 'good' oven' and is a carbon copy of oven two. It was supposed to be the 'super oven' for baking but the original oven two was discontinued and we got a fee upgrade so use that instead. Beyond heating plates at Christmas, I'm not sure it has really been used and it mostly contains all the spare trays and shelves from ovens 1-3, pristine. Admittedly they look smart in their 2x2 formation even if I spend an inordinate amount of time trying to get all their clock displays synched.0 points


.thumb.jpg.bac90f3bbf6868cf2118d010d936c99d.jpg)

