
Leaderboard


Popular Content
Showing content with the highest reputation on 02/16/24 in all areas
-
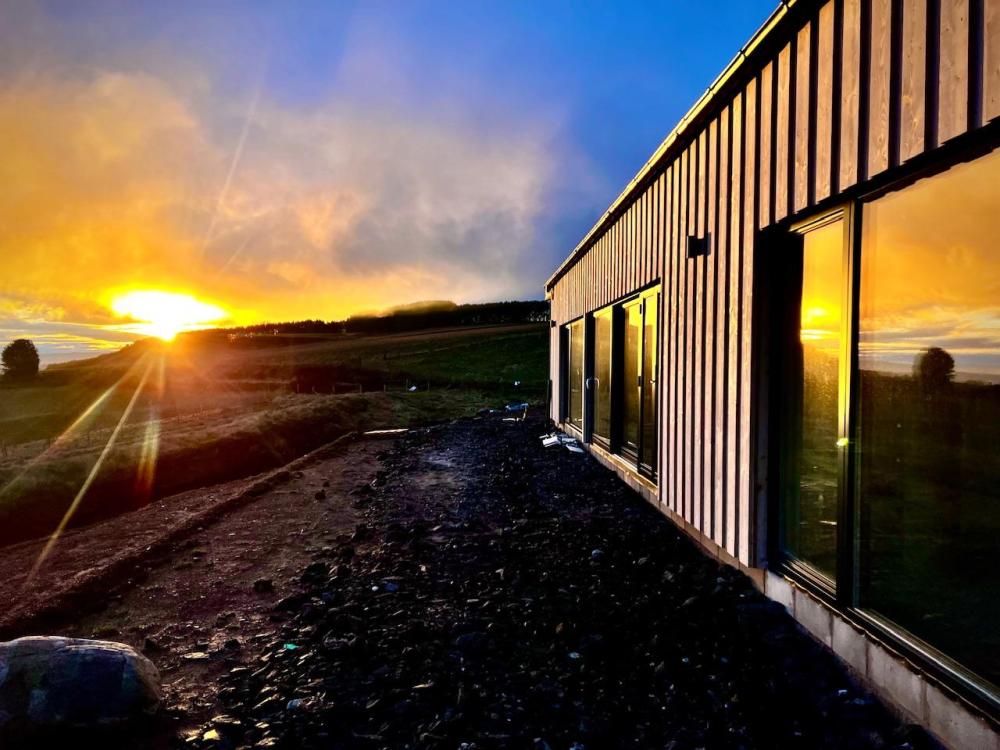
Came downstairs from painting to this
 4 points
 -
This might be of some interest! https://roofingtoday.co.uk/don-low-investigates-pivotal-factor-behind-industry-wide-roofing-membrane-leaks/2 points
-
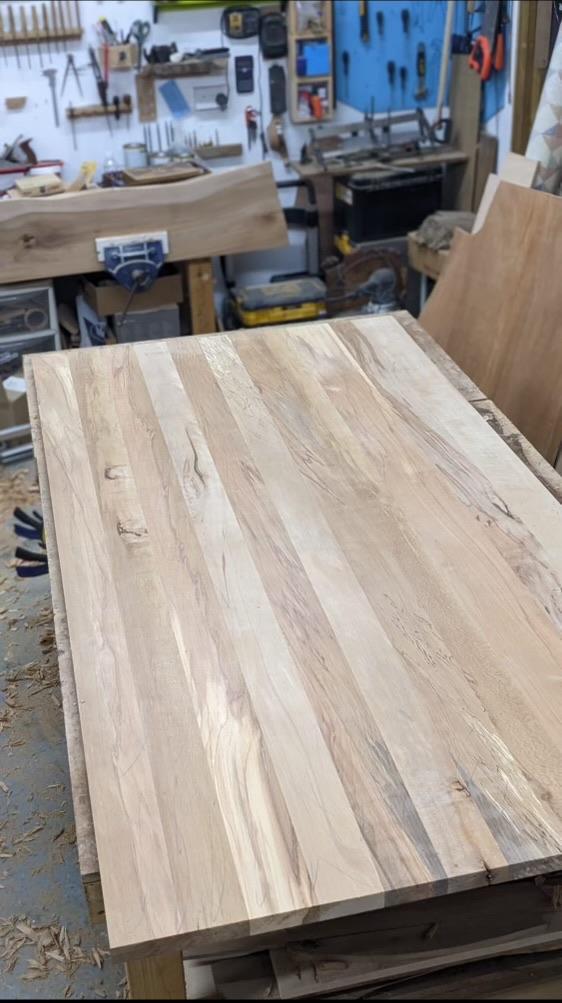
We’re having a table made by a young local cabinet maker made from a tree I bought a year ago. Just got a first picture of it. It’ll have ends to be added to frame and secure it. It’s 2.2m x 1.1m. Looks stunning.
 2 points
 -
Why can’t you fit the kore in place , shuffle it until you are happy then fix 4x2 strip at corners screwed down to keep it in place. if the blocks are put in place first you are at the mercy of the bricklayer’s accuracy.2 points
-
When you take into account that increased insulation thickness is a 'diminishing returns' thing. And that airtightness becomes more relevant as the level of insulation increases i think it will be money well spent.2 points
-
I very recently had a price of £2200 for my Potton 200 sq metre project in North Herts. They did say that they would stay and keep spraying until we got the airtight figure we needed/wanted. I think i will be taking them up on this offer.2 points
-
Cheers guys. I've done what the majority have suggested above. The pipe leaves the floor around 100mm from the wall and is capped ready to extend into the cabinet when the time comes. Appreciate your input as always you lot 👍1 point
-
You would need a more detailed plan that that. And some actual measurements of the dimensions inside the existing loft. The critical think is the staircase. A staircase, and the "landing" must have a headroom of 2 metres. Oddly enough building regs don't stipulate a headroom limit for a bedroom. So think where you could put a staircase that is both practical and meets that headroom requirement. The actual available height will probably be less than you measure in a bare loft, as you will likely need to increase the floor joists size, and insulation will reduce some of the ceiling height.1 point
-
Ursa acoustic roll - heard it’s a great product, better than many similar and nicer to use1 point
-
Thats what we thought but nothing. we're waiting till heavy rain and we'll get up there to have a look. just clearing the insulation in that area is helping to dry it out. But there's been no rain for a few days now.1 point
-
I do hundreds of m2 of tiling on to backer boards each year Never tape Simply glue with a U nozzle Over the past 40 years I’ve tiled lots of wet rooms The past five years we have been using Impey tanking kits without any issues Not the cheapest though1 point
-
I used automotive Sikaflex to do the same job - the tricky thing was making sure you didn't apply too much cos it's messy - mine you had to put the glass into the seal and then the seal into the frame and then fully insert both and there was very little clearance for additional adhesive and it goes off quite quickly..... I chose to apply sikaflex to the seal and then fit the seal to the glassand squeeze out any excess (two long battens and multiple clamps) - then when the sikaflex had gone off cut away any excess and then fit glass with seal to the frame using the good old fairy lube assist. It's been done 5 years and hasn't moved at all but one thing I would say (without doing that) is don't leave the shower screen in a position where it isn't supported for long periods of time because that is very likely to be your primary cause for the glass coming out of the seal of the seal (and glass coming out of the frame)1 point
-
I’ve bought URSA acoustic but have not fitted it yet I did get it at a really good price. I have heard it on good authority that’s it’s much nicer to use than Isover as it’s a bit stiffer so for ceilings it will stay up between the joists when you go to fit the plasterboard.1 point
-
Starting at one end the first connection goes to the isolator via an extension. You then connect positive to negative along the string. The last panel will have a spare end, this end goes to the isolator, your isolator now has a positive and negative. Depending on panel voltage, you now a voltage that will kill you, so be careful.1 point
-
The panels come with connectors on them, so you just need to link them up in series depending on the string voltage of the inverter. tje cable to the inverter will needs ends fitted, and then mounting isolators inverter, etc1 point
-
FYI slightly different here in NI. No private BC company only the local council. Also Water and electrical certificates not required. Fire alarm certificate only if a full fire alarm system was installed. All other stuff pretty similar.1 point
-
Kitchen cupboards usually have false backs, when I fitted kitchens I drilled a hole in the floor next to the back panel, cut the pipe to be just over (50mm) the floor height, drop the cupboard unit down over the pipe, extend the pipe with copper to its tap/connector. (Hint, the back panels are flimsy so glue a piece of ply where the pipe clips are to screw too 👍)1 point
-
I had a Secoh air pump in my plant and when a diaphragm split it would disconnect the power and so turn the pump off. I soon learnt to change the diaphragms every few years so I didn't have any nasty surprises in the middle of winter. Maintenance kits are easy to come by.1 point
-
Joints are the key, whether that is board to board, board to block etc. and especially corners. tanking paint and sealing tape work very well as the elasticity copes with and movement. And yes, getting the backing right is to prevent problems if - when the grout fails. It’s very easy to install a shower and do a bit of tiling but rotten plasterboard, wall studs and flooring is very common when water gets behind the tiles.1 point
-
The Wedi board XPS type boards are nice to use. Much easier to work with than the cement based likes of Hardi Backer.1 point
-
Get a wire brush and screwdriver and rake out some of the old mortar at ground level. Then a bucket of lime mortar, a small trowel and some gloves and have a go at repointing yourself. It's not rocket science. By the time you get to the chimney you'll be plenty proficient to make a tidy job of it.1 point
-
Your pipe feed for the washing machine should come up in the cupboard next to the washer the same as the drain. DO NOT bring the pipes up behind the washer. I used to bring washer feed up the wall, but now bring them vertical up through the bottom the cupboard clipped to the back or side of cupboard next to the waste. pro’s Easy to work on. con’s you can see the pipe in the cupboard.1 point
-
what size pipework? 10 or 15mm, chase the wall slightly above the joist and/or just hide the pipe in the dot and dab if plasterboard1 point
-
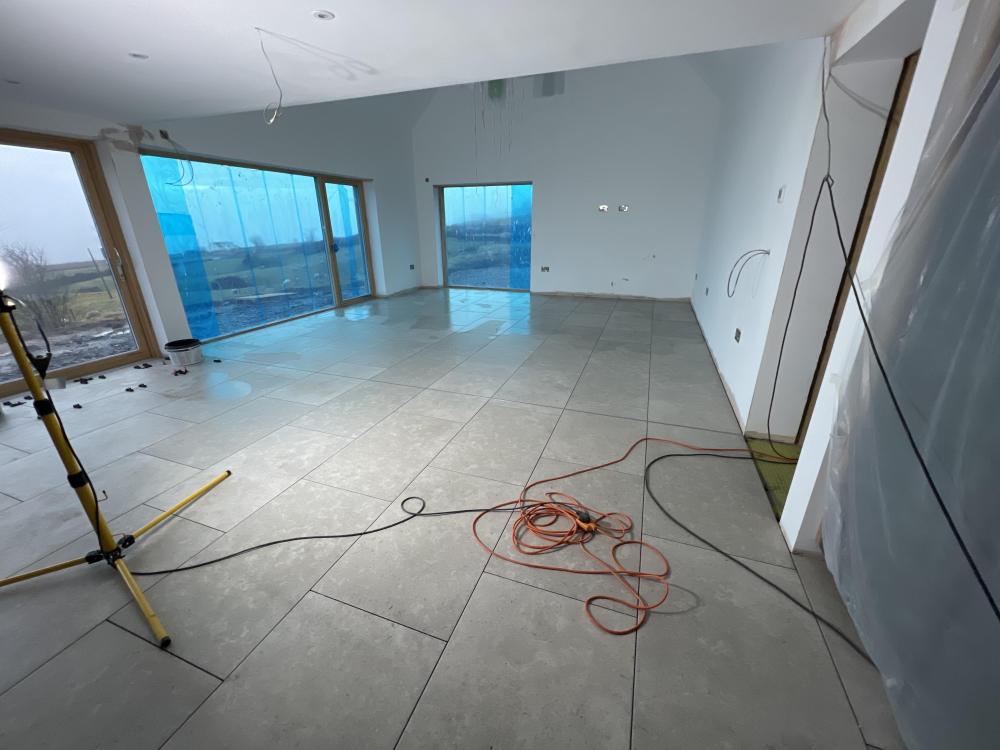
It’s covered up still but this gives an idea

 1 point
 -
Yeah 0.24 doesn’t sound great, I used Beco Wallform 375 which is quoted at 0.14 so the PIR 200 floor and 205 roof should get me to passivehaus standard1 point
-
It’s an insurance thing, policy should be checked regarding lockable windows and doors. They can void any insurance claim for break ins/stolen items as a result. One of the biggest cartels going and they’ll take any reason not to pay out.1 point
-
Great, let us know 👍1 point
-
In Scotland this would not pass building control, 0.18 is the maximum. My ICF (polysteel), needed EWI and then the standards changed in early 23 so needed 25mm PIR IWI that got me down to 0.139. We've spent the best part of 2 months in our home now, and very happy with the ICF decision. DHW and heating 220kWh for January and it's been cold and wild at times. Push for decent insulation levels, but use the heat loss calculation spreadsheet to play with the figures. It's very apparent that air tightness becomes more important once you've got a decent level of insulation..1 point
-
I've just had another price for the two fan units, £1300.00 inc VAT plus delivery. Hopefully they should be standard bearings which are freely available. I use simply bearings that offer a next day service and have top notch makes. It will be mid to end March before I can strip the unit too many other jobs now im retired. Will document the process to help others.1 point
-
To me, it looks like the lead on the left hand side goes on TOP of the tile? The lead should be underneath, properly dressed and the tile on top of the lead. Looks like the right side may be the same. You need a roofer up there to take those 2 tiles off and put them back with the lead underneath and tiles on top of the lead.
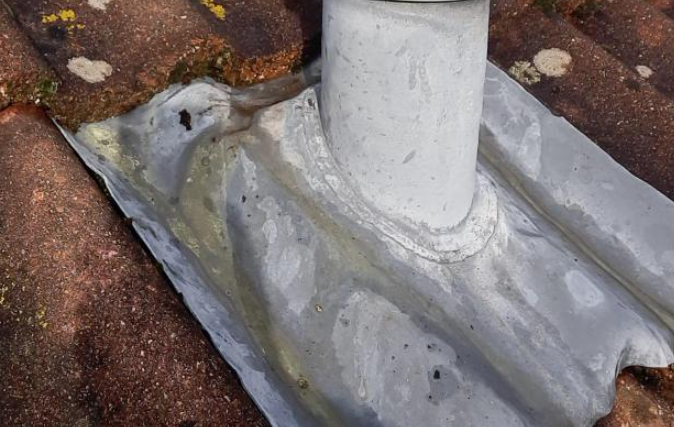 1 point
 -
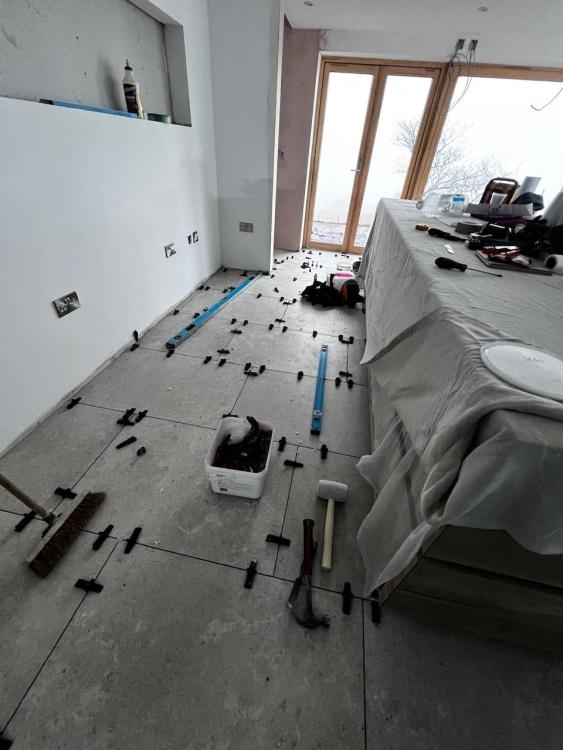
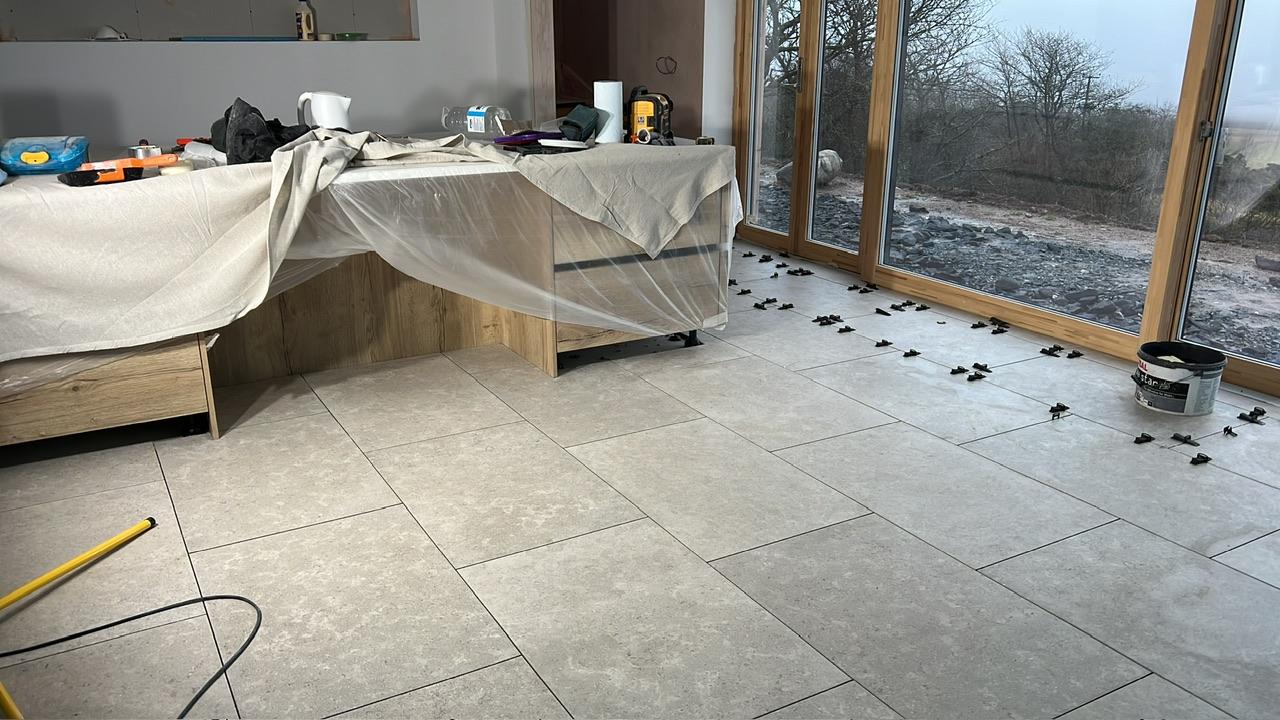
Open plan kitchen area tiling done. Started on Monday which was us mostly planning to have as few narrow cuts as possible. Very pleased that we were spot on with our door thresholds given all the last minute changes we had with the floor.
 1 point
 -
@Nic - err that was a joke, the clue is in the word 'unicorns' A couple of examples here: http://planning.highpeak.gov.uk/portal/servlets/AttachmentShowServlet?ImageName=397554 http://publicaccess.staffsmoorlands.gov.uk/portal/servlets/AttachmentShowServlet?ImageName=1612661 point
-
My advice is to try find a similar planning application and see what they provided. The condition says you need to provide a "Construction Ecological Management Plan (CEcMP)" so I would try and find a document with that title on the portal and read it. If there is anything irrelevant to your site edit it out. Make sure you aren't committing yourself to anything expensive etc. I'm pretty sure that a CEcMP will be all about protecting wild life during construction, whereas a "Biodiversity net gain (BNG)" is more about ensuring your planning application as a whole improves Biodiversity. I would stick with the former until they insist on the latter.1 point
-
Heat pump possibly just short cycles produces next to no heat and consumes a bucket of energy. Example my house is not passive (not a million miles off, but leaks heat faster), its 8 degs outside, misty and raining, so no solar gain, my heating has been off for 7 hours and is unlikely to kick on, until after midnight. House temperature has not changed more than 0.1 degs so far. Your house floor just needs to charged once per day and then switched off (act as a storage heater) or a proper WC curve and run all day on a fully open system. But I find running flat out for a number of hours is way more economical than running all day or lots of stop starts. Been there had thermostats everywhere, and I started to actually monitor what was going on, after my first winter bill being twice what I expected. Stripped more and more equipment out and monitored energy usage. The simpler I got the more efficient I got. If a room is a bit cooler than I like I open the room door and its same temp as everywhere else 30 mins later. Went from 7 thermostats to 1.1 point
-
Loft insulation won’t do the same job 25 mil of acoustic will out perform 100 mil of loft insulation I would also use a maximum of 50 mil on your setup Which will leave you a clear void1 point
-
Or just put 200mm of eps in the floor , much cheaper than pir will give a similar u value to 150mm pir and you won't have to make up the 50mm with another layer of something.1 point
-
Everything kicked off on January 8th 2024 finally after 8 years of faffing about and trying to line up finances, finding someone to sign off building regs and a year of selling the old house eventually succeeded. There was about 120 tons of muckaway judging from the number of trucks. The guys brought a 17 tonne digger and were glad of it. The big roller they didn't use in the end but went with a more compact diesel unit. hardcore was added and leveled. The trickier element was getting a rainwater harvesting tank installed. It had to go at the back of the site before we could block it off with the next phase of works. I found the office staff didn't have a clue about the dimensions so how deep to dig the hole?! They did the next best thing and sent a guy out to the yard with a tape measure and I passed these info on. The crane used was impressive - 350K worth to move a 4.5tonne concrete tank into position. They then crawled inside it to commission the pump etc and seal it up until the next phase of adding power (need to drill a hold into the tank but they provided enough electrical cable to go back to the house to hook it up later. It holds 4,000 litres and needed balast to stop it shifting as even at that weight it can move around!! Got a hose and friendly neighbours to assist and half filled it up!! Only 1 complainer - a neighbour around the corner giving out when the flatbed dropped off the excavator, there's always one! Did get a site inspection the next day but only to confirm we'd started within the terms of our commencement notice I think and he seemed friendly anyway! I left the mortgage a bit late, still waiting on approval so am spending cash currently. Hopefully that comes in this week! The Timber Frame prep is starting in their factory - I think I'll be ready in 5 weeks or so or on March 1st. Onto the exciting portion - Foundation Screws, 1.5 meter long and will have a 300mm x 300mm plate bolted to the top of the screw head. They spend an entire day prepping the holes, measuring and remeasuring to ensure everything was fine. There was some confusion around the height the screw was to end up but the groundworks team had marking the fence panel and I put them in direct contract with each other and didn't hear a peep from that point. All was good. I was hearing 100mm differences in the levels one day and this changed to 2mm the next!! I was sick with flu so not being able to be onsite was a curse, you just have to hope it works out. They pre drilled down to break up some rock but nothing too severe. The delivery took a bit longer than expected, so they started later than I'd hope which means I lose the groundsworks team for a week at the start of February but what can you do. Some start when they say, others, well, it's a moving target!! But once they started they've been onsite every day despite the cold weather and are making good progress. There are 89 of these to be driven in to a level set by the laser. They use an electric motor to drive in the screw with an arm braced against a previous screw they leave half way up. Eventually all you'll see is a field of square plates. A raft is to be poured around these and the Kore passive raft is being delivered to site later this week for use next month. Yep, there's a second raft going in on top of the Kore - like a Kore Concrete Raft Burger!! Enjoy the photos!1 point
-
Help BuildHub financially while getting a £50 credit on your energy account! For anyone considering moving to Octopus Energy, please message me for a referral code. Using that code will result in £100 being split between you and Buildhub. When the credit arrives in my Octopus account, I'll transfer £50 to the BuildHub Paypal account and post a confirmation screenshot in this thread (or to you privately, if you prefer) as proof the transfer happened. As you know, BuildHub is a non-commercial forum run entirely by unpaid volunteers. We pay for hosting etc solely through member donations. If this referral scheme is successful, the need for periodic donation drives will significantly be reduced, or perhaps even done away with completely. Thanks for helping to fund the forum! List of referrals: @trialuser @Dobbie @Jenki @Originaltwist @Mattg4321 - Code submitted 3 May 2024, transferred 13 June 2024: @Chanmenie - Code submitted 30 April 2024, transferred 14 August 2024: @SB2023 - Code submitted 5 September 2024, transferred 17 September 2024: @MikeSharp01 - Code submitted 17 September 2024, transferred 18 October 2024: @-rick- - Code submitted 2 October 2024, transferred 20 November 2024: <Placeholder for referral code received 9 January 2025 - details to follow>


 1 point
 -
Hi, Someone must know the answer to this on here because I've Googled the heck out of this but cannot find the answer anywhere. I'm in the process of planning out the brickwork for my new house. We are going with a projecting brick plinth detail for the bottom 6 / 7 courses with brick above. Where the brickwork steps in at the plinth detail there will be a 50mm overhang behind of the plinth detail that needs supporting somehow. How is this constructed? I've seen this in real life many times and there are plenty of houses within a short walk of where I live that have this detail so it must be straightforward but there doesn't seem to be any information about it online or any brick / block specials that would serve this purpose. Is there someone who has done this in real life who can tell me how its done. Thanks1 point
-
To be honest bud I wouldn't recommend him, he was OK but not without issue along the way and I would describe the work as 'it will do' rather than 'good'. To be honest the only trade I have had that I would be happy to recommend is the spark whi is a really nice bloke and works hard/does a good job for the price. Plasterer wasn't too shabby, joiners nah, roofer nah. I've tended to persevere once started with a tradesmen purely to keep the build moving as there is only so much I have time to do and still be in this side of Xmas!1 point
-
We tried that with a hose directed onto the roof but he couldnt see anything coming in.0 points
-
>>> Unicorns Oh FFS - is this part of the new biodiversity thing?0 points
-
With the planning permission, the Planning Authority will impose conditions such as "no habitation before......" As you approach completion, despite the level of completeness, they will be saying its habitable, give me some council tax.0 points


.jpg.c21f3ac78c9b7efd90cbdcb312744dc5.thumb.jpg.7adcad4c0e384f5ecd7d56b0618df6e5.jpg)


