Leaderboard
Popular Content
Showing content with the highest reputation on 11/01/22 in all areas
-
Getting good air tightness is mostly down to attention to detail in the build, taping and sealing everything, and not leaving anything unsealed, no unwanted holes, design out "leaks" like cat flaps and letter boxes, mvhr so no need for lots of separate individual extract fans and no need for trickle vents. It need not cost a great deal more than normal sloppy building.4 points
-
I think MVHR systems are designed to produce a target ACH (building regs use L/S) ignoring any provided by infiltration. On a calm day for example there could be very little. The 0.6 ACH figure is for Passive House standards. Less than 3.0 is the test when trying to decide if the house is even suitable for MVHR. I think if you are tasked with designing an MVHR system you will have to assume the house is suitable or ask if its already been tested? Was it done for a previous years project perhaps? If you need real world leakage rates.. I think measuring the actual ACH due to leaks in varying weather conditions involves using trace gasses. Not sure which trace gasses are used but you could inject one until it reaches a certain concentration, wait a few hours, remeasure the concentration and do the sums to work out how much air has got in to cause the measured dilution. Caution: Dont just use C02 without taking safety precautions. I believe its also possible to use humans.. You can measure the volume of a bedroom and estimate the C02 production of the people sleeping in it. Then by measuring the actual increase in C02 concentration overnight you can estimate the ACH. Ive not done the sums myself but google found .. https://protonsforbreakfast.wordpress.com/2021/06/06/estimating-rates-of-air-change-in-homes/3 points
-
3 points
-
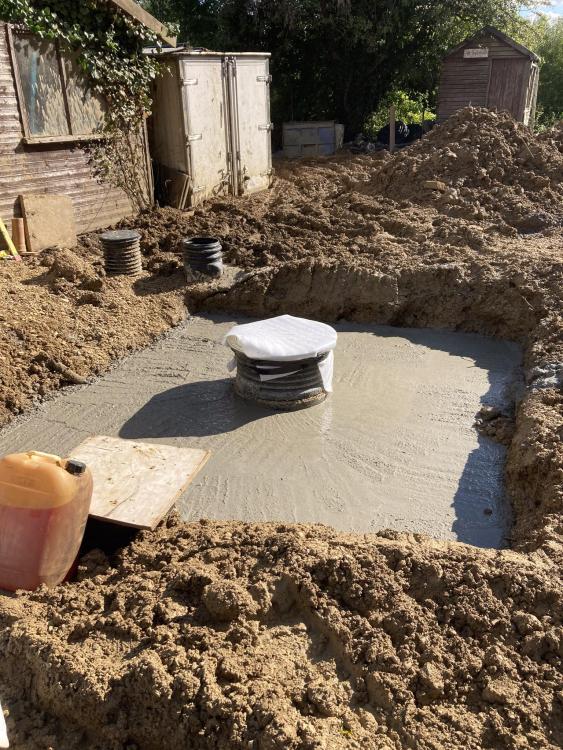
You don’t need a concrete base, in fact it could be a pain in the arse, if you set it too high you cannot wiggle the tank down. I have a graff and I bet I have a higher water table than anybody on the forum. Put 200mm of 10mm gravel in the bottom of the hole, bed your tank into this and get the correct height and level. Fill the tank with clean water 50% full back fill around tank with dry concrete mix, absolutely dry, so you can walk around it compacting it, get up to the half way mark and start adding more water to the tank up to 75% full, add more concrete around tank but this time a bit wetter, bring up to whatever level your happy with, as I said my water table is horrendous so I concreted right to ground level.2 points
-
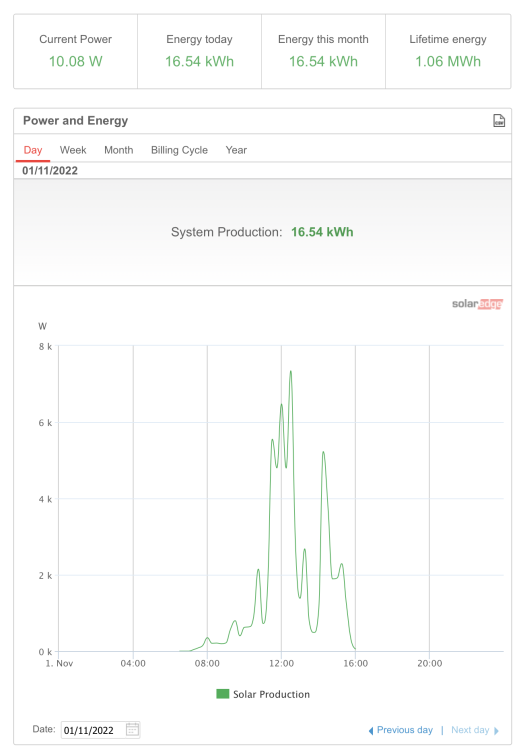
I guess that's a benefit of having a 10.5kWp array! even at this time of year with the storm we had today we generated 16.54kWh. 🙂 also helps that we haven't finished the house yet so pretty much all we generate goes in to the car or battery before exporting. I'm sure once we're in the car won't get as much love.2 points
-
2 points
-
My air pipe comes up through the floor connected to a socket on the stove. All air for the stove goes through this pipe. Not true for all stoves, some take primary air via the outside air connection and secondary air via the room. So check before you buy. Our stove has a primary and secondary air controlled via a rotary dial, this can be turned off fully. You can also get a butterfly valve that goes in to the air supply pipe, but was not really required for our stove - some do need it. I considered heat loss, but concluded if I was stopping continuous airflow though the stove in the grand scheme of things the heat loss was insignificant. The air pipe is required if you want a stove. So stove need air pipe, don't want air pipe - no stove. But to be frank - well insulated house - do you really need a stove? - NO. As mentioned a day or so without heat make a small difference, so put your jumper on. My wife wanted one - different story, different argument.2 points
-
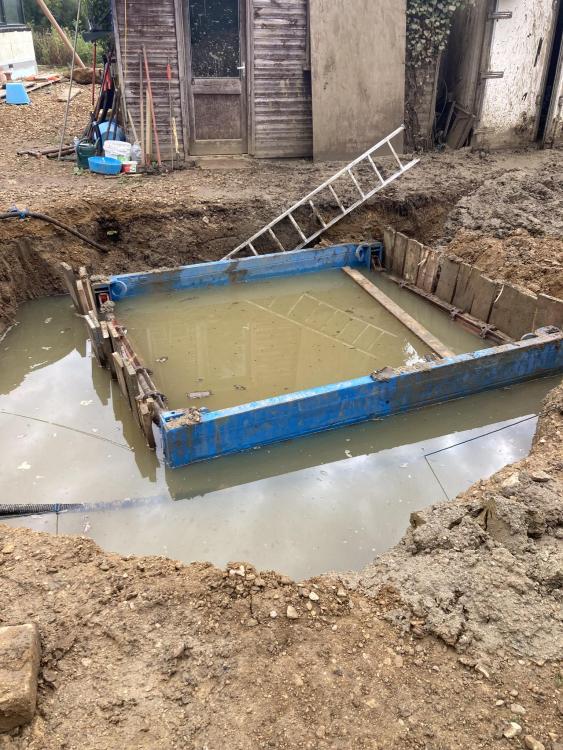
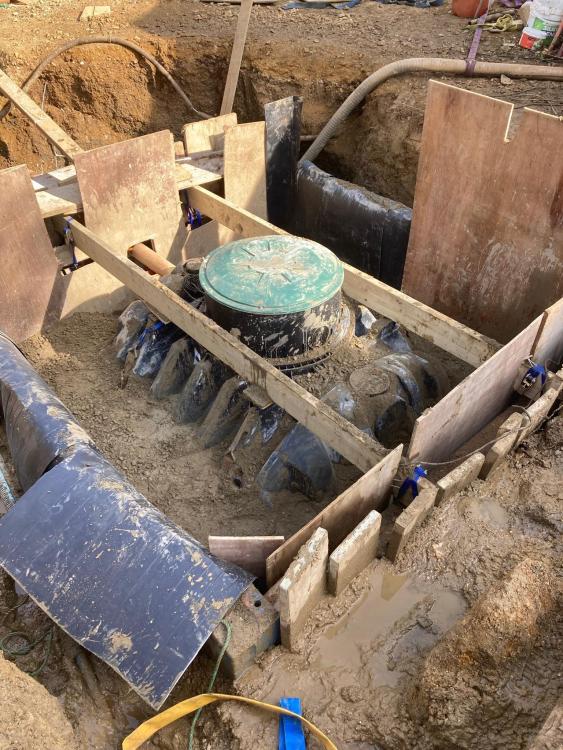
I've covered some of this on here, but wanted to treat you all to my story so far... Rewind to August 20th 2022 (shortened for convenience). One of my friends owns a Groundworks company. He subcontracts to the large developers. He offered to dig our foundations, which after lots of debate with SWMBO we decided to politely decline and go with the security of paying a company for this very important step. Then, at the final hour, matey steps in and tells us how silly we are paying for the work when he is very willing to do it for nothing. How could we refuse? So, on August 20th, he stuck the bucket of a hired 5 tonne Kubota into the ground and away we went. Over the course of the weekend, I watched in awe as he beavered away at our trenches. Digging to hard chalk, without a defined depth, as per BCO instructions. He went away on the Sunday, instructing me to 'grub the trenches out' and get Building Control in ASAP so that concrete could be put in without delay. However, on the Monday, in the cold light of day and under my own steam, I started to become suspicious. The trenches just didn't look right. They all merged into one another from a depth stand-point, but we have 2 internal level changes, 600mm and 400mm, so how were these accounted for? Truth is, they weren't. My trenches were wildly wrong. So, for the next 4 weeks, I had no choice but to master the 5T digger, climbing over trenches and all sorts of shenanigans in order to reach impossible-to-reach trenches in order to correct the depth errors. The worst corner to get to was 500mm too shallow, I had to have one track either side of a trench and the front bar propped up on Heras blocks, with the cab turned 90° digging through hard chalk and flints. But we got there, the relief of seeing the concrete going in was immeasurable. In went 43m2 of concrete. Well, 41m2 and 2 cube onto the floor, but that was a small price to pay. I'll continue the story below...2 points
-
We are building a four-bed detached house in the south of England and for a whole host of reasons (well mainly privacy!) I thought I’d try a blog in a slightly different way. I’ve been making notes of “lessons” we’ve learnt along the way and I thought I’d try and write them up whilst we progress before hindsight has the chance to alter them too much! Some of them are things I wish I’d known or realised beforehand, others are just little things that have worked well for us, but hopefully they might be useful for others at a similar stage and I’d be interested to hear how they compare to your own. The first chunk are my notes from finding land through to gaining planning permission… There’s no doubt luck is required to find a good plot, but you can give yourself the best chance to be lucky. Research planning applications, look for areas of land on Google Earth, use Land Registry, write letters. Don’t just wait for Rightmove. We paid a lot of money for a site without planning permission – many people told us we were breaking the biggest self-build golden rule. We were clear with ourselves about the risk we were taking, understood exactly why the current owners didn’t want to put planning in place and, importantly, we made sure the price we paid reflected the risk. Neighbourly relations are hugely important and you likely need to be prepared for people to object to your development no matter what you design. Disruption, noise, loss of green space, loss of privacy, and just change in general are all very real worries for people. We wrote letters to everyone in the immediate area outlining our plans and kept them up-to-date with our progress. We worked really hard to always be polite and courteous, even when we weren’t always getting that in return. We can now happily meet any neighbour know we’ve always done our best. Everything takes longer than you think! During the design process the weeks seemed to tick by very quickly – every iteration needed our architect to re-work something, and then come back to us a week or two later. Be open to your architects ideas and suggestions, think things through and question your own presumptions, but also don’t be afraid to push the design in the direction you think best. Our plot is in a conservation area so our plans were always going to come under a lot of scrutiny. Read up on planning applications in your local area and follow the applications as they progress, in particular read the statutory consultees responses (highways, trees, conservation). You can learn a lot by seeing what amendments or information they’re requesting and how that might translate to your own application. We used our local authority’s planning pre-application advice services with a fairly mature set of plans. This cost as much as a full planning application, and took longer, but was invaluable for letting us get feedback from the conservation/planning officer away from any neighbour scrutiny. We’d agreed at the start a fixed price with our architect through to full planning submission, this proved very worthwhile as significant re-design was needed on the basis of the pre-app feedback. We listened to our neighbour objections, and tried to mitigate their concerns where practical, but at the end of the day we knew we’d be submitting plans with things they wouldn’t like. We made sure we explained the rationale for why alternates weren’t possible, but otherwise pushed ahead with the design we wanted that stood us in the best stead for planning. Despite all our neighbourly relation work our application attracted objections (as expected!) but went through smoothly as we’d addressed all the material considerations from our pre-app. Importantly we remained on good terms. If the shoe’s on the other foot - and you’re objecting to a neighbouring application - make sure you focus on the material considerations. One neighbour picked up on the aspect of our design we were least confident would get through but then buried their remarks on it in the middle of long-winded list of other non-material objections. Had they clearly presented their case and focussed on the material considerations they likely stood a much better chance of influencing the planning officer.1 point
-
Hello everyone! Thank you for letting me join this fantastic community! I am currently doing a university project related to passive house. I am responsible for ventilation part. Cheers!1 point
-
So tactile too, things of beauty imo. I recall, as a kid, reading how the English POWs in WW2 would craft them from old tin cans.1 point
-
1 point
-
A measly 3.6kWh for us today. We'd have been better off with nano-hydro generators in the rainwater downpipes!1 point
-
There's absolutely nothing wrong with buying a digger because you want a digger. I've done a lot of work with mine and there's a lot still to do, but when all is said and done I wanted a digger of my own.1 point
-
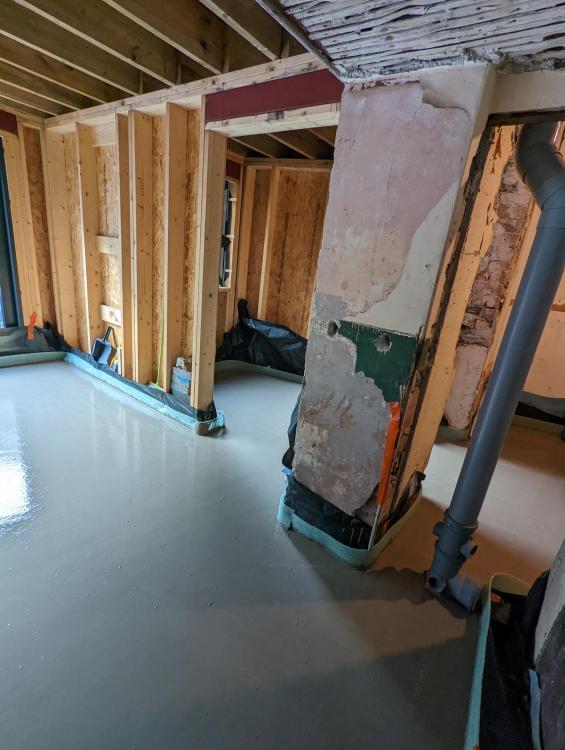
Thanks for the help, a few sleepless nights getting ready for everyone and two nights of taking way too long to get everything down, the disadvantage of old houses nothing is square!! Anyway from the photo at the start, to fiinally finished floor. Thanks 🙂 I presume I can just trim all the edge insulation, upstand and polythene to floor level when its nicely hardened off?1 point
-
Here is reading to be going on with. https://www.heatgeek.com/the-relationship-of-pressure-and-flow-in-balancing/1 point
-
Liquid DPM first, and flick some sand over it whilst wet to provide a key. You don’t want to bring damp up to the surface and then try and hold it back from there, far better to keep it out of ( below ) the new filler material.1 point
-
1 point
-
1 point
-
If the settings you are using succeed in keeping your house at the temperature(s) you want it to be then I see no reason to change them. You are using all the sophisticated control features that your heat pump is capable of. Load Compensation (Air and Water rather than Water) may cause your system to use more energy when the house needs to be heated quickly but less energy to maintain a steady temperature so that's swings and roundabouts. And you should be able to increase the temperature quickly if you need to (a capability for which heat pumps generally have a bad reputation). I like to experiment so I would see if AI+1 is necessary over the full range of outdoor temperatures you encounter but there is no great need for you to do that.1 point
-
I thought the 0.6ACH was the requirement to be certified as a passive house? In Scotland, if your air test comes in a 3 or lower, building control insist you install MVHR. Ours tested at 1.4 which initially I was disappointed with, but the tester said it was the best one he had yet tested. That surprised me.1 point
-
A subcontractor to TW, supplying concrete over a wall, is not my choice for advice. Literally off the back of a lorry, but i won't speculate further. For 16m2 you are only using 2m3, and reducing to 100mm will save you 1/2m2 but add labour. But just bear in mind that 100mm is plenty if you need to adapt as you go.1 point
-
You ca get an air test done on it. Either ask/beg a company that does tests, or make your own tester with a car radiator fan, manometer and a flow meter.1 point
-
I have Andersen charger . Too expensive imho but you can customise the colour choices 😁 . Does look smart . With the cable wrapped into it - it doesn’t look like a charger ( which is the effect I wanted ) . By careful management ( I.e as soon as I see export I plug the EV in ) - current runnings costs for EV are zero . Indeed electricity costs to date ( offsetting import against export of course ) are near zero . A simple way I do it is my direct debit to octopus is £25 a month . After 12 months I have £300 in credit 😁1 point
-
Very good. The eco+ mode on the Zappi requires 1.4kW surplus and we rarely generate that much at this time of year so just dump any excess into the Power Diverter. It will perhaps be different when there's more sun, but the current Go rate, the fact that we utilise so much of our PV already, and the relatively low mileage we use the Mini for, means battery storage is probably not for us (at least not until V2H becomes a possibility).1 point
-
It Passive House Open day in a couple of weeks - https://www.passivhaustrust.org.uk/event_detail.php?eId=1016#Participating projects1 point
-
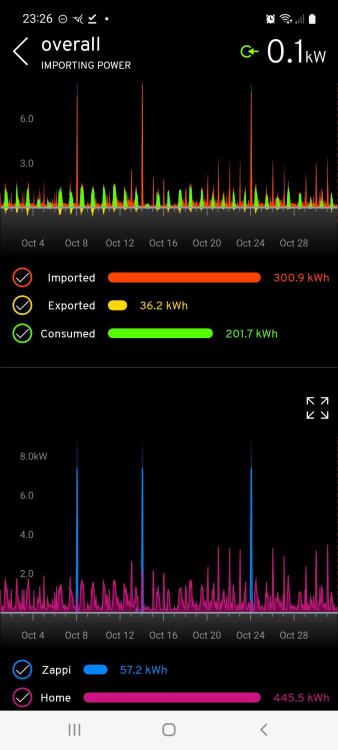
Hi @NSS. Glad the Zappi is working out well for you. I've recently purchased an EV charger having used a 3-pin plug for the last 3 years! I wanted something that worked with my solar PV and batteries and, obviously, the Zappi was near the top of the list. But.... ...I decided to go with a Hypervolt charger in the end. not as intelligent as the Zappi for solar/battery but it was quite a bit cheaper! since having it installed by my sparky I have mostly used it to charge from solar PV in what Hypervolt (HV) call their super-eco mode in which is requires a minimum of 1.4kW being produced to charge. I have noticed that in this mode it will also sometimes discharge from the battery to charge. I think the logic is that if the house is exporting to the grid then the HV will ramp up the charge to the car. I guess then that if the solar PV generation drops maybe the battery kicks in to cover the shortfall quicker than the HV reduces the charge rate. I'm not really sure but it seems to work! The reporting side of things is poor in comparison to the Zappi but from my battery usage data I can see that it's working. when you consider that there's hardly anything running in the house at the moment, just site lights mostly and so any consumption in the graph below is the car charging. you can see that the battery definitely discharges to help out with the charge and when the car doesn't need power (or there isn't enough power being generated) the car stops charging and the generated electricity goes back in to the batteries. what this basically means is that for the last month since I installed the HV I have been running the EV for free. 🙂 According to the HV app the amount of energy it has put in to the car during October would've cost me £133.06. I think that's a pretty darn good saving in a month.1 point
-
1 point
-
I stuck a temperature probe into the trap after showering this morning. The temperature was 34.6 ºC. You might lose some heat to the drain before the water enters the WWHR unit, but 27 ºC doesn't sound unreasonable for modelling purposes.1 point
-
If that happens in your house, there is something wrong with your stove. It does not happen here. Don't assume all stoves do this.1 point
-
We have balanced MVHR, WBS with an external air vent connected to to the stove. Would have thought a disconnected air supply, is just an air leak in to house, not really understanding why you want it in an airtight house, with MVHR. But everyone to there own thoughts on that. Never experienced anything stuffy in the house (with or without stove on), have baked myself when we first tried the stove with room temperatures at over 27. Buts its just a matter of getting the stove burning, very little air and not much wood, to controls heat output. Don't select a stove with a high output. A house that requires circa 3kW to heat at -5, doesn't need a stove that puts out 16kW for example. When stove is off, just select air supply off, so no un-necessary air movements. Simple1 point
-
it's not difficult to set the MVHR up to hold the house at slightly positive pressure which will deal with any possible leaks around the stove.1 point
-
If your buying a decent amount they will deal1 point
-
Advice we got was have your windows fixed to the kit, extending out across the cavity then 10mm beyond to allow for them to be sealed against the brickwork.1 point
-
Perhaps I should do a reddit-style AMA 😅1 point
-
Looks like tile on top of bitumen, probably shrunk back from the wall over time. Filling with foam or flexible sealer will be ok. Grippers really should have been glued or drilled and screwed on that floor.1 point
-
Time for an update. I settled with working within a 450J window and it's not too much of a hassle. The diverter has been in constant operation for 3 months now and has only let 6% of what it has diverted out to the grid. However, last week I installed a new UPS for some computer kit and immediately noticed a problem. The switching supply in the UPS puts a tragic amount of wideband noise on the mains when charging the battery and this was swamping my X10 like 120kHz signalling. I was using this as a low latency signal to "burn" cycles remotely around the house. But as elegant as it was, it's no good if it can't be relied on. Back to the drawing board (I always suspected this might be an issue). I then revisited the use of MQTT but nothing I did could get latency down below a max. of 160ms. At 3kW this is about 500J so the buffer could easily over/underflow and hence possibly cost me unnecessary import. UDP was still too slow with a max. latency of 80ms. Something else was needed. This is when I started looking at RF modules like the Nordic Semis NRF devices. But when researching I found comparisons with a thing called ESP-NOW. Turns out I don't need another RF module as Expressif have implemented a low-latency peer-to-peer communication protocol that can run concurrently with the WiFi stack on the ESP8266 and ESP32. It works by allowing small packets to fly between devices point-to-point. They're not passed through access points or switches and have a latency of a couple of milliseconds as a consequence. Perfect! It also has a broadcast capability so my goal of being able to distribute dump loads around the place is nicely catered for. The packets are only 250 bytes but that's plenty to have a 'burn' flagbit and a frame count (to spot missing packets for a QOS check) as well as a cycle-by-cycle voltage and power measurement to keep the immersion unit updated with the bigger picture. Being point-to-point also means the entire network, along with MQTT etc. can go down but the measurement unit and distributed dump load switches will all stay working. The range isn't great though and I've swapped the ESP32's with ones that can have an external antenna to improve the range. However, even with 5% packet loss, with packets sent at the end of every cycle it would be unlikey for 5 out of 100 to go missing in a row and lose 100ms (300J). Also, it's easy to rebroadcast the packets with a repeater that can extend the range. Somehow ESP-NOW manages to step in and answer all my prayers for the sake of a tiny extra code overhead.1 point
-
I know the advantage of buying one at the start of a build, but even mine I had to put a new crown and pinion gear in it as I lost all drive. If you own your own small machine you can use it when the weather conditions are suitable so you don't churn all the ground up, rather than being pressurised by a rental period to get the job done. Buy from a local dealer that way your transport cost will be less, make sure it comes with a selection of buckets. Have a look on www.machinerytrader.co.uk I wouldn't hire, such a handy tool to have available if you don't mind some of your finances tied up.1 point
-
And for very much of the time an immersion heater heater fed from a PV dump controller is running at a low power input.1 point
-
Now that is a dilemma. Here are two facets. In the past lenders would release funding at certain stages. Underbuilding out of the ground, wind and water tight, first fix, completion say. Their idea of wind and water tight was that the windows / doors had to be in and the roof weather tight but no tiles say. But for self builders windows and doors are a big ticket item so you wanted to buy them as late as you can in terms of the cost curve / interest paid on the loan. Also windows and doors can get damaged so best left until you have stopped using Sthill saws etc in close proximity. Structurally wise the windows are often fitted to the timber frame which moves up and down and thus so does the window with it and the finishes on the inside. To accommodate this movement we put a compressible material under the cill where it extends over the outside leaf of masonry which for all intents and purposes stays still. Over the head we allow a gap between the top of the window and the timber frame lintel (to account for deflection from roof loads.. tiles etc) and a flexible mastic joint between the outside of the window frame and the outer leaf of masonry. In Scotland we have been doing this for decades so know that it works ok if the drawings are followed... that is what we strive for! Remember that a timber framed house is very much a "living" structure. Yes when the frame is first built it will shrink a fair bit but in autumn after the heating has been off over the summer it will swell a bit. It is always moving. The problem is that if you fix your windows to the outer leaf of masonry is that it is much harder to create the aesthetic movement joints between the timber frame / attached finishes and the inside face of the window frame. The window frame then be still as it is fixed to the masonry, the window cill, wall paper ect will then be moving up and down. Best to keep the big flexible mastic joints outside than on the inside? Would I fix a window to the outer skin of masonry on a standard structural timber frame if it was my own house.. no.1 point
-
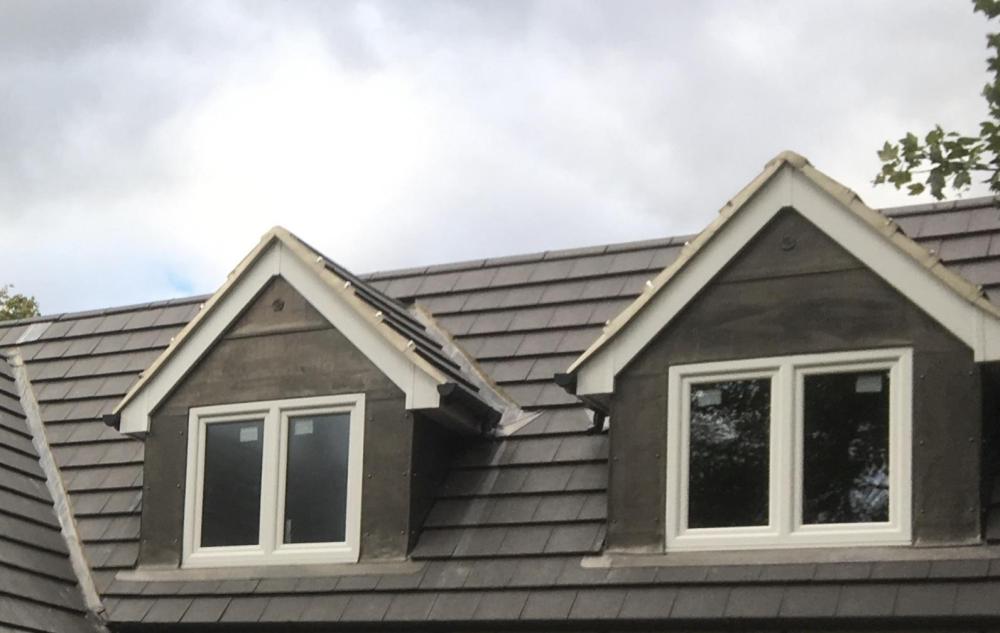
That's looking good.. everthing looks nice and clean. Nice brickwork / blockwork, lead flashings not over length (as per Cookson guide to good leadwork), good drip (min 40mm recommended) on the cills. Looks like a clever detail at the bottom of the wall abutment flashing.. any chance of a close up photo? Well done I say. For all. In principle you can stick a lot of load down a short strut bay pole before it buckles. Hence the two tonnes mentioned. But when the manufacture's test these they work on the basis that you have a material top and bottom that has a high compressive strength and is stable side to side (laterally) which is not often the case as you may have brickwork below and timber above. SE wise I would always look at any bay pole visually. Any more than 200 kg load say invites a fag packet calculation check on the suitability / stability of the materials that are above and below it. In summary.. if you are putting more than say 200kg down a bay pole then don't take just the advise of the window fitter, always use common sense and look at what is below it.. old brickwork, soft stone.. and what is transferring the load to the bay pole at the top.. say timber... let common sense prevail. Also remember that what is above and below may want to move sideways as it is essentially "balanced on a pole" so you need to take measures to prevent this. Remember that if the material starts to crush a bit at the top and bottom of your bay pole load will be transferred to your new windows which may start to "protest".1 point
-
Hi. I dragged the pipe and sheets up from Preston when I moved here, I bought the pipe from sky plastics. Poly sheets from Varico ltd, but they wouldn't deliver up here. They deliver to the isle of Lewis (I think there is a company there making a version of the polycrub). So being near Oban they might drop off. I'm going to be making another in the future for a weening shed and store so post back here if you get success.1 point
-
1 point
-
How will it fail ..? It’s not in contact with liquids, it’s not UV exposed so why would it fail..? All the sockets on your underground waste have seals made of the same stuff and we don’t worry about those for 50/60 years..?1 point
-
The relevant bit of the Building Regs is Approved Document G.. So yes it is a more stringent standard than otherwise. Never heard of it being a problem for lenders. One option might be to ask the planners if they would remove/replace the condition if you install some sort of rainwater recycling system. Even if only for flushing loos. Propose your own ambiguous condition. What does the SPD SP10 say about rainwater recycling if anything? We have an underground rainwater recycling tank but its only used for garden/car.1 point
-
HMRC see it like this... Fitting is labor which must be zero rated to you. If you purchase worktop from B&Q it would be standard rated to you but you can reclaim it after completion. Mixed labor and materials (eg supply and fit) should all be charged to you at the same lowest rate. In this case that woukd be the zero rate for labour. So in short, it should all be zero rated to you. If you are given a quote for £xyz plus or Inc VAT its best to get it amended before you accept it.1 point
-
If it helps I've compiled a list of ways you can connect blinds/curtains to Loxone.... Option 1: Hardwired Power with Loxone Wireless Control Example motors: Geiger Solidline Air - this is the motor Loxone promote Loxone Parts Needed: Loxone Air Receiver Pros: Loxone wireless protocol built into motor makes integration easy and no additional hardware needed at the window location (such as a wireless transmitter) Hardwired power means no batteries need re-charging No need for wiring back to a relay or main panel or plant room Only need 240v power at each window which could be taken off a socket or lighting circuit Cons: This is a 45mm motor which means it will only go in a 65mm+ tube meaning the minimum rollup size is going to be around 70mm which is quite large High torque motors (great for RLs but overkill for standard blinds) Wireless control limits distance from transmitter to receiver Wireless control is not 100% reliable although it is good and always getting better As more devices become wireless there is more radio traffic and more risk of interference 'Dumb' motors with no 2-way communication or feedback to the system Option 2: Hardwired Control Switched through Power Example motors: Somfy WT, Nice Action, Vestamatic MM or ME Loxone Parts Needed: Loxone 240v relay appropriate to the number of blinds you have. Pros: Total reliability of control Hardwired power means no batteries need re-charging Easy to trouble shoot Wide range of motors Cons: Home-run wiring needed from the relay to every window Intermediate stops need to be done via a timer rather than using logic in the motors 'Dumb' motors with no 2-way communication or feedback to the system Option 3: Hardwired Power with Wireless Control Example motors: Somfy WT, Nice Action, Vestamatic MM or ME Loxone Parts Needed: Shading Actuator Air Pros: Hardwired power means no batteries need re-charging No need for wiring back to a relay or main panel or plant room Only need 240v power at each window which could be taken off a socket or lighting circuit Wide range of motors Cons: Wireless control limits distance from transmitter to receiver Wireless control is not 100% reliable although it is good and always getting better As more devices become wireless there is more radio traffic and more risk of interference Intermediate stops need to be done via a timer rather than using logic in the motors 'Dumb' motors with no 2-way communication or feedback to the system (Loxone say it is a pain to setup) Option 4: Hardwired Power with Dry Contact Control, 0v Control, DCT Example Motors: Nice Edge AC or DC, Gaposa Sileo XS50 AC or DC, Somfy Sonesse 30 DCT, Glydea DCT, Movelite DCT Loxone Parts Needed: Loxone 0v Relay with number of channels appropriate to the number of blinds Pros: Total reliability of control Hardwired power means no batteries need re-charging Easy to trouble shoot Cons: Good range of motors but mostly in a higher price bracket than the switching through power option Home-run wiring needed from the relay to every window Intermediate stops need to be done via a timer rather than using logic in the motors 'Dumb' motors with no 2-way communication or feedback to the system Option 5: Hardwired Power with Digital Control Example Motors: Sonesse 30 RS485, Sonesse 50 RS485, Vestamatic SMI, Nice Smart, Glydea RS485 Loxone Parts Needed: Loxone RS485 extension Pros: Total reliability of control Hardwired power means no batteries need re-charging, power can be local to the blind Easy to trouble shoot Easy to set multiple intermediate limits and get hembar alignment at the stop positions Data can be daisy chained making communications wiring easier 'Smart' motors with 2-way communication, system can see blind status (open, closed, etc.) Cons: Slightly limited motor range although some good options available Potentially more complex commissioning needed, especially when intermediate stops required Power and communication wiring should usually be separate, therefore two cables to run (although power could come off a socket or lighting circuit) Option 6: Wireless power with Wireless Digital Control Example Motors: Sonesse 30 WF RTS Loxone parts needed: Loxone RS485 extension Other parts needed: Somfy RS485 RTS transmitter; Pros: Easy installation as no cabling required Long battery life (8-12 months depending on frequency of use) Cons: Maintenance required, battery charging once a year Wireless control limits distance from transmitter to receiver Wireless control is not 100% reliable although it is good and always getting better Slightly complex commissioning for AV integrator and blind installer Option 7: Wireless power with Wireless Dry Contact Control Example Motors: Sonesse 30 WF RTS, Nice Edge Battery motor Loxone parts needed: Loxone Dry Contact Relay Other parts needed: Somfy DCT RTS transmitter or Nice 0v radio transmitter Pros: Easy installation as no cabling required Long battery life (8-12 months depending on frequency of use) Cons: Maintenance required, battery charging once a year Wireless control limits distance from transmitter to receiver Wireless control is not 100% reliable although it is good and always getting better1 point





.jpg.c21f3ac78c9b7efd90cbdcb312744dc5.thumb.jpg.7adcad4c0e384f5ecd7d56b0618df6e5.jpg)


