Leaderboard
Popular Content
Showing content with the highest reputation on 06/04/21 in all areas
-
Hello all! We are finally taking the first steps towards our first self-build project in a small village in Cambridgeshire. About 7 years ago we found a run-down 1950’s house sitting in a lovely 0.75-acre plot in the middle of the village conservation area. We are currently living in the old house and we have submitted a full planning application to demolish and replace the house with a larger, well insulated modern ‘barn style’ house to fit in well with the surroundings. Our LPA took nearly 9 weeks just to validate our application (they did ask for one minor correction which was provided on the same day). The application seems to be moving forward well now with neighbours and parish council supportive. Our Phase 1 eco survey stated ‘low potential for bat roost’ and unfortunately one pesky Pipistrelle was then spotted emerging during a follow-up dusk survey! We have now had a dawn survey and we will have to pay for bat mitigation including supervised hand stripping of the old roof tiles… I’m planning to be very much ‘hands on’ during the build and I have already found lots of useful info on the forum. I’m sure I’ll have plenty of questions as we get underway.3 points
-
so, here we are at the end of the 3rd week of our build with the groundworkers having dug the basement to depth and put the sub-base down ready for levelling and compacting on Monday with the blinding and insulation to also be completed on the same day. We got a second digger driver on site this week and things have really got going and on Friday we even had a 3rd person to stand around with the laser level to assist. Here's the time-lapse video of the week. The basement contractors were due to start on Monday but as the groundworks aren't quite finished they've been pushed back to Tuesday. Despite that we're very happy and even happier since I've been told that the basement construction should only take 5 - 6 weeks, whereas previously I'd been working on around 8 weeks to complete. This is brilliant if they can do it in that time frame and I've already given the timber frame company notice that we might need the TF a couple of weeks earlier than anticipated if they can accommodate that. only time will tell if that's the case. The week finished off with me laying my first ever slab. It will house the electricity kiosk and also be a place for our wheelie bins to go. it was actually the UKPN surveyor who suggested to me to make the slab for the kiosk a bit bigger to allow the bins to go there. I thought it was a great idea and saves me creating something further down the line. Being a bit of a cheap-skate I use some of the old shiplap cladding from the pool house that got pulled down so it probably wasn't the best wood to use for the formwork and, after I put one piece down I did notice is was a bit warped but figured it's just for bins so just left it there. if it's not obvious it's the piece on the left hand side. Also, the 150mm ducting for the electricity cables made tamping the concrete down quite tricky around them so it's not perfect but it'll do. And if anyone asks I'll just say it adds character. seems to be a one-stop excuse for shoddy work. I promise I will take more care over the actual house! For mixing the concrete I was going to hire a cement mixer but at the last minute decided to cancel that and save myself £25 and a drive to pickup and drop-off the mixer and ended up mixing it by hand in a wheelbarrow. that was pretty hard work for someone who sits behind a desk all day and I'm feeling pretty stiff and sore right now but I'm sure as the manual labour progresses it'll help get me in shape in the long run. I'd like to finish with an observation.....this self-building is a funny old thing as I've never ever looked forward to a Monday morning so much in my entire life! I'm just so excited to get to Monday to see what next week will bring. Hopefully I'll go back to hating Mondays once the build is completed. that's about it for this week. I can't wait to see what next week brings.1 point
-
Thanks for the comments and bat humour! I do quite like to watch the bats at dusk, just don’t like getting reamed for several £k before we even get started! I hadn’t considered the potential impact upon roof construction, but I’m still waiting for the report with bat mitigation measures. Fingers crossed it won’t be a heated two storey bat annexe ?1 point
-
1 point
-
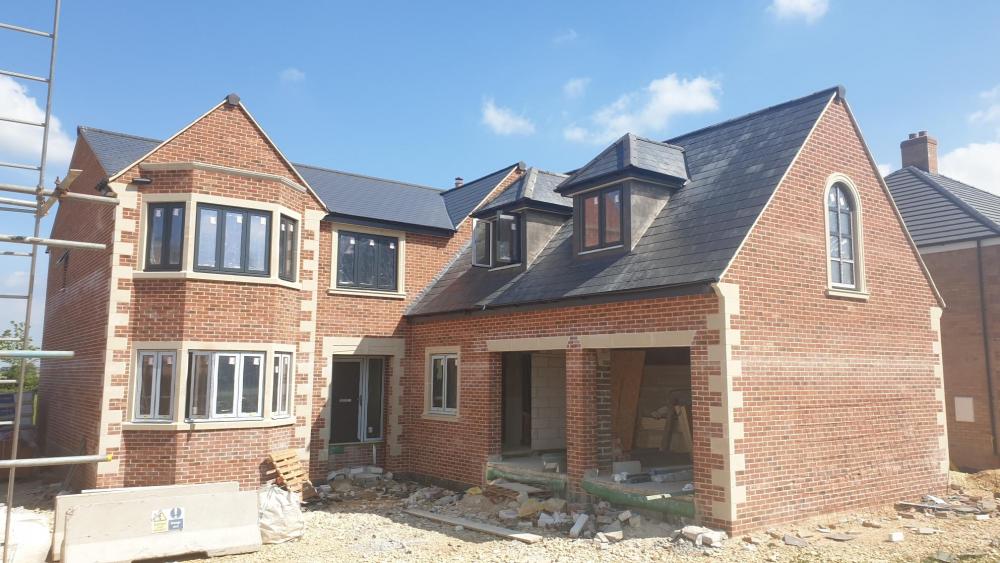
Attic roof, dormers and windows complete. 1st fix Monday. Those Alu windows were seriously heavy with the glass in place - had to boom some in with the forks at the back over the scaffold - a bit hairy lifting a £1k slider 14m in the air! The full on transition from basically winter to the height of summer this week has taken it's toll on me and everyone else on site - it is a nightmare.1 point
-
We have similar except we want to paint some decking and some timber cladding the same colour. That seems to limit choice somewhat. Only a few suppliers sell decking and "fence" paint the same colour and only in a few colours, mostly brown. So to get the colour we want we had to go to the big orange DIY shed where they can do both in a range of colours at the counter where they mix it. I will let you know when we get around to doing it how successful that was.1 point
-
The lawful development thing is usually an acknowledgement that you have done something without PP and got away with it long enough that they can't take any enforcement action. I don't see how that relates to this. If you have to demolish something before you can commence building then notify them that you have started the demolition and ask for confirmation from them that "the development has started" In our case we had a planning condition that the first thing we must to is create the new access from the highway before we can start building. I notified the planners when we started to do that and i had an email followed by a letter acknowledging that the development had started.1 point
-
I like Bedec MSP. Doesn't need a primer or undercoat. Lasts well. Goes on OK for me. Been using it for the last six or so years. Not repainted anything yet. Also used Sadolin Classic stain on some cladding. That on the shaded side is still good after nine years. On the side with more sun I gave it a recoat last year.1 point
-
Yes , could have gone cheaper but opted to spend a bit more for better quality detailed drawings. ( well that's what they have promised )1 point
-
Normally they use more words to justify the refusal, possibly citing the impact and it being contrary to some policy or other. Any chance you can post the full reason given? The only other reason I can think of is that more floor space can mean more bedrooms, more people living there so more cars, parking, school places etc.1 point
-
We have our boards down for almost 3 years now (Millboard) - No cleaning or maintenance at all, and looks as good as the day it went down. No warping either. The only issue has been where there are cut ends on show; the material has a yellowish core - Millboard provided some paint to colour these areas, but it is not as durable as the proper coating.1 point
-
1 point
-
1 point
-
1 point
-
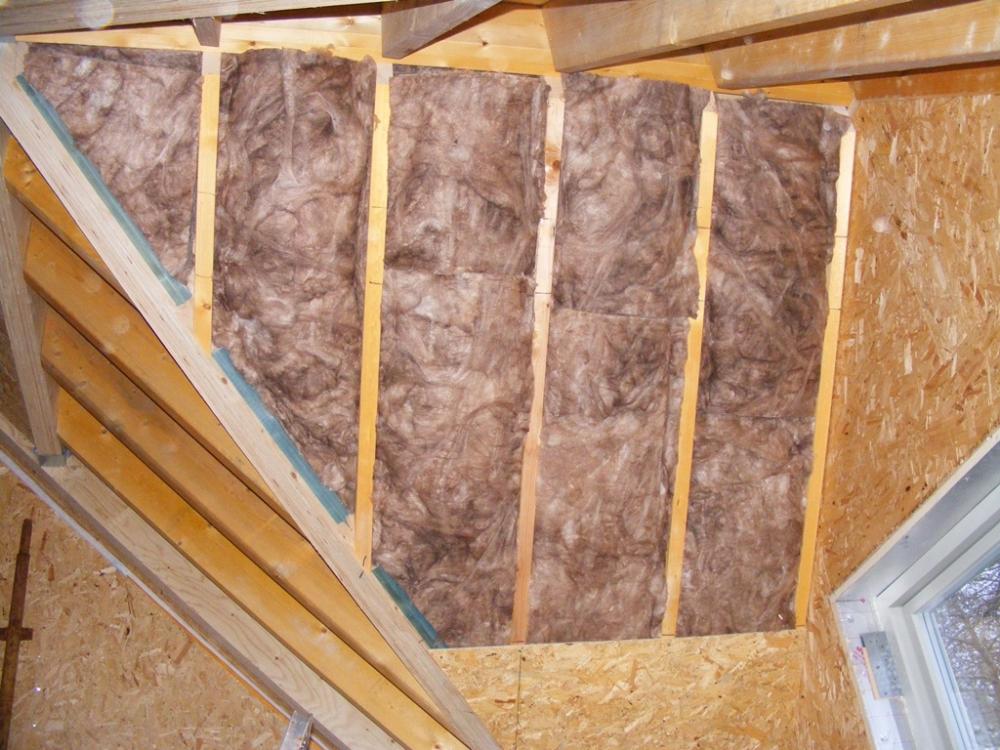
I also used frametherm for my room in the roof insulation. If it's cut to suit the gap in the rafters then it won't go anywhere. Like @ProDave I left a section not boarded for a few months waiting on plumbers to work their magic and it never moved a mm.1 point
-
How are you laying the slabs - will it be enough to displace the water to a level above the outlet height? Either way, if the workmanship was ok, I would be surprised if you were to see a problem in a medium term time frame - 15 -20 years or so.1 point
-
I found the appeal process easier than applying for planning (and I did it myself). Crack on ?1 point
-
1 point
-
1 point
-
So, to understand the full picture, you got PP to replace that old building with a new one but only put "rooms" in the ground floor leaving an empty loft? You now want to put rooms in the loft (just room in roof not a full on roof off and add a second story) and the LPA say no? Is that about it?1 point
-
I got one prepared by a local solicitor when we were preparing our own planning application. It didn’t cost much. We also got some friendly neighbours to write letters of support which included statements about the existence of a previous structure on the site.1 point
-
If you post up the photo we could take a view. Is the whole building demolished, or just the mezzanine? Even if there are some supports or fixing holes it should help your case.1 point
-
1 point
-
If you have a photograph of the previous mezanine I would say that is good grounds for appeal and just make it clear to your LPA that is exactly what you will do if it is refused.1 point
-
I was using the loft roll for insulating my sun room floor so it did not need to be self supporting. Frametherm 35 used in my ceiling, self supporting between the rafters before being boarded. I did one test section where I put a strip in long before I was ready as a test and left it there for 6 months and it did not sag or fall out.1 point
-
My wife’s just commented that a better grounding before coming working for me Would-be to read Oliver Twist1 point
-
I am not a plasterer but there is no way I would force dry plaster. They do tend to cut corners on that prog.1 point
-
Tony Tray. A sheet of air tightness membrane laid over the top of the downstairs wall (lapping down the wall a bit) that then wraps around the ends of the joists. the upstairs panels go on that and then the membrane laps up the wall. It makes the job of making the house air tight oh so simple compared to taping every single joist end individually.1 point
-
It depends what was specified. I have seen some insulation fixings where the screw is recessed far down into the large head of the fixing so if the insulation compresses the screw does not pop through the membrane. Because you have pedestals and raised paving, you should be able to avoid placing a pedestal base directly on a screw head. You can always drill or cut out a bit of the base if a clash is otherwise unavoidable.1 point
-
They dont look like fixing heads to me, more like pieces of grit or similar1 point
-
It’s normal to see large fixings, those do look a bit pointy though1 point
-
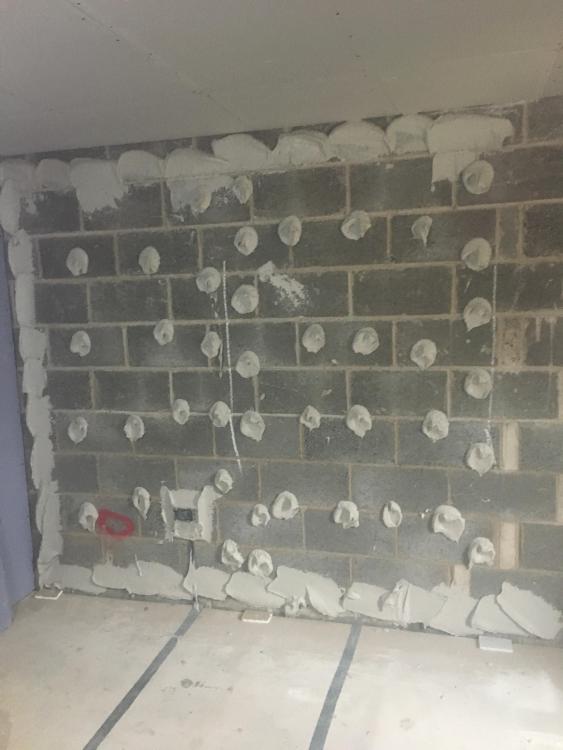
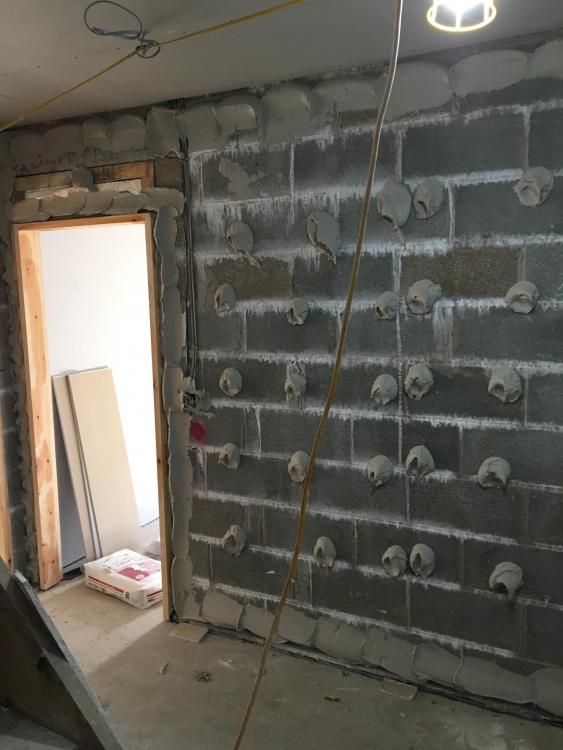
It's all down to quality of work, whichever you chose, and attention to detail. I would parge the blockwork, fill and smooth any chases / back boxes etc, foam and seal joist pockets / other penetrations to atmosphere if you have them, and then dot n dab. You won't get a plasterboard / thermal 'tent' if you mitigate against it. Knowing how / where to successfully mitigate is the key to success.1 point
-
As a business I do both options Both can easily be sealed It’s down to individual preference The main areas for air leakage are around windows and exterior doors The heads and reveals around these will need to be dot and dabbed But the rest can be wet plastered I chose to dot and dab ours As it gives a warmer feel Though I could have rendered it far half the price1 point
-
I like to hold posts up off anything that they can sit on outdoors, eg plate rebated into the end of the post1 point
-
I should add that its very unlikely they would initiate enforcement action if you started before getting the condition discharged. However there are situations where its important your start is legal. For example to keep,planning permission alive beyond 3 years and in some circumstances your VAT reclaim.1 point
-
It can go under the slab. In either case there should be a DPM somewhere below it and a slip layer immediately above it. https://insulation-uk.com/floor-insulation/ground-floors/concrete-slab-floors PIR for floors has a compressive strength of 140kPa for 10% compression, 1% compression (more realistic) will be around 45kPa (or about 4-5000kg/m2) so O.K. except for load bearing walls https://insulation-uk.com/assets/5405_floors_bba-certificate_nov2018.pdf1 point
-
1 point
-
The insulation can either go under the concrete or on top. As it is a ground bearing slab the make up will depend on the ground conditions. Double check with the building inspector as it is best to be on the safe side.1 point
-
With timber frame the floor deck adds to the strength of the building and the deck is fixed over the entire floor, excluding the stairwell. For internal partitions you can use some isolation strips at the base. Leave the plasterboard 5mm short of the floor. The Screedboard suggested by @Dan F is very good but you lose some ceiling height. You could use resilient bars on the walls. They are fairly cheap but help decouple the plasterboard.1 point
-
I usually try to keep them on side but there's a point when that goes out the window! Agreed, this is my attitude too. I try to make their decision easy, with all the information they will need, but not too much either. I hope that when they first stamp it in, they notice that it will be straight-forward. But then if they simply ignore it, it is time to make a fuss, and make it worth their while (I mean time efficiency) to just do it. If no progress, then it is legitimate to start the job, with the risk of pulling it down again, so depends on the likelihood of approval. There may well be other applications jumping the queue because of pressure from councillors and big developers. We little people have to decide to accept that or find another way forward. It is the system , not usually the planning officers personally. When they ask for an extension of time, otherwise it will be a refusal, then that is naughty. But I know why they are doing it, and a deadline can often be agreed. What to do? Speak to your Councillor and MP. In principle they work for you.1 point
-
Yes you can. With a programme such as Adobe Illustrator you can import the PDF into illustrator and then export it as an AutoCAD .dwg file. Two types of PDF files exist. Vector based and raster based. Vector are lines and text that would be printed from AutoCAD. A scanned pdf or image is made up of pixels and can't be converted back. When converting PDF back to AutoCAD with illustrator you'll lose some of the autocad layers but that's fine as some companies strip this out anyway when sending you the original AutoCAD file. It will also be to a particular scale. eg 1:50 so after you convert it back to .dwg file format you'll have to scale it by 50. Some other annoying stuff happens like hatches are all converted to lines. If used to AutoCAD commands it's the same as everything in the drawing is exploded. This can make hatches difficult to modify. Text is also converted and not editable. It's all still fine though as you strip out the hatches and text and have all the lines of the house or building perfectly which is what you want.1 point
-
We normally use a 15 mil rip of plasterboard under the track Or your case sole plate1 point
-
Weeks 4 and 5 of the build saw our basement slab being poured. it was a major milestone for us and we're really happy....well, apart from the section that was too high and they needed to grind it down of course, but apart from that we're really happy. ? We have 200mm EPS300 specified for under the slab and this was laid by using a long telescopic rule from the profile board strings 4m above at ground level. We are supposed to have a 200mm toe outside the slab and luckily I was outside when the basement contractor's engineer came for a site visit to set out for the slab and I asked if it was square and was told it was a bit off in one corner. a bit off turned out to be 70mm. now, in my mind if a structural engineer tells me that the 200mm toe is needed to take the 45° load from the walls above then you really should have a 200mm toe and 130mm just wouldn't cut it. you'd think that wouldn't you? but, it turns out that unless I was there to ask them to move the insulation so that I had the correct toe all around it it wouldn't have been done as the corner points had already been marked. I got a few huffs and whinges about 'but we've already set out' but there was no way I was letting it slide and made sure I was happy with the toe widths. This just goes to show the importance of living on-site as I pop out every hour or so to get a break from my desk to see what's been going on. if I didn't do that I wonder what else might get missed and just covered up? Anyway, after the corners were set out the FIS waterproofing membrane (http://www.fisproducts.co.uk/product/maxiprufe-plus-2/) was put down on top of the EPS300 as this will then join the same membrane on the walls to form a waterproof wrap around the basement to ensure Type A protection and with the Type B waterproof concrete that will give us our 2 forms of waterproofing. Following that was the formwork, steel bar and mesh, hydrophilic strips (http://www.fisproducts.co.uk/product/cemflex/) and kickers and then we were ready for the concrete. The day of the slab pour came and we were extremely excited. It was though, as I’m sure it is in most cases, a very last minute dash to get ready for the pour. The contractors were let down by a couple of extra pair of hands on the morning of the pour so they were rushing around finishing off bits in between lorry loads of concrete. it all worked out ok in the end though. We took loads of photos as well and here are some for your enjoyment. The waterproof membrane on the EPS: Formwork almost complete: Steel mesh: kickers almost finished. the final ones in the courtyard (to the right) were done on the day of the pour: The shuttering for our sump in the courtyard: first lorry load: almost there: finished: sadly the weather turned a bit for the worse during the pour and the finish isn't perfect so we'll probably have to put a self-levelling screed down but we can cross that bridge when we get to it. the next morning: After they struck the slab formwork they made a start on the wall rebar. it's only now that I see it up that I realise how bloody high the ceilings will be! 3m was the request and that is what I got. painting them will be fun. ? I did create a video for these last couple of weeks but as all the work was predominantly down at the bottom of the big hole and the camera didn't really catch it all I've sped the footage up quite a bit. Still, I think it's a pretty good watch and you can certainly see a large portion of the work that was done. (Please note that the music has explicit lyrics so you are forewarned) This week they’re starting on putting up the formwork for the walls and we’re hoping to get a pour in towards the end of the week which will be great. I was told that the walls should take about 3 weeks in total so we should really see some great progress over the next few weeks. As always, thanks for taking the time to read our journey.1 point
-
I'm currently looking at this again and I think Millboard is the one I'm going for. Waiting for some more samples to arrive to make a final decision. I've only seen a small deck with it at a local installer and it did look superior to their 'own' product which they claimed (iirc) had a warranty that was as long as Millboard's, but I doubt they'll be around in 5 years, let alone 25yrs. Prices and transport costs seem to vary quite a bit too for MB. I'll try and find my list of prices....1 point
-
week 2 has finished and the perimeter of our basement has been dug down to the sandstone and it is now obvious how bloody massive this thing is going to be! it really didn't look that big on the plans.....honest! ? we were hoping for more hands and heavy plant on site this week to speed things up but Monday and Tuesday came and went and still the one man and a digger. on Wednesday a second digger came! woo-hoo! but no extra help so we now have one man and two diggers. It seems to have made him more efficient as he doesn't have to get the one digger out of a big hole to load the lorries. Anyway, here's the video of the second week. I hope you enjoy. we did get the 9.5 tonnes of steel delivered for the reinforced concrete and the waterproofing membrane so it gives me confidence that the basement contractors will be starting soon. we just need to get the hole dug and the hardcore/blinding down and the insulation down first. so not much to do then in the 4-day week next week. One thing the video doesn't show is the huge amount of sandstone that has been dug up already and it's only been half the basement. we're hoping to store it all on site and use it to build a stone wall post-build as part of the landscaping. I think it'll be amazing to have a wall built from stone dug from our own land. here's a picture of the current pile of stone excavated. And here's a small piece I have rescued and cleaned up. it is really lovely stone. Anyway, that's about it for this week. fingers crossed this rain that's here as I type doesn't do any damage to our excavations and it clears up for work to start again on Tuesday. As always, thanks for reading.1 point
-
it's been a bit quiet on our blog so I thought I should update it. While we've been waiting for the groundworks to start we've been busy getting the site ready. This has included getting the new entrance to the plot created, getting the sub-base for the driveway in place and then topping it off with a layer of 6F5 as a hardstanding for the construction vehicles (after the build I can then remove the top layer to reveal the, hopefully, still in good condition sub-base to put the final layer on top of. well that's the plan at least!) and putting up the site toilet. Obviously the last job was the most important. Our new entrance to the plot is over a culvert and as it's connecting to an adopted road it had to be done by an insured contractor and so I had to fork out the cash to get it done. but they did a very good job and we're very happy with it. the culvert in situ with enough concrete on top to take the lorries and cranes for the build a nice base layer of tarmac finished, which will see us through the build when they will come back and put a nicely finished top layer on. nice sand-bagging. ? once, they'd finished the entrance we moved on to the driveway and hardstanding but, first, an observation....it's funny how things don't look as big on paper as they do in real life. that's exactly the conclusion I came to after I looked at the plans and thought "that driveway isn't that big I'll just dig it out myself and save myself a fair chunk of cash" and then went on to dig it out. it was only after I'd finished the 120m2 area did I realise how big the driveway is going to be (I swear it doesn't look that big on paper!). oh well, it's done now, at least we'll have plenty of parking. maybe I can rent it out and do a 'Park and Ride' in to the local town to recoup some of the costs. ? a big hole dug and covered in Terram (or an equivalent to be exact) 100 tonnes of beautiful primary Type-3 granite aggregate all compacted by that beast of a roller. Don't really care what everyone else thinks but I think I did a darn good job for my first driveway sub-base. Sadly it all got covered by another layer of Terram and then a load of 6F5 got dumped on top and it now looks like a building site hardstanding area (which is what it is!). here's a photo of the lovely lady of the house helping out on the roller. it was a bit cold out that day. And finally we get to the most important job, the building of the site toilet. Friends of ours got it from a local freebie site and used it for their self-build, we then dismantled it, transported it to our site, erected it, put a new roof on it and plumbed in the toilet and sink to our existing STP. we think it's a very luxurious WC for site use. it's even got a couple of windows so you can watch the work progress while you're doing your business. and that's it for this blog post. we are extremely excited as tomorrow is the day we've been waiting for and the groundworks starts in earnest. They'll be on site to set up and start digging out the big hole for the basement as the basement contractors are due to start on the 3rd May so we should start to see some real progress now! finally!! thanks for reading. ?1 point
-
The first week of the build is over and I've collated our time-lapse footage for the week and made a 2 minute video, hosted on Vimeo we're a little disappointed at the speed of the dig but the boss has only given us one driver to do the digging/dumping/lorry loading so a lot of his time is spent moving the spoil around. but I've been told that more hands might be on-site next week and a bigger excavator so fingers crossed that happens and we see more progress next week. The basement contractors are due in a week so they need to get moving if they want to hit that deadline! Anyway, I hope you enjoy the video.1 point
-
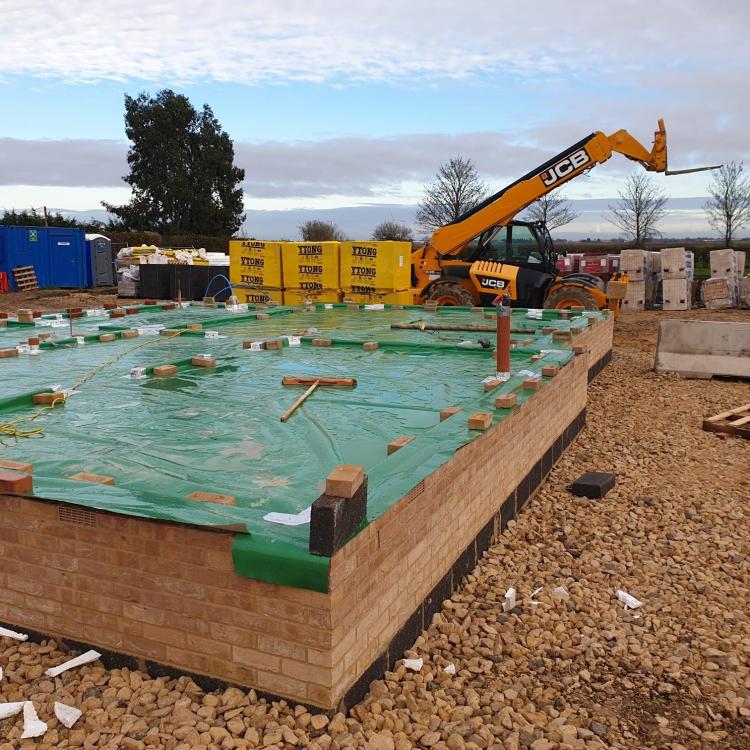
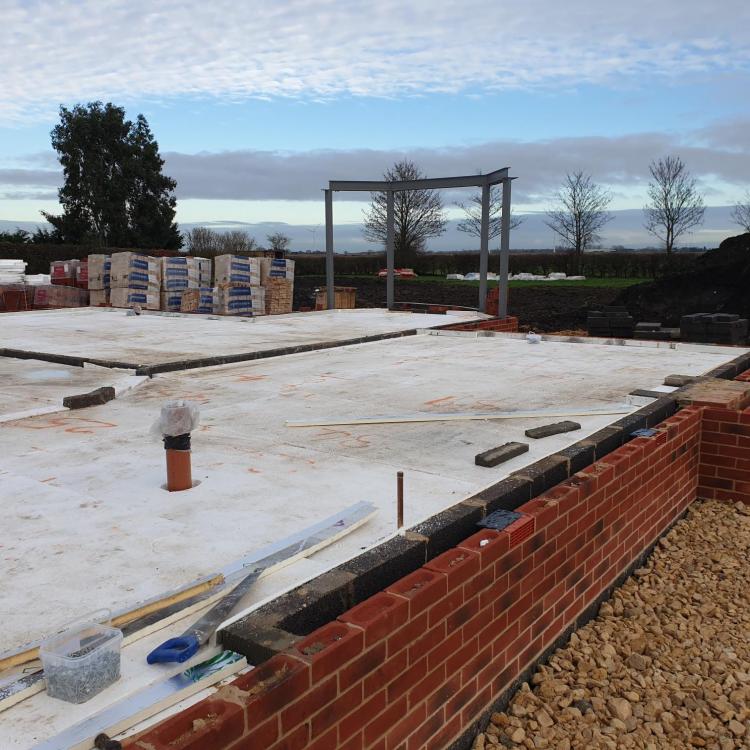
Just by way of an update, we are up to splash on all 3 and the gas membrane is now completed throughout (final plot completed yesterday after I took the photo). UFH on Monday and concrete screed Thursday. Need to spread out the A142 mesh for the garages prior to Thursday and then a day back before Christmas to get the foot scaffold in and that wraps me up until 2021 - happy days!1 point
-
Isotex Support Just a quick note on Isotex support from Jamie and the installation team managed by Dan. Fantastic support throughout with all my emails and calls answered. Only one issue and that was late delivery of blocks but apart from that I am very happy and as you can see the building is looking fantastic after just 7 weeks of onsite building work. This comprises of 3 weeks of support from Dan and his team. They helped me in very specific areas: 1. Laying the first course 2. Setting up the lintels and wall plates 3. Building and shaping the gables Myself and 2 other non Isotex staff helped throughout and ensured the building was ready for each visit by the Isotex installation team. My advice is do some yourself but recognise that certain elements especially on a full house development require experience and understanding. Anyone thinking of buying Isotex then you are very welcome to come to site but you need to book through Jamie and the team. I was supported by many visits to other buildings before I made my decision so if you are unsure then maybe our new house will help you decide.1 point

