Leaderboard
Popular Content
Showing content with the highest reputation on 05/28/21 in all areas
-
Just get an ordinary meter and swap it for a smart meter when it’s all finished. Land at xyz etc is fine for an install2 points
-
Only issue with out of date cement is the chromium and other salts that becomes more aggressive on the skin so gloves are essential.2 points
-
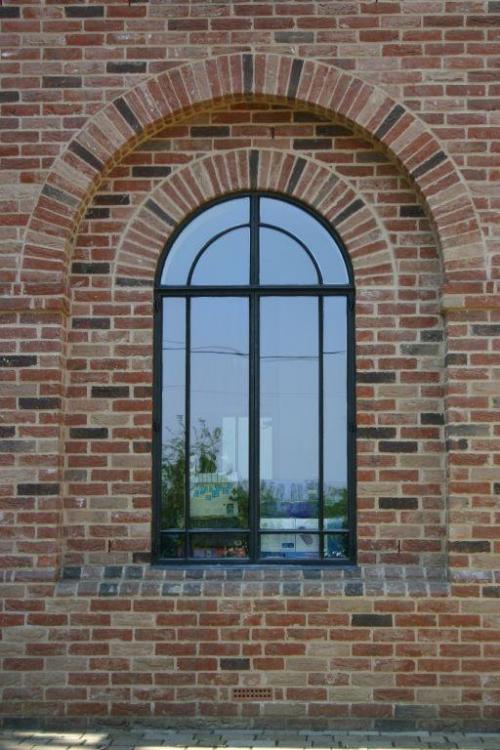
Hi There, I just wanted to share my experiences with one of the biggest stressors for me on the self build, leaking windows - I had 3 of them and it drove me mad. I'm here to share the experience and ask opinions on potential fixes...First of all I didn't want moustaches on my windows like this: I can moan about the detail but in fairness......At least it's watertight Here are my leaking windows, the Stone window/Doors have a different detail which is working perfect(thank God, don't fancy ripping off stonework) You can see I jumped to the conclusion that something was wrong with the window because the only leaking windows were the windows with a fixed glass panel below an opening window..there is a more complex drainage system in these windows (Aluclad-PVC) ... Anyway after so many tests, it turns out it was the sill after all and you can see there is no DPC on the sills either below(It was cut short to allow the sills be stuck in place). you can see the window on the right was ripped out last Month in an effort to address these leaks. (DPC sill in at the moment) This is the install effort unfortunately I trusted the window installers who said once the DPC was past the concrete core, Everything was good (sweet Jesus) and I didn't know any better Sill was CT1 to the window support....That actually was fine and watertight as I later found out. Here is the final install: I extended the window side drip edge because the window company did not manufacture the sills the way I had asked...I guess they were going for the mustache look? Also they didn't know anything about drip edges under the main sill either? So I bent little strips of zinc and powder coated them and stuck them to the Sill. Here's a really bad front profile of the sill, the edge of the sill is actually bent around in a C shape up until my little zinc add on above. The leak is coming in on the seam where the render comes down onto the narrow little bit of aluminum. It was maybe 6mm-8mm wide. All of the other windows seem to be unaffected here's some of the water leaking in under the concrete cold joint the floor makes before the second Floor walls. and here's some lovely salt lines on the head of the opening below the leaky windows (about 1.5 years of leaking) I never respected that ICF was like a sponge for water, I should have sealed up the foam before the sill was put in That product mentioned by @Russell griffiths Illbruck 295 is absolutely great stuff, super sticky and seem quite durable too.1 point
-
1 point
-
Have you tried Freecycle? Lots of creative folk who care about the environment as well as people just wanting a freebie.1 point
-
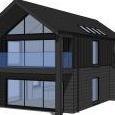
I chose the blackest ones I could find to try and make the black in-roof solar panels blend in, but with your cladding, I think I'd want some contrast, and maybe go with far left on top photo.1 point
-
Your choice obviously, although £8k sounds very expensive for MVHR. The entire system for my 400m2 cost £4k. In my opinion, MVHR's primary function is to deliver continuous controlled ventilation to every room, the heat recovery capability means it does so efficiently. In an airtight house it is essential but as yours is a conversion, you may not reach the airtightness levels to really take advantage of the efficiency anyway. In a sufficiently airtight house you can leave the front door open and there will be no draught in or out as there is nowhere for the air to go.1 point
-
You are right that it was that calculator: probably not very accurate but was enough to show me the logic. That attachment of yours shows the same, that the efficiency is 90% (more like 80% really?) when it is 0C outside. None of the sales literature I had seen mentioned this. Do you know what the downward curve is? I would like to see the graph extended into positive temperatures. I am now almost decided that to spend £8k on a heat exchanger is not for me, whether it ticks boxes or not. That buys an awful lot of insulation, for example, with no running or maintenance costs. If it is stuffy I will open some of the trickle vents. If it is cold I will close them. Fortunately, the air is pure and filtering is not an issue. Also, for a conversion we only have to take 'reasonable' steps to efficiency, and that includes cost. In my opinion the next best thing for energy saving, after airtightness and insulation, comes entrance porches for an air-lock when doors are opened in a howling winter gale.1 point
-
@Jilly , K5 is a phenolic insulation with slightly better insulation characteristics than PIR. With Thermalite as described the U-value is correct, even slightly conservative.1 point
-
Over the last month we've spent most of our time continuing to take parts of the barn apart whilst repairing some bits that need to stay. What's brilliant is that all the fibre cement roofing which contains a small amount of asbestos is gone. The skip company delivered on Friday and collected on Monday and after seeing it all wrapped said it was very good and we didn't need to wrap the skip as well. We've pretty much finished clearing the back sheds, although there is still quite a bit of moving from A to B with no real idea of where it is going to end up, such as 8 farm gates that I will need in the future, but am not sure where to store. I spent a number of days moving rocks, where are the chain gangs when you want them, these are ones that can't be reached by the digger. I also knocked down an internal wall that we don't need, this means that 2 sheds become 2 beds and a bathroom. I also removed a number of broken blocks and HID replaced them with new ones. Then HID started digging out the floors and I got to clear, sweep and drive the digger. I'm also revisiting my plans to measure again, thinking about windows and drainage. In my online plans I've added furniture to see how space works and the best place to put doors. With all the comments about price increases I'm thinking about ordering some items sooner than originally intended. As physical self builders this project is going to be a few years, yet if I wait then we might end up with boarded up holes and no glass, nice and warm I guess. Next month is going to be much of the same as will the following months with a lot of floors to be dug out. The digger cannot break the concrete so we have to use the breaker to start and then lift with the digger. Last month I bought an Aldi wacker as they seemed a good price. It will be a long time before it's needed though. I can see all this clearing is going to lose my interest long before it's done, but doing it ourselves is literally the only way we have any chance of affording this build the ways things are going. Well I guess it's back to the grind. And, thanks for all the help and answers that I have been getting from BH.1 point
-
You need to connect back to the inspection chamber not the middle of the pipe, imagine a blockage past the point of that join heading towards the island, there is no way to direct a drainage rod to veer off and go up the junction to the blockage. Imagine a blockage at the point the (N) is in the word island, no easy way to get to it.1 point
-
Thanks for all of your comments and have paid my manufacturing invoice - I felt that it was fair enough and is reassuring that no-one screamed blue murder. My architect said that one of his other clients was just about to start an extension, but the builder put up the price by 20% and the clients can't afford it so have had to cancel the project.1 point
-
1 point
-
Yes. No need for anything fancy. I have always like SMA and Fronius. Don't get hung up on any live monitoring/remote monitoring, after a year you will not look at that data. The SMAs had Bluetooth built in anyway, so you can easily download the data locally anyway.1 point
-
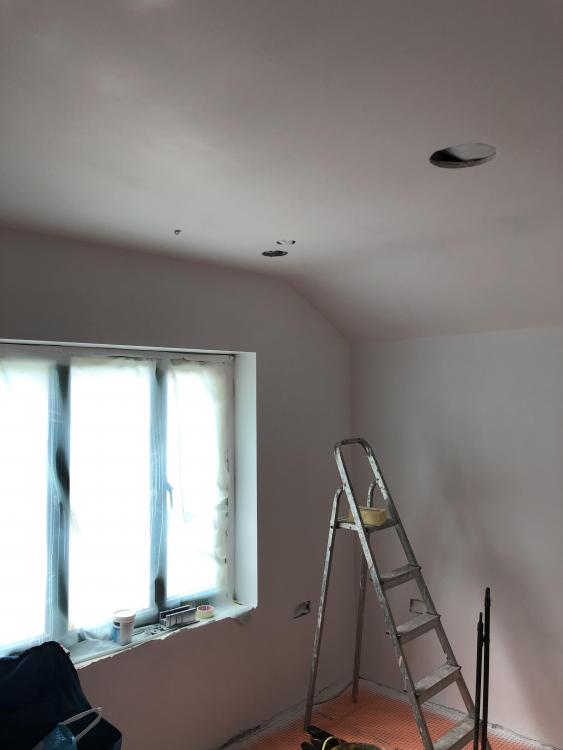
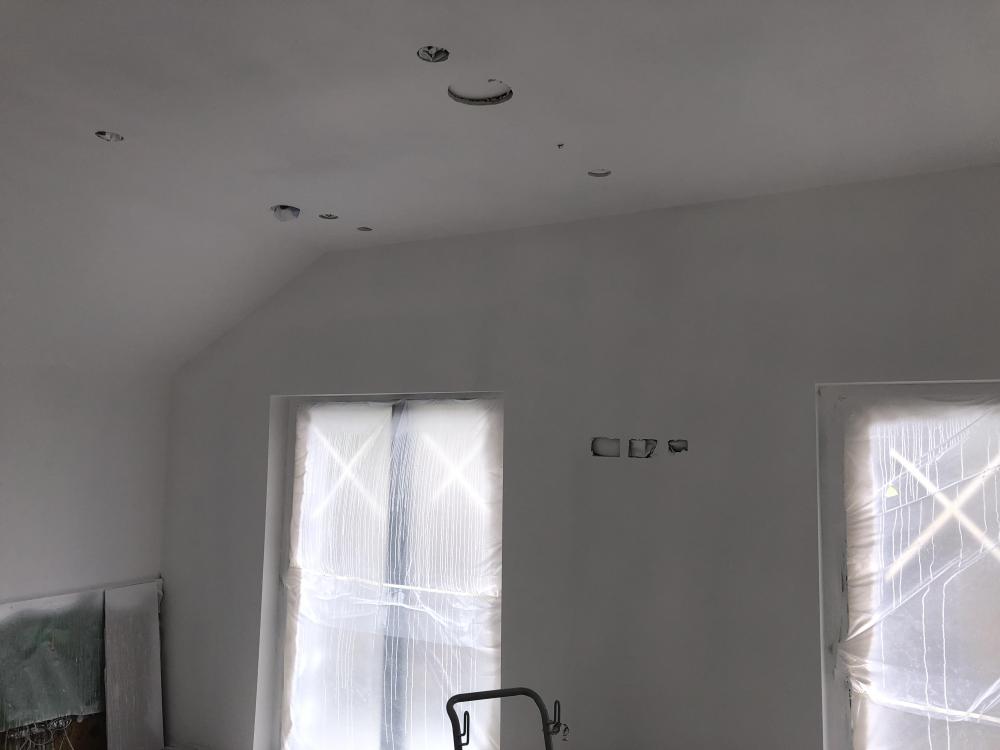
I went for it Even the Wagner extension rod doesn’t seem to work ! Just a dribble ! Back to the short nozzle . Man in paint shop said not to dilute just mix well . Kept blocking over and over again ! I then ran out of paint ( sprayers seem to use tons more ) Sent SWMBO to get more Mixed the 2nd tub in and magic . No blocking - runs like a dream ! I’m over stretching to do ceiling and the mess on me is amusing . But the quality of finish is the dogs ! ? Photos don’t do justice . Perfect white not one dribble ( not one !! ) Almost like a skilled man did it1 point
-
What block specifically as this is quite low. Typical lightweight aggregate block gives about 0.26 Up to 50mm of fibrous insulation would be OK. A polythene VCL or foil backed plasterboard would add reassurance. Compressing insulation destroys its properties.1 point
-
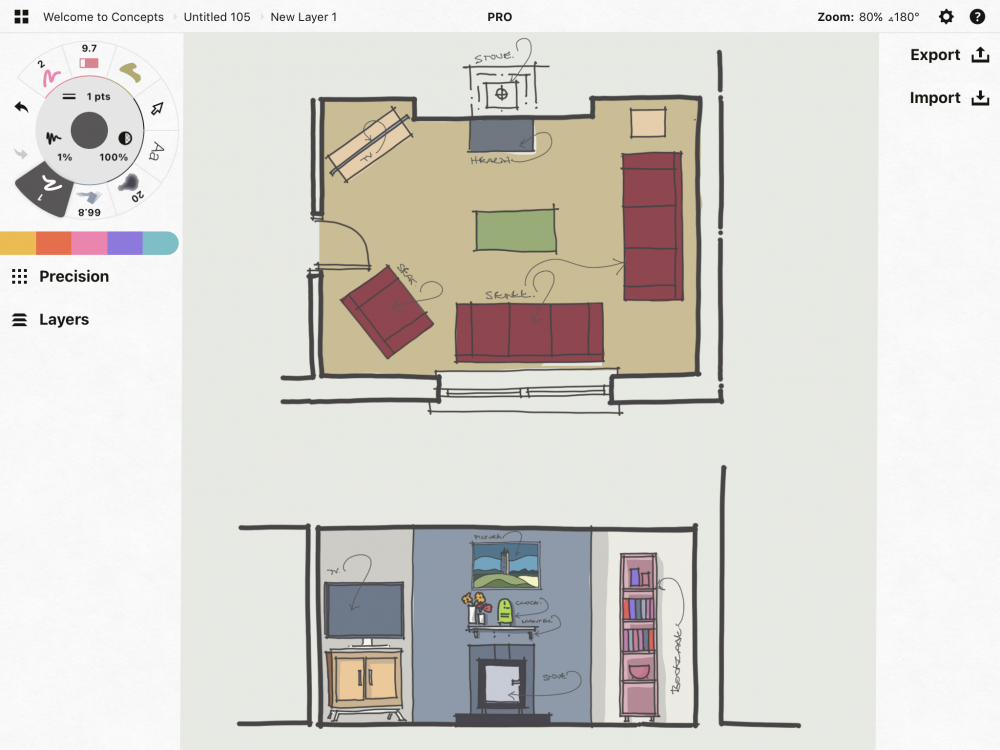
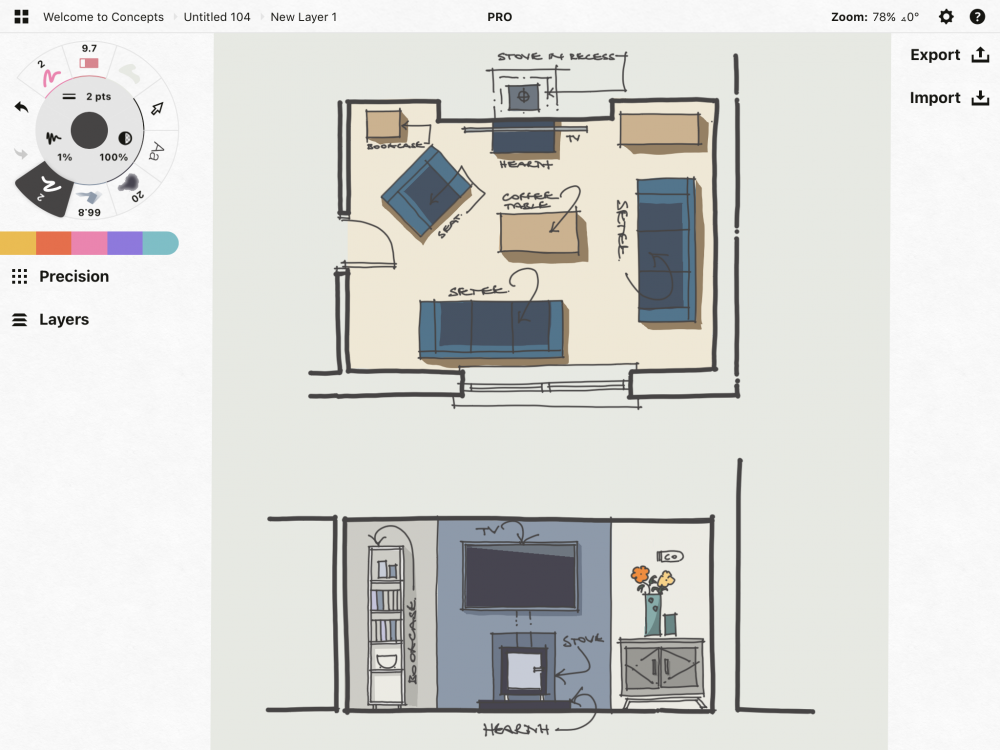
The stove needs to move to the bottom right corner, tv in bottom left corner, seating along the top wall looking at the stove, view and tv. I suspect you might have been looking for a less radical solution. If you do that, put a new twin wall flue for the stove, and ditch the old chimney and knock out the fireplace to widen the room. I'll get my coat.1 point
-
Your numbers look correct. 100m2 with an average U-value of 0.32W/m2K and temperature difference of 13C will pass 100 * 0.32 * 13 = 416W of heat. An ASHP will consume about 140W of electricity to create that heat (based on COP=300%). 140W average for 6 months with an electricity price of 14p/kWh works out as 0.14kW * (24hrs * 183days) * £0.14/kWh = £86/yr. That's the total cost of all of the 100m2, not just the windows or the difference between the two window types. My previous calculation identified 22.8kWh per year of heat for 1m2 as the difference between DG and TG. Based on 20m2 of windows, an ASHP (COP=300%) and 14p/kWh that would yield a total electricity saving of ((22.8kWh/m2 * 20m2) / 300%) = 152kWh per year, which amounts to 152kWh * £0.14/kWh = £21.28 per year. I worked out on another thread that 1kWpk of solar panel sited well in my area would generate 1000kWh per year. So if I wanted to save that 152kWh, I would need 152kWpk plus whatever inefficiencies, call it 200kWpk needed. Solar costs around £1/Whpk so that's £200. A 350Wpk solar panel is about £350. If you have a solar array you would get more environmental benefit by adding a single panel to your array than by upgrading >30m2 of windows to triple glazing (in the South of England). There are exceptions to this logic though. For example if you don't have an ASHP and want to keep all heat leaks down in order to avoid one. You may live somewhere that is much colder and gets less sun. The perversion of all of this is that I may end up going TG due to the 'brochure value' of it. We're building for ourselves, but I have to be mindful of the impact of decisions. That said, I'm still not convinced we will go TG.1 point
-
+1 It works for everything we found. We only got an official address in the last month of the build. Could do it bit earlier but never occurred to us. Consider fixing up a temporary post box on the site fencing as we did have some companies send quotes to the site address instead of where we were living.1 point
-
SSE refused to give us a meter until we had a UPRN for the address, I think it was £100. The irony being that the PO wont make it live until it's occupied and the address for planning was something like "land 200m to the west of xx farm" which has now made it on to some address databases.1 point
-
I heard a saying the other day, "if someone is wearing ethnic clothes, don't bother to argue with them".1 point
-
I never registered my address oficcially. Everyone knows about it and it is on every address database except the Postcode Address File held by Royal Mail. None of the utilities had any problem with this and the address is now on their own address databases. For the council tax, they preceeded the address with "Caravan" to give it it's own entry on the valuation list.1 point
-
We registered our new address as soon as the house was going up Mainly to stop deliveries going to next door1 point
-
For me,that system requires such attention to detail & supervision during the install that you don’t actually achieve the u-value they claim. Think about a bricky on the scaffold cutting those sheets at a tray damp detail,or around a lintol,or even just up to a cavity closer on a reveal. Trust me,there’ll be gaps galore.1 point
-
Yes of course. The placing of the slabs highlighted a bit of an issue elsewhere, so its going to be a few days before i seal it up as the slabs need a little more positioning...1 point
-
1 point
-
That’s upside down unfortunately so the battens need to come off. Membrane has to go below the tile battens with a slight sag so any water will run down and not sit against the battens.1 point
-
Interesting thread this. Good technical points made by Peter,Craig et al. To add my thoughts, partly technical, but mainly to open up design options you can consider that are cost effective, that won't lead to problems with your mastic etc on the finishes, sticky door issues, glass that fails due to adverse unforseen loads etc and the subsequent arguments. Don't forget that these large glazed openings cost a lot, the glass, slim frames etc. A bit of technical stuff. The formula for deflection of a steel beam is 5* w* L^4 /384 EI. For the keen, often domestic steel beam design ignores what is called shear deflection but for timber beams this needs to be accounted for as it is significant. To explain the formula for typical domestic steel beams. E is Young's modulus.. a property of the steel which does not change with beam size. w is the load per metre run of the beam. I is what is called the second moment of area and L is the length. Now you can see that if E, I and w all stay the same then if you have a beam 3.0m long then L is to the power of four i.e. 3*3*3*3 = 81 units, if you have a four metre beam we have 4*4*4*4 = 256 Now 256 divided by 81 = 3.16. So you get over 300% more deflection on a four metre beam than one that is 3.0m long all other things being equal. The thing to draw from this is that beam deflections are very sensetive to length. Extrapolate this to an 6-8m opening and you get this exponential deflection which plays havoc with your doors. The next parameter you can vary is the second moment of area "I". To get your head around this the formula for a rectangular beam is I = b*d^3 / 12 where b is the width and d is the depth. You can see here that if you have a rectangular beam 200mm deep beam d^3 (cubed) is 200*200*200 = 8*10^6 mm^3 (mm cubed) but if you have a same width but 300mm deep it is 300*300*300 = 27*10^6mm^3. So buy increasing the depth of the beam by 100mm you reduce the deflection by 27/8 ~ 300%. The way a steel I beam works is that you cut out the sides and place more steel in the flanges. This give a much more efficient shape so by moving the material to the top and bottom flanges you get more "I" for your buck! Now for a big glazed opening design the starting point is how much deflection will be ok over the head of the doors. There are general structural recommendations in the codes that go along the lines of beam span / 360 but these are mainly to do with the other elements of the building. If you have an effective clear span of 8.0m that is 8000mm / 360 = 22mm. That is going to jamb your doors, break the mastic seal (at times you will notice the bend over the opening) on the outside and probably damage any wall paper inside. It's easy to fall into the trap where you see the deflection as being say 22 mm, so you put in 25mm of say compriband.. but if you compress compriband or similar down to 3.0mm it will start to extert load on your doors.. it's good (squashy) but not that good! You also need to make sure that when the load is not there that the compriband will recover and not leave a gap. The next thing (Craig, Peter etc have touched on this I think in the past) is that there is a difference in how you install bifold doors and true sliding doors. A sliding door head can be installed with a bit of a gap over the head as they now tend to be all bottom supported, but bifold door heads need tighter packing at the head. In other words bifolds are less forgiving in terms of beam deflection. If you think about it. When the bifolds are open there is a lot of glass weight hanging out from the building so the mechanism at the head of the doors needs to be held firmly in place so that over time they still perform, the tolerances are tighter and less compatible with the structure. As promised. If you have read this far then if you have a single storey extension with a large opening you may have a flat roof above. Here you may be able to use the upstand on the flat roof to accomodate a deeper beam thus reducing any downstand in the extension. If you have a two storey house with large bifolds etc below you can start to look at turning the upper floor external wall into a big truss. This in the right circumstances can allow you almost take the doors right up to the ceiling! The secret is that there comes a point where a big steel beam is no use / economic if you have some height above to do something. If you have a modern house, say with an "L" shaped roof" and go in the attic you may see lots of thin prefabricated trusses. But at the "L" bit you may see some sturdy looking trusses.. girder trusses. You can apply the same principle to creating a large glazed opening on the ground floor. If I was looking at designing a 3.5m plus opening for glazing I would use start by saying.. I want no more than 6 - 8mm deflection at concept design stage under say snow loading or roof access. I would then look at the type of construction.. masonry, timber frame. Timber creeps over time so that has to be accounted for. I would also look to see how much the founds may settle.. if there is uneven loading.. differential settlement. Once you get a handle on the "feel" of things you are on your way to getting a problem free solution. This all may sound expensive as you need an SE, experienced designer that can look holistically at this but it may only cost a little more for the extra design input. Ideally it may end up that you save money!1 point
-
So Series 10 Episode 1 was shown tonight. Below are my show notes. Location: Hertfordshire (Potters Bar) The Self-builders: Bob (retired firefighter) & Wendy (chartered accountant & writer). Experienced with renovations & an extension. Eight children. Setting the Scene: Oct 2016 – Charlie visits to meet the self-builders & review site and plans Secured planning permission for four bedroom chalet bungalow on back garden plot. Nominal value of plot £350k. £350k build budget. £950k expected value for completed house. Targeting completion in 12 months Eco-features: Solar panels and rainwater harvesting Impressive westerly views towards green belt – Charlie suggests changing ground floor layout to take advantage of this with a large kitchen diner with bifolds in west elevation. Suggests replacing two small dormers with large, long dormer clad in zinc The Build: Aug 2017 – Groundworks underway after approval of revised plans. Ridge height too high so site lowered by 2m. Piling and groundbeam (£30k) required. Muckaway cost £10k. Total groundworks cost £50k. Block & beam floor installed. Timber frame (standard 140mm with OSB sheathing) erection commences. Posi-joists. Kingspan Kooltherm insulation, Protect VC foil air-tightness layer, Protect TF200 Thermo external membrane. Sept 2017 – Roof timbers erected. Windows (look like Aluclad uPVC) being installed. Oct 2017 – Charlie returns. Expecting completion June 2018. The Visit to Another Self-build: Larch clad four bedroom barn style home in Loughborough. Double height hallway. Power floated concrete floor. The Build contd: Dec 2017 – Roof tiles & solar panels (12No) installed Feb 2018 – Brick skin has been (miraculously as we never see a single brick being laid) installed. Plasterboarding ongoing. Apr 2018 – Polished porcelain floor tiles being laid. Decorating with help of family & friends (to save v £6k quoted) May 2018 – Plumbing. Kitchen fitting. Self-builders move in in late May. July 2018 – Charlie visits completed home (called Luxton Lodge). Double height hallway with skylight above. The final figures: Actual build costs £350k including VAT but with some landscaping incomplete giving total cost of £700k. Bob put in a lot of work himself (shown fixing cladding and doing plumbing).(However, why does this figure never include design or the other project costs? Actual valuation of £1.2M (2018 prices). Impressive figures but as usual with these backgarden plots, the reduction in value of the original house never seems to get mentioned.1 point
-
1 point
-
Only thing rising at your gaff will be the water level! And yes it'll still be higher than my bathroom temperature before you say that!0 points
-
This is obviously what sets the amateur and the professional walk on glazing installer apart.0 points
-
0 points
-
0 points
-
I had the same issues with Powys CC. Planner never answered our calls or replied to a SINGLE email for 7 months. Then after I escalated it to the head of planning he sent me an email saying he was leaving the council in 3 days time so would leave it to the next bod to review! They are totally incompetent. They say they are overwhelmed with applications but half the problem is they create the burden upon themselves with ridiculous interpretation of the policies they administer. I couldn't help laughing in amongst all the frustration though. When some of the locals were asking why it was taking so long for me to start on site I told them the planners were being unresponsive and that I'd emailed the local councilor to try and rally some support. They laughed and said ' you'll be lucky, our councilor? he's a 80 year old farmer, he doesn't know what email is and hasn't got a computer'. Explains why I never got a response from him!0 points
-
0 points
-
0 points


