Leaderboard
Popular Content
Showing content with the highest reputation on 12/12/20 in all areas
-
6 points
-
We opted not to use epoxy due to cost and because its more difficult to use, I have also read that it can discolour in bright sunlight, and look a bit plastic. We used Keracoll Fugabella Grout and a grout sealer afterwards, they do a range of 50 colours. Just looked up the Fugabella details: Kerakoll Fugabella Color Grout is a decorative resin-cement grout for grouting of ceramic and porcelain tiles, mosaic and natural stone, available in a 50-colour design range. Green product for bio-building. Available in 50 colours – the colour of the bag denotes the colour of the grout it contains. Also available is a matching silicone – Kerakoll Silicone Color – in all 50 colours. Kerakoll Fugabella Color resin-cement grout is a hybrid between resin and cement – combining the ease of application of a cement based grout with the resilient, fine-grained, non-porous finish of an epoxy resin grout. Kerakoll Fugabella Color Grout achieves performance characteristics such as water-repellence, very low water absorption, high surface hardness, high resistance to the most common acidic substances and total colour uniformity. Produces grout joints that are naturally antibacterial, easy to clean and maintain, suitable for underfloor heating systems and can be recycled as mineral inert material, avoiding waste disposal costs and environmental impact.3 points
-
We took the decision not to enable purchase of anything thats not out of stock. If you want to order something not in stock, you can only do it by phone or email. If its for something thats a stock item (prob about 95% of orders) we dont take payment until its physically in our warehouse and ready to ship. With all the current delays, whilst there may be some grumblings, nobody is out of pocket. Avoids all the upset, aggravation etc. Plus i can sleep at night as i dont have a stack of other peoples money for suff i cant ship.2 points
-
2 points
-
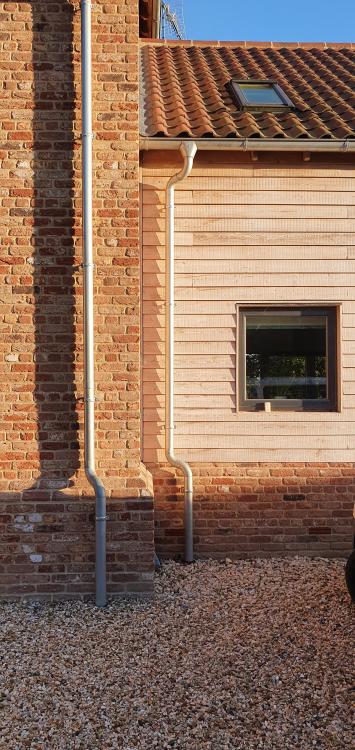
It's Zambelli by the looks of it (logo is on the hopper), and yes, I installed it. I got it from Drain Depot, who were cheapest at the time, so if you've got a shopping list I'd punt it out to both and see if you can squeeze a bit more cost out! I'm impressed with the system; easy to cut to size and put together, looks and feels robust, and often admired by visitors. Took a pic earlier in the year when the sun was throwing interesting shadows on the cladding; it had been up 3 and a half years at that point.2 points
-
2 points
-
I’ve just laid 28mm t&g floorboards to match the old part of the house. i used a plug cutter in an off cut of flooring to make plugs, drilled the corresponding hole diameter in the first board, screwed it down and then plugged the hole waited until glue dried and chiselled and sanded the plug flush with the floor. i used ring shank nails and nailed them into each tongue and punched them in with a nail punch. the joists were filled with 200mm of kingspan insulation first, 2 staggered rows of 100mm.2 points
-
Yes, I like walking ancient routes. I like old boundaries too, stone walls etc Look interesting, perhaps it might be a Christmas present. I think most people who want to live this way, wouldn't want to be with to many people. They want to have their own space. I think there is a big difference being off grid and wanting to live fairly remotely. The core reason for doing it will be different. For me it's like when people go camping. When I mean camping, this is not a camp site full of people, but camping in the middle of nowhere, so I can be left with my own thoughts.2 points
-
2 points
-
I love ancient byways for that reason. The thought that people have been treading these paths for perhaps millennia, is truly humbling. Come to think of it, building your own shelter is a pretty basic path that is uniting us. The forum is egalitarian, our personal circumstances are hidden, our abilities are diverse, but we are out here (or is it there?), lending a metaphorical hand in our abstract community...2 points
-
2 points
-
I often wonder what life would have been like in the iron age. A simpler way of life, connected to nature. I would go for it, buy a little area of woodland somewhere really remote. Why can't people live like our ancestors, if they want? Ideally if I we able to, we would like recreate the iron age broch on the croft that would be amazing. Sometimes I just sit here and try be connected to the previous occupiers.2 points
-
Not sure what to say, very unusual to be stuck for words. Anyway, I’m Mark. I live in Cornwall and after a recent life changing event I decided to follow the dream (well mine at least) and create an off grid property and workshop to live my life and run my small business (I’m an electrical/mechanical maintenance engineer), to be honest I was toying with the idea of buying a canal boat and running away slowly but I’m a bit big for boats and I’m a hoarder of old machinery and electrical equipment. So this tied in with a good friend of mine sending me a text along the lines of “do you want to buy a bunker”, I’ve been involved with bunkers for almost 40 years so I know a thing or two about them and I went to have a look. Looking at it, meeting the farmer who wanted rid of it was another life changing event and so here I sit in a concrete room with my feet up drinking tea and writing this intro. It’s been quite a journey and there is much further to go so I thought rather than keep making it up as I go along I’d be better joining this forum. All I can say is the off grid bit works well (I don’t slum it) and I have no idea what the weather is doing outside. Cheers1 point
-
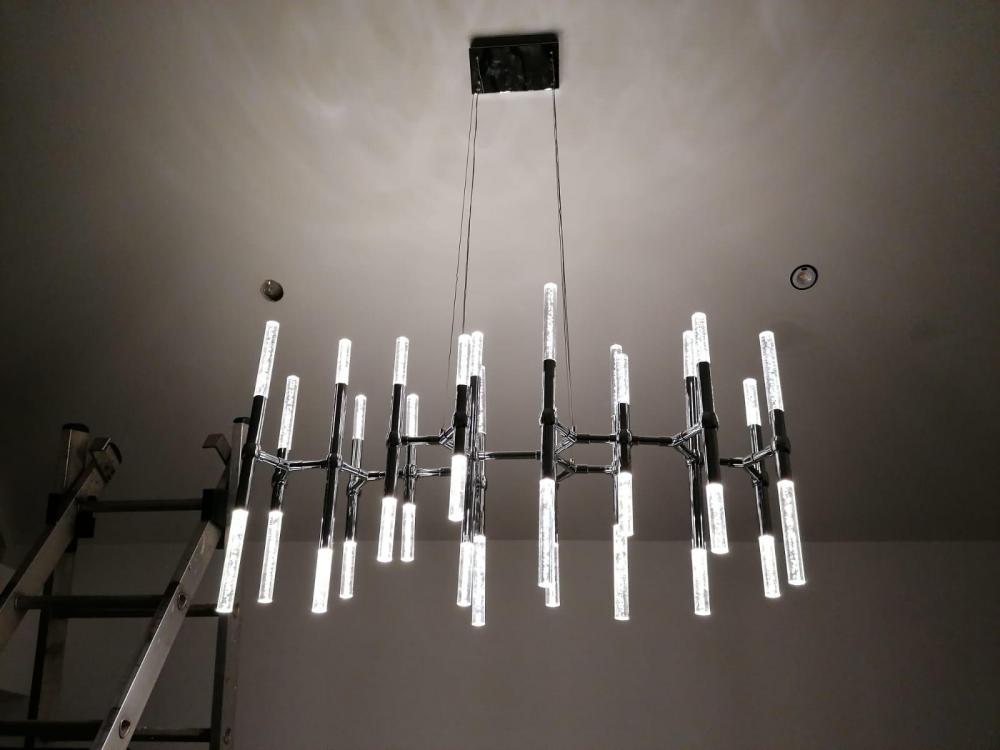
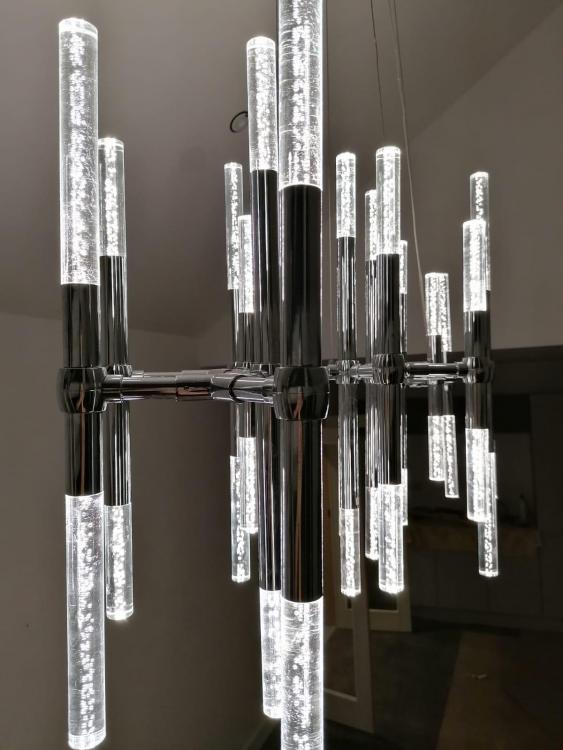
It's been a while since our last update but just to let everyone know we may be in for Xmas. We still need the EWI and render but inside should be liveable and we can get out of the caravan. The kitchen is almost complete now after getting damaged units all replaced and given it was ex display I think it looks lovely. The part with the hob on could possibly have been a bit longer but I didn't want a breakfast bar and by time we have our table, chairs and small sofa I think it will look good. At the moment it's like a big dancefloor! And although the majority of the house doesn't have light fittings because frankly we are skint, we did manage to get the kitchen/dining room sorted and I love the light in there which we got from a small lighting place I convinced the other half to drive a couple of hours for. If I would have hated it she would have killed me. We got the whole house sprayed white by a local decorator because I didn't want to look at plaster for 12 months and I didn't fancy doing the pitched ceilings in the kitchen and with a bad neck injury. For our bungalow which is around 190m2 it was a few hundred pounds Inc all materials, paint, masking prior to second fix. It would have taken weeks to do it and the spray finish is brilliant (although has a few marks on it from second fix now). No woodwork has been done because it wasn't in place and frankly we can't afford it and once we decide on colours etc we can get doors, skirting done later on when we have calmed down and gradually work through each room. We have already decided we want the kitchen orange eventually and our yellow living room sofa is due to arrive too just before Xmas so it will definitely have injection of colour. The bathrooms are almost completed now after the showerwall saga, on the third replacement it now looks decent. We went for LVT throughout and the UFH is working well in that it's warmer than the caravan......1 point
-
There is a BS calculation to the flow rate from a roof. You then use that to work out the litres/second and then the number of down pipes. Unless it’s a small building, 125mm deep flow or 150mm If you don’t have many downpipes Decent guide here1 point
-
Thanks! Wrap-around; easy enough to fit with a hacksaw and a pair of tin snips, (and it doesn't matter if the hole you cut in the gutter is a bit rough, 'cos the outlet covers it ?). I put the gutter in position first, then dropped a plumb line down to the where the underground drainage came up; mark and fit! If you Google 'youtube zambelli' you should find some 'how to' stuff.1 point
-
Agree wholeheartedly - we installed solar thermal when PV was too expensive - it's great in the summer for hot water but you need a few panels for it to be effective. In the winter it doesn't really do a lot, so no use for hot water, which in your question would mean an immersion heater if you didn't use the ASHP. If you use the ASHP for hot water as well as UFH then it should be up to a third cheaper than an immersion heater due to the COP of the ASHP. MVHR will simply mean you don't lose a lot of heat through the air changes you need for air quality. When PV came down in price we installed some PV - sadly we didn't remove the solar thermal and replace it with PV - wish we had!! PV is much more versatile as you can divert any excess through an immersion heater into your hot water tank - and when that's had enough it will supplement the power needed for any other electrical devices and if they aren't using anything into a battery for later consumption, or your EV. And hopefully in a couple of years more vehicle manufacturers will get 'enlightened' and allow V2H or V2G - in which case you won't need a house battery as you'll have one on 4 wheels parked up outside. (Only the Leaf does this currently). Batteries are great for some of the new electricity tariffs like Octopus agile - if you can avoid the peak times, rates are cheap and last summer they were paying you to fill up your EV or battery storage overnight - yes a few p per kW to take electricity off their hands!! Kerching!! Simon PS We're also about to start a new build - ASHP (UFH and DHW), MVHR and a 4kW PV array (and when the SAAB convertible dies an EV...) PPS I saw a table comparing prices of batteries on Naked Solar (was put on to this by a Mesh Energy presentation) Tesla come out as one of the cheapest in their comparison which wasn't what I expected -> https://nakedsolar.co.uk/storage/ scroll down a bit to see the comparison table.1 point
-
@joe90 try these guys but give them a call and tell them the soil type etc https://www.thegrassseedstore.co.uk1 point
-
It is quite common on developer houses to have partial fill insulated cavity walls with dot and dab plasterboard, where outside air freely circulates around both cavities. I like wet plaster as an airtightness barrier. I have been looking at poly bead fill but I am moving towards premium mineral wool. It has the same R value and none of the fire risk. Flammable insulation may be going rapidly out of fashion, especially in walls. https://www.insidehousing.co.uk/news/widely-used-polystyrene-insulation-system-shown-to-be-similar-to-grenfell-style-cladding-in-australian-fire-test-690051 point
-
Yes, I forgot that I can easily hide the nails with the plasterboard etc. Sounds easier than the plug cutting approach. Thanks all. That nailing device looks pretty clever but I'll go with the tongue tite screws. Saves the hire cost.1 point
-
1 point
-
Have you a name for your lair yet? Apshai might work with the whole dungeon thing? SWMBO vetoed me naming the house Göttwood. Told her it was in deference to my German great, great grandfather...1 point
-
1 point
-
I found the chisel style multitool blade pretty good. I've even ground a sharp edge on some blunted serrated blades.1 point
-
I did. but there isn’t enough space with tile. back butter. adhesive layer and then the door edge......1 point
-
1 point
-
@NeilScotland Did you consider using a decoupling matt? Please post a pic when finished.1 point
-
yes, as you have yet to plasterboard or do skirting the nails/screws won’t be seen. If they will then just make 20mm spacers out of scrap on the joists to keep it away from the wall and not move while you fix the boards.1 point
-
If you have a good idea of what you want then you just need an architectural technician to turn your ideas into drawings you can submit for building control, your budget is small, don’t spend what you don’t need to.1 point
-
So if this is all internal and you just need the drawings for structural purposes such as steel calculations then go to a structural engineer. It sounds like you know what you want to do, not quite sure what an architect would add at this point and you’ll still need the SEng calcs for building regs anyway.1 point
-
You're repointing not rebuilding! If you remove all what's in the mortar joints you well might get stones fall out. I'd dig out no more than a couple of inches deep. Try and ram solid what's left in the gap with a bit of timber. Then the ready mix lime mortar over the top. Clean a stone face at a time picking off all the old render. I really would have this as a feature and not repaint. Could look fantastic. I Googled "Welsh cottage wall repointing" btw. Picked at random but how good does this look? http://gwyneddrestoration.co.uk/re-pointing-stonework-brick-lime-mortar/ Where the exposed stone wall comes up to say a corner or frame you could always add a bit of timber to separate the two visually and "frame" the nice stone feature wall. And it'll breathe!1 point
-
I think yes, especially as it is large format tiles. It is really easy to keep clean. We used to use it for tiled worktops. Make sure you are happy with the colour.1 point
-
Ha @PeterW, same source!!, WTE, great minds think alike ?1 point
-
Sadly most councils see that as loss of income and revenue for services, so they tend to discourage ... I still remember the early days of CAT at Machynlleth and how they had some very radical ideas on off grid which I think the closest to mainstream that has become is either Lammas or Ben Law and his house in the woods which still lists as my all time favourite Grand Design, even with its extensions ..!1 point
-
I've just read a book about a chap who lived without money or technology. Very interesting. https://www.amazon.co.uk/dp/17860772721 point
-
1 point
-
+1 to Amazon Prime and fulfilled by Amazon. Always found them good. I recently got sent wrong item and their returns system is about as good as it gets. Free return postage and the money refunded as soon as package was scanned at post office. Sometimes Amazon Prime prices are a bit more than ebay so i do use both but Amazon always first choice.1 point
-
1 point
-
Ordered my Kore foundation yesterday (from Ireland). €9718 Was going to do BACS payment...but at the last second noticed the exchange rate being given of 1.05 from bank of Scotland.. Quick change to credit card and paid using that (no fees) and you get the mastercard rate at that point of 1.1. Point of the story £420 better off. Happy days1 point
-
I only ever order from Amazon if it’s Prime. And to be fair they have been spot on. Sometimes delivered same day. Any time I used a 3rd party seller, they seem to be acting as intermediaries for Chinese sellers. If on eBay, i always check if they are uk based by checking if their PayPal account is uk based.1 point
-
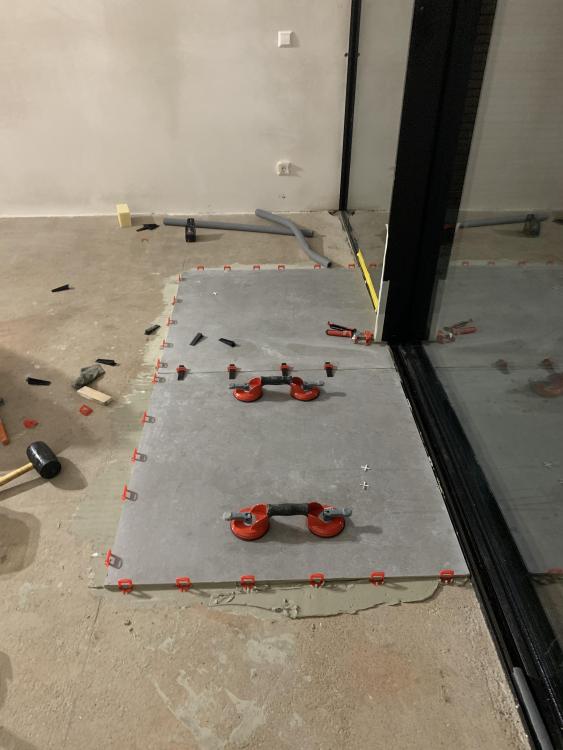
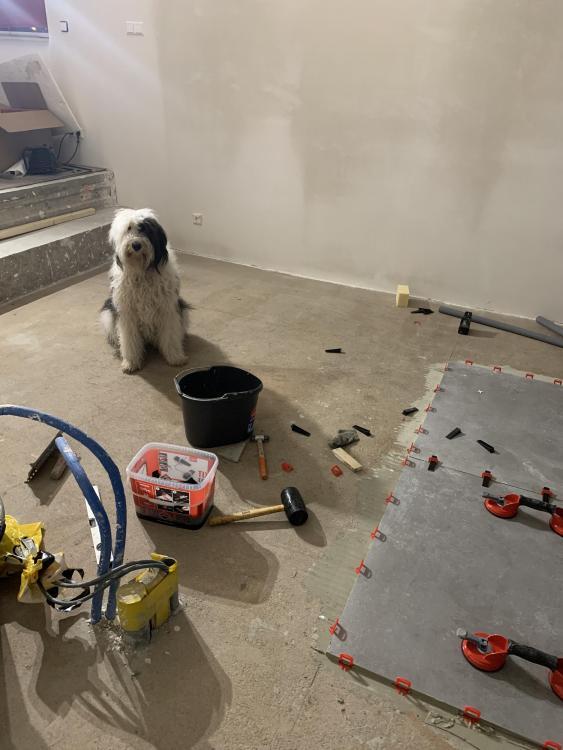
Nice... you don’t realise the size of the room until you know the tiles are 1.2m each!1 point
-
We used the Perfect Level Master system for our 120 x 120cm tiles. Where we left an unfinished tile edge, we either put a clip in place with a small offcut of tile to support it, or we put the clip in loose.1 point
-
I used Tongue Tite screws for mine https://www.screwfix.com/p/tongue-tite-screws-3-5-x-45mm-200-pack/859911 point
-
It looks like the windows were foamed, then mortar over the foam. You could run a bead of silicone down if you can finish it neatly. The low modulus stuff may be good for this. Whare you have to bit of missing mortar, fill with fresh mortar first.1 point
-
Only issues that we have experienced, is glass lead times in the UK are a lot longer than anticipated normally.1 point
-
Hi and welcome. Sounds like an interesting project. Pictures. We like pictures. please?1 point
-
Welcome, well that’s different? Don’t think we have one of those on here. Would love to know the nitty gritty details and pics if you can.1 point
-
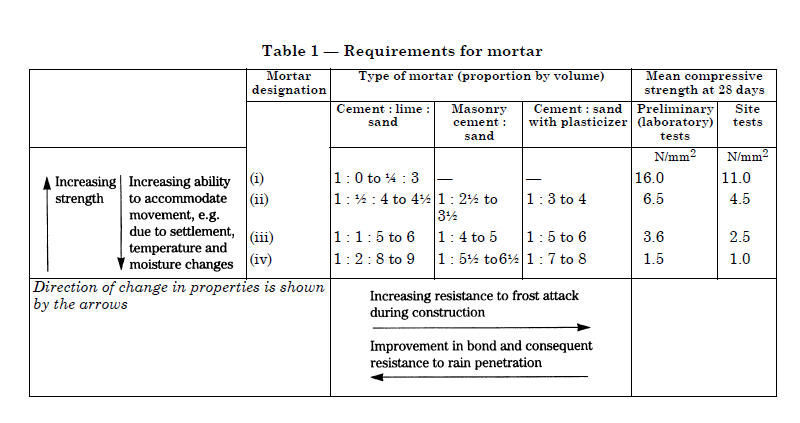
Hello Vijay. Well done getting the tools out. Below is a bit of text from a previous post. "Just on you own with a half bag Belle mixer, a good barrow, under cover, with not too many windows, tricky bits, and loading out the blocks each night for the next day, cleaning the mixer then with this amount of blocks I would go for 150 blocks a day (15m sq) if you are fit and tenatious. Expect this to drop off from time to time, well quite often, go for a hundered a day (10m sq) tops as you also need to order materials etc" Vijay, if you haven't done this before expect to lay say fifty 100mm thick dense block for the first few days. But the mix.. Oz07 @Oz07 is bang on with it being a learning process. Actually, a good labourer used to be worth their weight in gold to a brickie squad. Anyway here are a few pointers. 1/ Look after you materials. Get the sand, cover it up so it does not get too wet / or dry and to stop the local cats / foxes using it as a bog. 2/ Buy your cement in weather proof bags.. may cost a few pence more. 3/ Get some plasticizer for mortar.. 5 litres should about do. 4/ Get a half bag Belle or similar mixer.. bigger than that and you'll end up wasting mortar and having to dump it. 5/ Get two or three mortar boards.. kitchen doors work well, not OSB board as it splinters 6/ Tools.. string line, good bead etc. A bit of technical stuff. Below is some info from a common standard. The key here is to understand what type of blocks you are working with. If the mortar is too strong the blockwork will be more prevelant to cracking. Too weak and well.. that is just as bad as making it too strong. Roughly what you are often looking for is something around class two to three.. more leaning towards class three for practical purposes above ground.. provided you do you best to not remix stuff and really take care with the mortar, temperature, keeping the blocks not too wet or too dry (not on a boiling hot day or below 4 deg c or falling).. there is a lot too it.. but so long as you do a bit of research you should be on the way to a good job. You can see he above table refers to proportion by volume. This helps. Get a pail and pour half a 25 kg bag of cement into it. Mark the level. Now gently shovel the sand into the pail to the same level as the cement was. Tip it out onto a board and repeat. Now you have a pile of sand. Get your shovel and count how many shovels it take of the same size to move the sand into the mixer... note it down as you are learning. Don't whack the sand into the pail as you are not at the beach. As you go you'll get the hang of judging the proportions so you don't have to use the pail any more. Put half the sand into the mixer, Now depending on how dry the sand is you roughly need about the same volume or a bit less than the amount of cement. For the first mix of the day put the plasticiser in first following the instructions for how much you need for 12.5 kg of cement.. Now add water.. about half the volume of the cement measuring as you go. Now add the cement, a bit more water until it starts to mix and the back of the mixer is clean.. stuff not sticking to the blades... don't put your arm into the mixer.. Add the rest of the sand and very slowly add more water, it comes a point where you only need about a mug full to get it just right. Mixing should take three to five minutes.. don't over mix or under mix. The key to getting start is to make sure it is workable but not over mixed with too much air. It will take some time to learn how to do it but once you get the hang of it it can be very satisfying, so long as you take your time and set everything out carefully. From memory roughly one batch out of a mini Belle ( 12.5 kg of cement) will do about 25 number 100mm thick blocks. Do a bit more research and it's all doable. Lastly, just check that what you are building is a standard wall.. not some kind of specialist engineered wall with high strength blocks carrying high loads.. always check first.1 point
-
Good Interior design can make a mediocre home look amazing. There is a reason showhomes have ID money spent on them. I think self builders can get so invested (and worn out!) getting the building up with all the associated behind the scenes stuff that there isnt much budget or sweat left for the rest! Our current build in progress I've employed an interior designer at the planning stage this time, may not do all the suggestions but it really helps with furnishings/colours/light etc1 point


