Leaderboard
Popular Content
Showing content with the highest reputation on 11/14/20 in all areas
-
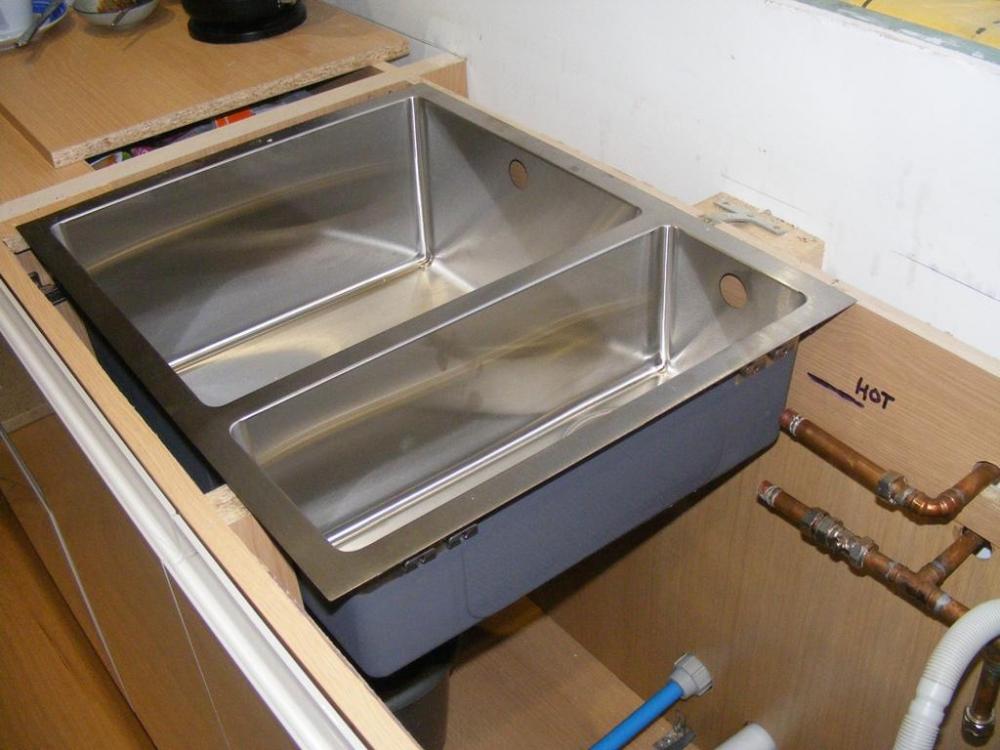
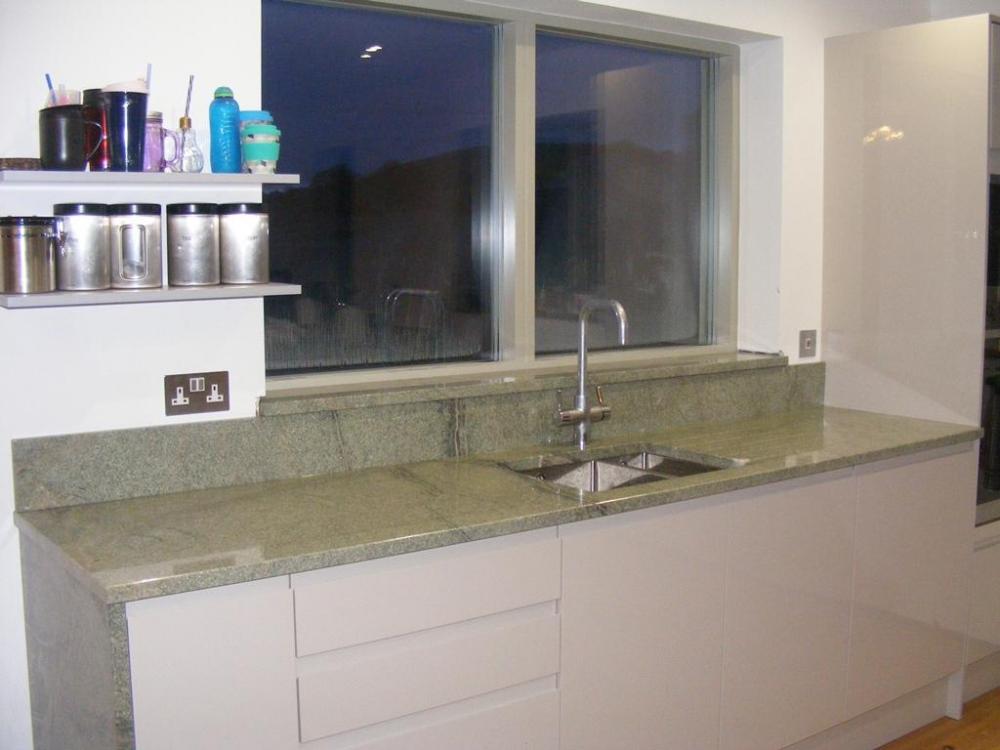
Here is mine Bare sink being offered up for size And all finished mounted in the granite It's a Lamona sink from Howdens. I preferred this one that had the half bowl the same depth as the full bowl, so you just have a rectangular hole in the worktop. That's also a Lamona boiling water tap also from Howdens.1 point
-
1 point
-
1 point
-
Measure from the top edge to the base of the bath and then the outer side and subtract ..? Will have 15-20mm of acrylic / board / GRP but should have space. How far have you got to go ..??1 point
-
Yes, we know about you! Your build is the one I always refer to in conversations about the lowest £/m2. ? I have to be realistic about my ability, but I'm always keen to do whatever jobs I can. Though I want to keep the cadence up so have to be sure to find the balance. In our renovation project, we struggled to find trades we trusted, hence learning it ourselves. It might take me 3 or 4 times as long, but I'm usually pretty happy with my finish. Whereas I've had tradesmen make c'ockups, then lie and cover them up (badly).1 point
-
I would strip the skirting boards off and use a decent low expansion foam under the bottom edge of the plasterboard to fill the gap between floor and wall. I expect it is air coming down the back of the plasterboard (dot and dab ..?) as much as from below the floor so get that closed off. The S10 can take external air and isn’t expensive - £110 here https://www.thestovesite.co.uk/prod/Accessories/Morso-Outside-Air-Kit-1.htm1 point
-
From memory it is the same as the Flomasta one and you can get spares from S’Fix https://www.screwfix.com/p/flomasta-magnetic-filter-seal-service-kit/3287V1 point
-
Have a look at the passivehaus database. https://database.passivehouse.com/en/components/list/ventilation_small it gives a like for like comparison of units with regards to heat recovery and importantly unit noise. No surprise the better units are more coins.1 point
-
1 point
-
Ahhh ok ..!! Makes sense ..! Sounds like your first stop is a decent SEng and then work from there1 point
-
We knew we would be selling So while we did it nice we took the advice of an estate agent friend and push the boat out on the finish All German and Italian If it had just been for us We wouldn’t have spent on bifold Neff dishwasher 800 quid Italian extractor All of which we hardly use Oh and two bathrooms that we have never used1 point
-
My first self build plot was alongside an experienced self-builder. He looked after me and I learned from him. He was about two weeks in front of me. Recoveringbuilder is quite right - you need a great deal of committment. Any of your family members in the building trade - if so talk to them.1 point
-
Labour Labour Labour Without any doubt We also bought materials at good prices Where we could Kept the professional fees down to a minimum We where very lucky with Conections All in the same place 750 810 1150 Though other costs where going to be high 750 tons of much to move and pay for leveling the site prior to starting Tree roots meant deep foundation 100 cube of concrete plus B&B Planners insisting on more than thirty sash windows My wife choosing the most expensive Italian floor tiles (160 m2) and 17 on a German Kitchen Saved four k fitting it myself My wife and myself slated the roofs We returned just over a thousand warped slates If we had brought someone in They would have chucked these off the scaffold No chance of taking them back for a refund No one will look after your money better than yourself1 point
-
We used quite a few of the online ones without any problem, we did have to pre order the bath but it only took a couple of weeks1 point
-
Yes if you drain the contents into the system by venting somewhere else but tbh you won’t have enough flow between the tank and the system apart from when you are filling the system. Just use the magnaclean for what it’s there for !1 point
-
That'll teach you to let someone else make decisions. I couldnt deal with that in the first place...I'm not a control freak but I need to research everything to death before buying. My wife won't even follow the rules about where the dishes go in the dishwasher...and she always puts a tiny pan on the biggest hob ring...both which bother me each day. She isn't allowed to make technical decisions. Disclaimer: this isn't a sexist comment..its.merely one about my other half. ( I load the dishwasher!)1 point
-
£1250 ... and buy smart !! Chalet bungalow can be done cheaply, go for standard construction methods and don’t spend £30k on windows ...1 point
-
OK this may appear somewhat “ controversial” but you have a huge space there, and I think you are missing a trick. I would be finishing up the blocks as a single skin, and then cladding all round or rendering direct to block. I’d then build a completely new timber frame structure inside the building - even use metal framing like @nod has recommended - and seal it / insulate it and you have a “conversion” without the structural hassles. Also, if you have to have a contamination survey done, get them to condemn the current concrete floor due to urea etching (yes this is a thing) so it is not structurally sound .... and then dig it out !! Drop your floor by 200mm all round the inside of the blockwork, cast a ring beam to support the inside of the outer wall plus provide the edge for your inner frame, new DPM up the inside of your “swimming pool” and then you negate the need for the external injected DPM (that invariably don’t work...) You may lose 25sqm of floor potentially but it will give you a much better build and much more DIY-able.1 point
-
Any phone calls with planning record . If you can arrange face to face even in current situation, do that . Buy a quality recording pen !! . They will fuss , lie , mislead , contradict - anything to avoid stamping ‘approved’ on it . It is a long play Tactical game I am afraid !!1 point
-
If I’m designing something with standard casement windows, then I work on the premise of 600mm (1-pane), 1200mm (2-pane), 1800mm (3-pane) and 2400mm (4-pane) wide windows. In relation to their heights and working on the basis of 2.4m floor to ceiling heights... 1200mm deep for standard windows and 1050mm deep for those above worktops, i.e. Utility and Kitchen. Also use 1050mm deep for window above W.C.’s. All of those would have head heights 2.1m above DPC.1 point
-
I think you'll find it's very dependent on where you live as to how Part Q rules are interpreted. Down here it's pretty relaxed. There was a small timber framed barn in the orchard next to us which was dismantled and completely rebuilt with new timber and roofed with slate when the original was tin. Roughly the same size but looks completely different. On a farm a mile away from here they are at present dismantling a timber barn and there doesn't appear to much of the original left. As I said it's down to the local planners as to what you can get away with, not necessarily national guidance.1 point
-
Hello guys, I am Kastro, and I am from Kosovo. I have joined this forum with hopes to learn new topics about plumbing systems - UFH systems particularly is what is interesting me. Greetings to everyone, and thank you.1 point
-
Hi Kastro, welcome to the forum. As you have probably already found there is plenty on here about UFH.1 point
-
Yes, ignore your neighbour ..!! What he is describing is poor construction practices not the issue with heavy tiles - that could happen on any roof if you only loaded one side of the trusses. The whole point you load out a roof in it entirety and do both sides at the same time (even if just loading out not laying ) it to keep the weight on the roof even as it goes up.1 point
-
1 point
-
Pressure in the bottom manifold from water being pushed round the loops from the top manifold keeps the actuators closed on the loops not in use and also helps them to close down if they are the wax actuator type. If they were the other way round then flow pressure would pull water past the actuator. The flow gauges also rely on a “pull” flow around the gauge which needs the water to flow past the base of the gauge itself which you wouldn’t get if it was reversed.1 point
-
We bought our 17 yo van for £3200 delivered from a caravan park, which we're currently living in. It's double glazed and centrally heated, and frankly, find it more comfortable/warmer compared to the cottage we spent the last few years renting. I would definitely recommend going big - I work from home and have a separate office, which helps with sanity. From taking deliveries to working a few hours around work or in the evenings, living on site is invaluable. Of course, you could spend £15k, but imo if you purchase correctly, there is no need. I'm pretty confident that we'll sell for what we paid, but will have saved us £££££ in rent!1 point
-
Im sure you know that the issue that must be addressed is the weight of the roof pushing the walls out. This is normally achieved by triangulation/joists but another way is to use a structural ridge beam... This works by using a steel or possibly a large wood beam instead of the normal thin ridge board. The ends of the beam carry the majority of the weight of the roof so must rest on padstones in the gable walls or possibly on steel or large wood posts that go down to the foundations. If possible avoid having doors or windows in the gable walls as that can complicate things. The rafters should meet above the ridge beam and be connected together (perhaps with steel straps) so they effectively "hang" from the ridge beam. There are versions of this that use purlins to carry some of the load. These also reduce the unsupported span of the rafters and consequently their dimensions can be smaller. Lot depends on what the roof covering is going to be - tiles are much heavier than polycarbonate sheeting! https://www.beamcalculation.co.uk/start-calculation/steel-ridge-beam/1 point
-
have you priced the build yet ? If you think blocks are expensive you may be in for a bit of shock! Have you submitted your plans to building control ? You starting with the most expenive type of build as well a conversion. You have a massive floor area 24mx16m 384m2 Even if you do all the work yourself you we be very lucky to get sub £1000 m2 and your worrying about 4k's worth of conc blocks.... Get the whole lot priced so you know what your getting into.1 point
-
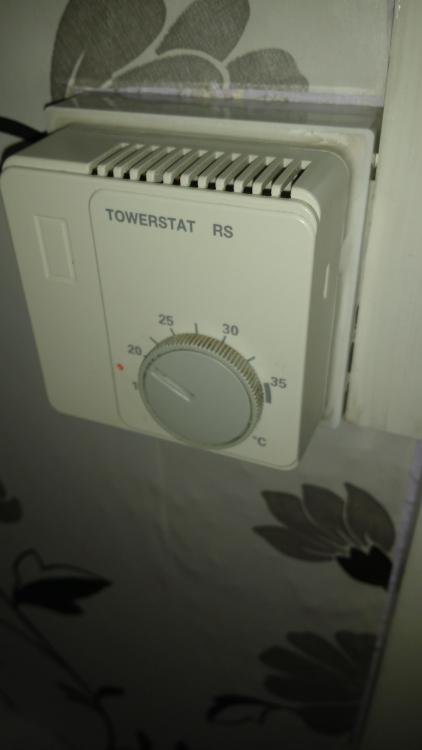
Well after living with the cleaned system for nearly a week it seems we can have the stat down at least 7.5degC and still feel warm. Place seems to warm up quicker and rads are hotter. That being said the boiler still comes on frequently but I guess that's the heat loss via the fabric. I'll bend the float valve in the F&E tank tomorrow to stop it coming out the overflow. Then I'll add the inhibitor. Thanks btw to all who helped.1 point
-
If it’s only outflow from the system then gradient is irrelevant - follow the level of the ground and just put 10mm pea gravel all round it. If it does run all year round, you may want to run the last few metres in clay (UPVC is not UV stable) and also put one of these in the run just before you convert to clay. Make it accessible in a simple concrete chamber. https://www.plastics-express.co.uk/underground-drainage/Underground-Drainage-110mm/110mm-non-return-valve-28single-flap29-p-pte3481 point
-
Wireless booster / mesh tech keeps changing. Having extra wired connections will never go out of fashion and indeed as others are saying will definitely help existing mesh APs work much better, and very likely will continue to do so in future. Ultimately, the wireless bandwidth available in a given building is inherently constrained by the laws of physics (and licensing politics), but wired bandwidth is only limited by the quantity of copper (or fiber) you pull. PS use CAT6, no point using CAT5 these days. New PoE++ spec recommends CAT6A (or at least AWG23 with foil screen)1 point
-
+1 Otherwise I think they recommend aiming for 1 in 60 with 1 in 40 max and 1 in 80 minimum.1 point
-
It should only be liquid exiting so there is not the usual concern of "solids separating" on a normal drain run. What I found was building control had absolutely no interest in checking the outflow pipework. but probably wise to run the design past them. I would want rodding access less than 45 metres or you will want a lot of rods if you ever do get a blockage.1 point
-
There are several ways to improve wifi coverage but .. First thing I would do is download this free Wifi Analyser App for Android or a similar one and check what channels are in use near you. https://play.google.com/store/apps/details?id=com.keuwl.wifi Put it Channel mode (see buttons at the bottom) and walk around where its bad to see if there are lots of other wifi stations in the area. Although there are 13 channels a wifi access point effectively broadcasts on a block of 4. So in practice life can get tricky if there are more than three or four wifi access points in close proximity. Channels 1, 6 and 11 are recommended to keep them from overlapping. However most ISP give you router set up on channel 1. So one cause of poor coverage is interference from a neighbours wifi that is also on ch 1. You might be able to improve your coverage simply by switching it to ch 6 or 11 for no cost at all.1 point
-
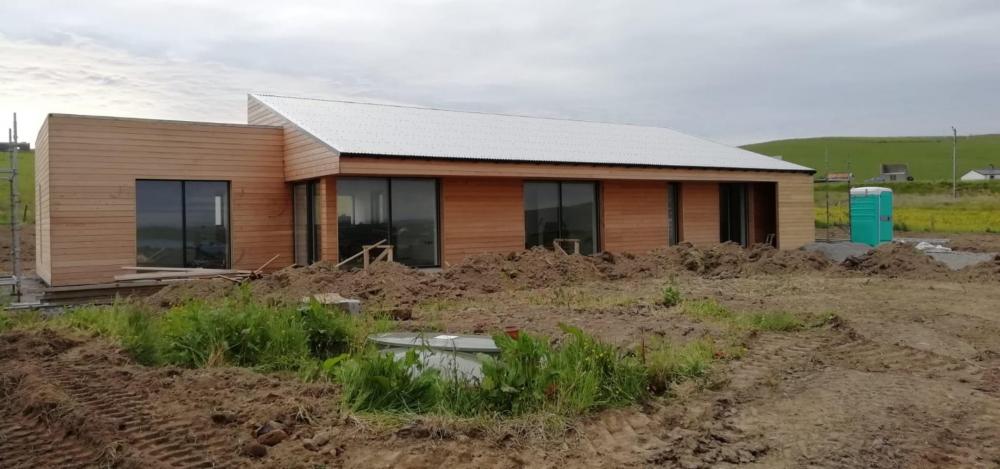
I've just realise that I just barged in asking loads of questions, so I reckoned I'd better introduce myself... ? I'm Marcel (as you might have guessed from my username), and my other half (Joanne) and I have been in the lucky position to be able to build our own house in Orphir in Orkney. ...well, I say we built our own house, we had someone do it who has more experience at this game than either of us does... We moved to Orkney 5 1/2 years ago after falling in love with it on a holiday a number of years before that. In 2014 we were both made redundant from the jobs we were at (don't worry, it was voluntary), and we had always had the dream of one day building our own... During the design and build stages, we've stayed in a few places, but we moved in in September. This is the result of our little project, minus the portaloo. It's a 2 1/2 bed ICF built larch clad bungalow, with an Air to water heatpump and MVHR. (edit because I hit Post before I was done... ?)1 point
-
We used a local builder, and from what I've heard everyone's very busy, so they're spreading themselves thinly on quite a few jobs, which makes things possibly take a bit longer than they otherwise would. Now that we're in, apart from some teething issues, it's slowly beginning to dawn what we've actually done!1 point
-
1 point
-
Not sure if you only posted a picture and no plans, it says 3 downloads but I only see a PDF picture. Is the pool outside or inside? I am guessing maybe outside if you plan to heat it in the summer. I did a lot of work on the cost of heating a pool. Basically if you put a pool outside, heating costs are high as there is very little to stop the heat escaping. However, you don't need to worry about dehumidifying which is expensive on my indoor pool. The biggest thing that helps is for the pool to have a proper cover as a lot of the cost of heating a pool is that warm water evaporates from the surface of the pool and is then replaced by cold mains water which needs to be heated up. Stopping the evaporation stops this heating cost. Depending on the size you are probably looking at 100kwh a day to heat an outside pool, according to what I can find online. So that is £3 in mains gas or £4 in electricity via a heat pump. This is a very rough guess depending on the size of the pool, how hot you want it etc, turning the temperature up considerably increases the costs so people normally run outside pools colder, around 27C. You will also spend quite a bit on electricity for the filter pump, a few hundred a year. I would question why you would install a separate ASHP and not just use the GSHP to heat the pool. You will be looking at a multi thousand bill, so even if it has a slightly better COP in the summer it won't offset the extra cost of another heat pump. If you have mains gas available I would just use that. Electricity currently costs more than 5x the price of gas, not enough for the COP of a heat pump to offset plus the installation costs are considerably cheaper. We heat the whole house and pool from a standard Bosch 40kw boiler.1 point
-
Just checking that you have found this thread:1 point
-
1 point
-
8 weeks to give you a not validated. Council officers all sitting at home watching TV and not actually bothering to do any work ? Got to be one of the best jobs. "Work for the council, you can be crap, but we still won't sack you"1 point
-
1 point
-
As a rule of thumb, cubic metre of air has a mass of 1.2 kg. The energy needed to heat 1 kg of air by 1 K is 1 kJ. There are 1000 litres in 1 m3. There are 3600 seconds in an hour. 6 [lt.s-1] / 1000 = 0.006 m3.s-1 0.006 [m3.s-1] / 1.2 = 0.0072 kg.s-1 0.0072 [kg.s-1 ] x 3600 = 25.92 kg.hour-1 To convert from kJ to kWh multiply by 0.0002778 25.92 x 0.0002778 = 0.0075 kWh I have skipped the conversion to kJ as air has a SHC of 1 (near enough), though there will be some energy in the moisture) This gives you a loss of 0.0075 kWh for every K, or °C, temperature rise, for every hour the fan is running. So taking the 20°C temperature difference in your example, to run that fan for 24 hours will be: 0.0075 [kWh] x 20 [K] x 24 [h] = 3.46 kWh1 point
-
Ok I will chuck this in, why are they not connected to the slab ? why not dig out the shape, line it with the insulation board as shuttering and pour at the same time as the slab.1 point
-
I would start will all ducts/valves about half way open. There is a lot of interaction when adjusting rates - as you close one valve to reduce the rate the flow rate at all other terminals on that run will start to increase. This makes the process a bit of a pain, as you end up adjusting every room several times. I started with the kitchen, as that had the highest flow rate requirement, and so would tend to cause the least upset to other rooms. I also did all the extract rooms first, as building regs only really stipulates extract rates for individual rooms. The individual room extract rates in the regs are actually the maximum figures the system needs to provide, not the background figures, so turn the MVHR up to boost for these initial room settings. Once you have at least 13l/s from the kitchen, next move to the bathrooms and utility room, and adjust those to get at least 8l/s. Then do the WCs, and adjust for 6l/s. After doing this, go around again and check that you still have at least these rates from each of the extracts - some will have changed because of the adjustments throwing off the main plenum pressure. You will probably have too high a flow rate everywhere, so I would advice opening up the valve to increase the flow rates whilst keeping them in proportion with the regs requirement for each designated extract room (kitchen, bathrooms, utility room, WCs). If you have fitted the toilet smell extractor system I came up with, then just ignore the flow from that - it isn't officially part of the ventilation requirement. Once you have the system extract rates looking in proportion at boost (and bear in mind that they will probably be way over the requirement at this stage) then start measuring the fresh air inlets, also on boost (doing it this way will highlight the main duct loss differences). Adjust these to achieve two objectives. You want the sum of the fresh air flow to be as close as possible to the sum of the extract air flow, plus you want to adjust the fresh air flow so that the most frequently used rooms have the higher flow rates. There is nothing in the regs about fresh air flow rates, so use your own judgement here. For example, you will want the largest and most often used rooms to have the highest flow rates, the smallest and least often used rooms to have the lowest flow rates. The main thing is to adjust the fresh air total flow to match, as closely as possible to the extract total flow. After doing this, go around again and check all the extract flow rates. The chances are they may have changed, and if so then adjust them to make sure they all exceed the building regs limit and match the fresh air feeds. Then go back and double check the fresh air feeds, these may need slight adjustment to get the system balanced at boost. The chances are that you will find at this stage that the system is pretty close to being balanced. Next, reduce the MVHR to the background ventilation rate setting (this is specified as speed 2 on our system, but see my note later). Go around as before and measure the flow rate on all the extract terminals and note the total extract flow rate (the sum of the flow rates from all the terminals). Do the same for the fresh air feed terminals. The total figures for each should match. If they don't, then adjust only the fresh air feed flow rates to get them to match, do not adjust the extract rates. Note the total extract flow rate with the MVHR system on the background ventilation setting and make sure that it exceeds the continuous ventilation rate requirement in Part F, which is calculated from the house total floor area (the total must exceed 0.3l/s per m² of net internal floor area for the whole house). With luck you should find that the ventilation rate exceeds this figure with ease. If it doesn't, then go back to the start, turn the MVHR to boost and go around opening up all the extract ducts, starting with the kitchen, (this is why I said at the start it was a good idea to open up all the extract ducts to maintain the ratio and exceed the building regs extract figure), then go though the process again. Once you have the system so that it meets the building regs Part F Table 5.1a max extract rates from the specified rooms, and is in balance at the background ventilation rate of 0.3l/s/m² of floor area, the job is done. However, you may well find that the background ventilation rate is too high in practice, and that as a consequence the MVHR is using more power than it needs to in order to keep the air in the house fresh. Our experience is that turning down the background ventilation rate has had no detrimental impact at all, so I now run ours at speed 1, with the fan speeds around 25% of full speed. It's worth noting that some MVHR units have the option of being able to individually adjust the extract and fresh air fan speeds independently in the set up menu. This is useful for fine tuning, but is detrimental to efficiency if used as a shortcut way to try and balance the system. I have our system set to 28% extract and 25% fresh air fan speeds, to fine tune it, but would suggest that anything more than a 5% difference really needs to be adjusted out in the ducting/terminals if possible.1 point
-
Unfortunately one of the builders dropped a hammer off the scaffold and it bounced off part of the scaffold on its way down and cracked the glass, in one of my Rationel Ali-clad windows, fortunately it’s one of the small panels of glass.. The question is, how is the Ali-Clad exterior trim removed from the window to get the glass out? Any ideas?0 points
-
0 points
-
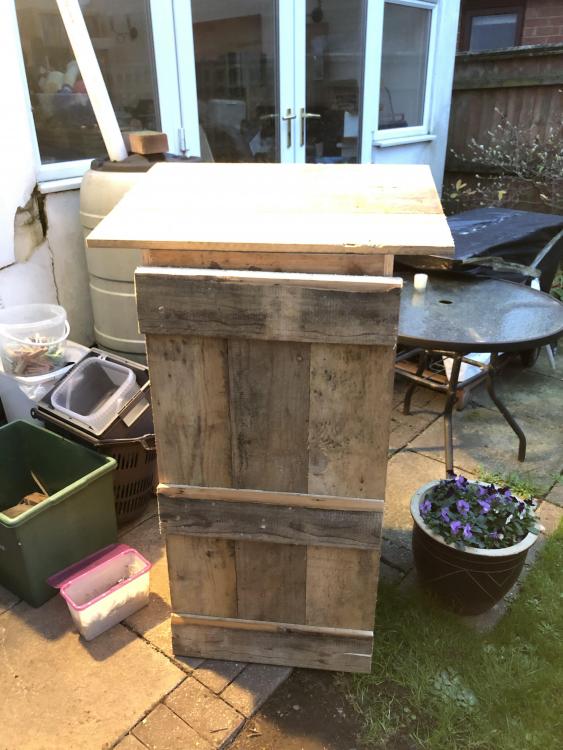
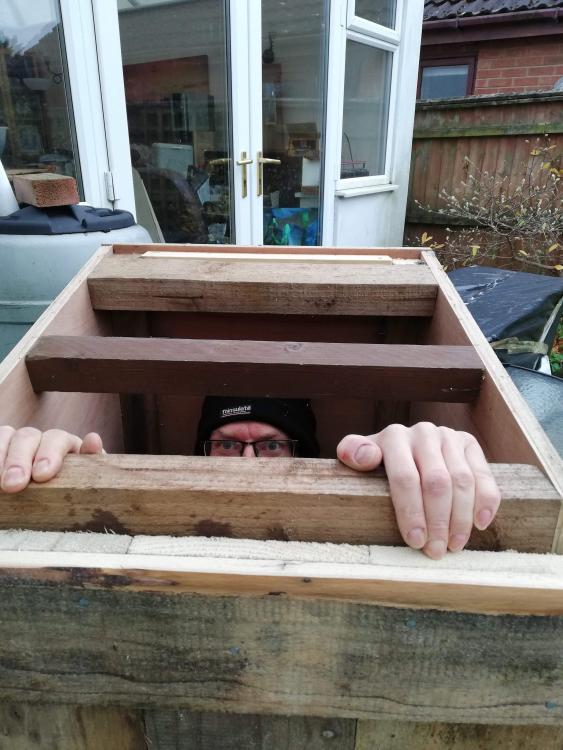
There’s been a fair amount of unkind references to the size of my standpipe housing, without having any reference to scale. With that in mind I post the following image showing that I barely even fit inside it with the door shut! Therefore I struggle to see how my bricklayer will ever manage to use it for shelter, particularly when I’ve put in a shelf for the kettle? ?0 points
-
0 points


