Leaderboard
Popular Content
Showing content with the highest reputation on 06/20/20 in all areas
-
Seemed to spend most of the winter and spring fitting plasterboard. At times I struggled to keep motivated. About 275 sheets later and still a bathroom and living room to board out even now. The plasterer did a great job, I have great admiration for the skill. Did some drainage and fitted the Vortex treatment plant and rainwater harvesting tank aswell as the. mains supply to the house as the ASHP arrived ready to be plumbed in. My dear Father built the staircase which went straight in. I showed him a photo of a staircase without stringers and he just got on with it. Thank you Dad. Its nearly May 2019 and the kitchen ceiling issue is nearing a solution.5 points
-
Having never thought we'd be in the position of designing a house from scratch, we were overwhelmed by the prospect. Through a work colleague of my partner, we got in touch with an architectural technologist that specialises in passive houses and low energy homes. His style is quite simple and very much what we were after. We met up, got on very well, and spent the next 9 months designing our future home. We went through 12 drafts before we were happy. To say we're indecisive is an understatement! We had a few design challenges, namely being in a prominent conservation area, and working with a sloping site. Another factor was a relatively large size of the site, and the fact that the road is dominated by large detached houses (tho we are in a short row of Victorian semis and bungalows). This basically meant we'd have to build a 4 bed house over 200m² and with a garage in order to make any economic sense for resale. Anything smaller would likely not get us much of a margin. Coming from a 100m² semi, the idea of a 200m² house for two people was daunting! We went through various ideas and drafts, all attempting to make most of the sloping site and southerly facing rear and large garden. Split level was played around with, as did building up to match the front ground levels. Very quickly we decided on a basement. Sounds like an expensive decision, and may well end up being. But because of the slope, we would either have to build 2m high rising walls, or dig down one more meter and get another floor. After some calculations, the latter one one. Mostly because of simplicity of construction, a single insulted raft foundation and single, simple thermal envelope. Due to the slope, we knew the water table was significantly below even the basement level, and only two walls would be "below grade". Then, off to planning. A few surveys and back and forth with the historical monuments people... But no objections and no dramas. Yet... It still took a full year! Application went in Sept 2018, planning officer had completed all her work and was ready to write the final report in Jan/Deb 2019.... Ended up being July before this happened due to their own backlogs and to be honest, them cocking up and missing an external consultation relating to the river. So, end of August before we had planning granted! Construction wise, I was set on ICF from the start as made a lot of sense in terms of build speed and simplicity. We both really want a house that is always warm and needs minimal heating. I had never entertained building to Passive standard as pictured small, boxy houses with small windows. But our architect modelled the design and we came well within the parameters with our design. Would just need to use the thicker ICF blocks, triple glazing and mvhr were a given anyway. Basement: Not quite how it looks here, this layout is post-planning and not quite how it will be (bathroom is now beside utility, and there a door in to the plant room/store) For budget reasons, we will only be finishing the bedroom and bathroom, the rest will generally be unfinished and open. I have grand plans for a chilled store room, games room/ cinema etc... Phase 15 or so! Ground floor: A big sociable open plan area that made the most of the southerly aspect to the garden was always the priority for us. As you can see, this dominates the floor. A separate TV room or snug was also important. First floor: You may be able to guess, but at the time of design, there were just two of us in the picture! Hence the massive master suite. Another important detail, we are intending on having a washer and dryer in the main bathroom, to save trips up and down stairs - my partner has minor mobility issues. Now that we are three (in true self build style, having a baby seems to be compulsory), very little has changed, but the walk in wardrobe will likely be a nursery for the first year or two.4 points
-
In response to @Russell griffiths post about blogs, here goes. It is still 2018. I finished the Tata Colorcoat Urban roof, tricky around the Velux windows and fitting the ridge trying not to get sealant everywhere. No leaks 2 years later. Kwikstage very useful, heavy but a worthy purchase on a long self build. I made up one of the roof trusses for the garage and thats where it sat for another year. Back inside and started to put down 150 Celotex on the ground floor, taped and polyethened ready for the screeders. All UFH supplied by Wunda, about 1200m of 16mm pipe on the ground floor for 14 ports from 2 manifolds. All cliptrack and staples. Take care not to kink the pipe and take photos and measurements if you might be fixing anything to the floor. The electrician arrived and made great progress and then the screeders in early December 2018, 200sqm of 45mm anhydrite down in 2-3 hours. Once the electrician had finished first fix I started battening the OSB ready for the plasterboard, I notched out around the wiring. I fitted some resilient bars to all the ground floor ceilings, little cost apart from fitting time. It's now 2019.4 points
-
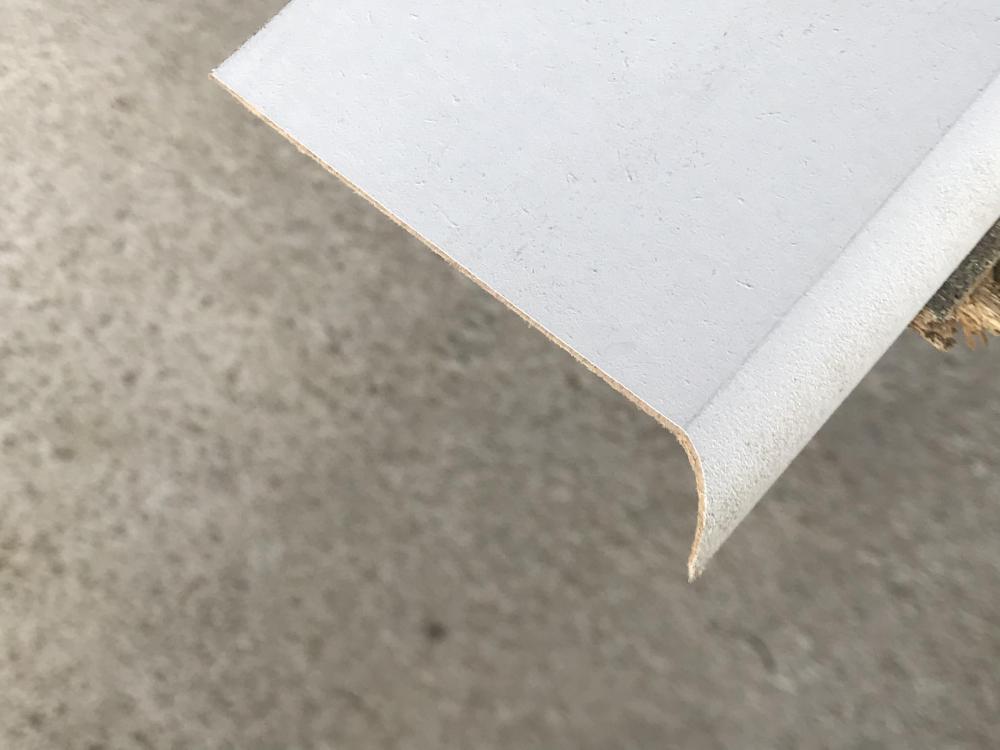
The kitchen has a 10.5 metre steel ridge which protrudes into the vaulted ceiling by 50cm. I also attached the ventilation 75mm pipework along the side of the steel to supply the living room at the opposite end. So a curved ceiling to run underneath the inside of the ridge. A simple explanation is imagining a skateboard halfpipe upside down. I built a frame out of ply with cutouts for batten to run the entire length of the ceiling. I then fitted a layer of 6mm red faced ply to create a curve. Then the final layer of 4mm birch plywood, glue and pinned and treated with Osmo oil. Well, it took a while. I know my building is not 100% square as one of the long kitchen walls was leaning out when we fitted the original rafters but overall the sheets all butted up square with only one sheet needing a little fillet added. I started in the middle of the room to allow any discrepancies to dealt with at either end. Then it was back to more plaster boarding and a novice bee keeper. More to follow.3 points
-
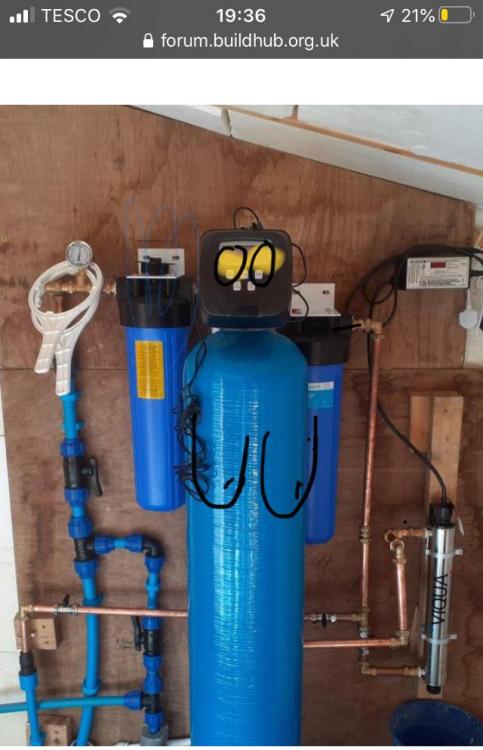
We were pretty lucky to get a big plasterboard delivery the week before lockdown. The inside is now boarded, taped and painted. The bathroom floor has been tiled. A wee thanks to @nod for pointing me in the direction of ditra. Floor seems solid enough and looks neater than I thought it might. The water treatment has been plumbed (thanks to @PeterW for the plumbing advice). Needs a bit of refinement to make it look more aesthetically pleasing but it is watertight, which is the main thing. Next stop second fix electrics and plumbing. I'd originally taken a year off work which is now up, so the sooner we get out of the caravan the better. Laptop on a wee solar panel and dodgy 4g connection isn't ideal.3 points
-
Hello folks My partner and I are three quarters through a self build strawbale house in rural Stirlingshire. We're fully offgrid with solar pv and rainwater harvesting. There's a lot of carpentry involved and I've done most myself, including building a 6 x 4m workshop on site. I've already used Buildhub to find the answers to many questions, and am looking forward to posting my own. Happy to answer any questions on our build.2 points
-
A very simple thing I do is to put a value against my time. Let's say £10 an hour for low skilled work, like digging a ditch. Then say we have a job that will take a full week, say £400 of my own labour. But I could hire some equipment that would mean the job only took two days. Say £150 for equipment hire and my time meant that the real cost was £310. So you've not only saved some "money", you've freed up three days to do other jobs, more skilled work that's worth £25hr. That's how you save money on a self build.2 points
-
So this one has been 10 years in the making, which is when I originally built this extension, and not long after i'd built it, the outdoor bunny became an indoor bunny! So the glorified rabbit hutch has now become the kitchen it was intended to be. Worktops just been installed. Will crack on with tap, dishwasher, hob, and oven later this week. Really pleased with it all, just need to choose some paint, but will sort that in the autumn, as I've got the old kitchen to rip out and the room to bare brick, and floor to replace first!1 point
-
1 point
-
Hi , they are being shipped, cut and polished in wooden crates, padded out and put in a container from Alexandria to Immingham where they are collected after VAT paid and delivered to my door with forklift.1 point
-
we've had a quote from idealcombi and it's very competitive. I like the idea of all the profiles being the same regardless of being inward, outward or fixed windows. they're definitely going on the shortlist and we'll probably end up having a showroom visit to see them in the flesh. oh, and for us Rationel couldn't do the large size panes of glass for our entrance hall, nor the large sliders so they quoted for Solarlux for the slider which were astronomical! as such, Rationel are no longer being considered for us.1 point
-
+1 and measure your openings. Our very experienced builder never purchased anything based on the plan dimensions. He always measured what had actually been built. He'd been caught out too many times.1 point
-
No 1. Report the planning breaches to your council planning, particularly the brick outbuilding that was refused and the extension that does not conform to the approved dimensions. Appoint a solicitor to deal with the damage issues.1 point
-
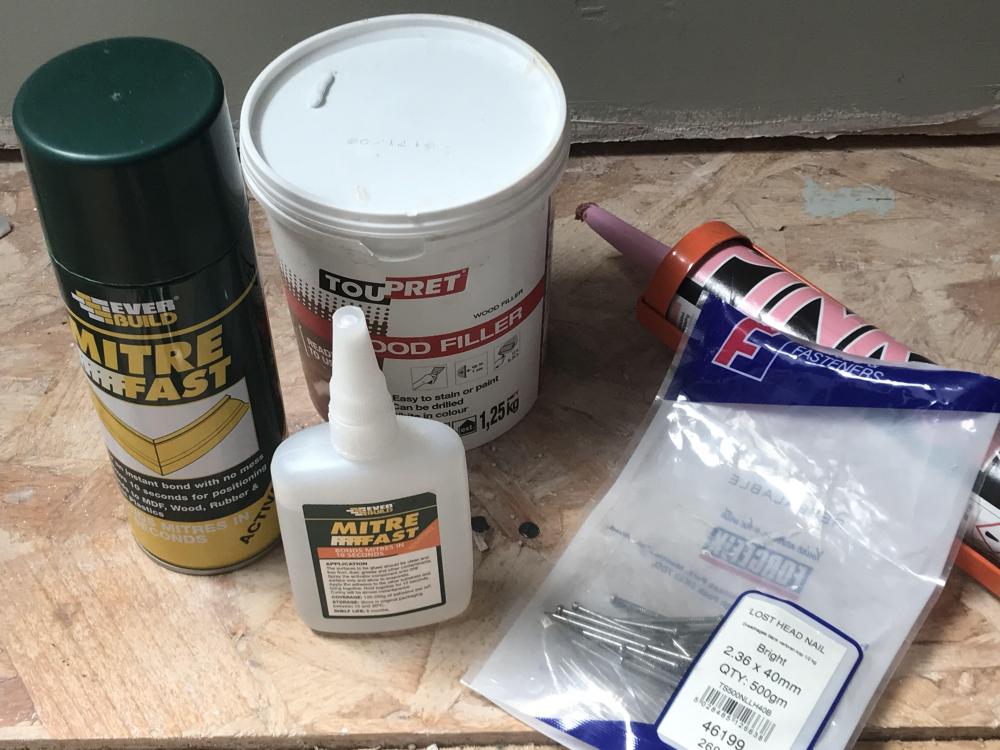
Just started fitting some mdf pencil round architrave / skirting. Bought a few new tools, fine cut saw 9tpi and a coping saw. The Mitre fast is excellent for fixing the door architrave together before nailing to the door frame. Nailing which is a novelty in my build. Pink grip goes off quite quickly and Toupret wood filler excellent. No nonsense caulk for filling small gaps. I use a damp sponge to clean excess off as you go. @Oz07 What foam do you use as I find the Pinkgrip a little hard?1 point
-
whoever you choose, just remember that you must check everything and don't rely 100% that someone would check all the details for you. Our supplier/installer (quite a big name) managed to sell us a door which not only did not match the BC regulations on clear opening, but was even manufactured with a visible difference to the spec declared on the drawings! Naturally, in comes a BC inspector and says no, i won't sign this off! Follows a lengthy discussion with the supplier another month of wait, cutting an enlarged door opening and re-installing a newly produced door. We thought they'd know their Part M Diagram 1.1, but... well, now we know.1 point
-
That's an interesting approach. I like it. To add to this in my case, as a novice in building, I also want to try everything* at least once. There is nothing quite like being hands-on to really learn about something. Moreover, this would then put me in a much better position to know what's-what when I have someone else doing the job in exchange for my money. * with well-known exceptions, like plastering, brick-laying and electrics.1 point
-
1 point
-
I roller another undercoat on the face on my own jobs. Some people here were saying they paint the bottom edge to stop it blowing but I cba with that. I use a 2nd fix pin gun and pink or grip fill but have just switched to foam instead. I think the foam is a better fixing and it's cheaper. On the arcs I use mitre bond, build them all up in one room. Then flip them over, bead of pva where they hit the frame then dobs of grippo every 12" or so. I wouldn't use ovals if I were you they will be too rough knocking in by hand.1 point
-
I had exactly the same problem right when C-19 struck. That meant about a month digging 35 cubic meters by hand. At the time I cursed a bit. I've already forgotten the irritation, but I do know - now - exactly what's involved in accurate digging to a fairly precise fall. In brief Keep checking for level - over-digging by hand is soooo annoying Make sure the width is right, pipe width plus space for one foot either side of the pipe- too wide is as bad as too narrow Plan for spoil - topsoil one side, clay / whatever else 'other side. Backfills easier that way. Make a set of trench boards to prevent, where necessary, collapse- scaffold Jacks to brace between boards on either side. Plan how to drain the trench : thunderstorms. Buy a clay spade. Brilliant bit of kit. Two people digging (machine or hand) speeds the process significantly. Debbie helping more than doubled the rate of progress Plan for where the backfill 10mm gravel is dumped. It's a much bigger task than I thought. A laser level really helps.1 point
-
One idea: go to your local agricultural merchant and have a look at their metal gateposts. It may not be an intuitive answer, but they should have posts designed for gates that are up to 12ft wide and up to 7 bar, and so will be very robust. When I have these they have usually been approx 8 ft 6 in long, and I have used them around 1/3 in the ground. They seem to come in 3"-5" diameters. You may wish to put some type of cosmetic larger post round it. Ferdinand1 point
-
1 point
-
A few years ago I worked for a while in a 4 storey shipping container 'office block' https://turner.works/works/view/pop-brixton/ and the containers were an excellent solution here - enabled very rapid construction of a multi-storey building with multi-purpose units on a brown-field site, only intended to be used for about 5 years (though I expect it will continue for much longer than planned since Pop Brixton is such a success). But as noted above, there were limitations I think would mean it's less appropriate for a long-term residential structure and almost certainly other construction methods would last longer and be more pleasant to live in, and I'd imagine resale would be extremely difficult. While thinking about how you'd build it is the fun part, I think you'll need to start with finding a location you can build at and then what you can build there. But, perhaps building a quick 'short-life span' house on a brown-field site might be a way around this problem? Maybe councils are keen to find short-term uses for brownfield sites they have lying about? This might not be what you had in mind though. Unfortunately Pop Brixton is currently shut due to COVID, so you can't go and see what it's like. Despite having supported it at the planning consultation stage, I'll admit I was snooty about it when it opened - but ultimately it was too awesome to resist. As a working space it was fun, but there was some secret relief all round when a water leak and collapsed ceiling meant we all had to go and work in a vast, airy, Victorian corn warehouse in Loughborough Junction for a few weeks.1 point
-
I am probably with Russell on this. A shipping container is designed to be a strong monocoque as a unit without holes in it, and projects I have seen seem to go across the grain of that principle ... unless they can leverage the precise dimensions and really minimise work. F1 point
-
I’m not convinced containers is the way to go, I think they are constricting in size and require a huge amount of work to insulate, all they bring to the party is a box and it’s not hard to build a box. I would think a simple steel frame with timber panels installed in between could be far simpler.1 point
-
Hello @FtypeMark (I presume another Jaguar fan?) This is definitely the place for scared clueless fools. I was, now I’m not so scared (but still a bit) and not so clueless (but still a bit) and that’s almost entirely down to the wealth of information here and help that is available. In answer to your question, I don’t have a clue but I’d guess it may be a struggle. I suspect insurance may be problematic as well. I also suspect none of it is insurmountable and a wise wo/man will be along to help soon.1 point
-
I am on the Devon Cornwall builder and will have a container for sale soon!!,!, (just joking, but I do!). You may well find banks shun non traditional building methods and the planners round here HATE anything non traditional.1 point
-
Thanks everyone for the warm welcome and to Russell especially for the heads up about TBC; it's always good to know who the big cheese is and who one should be deferential towards! ? Peter, some pic's for you - nothing very interesting I'm afraid. Currently, the whole structure is wrapped in a breathable membrane (a cheap version of Tyvek) and looks dreadful. The chap one can just see in the corner of the final image (pic #4) is our local village chippy who helped with the main construction of walls and roof. A great bloke, a good carpenter and super quick. From the base frame, (pic #3) to the main structure being completed - including two windows - took just eight days. It would have taken nearer eight months if I'd been working alone! Tim. #1. Studio Site Diseased apple tree and Leylandii hedging subsequently removed. Just behind the figure (my wife, Pam) you can just make out the corner of the summer house which you can see in pic #2, below. #2. Concrete Piers 24 concrete blocks used in total - much cheaper than using bespoke products. #3. Base Frame This is secured to the concrete blocks with steel angle brackets and 80mm long 10M concrete screws. The 200mm long battens at the bottom of the 5" x 2" joists are for the 100mm insulation to sit on to ensure it doesn't fall out. #4. OSB Sheathing Going Up The large aperture on the end elevation is where the entrance door will go (currently the entrance to our bungalow which is due to be replaced). The openings in the right elevation are for two windows bought from a supplier of misfits for £190 including the glazing and VAT! So, that is in fact the total cost of windows and doors - which is often a big chunk of the budget for a project like this.1 point
-
thank you @puntloos!! I showed your layout to my other half and we both thought there was real merit in having a sitting area that we could close off from the kitchen/dining area. Great idea!1 point
-
If they are looking for a movement joint then you need to sleeve it properly or use a flexible coupling either side. What is the ground makeup..?1 point
-
You'd normally encase in concrete. Look up the Part N booklet. Polythene wraps are used to protect against chemical attack, unlikely you'd need that.1 point
-
Take a look at Idealcombi https://idealcombi.com/domestic/1 point
-
In the last few months work on the house was on hold because of the COVID 19 pandemic. With the rules starting to be relaxed we have now been able to make some progress. A few months ago I posted on BH about being a bit concerned about the bath being a tight fit as it’s 1800mm and the distance between the wall was 1802mm. Not sure how the plumber got it in but happy that it fills the space. The bath is made from Carronite so it should feel more rigid when showering. Our joiner fitted the hydro lock panels and the plumber came back to fit the shower fittings. The Joule Aero tank has now been connected up. The tank holds 260 litres and utilises a heat pump which draws air from the bathroom, utility and ensuite. We visited a couple of properties that utilised this set-up and although they were happy with the efficiency of the system the feedback we got was to consider potential vibration noise from the tank. We took some steps to do this, firstly sitting the tank in a cupboard in the utility room, using a thick anti vibration mat with 22mm plywood on top. The ducting throughout the house is metal but we switched to flexible ducting for the last bit to ensure any vibration would not travel through the ducting. We also fitted a silencer to reduce the noise travelling through the ducts particularly to the ensuite. These steps have had the desired effect. Because we have yet to move in, I was able to monitor the electricity consumption of the tank when it heated the first 260 litres. To get the water to 50 degrees it used 4 units of electricity which would be about 50p. The tank also has a dual immersion which could be used to heat the tank more quickly if desired. After the air has gone through the system it passes through an external vent through the utility wall. In the last entry I mentioned that we wanting to prepare the ground for grass seed. The first job was removing a lot of stones. I’ll probably use the smaller stones to extend the parking area slightly and it would be good to use the larger ones for a small wall or some other feature in the garden. After the stones were removed, we raked the ground and then sowed the seed. The grass is starting to come through which is promising but we will need to fill in any patchy gaps. I can see why people go for the more expensive option of turfing but a big bag of seed is very cheap and although it takes some time and effort it’s satisfying to see the grass come through. I guess this is a good analogy for our self build! We had a sunny weather spell which allowed me to finished off some painting and my wife put some oil on the cladding. This had been previously left to weather but as this is on the southern elevation this could now do with some oil. We chose one which had a slight pigmentation and after applying the finished result was that it looked very similar to the pre oiled look but helped to even out the upper areas that had yet to sliver as they are shaded by the soffit. We plan to work our way around the house with the oil. We have used various tins of Osmo throughout the house and although it is quite pricey it does the job well. This is the tin what we used on the cladding. What is next? We had hoped that we could order some furniture from Ikea to furnish the downstairs but I think the pandemic is affecting stock issues and delivery. We now need to decide whether we want to move with limited furniture or wait a few more weeks. The next jobs: - a little bit of electrical work, lighting fittings, connecting up cooker, towel rails etc - BT due to connect us up on Tuesday - need to get some tiling work done for splashbacks - order some chips to spread around the site. - need to decide what to put as a finishing layer on the access road. - need to order materials for ramp, decking and downpipes for guttering. I hope everyone is keeping well and thanks for reading.1 point
-
My window company/installer was adamant that they only ever use expanding foam and not the tape but after a discussion they came round to my way of thinking so the installation included the cost of the expanding foam tape. They put expanding foam on the interior side above the sliding doors (expanding foam tape on the exterior side of the doors) and when the technical guy turned up from Internorm the first thing he said who has used expanding foam there even though this was not the reason he was there. The problem with Internorm and some of the higher end companies is that they specify the way the windows/doors should be fitted (but not so the customer will know if it is right or not) and if in the future you have a problem with the product and it is not fitted exactly to standard then you will have a whole load of trouble. Not only did we have trouble with the standard of the installation but we had the wrong type of door fitted for the location it was fitted in. When you query the whole procedure from a customers point of view you just get that the installers/fitters/desiners are supposed to know what they are doing and have been trained to do so but how are we meant to know what is an acceptable standard. Windows for us has been a nightmare. Do not under estimate how much the airtightness tape costs either.1 point
-
I would have agreed with you after seeing a couple of TS installs however after last weekend and seeing @newhome TS installation, once me and @Nickfromwales had lagged the pipework the losses were really a lot less - tank was covered with spiral galvanised steel and at 75c tank temp we had barely warm tank sides.1 point
-
0 points
-
Why bother with shipping containers. Old (and even fairly new) 747s and A380s will be cheap as chips for the foreseeable and come with leather seats, first class beds, a bar, toilets, kitchen... What more could you need?0 points
-
i'd love to be able to tell you how mine are, however, someone is storing them ? prior to being delivered due to slow kit erection prior to total covid shutdown. apparently we'll be back up again on the 22nd woo-hoo!0 points






.thumb.jpg.bac90f3bbf6868cf2118d010d936c99d.jpg)