Leaderboard


Popular Content
Showing content with the highest reputation on 10/02/18 in all areas
-
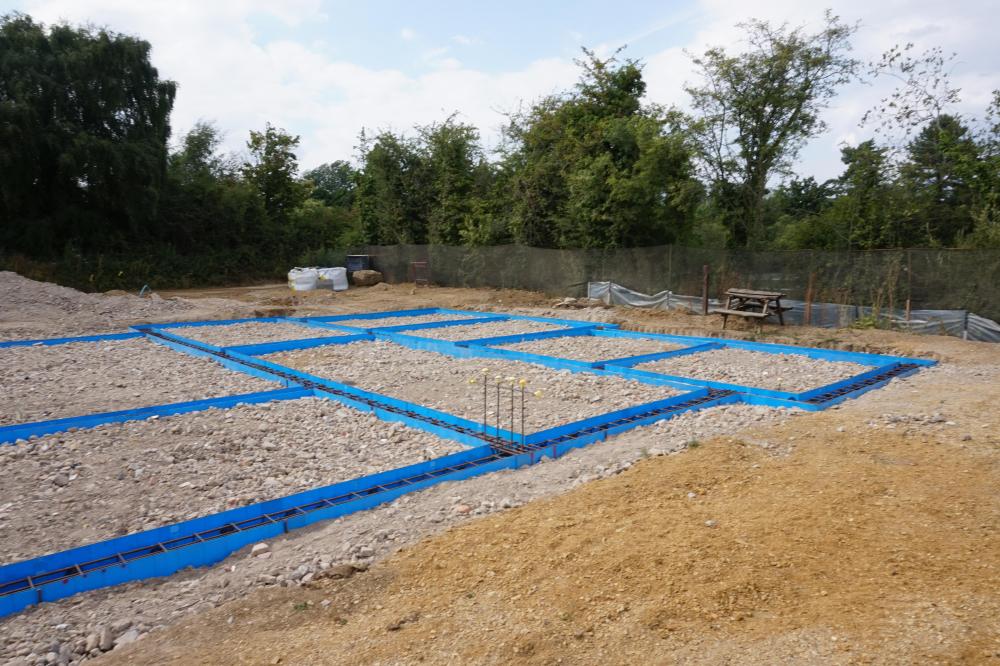
I did a sand blind first dead level. Found it very Zen! Then the 25mm eps: Then the dpc: Then the pir: Think I put thick down first! Putting the 50 down first followed by the 100 would have been better I think.3 points
-
Missed that bit. Then probably not, I was thinking of the public highway. I smarted at paying £1000 for a 3 metre single track road crossing.2 points
-
Ugh? Don't you mean top, bottom and sides in plain? Anyway I googled tile pockets and every image I saw that had mosaics only had them in the back panel. I imagine any slight variations in depth or any slight angles may be more noticeable if you are looking at tiny squares? Other than that I reckon it's personal preference.2 points
-
Get a cook so it is an S.E.P. ?2 points
-
I've just (as in late yesterday afternoon) finished installing and commissioning a Sunamp UniQ 9 eHW, with the PV option in the controller. The installation manual that came with my unit is not the one linked to above, and has a different (and simpler) set of wiring instructions. The version of the manual I have is dated 19/7/2018, so is newer than the one linked to. The way I've converted my wiring from the previously fitted Sunamp PV is this: I have a 16 A radial from the consumer unit that runs to a 20 A DP isolator switch for the hot water related electrical systems. This is the same as I had originally to run first an immersion heater in a thermal store, then the Sunamp PV. From that isolator I have a feed to my PV diverter that then runs to the main power supply to the Sunamp controller. This is a length of 2.5mm² T&E. I have another run of 2.5mm² T&E from the 20 A DP isolator to a fused connection unit (FCU) fitted with a 3 A fuse, as the low power, always-on, supply for the Sunamp control box, and my pre-heat circulation pump. From that FCU I have a length of 1mm² cable running to the "always on" low power supply to the Sunamp control box. This is also fused inside the Sunamp control box at 3 A. In my case I have a pre-heat circulation pump that is switched by a flow switch in the DHW supply, so that when any hot tap is operated water is drawn from the buffer tank to a plate heat exchanger that pre-heats the incoming cold supply to the Sunamp. The power for that circulation pump and flow switch also comes from the 3 A FCU. The electrician just needs to provide a standard 16 A immersion radial in 2.5mm² T&E from the CU to a 20 A DP isolator switch near the Sunamp installation initially, perhaps with a FCU for the low power connection. If you're having a PV diverter fitted then the isolator needs to be before the diverter. As far as the plumbing is concerned then it depends on which version of the Sunamp you are looking at using. In my case, the UniQ eHW is used for hot water only, so I've connected the two Sunamp internal heat exchangers together in parallel, with 22mm pipe, and have just a 22mm cold feed (which is pre-heated in my case, but doesn't need to be) and a 22mm hot water outlet that runs to a 22mm thermostatic mixer valve (TMV) fitted to the end of the DHW distribution manifold. I'll be taking some photos and writing up this installation in our blog over the next few days, so you can see what's involved. Best to look at siting the Sunamp somewhere where you can easily fit something that's very heavy. Mine is upstairs and it was an interesting challenge to get a 155kg unit up the stairs and into our services room on my own - took me a whole day just to get it up the stairs! I'd think about the transport route and location carefully, although I found that my 250kg rated sack truck was just about able to handle a UniQ 9, with it ratchet strapped tightly in place. Definitely better to try and not move one on your own, though.2 points
-
Even hardcore will eventually go muddy in rain as the fines work their way to the top - it's inescapable! Worse, when it dries out inside it reverts to a fine grit which can scuff floors - we had a strict shoes off at door policy since moving in which we maintain today. They day we finished our resin bound driveway was glorious - I could walk from door to road in my socks2 points
-
@lizzie, is this a good point to introduce that well known bird Anas fulvigula, the Mottled Duck, as a suitable mood and texture board for this putative fence painted in Ducks Back? Its back has an undertone of greyish, and a dominant colour of brown and a patch of bright, inky blue. Really quite fetching. Credit: Macaulay Library. If the top coat flakes, you will get an attractive, naturalistic, pattern. Ferdinand
 2 points
 -
Not on my bloody site there’s not as the seasons start to change I thought I would add my opinion on mud on site nope don’t want it, your trades will walk it through your new house, their van will drag it down the road, and it makes for an unhappy environment to work in. When I did the site scrape I extended it for 5-6 m in all directions from the hose footprint, I removed all topsoil and replaced it with recycled crushed hardcore and a blinding of local stone, the cost was 3 truckloads of crushed at £145 per load and 1load of stone at £165 the outcome is priceless not a drop of crud anywhere.
 1 point
 -
Cat will pick up pretty much anything metal - to find water sometimes you need to put a tone generator on the pipe but some pipes it doesn’t work with. The difference is that if you hit a water pipe, you fill the trench with water .... hit an 11kv underground cable and you fill your pants .....1 point
-
Firstly I would get a report off DigDat to see what’s in the lane. Then the contractor needs a Cat scanner to do a mark up of all the services on the lane by both the map and the Cat scanner to confirm what’s there. And then once they have confirmed that lot - they start digging ..! Half a day to mark out is not unreasonable. Also check they have good PI insurance ....1 point
-
Sounds like the over inflated price a (now dumped) plumber charged me. 2 men x 2 days - £800 per day each .... In their dreams!!! In fact that makes even her prices look reasonable - if she had done the job she was paid for1 point
-
Sounds like a 2 day job to me at most - get a bloke with a digger and lay the duct yourself as they dig. You shouldn't have to mess about laying sand blinding or any such if you put ducts in so should be a quick and easy task.1 point
-
Yup. And that sends juice to the respective TS stats. If the TS stats are calling then they are what tells the boiler to light, so they boiler is the last to know.1 point
-
And yes, the red Reliance TMVs each control the temp to the ground and 1st floor Ufh manifolds. Without them the water from the TS would go into the floor and cook Mutt n Jeff1 point
-
Plenty of pur/pir alternatives but kingspan has a virtual monopoly on phenolic foam so expect to pay top dollar for it.1 point
-
+1 to mosaics on the back only1 point
-
I would be looking at a man and a mini digger at £200 a day instead1 point
-
This one has industry standard motors https://www.bes.co.uk/motorised-mid-position-valve-3-port-28mm-173921 point
-
Kooltherm's lamba is 0.018 - that's why it's often specified - it saves space. Not that that's the only reason you should decide on an insulant of course; for newbuild you have many more options.1 point
-
Getting the house 'warmed through' will take a chunk of heat unless youve elected it to do so incrementally ( leaving the stat on and set to the desired temp ). Peter and I set the system to do 'summer / winter modes' where the top stat is the boss if you select DHW only ( aka summer ), and the lower stat is the boss if youve selected space heating ( aka winter ) where you will then also get DHW as a bi-product of the TS being hot. The idea was, fuelled by confusion and free beer, to only heat the upper 1/3rd of the TS during summer ( or when only hot water was required ) to reduce the volume of heated water. As there is far less volume then, the stat is set to a higher temp to get the boiler to kick in sooner, but to also have less work to do ( as at 24kw it was undersized for the system ). The lower stat is set to the lower temp as there is much more water and far less recovery for the boiler to do when the TS is full of warm water. Dont forget that the boiler also has to heat up 450L of cold water when you select the heating and water from a standstill before anything gets to the UFH. Comprendez vouz ?1 point
-
nice looking drum there1 point
-
Taking off the rads and blowing them through with cold mains water off the hose pipe is a good idea. I turn them upside down, and give them a few whacks with a hammer and a wooden block. Thats as good / better than a flush IMO, but If theyre over 30 years old, you'd be a heck of a lot better off changing them all to new convectors, and the heat output and reduced boiler temp will be significant. A power flush will be expensive, and you'll have to change all the radiator valves at the same time ( thus mitigating against @PeterW's point about causing multiple leak points ). If you change the rads and valves then you can get away without the expensive power flush, so you can then put that money towards the new rads. MrCentralheating online is cheap as chips and do package deals on rads and valves, but do avoid B&Q / Screwfix as the Kudox rads are garbage. If you have an old boiler I'd not recommend flushing that tbh, but it will be full of crap too. That would be better dispersed by using chemicals, over time. TBH at 60 years its time to spend some money on it as its all probably at the very end of its serviceable and reliable life. A leak could be more expensive than the system having an overhaul1 point
-
The cells in the old Sunamp PV were removable, and a lot smaller. There were photos of the assembly of those at Sunamp, on their old website, I think, that showed filled cells in a row, waiting to be fitted into units. The Sunamp PV I had (well, technically still have, as it's waiting for me to move it downstairs so it can be collected) had two much smaller cells in the lower part of the enclosure, with a circulating pump, heating element a couple of non-return valves, an ultrasonic flow sensor and the control electronics in the upper part of the unit. The case of that was more complex and bolted together in sections, so it was relatively easy to take the cells out. The Sunamp UniQ 9 we now have is much larger and almost the entire volume of the case is filled with a single large cell, with vacuum insulation panels around it. There's no pump, valves, electronics etc inside the case any more, instead the heating element is in the base of the cell and heats the PCM directly. There is a separate control box that houses the electronics, and senses the state of charge of the cell by a vertical chain of thermistors inside the cell. The control system seems simpler than on the Sunamp PV, in that the relay that connects the heating element to the incoming power (either diverted excess PV or a directly connected supply) is activated whenever the cell charge drops below a set level (either 50% discharged or 90% discharged, it can be set on the control unit). The Sunamp PV used to switch on and off depending on whether there was any power coming from the PV diverter, whereas the UniQ just connects the heating element to the incoming supply whenever the state of charge drops below the threshold, and allows the PV diverter to do the switching. The other function seems to be that the unit now has a start from cold mode, where if the PCM is completely solid (so fully discharged) it pulses power to the heater initially, presumably because if it didn't there would be a risk of locally overheating the PCM immediately around the heater. As soon as the lower part of the PCM has turned to liquid, the control unit switches out of cold start mode and allows full power to be fed to the heating element. All told it's a great deal simpler than the old Sunamp PV, with none of the complexity of pumps, valves, flow sensor or whatever. It's pretty much like a conventional thermal store, with a pair of heat exchangers inside the PCM to provide "instant" water heating and an electric heating element at the base, rather like an immersion heater. The unit I have is roughly equivalent to a 210 litre hot water cylinder, but a great deal smaller and with much lower heat losses.1 point
-
I did the wiring for a loft conversion once, and on final inspection the BC found the cill of the MOE roof windows was 1" too high. He insisted on a fixed 1" high step being placed in front of the window before he would sign it off.1 point
-
check VERY carefully with a meter BEFORE you connect it. i.e connect a bit of flex and a plug to provide power to L and N in. Then turn the thermostat up so it calls for heat and measure with a multimeter what comes out of L1 and N1 You don't want to be connecting a switched L to something expecting a dry volt free contact.1 point
-
Thanks, @joe90, but I have it sorted with two chaps in the village who heard my tale of getting the UniQ upstairs and have volunteered to give me a hand to get the old unit down. The Sunamp PV is a lot lighter and a bit smaller, so it's nowhere near as hard to handle. Last time I just put strops around it and lifted it up one step at a time, and going down will be easier, I'm sure.1 point
-
Jeremy, give me a call, I am more than willing to come and give you a hand, I would have helped with getting the new one in if I had known, don’t risk damaging your house (or yourself for that matter), it’s not worth it. ?1 point
-
Just wire link 6 and 7 to 3 for now, as that will turn the ASHP on in heating mode. If getting out to it is a problem, then over-riding the dry contact control from the programmer may be an option, although this isn't something I've tried, so can't say for sure that it will work as expected. What you suggest should work OK, I think, from my interpretation of the manual.1 point
-
With a lot of F'ing and blinding... It took me the best part of half a day to get the unit from where it was dropped at the curbside, on a pallet, up our steep drive, up the steps by our front door and into the hall, where it sat at the bottom of the stairs for a couple of days until I'd recovered enough to attempt stage two, getting it up the stairs on my own. Most of the time was spent rigging up timber frames and a tirfor winch, plus a back up safety rope, using some of my old climbing gear, with a length of rope and a couple of ascenders fitted to it and attached to the load so that I could maintain the tightness on the safety rope. I had to use the tirfor just to get my sack truck up the steps and in through the front door. I have one remaining challenge, which is to get the old 55kg Sunamp PV back down the stairs and crated up ready to ship back to Sunamp. Should be child's play after getting the UniQ 9 up the stairs...1 point
-
Which size / type of units did you got for ? 12's judging by the weight? Jesus Jeremy !!! It took 4 of us to get up a double- winder staircase with a 58/9 eHw the other day !!! How the hell did you manage that ?!? All I can say is thank god the customer was home and was a young fit chap or it would have been staying downstairs on some very long flexible hoses . Don't underestimate the weight if these things folks, and allow for mechanical handling. If going for size 12 units beware as they feel like they're bolted to the floor.1 point
-
For a site which is near permanently water-logged I've had very little trouble with mud. The access track and parking area is built up above the surrounding ground with uncountably many dumper-truck loads of rotten rock from my neighbour's borrow pit (https://edavies.me.uk/2014/05/access/). The actual house site was scrapped down to clay (only a few 100mm below ground level) then covered with 12 tonnes of 20mm Melvich stone (https://edavies.me.uk/2015/06/still-here/). As long as I stay on the parking area and the immediate house site mud hasn't been a problem. Step off that, though, and wellies are needed; ordinary ankle length boots are liable to flooding from one wrong step unless it's been mostly dry for a few weeks. The skylarks which were nesting nearby last year seemed to understand this: they weren't bothered at all by my using power tools only a few metres away from their nests but the moment I stepped off the hard ground I was invading their territory and they were up in the air giving alarm calls. Haven't seen anything like as many this year, I think the beast-from-east weeks earlier in the year stopped them breeding so much.1 point
-
The ASHP will need both dry contact terminals 6 and 7 to be connected to terminal 3 in order to turn on and run in heating mode. Terminal 3 is the 12 V supply 0 V terminal, so you can check with a meter between terminal 3 and terminals 6 and 7 to see if they are switched to 0 V OK. If they aren't, they will float at around 12 V, and the heat pump won't turn on. Watch out when doing these checks, as there are live mains terminals exposed very close to them.1 point
-
Not being as well organised as @Russell griffiths, but having an inkling that mud would be a foe, this is what we did..... First, try not to get it on yer shoes in the first place I found that if I laid the mat(s) at a slight angle, the rain rinses the mat clean. An occasional brush with the same stuff we use to rinse the dog pens is perfect. Next: accept the the inevitable - so I bought a 5 meter off-cut of Astro Turf and put it down in front of the door; put a hose sprayer and brush next to the sluice..... Yes, that's a Dock leaf growing through the plastic. You can scrape your boots to your hearts content on Astro Turf. Best £50 I ever spent. Ashamed to admit I asked Rollo to mow it. ?
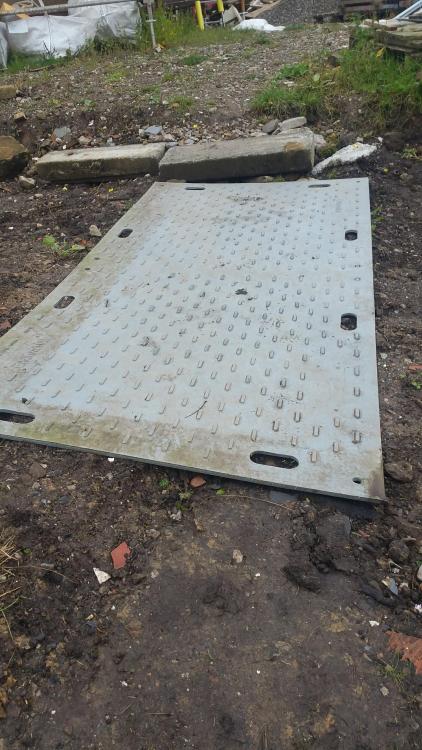
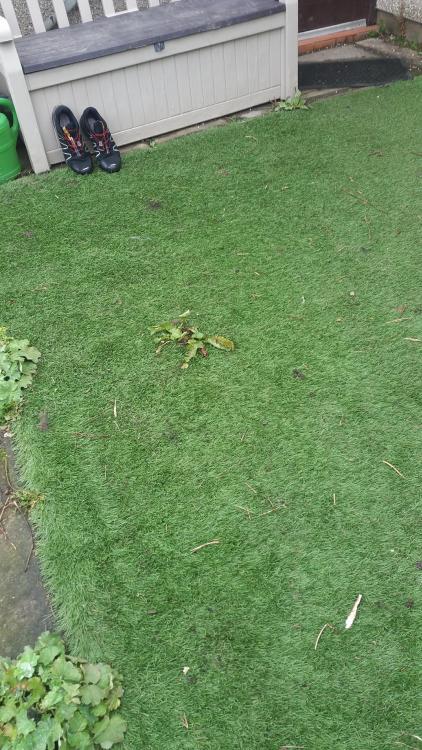 1 point
 -
Yep. I foil taped the joints on both layers.1 point
-
Seems to me that an advantage of two layers is that you can stagger the joints reducing any air paths if the stuff shrinks or moves a bit.1 point
-
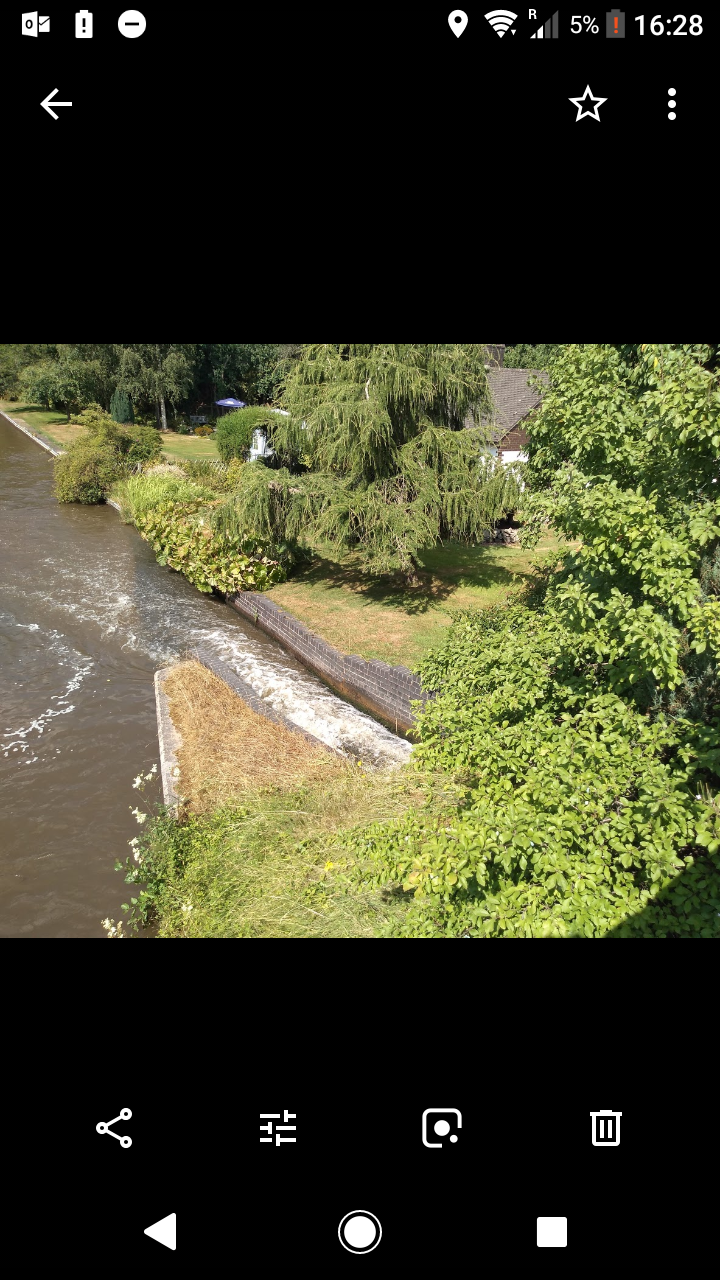
The bywash depth is definitely more than 600mm having stuck a pole into it it went deeper than that, but how deep I don't know and will need to check (more pics attached for clarity from different angles). From our time and our neighbours the bywash has always had continuous flow, there are three locks the other side of that bridge and 5 mins walk the staircase locks too. I guess once the Nuenta guy visits I'll have more info on if such a system is even viable where we want to put it, and then it'd looking into the figures and comparing it to an ashp.
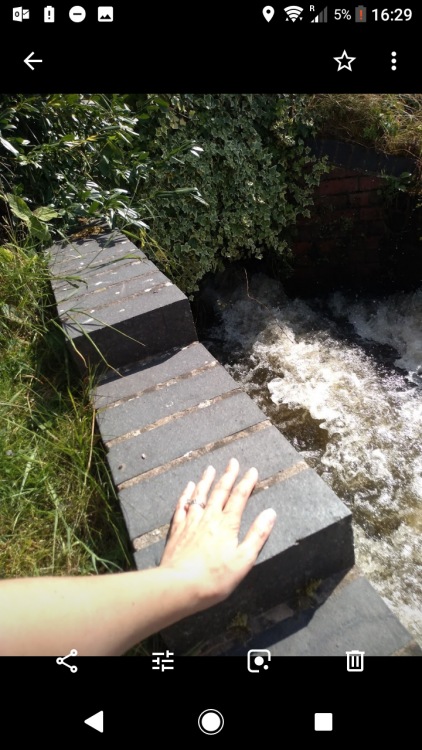

 1 point
 -
Well I have found 2 drain cocks anyway! Plan B is to remove the radiators and flush them manually until I can get a magnaclean filter installed. Hopefully this wont put pressure on the heating system or risk getting dirt in the heat exchangers.1 point
-
This is the problem with looking at pretty pictures of gorgeous kitchens that nobody is ever going to cook in!1 point
-
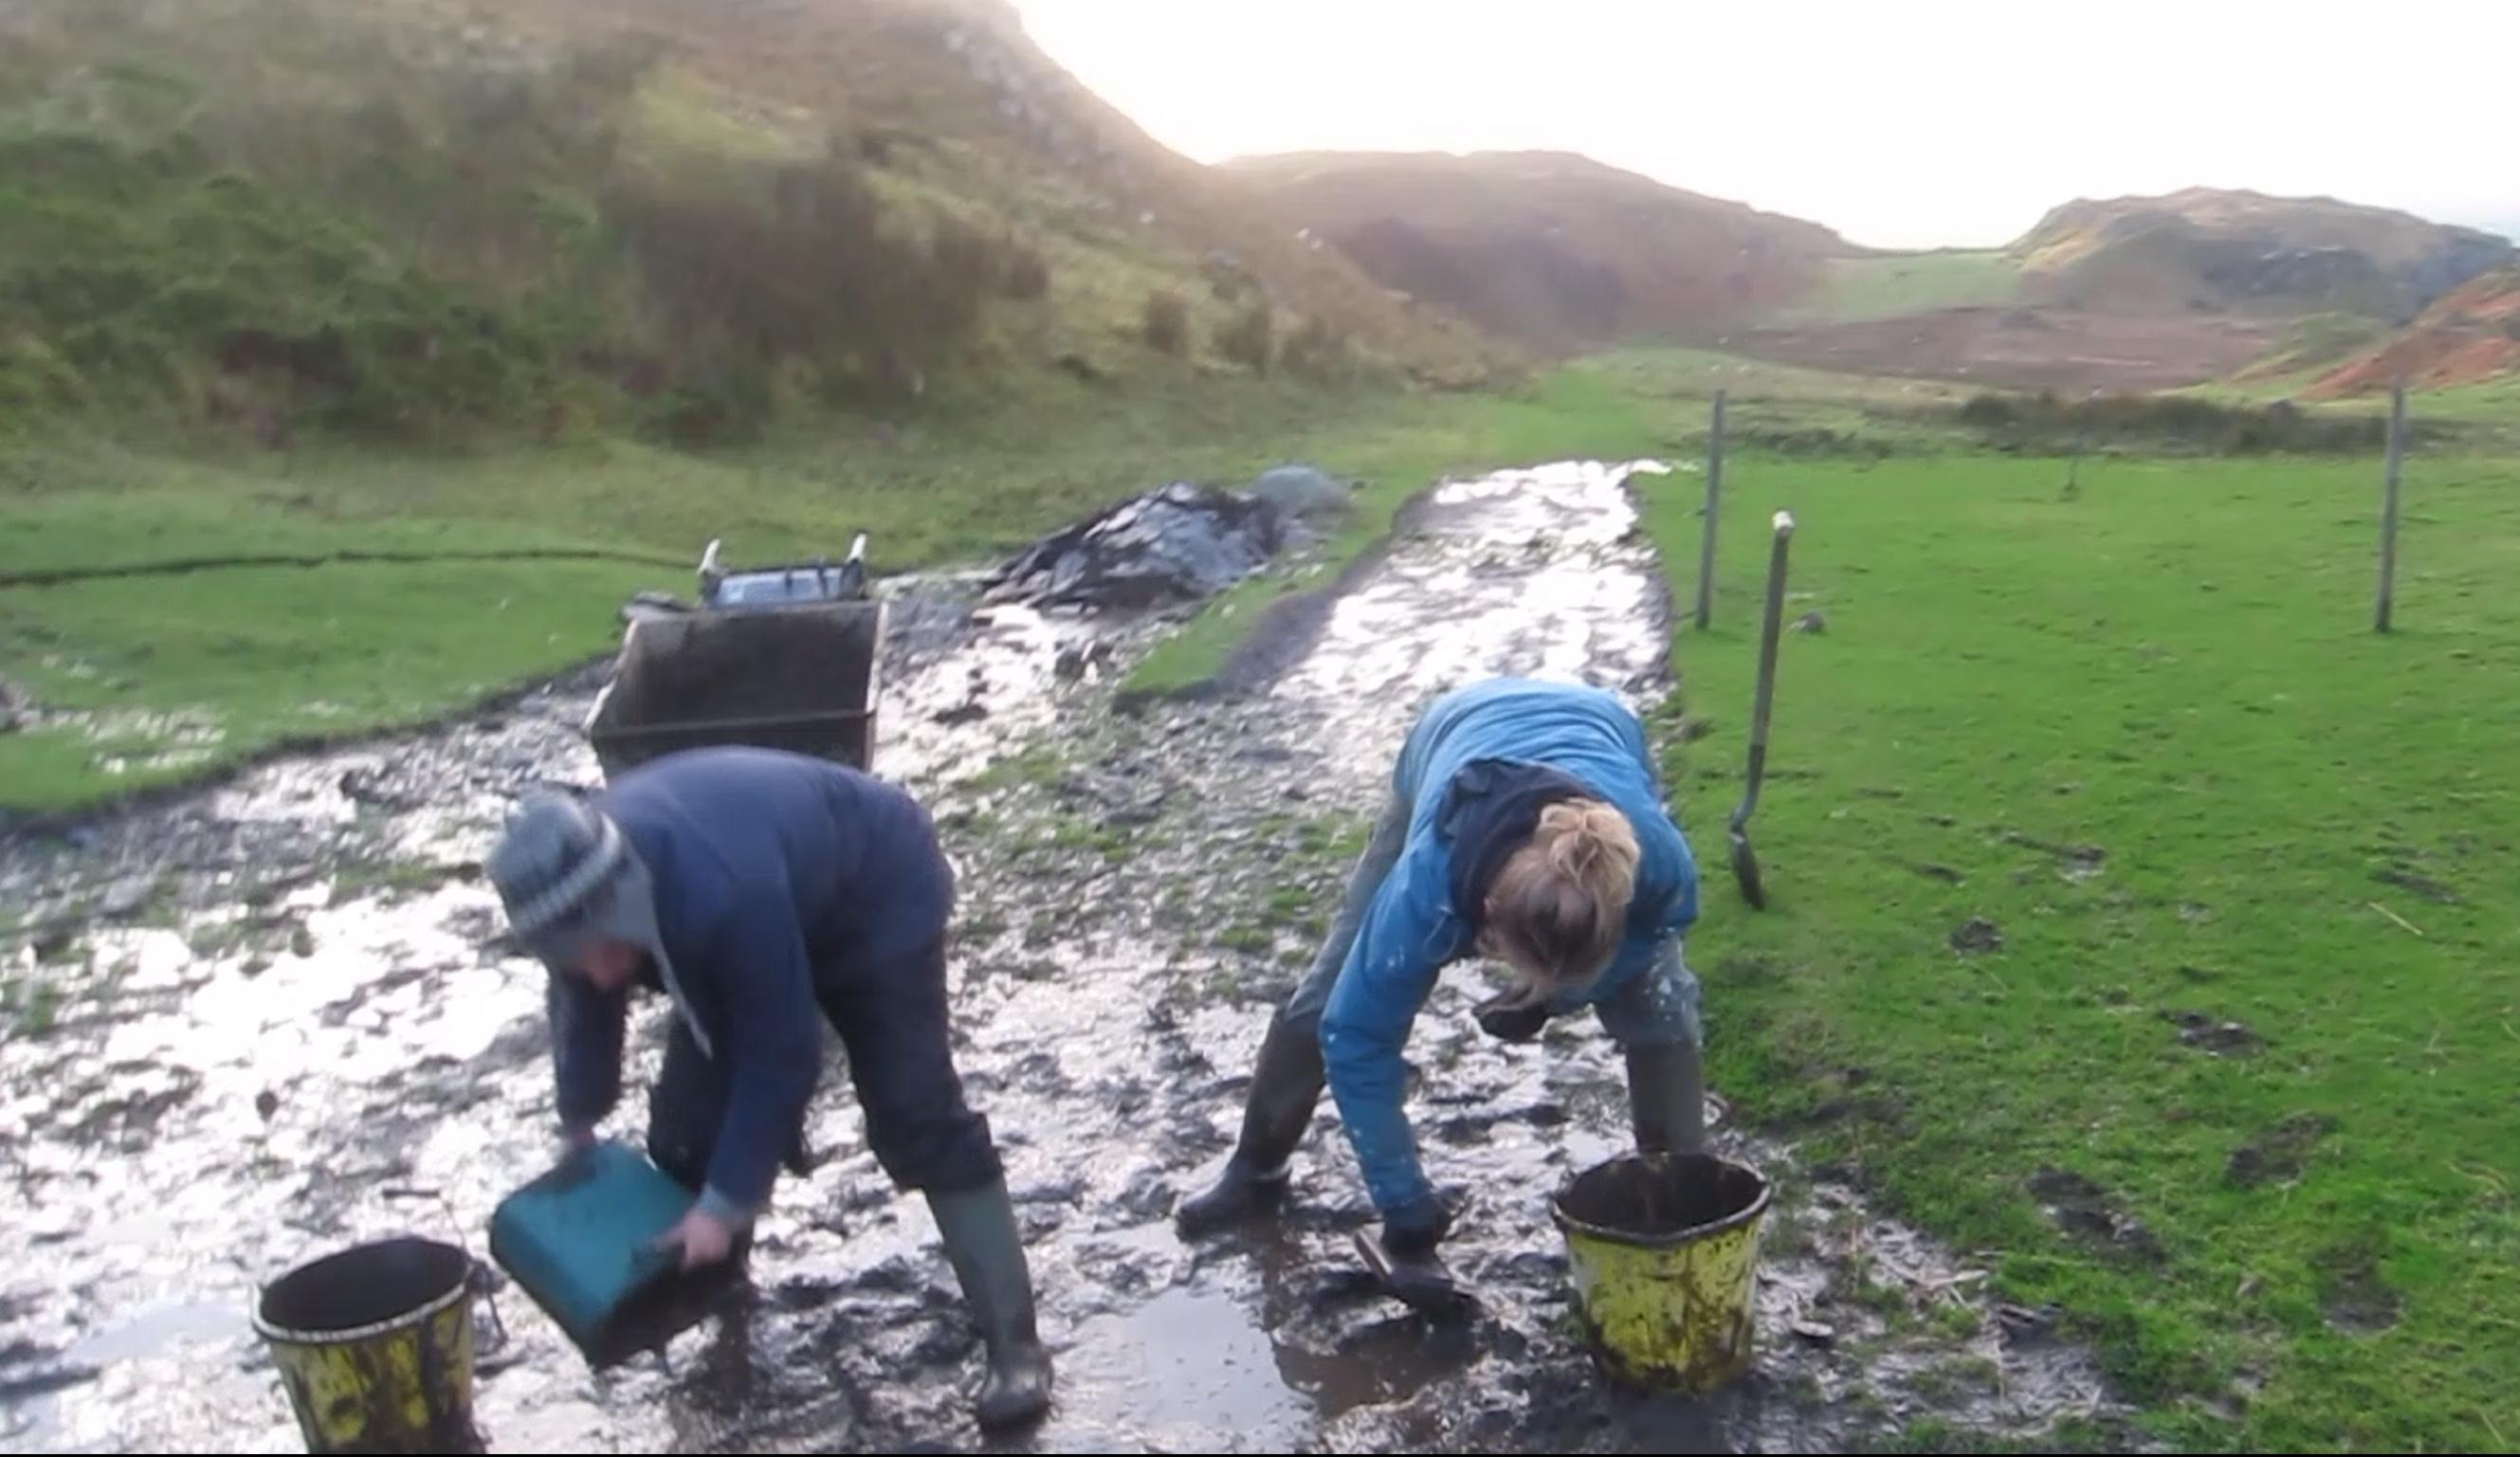
Mud...... when I first got my place it was mud hell, a few hundred years of neglected drainage and livestock using the buildings as shelter...... I did not have a digger.... but I had lots of willing helpers and we just spent a few weeks shovelling it up in buckets.... into even bigger buckets..... into a power barrow and then tipped it into a low area out the way. There were pre existing roads and hard standing but it had not seen the light of day for at leat 100 years....... once the mud was cleared the rains and lack of drainage cleared the rest and we were able to repair the hardstanding and roads. It was a great feeling when one day we realised that we were no longer traipsing mud around and could wear our boots in the house again !
 1 point
 -
Update...electrician is coming tomorrow to go through so I can label switches in the plant room..........he still maintains the switch in the corner is immersion only, we know it switches off the motorised valves....could be an interesting visit. UFH MVHR installer coming next week to go through what all the bits are in the plant room, show me how it all works and change the trap on the MVHR. Fingers crossed the plant mysteries will soon be solved.1 point
-
Every day!1 point
-
How about extruded polystyrene (XPS). You are going to need about 30% more by thickness. https://www.jackon-insulation.co.uk/products/detail/jackodur-plus-300-gefiniert-gl/ There is always mineral wool batts (e.g. prorox SL920) or expanded polystyrene. Both with a lambda of 0.035 so about 70% more by thickness1 point
-
Lorries in Lincolnshire must be smaller, my three loads of hardcore only went this far.
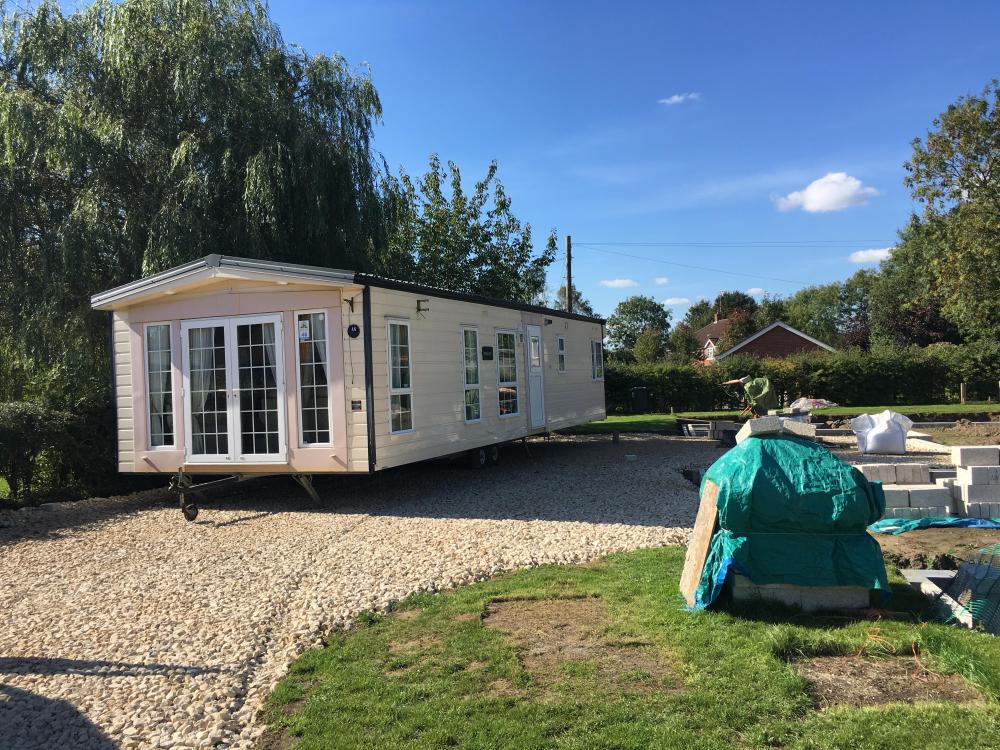 1 point
 -
For some reason architects love to specify Kingspan K7 which has conductivity of 0.2W/mK versus Celotex GA3/4000 or Kingspan TP10 at 0.22/0.23. The Celotex is between 2/3 and 1/2 the price of the K7, the U-value would be around 0.13 instead of 0.11 for the roof. You would get a similar saving and 10% worse U-value using Celotex GA3/4000 in the floor. There are other makes as mentioned above, generally any PIR insulation with a conductivity of around 0.22 will do. The Kingspan is considerably more expensive phenolic insulation which I would only pay for if it was absolutely necessary that it was a little thinner. You can also sometimes buy seconds of these which are cheaper again. The other thing I would note is that you cannot get 175mm insulation, you will need to buy 100mm and 75mm. This adds a bit to the cost and labour, although I am guessing that you are doing it yourself.1 point
-
Floor you could go EPS but would require double the depth to get same uValue. ExtraTherm is another round here, as it Reticel. You can always look at seconds of PIR under the floor slab.1 point
-
Won’t be helping with your smoke issue,I’d say.1 point
-
Smaller mix, smaller bucket! (Taylor, Gilbreth?) Don't look too close: Like I said, don't look too close. Had to put a couple of pb screws in just to hold a tile in position: Above the window coming down from the ceiling it'll go slip, full tile, slip. SWMBO wants a blind there so that'll take the eye off the lower slip.1 point
-
1 point
-
Next couple of weeks are me filling all of those holes and back in the loft to do more insulating , large 100m squared loft to do I can't remember the exact issues but the fact they crack just be looking at them and issues with parge coat not sticking so well due to the celcon and thermalite sucking all the water out in no time at all. He's fine using a different block , just not the ultra lightweight ones.1 point
-
Hi and welcome I think a quick picture or sketch may help here as it sounds like you have different floor levels unless I’ve misread your post ..?? Assuming this is a right angle extension wall off an existing wall and you are using some sort of stainless wall starter kit too..?? If you are building using a standard 100/100/100 construction of brick/cavity/block then 300mm DPC won’t work as you want to step it up on the inside one course. This can be fixed using 100mm on the inner course overlapping the 300mm, or you can just form the tray with 450mm. If you have any drawings it may be worth posting them up too.1 point