
Leaderboard


Popular Content
Showing content with the highest reputation since 07/27/25 in Posts
-
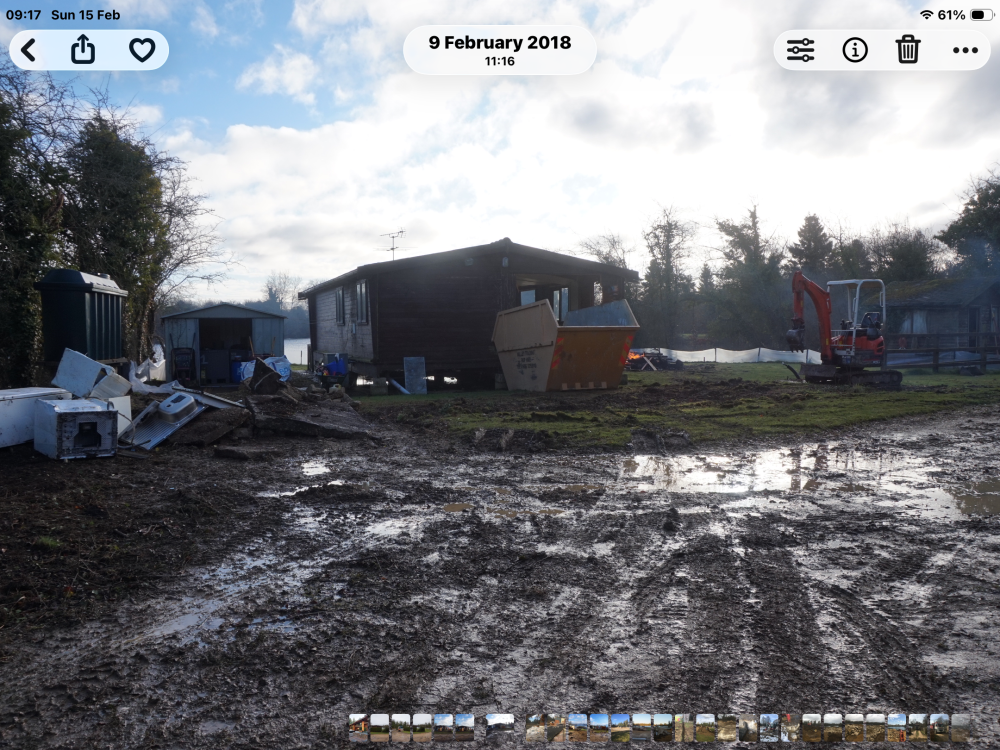
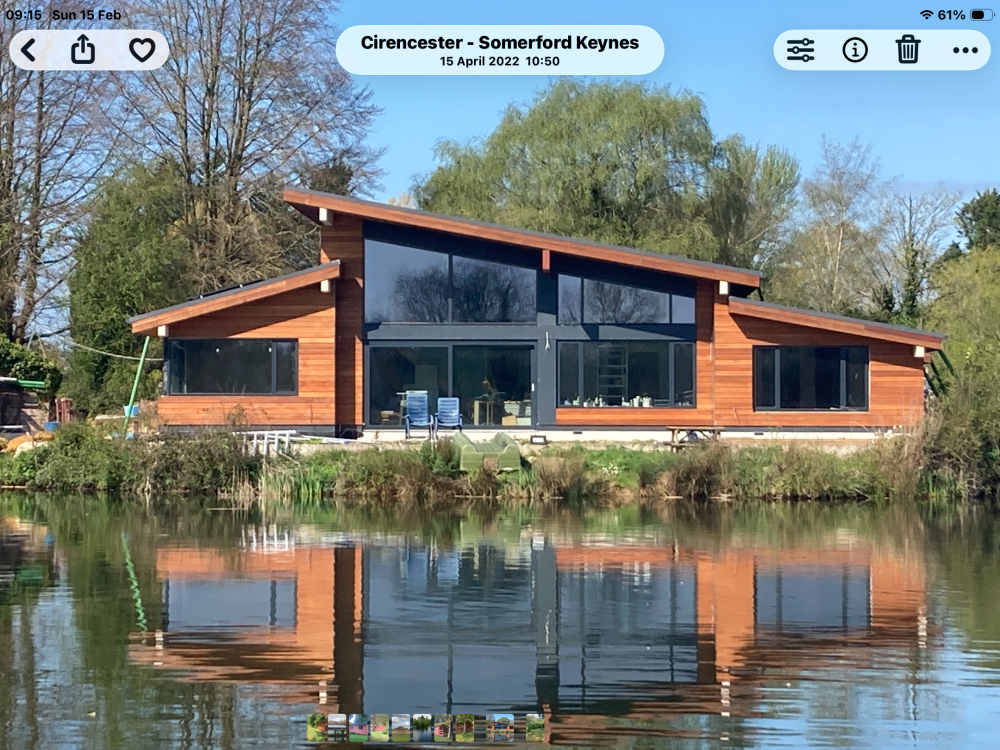
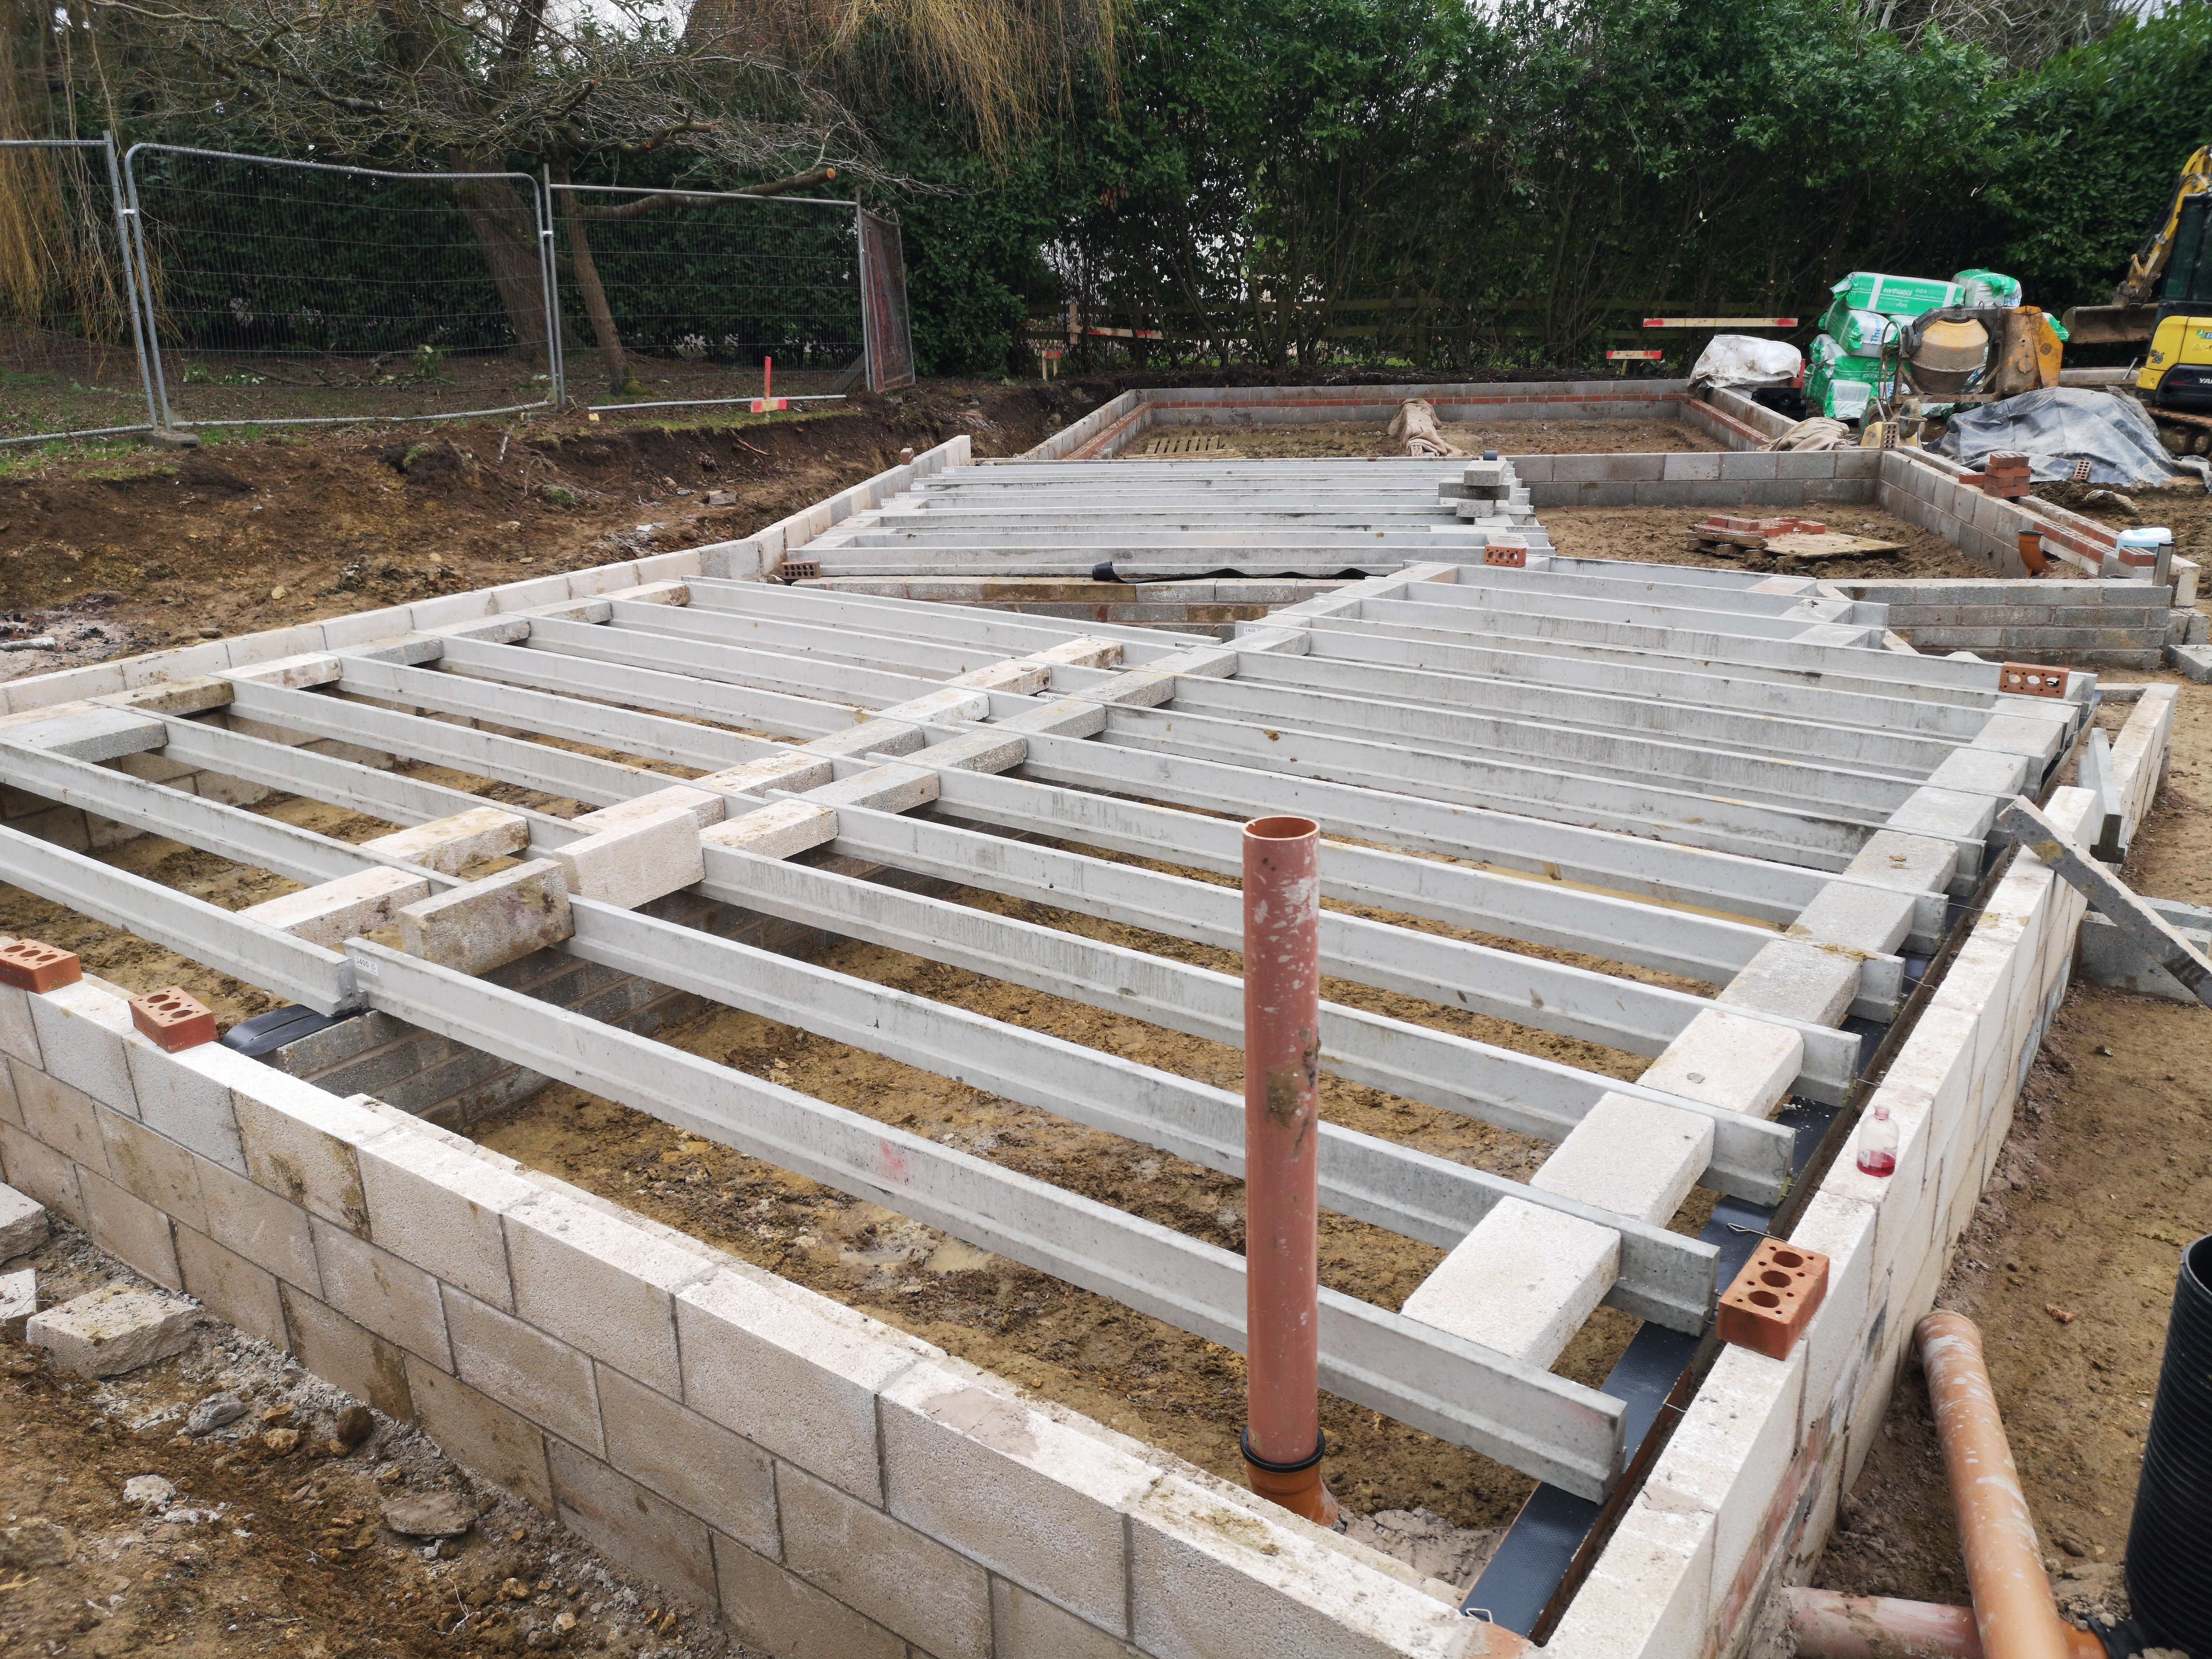
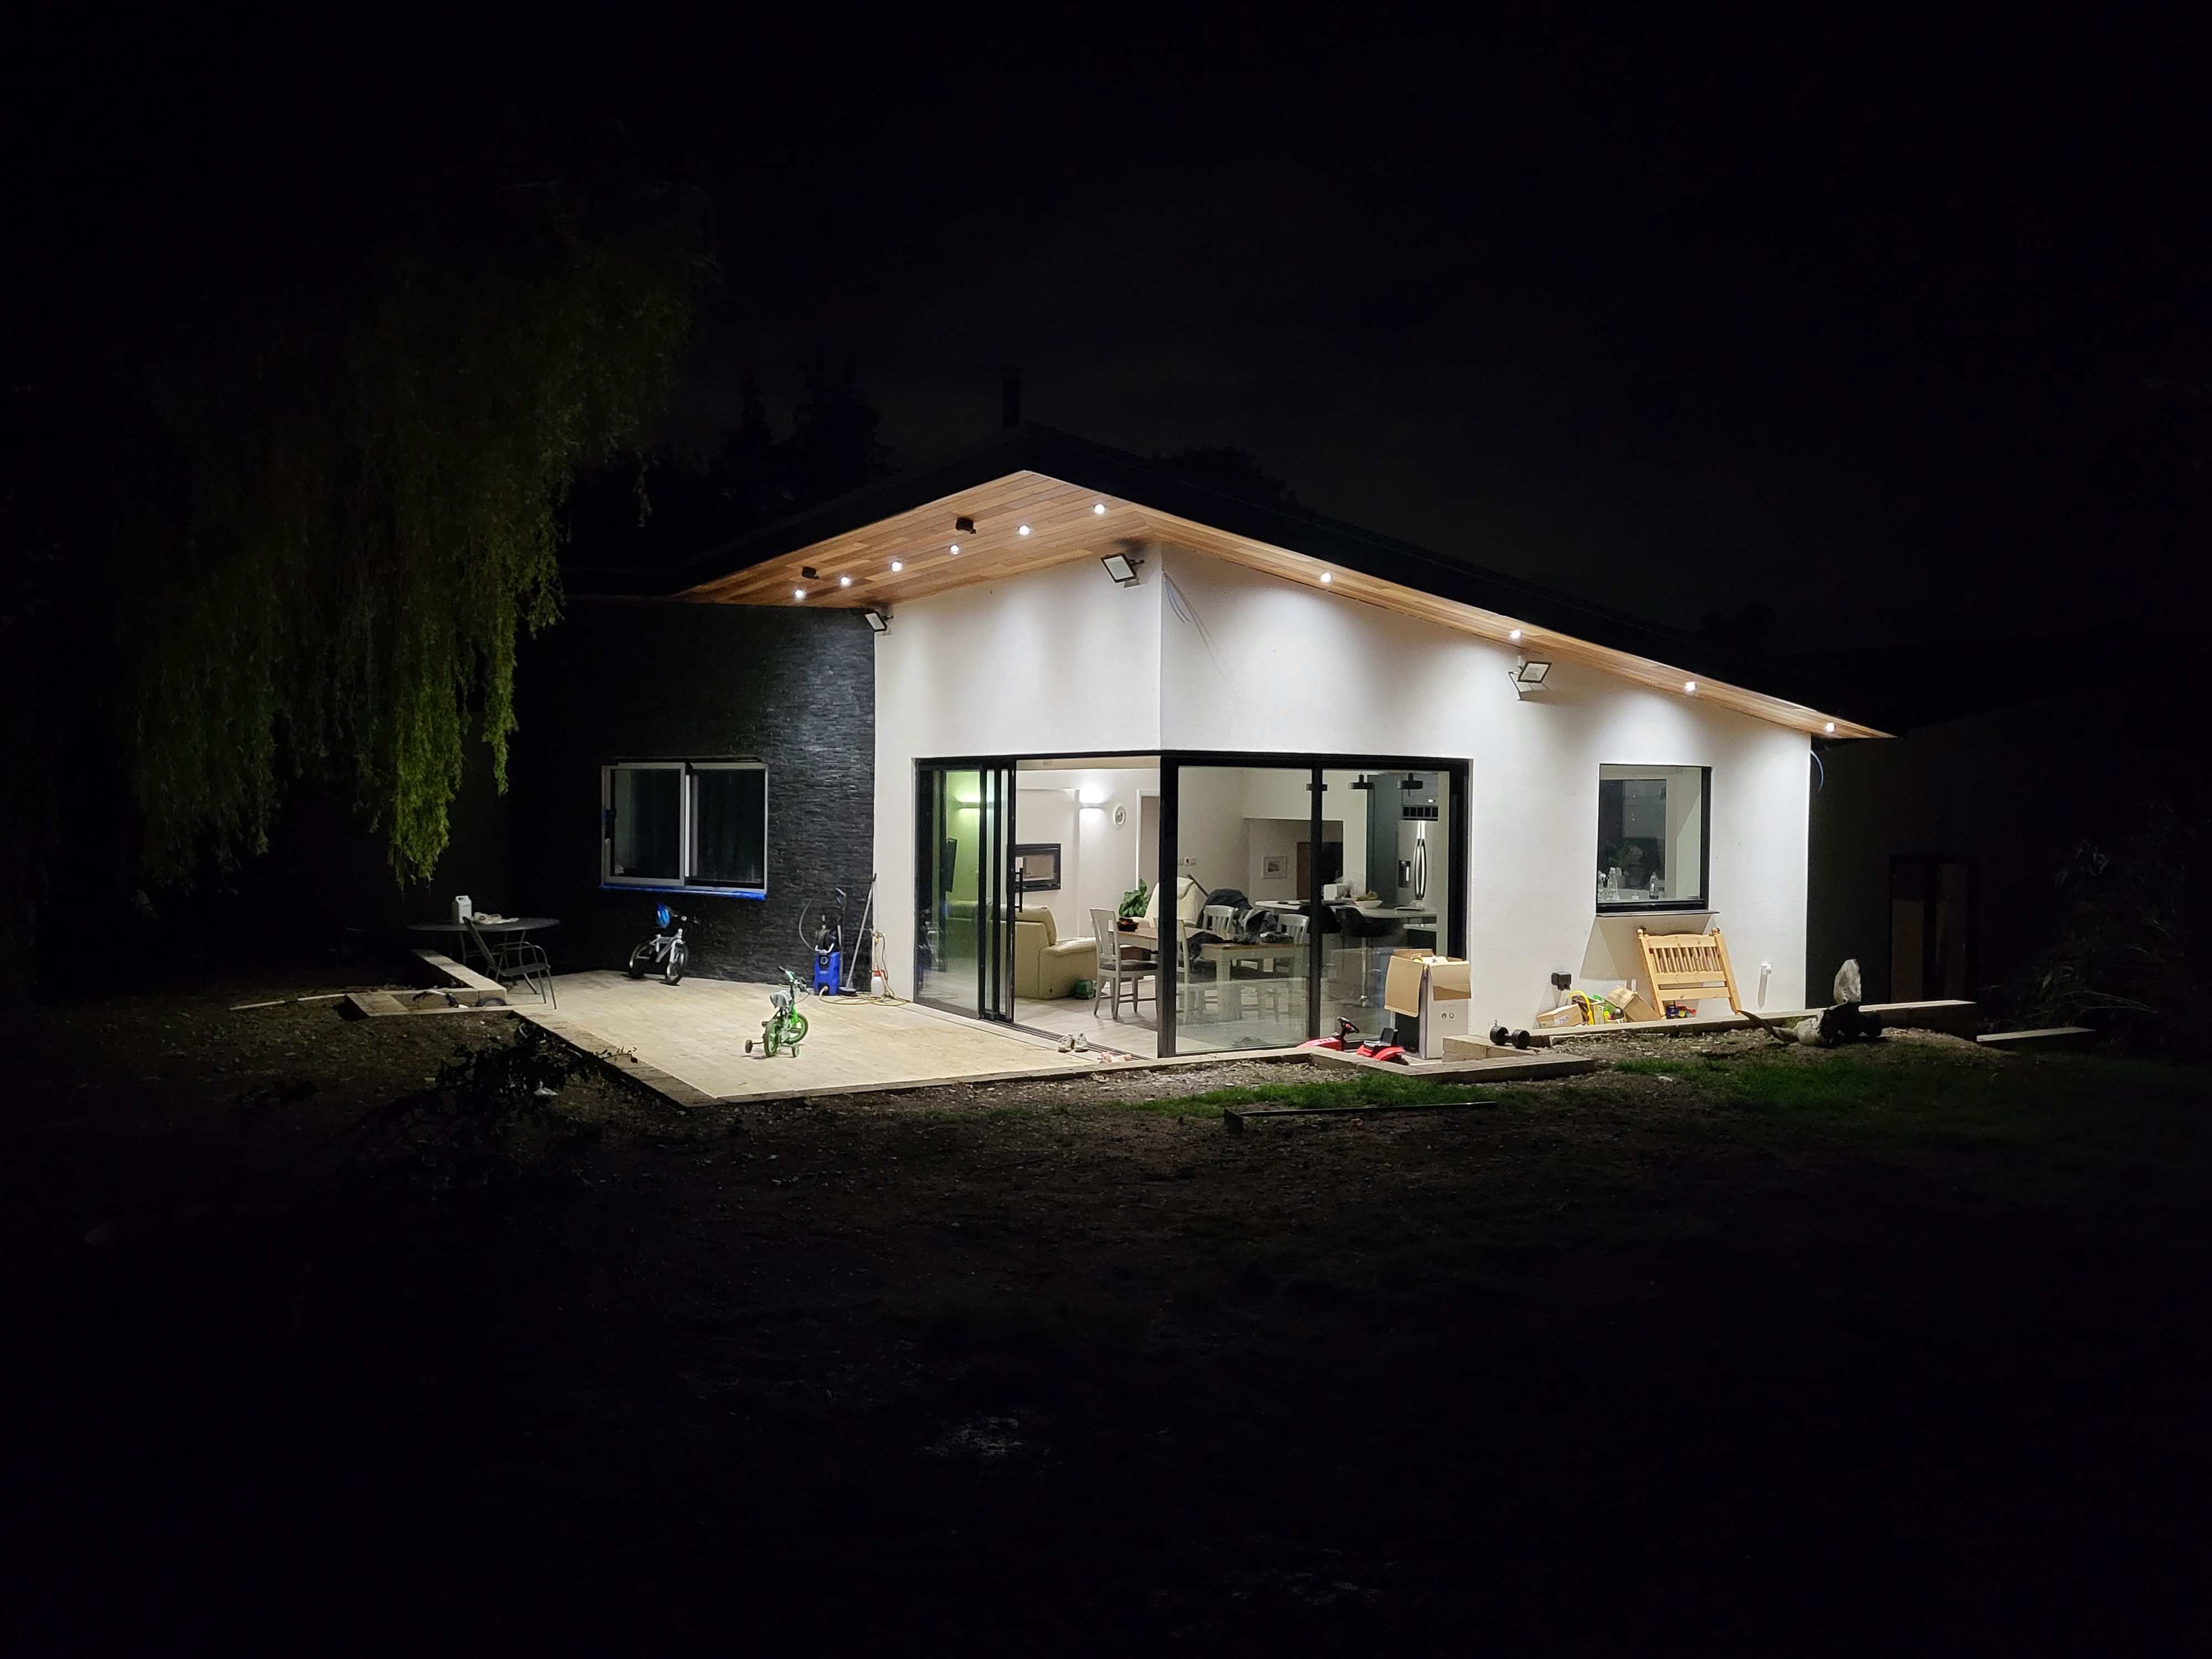
Yesterday we moved into our place, started in 2018 still not 100% finished in 2026, I estimated it would take me 2 years, 🤣🤣 thanks for all the advice from fellow buildhubbers. What we bought, what we have now.
 34 points
 -
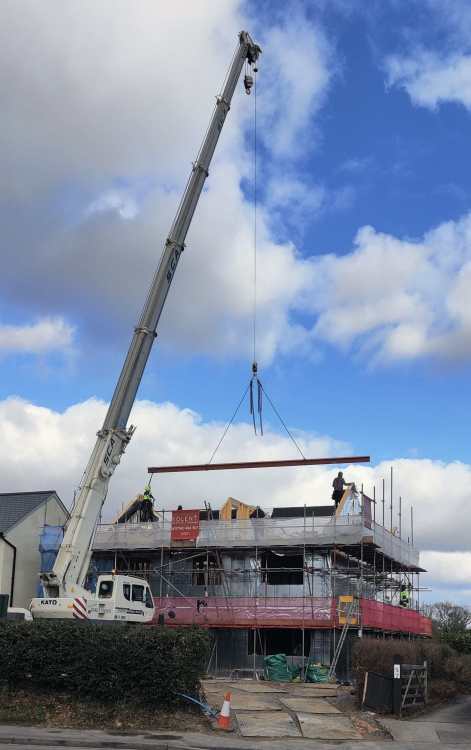
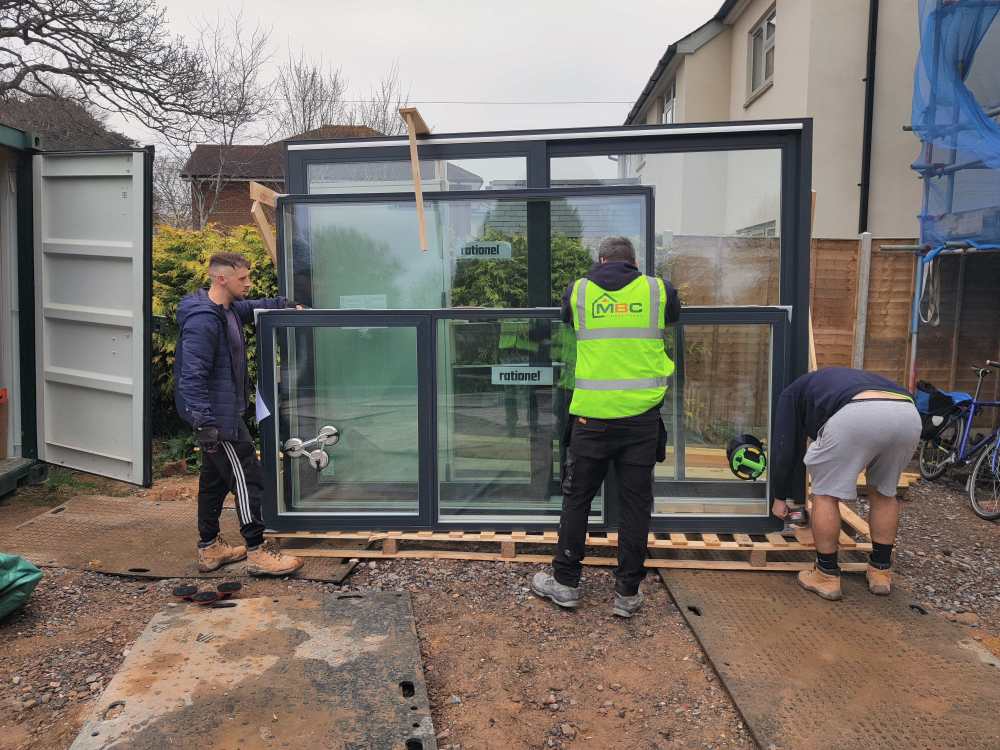
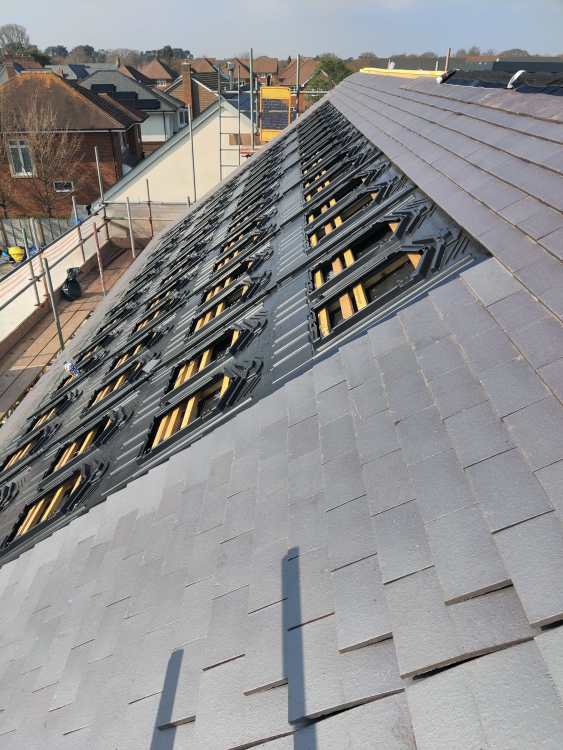
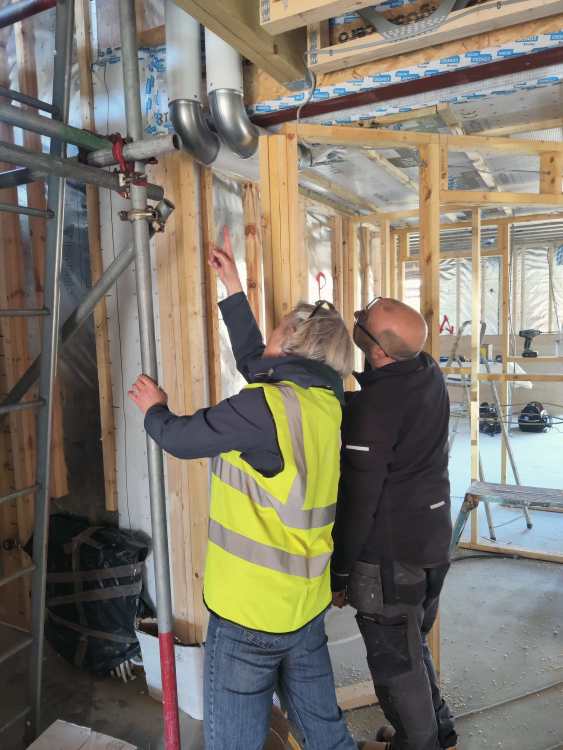
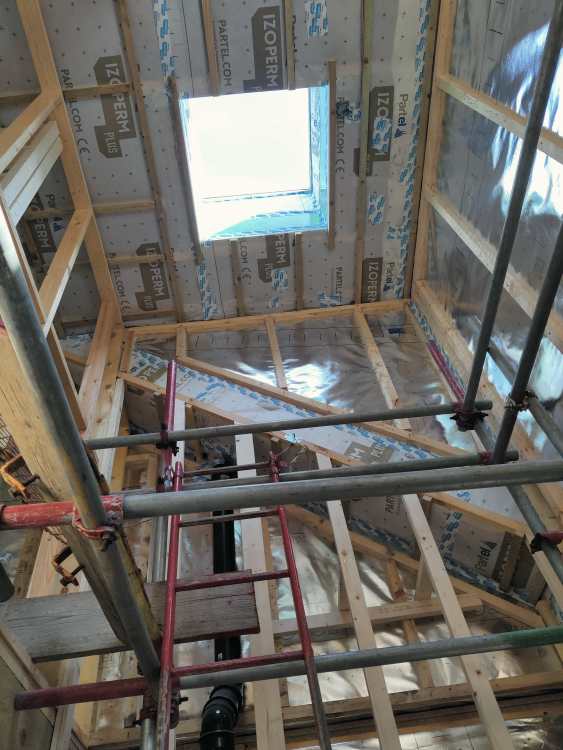
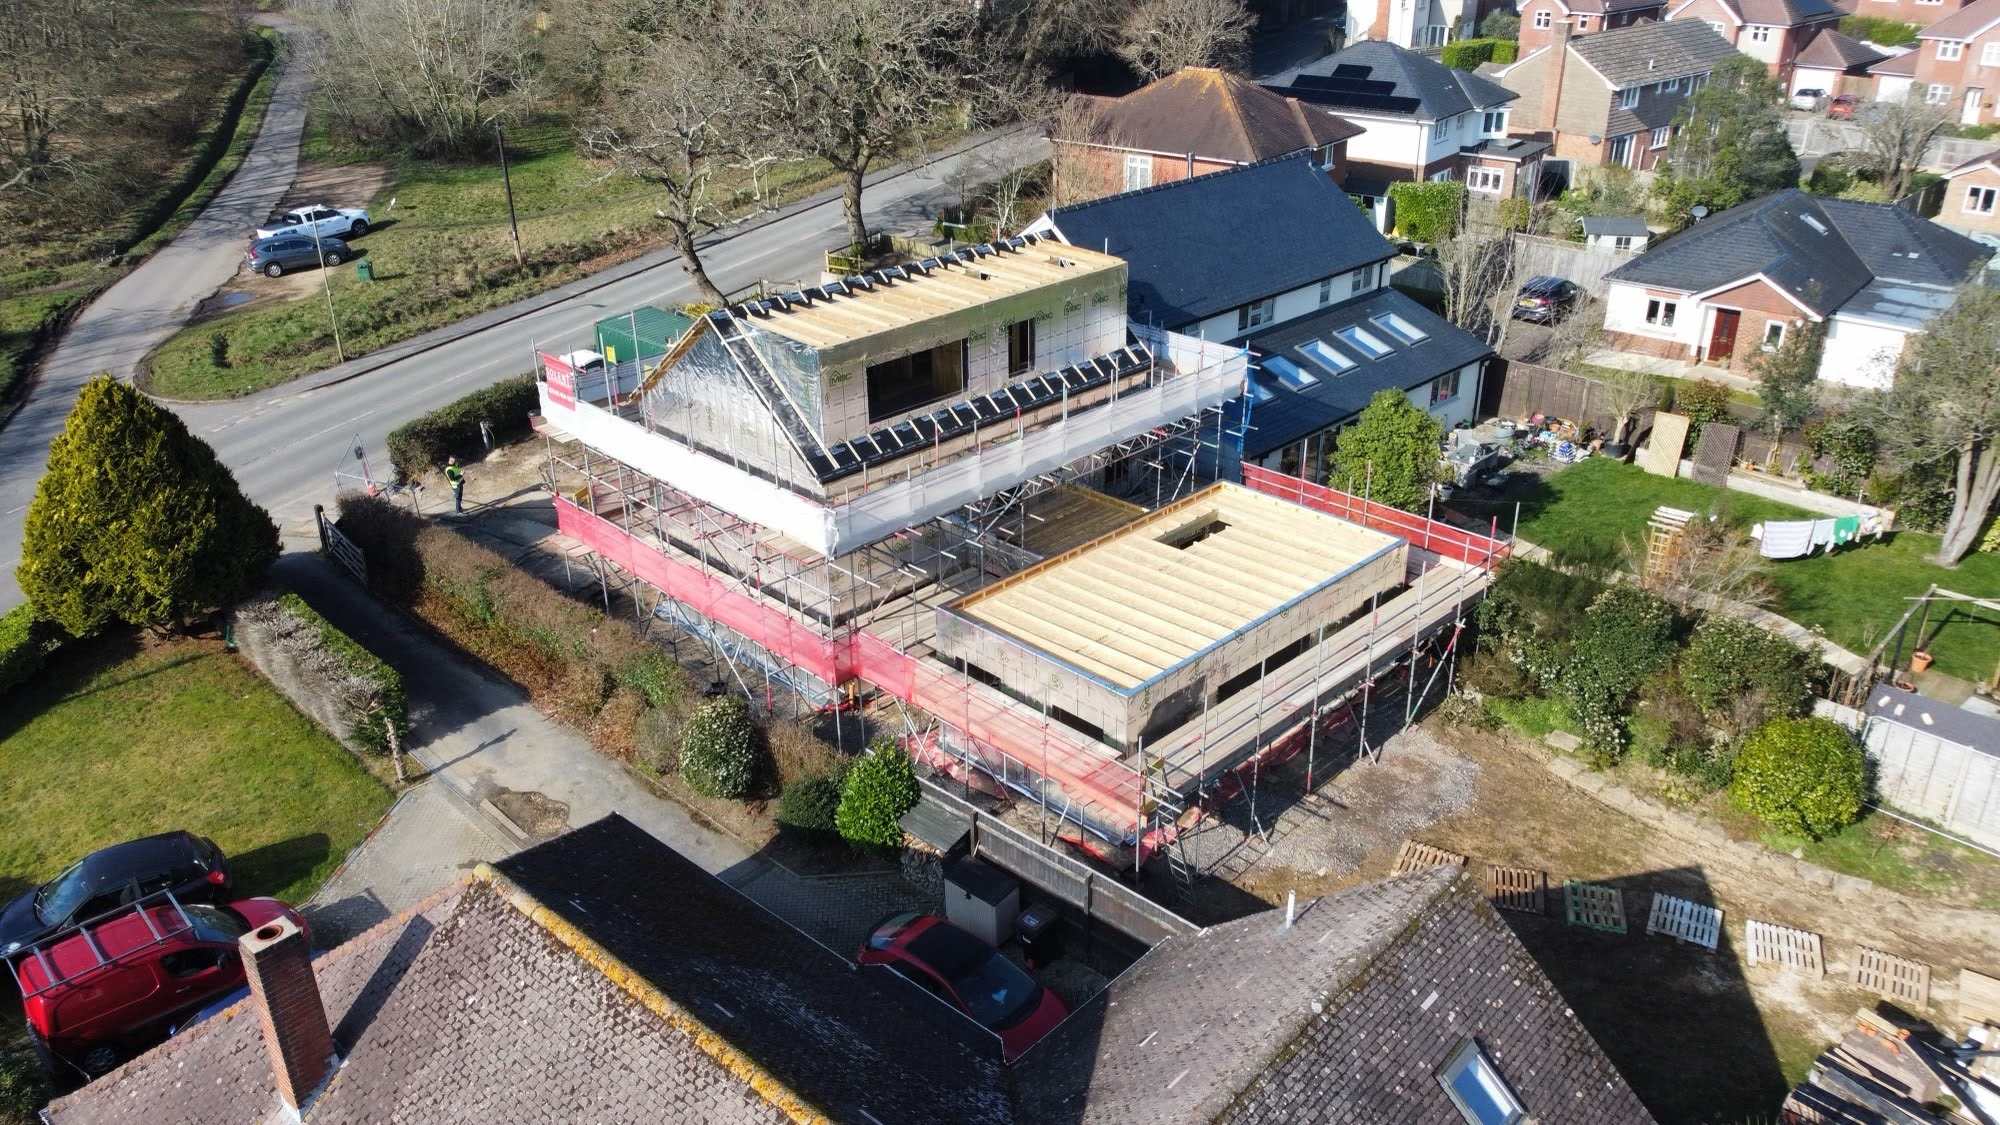
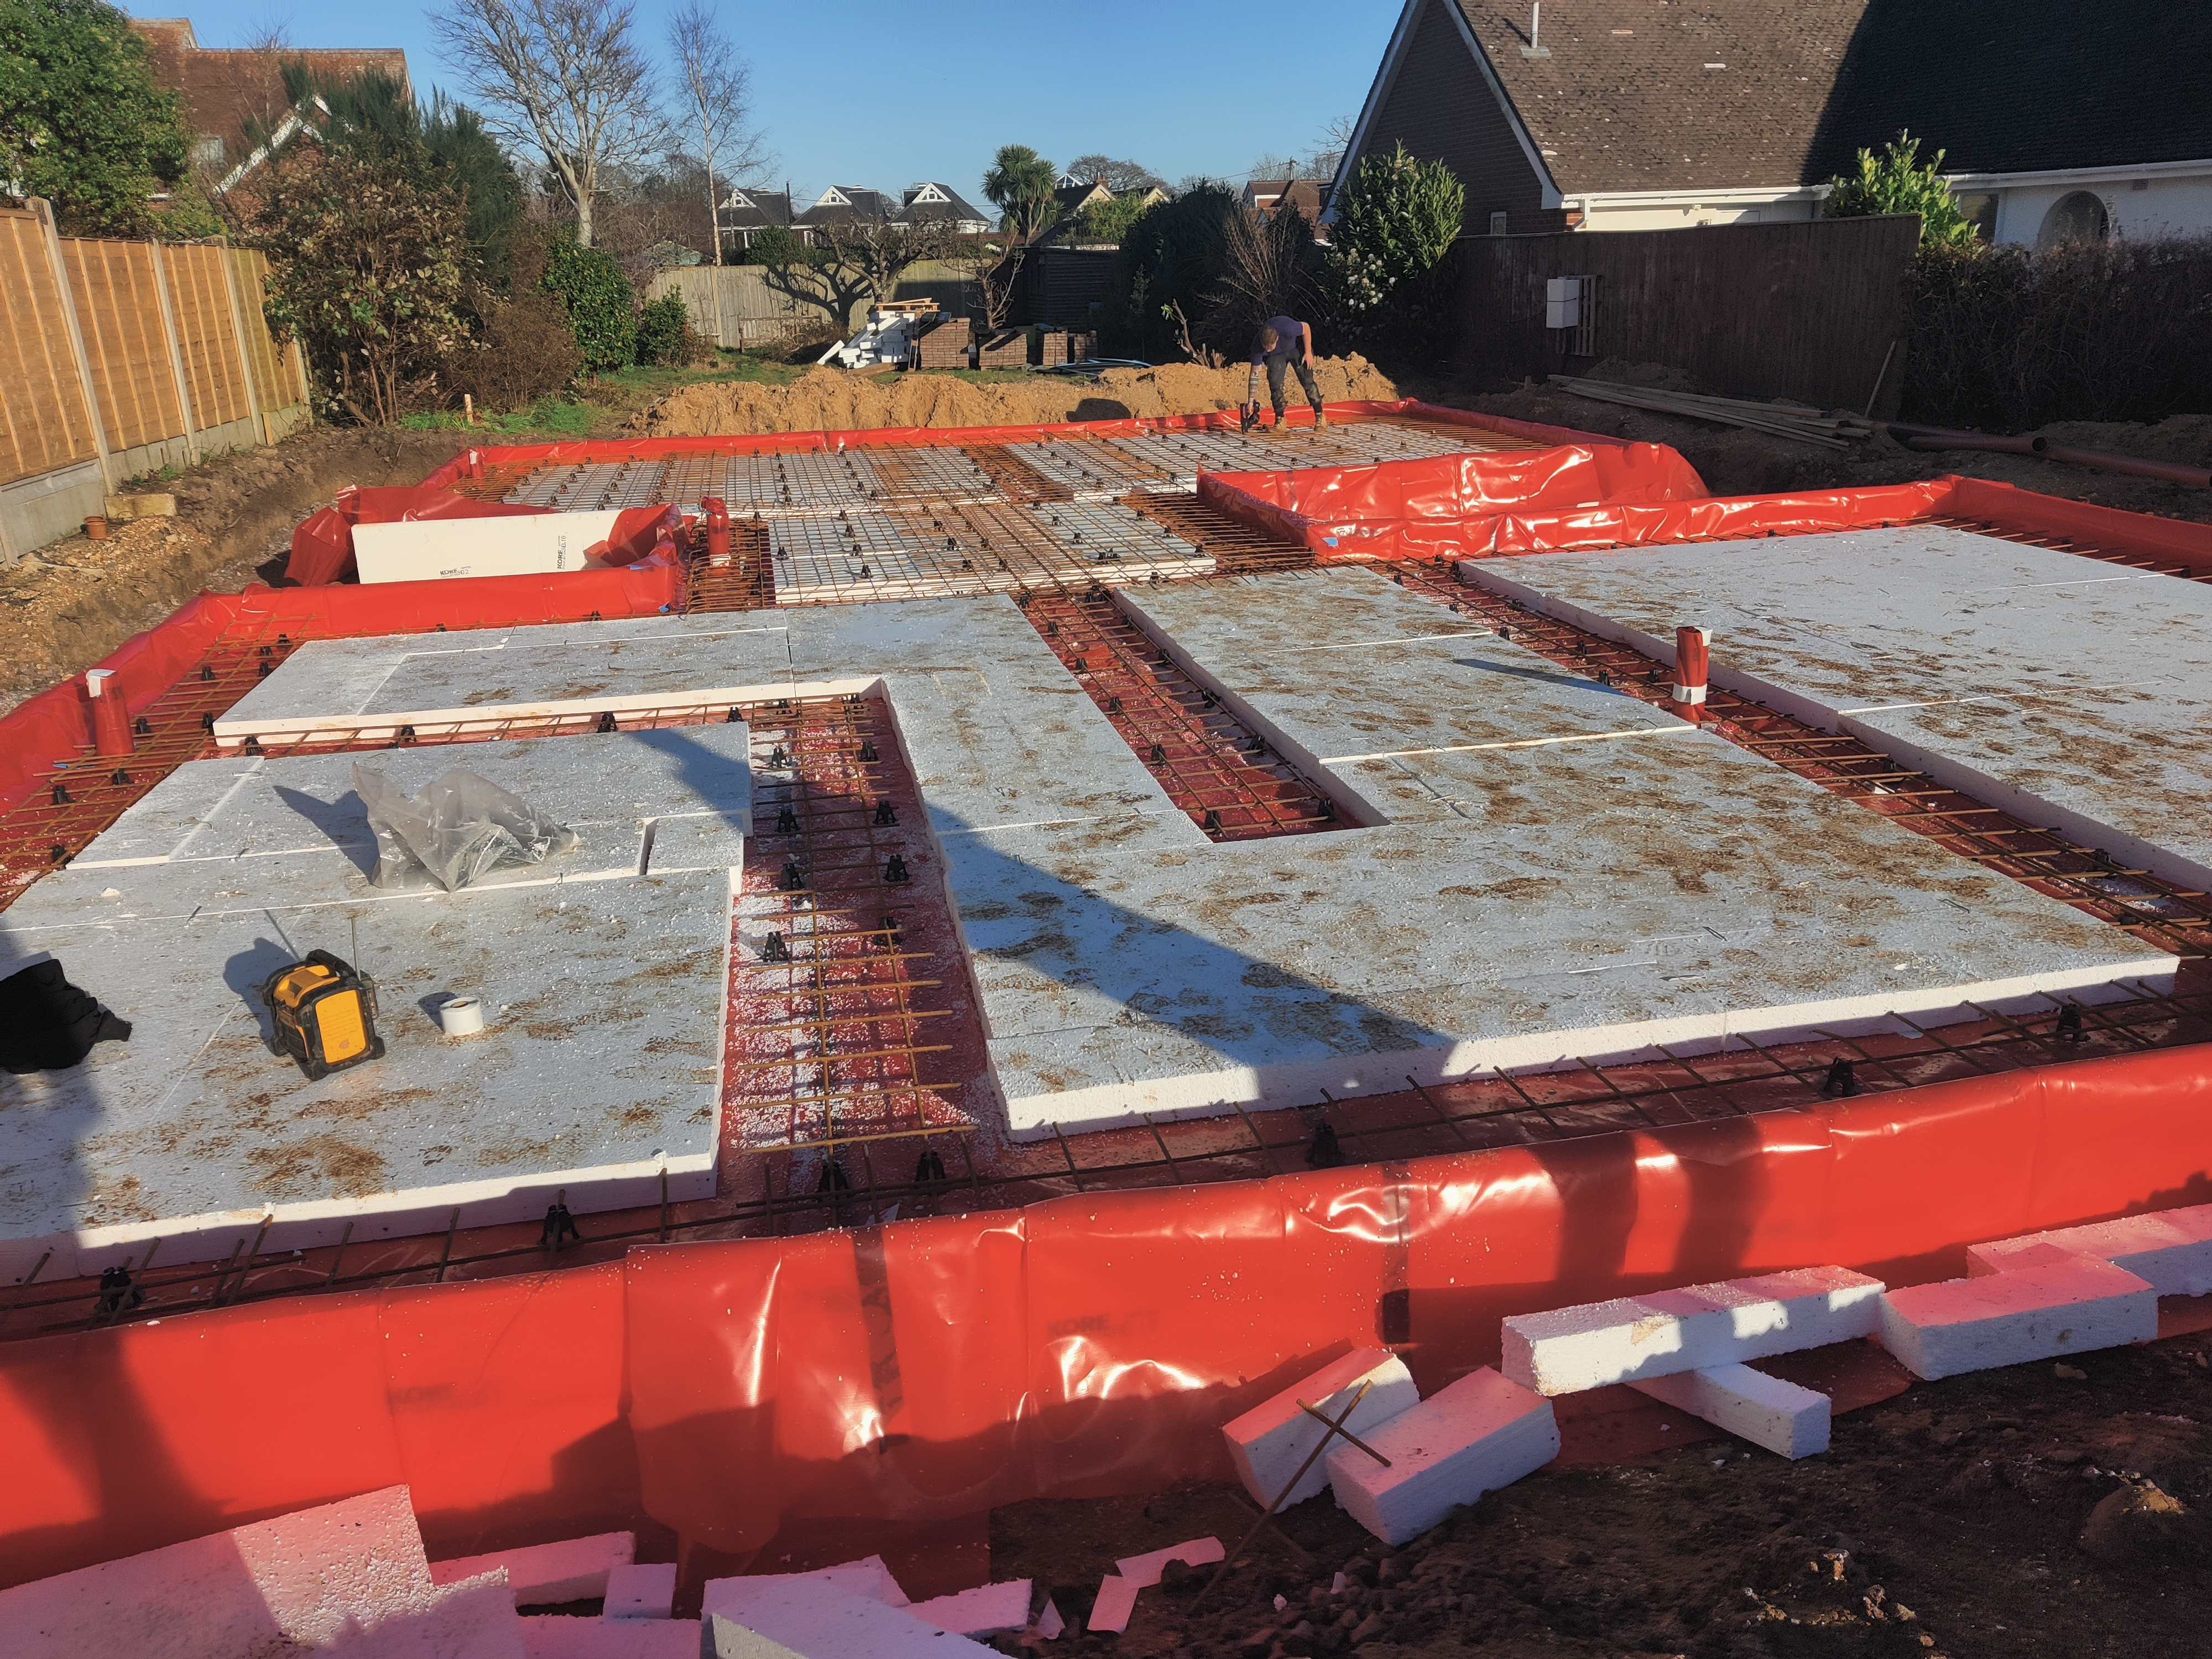
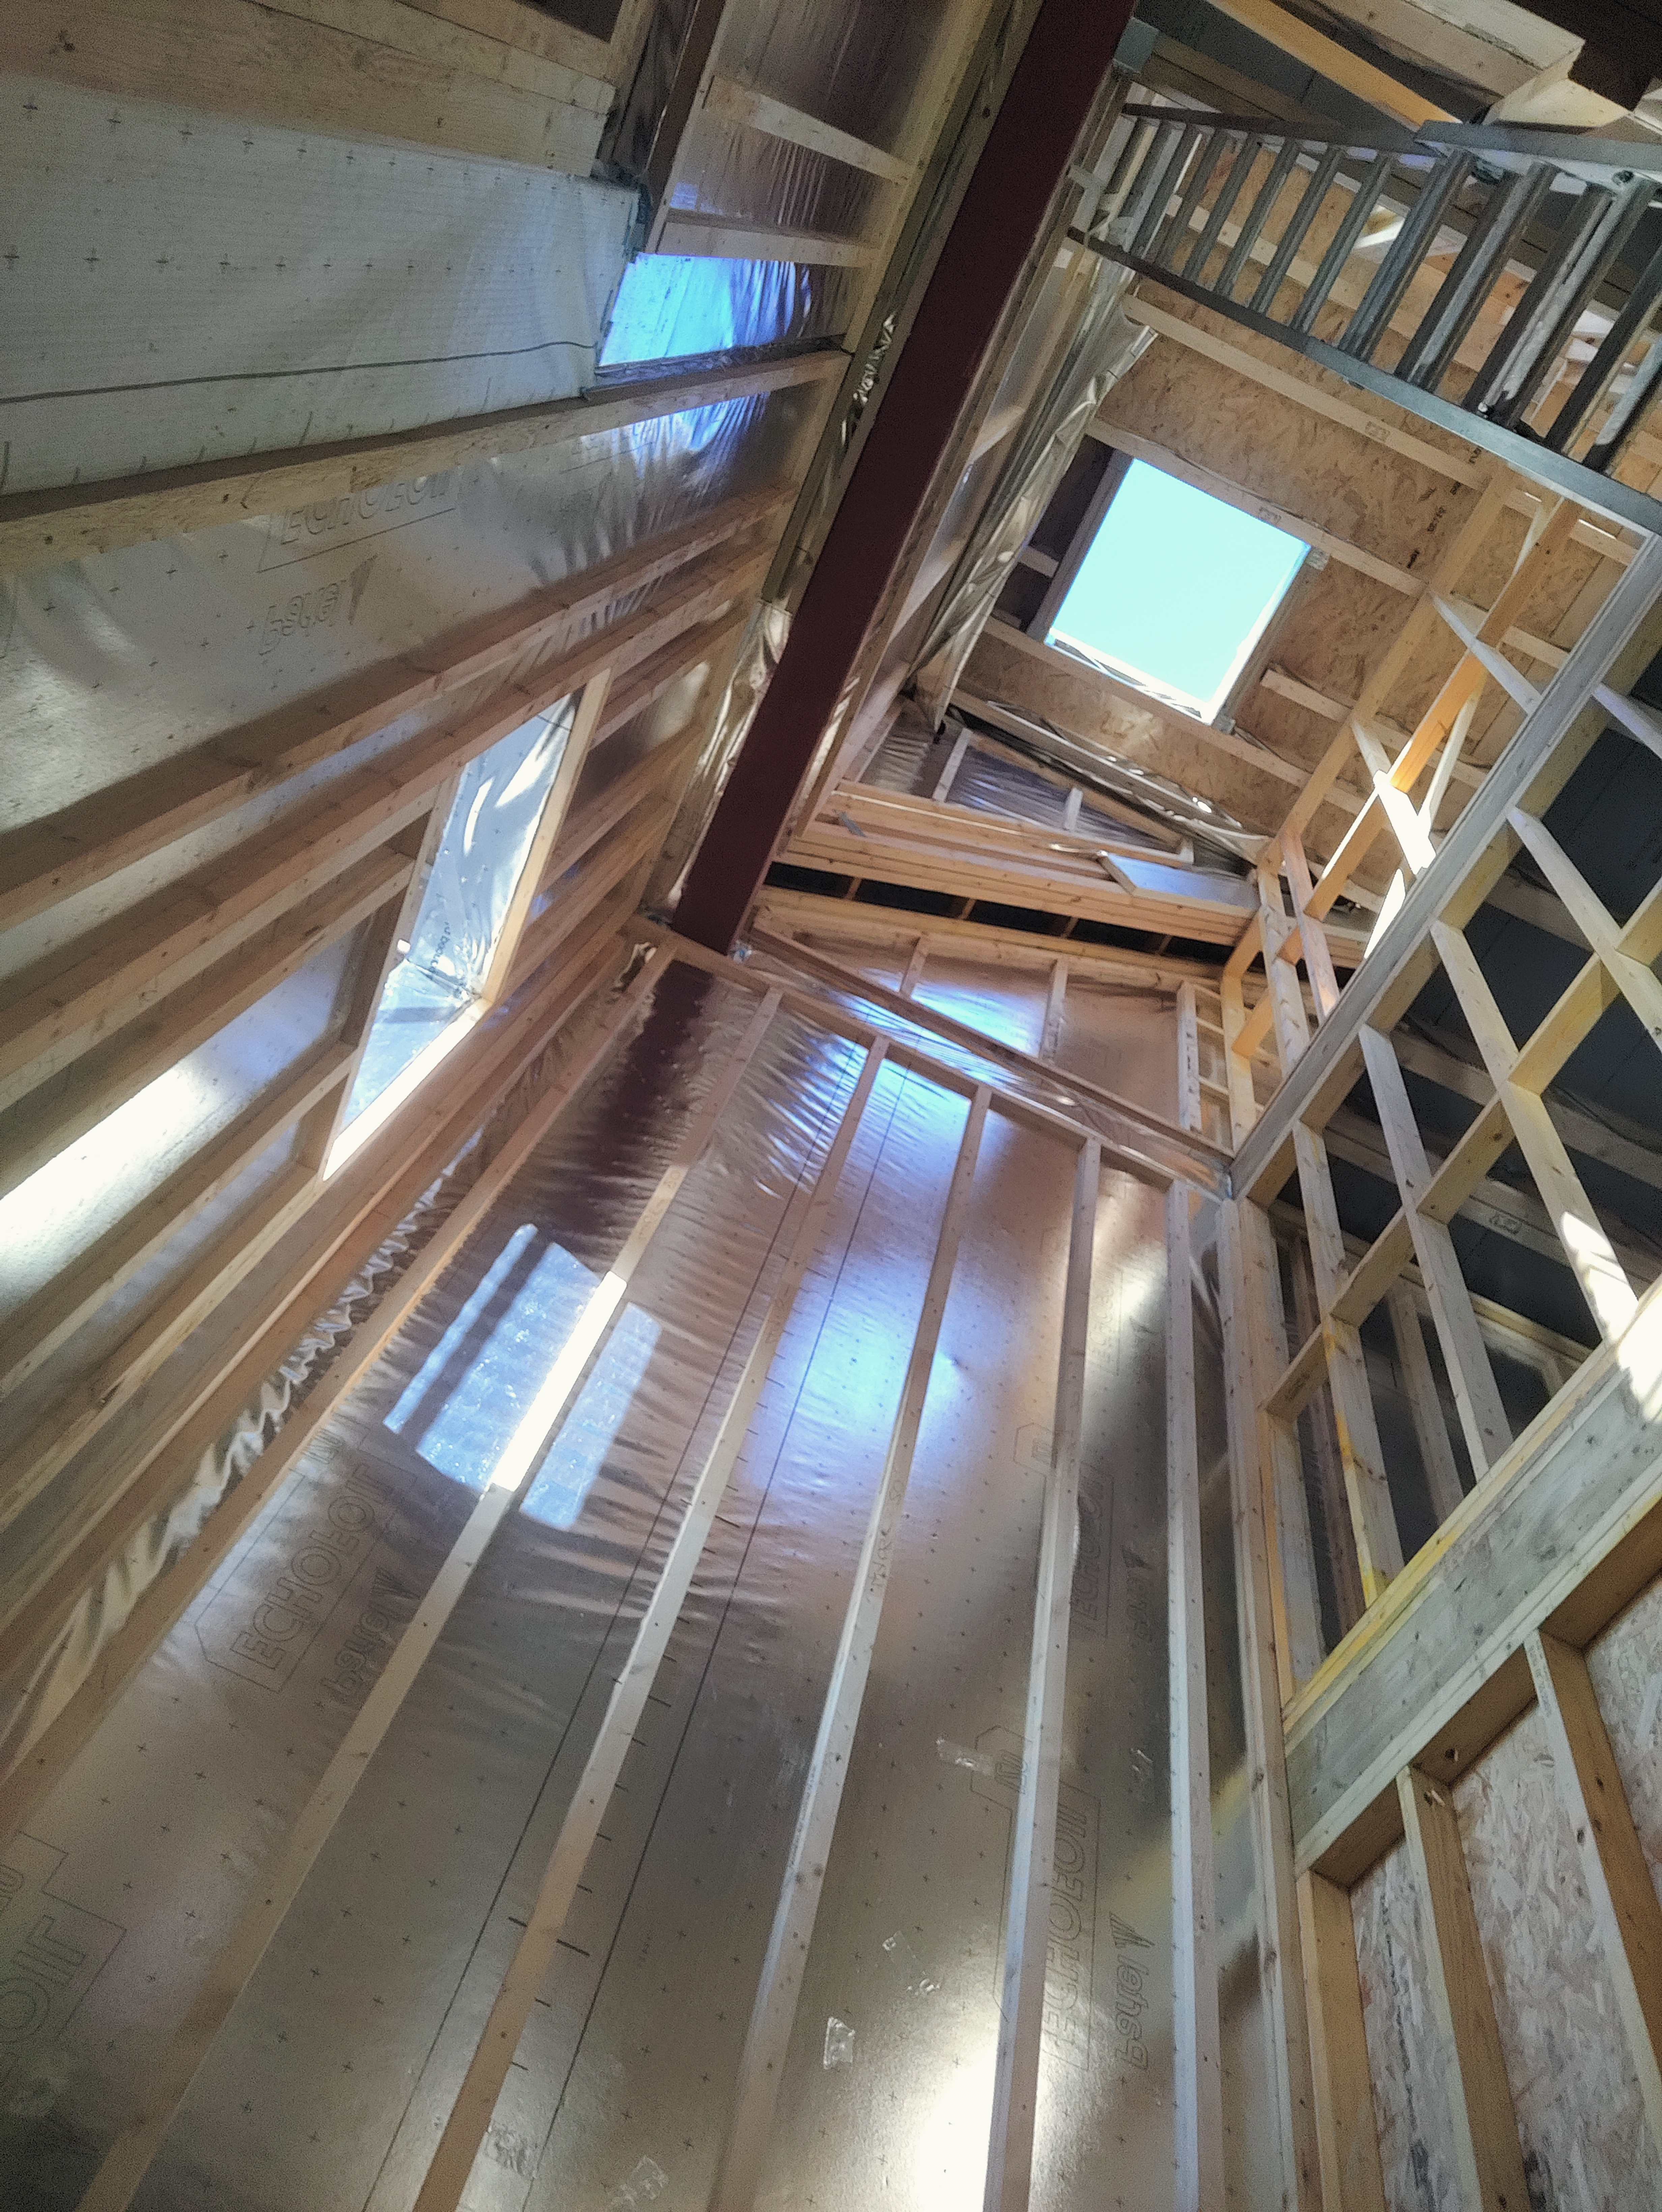
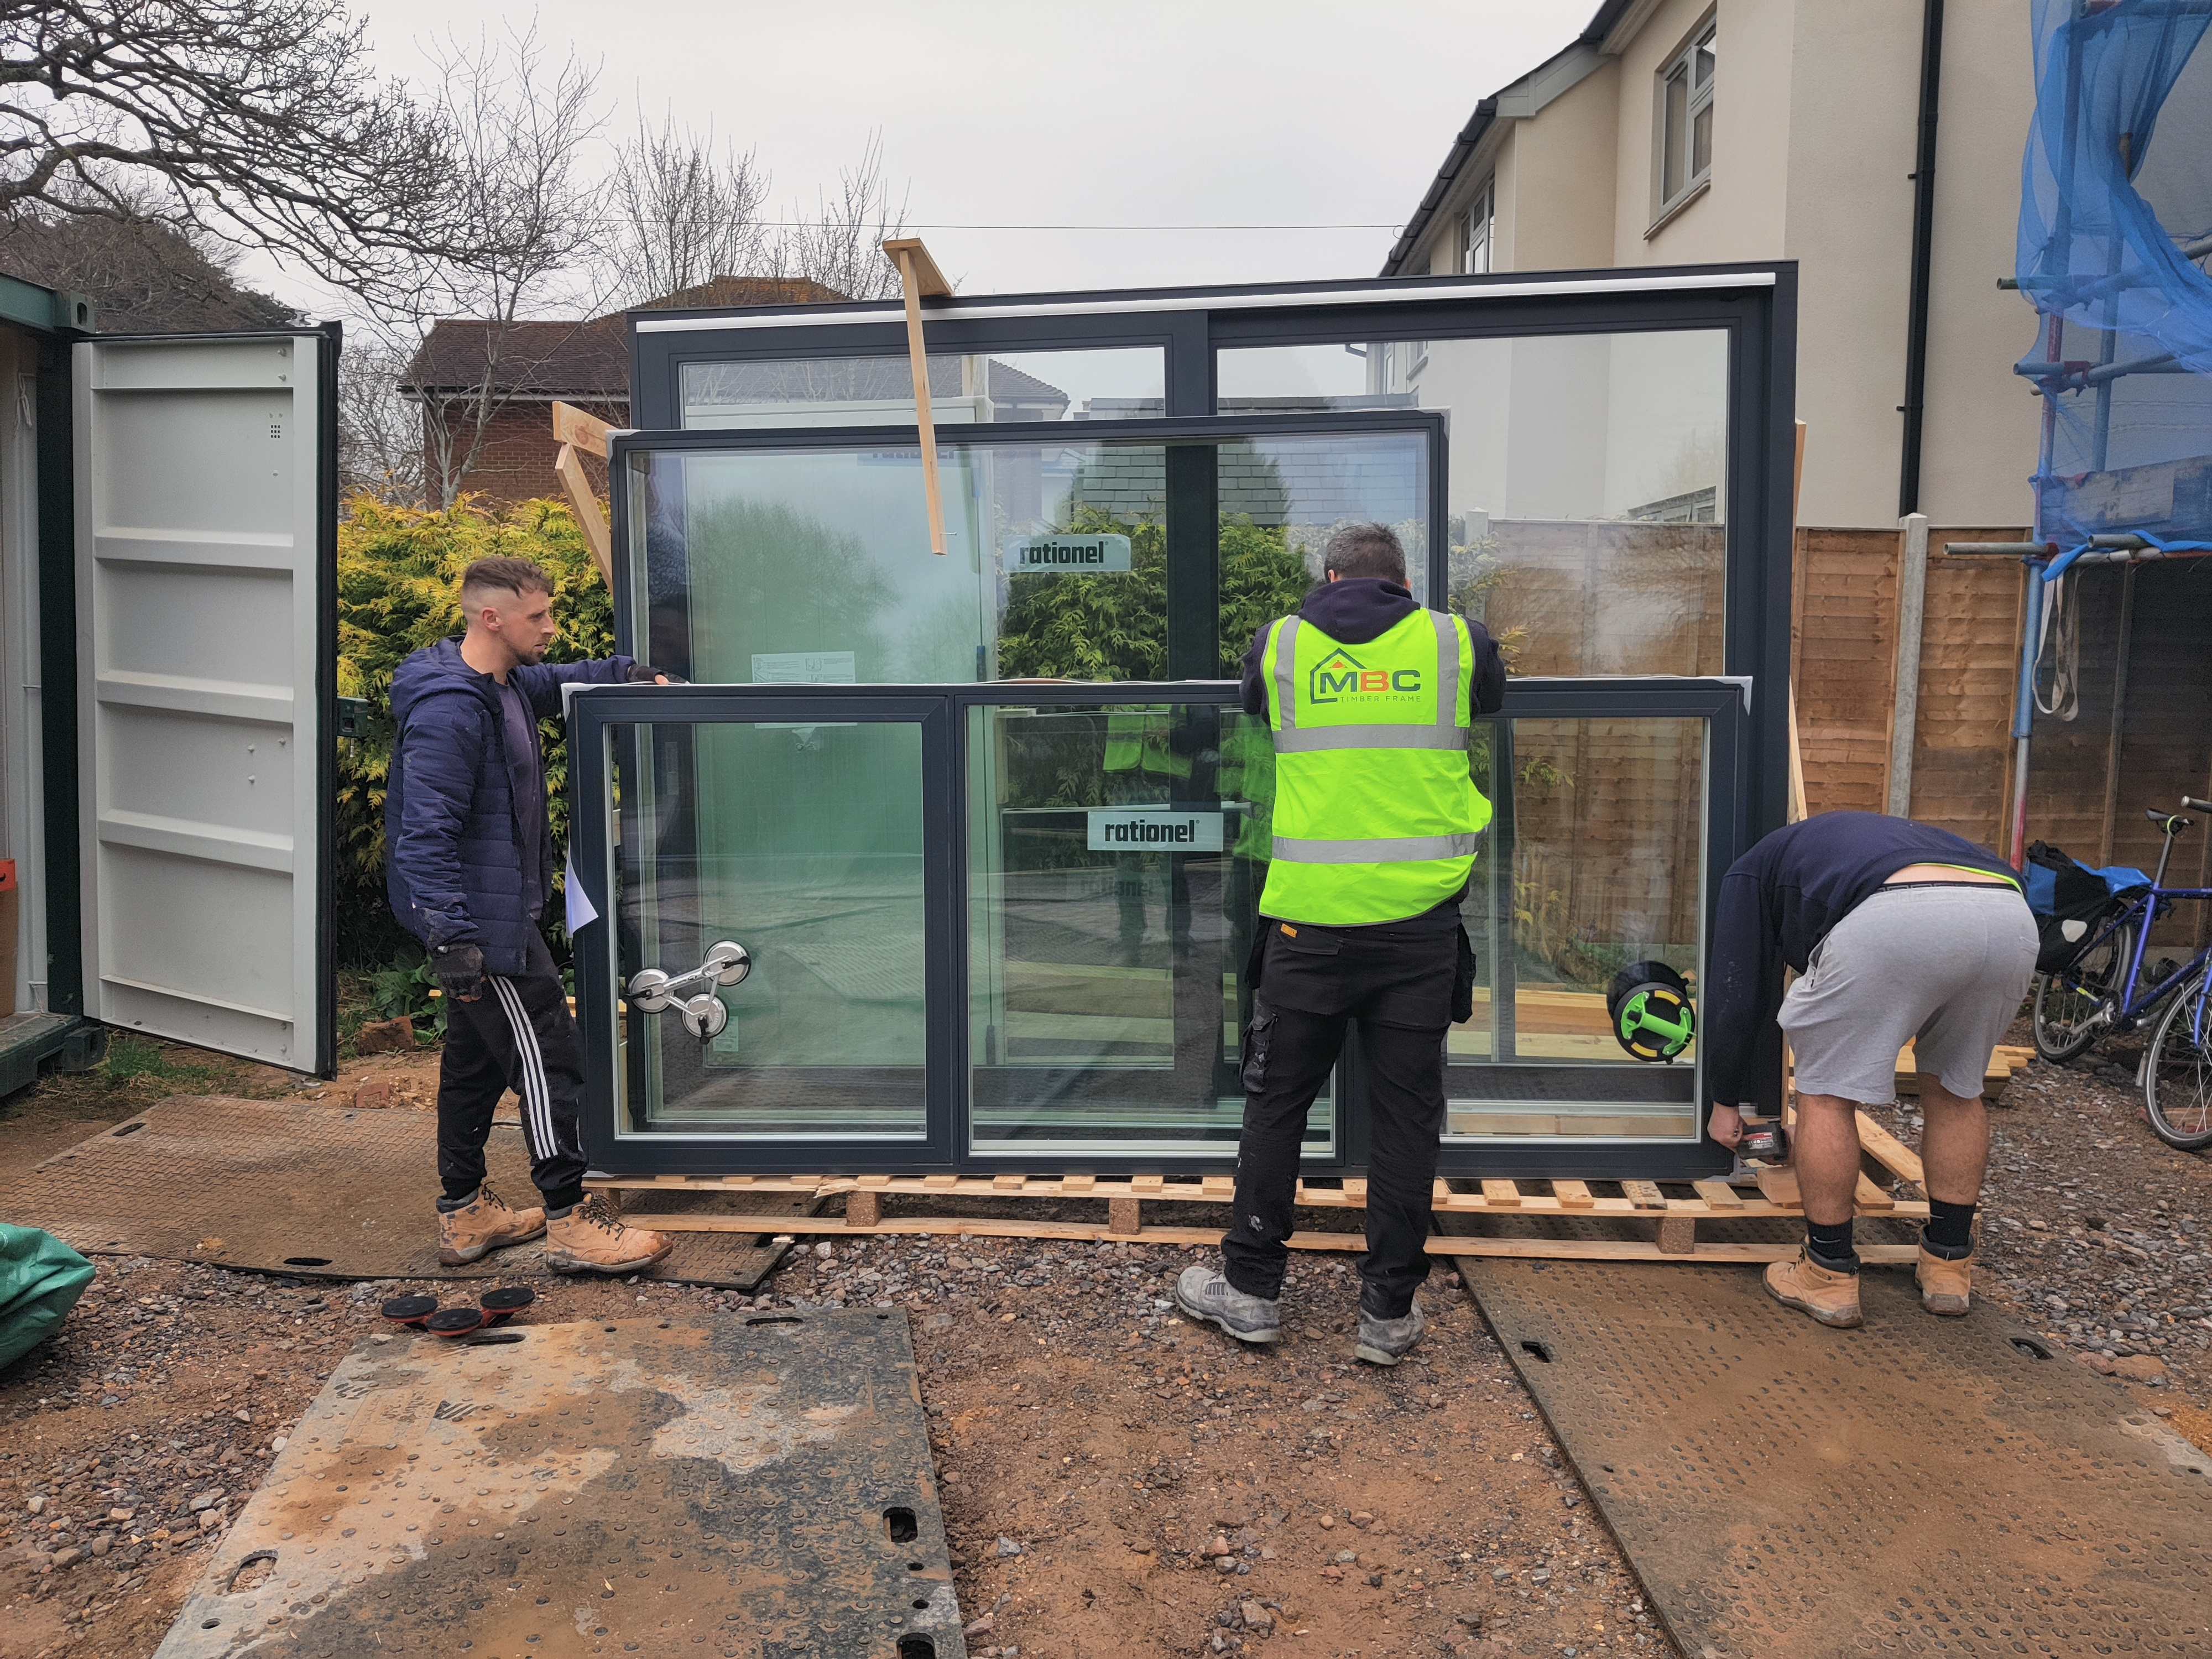
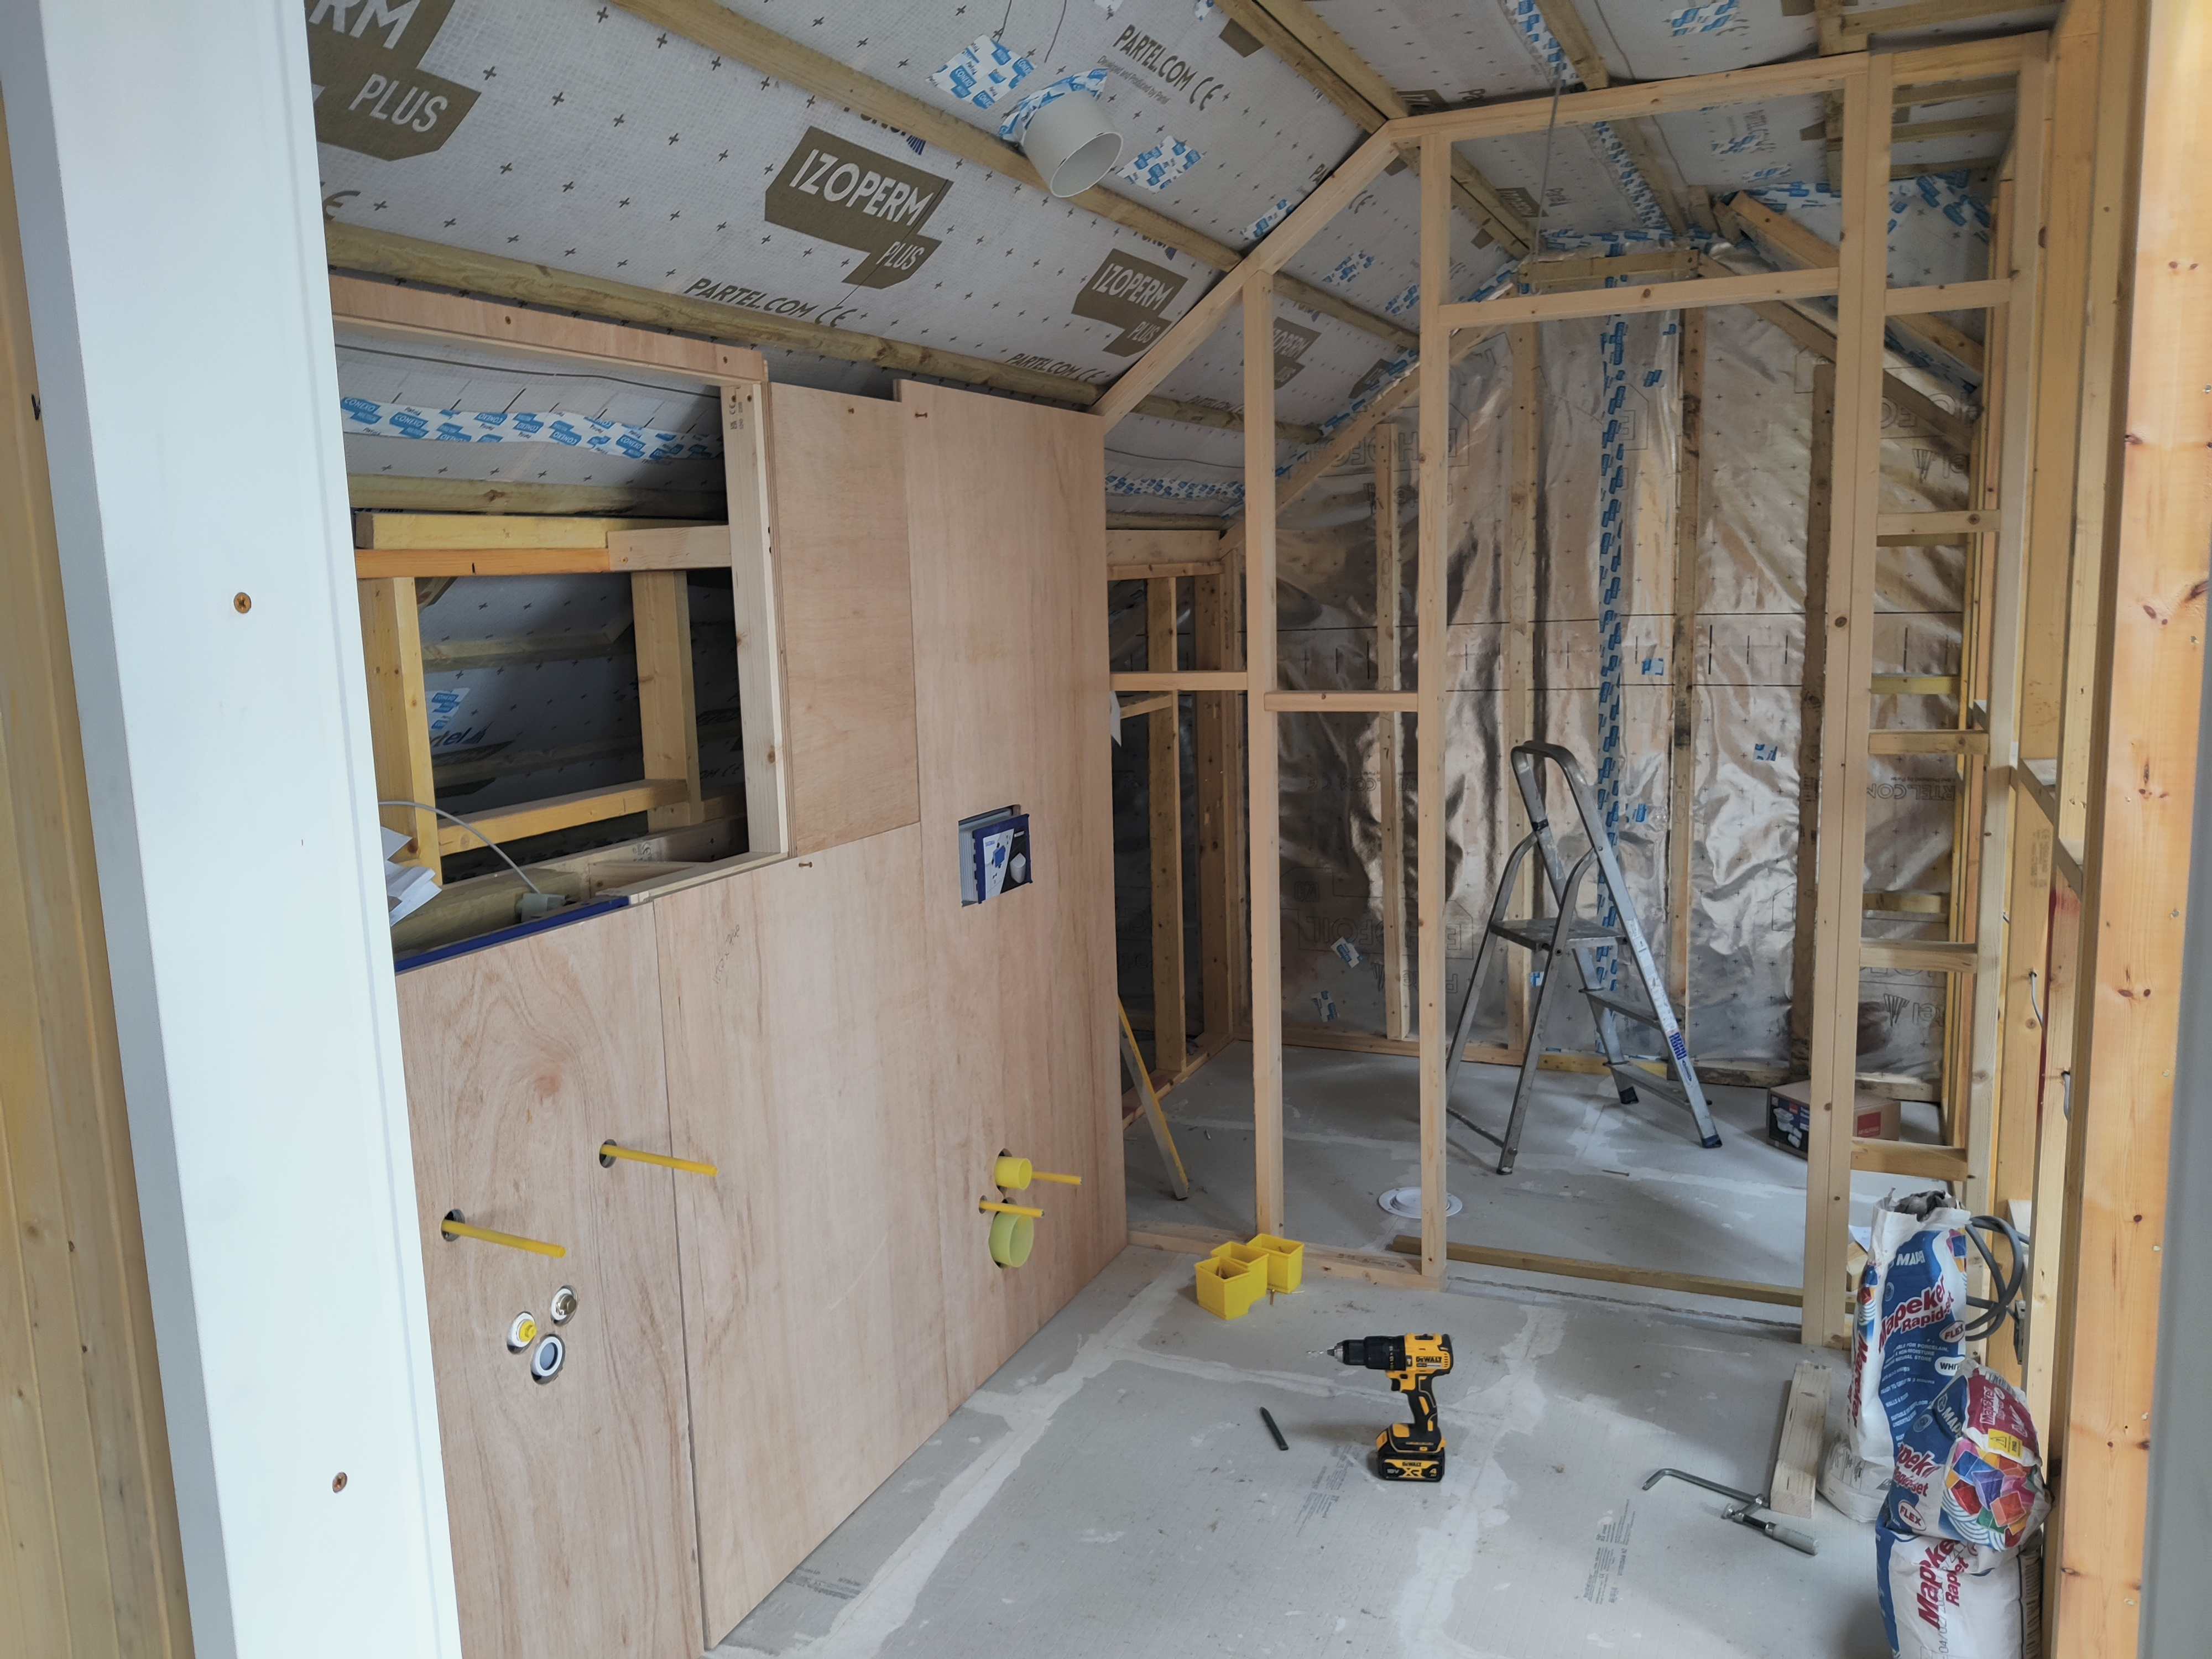
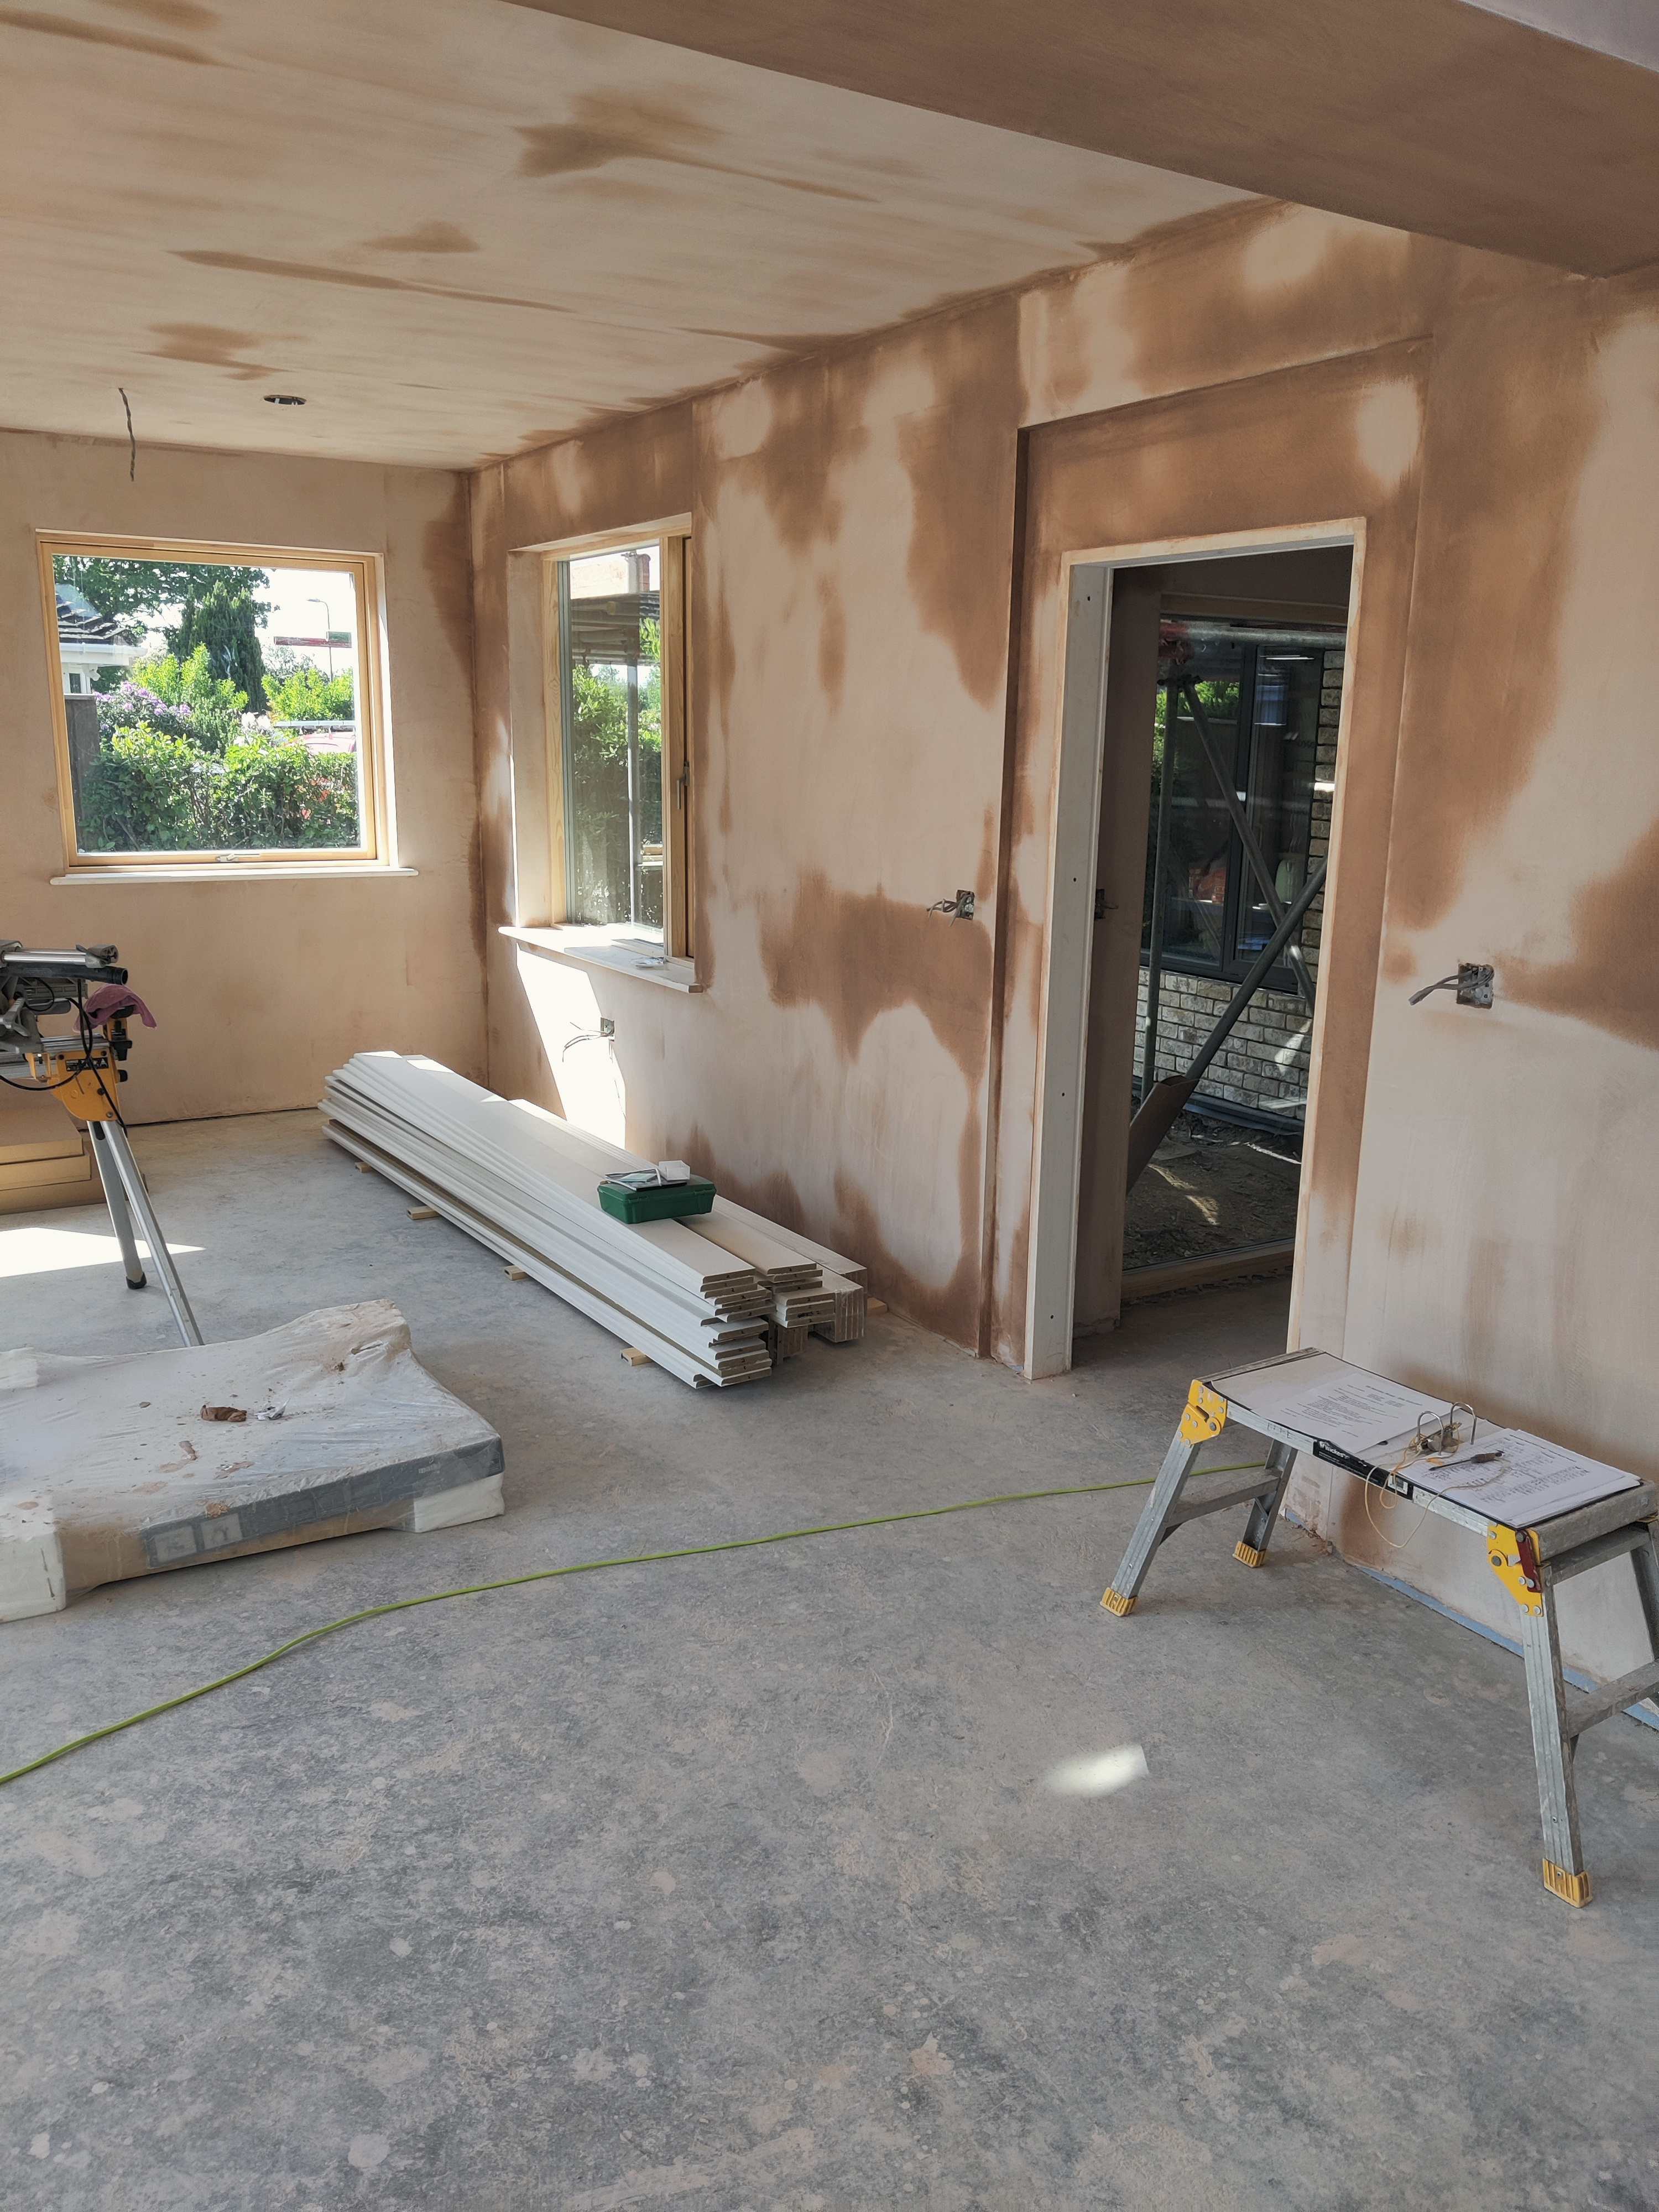
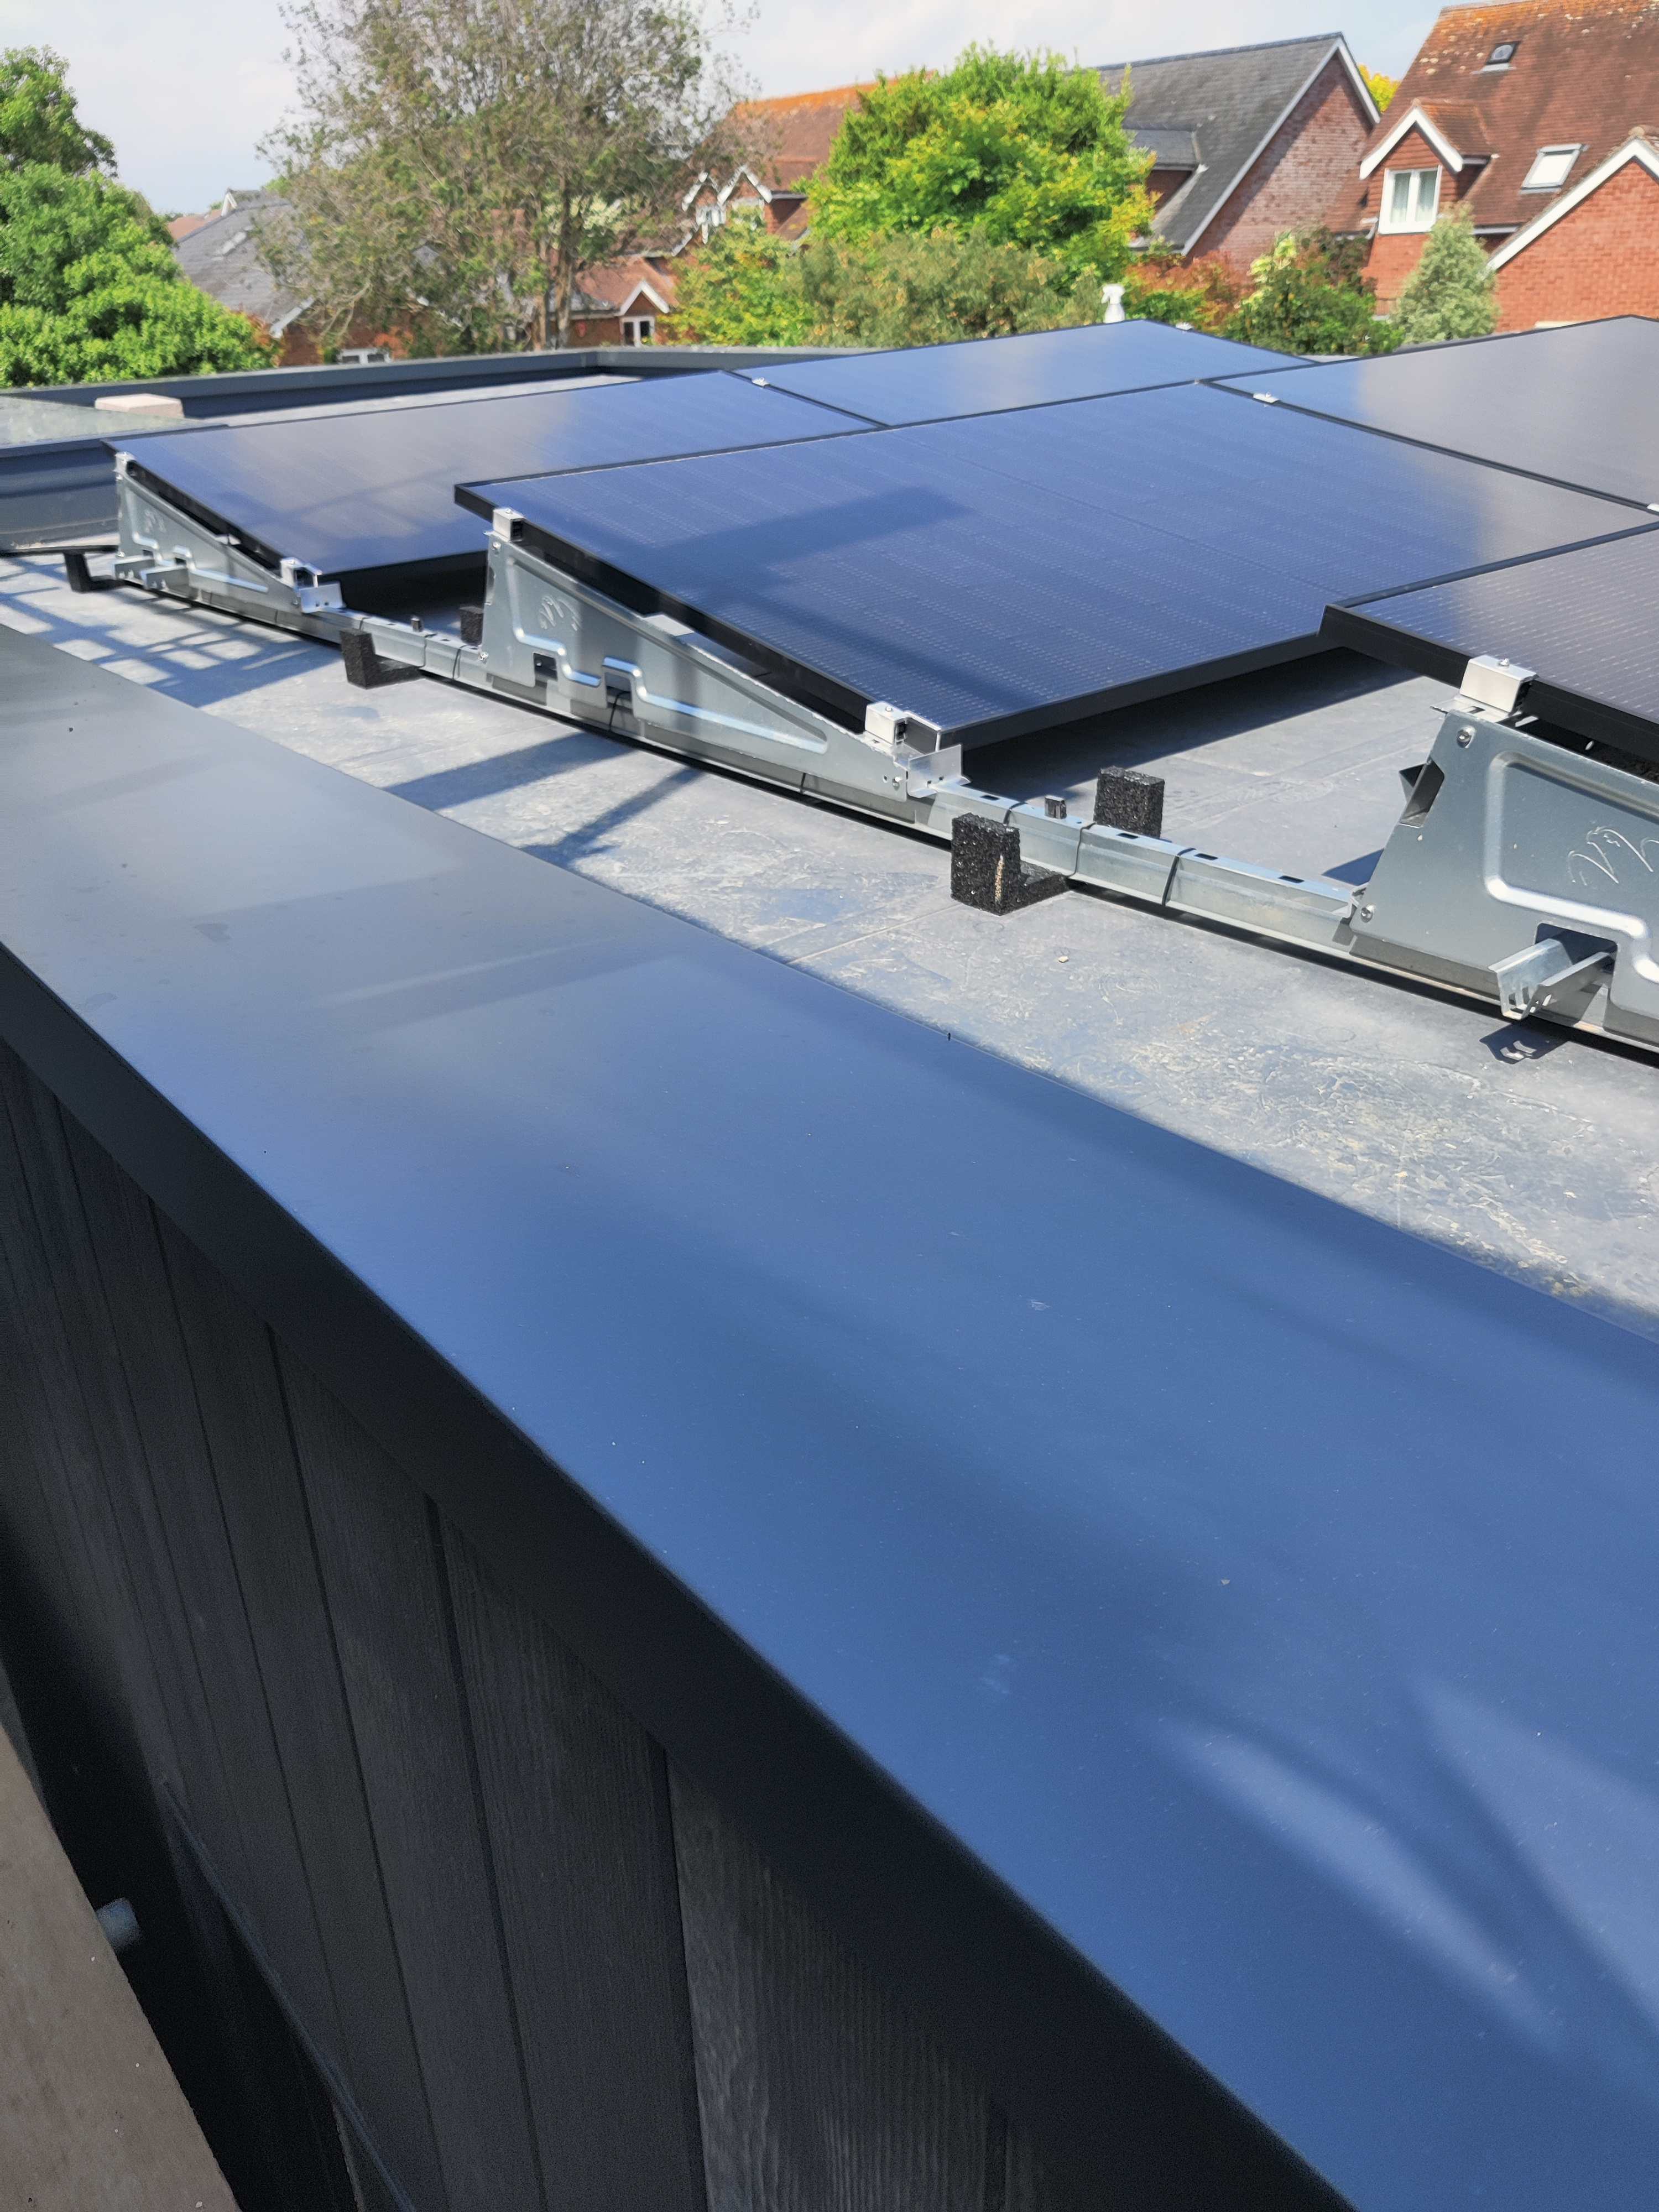
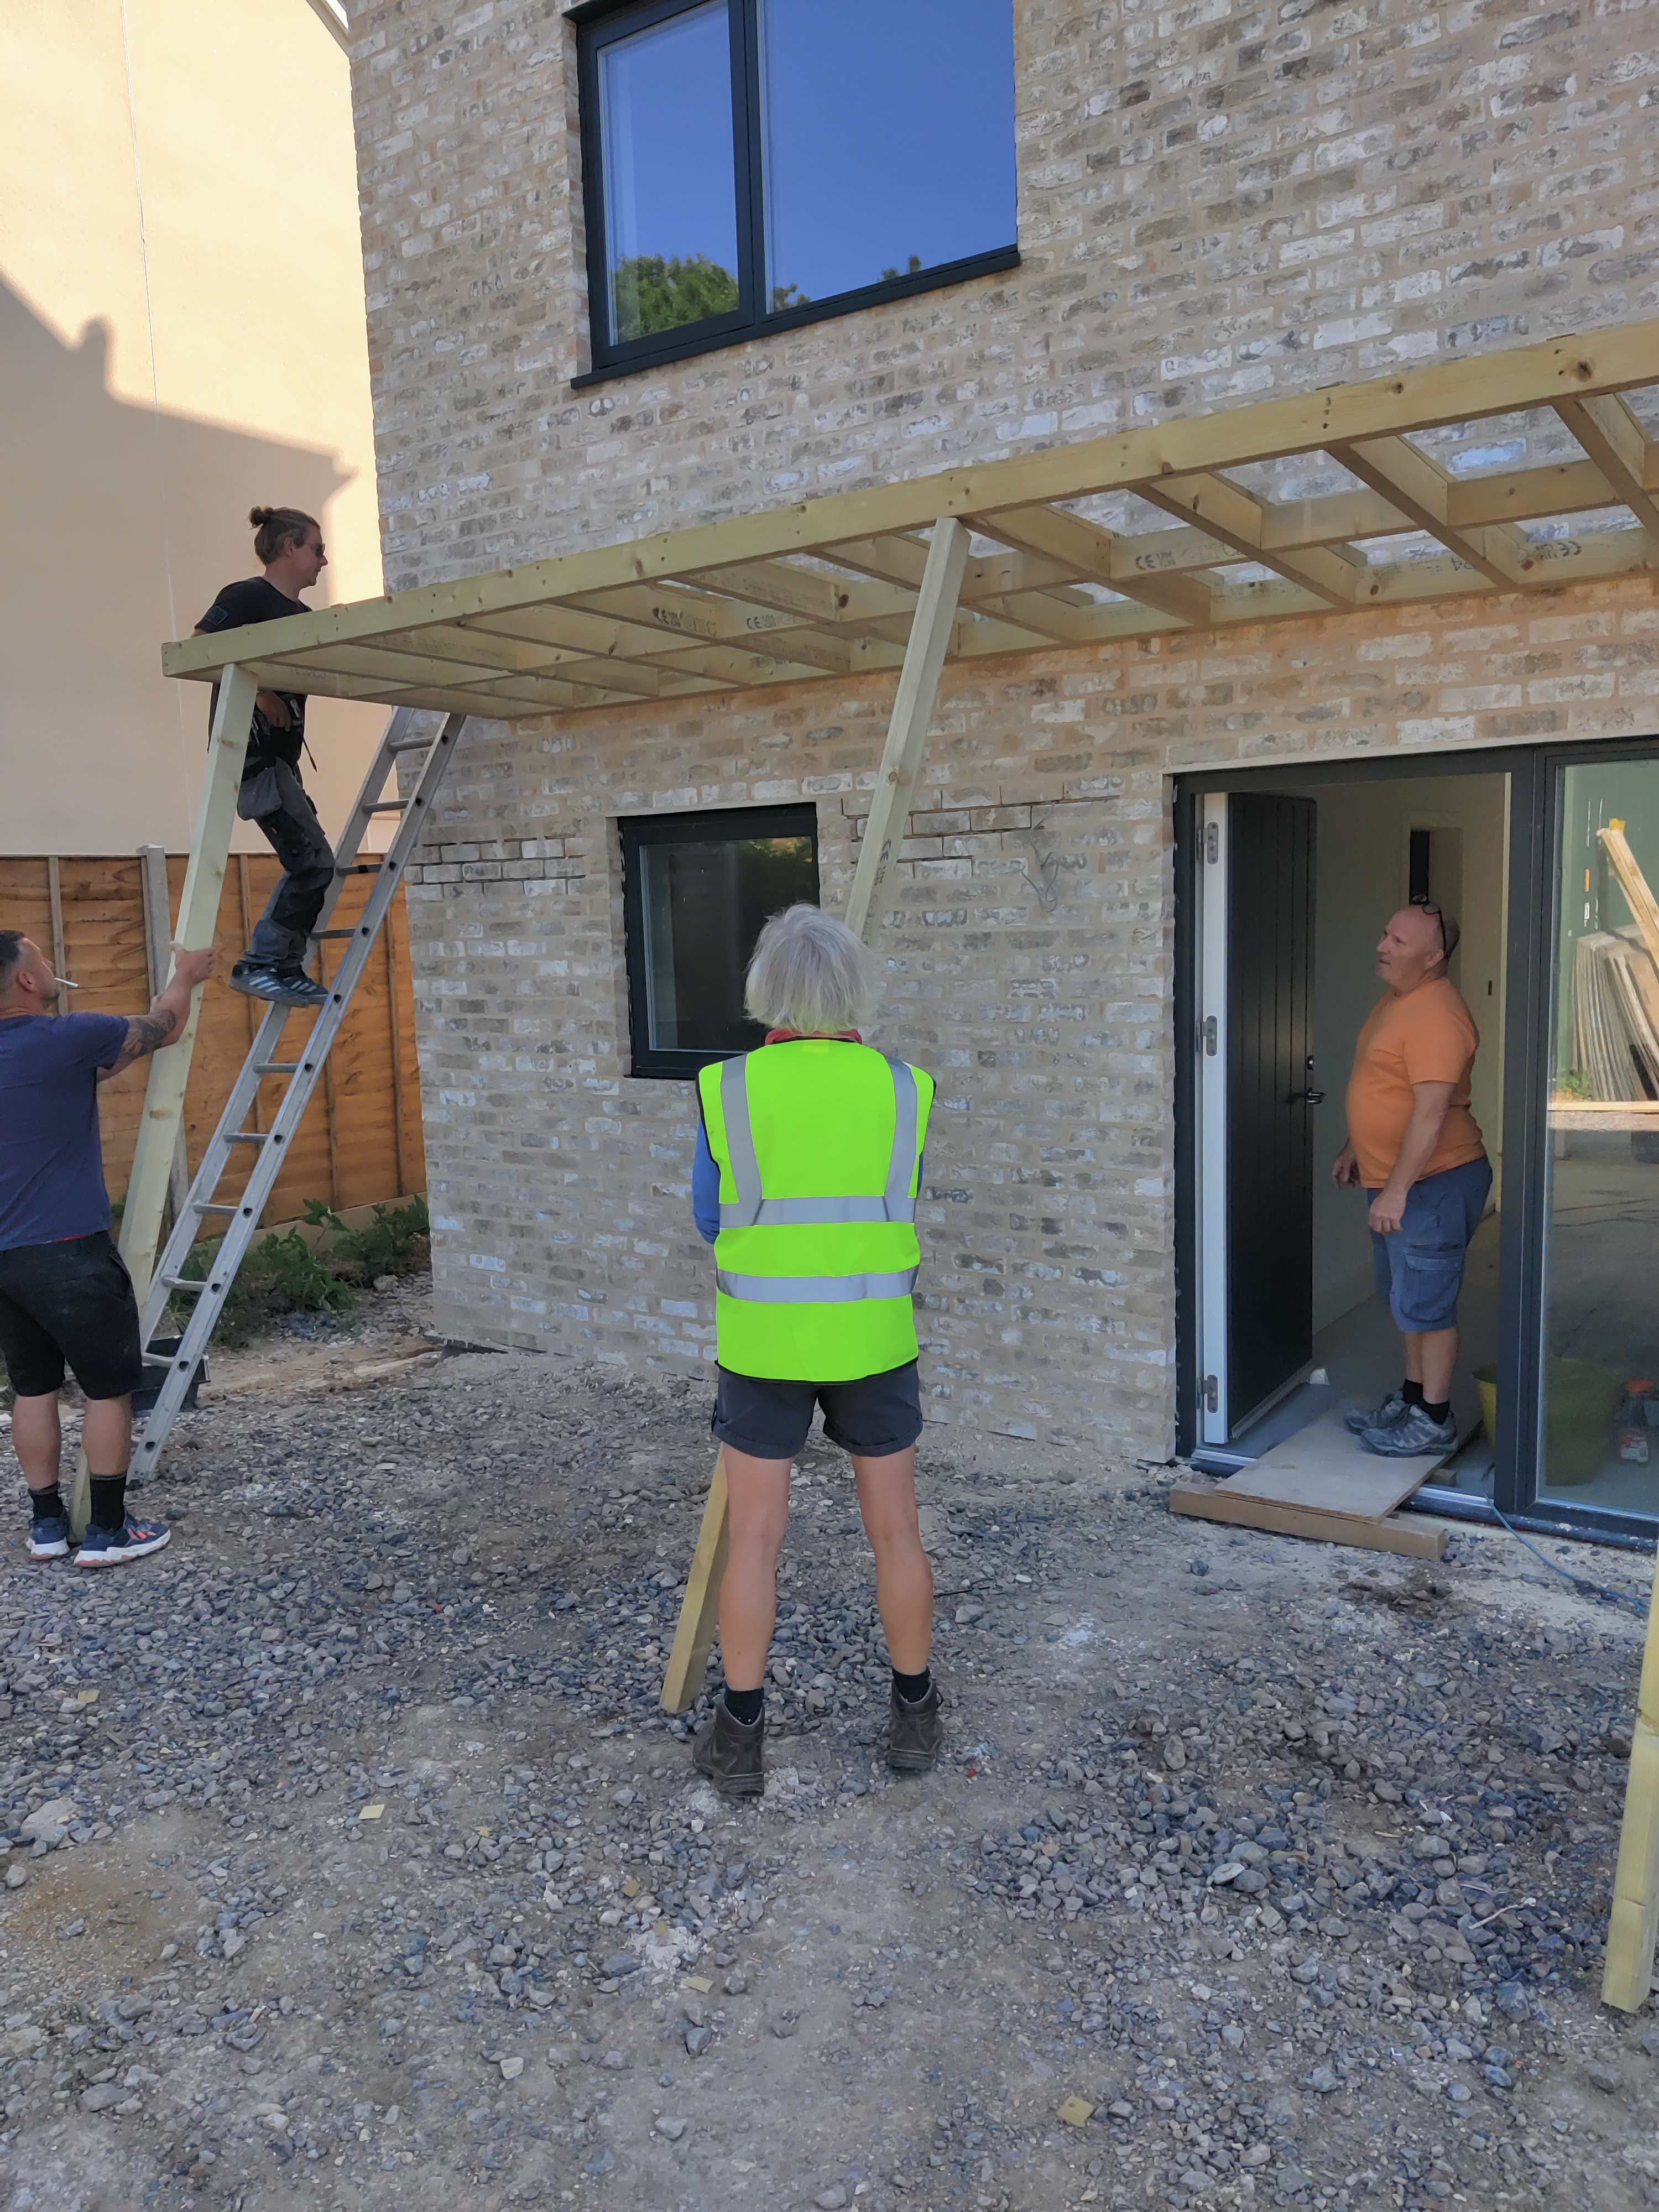
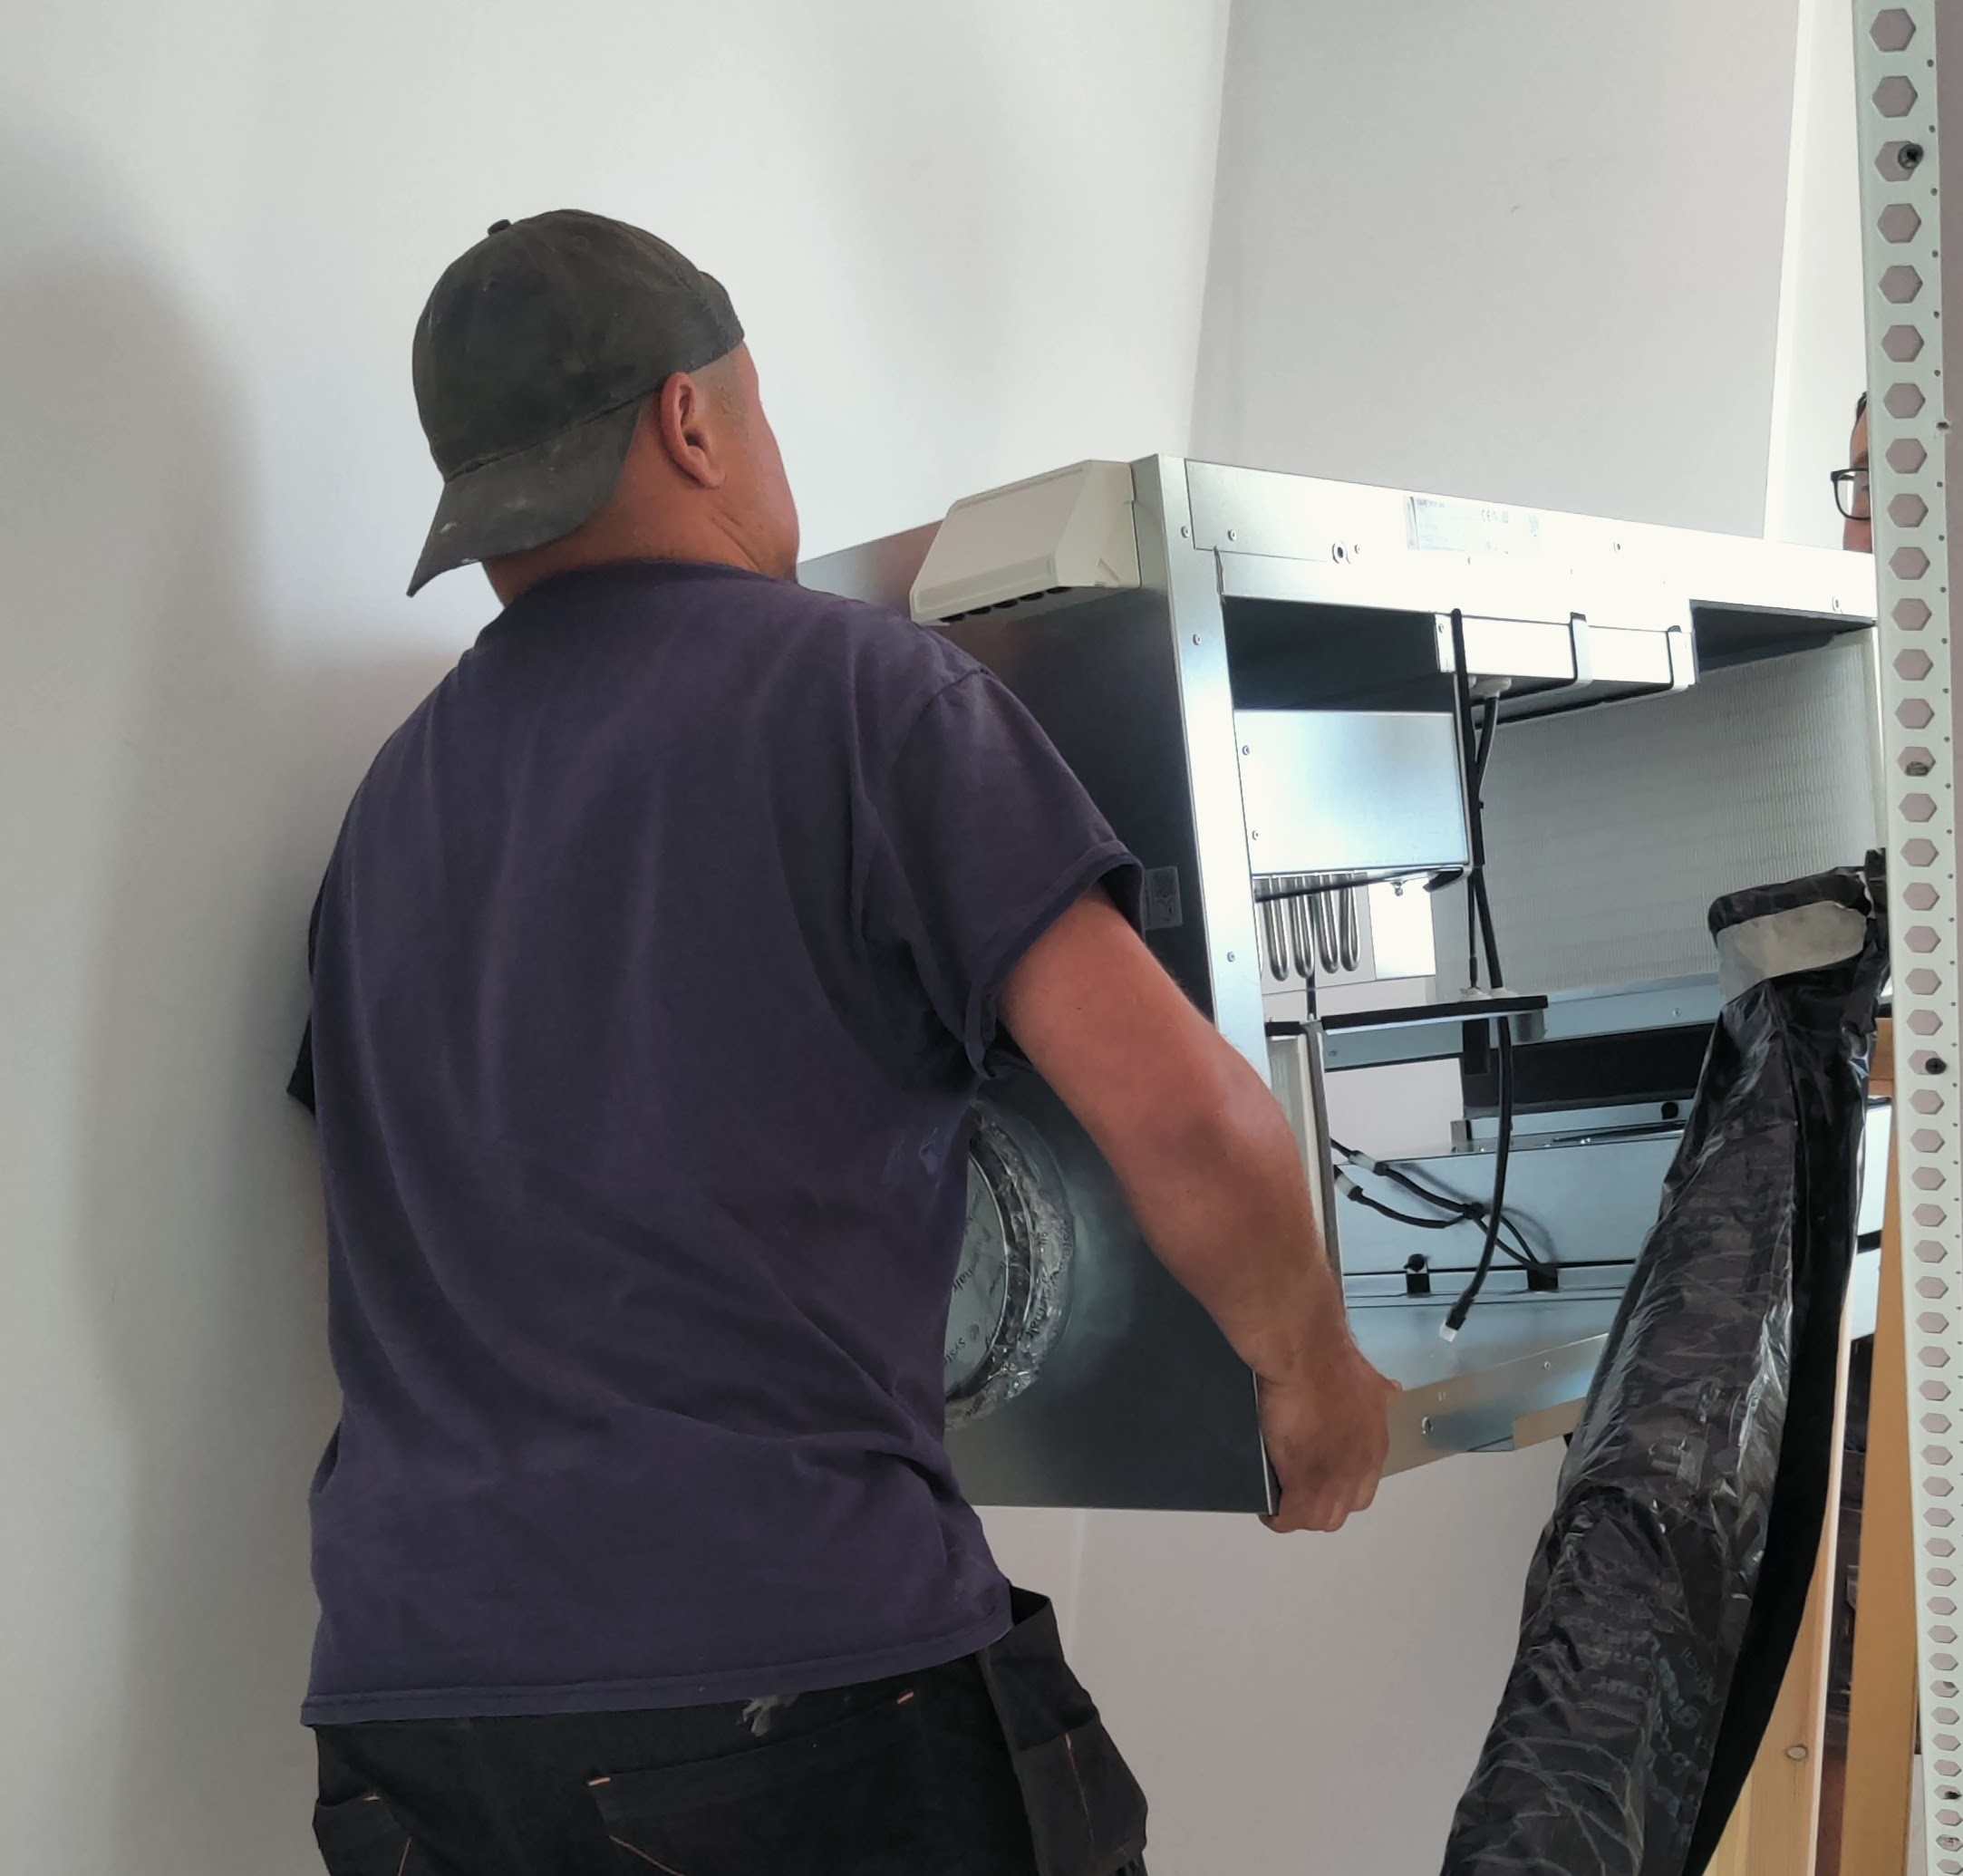
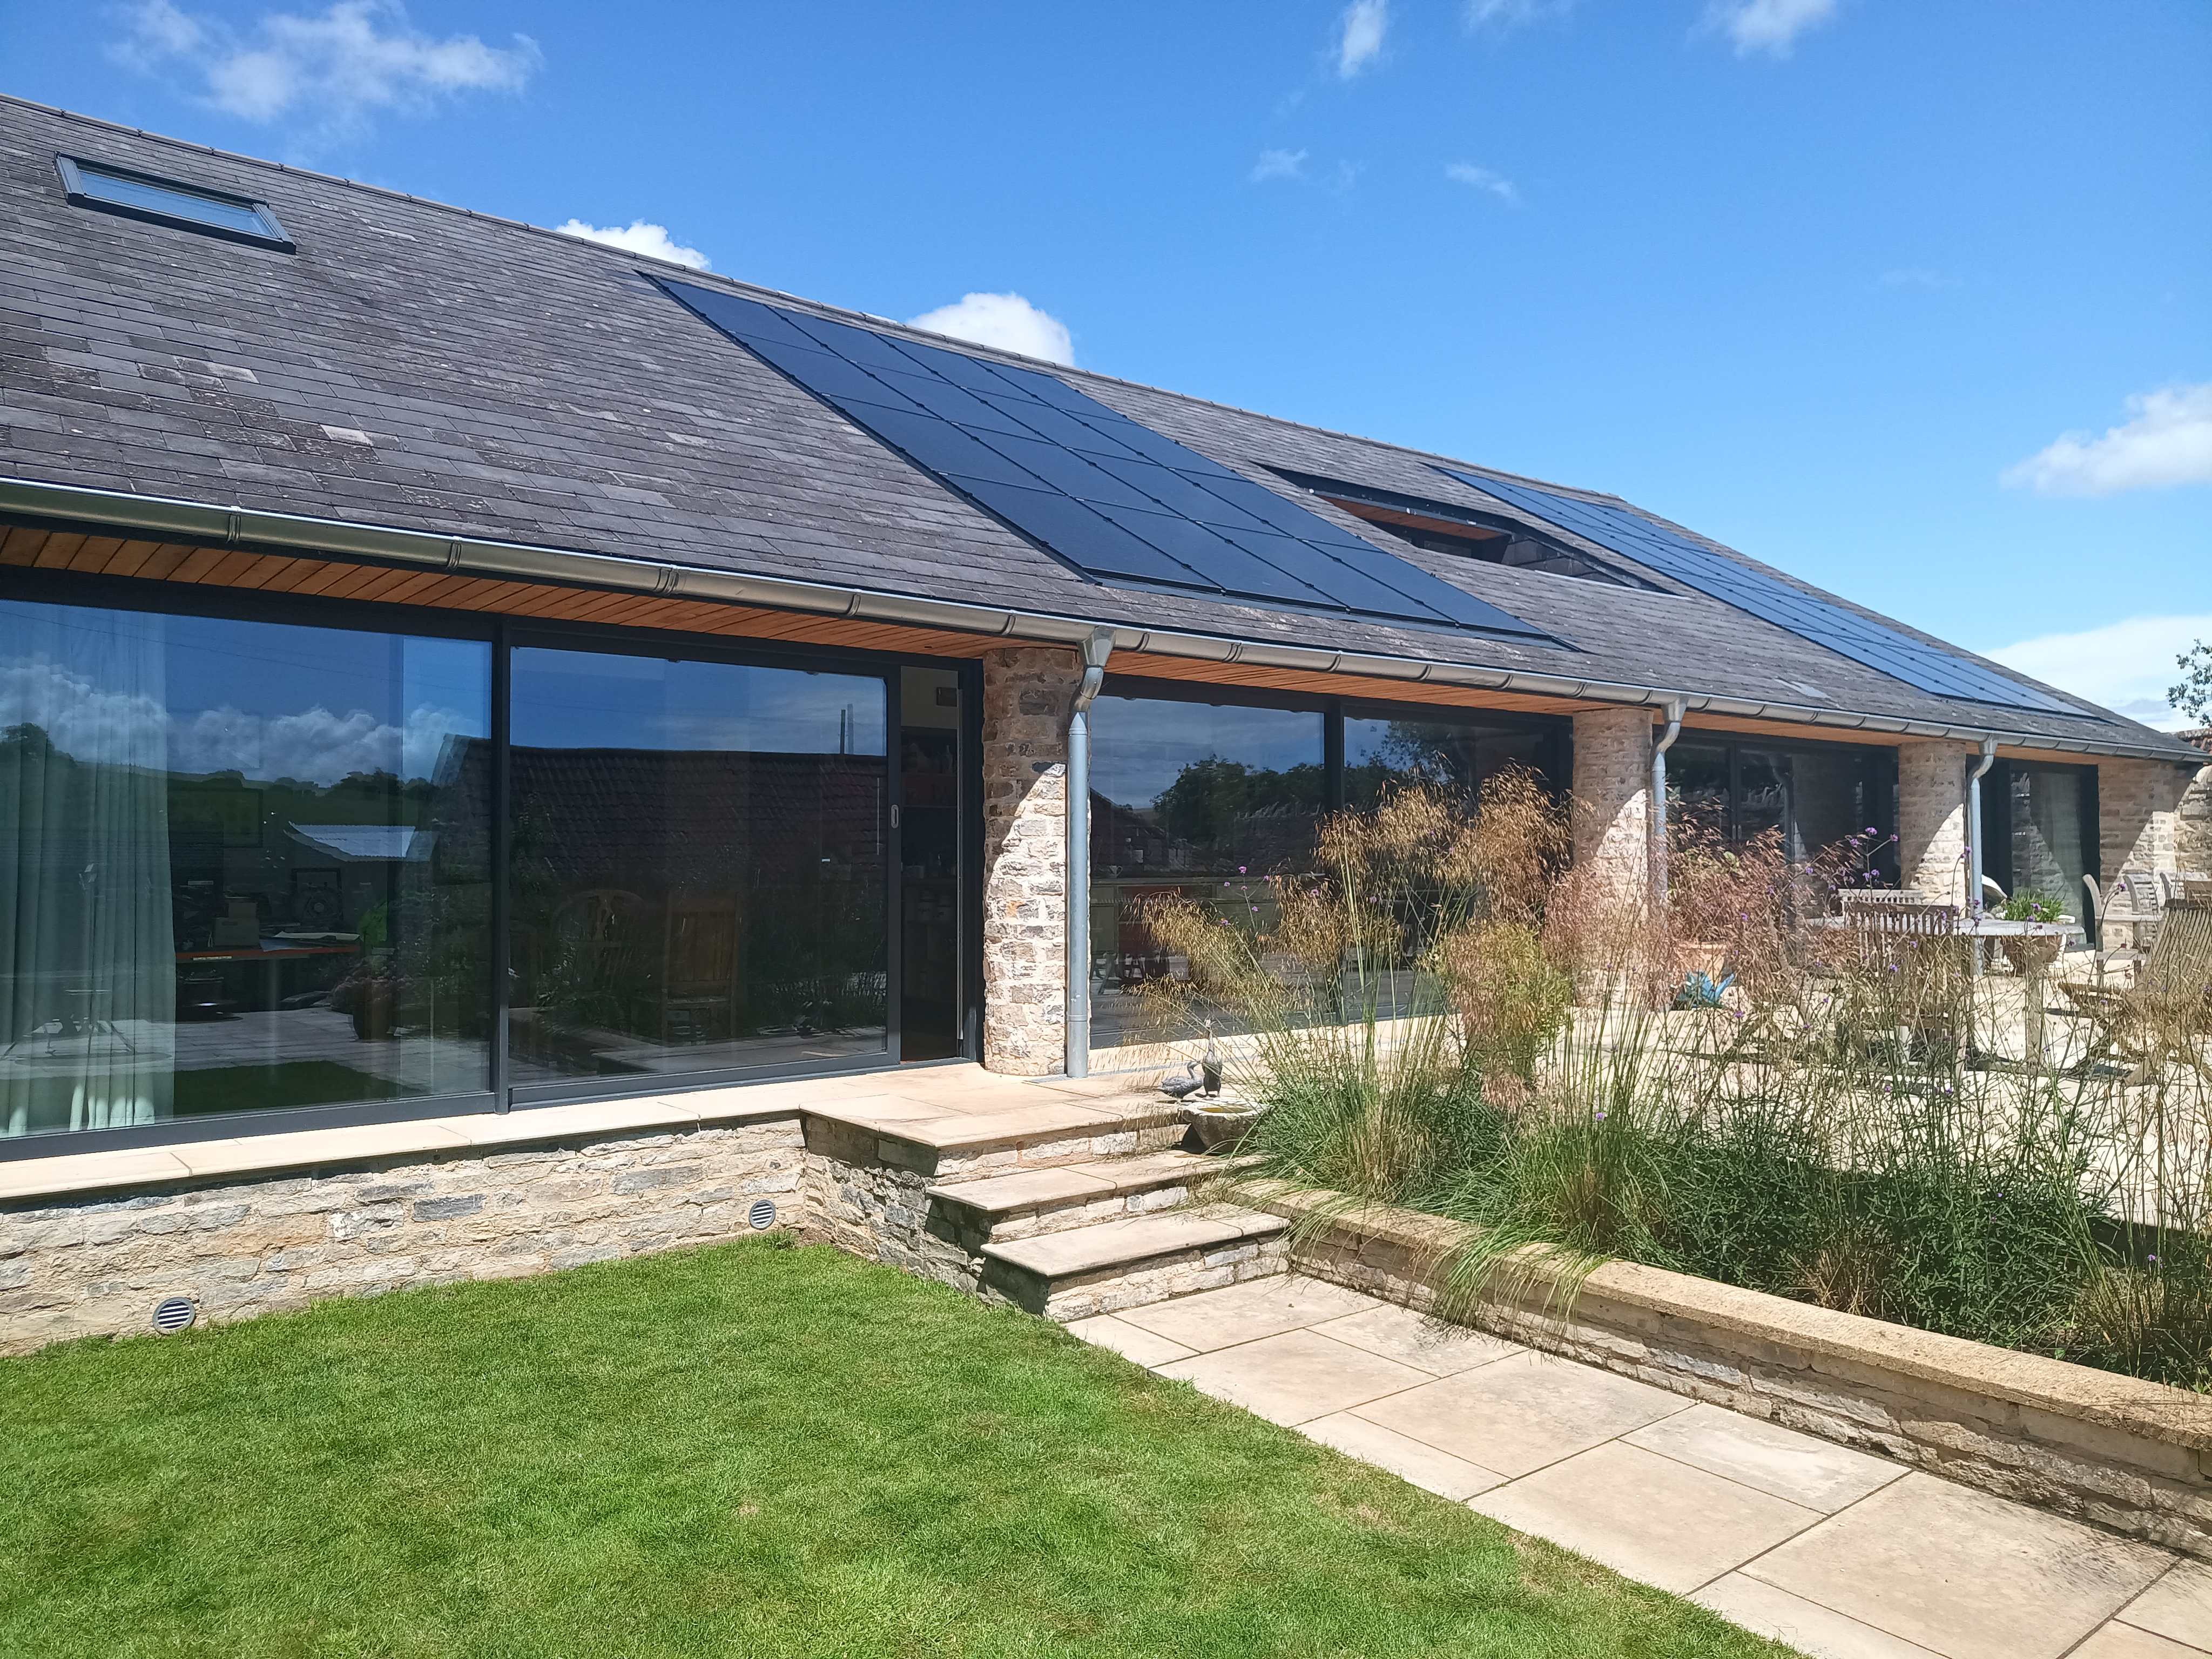
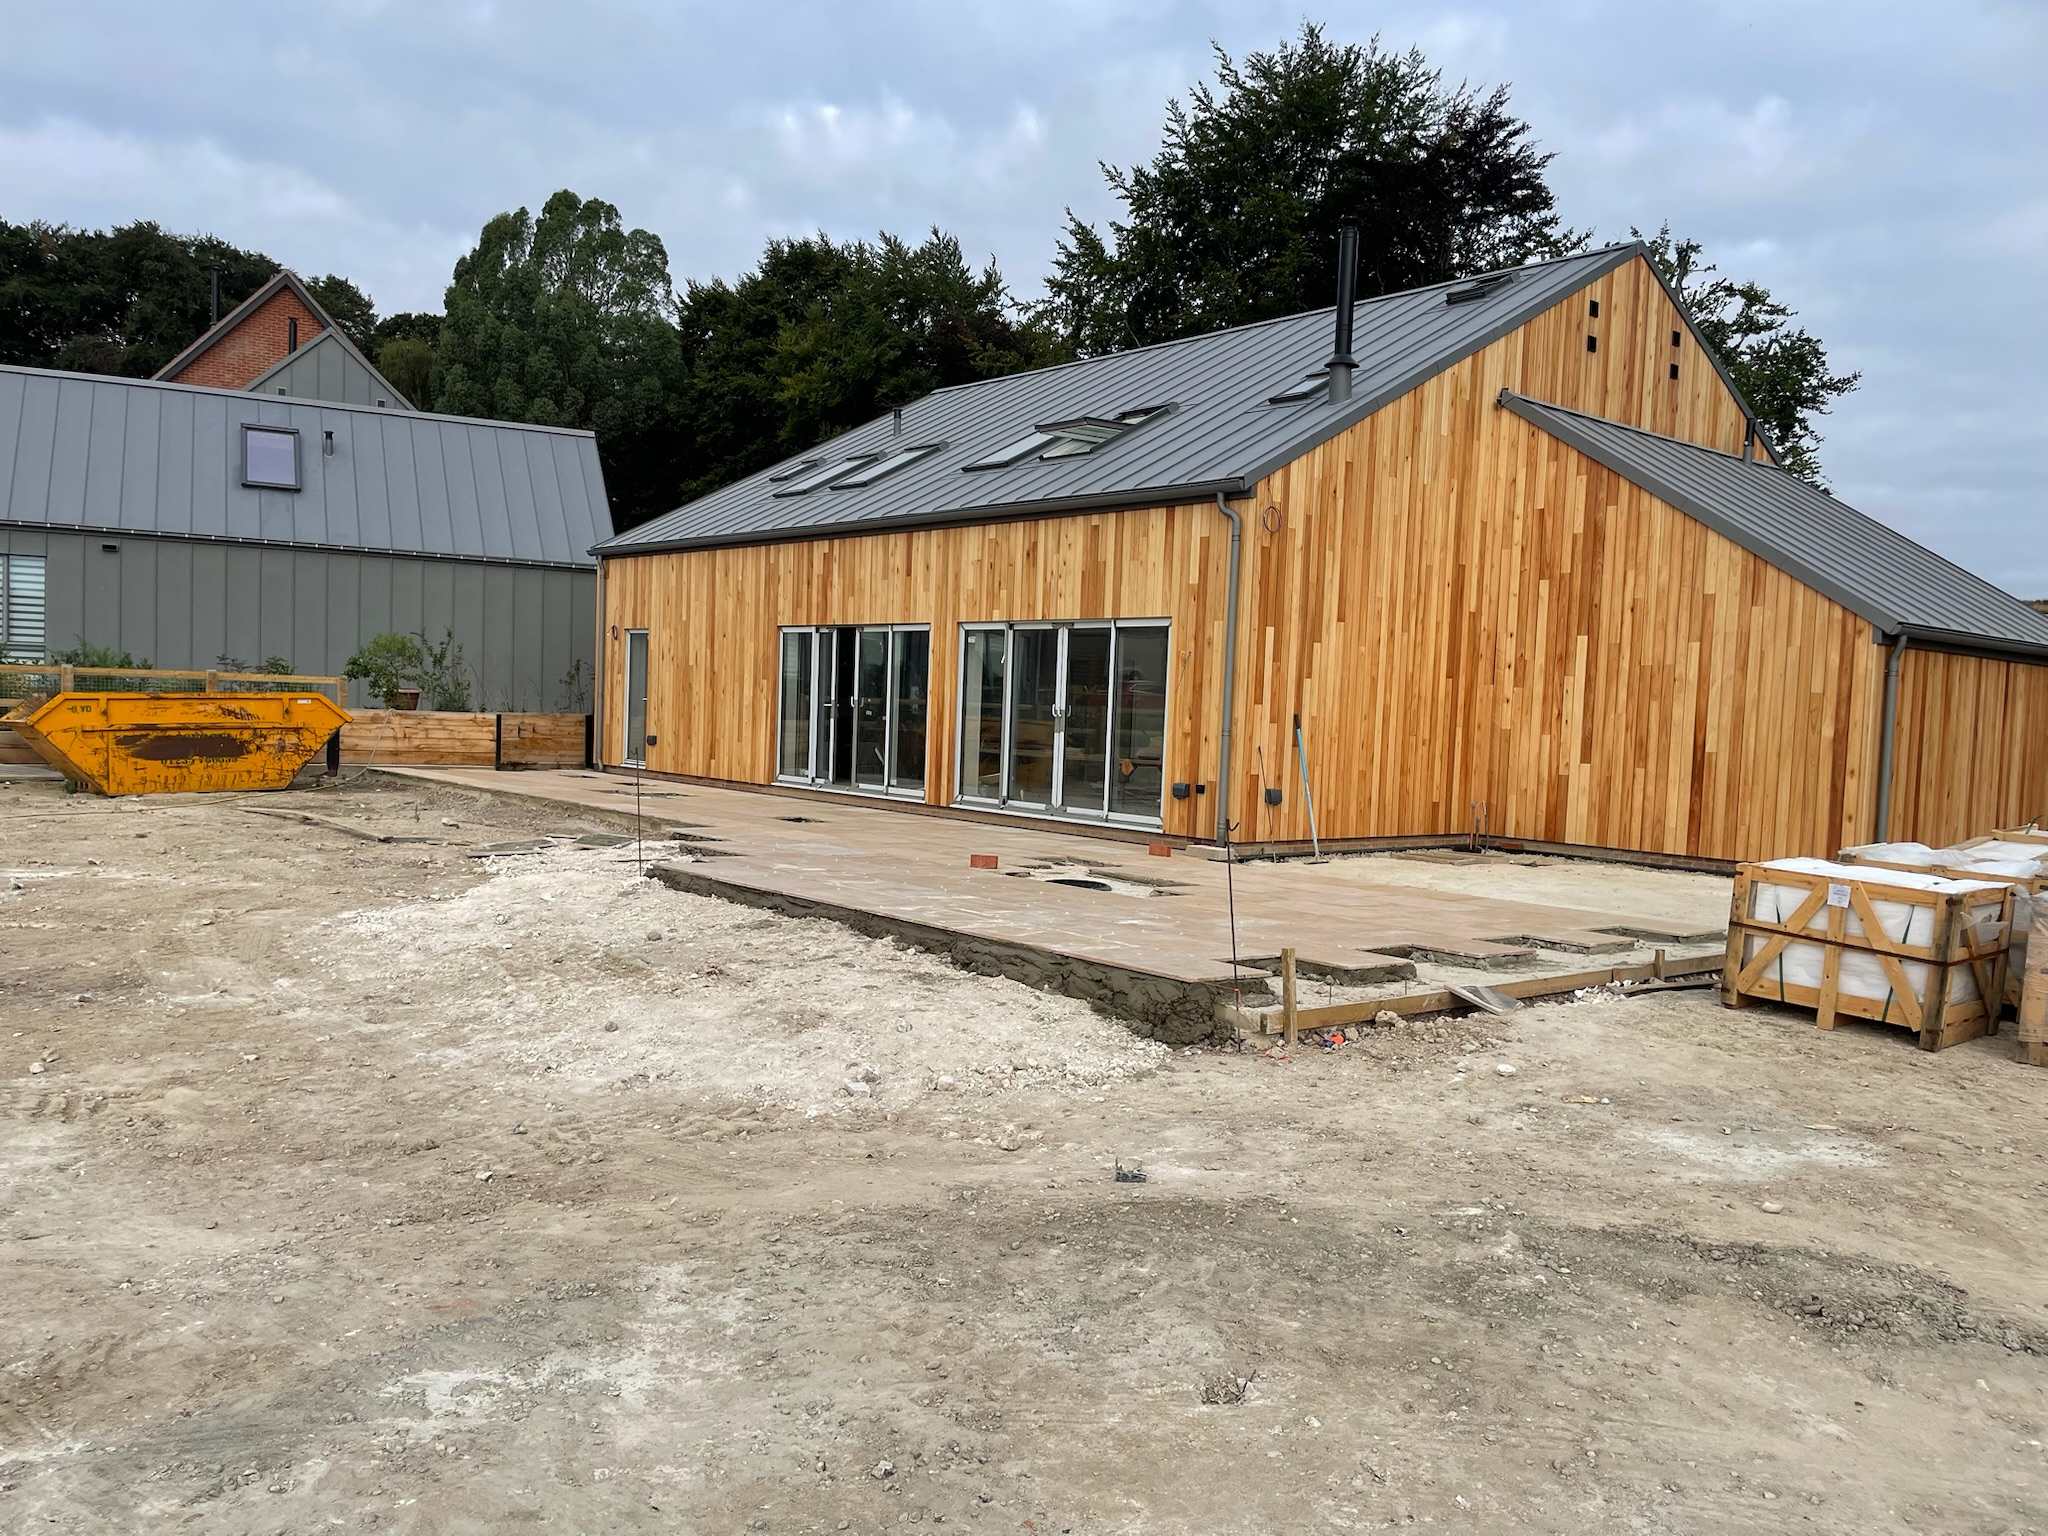
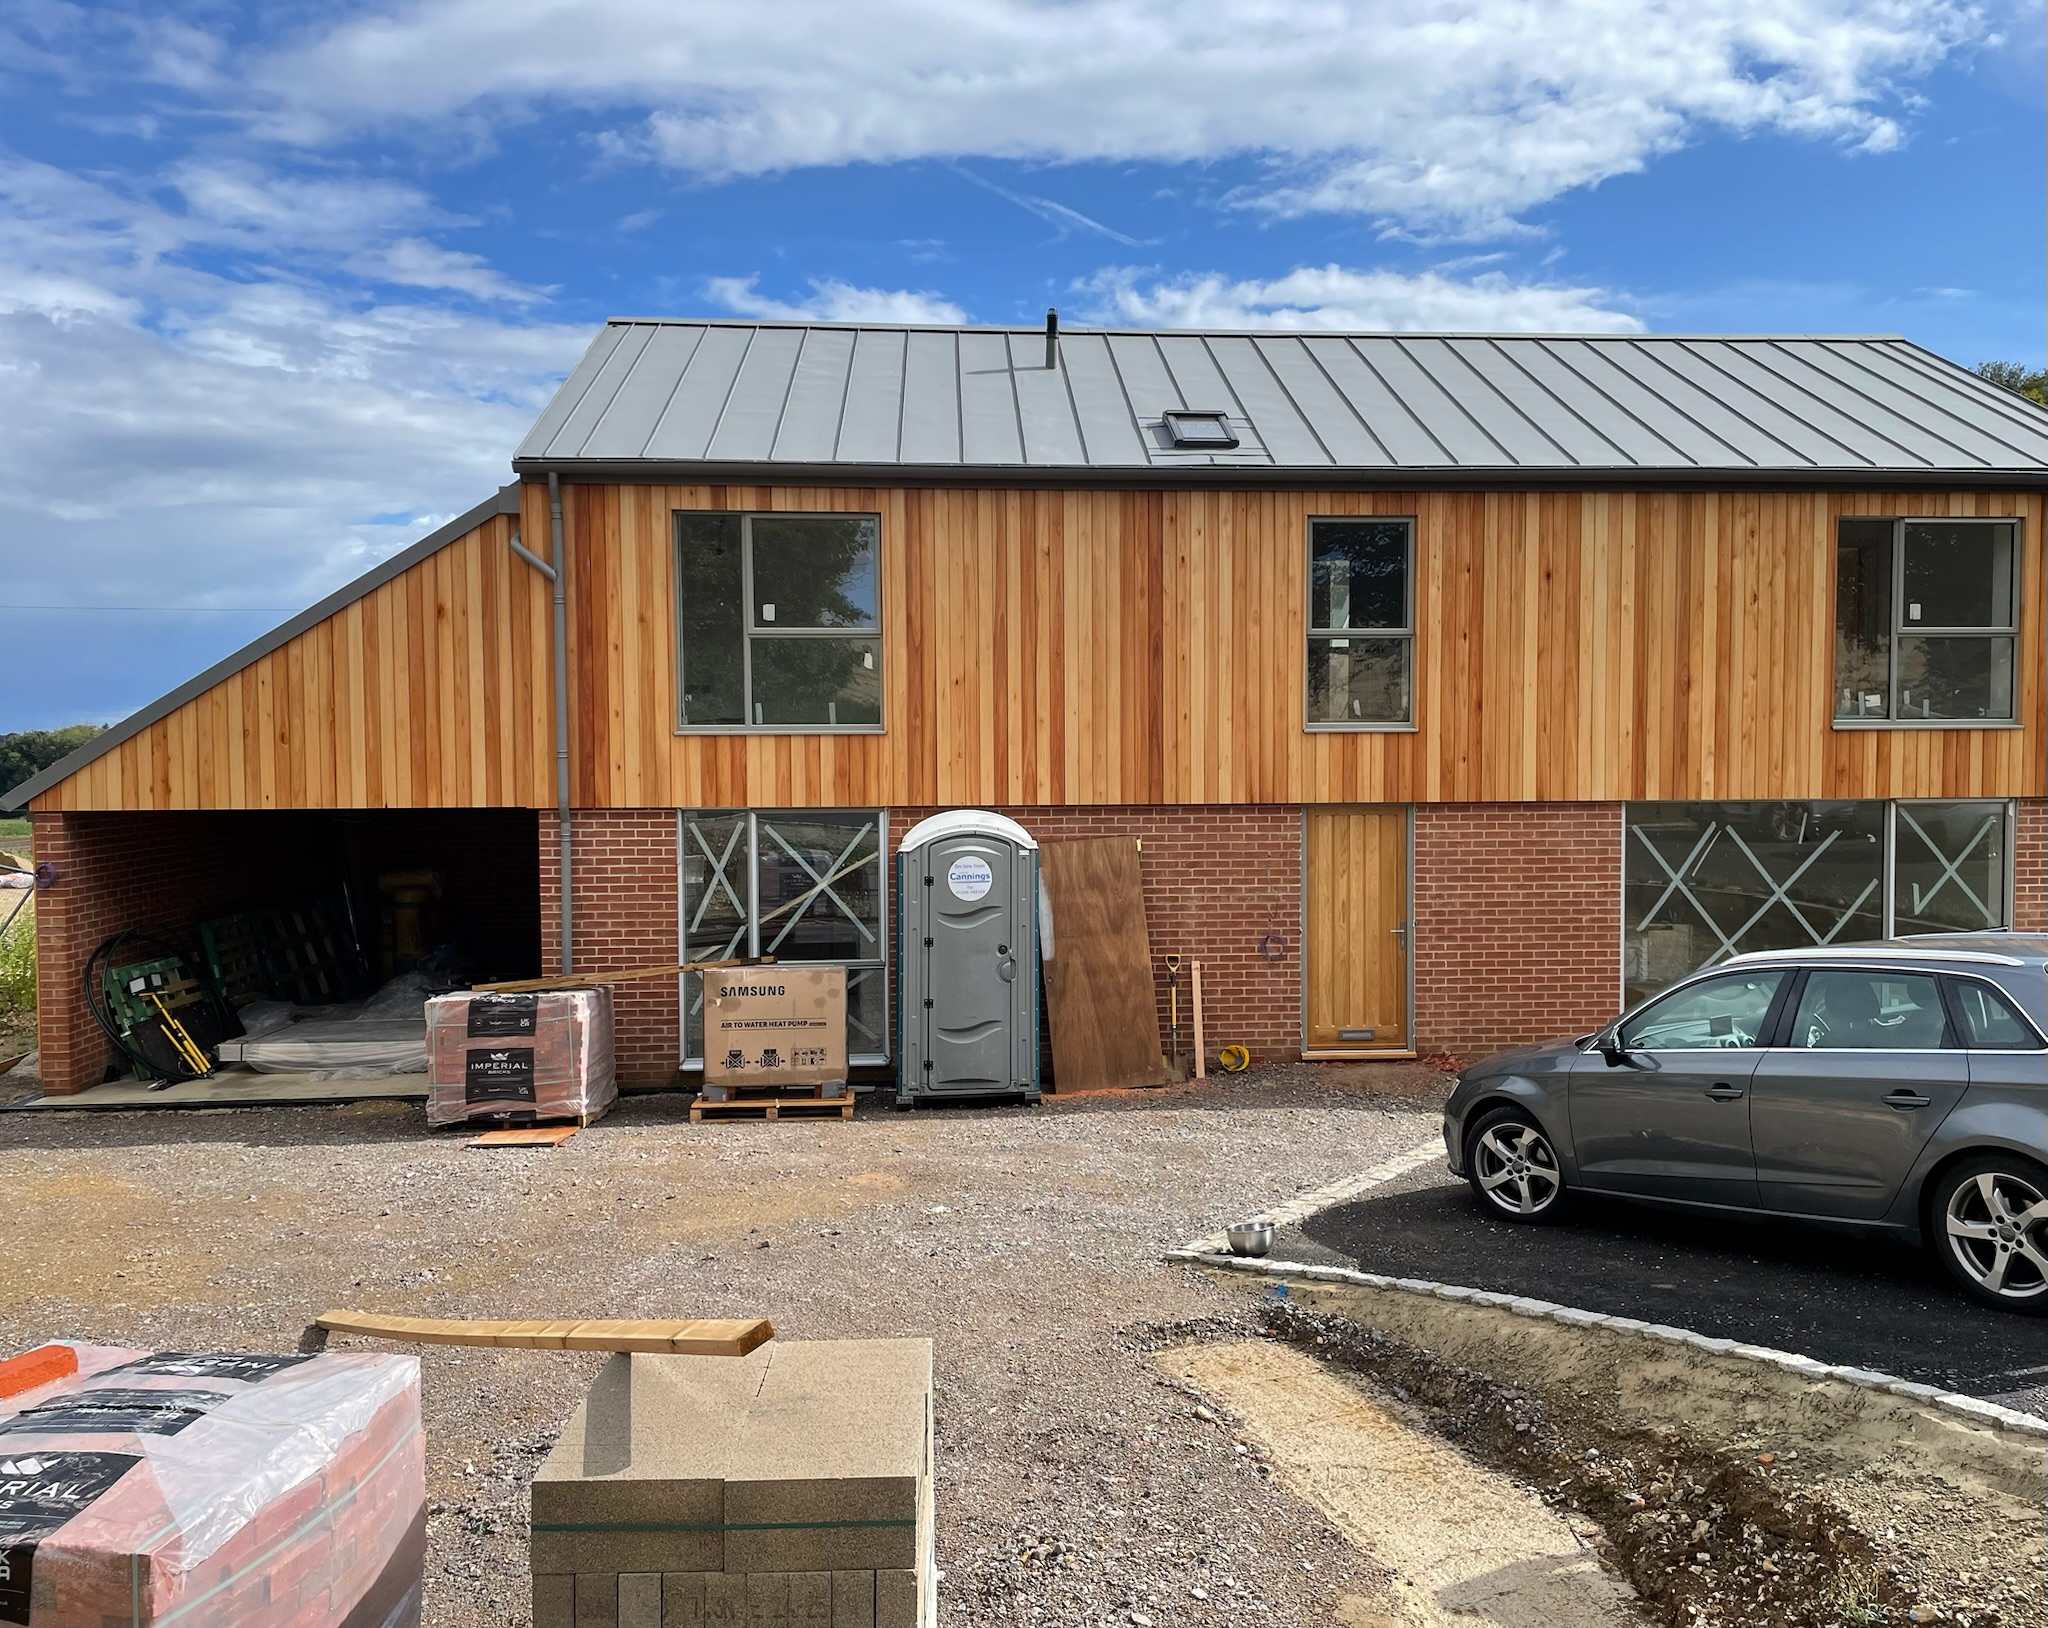
Dear forum members, Our house is complete and we have been resident for three months. I thought to post some pictures and I offer to answer any questions people might have. I don't put ourselves on a pedestal as being any better than other projects, only to say that we have done it. Our primary decisions: We chose a RIBA architect given the importance of the initial concept The layout is somewhat novel, having an H footprint with a single storey 'extension' to reduce the mass of the main house for planning purposes and to help project the rear of the house beyond the shade of the ridge line We chose timber frame (we have built with timber frame, brick and block and ICF in the past) because of speed of construction, and thermal performance We selected MBC from a shortlist of three TF suppliers, and chose MBC's insulated slab We are very pleased to have chosen a large solar array (9KW) and Tesla battery. We have used no grid electricity since commissioning. We have a Valliant ASHP with UFH but haven't had need to heat the house yet We have MVHR which works very well with our air tightness of 0.89 We have no fireplace or chimney We project managed ourselves, and were onsite every day and I did a lot of carpentry / general work alongside the proper trades Project timing: groundwork prep Dec 24, slab Jan 25, frame erection February, windows March, resident 4th July, finished end of August.


 19 points
 -
I appreciate very few will have read, let alone remembered, my original post in this thread (hence I've quoted it for context), but i thought some may be interested in an update, 8 years on. Just before we moved in in October 2017, my wife had a spirometry test on her lung function. It showed, despite having nebulised antibiotics for 18 months, that her lungs had worsened, with capacity having deteriorated to 50% (from 65% three years earlier). She stopped using the nebuliser around three weeks after moving in, and has only used it for a few days in total in the 8 years since. In late December, as part of a pre-assessment for surgery for an unrelated condition, the anaesthetist requested a new spirometry test. Remarkably, it shows that her lungs have not measurably deteriorated since 2017. I can't say for certain that the house can be credited entirely for this result, but it has certainly played a massive part, and this is one bubble that refuses to burst.17 points
-
We've nearly finished our lovely Somerset barn conversion. The parents in law and my 99 year old mother have moved into two separate annexes. It all started 8 years ago and we've been building ever since inspite of lockdown and a nasty bout of cancer.
 15 points
 -
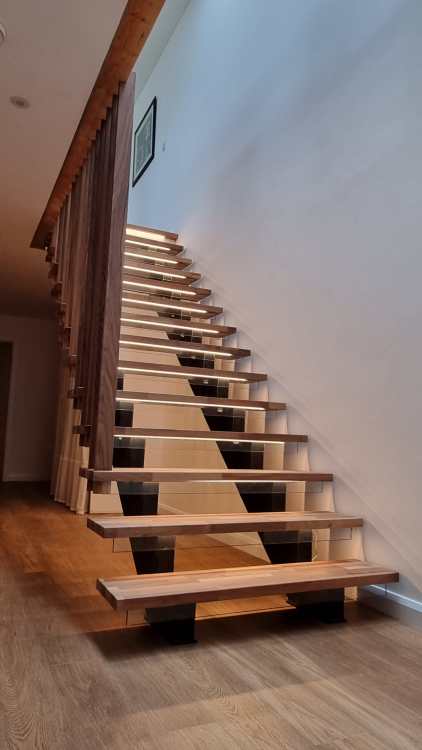
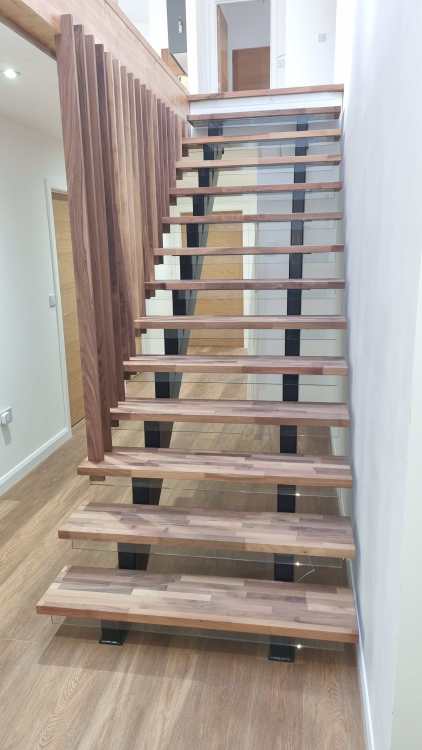
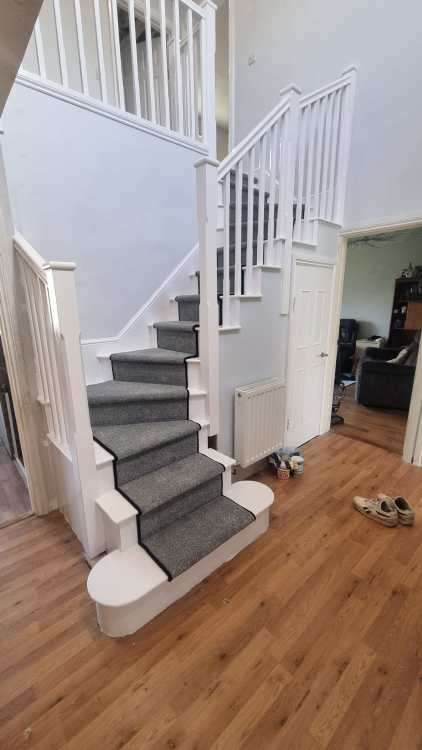
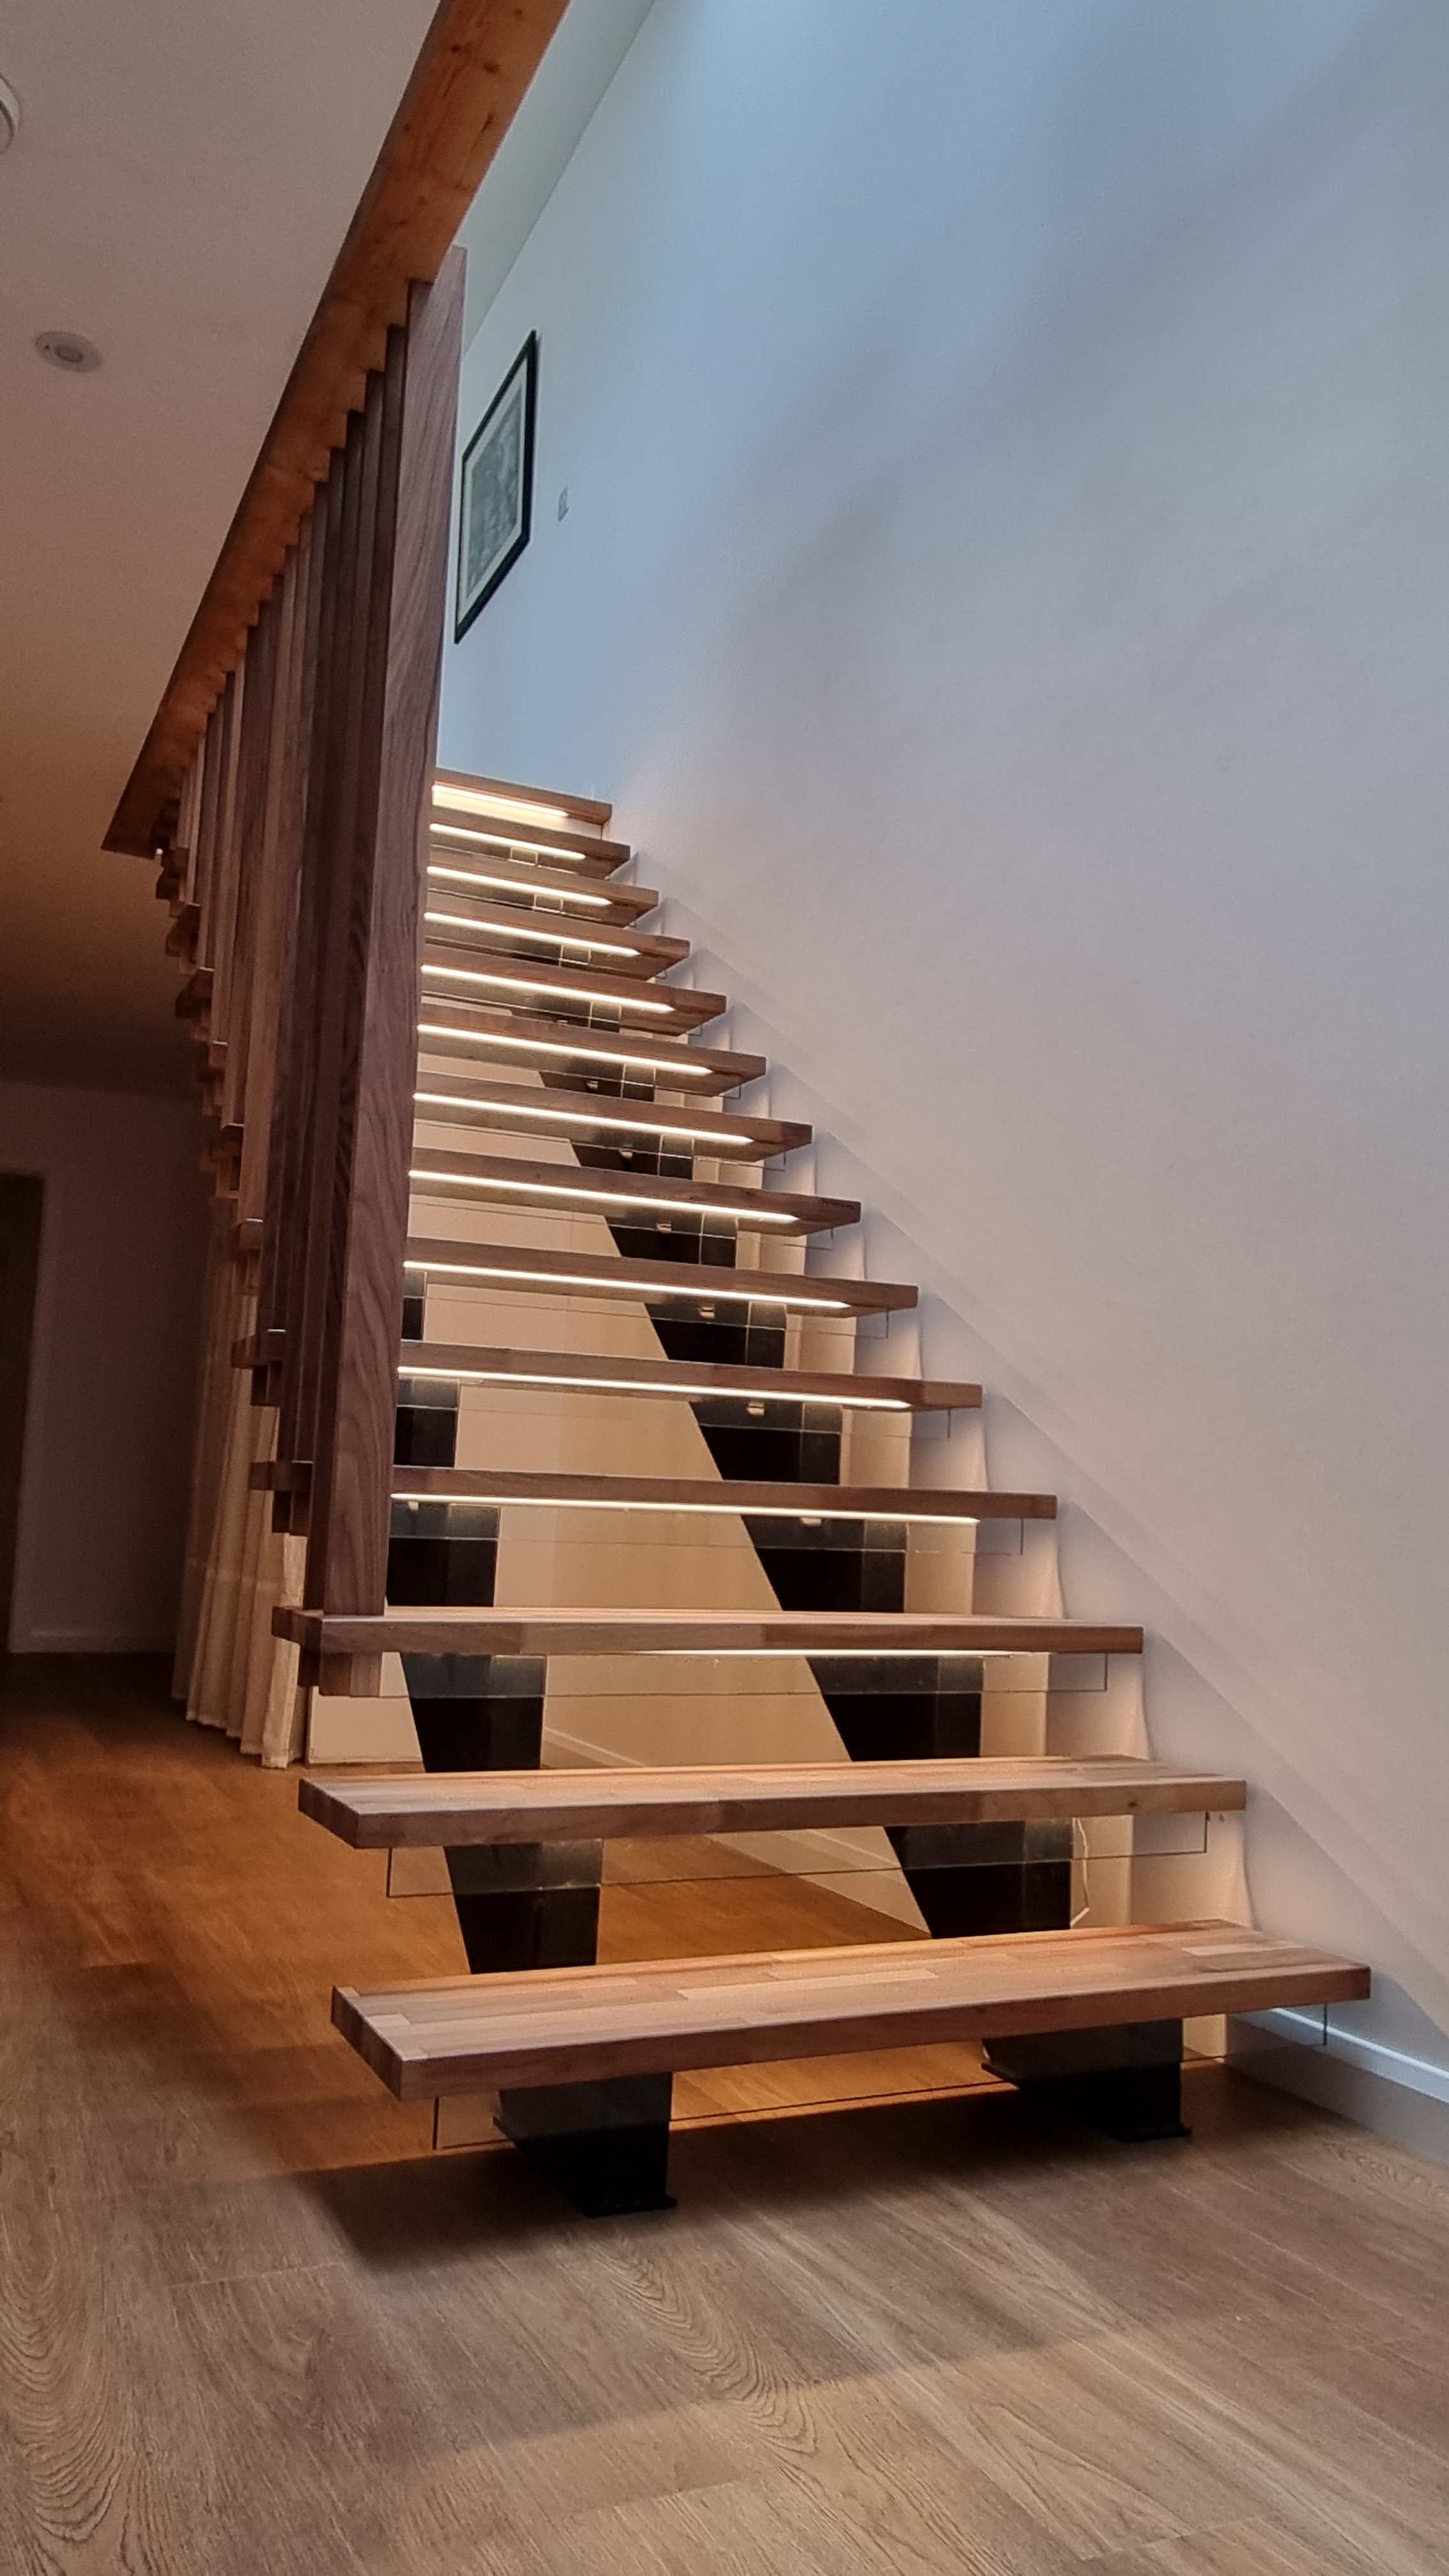
One of the things we paid someone to do for us. Spines are powder coated. Cabling for lights runs inside the spines. Steps made from walnut kitchen worktops. Spindles are solid walnut. Glass is 10mm toughened from Cornwall Glass. Why walnut? It goes with the breakfast bar made from the walnut tree we cut down, also made by same person (Principle Constructions based in Cornwall).
 15 points
 -
I'm actually not sure where the best place is to post this but as it's primarily about heat pump system design, I'll put it here. @marshian and @mads ,and maybe @MikeSharp01? you've expressed your interest so mentioning you here too. I hope the admins don't mind me putting this up here, but maybe if it is found to be useful, could be pinned to help so many of the people who come here struggling with poor heat loss calcs and designs and want to complete their own. I've finally deployed the tool I've been working on for initial public use. It's available free and open source, so repository on GitHub if anyone wants to host locally. It's currently in a bit of a test mode so I can get some feedback and bug reports to refine it and add further important functions. Just bear in mind I've been developing this myself along with everything else in life and it's been quite a major piece of work since last summer. It is now based on the CIBSE 2026 Domestic Heating Design Guide implementation of BS EN 12831:2017 and BS EN12831:2017 so complies with MCS design requirements. I have been using this tool for MCS heat pump projects in house that I'm doing. It's at https://openheatloss.com Important user notes: At the moment when you arrive, you can complete a whole project anonymously without logging in but this persists only for 48 hours or until you close the browser. The save a project, just register using name and email, nothing else. If you want to remain largely anonymous, you can just add the post code prefix to the installation address to set outdoor design temperature and Typical reference temperature. No need to put in loads of personal information. The workflow design is to work you way from left to right across the app tabs. Current limitations: I have not populated the database with standard wall build-ups and U-values. If you're a self-builder or doing major diy hopefully you'll have this info already for your project, otherwise you'll need to look it up manually. There is, however, a comprehensive floor u-value calculator and a simplified one in the room elements input too, so these can be calculated for you. Same thing with radiators - no standard sizes or outputs in a global database yet. I will do a scrape at some point. All outputs entered should be the Delta T 50 catalogue values and if you want system volume calcs, also input the radiator water volume. The UFH sizing calculates volume automatically based on your set pipe diameter, spacing and room area. Text based design - I've tried some of the design tools that are trying to be like cad design software, so you've got do draw your project. Having used cad software, I didn't warm to any of them because they're not proper cad software but in house bespoke design. As I also found out they have limitations so you have to fudge some shapes - roofs in particular. Text based means you can input elements more flexibly according to your needs. Well, I hope so anyway. What you will find different if you've used other tools, although I'm sure they'll either be doing it already or soon, is that the tool provides 2 different heat load figures. is for the heat generator which calculates the whole house fabric and normal ventilation includes a full fabric air infiltration calculation and is usually higher than the generator load To explain this, the new heat loss calculation methods according to BS EN 12931:2017 and specifically those implemented in CIBSE 2026, with wind load under certain conditions, parts of the building and rooms may require higher heat outputs, whilst other parts may need less. This 'total' value comes to a higher result than the generator. In my own test projects that I've run through the new software, I can attest to this working quite well. For example, in one design and installation project of mine, one particular room in the house was designed for 23C but over the winter, whilst never cold, the room never managed more than 21C. I had thought it was a balancing issue, but no. When I ran this project through the new software it predicted that I would need larger radiators in this particular room, base on the new ventilation infiltration calculation, so that is what I will be installing before next winter. Anyway, please have a go and let me know what you think, and ask any questions you have here, or email me at the tool - heatloss@openheatloss.com Does anyone need a user guide to the design workflow and inputs? Let me know..14 points
-
I am currently waiting for Structural Engineer to share a report. But Pasquill gave me quite a comprehensive email but in summary: They have confirmed that the main issue on my site is that the steel valley beams have been set in the wrong position and at the wrong angle, they should not go through the internal corner as built and need offsetting a little this means the pitch is out by one degree. This has also caused the problems with the fascia and soffit lines. Pasquill say the Posi rafters already fitted may still usable if the beams are moved to the correct positions, though if any hidden cuts are worse than visible they may need replacing. If I do decide to replace the 12 rafters sitting on the valley, Pasquill have offered to supply new ones at a very reasonable price for me ( Which I have said yes to ). The next step is to fully dismiss the builder, take ownership of site. I have found a good joiner to come sort the posis, and will just await the SE to give me a plan of action for these steels.13 points
-
So a few months in to our build and I have to agree that self-build is hard work! It's also an amazing experience in which every day brings something new. It's difficult to say whether this is physically the hardest thing we have ever done because I think age plays its part, we are late 60's or so and even though we are both fit people building at this age cant be compared to the house renovations that we have done in our 30's, 40's and 50's. What I can say is that we wouldn't swap it for anything, we have promised ourselves that we would self-build for years and to be actually doing so is an amazing experience. Onwards & Upwards!12 points
-
Quite a sobering thread this tbf. I was not aware that this grinds folk down quite as much as it seems to, the old "self-build" malarkey....... I use BH to shed my brain of the excess energy floating around between my ears, quite bad ADHD etc, and an interest shared here and on eBuild, our home before Buildhub, where it's just nice to see and hear people ask questions and then have us lot intervene so they then don't have things go "tits-up". I'ts nice to have a hand in the prevention of such events. For any folk who are a bit befuddled or overwhelmed and want to get off the starting blocks with their projects, if this helps, I'm happy to do so some 30 mins Teams / phone chats FOC. I can offer advice for groundworks / substructures / superstructures, insulation and airtightness, right through to fenestration, roof and solar etc, or ask me which ASHP or MVHR is the best one to go for etc. 60 min chats not a prob, with maybe members then offering up a small donation to the Buildhub coffers for our annual running costs or whatever. Buildhub is a free-to-join forum that is completely volunteer run and operated, and is not for profit btw. Without donations, it would not exist. I cover pretty much A-Z, so quite comprehensive, and if anyone is interested just ping me a PM and I'll slot you in when I'm between doing other stuff I imagine it'll be like a really coarse, Welsh AI lol. The caveat is, it'll be offered to contributing members only, so no piss-takers need apply IIRC @ETC offers up a bit of selfless support here and there, so it's not uncommon for good folk on here to give up their time to give struggling members an occasional leg-up. I'm sure a few other regulars help, such as @craig, other maybe going unsung so sorry if I missed anyone also deserving of a mention here. "Long live the Hub".11 points
-
I was drawn to this thread as I was badly struggling for motivation in the couple of months before Christmas, especially trying to undertake tasks single handedly that really required someone with 8 arms, and a lot more height and strength than I have. I eventually got to the point where I was barely achieving anything, and getting more and more self-critical and fed up. Constantly tired, frustrated, and aching. I decided to speak to my GP and started taking anti-depressant medication, which has made a tremendous difference already. In addition, I decided to take up the offers of help that people have given me, and aimed to structure activities around that help in a way that makes it feel the most effective, eg. getting some large boards up on the wall with a few screws so that when I'm back to working alone I can do the simple task of filling in the remaining screws. It isn't even slightly surprising that the pressures of undertaking a self building project can have a negative impact on mental wellbeing. Even the most optimistic of us can get worn down by the feeling of it being relentless and interminable. Asking for help can be transformative.11 points
-
Rick - would strongly advise against this position and sending a letter like this. At this stage your builder is possibly preparing themselves for legal proceedings. In this instance you are absolutely advised to commit as little as possible to written (or even verbal form). I would advise that you don’t continue with this contractor under any circumstances - and get yourself in a headspace where you’ve accepted you need to find someone else. reading your contract you can’t unilaterally terminate the contract as there is the provision for remediation. My first course would be to request a without prejudice conversation with your builder. Within this conversation (have a third party present such as your SE, architect or a friend) set out that from your point of view the trust and relationship has degraded to a point of no return and you do not under any circumstances want the builder to continue. Explain that if that isn’t agreeable you will exercise clause 37 and at the builders Cost they will be required to replace all posi rafters and fit them to the satisfaction of your SE. State that Pasquill have advised they are likely not recoverable. This is an expensive exercise for the builder. Others may suggest you try and get them to cover the cost of doing the job right. Personally I wouldn’t trust them anywhere near my site. I would seek a negotiated exit and write off getting any money back. Alternatively, if the builder doesn’t agree I would advise you exercise clause 37 immediately. I doubt that they will remediate within 14 days but if you don’t follow the provisions of your contract your builder can pursue you. I would advise a letter that is entirely factual, unemotional and succinct if you need to serve a breach notice. I can help draft one if you need. Accept your relationship with your builder is over.11 points
-
This time of the year gets to me - sometimes. And in the context of self-building, its dark for longer, wet for longer, cold for longer, windy for longer than I'd like. Optimists say that some of that can be sorted by proper clothing, and decent site lighting. But wetness can make a site misery quicker than anything, cold can stop concrete and mortar dead. Wind is a bastard on a scaffold. Self building's a character test. The push to complete never lets up despite all of the above. I suspect that a few of us are having to 'dig-deeper-than-normal' these days. Got any ways of picking yourself up when things are more than merely gloomy?9 points
-
Hi, last September we found a plot we liked in South Cambridgeshire and started to look into doing our own self build. This is something we had considered doing when we retire, but plots that align with our requirements are not super abundant, so we decided to do it now instead. We are looking to build a Passivhaus two storey dwelling and have it certified. Energy efficiency is important to us and so is having a home at the end that is really comfortable to live in. A few months later and we have exchanged contracts and are a couple of months into a planning application, awaiting the final outcome any week now. We started the journey with an architect, but two months into the relationship we realized our timeline would be heavily affected by the fact that we were not totally aligned and not fully listened to (despite very lengthy email threads back and forth) and decided to learn how to do the architecting ourselves, and hire any experts we needed to help with things along the way. But having a third party handling it all for us was... too low touch for our liking. We'll be managing the build ourselves, as we've decided against having a main contractor. Maybe we'll need a project manager at some point. We've been reading the forum and learning from you all, hopefully we contribute something back soon!8 points
-
No apologies needed. As self builders sometimes the pressure of managing everything just gets too much and when things go wrong it's usually our closest that bear the brunt. I recall a renovation where we had sunk everything we had into it and needed it finished desperately in order to sell it before we ran out of money just for day to day living. Our 10 year old had got used to coming to site with us most weekends as we scrabbled to get done. I gave her the job of painting a short length of cast iron downpipe with some black gloss. She did ok with that but didn't put the lid back on the tin. I picked up the dust sheet without noticing and poured black gloss all over the indian sandstone patio that had been freshly laid only a couple of weeks before. I do admit to ranting excessively, not directly at her but just how unfair life, god, the world and everything was. It was the straw that broke the camels back so to speak. Later that day, having dropped her back home and returned to site, her elder brother rang to say he couldn't find her in the house. A frantic search all over the village ensued to no avail. As we widened the search with the help of neighbours and decided to alert the police, a call came in from a nice lady in Cambridge who had found her wandering the streets. It seems she had packed a bag (including an OS map for reference!), boarded a train (unmanned village station) and traveled a few stops into Cambridge with the intention of going to her aunt's house. She had got upset and thought all the problems were her fault. Boy did that bring home the important things in life and certainly gave me a new perspective. We never let ourselves get into that situation again and despite many a frustration over the years you just have to press on through it - worse things happen at sea!8 points
-
BuildHub is a non-profit, self-funding forum, run by volunteers. We've grown steadily over the years to become the UK's largest (and certainly best!) self-building and renovation forum. While the unpaid contributions of our volunteer managers, administrators and moderators help reduce our running costs, we still have unavoidable direct expenses, such as software and hosting. Unusually for a forum of our size - we recently registered our 23,000th member - BuildHub does not accept sponsorship or run ads as a way of covering our outgoings. Over the past 2 years the money raised from the tool loan and the Octopus referral scheme - both run by @jack have kept us in funds and we owe him a vote of thanks for that work. Costs have risen and we therefore need to turn to you, BuildHub's wonderful members, to ask for donations. If you are able to make a financial contribution at this time, it would be very much appreciated. There is no minimum or suggested donation amount, and even a small donation will have a positive impact. Donations via PayPal can be made to the following email address. Please remember to select 'gift' / Friends & Family or Paypal will charge fees. Please note our new PayPal account: @buildhubforum You can also request the forums bank details, please PM @AliGfor those details and let him know of your donation. We'll post again once we've received sufficient donations cover expenses due in the foreseeable future. BuildHub's Treasurer, @AliG , manages our funding account. Could anyone wishing to make a donation please send him a PM with your email, username, and the amount that you have pledged so he can confirm receipt of the funds and log your donation accordingly? All donations will be treated as confidential. If you can offer any skills that may assist with the support of the forum, please contact either Herb (@HerbJ) or Mike (@MikeSharp01) for details about how you can help run the forum or if you have ideas that you feel might make Buildhub even better. Thank you, as always, for your ongoing support.8 points
-
In case anyone is interested, we had some good news today. To recap: the plot is a disused commercial building, in a village centre, in a Conservation Area, and in a National Park. It's directly overlooked by the neighbours who are on higher ground. There were two reasons for refusal - the impact on the Conservation Area and the impact on the neighbours. We'd offered a detailed study of the local area and showed how our design responded to it. The Inspector agreed with us. But the Inspector agreed with the neighbours that there would be a negative impact on them. He weighed it on the opportunity to redevelop a derelict site, the need for housing and the environmental credentials (EPC B in this case). So that's the end of that chapter. Start = 11 July, site visit = 9 October, decision = 5 February. Thanks for the moral and technical support from this group, and I'm happy to share more details if anyone needs them. Now the actual work begins!8 points
-
That's a good call on both counts. My recommendation is also to have a serious look at the tools out there available - as well as rigs you can knock up with spare timber - that can make your life easier to move and fit materials. One of the things I've noticed is that the trades and builders generally are really bad at thinking things through like this and will scoff at stuff that makes life easier - as a consequence we unconsciously follow those practices. Building on your own takes a very different mentality than a testosterone filled building site with lots of labour available or those who are willing to harm their bodies (I once got laughed at by a builder for putting on some chain saw trousers when I was about to chop down 3 trees). One very small example is atool I bought several years ago was this: https://grabo.com/ It turns lifting plywood, plasterboard, windows, paving slabs, you name it, into a one person job and means you can hold a sheet up to a wall single handedly with putting in a screw with the other. When I first started using it I got giggles from staff in the builders merchants about how I'd just got the vibrator out. Then that turned into how they wished the company would buy a few in for them. I had no idea how much I'd end up using it.8 points
-
Sorry to hear it OP, these houses can be such a massive emotional and physical heavylift.... But the shitshow will be temporary and the satisfaction and enjoyment is a lifetime. I promise you it is all worth it in the end, but you do need to smile and endure.

 7 points
 -
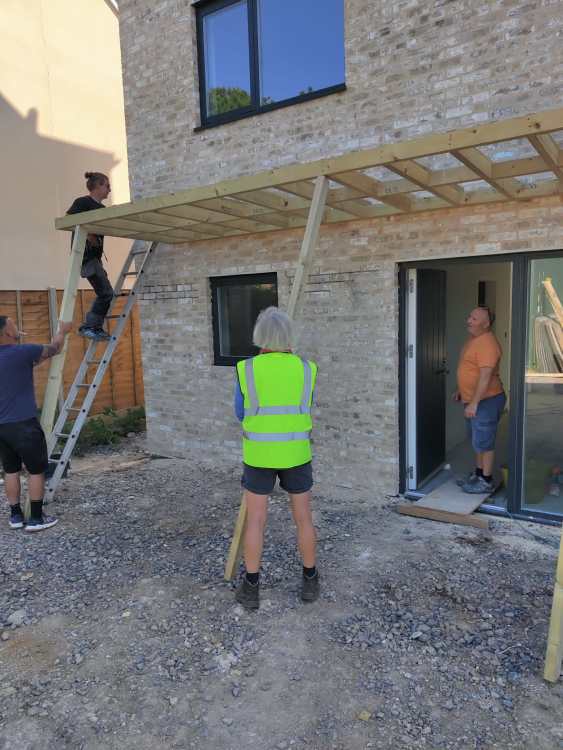
UPDATE……. so after emailing and posting the letters by hand, the builders truck arrived at the neighbours yesterday. This morning I was doing some work outside and the neighbour called by and said the builders aren’t starting Tuesday now. They (neighbours) put a halt to it to clear up what’s going on. Said builder said he would deal with communications, they didn’t know what was involved with access or PWA. Didn’t want any bother so it’s paused until further notice. It was the first amicable conversation about it. So the builder is available for work now if anyone is interested 😁 In the meantime I’ve painted the fence, walls have a had a coat of brilliant white, jet washed and pointed slabs and oiled furniture. looks lovely for any future photos 👍🏻 Thank you7 points
-
My faulty Brink Flair unit has now been returned, and I bought and installed a DucoBox Energy Comfort 325. All of the problems I attributed to the Flair have now gone away. This is as good a like-for-like test as you're going to get, everything is the same - same house, same ducting, same vents, only the main unit has changed. Just for completeness, I want to mention two additional (objective, measurable) tests I did on the Brink Flair in the last days we had it, using a CO2 and humidity monitor. Why didn't I think of this earlier!! I placed the monitor inside one of the supply vents, luckily we have two through-wall vents which are perfect for this (https://www.ventilationland.co.uk/en_GB/p/uniflexplus-wall-manifold-rear-connection-1x-o90-mm/9744/) so the whole monitor can sit in the incoming airflow. We then left it for a few minutes so the values could settle down and we could get a general background reading: the RH was about 55% and the CO2 was about 450ppm. First test was a humidity test: I boiled a kettle in the kitchen and let the steam be sucked into the extract valve. The RH jumped to 70%, then went back down again. I also showered, and again the RH shot up to 70% (see attached graph). Second test was a CO2 test: I disconnected the flexible noise dampener which is connected to the Flair's extract port, and breathed into it several times. The CO2 reading at the supply vent briefly increased, from about 450 to 485, then went down again. I tried this again with my partner, and the CO2 reading went up to about 540 PPM. (This one is difficult to show on the graph though, as the unit only logs every five minutes, so the brief peak isn't logged. It's difficult to keep breathing into the extract!) This can only be because there was a leak inside the unit. This does echo the results of my smell test, but is more objective and can't be written off as me having some sort of super-nose! I consider that to be proof that the Flair was faulty, despite Brink's inistence that it wasn't. The new Duco works as expected. I've done the same tests, and showering makes no difference at all to the moisture levels of the incoming air. It's been in for over a week now, and the RH in the house hovers around 44 to 54%. Even while boiling a big pan of potatoes there's no moisture on the kitchen window, whereas with the Flair it would be dripping wet. With the Brink Flair the humidity in the house was always high. The 55% mentioned above was only acheived because we had left the above-window vents open, and aired the house out every day by opening the windows for several minutes. Until we started doing that it was always above 60% and would jump to over 70% when cooking/showering. I must say I'm really disappointed with Brink. They showed little interest in the problem, I had to nag them constantly, and were almost totally unresponsive, and it seems they closed my 'case' several times. If I hadn't kept the pressure up they would never have responded. Which is a shame, as I really liked their products otherwise.
 7 points
 -
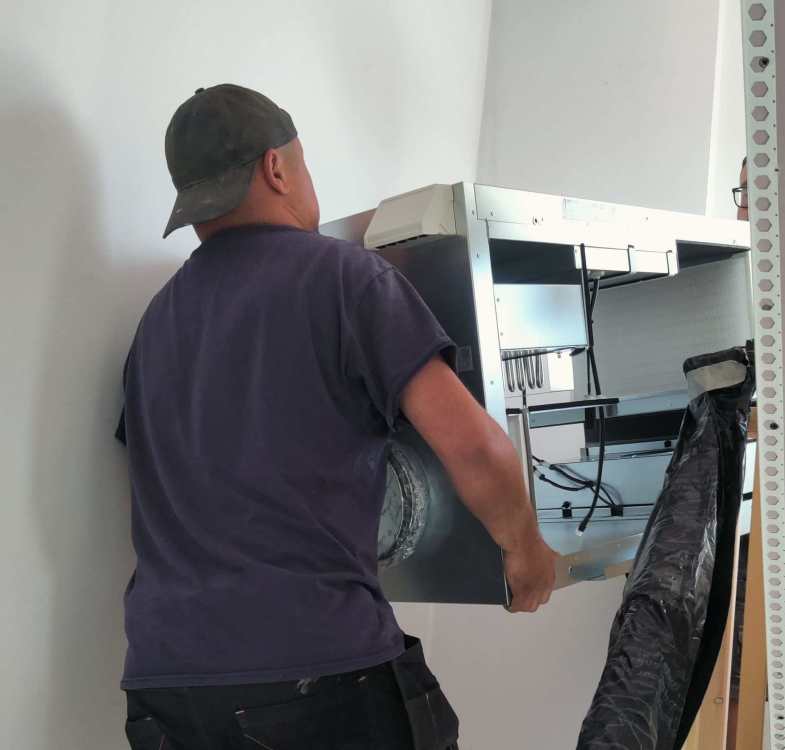
Hi chaps, UPDATE! been a while since I posted. Hope y'all doing well. Good news & an update on this heatpump! I finally won the battle with Vaillant, & they've come up trumps, by replacing my problematic Split system with a Monobloc. Installed 10 days ago. No mechanical noise in the house anymore! hydraulic unit gone- good riddance! My goodness, what a long battle tho. I got the final agreement & date set, after approaching a different female at Group Service dept, picked up my sword for one last effort, & with careful navigation (tricky & complex & 5 years of stress tbh) she empathized.. & got the ball rolling for me. Which had been stalled for over a year & my energy spent, & I was defeated & demoralised tbh. And with it I had a fantastic installer too. Extremely competent & friendly. Fab work done, you can just see the difference. Vaillant's west UK choice, so had tiptop credentials. Thanks to all who offered help & advice on this. Zoot7 points
-
Hello In the early stages of converting a former railway building into a house in the Yorkshire Dales. We will also have a SIP extension. Trying to do as much as I can myself, but I'll pay some people to do some parts. Would love to be in for Christmas 2027, but no promises!7 points
-
I think what you've done is that brave, put your head above the parapet, admission of human vulnerability in an arena that is still steeped in 'manly toughness' mythology. And what you've done is highlight the experience that probably most, if not all self-builders go through during their build. I come from a psychology background - I began in the engineering field and then gravitated to psychology, so I originally trained to BACP levels in counselling and eventually moved into a field called coaching psychology where I worked with a combination of high level athletes, business leaders and business founders. Now, I can say that every single one of my clients has experienced major ups and downs and a lot of their time is spent grafting in uncomfortable places. But context is everything. In both business and sport there is at least a good proportion of acceptance around psychology and mental health. The most successful ones embrace this as of primary importance for their day to day function and successes, but even in these contects, there is still a long way to go. My experience so far of the construction industry is that it hasn't even begun to accept this. When I go and see construction sites, I don't see pleasant, human environments and people just don't talk about or readily and openly acknowledge their vulnerability. Sometimes I see quite frankly highly unpleasant working environments, with lots of miserable staff - which I see as one of the reasons why we get such shit building and trade quality - it's a UK construction industry cultural context that just doesn't seem anywhere close to shifting. Last summer I spent a couple of weeks in a construction academy training centre and it was one of the most miserable places I've been to in a long time and the trainers wonder why they get such poor engagement, performance, and results from students. This cultural context to me goes a long way to explaining why the construction industry has one of the highest rates of suicide. Here's a quote from the ONS about this: " These are pretty alarming figures. There are obvious exceptions to this. I know a contractor fairly near to me who runs a small company where he treats and pays his staff well. As soon as you go on site you can tell this from the nice, smiley and friendly atmosphere. In another example, a previous client of mine who engaged me when he started up, we spent 18 months to 2 years exploring how he wanted to lead the company and what kind of culture he was looking to foster as he wanted to be very different from his experience in construction with very large construction companies. Most of his contracts are in Europe but his company has now surpassed £1 billion in annual revenue. The context of a self-builder changes things and can make them more complex, especially if you're very hands on. As a self-builder you are completely invested and I know myself that this can make you feel trapped - you can't just walk away like you can from a job because not only have you ploughed loads of money into it, it's your blood, sweat and tears too. It's personal. You're also in the construction industry, but an outsider without necessarily having all the domain knowledge to navigate your way through a different working environment. So it's realy no surprise that self-builders feel down and it's great that this is being discussed so openly here with so much support being offered. I too can offer help and to talk, if someone wants to do so. I'm based just out side of Bath Oh, and to mention a little celebration I had for myself yesterday. My company is now officially MCS certified for design and installation of air source heat pumps - but please don't crucify me for that 😉7 points
-
Thanks all for the supportive replies. This forum is one of the best sources of support a self-builder could have. I want to give special thanks to @BotusBuild and @Fallingditch for their generosity with both practical and moral support, and to @Gus Potter, @Nickfromwales, @ProDave, @SteamyTea, @ToughButterCup and others who have responded to threads and direct messages with advice and wisdom that I could not have managed without. Knowing that you guys are here, and willing to show such kindness and generosity with your time and knowledge, is invaluable.7 points
-
Prior to starting our build and when deciding on what and how we would heat the house we were told more than once that separate heating upstairs was not required. Ours is not at Passiv level, it does have a .11 roof, .12 floor and .15 walls. We have UFH downstairs and a total of 6 radiators upstairs. All on a single unmixed heating zone. Radiators were sized for the expected heat loss and flow temperatures. The bedrooms are at about 18.5 - 19 degrees which feels a little chilly to me. Heat does not appear to reach upstairs very effectively. We have a centrally located 180 degree return staircase. There is a noticeable gradient in temperature as you get to the landing, which surprised me. Now, i fully accept that our single zone design with a flow temperature that has not so far ever got above 38 degrees even at minus 5 in December is not best suited to radiators upstairs. But that is not the point. If we had gone without radiators at all upstairs we would be in trouble . For those contemplating going without any heating upstairs i hope this little tale is helpful. keith7 points
-
This is the bit that's the toughest for me especially when trying to balance everything else that's important in life. With the build, it's not like going home from the office and switching off. One of the things here is that my boys have grown through their teenage years on a building site, but I've spent a lot of time with them away from the build, which at the moment seems to have been the best thing for them. They're living in a warm, dry house, and have their own bedrooms, a bathroom and a functional kitchen, it's just so many other areas of the house still need a lot of work. Deepest winter does seem to be the worst. I approached it with the mentality of - just do one thing, however small it might be. Rather than looking around and seeing how much needs to be done, it's about seeing what little things can I do here or there, even when the weather or light is against me. It's not the solution, but it can very much help. Sometimes I'm surprised by how much gets done as a result and how even just getting some plasterboard put up, can feel so satisfying. But then, sometimes, it is just a pure grind and I see that as just a temporary phase that'll change in a few short days or weeks.7 points
-
Ufh pipes will cost a grand to buy, if you don’t put them in you need a serious word with yourself. I don’t understand the figures like some on here, but I know I’m sitting in the most comfortable house I’ve been in for a long time, just a gentle warmth in the tiles emits to every point of the house. it’s just an absolute pleasure.7 points
-
Been a while and I was just randomly passing through when I noticed a few recent posts on this thread. Current update is we gained our Completion Cert in July (almost exactly 10 years to the day since buying the land), and the interior is nearing completion with just the kitchen to finish. Fully offgrid, we haven't paid a utility bill in 9 years. Living our dream and still pinching myself, tbh.
.jpg.6d82280948da1ced357e791676969673.jpg)
.jpg.f5ad4d134bf18cc792740d393cdb1432.jpg) 7 points
7 points -
7 points
-
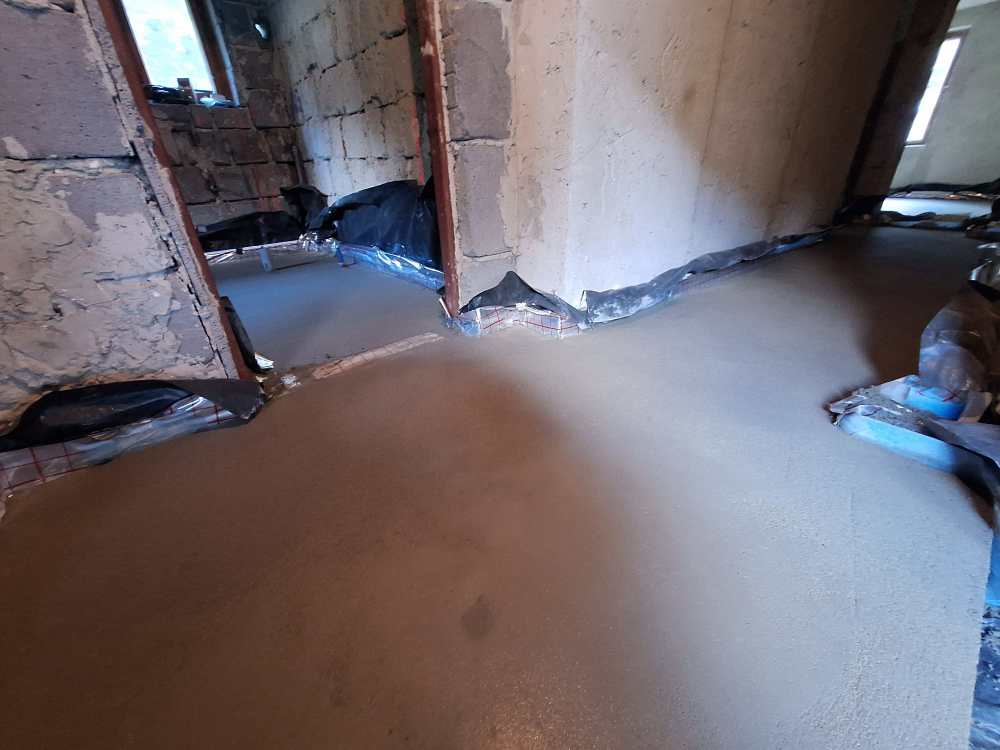
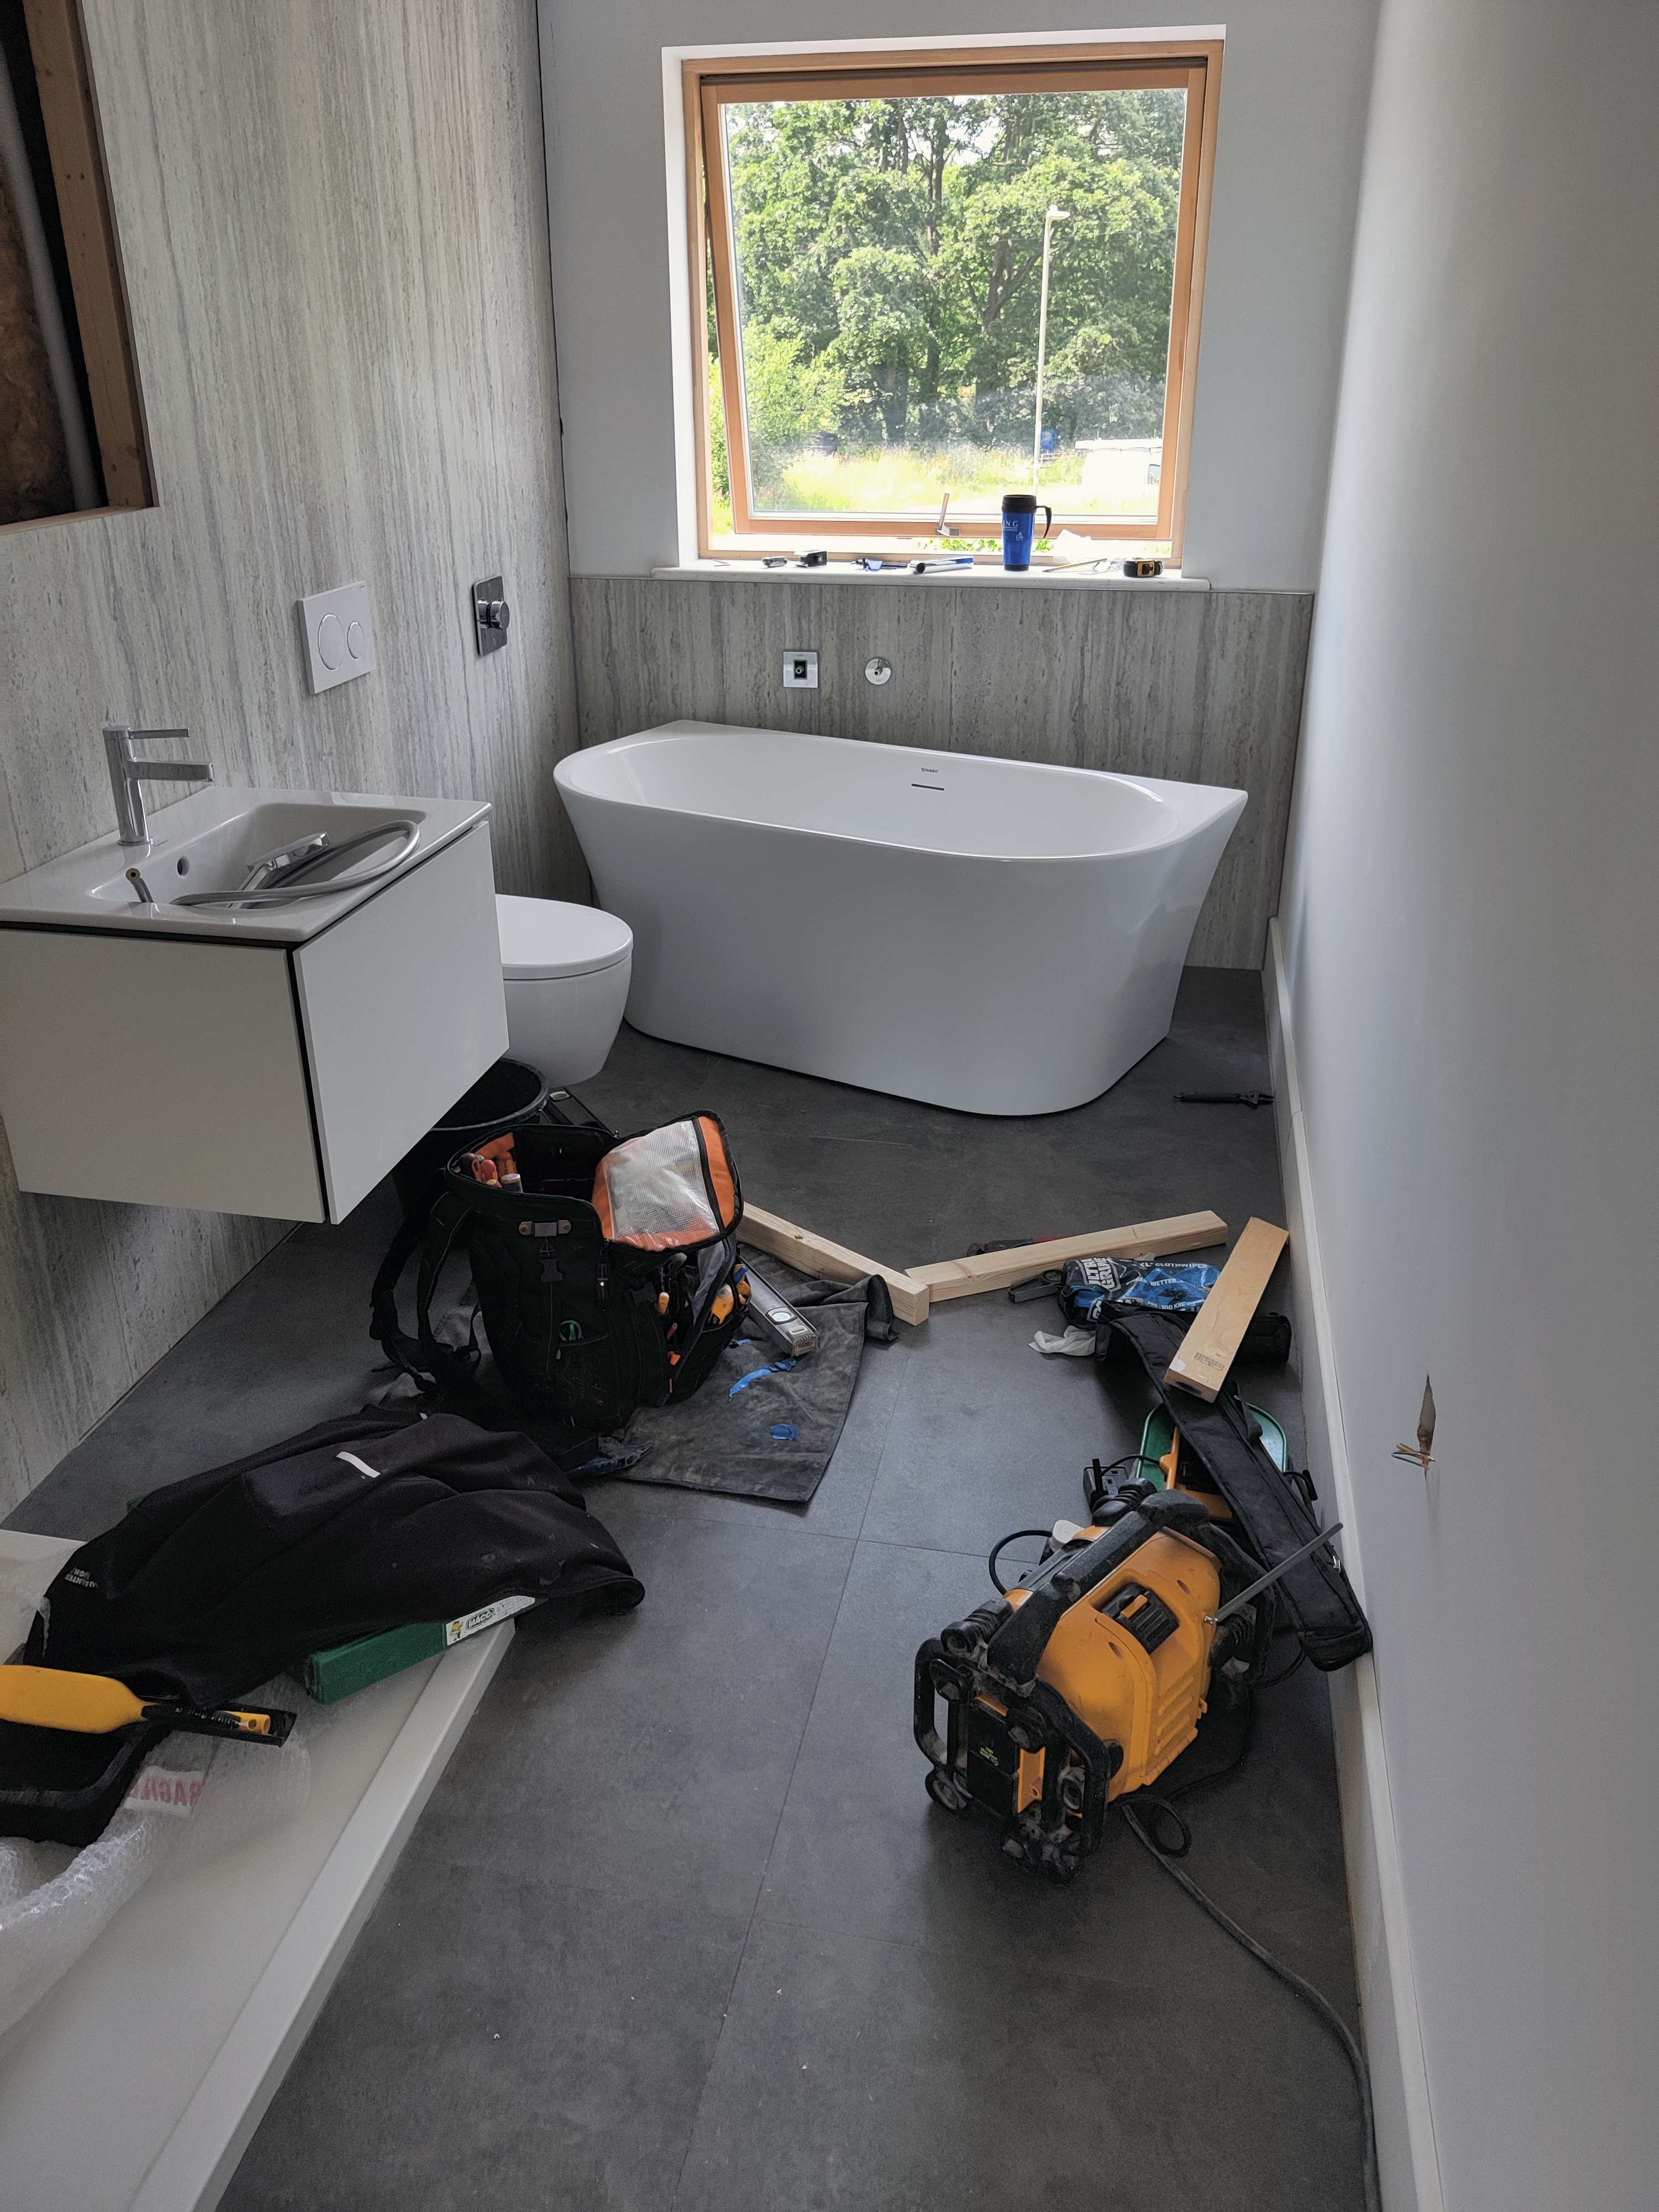
It's done!! Just wanted to say a big thank you to everyone with the advice on this one. After the advice I changed plans and in the end got a sand cement screed laid by a professional company who did an amazing job and finish. Time to move on to the next stage (I'm sure I will gleaming you wisdom again) Thanks again, few pictures before
 7 points
 -
After the advice of pretty much everyone, for once I am going to admit defeat and have some professionals in for this job. We have found a couple of options we are happy with and will readjust the budget a little to accommodate but its not something we can afford to go wrong. I will take some pictures and update you in a couple of weeks when it's done but thank you so for your advice and help and I now know what to watch for when it's poured and what to prepare7 points
-
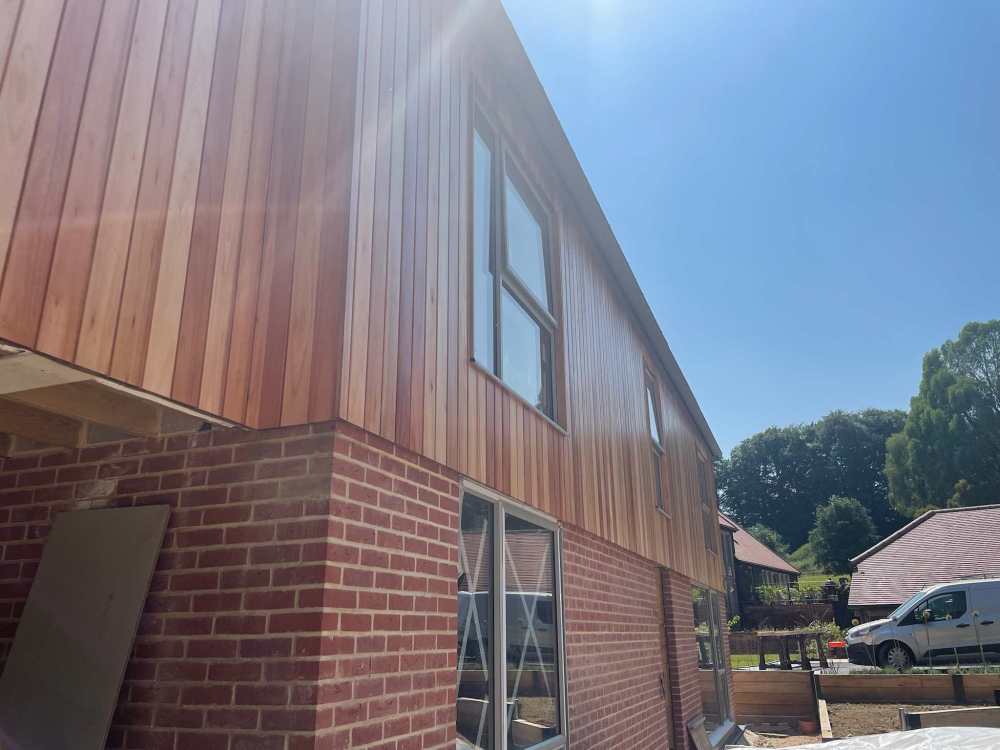
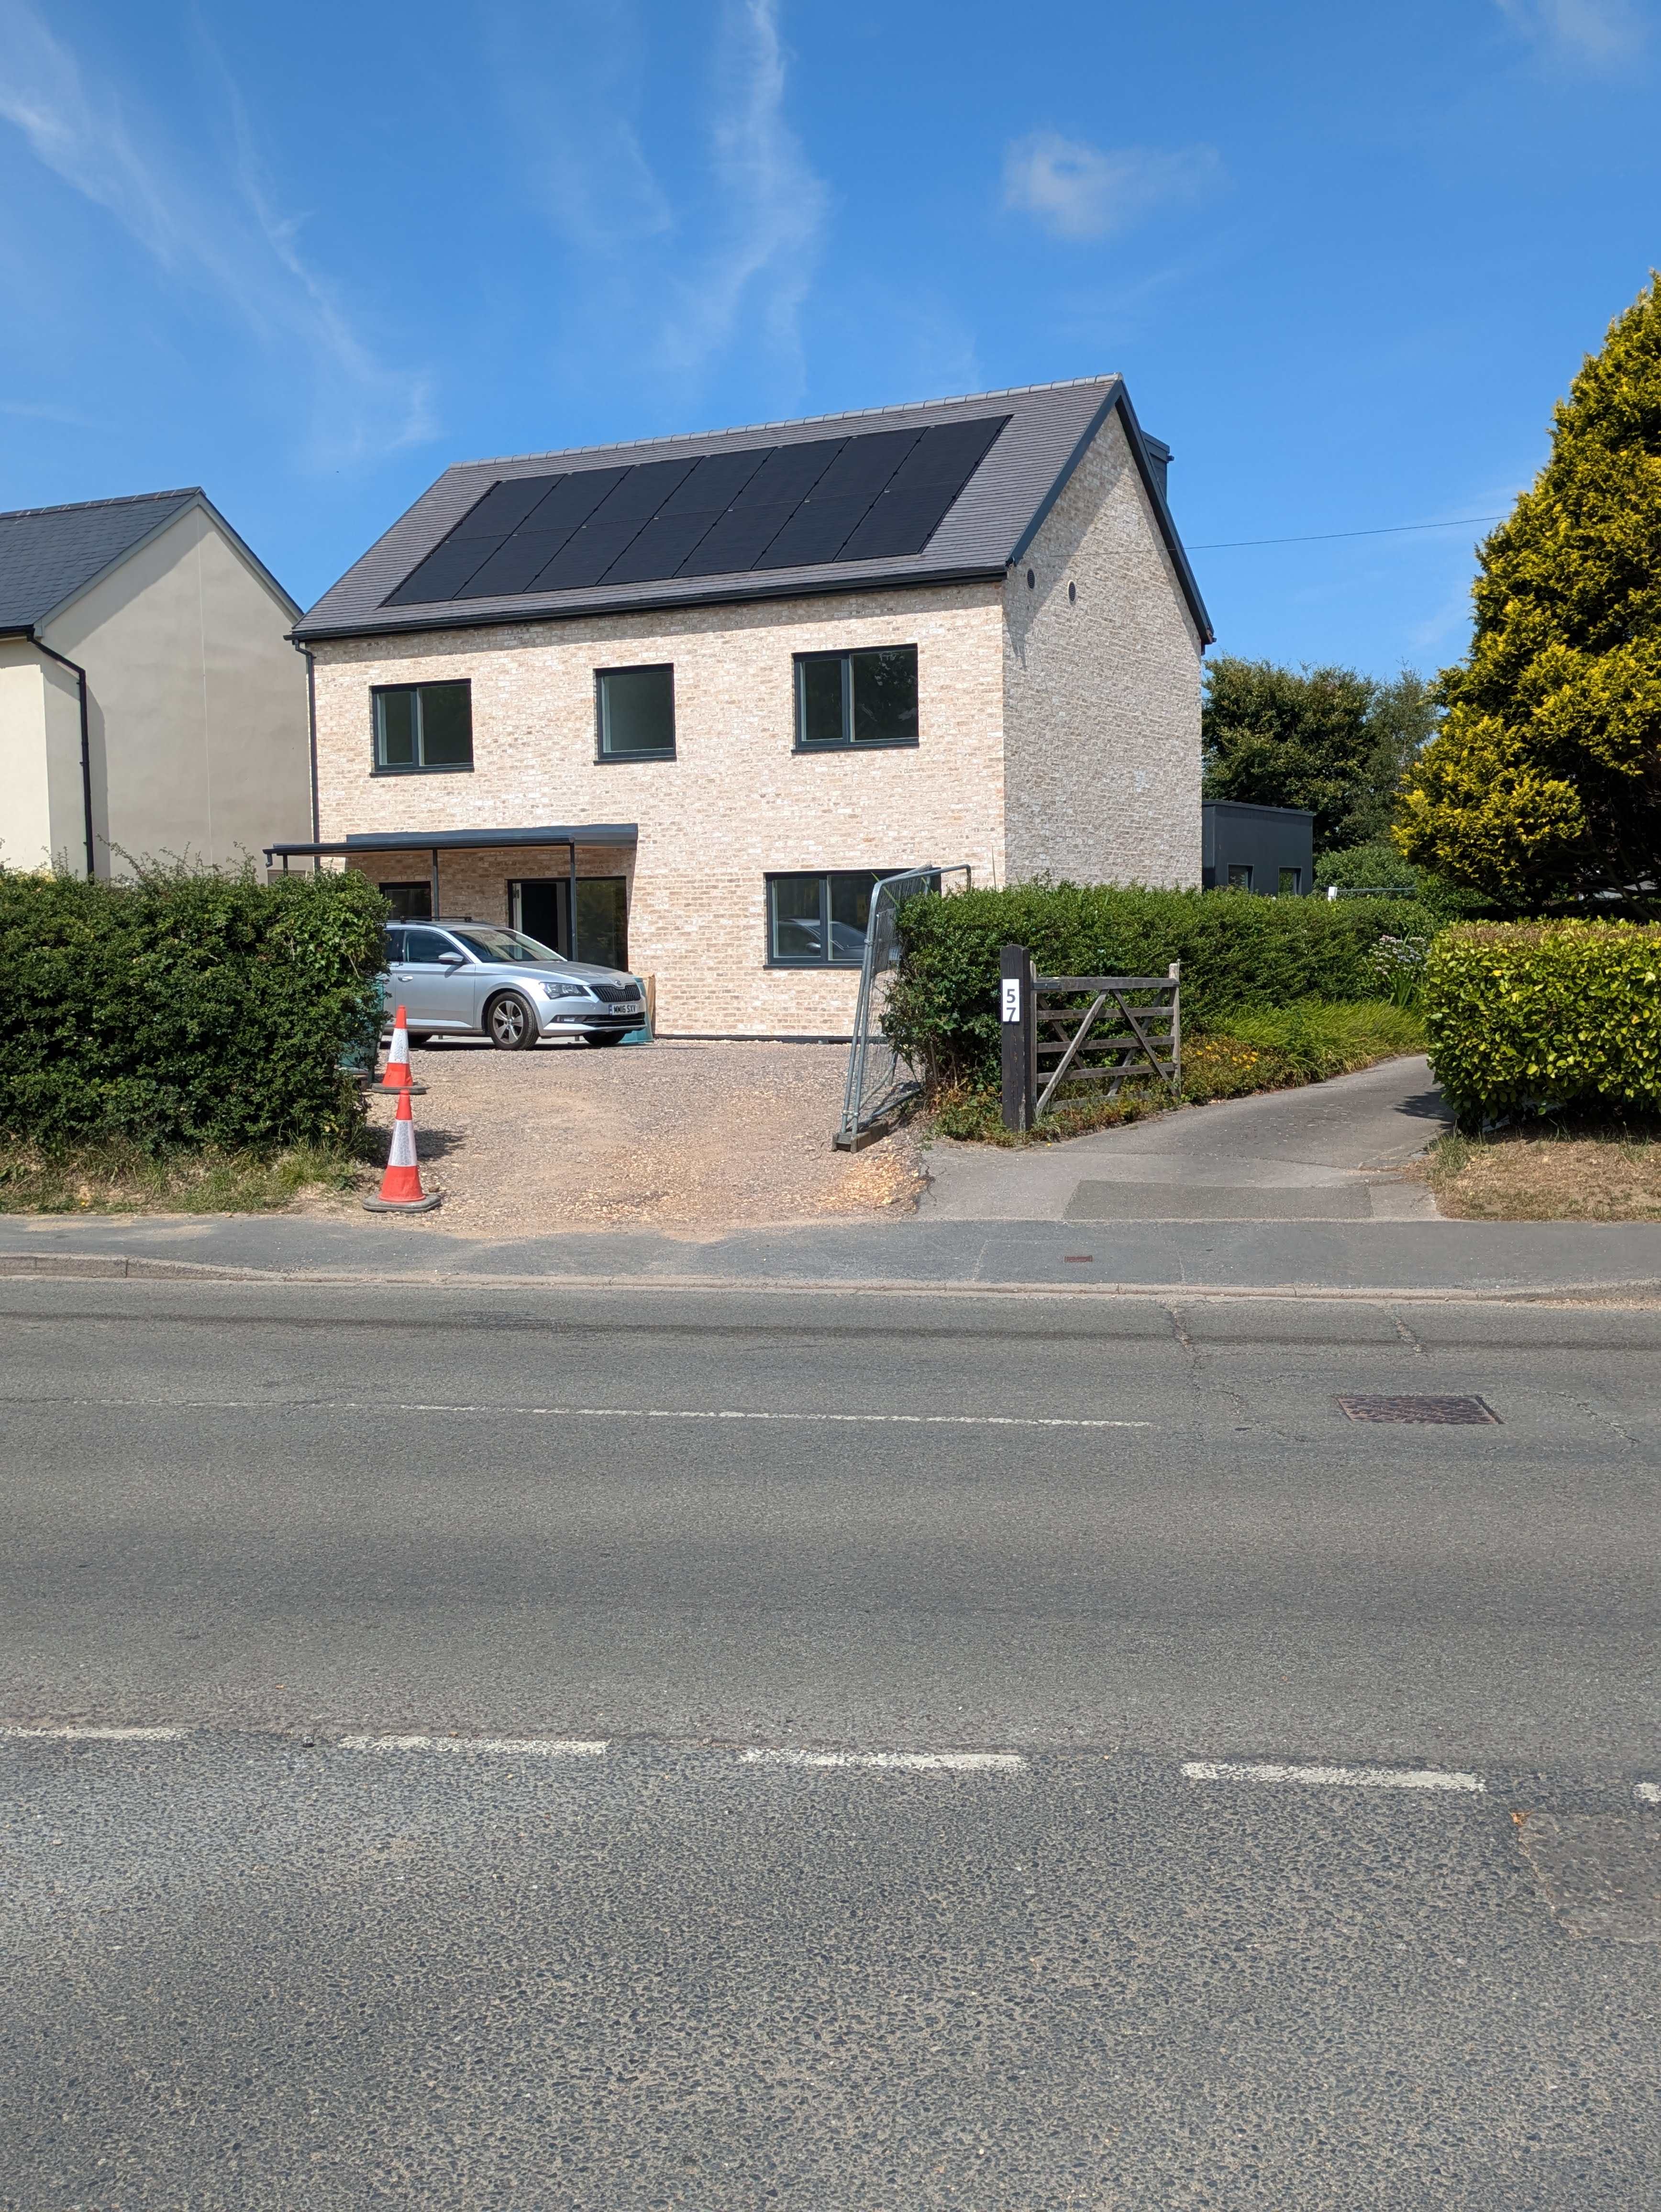
Came across this forum recently whilst searching for information about BNG, after delving deeper I wish we’d found you all about 2 1/2 years ago. My wife and I are just finishing our build, hopefully by the end of this month. Maybe 6 months later than projected, so probably not too bad. Our struggles along the way have been for the most part due to our main contractor going into liquidation in December 24. In some respects this may have been a blessing, in others not so. We realise now that not all of the headaches end with the completion of the build; reverting to LA building control after the liquidation is challenging, we still have outstanding land transfer issues and obtaining planning permission for a ground mounted PV array is laughable. Our build is a new build replacement of an old tractor barn, close to the ridgeway in Oxfordshire. It seems the forum likes photos so I will attach a couple.
.thumb.jpeg.b28cd0cbc0f4f6cb4c86bc6d7270cc5f.jpeg)


 7 points
 -
Cheers for the help everyone... got people lined up. Joiners are on site now fixing up / measuring. Brickies and welders coming next week. Should have things fixed up in no time hopefully.7 points
-
We're first timers in our sixties, renovating a 200 year old Gloucestershire property as our last home. It's very basic (no central heating, damp) with a stone centre, brick semi-added pre 1860 and s 20th C. extension at each end. Removing the plaster and some ceiling my wife has revealed questionable [cough] building techniques which explain some of the cracks and a patched up Inglenook which we plan to restore. Early days but we have a builder and architect for a garden room style extension. We have lots of ideas and plenty of time, but of course not enough money :-) If you've done anything like this by all means tell us we're barmy, it just say hi. Met a couple this morning and got chatting about this, and they recommended this forum highly. I'm learning so much useful stuff from others offline and online. For others I can recommend Mastodon (a non commercial social network - no ads or algorithm getting in the way). Posting questions there has been a great help.6 points
-
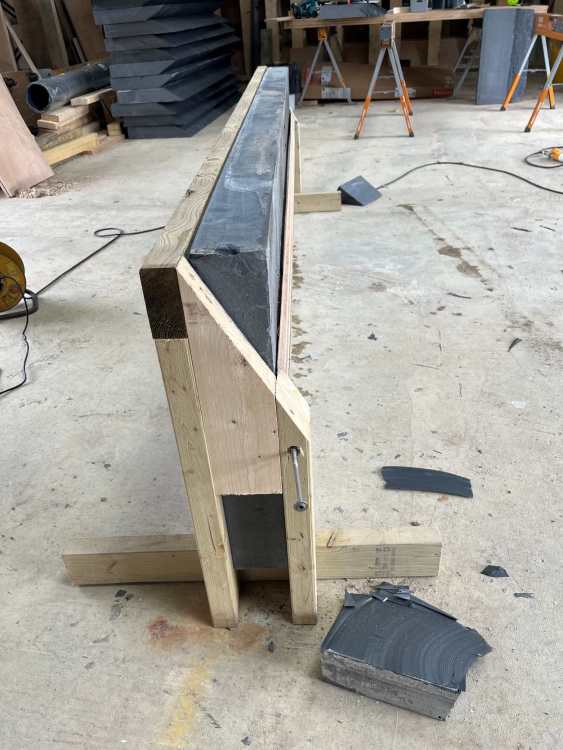
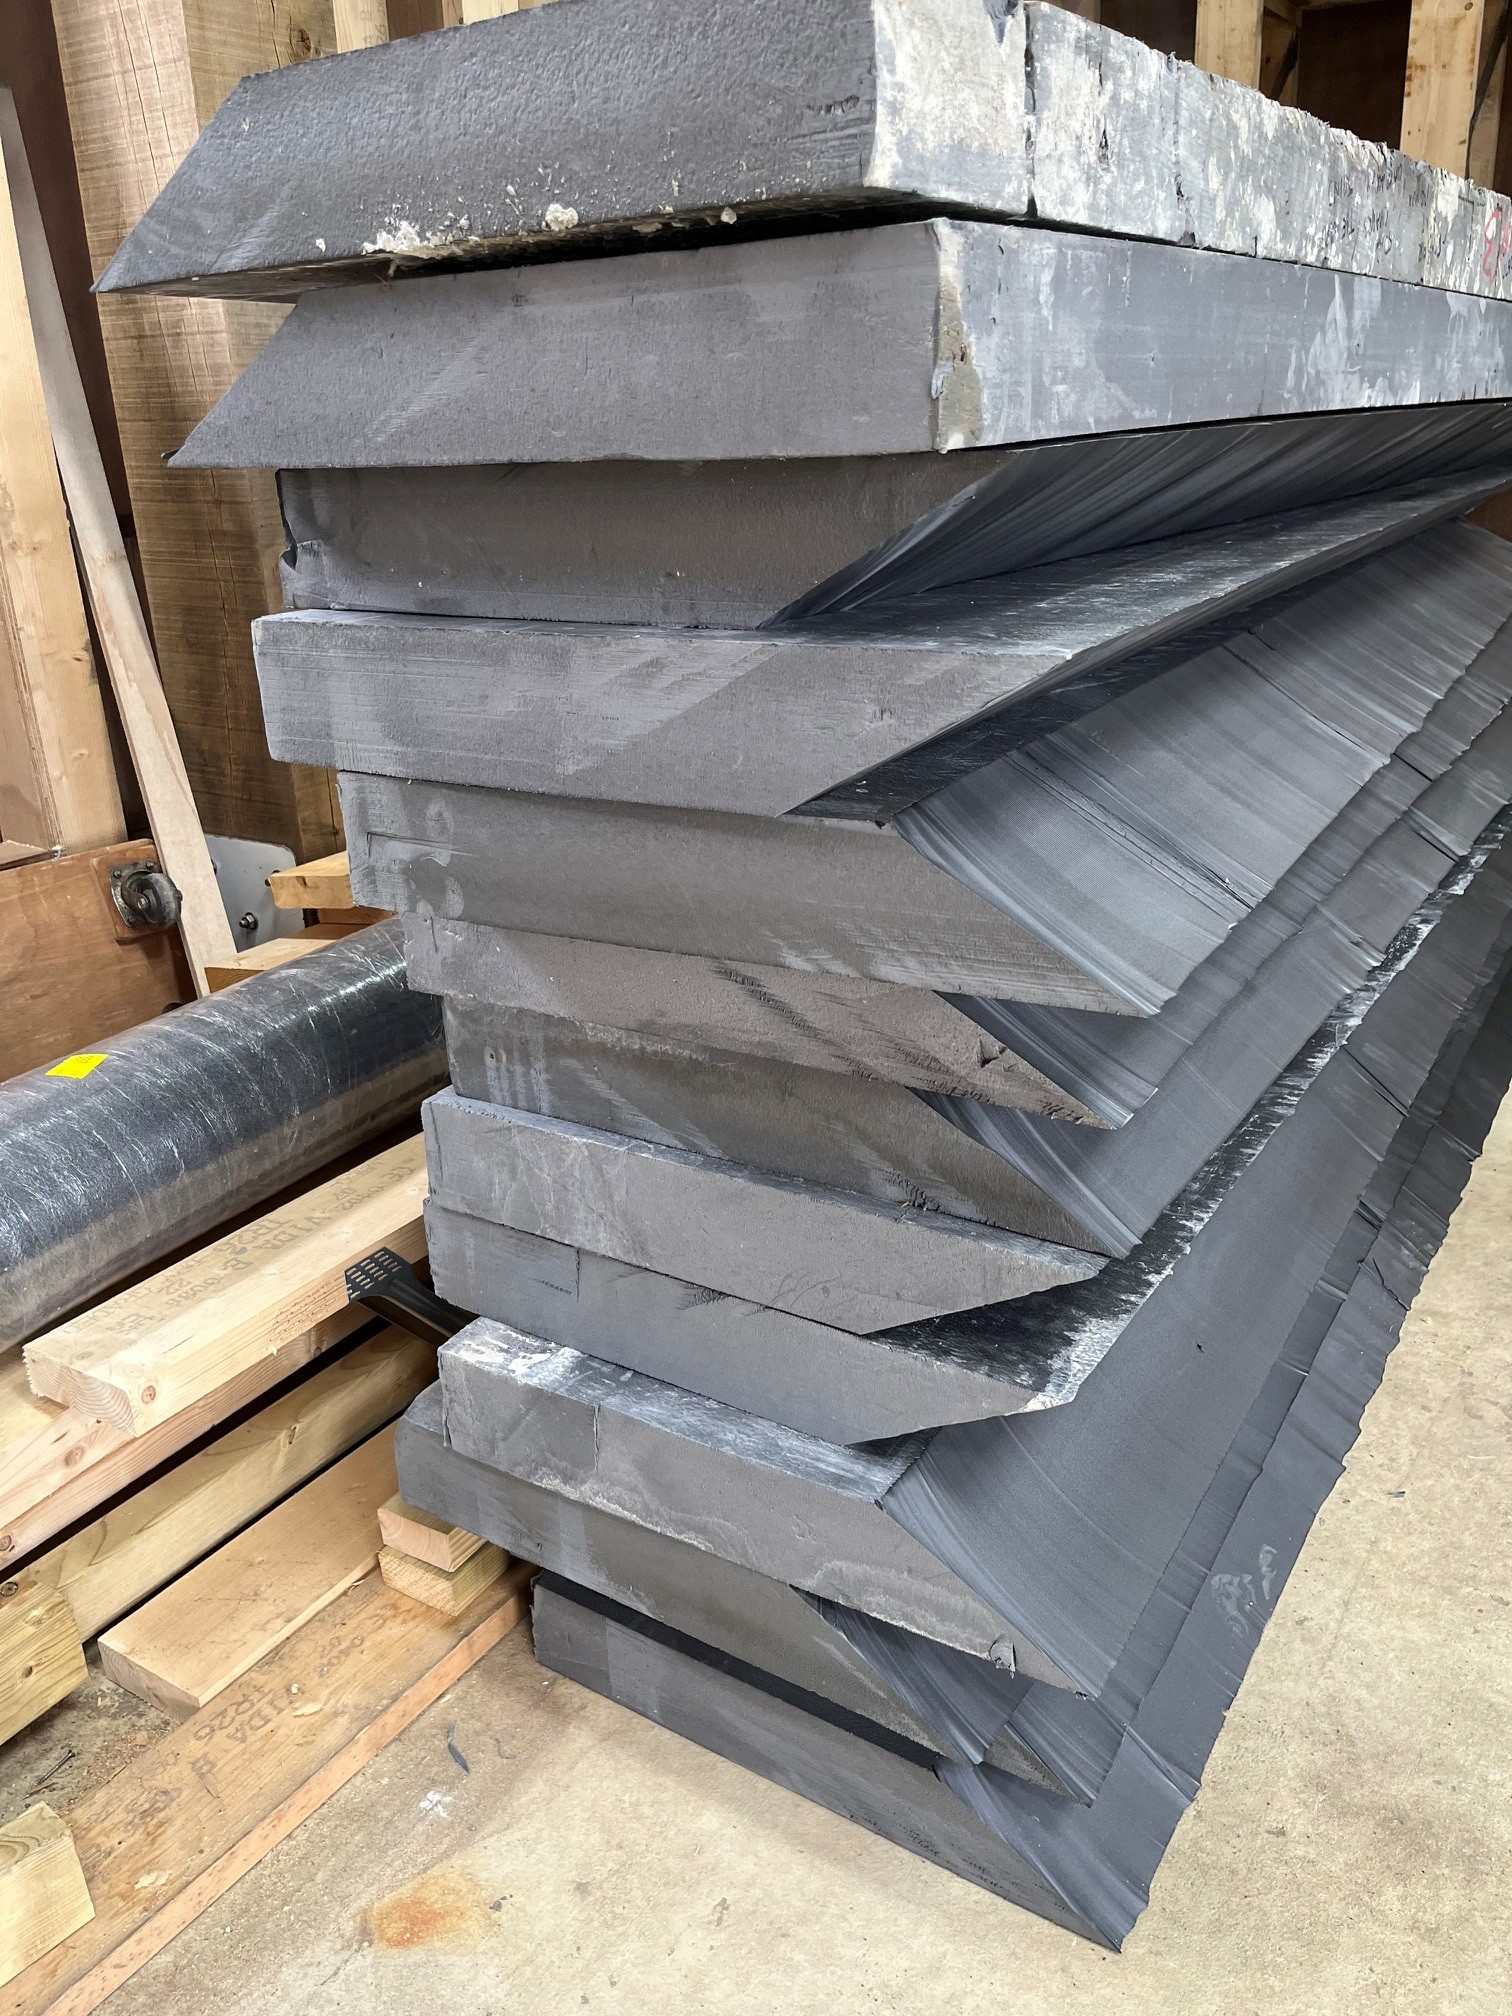
OK reporting back: after trying out lots of options, we cut the angle with a Proxxon Thermocut 650 and a home made jig. It lacks a bit of oomph and was fairly slow, but the flipside was that it didn't burn or smell much. We made the straight-through cuts with a big-assed circ saw - not crazily messy. You can get bigger hotwire cutters than the Proxxon and specifically for insulation, but we wanted to specifically cut 200mm deep. p.s. the wire is very thin and breaks quite easily. Although it comes with 30m of wire on a little spool, you might want some extra.


 6 points
 -
Well, I bit the bullet : 1 tonne moved a hundred meters or so . Ladies and gentlemen, I give you The Age Appropriate Wheelbarrow (Branding deliberately removed by AI )
.thumb.jpg.db38d07231186b165979807dea1e5c19.jpg) 6 points
6 points -
The thing is that snagging stuff is mostly at the finishing stage, because that is what is visible. It begs the question of what 'snags' might exist in foundations, drains, structure, electrical cabling etc. New build estates can look good when newly built, go back 10 years later and you can find rainwater stains all down the render, paint/finishing peeling off window frames, rotten fences, cracked kerbs etc. Suddenly it doesn't look like a place you would want to live. As the generations pass, general knowledge and basic skills seem to erode. Most used to have some DIY manuals and knew how to change a plug, a tap washer, put up some shelves, change their car oil, mix cement, and keep house and home together. Usually learned helping out dad as a kid. These days a lot of that seems to have all but disappeared. Contributed to by youngsters in generation rent that have to call the landlord and not fix it themselves.6 points
-
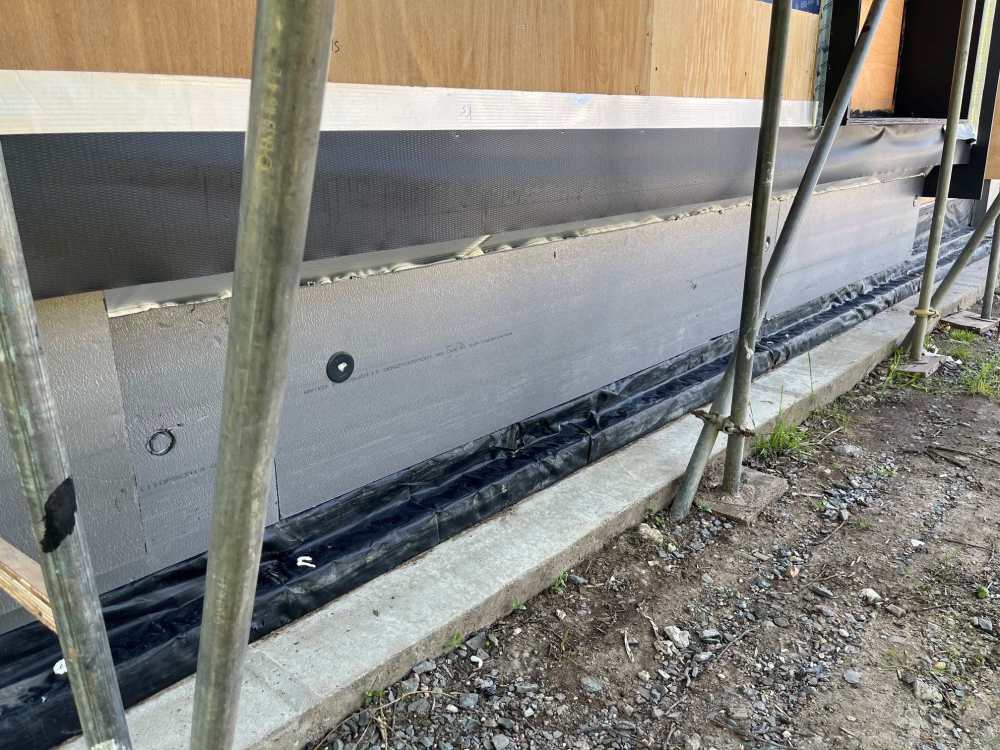
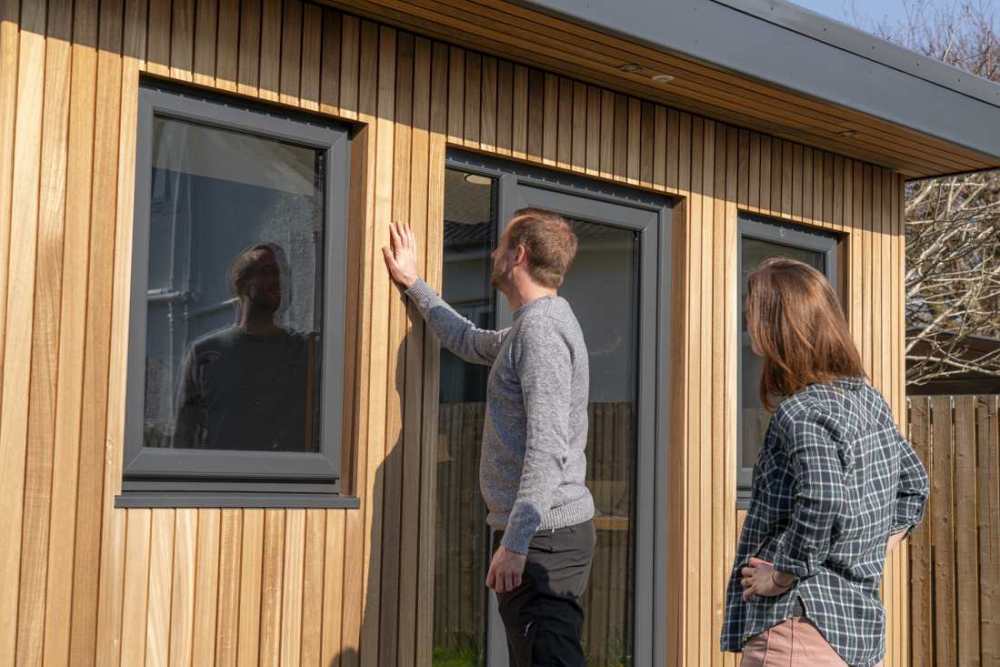
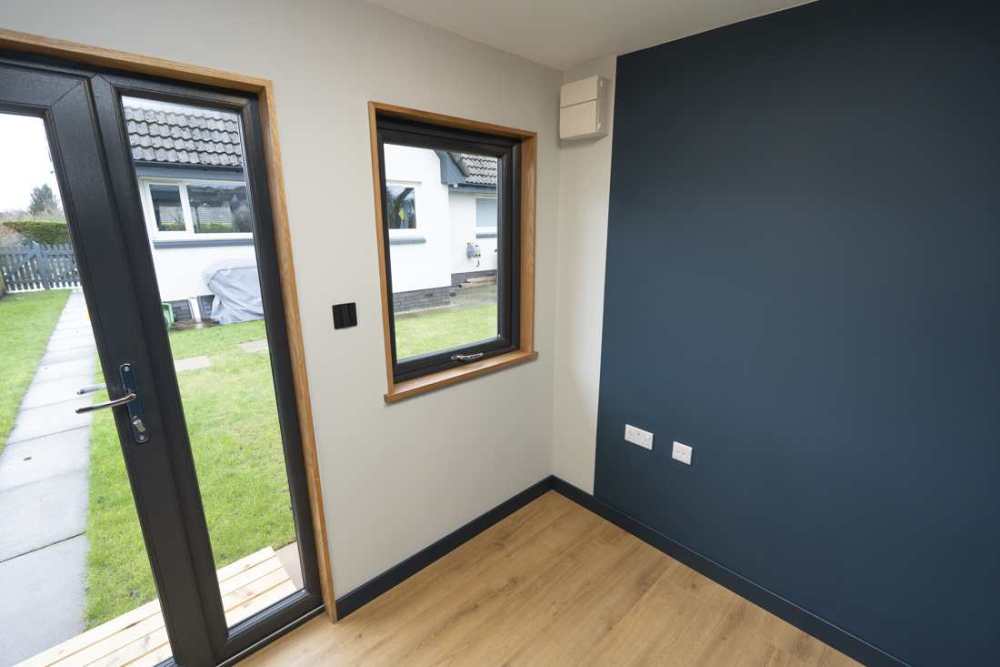
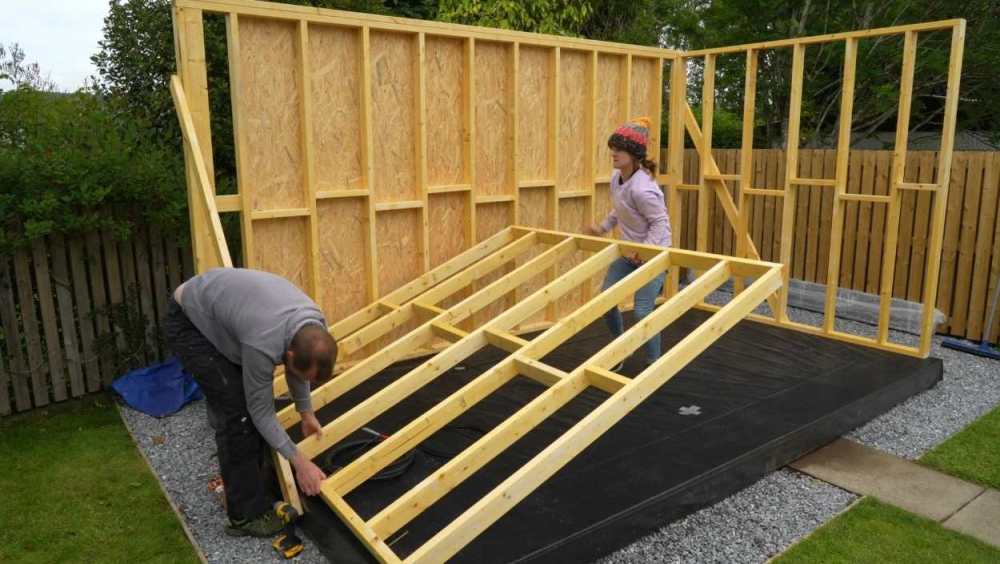
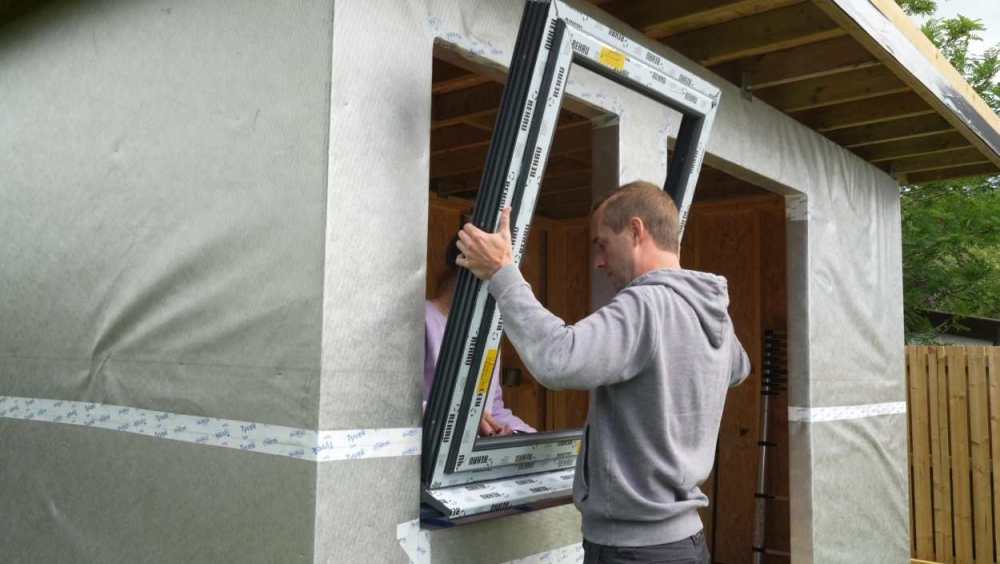
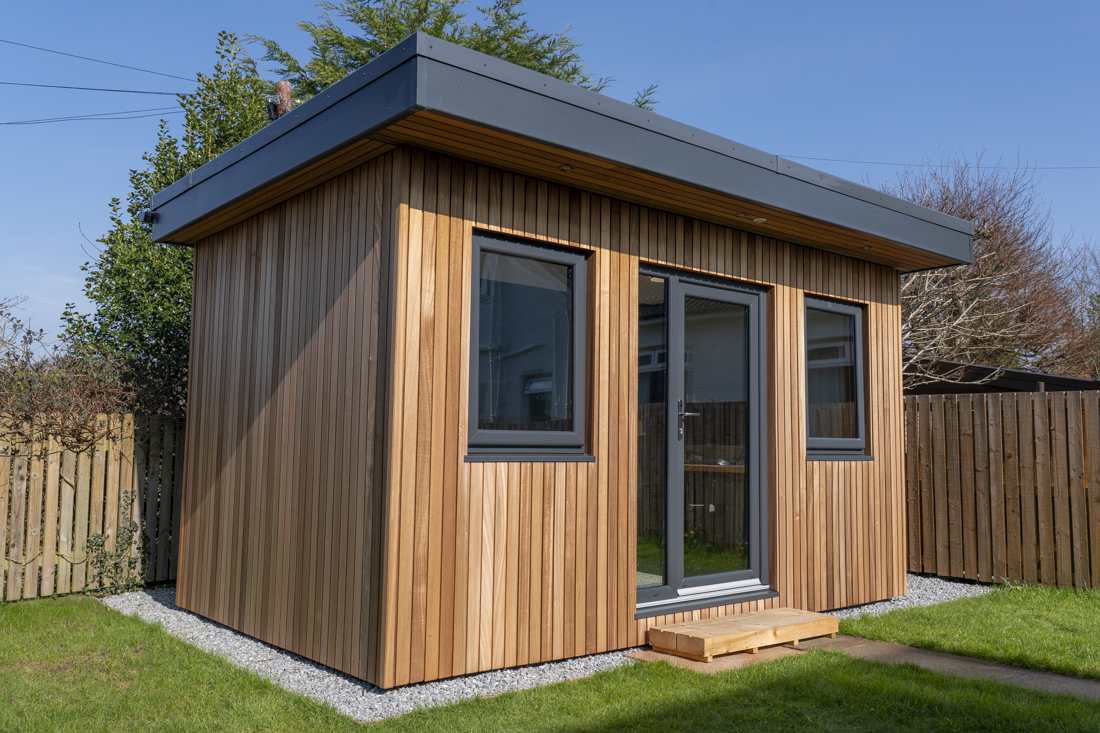
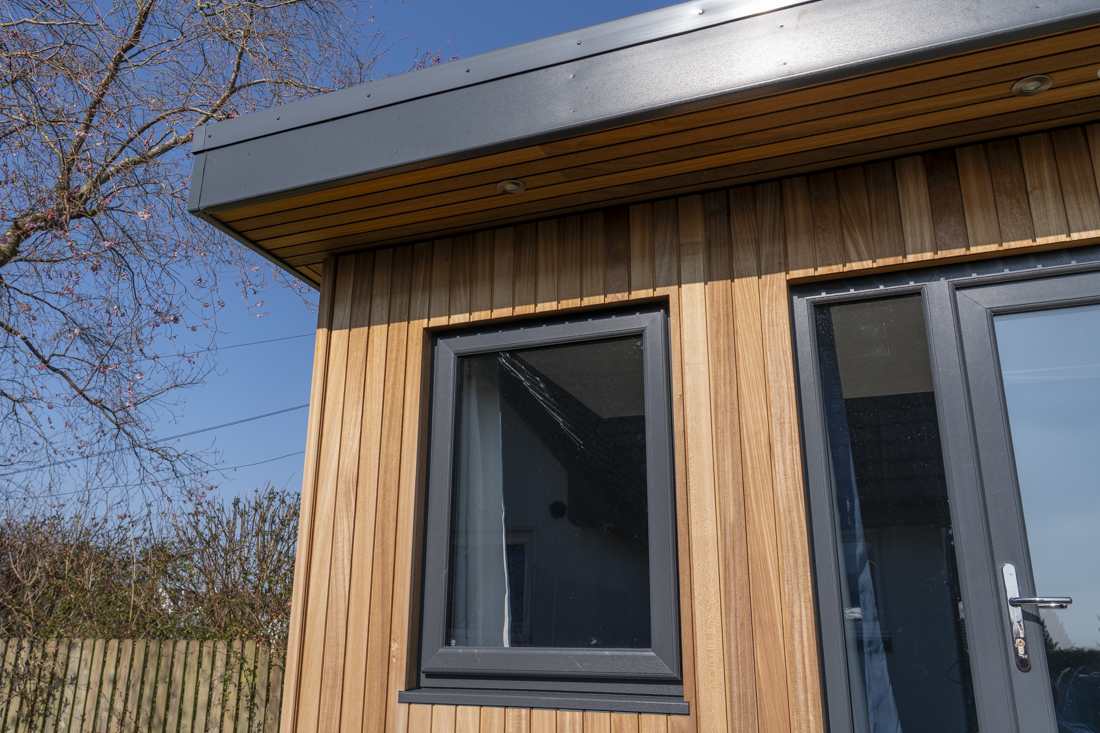
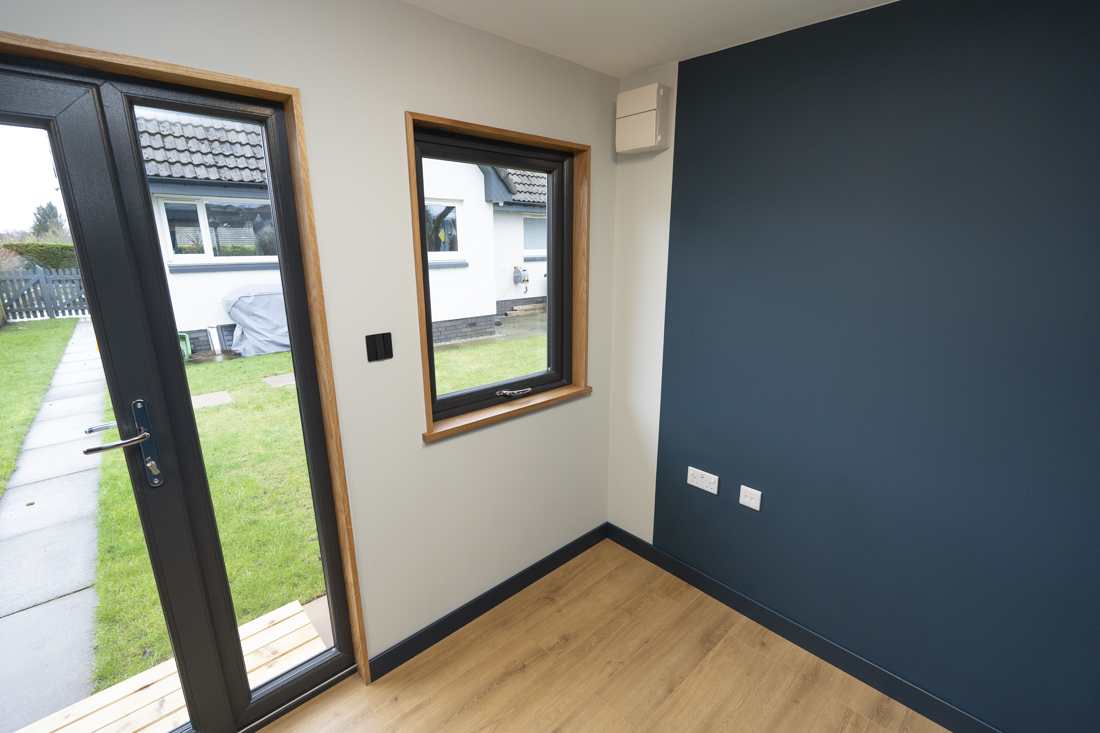
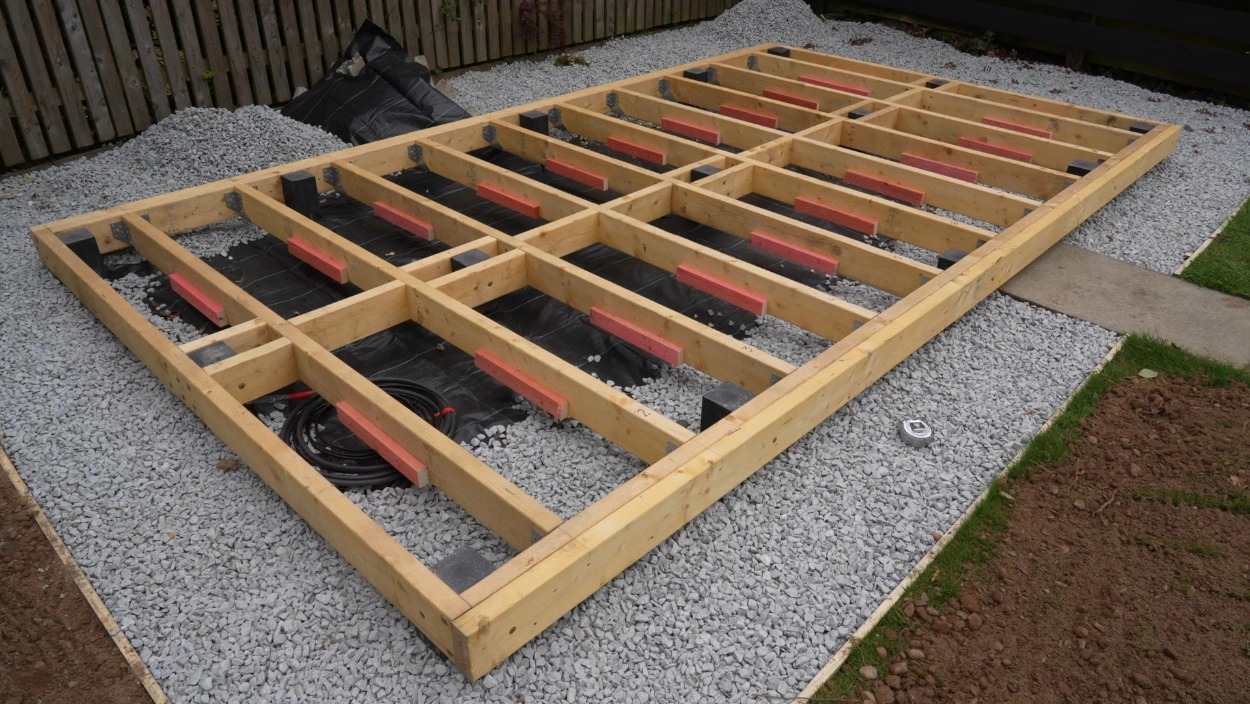
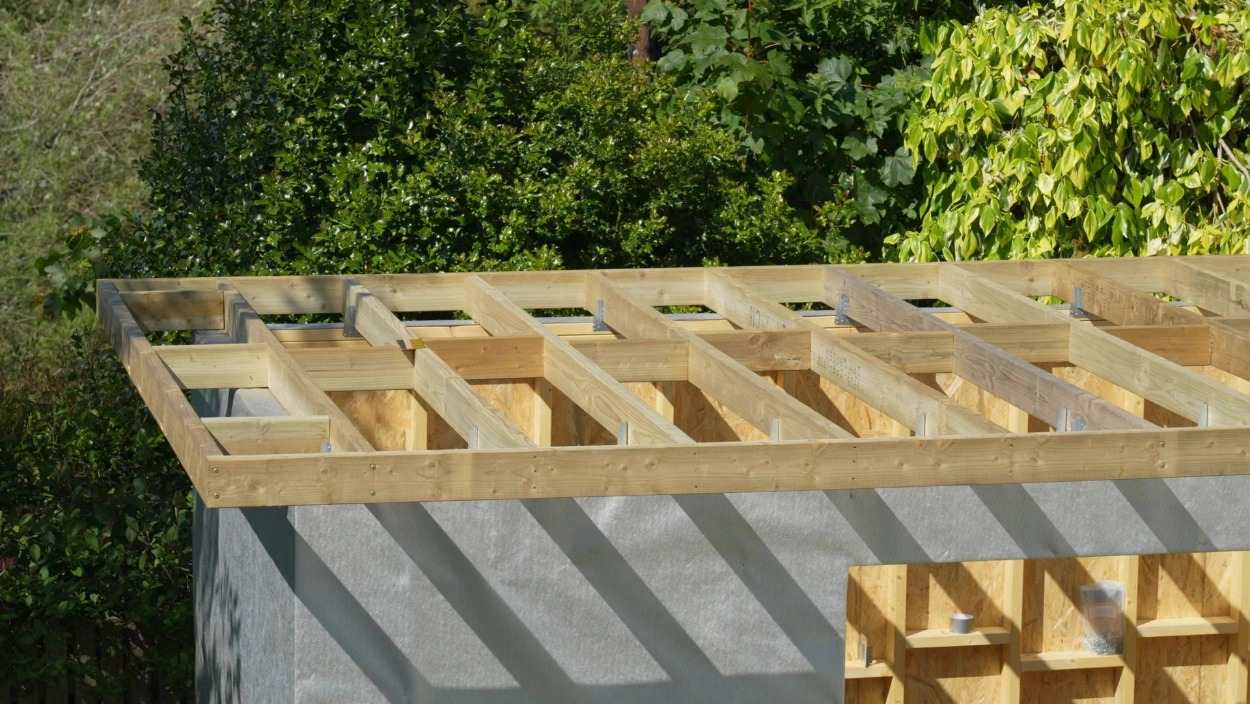
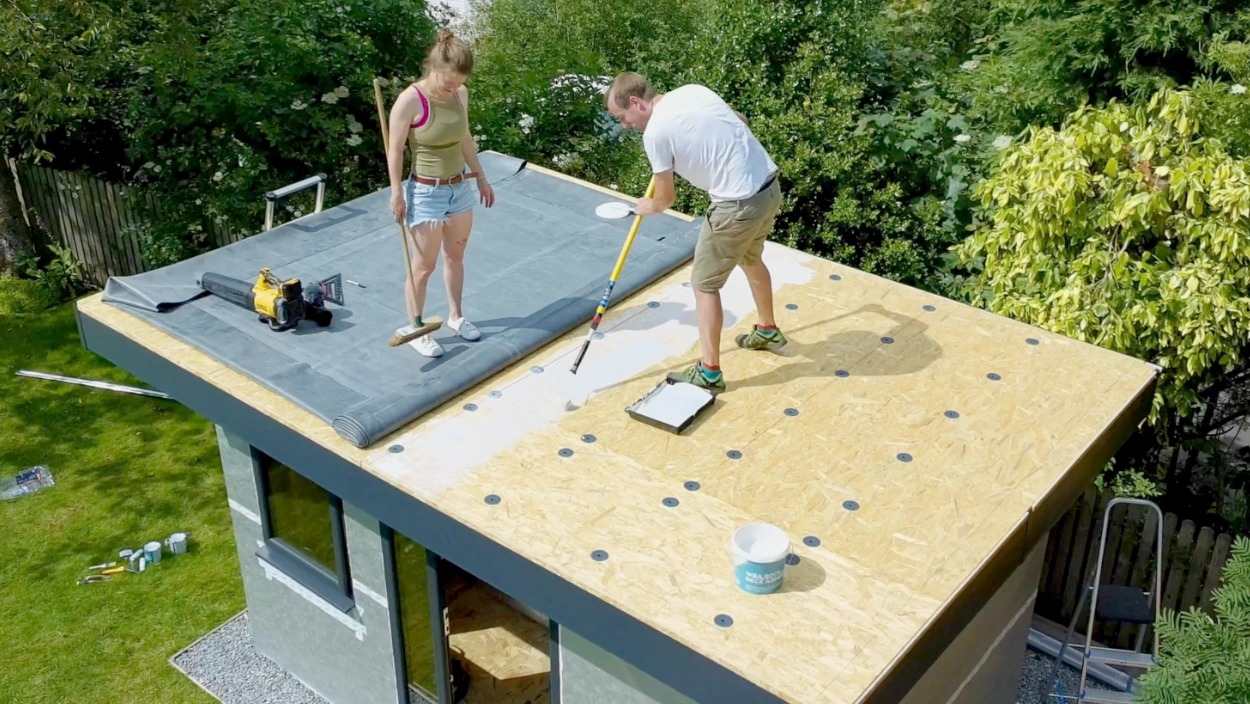
Hi all, thought I’d share our garden room build now that it’s finished. It was a proper self-build from start to finish, including the design, and we put a lot of time into researching the best way to approach it before we began. We tried to follow good building practice wherever possible, while still keeping it realistic for a garden room build. I’ve attached a few pictures in case they’re useful to anyone planning something similar. We also filmed the whole process and put it together as a YouTube playlist, documenting the reasoning behind the different decisions we made along the way. We found that especially helpful when researching, as there’s a lot of advice out there and not all of it is equally useful. It’s been a really rewarding project, and I’m proud of what we’ve managed to build as a DIYer with a bit of planning and the right approach. I’m looking forward to using it as an office for many years to come. Would be great to hear what others have done too.


 6 points
 -
If you’re not driving the digger then your opinion doesn’t matter. if you have an experienced operator and a good groundworker then they will know exactly what to do. don’t interfere too much, sit on the dumper or work the laser, but trying to over manage lads that do this every day won’t go down very well. You won’t know how the corners will hold up until you start, you might come across a big patch of loose backfill,have the shuttering to hand you will dig all that in two days, you need a site visit the second you get 4-5 m of trench to full depth. you do not under any circumstances want to have to go back over it, so you need depth sign off the same day you start. what do you mean by shutter and pour multiple times. that all needs digging in one go and pouring in one hit the following day.6 points
-
Trump may keel over tomorrow. But that is to miss the point. The fact that he has been allowed to drive a coach and horses through the old world order, threatening economic and military force to take over Iceland/Greenland with no pushback from the much vaunted "checks and balances" of the US constitution is the problem. He has shown that the institutions that were supposed to keep any madman in check are toothless. The US can no longer be considered a reliable partner. We are just one suoreme court appointment, one special election away from everything being thrown up in the air. I can't remember the source of the quote but "we cannot base our security and prosperity on some voters in Florida every 4 years"6 points
-
That's the trouble with this country - lowest standards possible. And a general public that are willing to accept that. So a cheap 30kW combi that only modulates down to 10kW, thermostat in every room, boiler that lasts about 5 years because it cycles so often. That'll do6 points
-
It’s taken a little while to get an exact figure With some moneys and bills still to go out and £1500 off the vat reclaim off a supplier Which we’ve now done We ended up with £42800 back off the vat Most of which went on the landscaping and gates So I’ve knocked that out of the total spent Carpet curtains blinds wood burner I’ve left in as part of the spend fees surveys buying costs Architects BC fees All in Land purchase omitted from the spend tax All complete 420m2 £3860006 points
-
As above. All the best for another year of staring at one tiny problem for waaaaaaaaaaaaaaaaaaaaaaaaaaaaay too long. And then realising it didn't REALLY matter that much after all. Adios 2025, here we go for 2026. Get your house built asap, or it'll be 2027 and I'll be telling you off again6 points
-
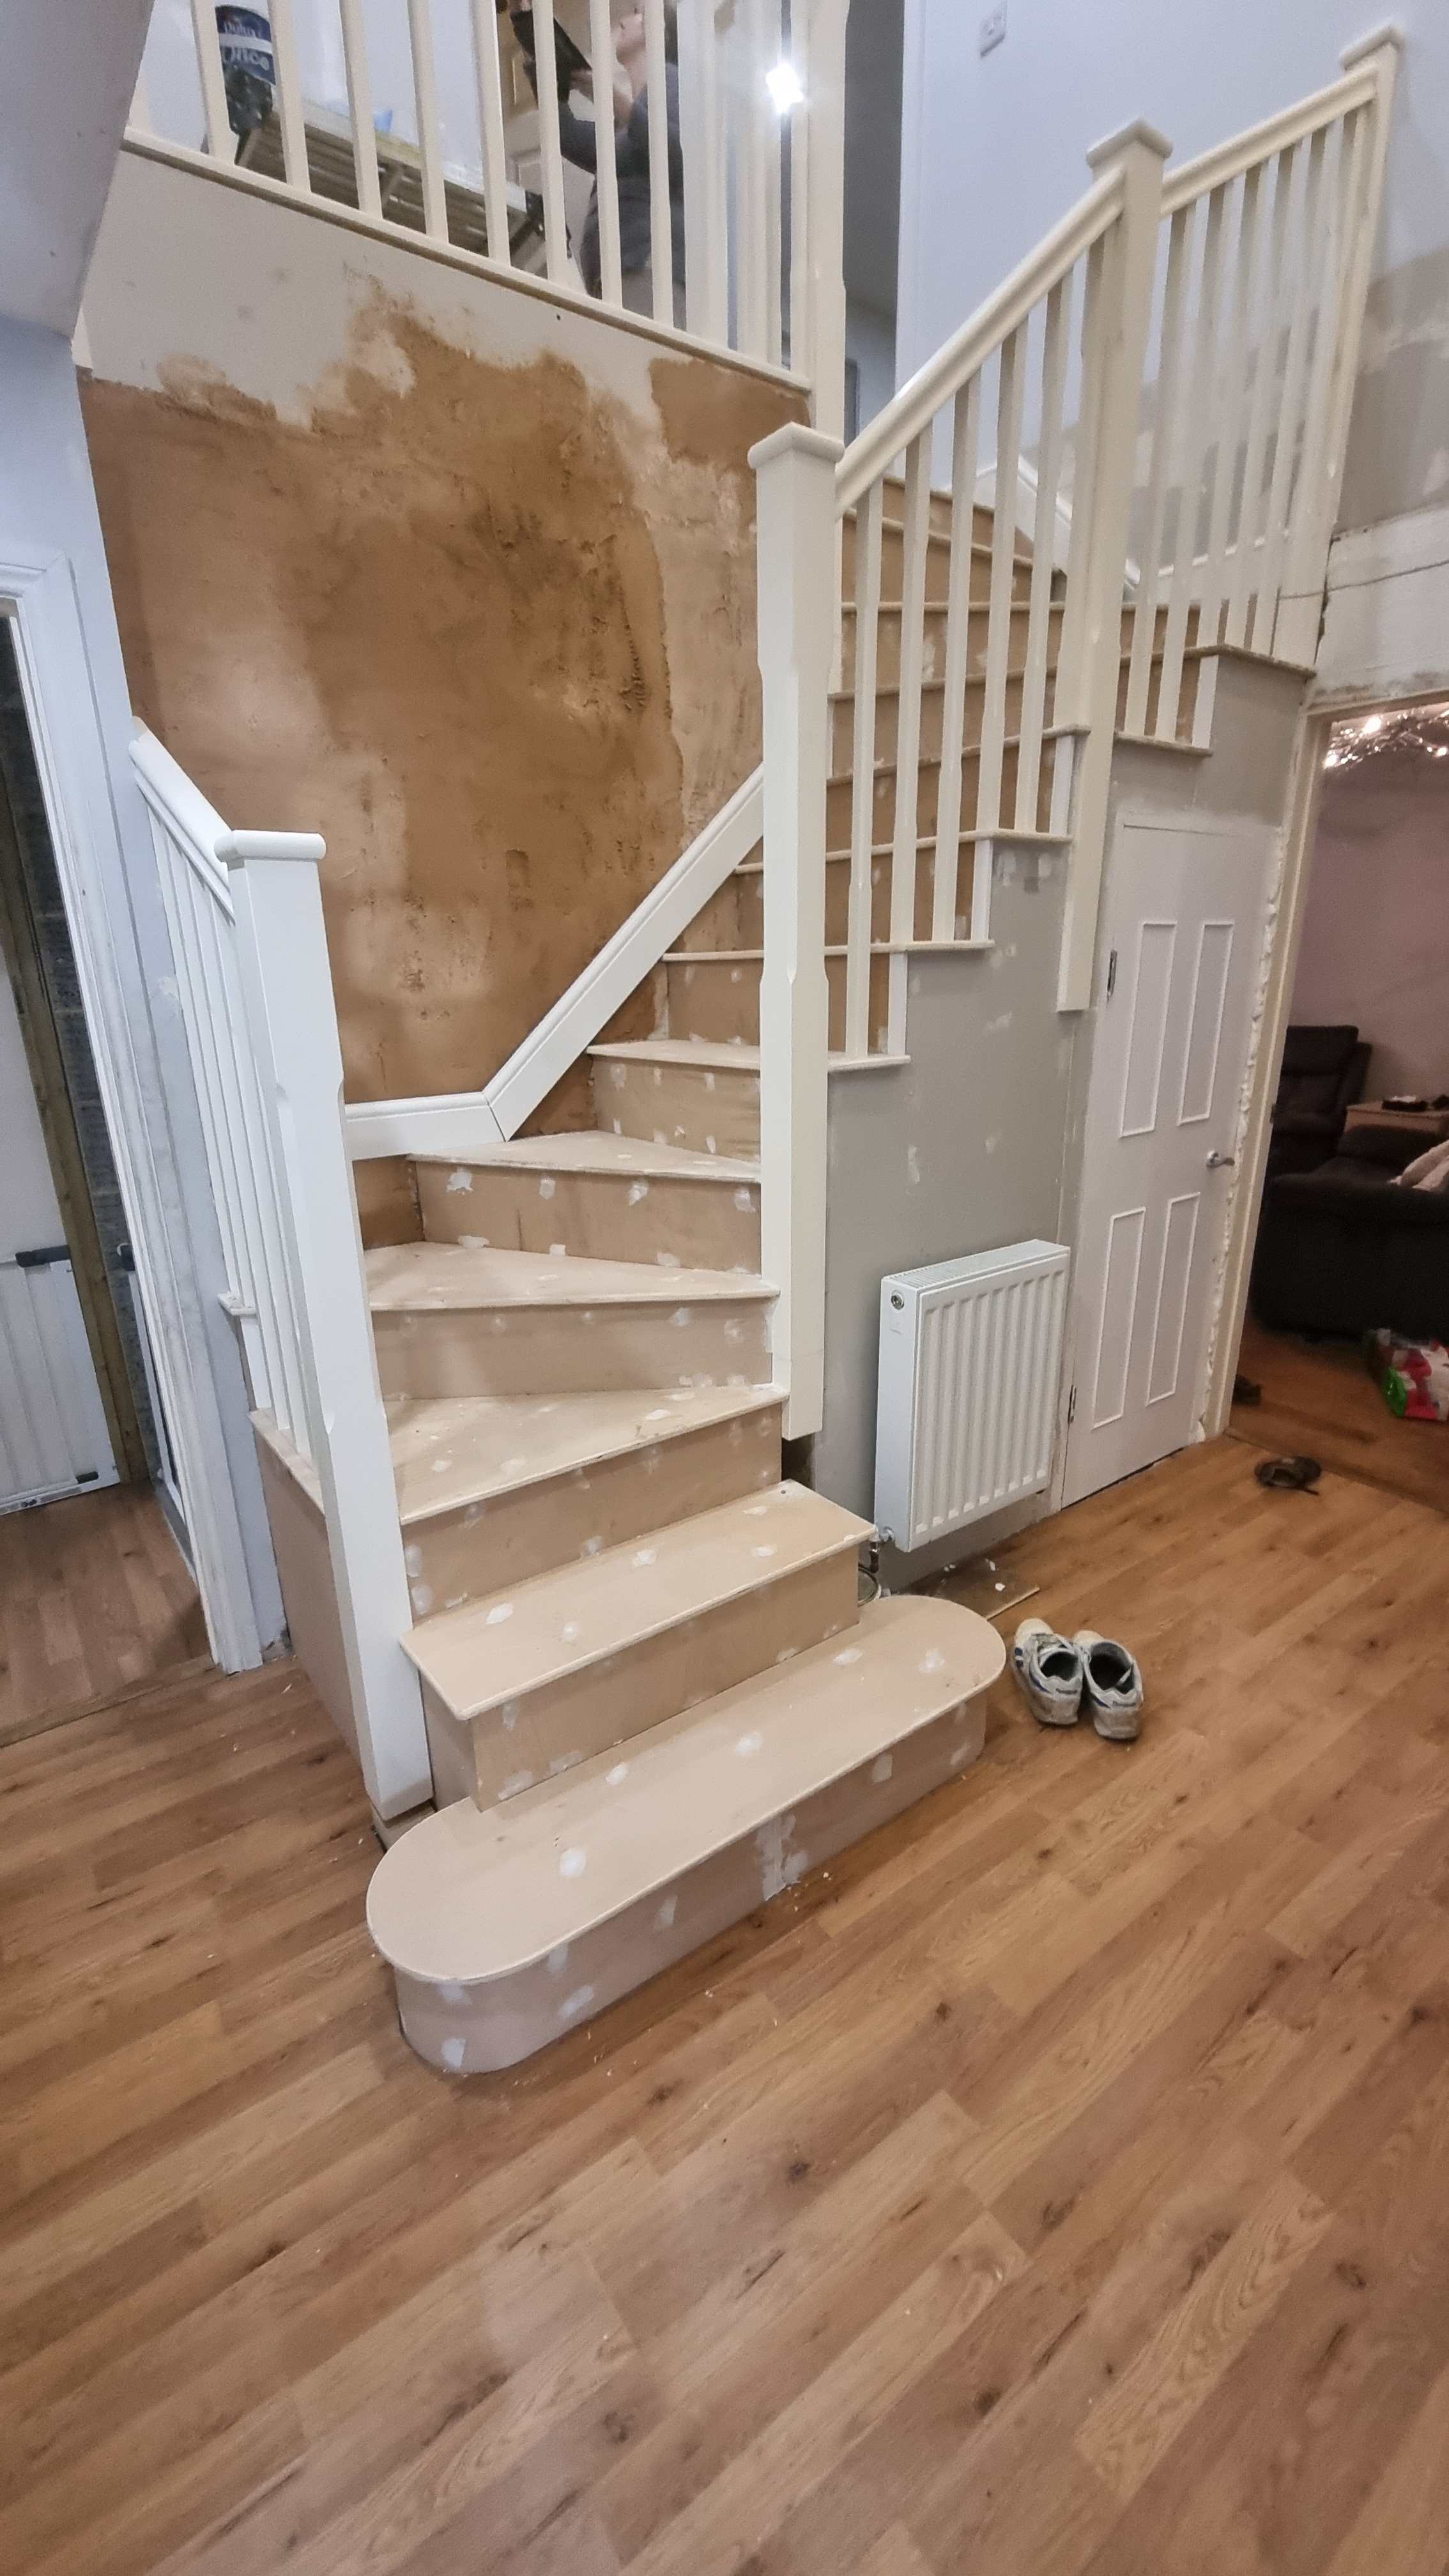
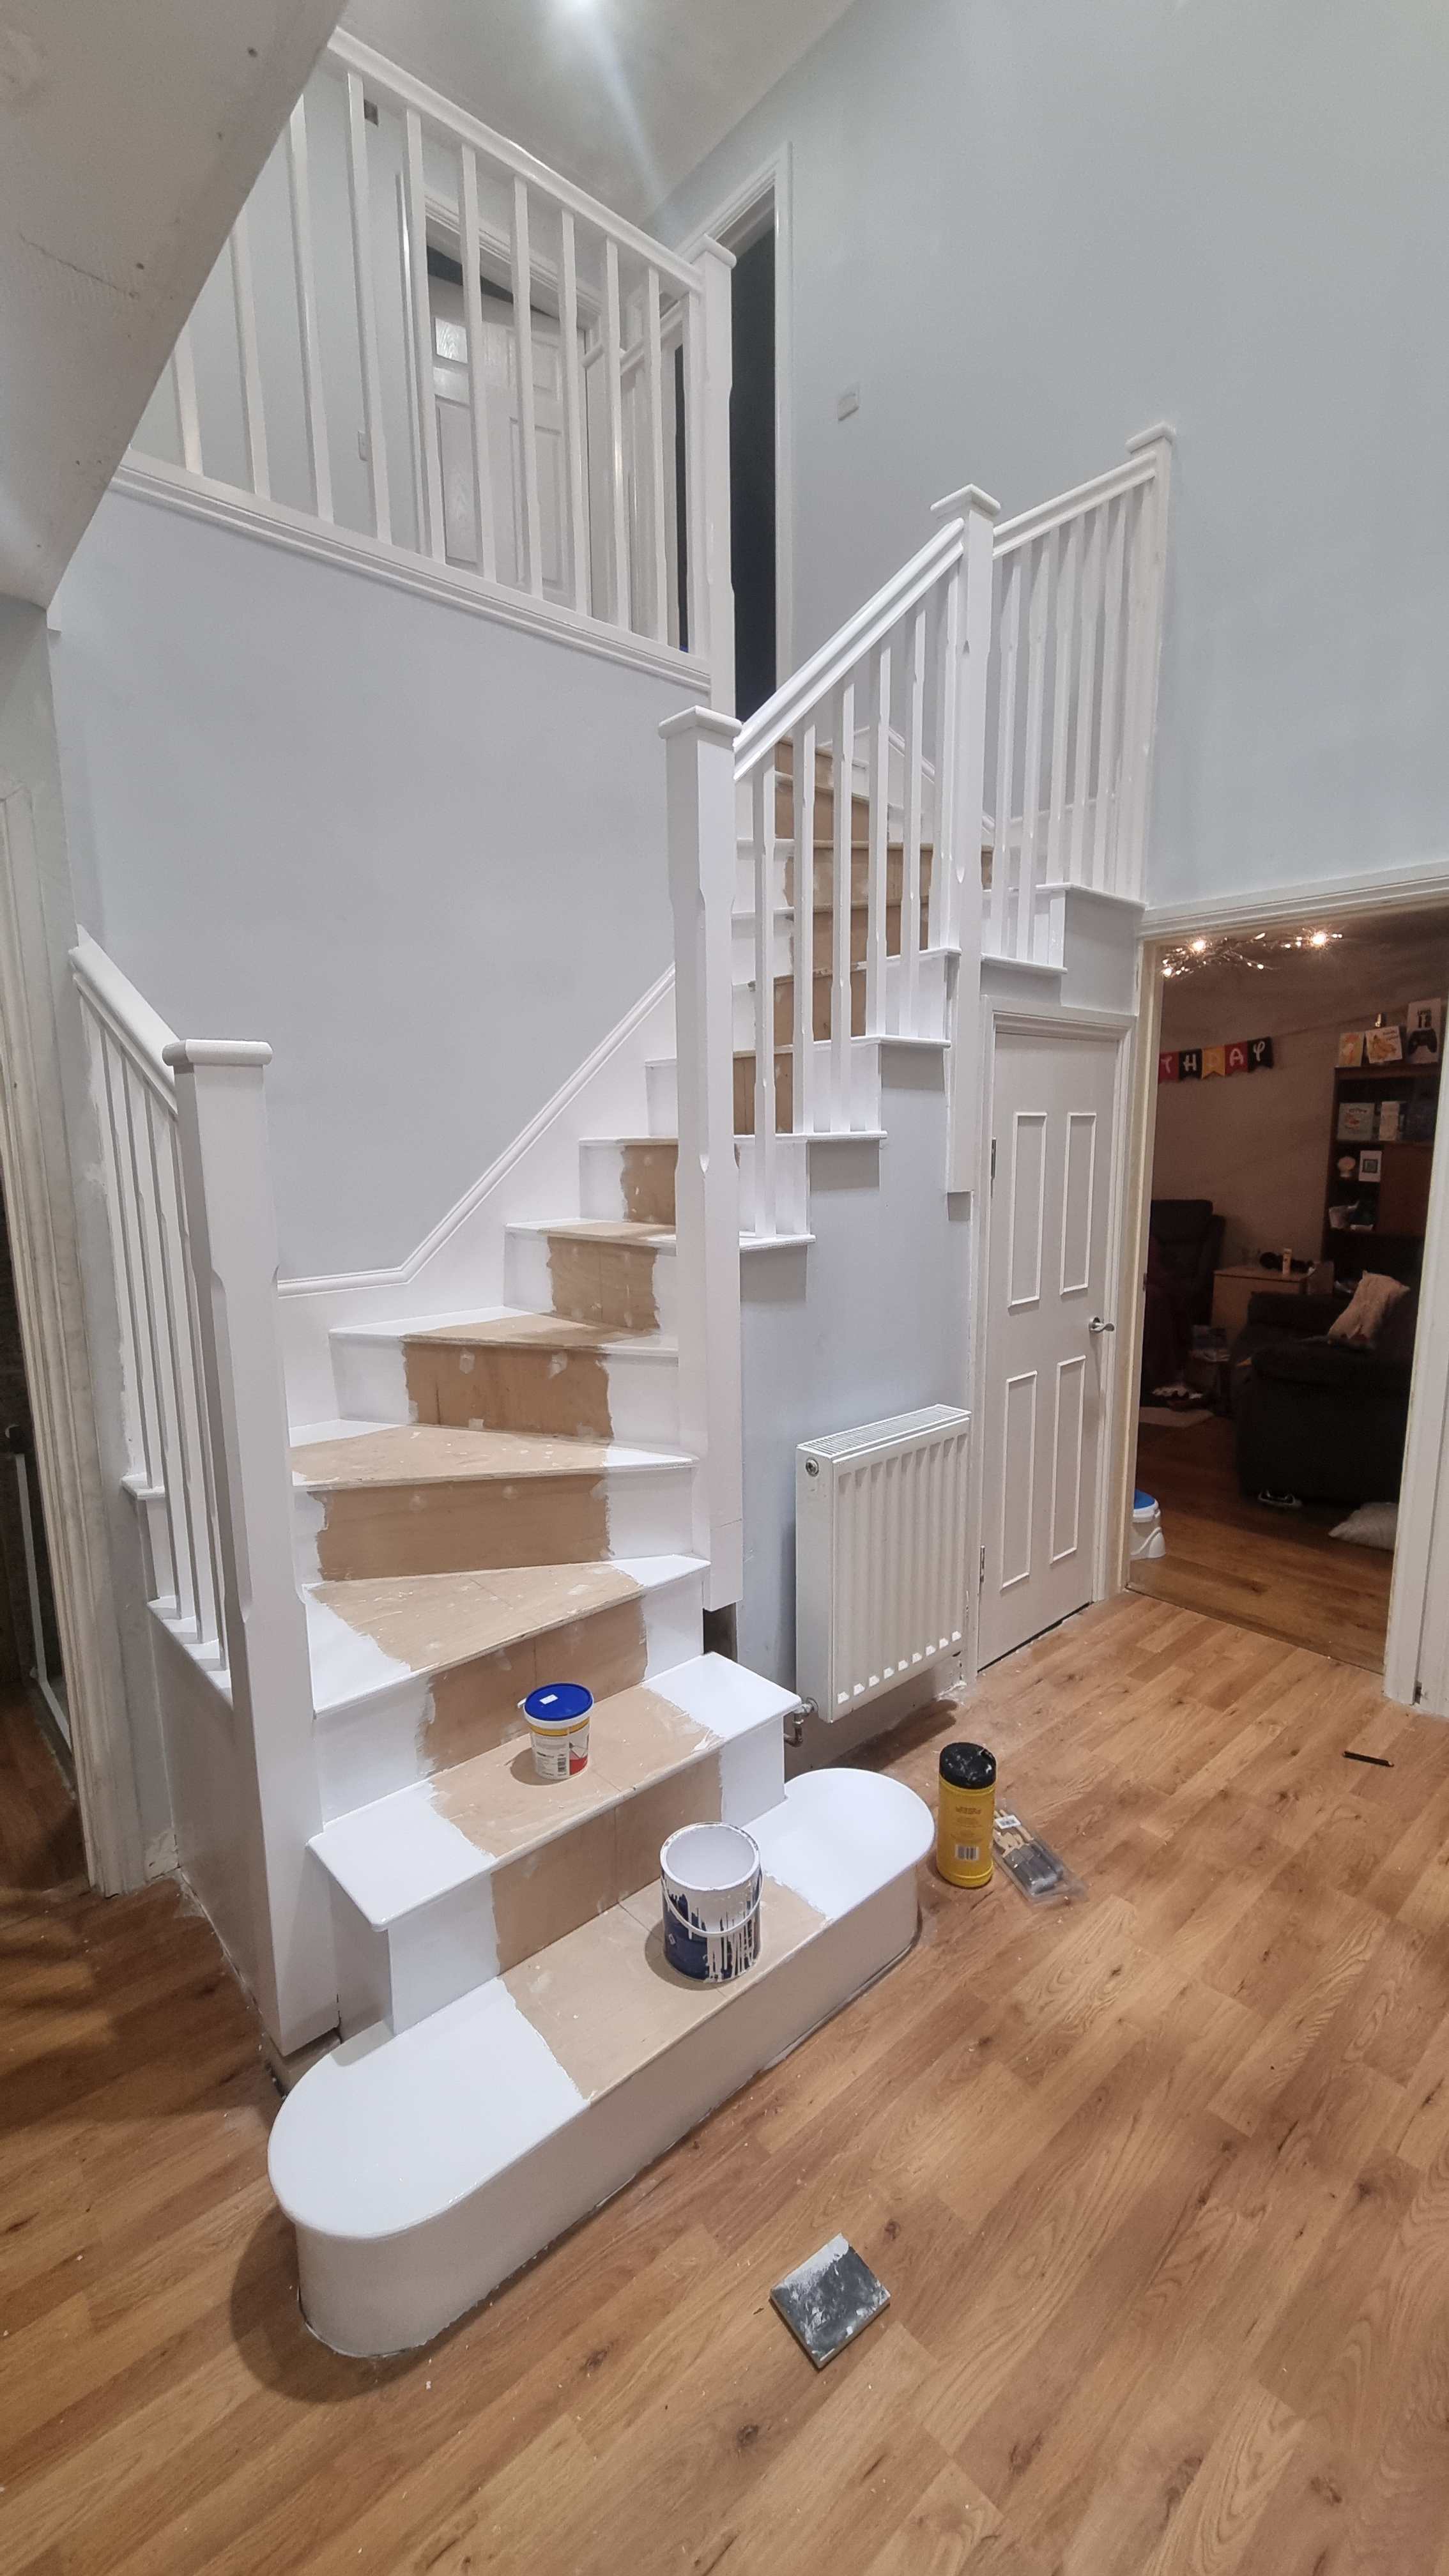
I built mine from ply myself. And routed the nosing. Filled and sanded out looks and feels like solid wood but is silent. Was quoted a silly price for it, so did it myself and I'm glad I did.


 6 points
 -
Update: I bought the Zehnder attenuated manifold a few weeks ago and fitted it, with great difficulty. An absolute pig. I was even less happy when I turned it on and it had made absolutely zero difference. A few hundred quid and half a day down the drain unfortunately. However, there is a happy ending eventually, as today I fitted 2 of the flexible silencers @Jolo suggested, near to the terminal in the main bedroom. I used 80mm as they fitted fairly well directly over the 75mm ducting I have. It appears @Jolo has 90mm ducting? Result, I can't hear any noise whatsoever from main bedroom terminal even with my ear to it! A dramatic improvement. Tested the airflow and it hasn't reduced whatsoever. Thank you @Jolo. The only baffling thing is why the semi rigid ducting itself has caused this effect on both our systems. Mine is fixed well every 600mm, no sharp bends. I have 75mm, Jolo has 90mm. I have Quiet Vent ducting, he has Ubbink. I'm surprised more people don't have this problem? Or maybe they just put up with it?6 points
-
@Nickfromwales @marshian Advice taken, many thanks.

 6 points
 -
Aero barrier have been and gone. initial air changes per hours was 1.7 builders did an excellent job and AB guys were impressed. after their magic mist was finished, they got it down to 0.2.6 points
-
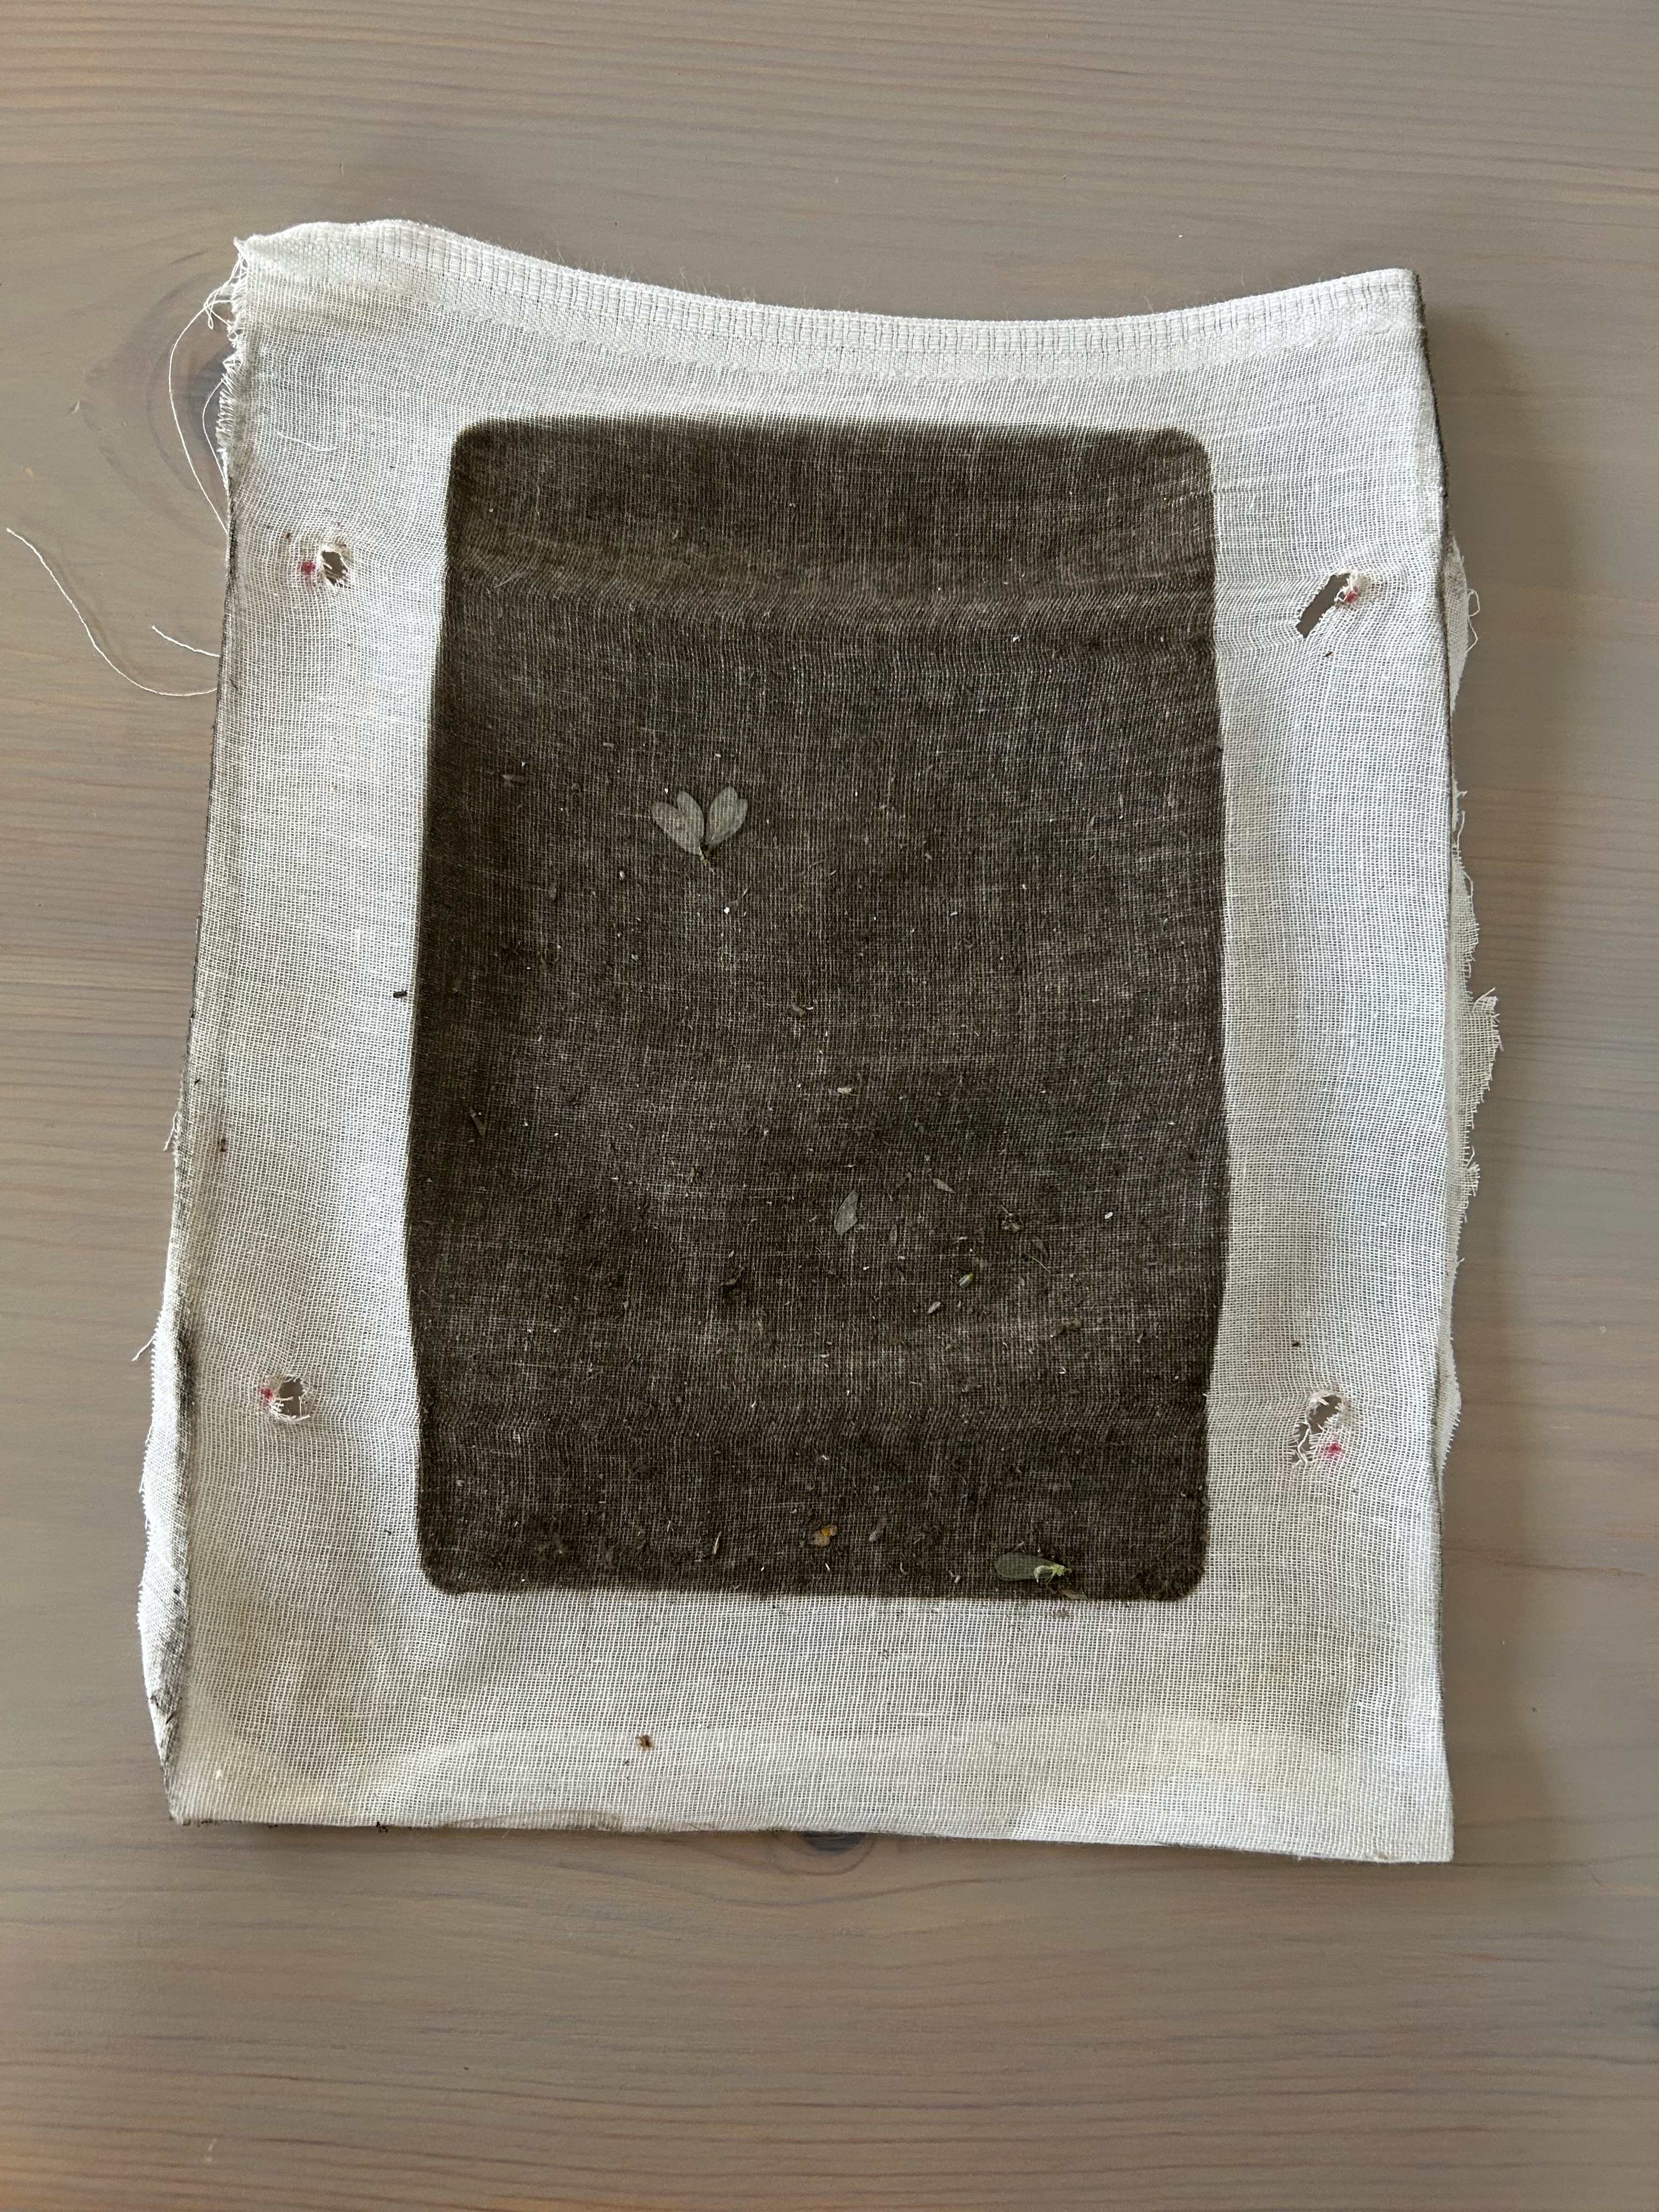
3 months after commissioning the new and improved Mk2 Pre Filter box it was time to change the filter material. The muslin seems to be doing a grand job and the increase in useable filter surface area is being fully exploited by dust and flies.
 6 points
 -
Best thing is take your time. Get your plans right first. Even if you need to go back to planning to make changes. Step back, write down what you want and what you don't. Look at the following aspects Foundation level how are you going to do it Walls many different ways to build so get that sorted in your head before you go too far. Roof are you having vaulted ceiling, this changes how the roof is built. Insulation and airtightness, this then helps you decide on ventilation and heating system. Layout of house, it's very easy to make a massive house, if you are not careful. Use you current house, what is good and bad, what are room sizes like, ok, too big or small etc. how does the layout work or not? Write stuff down, revisit what you write down, is it still true. Once you know what you are doing don't change.6 points


.jpeg.65566fad17f808f0db9ae8e344b5c979.jpeg)


.jpg.074d8bcd6d00cb0b218aff773dcf74f9.jpg)


This leaderboard is set to London/GMT+01:00