
Leaderboard


Popular Content
Showing content with the highest reputation since 07/27/25 in all areas
-
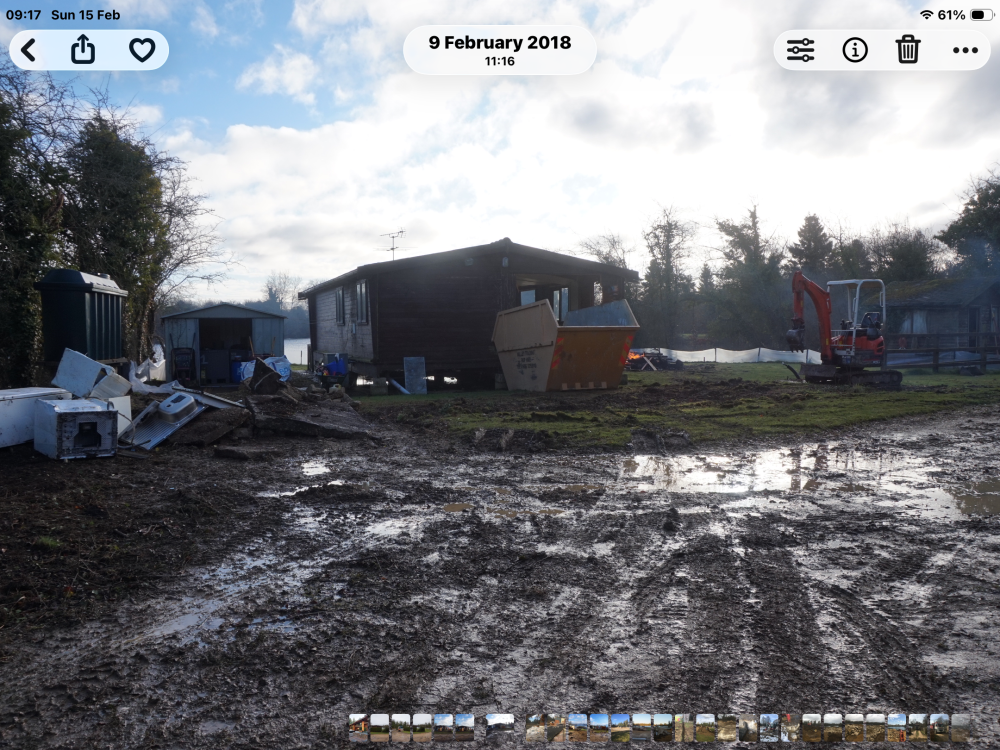
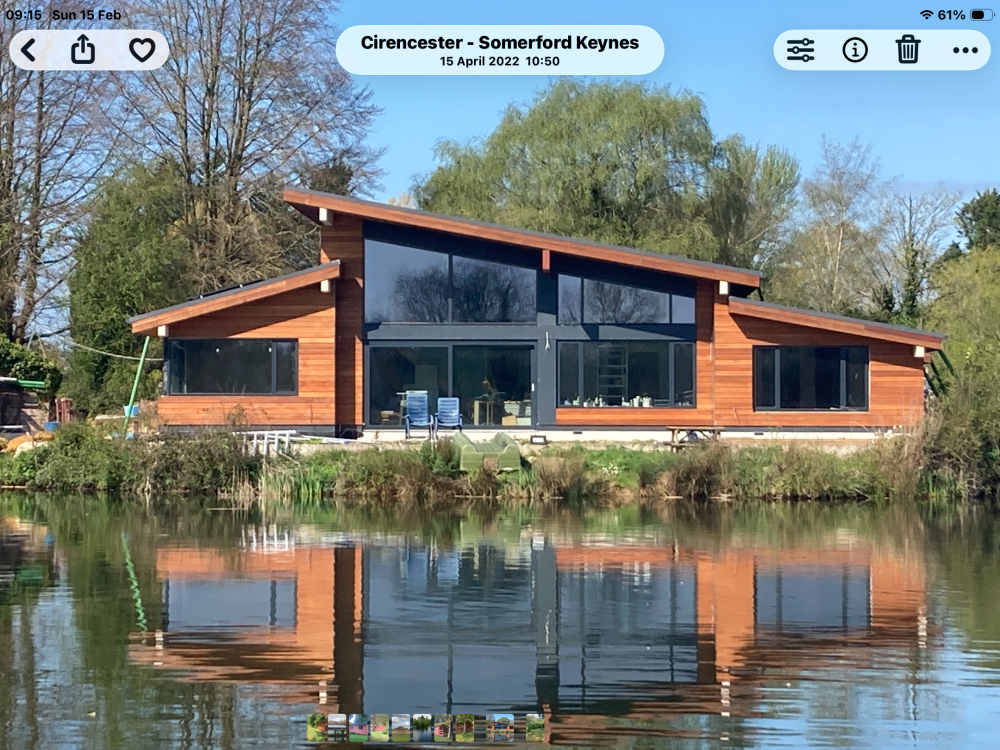
Yesterday we moved into our place, started in 2018 still not 100% finished in 2026, I estimated it would take me 2 years, 🤣🤣 thanks for all the advice from fellow buildhubbers. What we bought, what we have now.
 34 points
 -
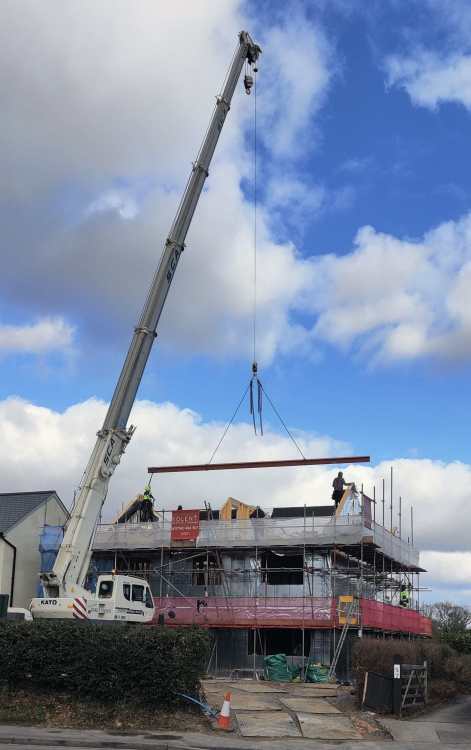
Yes, we moved into our new house on Monday last week, pretty much 9 months to the day since we broke ground and 15 months after we purchased the plot. We know we’ve been very lucky with our build. The weather has generally been in our favour and we had no supply issues or delays. Above all, we’ve had some excellent people working for us without whom we could not have achieved the build. There are too many stars to mention here but if you look through the blog you will see them all get a shout out for their excellent work as it happened. Ahead of the move, Mrs P. did a superhuman job getting everything packed, and the move itself went relatively smoothly, with dry weather and no mishaps. Amazingly, Mrs P. also managed to unpack most of those boxes within a few days, though we do still have some residual boxes to deal with in due course. Moving in day: As we all know, moving house is always a stressful business and moving to a new house is no different. But it is a relief to finally get in - there is always the nagging fear that some disaster will strike at the last minute while the house remains unoccupied. But of course, all was fine. Is our build complete? Not quite. We have some minor electrical and joinery items outstanding, both inside and outside; we have the garden landscaping well under way but some distance from completion as you will see from the photos below. Beyond that, there is a list of jobs of the sort you’ll have following any house move: curtains, blinds, wardrobes, shelving, etc. - but these are ‘house move’ rather than ‘house build’ tasks imo. We do still have to obtain Building Control sign-off and there’s a VAT reclaim to do. On the BC front we had our ‘As Built’ air-tightness test performed by Richard Harris of Peninsular Energy Compliance this week (highly recommended). The result is 1.16m m3/m2 at 50hPa on the envelope basis. Virtually the same figure for Air Changes per Hour , as our envelope area is 583m2 and our volume is coincidentally 580m3. We are very happy with 1.2 ACH. Air-tightness test under way: We have been in the house for a week now and we are really happy with the way it feels and works for us. It’s warm, draft-free, well-lit, quiet, and comfortable; the layout and spaces are working just as we hoped. We are both sure we are going to really love living here. The plant room is (to me) surprisingly warm, running at 25-26 deg C due presumably to the amount of heat-generating equipment in there. I raised this as a separate Build Hub topic but the consensus seems to be that it's not an issue, so I shan't worry. As a side benefit, it does make a splendid clothes airing room. https://forum.buildhub.org.uk/topic/46744-hot-plant-room/ Energy use The combination of solar panels, batteries, ASHP and insulation levels seems to be working well - in our first week we used 0.7kWh from the grid and exported 63kWh. Not bad for February. I need to work out our best tariff option but that’s a job for the future. Enough talk, time for some more photos (some taken just before we moved in)... Kitchen/dining/lounge: Hall: Bathrooms - master ensuite: Shower room: Guest ensuite: Bedrooms Master bedroom: Guest bedroom: Bed 3 / hobby room (Ok, so we still have some unpacking to do.) Landscaping - plenty to do yet. The layout is literally as clear as mud to me... I'm sure it will all be fine in the end(!) And finally... Troy likes the new house - it still has yogurt pots that need licking out Dashboard: Contractor days on site this past two weeks: 15 Contractor days on site since build start: 587 person days That 587 days is well over the 500 days which requires HSE being notified of the build using form F10 (which we did). HSE have not spoken to us or troubled us at all and the F10 notification is simple and costs nothing, so I would recommend any self-builder do so - if you are unfortunate and have an incident it’s surely means less chance of getting into hot water if you registered properly. Budget: I confess that in the final weeks we have gone a bit beyond our self-imposed budget contingency and dipped slightly into savings, but that is really down to choices we have made about the quality of the fit, e.g joinery, kitchen, bathroom equipment etc., and also the extent of the landscaping we have chosen to do. We could probably have remained well within contingency had we needed to but luckily we had some leeway. Plan: We did it! Conclusion: Overall, we set out to use the entire proceeds of our previous house sale to buy a plot and build a better house, and we believe we have achieved that. Thanks once again to all the dedicated and skilled people who have worked on our house and made the build a success. Especial thanks to Mrs P. who indulged my yearning to do a build provided brilliant design input and kept the whole show on the road throughout - a truly wonderful person! That then dear friends is the final blog! Thank you for following us and for your kind words of encouragement and support through our project.24 points
-
Dear forum members, Our house is complete and we have been resident for three months. I thought to post some pictures and I offer to answer any questions people might have. I don't put ourselves on a pedestal as being any better than other projects, only to say that we have done it. Our primary decisions: We chose a RIBA architect given the importance of the initial concept The layout is somewhat novel, having an H footprint with a single storey 'extension' to reduce the mass of the main house for planning purposes and to help project the rear of the house beyond the shade of the ridge line We chose timber frame (we have built with timber frame, brick and block and ICF in the past) because of speed of construction, and thermal performance We selected MBC from a shortlist of three TF suppliers, and chose MBC's insulated slab We are very pleased to have chosen a large solar array (9KW) and Tesla battery. We have used no grid electricity since commissioning. We have a Valliant ASHP with UFH but haven't had need to heat the house yet We have MVHR which works very well with our air tightness of 0.89 We have no fireplace or chimney We project managed ourselves, and were onsite every day and I did a lot of carpentry / general work alongside the proper trades Project timing: groundwork prep Dec 24, slab Jan 25, frame erection February, windows March, resident 4th July, finished end of August.


 19 points
 -
I appreciate very few will have read, let alone remembered, my original post in this thread (hence I've quoted it for context), but i thought some may be interested in an update, 8 years on. Just before we moved in in October 2017, my wife had a spirometry test on her lung function. It showed, despite having nebulised antibiotics for 18 months, that her lungs had worsened, with capacity having deteriorated to 50% (from 65% three years earlier). She stopped using the nebuliser around three weeks after moving in, and has only used it for a few days in total in the 8 years since. In late December, as part of a pre-assessment for surgery for an unrelated condition, the anaesthetist requested a new spirometry test. Remarkably, it shows that her lungs have not measurably deteriorated since 2017. I can't say for certain that the house can be credited entirely for this result, but it has certainly played a massive part, and this is one bubble that refuses to burst.17 points
-
We've nearly finished our lovely Somerset barn conversion. The parents in law and my 99 year old mother have moved into two separate annexes. It all started 8 years ago and we've been building ever since inspite of lockdown and a nasty bout of cancer.
 15 points
 -
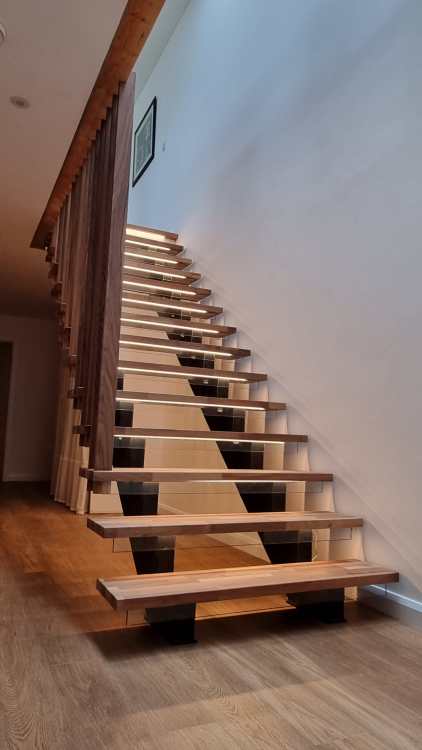
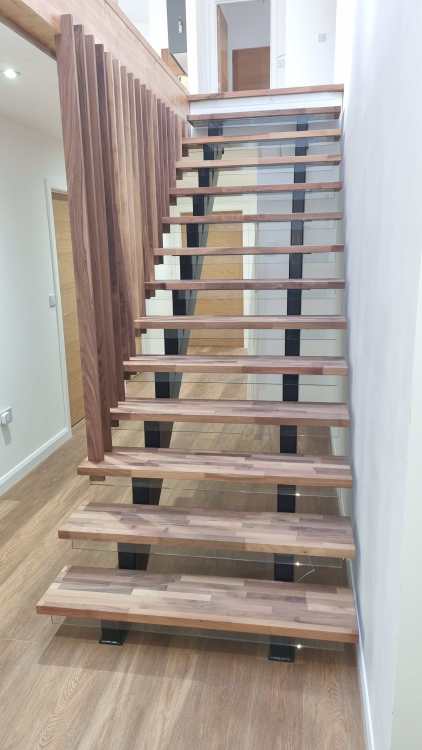
One of the things we paid someone to do for us. Spines are powder coated. Cabling for lights runs inside the spines. Steps made from walnut kitchen worktops. Spindles are solid walnut. Glass is 10mm toughened from Cornwall Glass. Why walnut? It goes with the breakfast bar made from the walnut tree we cut down, also made by same person (Principle Constructions based in Cornwall).
 15 points
 -
I'm actually not sure where the best place is to post this but as it's primarily about heat pump system design, I'll put it here. @marshian and @mads ,and maybe @MikeSharp01? you've expressed your interest so mentioning you here too. I hope the admins don't mind me putting this up here, but maybe if it is found to be useful, could be pinned to help so many of the people who come here struggling with poor heat loss calcs and designs and want to complete their own. I've finally deployed the tool I've been working on for initial public use. It's available free and open source, so repository on GitHub if anyone wants to host locally. It's currently in a bit of a test mode so I can get some feedback and bug reports to refine it and add further important functions. Just bear in mind I've been developing this myself along with everything else in life and it's been quite a major piece of work since last summer. It is now based on the CIBSE 2026 Domestic Heating Design Guide implementation of BS EN 12831:2017 and BS EN12831:2017 so complies with MCS design requirements. I have been using this tool for MCS heat pump projects in house that I'm doing. It's at https://openheatloss.com Important user notes: At the moment when you arrive, you can complete a whole project anonymously without logging in but this persists only for 48 hours or until you close the browser. The save a project, just register using name and email, nothing else. If you want to remain largely anonymous, you can just add the post code prefix to the installation address to set outdoor design temperature and Typical reference temperature. No need to put in loads of personal information. The workflow design is to work you way from left to right across the app tabs. Current limitations: I have not populated the database with standard wall build-ups and U-values. If you're a self-builder or doing major diy hopefully you'll have this info already for your project, otherwise you'll need to look it up manually. There is, however, a comprehensive floor u-value calculator and a simplified one in the room elements input too, so these can be calculated for you. Same thing with radiators - no standard sizes or outputs in a global database yet. I will do a scrape at some point. All outputs entered should be the Delta T 50 catalogue values and if you want system volume calcs, also input the radiator water volume. The UFH sizing calculates volume automatically based on your set pipe diameter, spacing and room area. Text based design - I've tried some of the design tools that are trying to be like cad design software, so you've got do draw your project. Having used cad software, I didn't warm to any of them because they're not proper cad software but in house bespoke design. As I also found out they have limitations so you have to fudge some shapes - roofs in particular. Text based means you can input elements more flexibly according to your needs. Well, I hope so anyway. What you will find different if you've used other tools, although I'm sure they'll either be doing it already or soon, is that the tool provides 2 different heat load figures. is for the heat generator which calculates the whole house fabric and normal ventilation includes a full fabric air infiltration calculation and is usually higher than the generator load To explain this, the new heat loss calculation methods according to BS EN 12931:2017 and specifically those implemented in CIBSE 2026, with wind load under certain conditions, parts of the building and rooms may require higher heat outputs, whilst other parts may need less. This 'total' value comes to a higher result than the generator. In my own test projects that I've run through the new software, I can attest to this working quite well. For example, in one design and installation project of mine, one particular room in the house was designed for 23C but over the winter, whilst never cold, the room never managed more than 21C. I had thought it was a balancing issue, but no. When I ran this project through the new software it predicted that I would need larger radiators in this particular room, base on the new ventilation infiltration calculation, so that is what I will be installing before next winter. Anyway, please have a go and let me know what you think, and ask any questions you have here, or email me at the tool - heatloss@openheatloss.com Does anyone need a user guide to the design workflow and inputs? Let me know..14 points
-
Blogging: an activity where the perpetrator converts trivia into prose and in doing so reorganises their own otherwise disordered mind. Possible side effects: perpetrator enhancing feelings of self importance; boredom amongst those reading; history being rewritten. I find it interesting to contemplate why I don’t have quite such a burning need to blog at the mo. I’ve always enjoyed working with wood and metal and power tools. And that’s what I’ve been playing at for the last three weeks. I’m not really at home with concrete and soil and masonry - they’re from another planet. On top of that I’m working closely with Rolly the chippy, and he is knowledgeable and experienced, which translates into me having great confidence in him, and additionally he is calm, and has a very powerful calming influence on me. So my head isn’t quite so haywire most evenings now, certainly less than it was during both demolition and groundworks. My head is also full of diagrams and schedules. Both the project and the timber frame kit are constantly changing puzzles which I do kinda understand and can usefully sit and think through - and having puzzles to occupy me keeps both anxiety and random diversionary thoughts at bay. Which is a v long winded way of saying that I’m happy with how it’s going right now. Since the last entry the house has shot up. We’ve had roughly a metric ton of steels popped on to the top of the downstairs panels. Two steelworkers, me, and a genie lift, watched by J and Steve the injured builder. It’s fascinating how banter volume is inversely proportional to difficulties being encountered. It’s also fascinating how distracting, frustrating and irritating little side comments can be from the audience. I’d never cope with stand up - even the gentlest heckling would completely derail me. Jerry and Paul however are made of more hardy stuff. Most of the steels they got up in no time, but then we got to the bogey - the longest, heaviest beam. It would have been massively easier had it been wheeled into the house the other way round, and in hindsight we’d have finished quicker had we put it back on the trolley, wheeled it out into the road, smiled sweetly at the scowling motorists who appear to turn purple if delayed by more than 2,345 microseconds, spun the beam round and wheeled it back in. In fact that was even suggested, but no, perhaps because it would mean admitting defeat, we soldiered on regardless. Regardless and in near silence. Even the audience cottoned on and were uncharacteristically quiet. Then suddenly, we got the beam to spin round above the head binders, dropped it into place, bolted it up and the only thing drowning out the huge sigh of relief was the loud resumption of banter. Banter and tea appear to run our build, both as a glue and a lubricant. Feelings do run high at times and managing feelings, both my own and others, is far more important than I ever imagined. An essential part of that is that the peeps working with us seem to care about our progress, take pride in helping us. We make no secret of our inexperience and our reliance on others and so far that has been met with both kindness and determination to help us. We’ve been stupidly fortunate. Anyway, we’ve also put up the rest of the downstairs panels, including the monster 11’ wide one which was the heaviest of the whole build. Leaving that till we’d done the rest of the downstairs turned out to be a very smart move. We probably found it easier than any of the panels we put up in the first week of frame erection, despite the weight of it and the fact that it was awkward. Part of that is Rolly and I settling in to work with each other. There is now a lot less verbal communication than there was to start with. We’ve also honed panel handling so there’s less pure physical grunt needed. And of course, as time goes on with each panel fitted we’ve more room to work, and that’s also significant. With such a cramped site we are constantly tripping over stuff, moving stuff repeatedly, trying to get stuff delivered at the last minute, etc. But much as I might try to plan, at times there’s no choice but to work with way too little space. A good example is the joists. They were delivered before we’d finished putting up the downstairs panels and there’s an awful lot of them. Ideally I’d have put the delivery back a couple of days but that wasn’t an option. I had no idea how much time the limited space would cost us. Ho humm. Talking of joists that was the next job. Rolly and I deposited nearly another metric ton onto the downstairs panels by hand, (just how much does this ‘lightweight’ timber frame structure support?). I say by hand, but shoulders, knees, and just about every other available body part was deployed. I don’t know what lifting capacity each of us have but somehow when working together we exceed more than the sum of our two capabilities. It’s probably simultaneously driving progress and pushing us a teensy bit too far towards injury risk but it’s just what one does. Joists up Rolly set to making us a temporary staircase while I attacked flooring boards. The temp staircase really has helped reduce fatigue and made getting things upstairs safer and easier. Good idea Rolly. Anybody would think he’d done this house building stuff before. We’ve so many joists we almost don’t need flooring boards, but they’re on the design. Yet another metric ton of them. Plus several kilograms of this funny polyurethane glue stuff. That’s really odd to work with. The first day I came home with black gloves on, only non removable ones. I’m sure my fingerprints must have been obliterated (I certainly couldn’t unlock my iPad) so that would have been the time to do a bank job. But there was no time for niceties as the following day the upstairs panels were due and the telehandler was booked, so I had to get enough decking down to allow the piles to be dropped upstairs and sorted/distributed so the other two piles could follow. Rolly was given the day off for the delivery - he’s not supposed to be full time anyway and his skills are reserved for the clever woodworky bits. So Andy the Boss supplied a telehandler driver who was also a power lifter and another equally capable bod to help me sort the panels. When the downstairs panels were delivered they were dumped in the piles they were transported in and Rolly and I had to reshuffle them, which took lots of time and energy. This time I got the long suffering timber frame company to send me pics of the piles so I could work out which pile to do first and how to sort them into sensible piles. For once the theory worked in practice and despite the complaints about how near the edge of the deck I kept walking that day ended with three piles in a near sensible assembly order. I was pleased with myself but I had a nagging doubt - would it speed erection? As I was pondering this very question Dean the neighbour (two doors down) wandered onto site to offer his help with future deliveries. “Why wait for a delivery?” I asked, there’s tons to do and I’m certainly not too proud to accept help. Next day Rolly and I attended to the odd bits and finished the decking whilst the first lift of scaffold was put up. I’m not sure I did anything but look for discarded cups, (sort of) wash them, boil a kettle and make tea, repeat. Rolly has a near infinite tea consumption capacity but the scaffolders beat him hands down whilst managing, like Rolly, to work hard and get lots done at the same time. The song definitely has it wrong, nothing stops for tea but it gets drunk anyway. Tea is useful though. Rolly arrives way before we are allowed to start work so tea helps him cope with rising agitation as the clocks edges glacially towards 08:00. Tea (and biscuits) helps me get Rolly to stop work long enough to help me plan too. And as we drank our tea and discussed the upstairs panels Dean the neighbour arrived. “I can help for a few hours” he said. Now Dean is in his mid eighties so the average site age rose to 73 that day. Hence my initial caution. I started getting Dean to help me organise and stack lightweight stuff, but it became clear that as he tuned in to the way Rolly and I worked (it’s a kind of grunt and nod based language previously unknown to science) that more ambitious stuff was in order. Panels! The three of us got the first two corner panels up, rather effectively. Whilst Rolly was checking and bracing and securing those panels Dean and I got ready for the next panel, only we didn’t, we put it up ready for Rolly to do his check/brace/secure thing. Fast forward, and I do mean fast, and five hours later almost the whole of upstairs was up. Staggering. And very satisfying for all concerned. Perhaps the speed was helped by my sorting after all. The next day Dean pitched up we lifted the gable panels from the ground floor - there was no room on the deck to use the telehandler to get them up previously - we used ropes, crabs, ladders and way too much giggling but up they went so another keep me awake job was dashed off. Don’t underestimate the capability of us wrinklies. Not so easy was the cement board fitting next day. It’s a bitch of a material to work with and slower than I’d have predicted. But we need it done before we fit the roof trusses - finishing these and getting breather membrane on will be the first job next week. On Friday we were ready in good time for the roof trusses, all 19 of them. Two powerlifters from Andy the boss arrived just as the lorry backed onto site. It’s almost like it was planned. They took one look at the job, shook their heads and took up positions. It worked like this (after a couple of false starts): Driver on lorry pushes ends of truss to edge of lorry. Shortest guy on site grabs end furthest from house and has the job of stabilising the truss. It’s at this point I realise why I need platform steel toecapped boots. Short tempered power lifter grabs end of truss nearest the house. Truss is run towards house like a pole vaulter on speed. At last second short tempered power lifter pushes his end of truss skyward. Shortest guy at back of truss grunts and struggles to keep truss upright whilst swearing, profusely. Truss end is caught by other power lifter (the smiley one) just before it lands on the upstairs floor. Smiley power lifter drags truss upwards as shortest guy is dragged along the ground with it still trying to keep truss upright. Rolly and smiley place truss neatly on rapidly growing pile. In total there was 31 minutes between lorry arriving and the truss pile being completed - if my pics weren’t time stamped I’d not now believe it. That made even the short tempered power lifter grin. To finish the week while I continued fitting cement boards Rolly prepped the first truss for a test fitting. Getting the first truss up felt good, really good. That made me grin. I’m loving this part of the build. Yes, progress is visible, and that helps, but it’s more than that. Even when I’m doing things I’ve never done I’m in my comfort zone, and the muscle and joint aches diminish overnight, and I’m not generally laying awake worrying. OK, that probably means I’ve missed some thing or things that are really important, but I’m feeling good. Long may it continue.13 points
-
I am currently waiting for Structural Engineer to share a report. But Pasquill gave me quite a comprehensive email but in summary: They have confirmed that the main issue on my site is that the steel valley beams have been set in the wrong position and at the wrong angle, they should not go through the internal corner as built and need offsetting a little this means the pitch is out by one degree. This has also caused the problems with the fascia and soffit lines. Pasquill say the Posi rafters already fitted may still usable if the beams are moved to the correct positions, though if any hidden cuts are worse than visible they may need replacing. If I do decide to replace the 12 rafters sitting on the valley, Pasquill have offered to supply new ones at a very reasonable price for me ( Which I have said yes to ). The next step is to fully dismiss the builder, take ownership of site. I have found a good joiner to come sort the posis, and will just await the SE to give me a plan of action for these steels.13 points
-
After many years of searching, we finally have a plot! Our offer on this plot was accepted in March 2024 and we've only just now completed. But we're excited that it's finally done and we can move forward. Next steps: We have an architect already and a set of draft plans. We'll be working to finalise these plans and take them to planning. The site has detailed planning permission already, so we'll just be looking to vary the design -- and not significantly so fingers crossed it goes okay.12 points
-
So a few months in to our build and I have to agree that self-build is hard work! It's also an amazing experience in which every day brings something new. It's difficult to say whether this is physically the hardest thing we have ever done because I think age plays its part, we are late 60's or so and even though we are both fit people building at this age cant be compared to the house renovations that we have done in our 30's, 40's and 50's. What I can say is that we wouldn't swap it for anything, we have promised ourselves that we would self-build for years and to be actually doing so is an amazing experience. Onwards & Upwards!12 points
-
Weeks 56 to 74 The UFH is laid and the screed is providing a lovely wobble free surface for the ladders and makes brushing up so much nicer. Our neighbour kindly lent us his scaffold tower so that we could insulate the vaulted ceiling in the open plan area which is approx 5m high. This has enabled me to finish insulating between the rafters with 140mm of Rockwool and I have PIR sheets to put up under the rafters. For cutting both the Rockwool and the PIR I created a few templates of different angles and had them ready for when my husband came to help pass them up to me. Once the Rockwool was finished we both took it in turns on the scaffold tower fitting the PIR. Having a vaulted ceiling in the openplan area and partially vaulted elsewhere will give us plenty of light and nice high ceilings but for now they are awkward to cut around to insulate and ensure the VCL is tight around the junctions. The time spent doing this will no doubt be forgotten once we move in and it is starting to feel closer. We marked out the kitchen island location and dining room table location to get first fix electic lighting located and measured for the kitchen units. For my birthday treat our daughter came to stay and dog sit our elderly Greyhound so that we could go shopping looking at kitchens. We spent almost 4 hours in Wren Exeter with Harvinder but we think we have ordered a lovely kitchen and pantry. Unfortunately our neighbour needed the scaffold tower back but said we could borrow it again as soon as he had finished with it. We then decided we should book in the plasterer as things were starting to come together, rather luckily for us our plasterer had just had a job cancel on him and when we spoke to him on a Thursday he said he could start next week either Tuesday or Wednesday. As we hadn’t finished insulating one side of the vaulted ceiling we said we couldn’t be ready that quick unless he wanted to quote for fitting the PIR and the VCL, which I had already purchased most of. We then spent the weekend and Monday getting first fix electrics in the kitchen and mocking up where the TV was going to get the electrics and room wall lighting ready. Things have therefore started to move on quicker than we expected, so we are hopeful of moving in by winter this year with a working kitchen, one bathroom and one bedroom finished at least. Kitchen design render. Testing TV and speaker location. Even with the plasterboard lifter its hard with 3 on the scaff and one on the lifter, so glad I'm not doing it. Taking time off the insulation has meant I can tidy the UFH expansion foam up in all the rooms and the trip hazards we kept ignoring at door room openings, whilst being on hand for the plasterers if they need more tape etc or have any questions. Once they have finished with the VCL membrane I might finish the VCL I started before we borrowed the scaffold tower or I could take a rest from the build and catch up on so many other things, even paint schemes maybe. I have caught up on the build paperwork this weekend. The total spend to date including the provisional kitchen figure of £15,000 which includes VAT, units, worktop, tiles and some appliances so not the reclaim amount. Total to date £238917 over 135m2 is £1770 m2 for a 3 bed, 2 bath, bungalow This is broken down as follows. General £4200 Carpentry £500 Kitchen £15100 Roof insulation, inc membrane and tapes etc £4500 First Fix Electrical £1230 First fix plumbing and partial bathroom costs (ongoing) £1430 UFH £900 Drainage and gutering £8540 Floor insulation inc tape and membranes £2670 Screed £2740 Cladding (over ordered but ideas are developing) £5690 Render £3090 Solar 7.5 KWp £8570 Roof £23300 Windows £20870 no front door yet. ICF Construction £119600 Pre build costs and fees etc £15830 The back of envelope guesstimate of future spend is £35k to finish apx £2k per m211 points
-
Quite a sobering thread this tbf. I was not aware that this grinds folk down quite as much as it seems to, the old "self-build" malarkey....... I use BH to shed my brain of the excess energy floating around between my ears, quite bad ADHD etc, and an interest shared here and on eBuild, our home before Buildhub, where it's just nice to see and hear people ask questions and then have us lot intervene so they then don't have things go "tits-up". I'ts nice to have a hand in the prevention of such events. For any folk who are a bit befuddled or overwhelmed and want to get off the starting blocks with their projects, if this helps, I'm happy to do so some 30 mins Teams / phone chats FOC. I can offer advice for groundworks / substructures / superstructures, insulation and airtightness, right through to fenestration, roof and solar etc, or ask me which ASHP or MVHR is the best one to go for etc. 60 min chats not a prob, with maybe members then offering up a small donation to the Buildhub coffers for our annual running costs or whatever. Buildhub is a free-to-join forum that is completely volunteer run and operated, and is not for profit btw. Without donations, it would not exist. I cover pretty much A-Z, so quite comprehensive, and if anyone is interested just ping me a PM and I'll slot you in when I'm between doing other stuff I imagine it'll be like a really coarse, Welsh AI lol. The caveat is, it'll be offered to contributing members only, so no piss-takers need apply IIRC @ETC offers up a bit of selfless support here and there, so it's not uncommon for good folk on here to give up their time to give struggling members an occasional leg-up. I'm sure a few other regulars help, such as @craig, other maybe going unsung so sorry if I missed anyone also deserving of a mention here. "Long live the Hub".11 points
-
I was drawn to this thread as I was badly struggling for motivation in the couple of months before Christmas, especially trying to undertake tasks single handedly that really required someone with 8 arms, and a lot more height and strength than I have. I eventually got to the point where I was barely achieving anything, and getting more and more self-critical and fed up. Constantly tired, frustrated, and aching. I decided to speak to my GP and started taking anti-depressant medication, which has made a tremendous difference already. In addition, I decided to take up the offers of help that people have given me, and aimed to structure activities around that help in a way that makes it feel the most effective, eg. getting some large boards up on the wall with a few screws so that when I'm back to working alone I can do the simple task of filling in the remaining screws. It isn't even slightly surprising that the pressures of undertaking a self building project can have a negative impact on mental wellbeing. Even the most optimistic of us can get worn down by the feeling of it being relentless and interminable. Asking for help can be transformative.11 points
-
Last night was my first night sleeping in my new house, finally! Got 1 bedroom mostly finished. Ikea wardrobes, painted, blind and floor installed. Just enough to call it a home! Lots more to do but it saves rent and commuting time. I plan to take it easy for the next fortnight as the last two years have been creeping up on me. Small projects for the short term. Getting internal doors installed (by someone else!) currently. Put some acoustic insulation around the linings and cut it back. I like the look of the wood/oak veneer. Been chasing documentation for the BER (SAP) assessor. It adds up to quite a lot. Doors, Windows, Heating systems, section plans, U value calcs. Think I have all of it now - hopefully they'll issue a BER Cert soon! My airtightness commission went sideways, lots of leaks. So one of my snags is to put air tightness tape around all the ducts to the MVHR unit and outdoors and also between it and the manifolds. The testing unit is very sensitive (even dropping it puts it out of commission for two weeks!) so I've a bit of work to do before I call them back. The Renson Endura Delta 330 has a few levels of ventilation and they upped the minimums from 50m3/hr to 127. Will see with single occupancy if I adjust this down a bit. I can monitor the unit with an app only, there's no display. I noticed when I ran the supersayer gas heater for a few hours to warm the house (as the gas bottles had been unused for the last two years) the CO2 levels hit the roof and it went to max flow rate to clear it out. Anyway, I plan to use the Air to air system more going forward and that won't cause the same issue. Had two floods to deal with. I've a japanese bath I was trying out. We'd filled the bath with a little water to check for leaks a few weeks ago and it drained fine. The bath is on a platform to allow for a trap to be installed below it. The drain for the bath just fits into a grill so it's open and can potentially overflow which is what happened after I fully filled it, used it and two days later pulled the plug! Luckily I put the plug back in and used towels to keep the water in the bathroom as it's tanked / is a wetroom so no damage was caused to the rest of the house. There is a seat in the bath so I was trying to get the most comfortable position and removed the seat. I'll probably put it back as it's a short bath and my back didn't like the sitting position on the floor of that bath all scrunched up. The seat means you only get heat around your hips so will have to have a think about it more at some stage. Or get a bigger bath! The second incident was with the washing machine last night. The discharge pipe isn't big enough for the tumble dryer, air to air condensate and the washing machine so I got an adapter that taps into the side of the pipe with a spigot for the washing machine discharge. This didn't seal/hold so it spilled everywhere. I think I'll go back to basics, replace that section of pipe and glue on a y bend to create two parallel discharge pipes and this way I can get everything connected at once and no risk of floods! My car charger won't reach the car as it's about a meter short but that's due to a big hole I've to backfill with MOT. The dust is everywhere but at least with the internal doors I can mitigate this a bit going forward! So not finished yet but I have a doorbell, hot water, heating and an amazing house to walk around in and rest a bit before finishing the final list of projects and call it a day!11 points
-
Rick - would strongly advise against this position and sending a letter like this. At this stage your builder is possibly preparing themselves for legal proceedings. In this instance you are absolutely advised to commit as little as possible to written (or even verbal form). I would advise that you don’t continue with this contractor under any circumstances - and get yourself in a headspace where you’ve accepted you need to find someone else. reading your contract you can’t unilaterally terminate the contract as there is the provision for remediation. My first course would be to request a without prejudice conversation with your builder. Within this conversation (have a third party present such as your SE, architect or a friend) set out that from your point of view the trust and relationship has degraded to a point of no return and you do not under any circumstances want the builder to continue. Explain that if that isn’t agreeable you will exercise clause 37 and at the builders Cost they will be required to replace all posi rafters and fit them to the satisfaction of your SE. State that Pasquill have advised they are likely not recoverable. This is an expensive exercise for the builder. Others may suggest you try and get them to cover the cost of doing the job right. Personally I wouldn’t trust them anywhere near my site. I would seek a negotiated exit and write off getting any money back. Alternatively, if the builder doesn’t agree I would advise you exercise clause 37 immediately. I doubt that they will remediate within 14 days but if you don’t follow the provisions of your contract your builder can pursue you. I would advise a letter that is entirely factual, unemotional and succinct if you need to serve a breach notice. I can help draft one if you need. Accept your relationship with your builder is over.11 points
-
As promised, I spared you a Week 14 blog due to our visit to Yorkshire for a wedding and catch-up with old friends. It was lovely to do something unrelated to the house and it made us realise how all-consuming our build has become. We will definitely try to have some more non-house time through the rest of the build. That said, it’s back to the matter in hand: UFH Two weeks ago the guys were battling through laying the floor insulation in preparation for laying the UFH pipes, ahead of the screed pour which was booked for 3rd September. In the end it was a very close-run thing - the UFH pipes were ready by 13:30 and the screed arrived 10 minutes later. Too close for comfort really: Tight project scheduling is one thing but the stress of 11 cubic metres of unusable liquid screed potentially being dumped on the site was a very uncomfortable feeling. Screed Once started, the screed pour itself (by Williams Walls and Floors) seemed to go very smoothly (hah!) and it looks fantastic. We have had 65mm of Cemfloor Therm liquid screed laid. Still in stressed-out mode I woke up before 4:00am the next day worrying about what would happen if the pipes floated up or the screed was laid too high (they didn’t; it wasn’t). (I helpfully woke Mrs P. too just so that she could share the experience - she seemed not to appreciate it.) We left the house shut up for 24 hours as instructed by the screed man Rob Williams. On Friday morning I went over and opened up to find we had a sauna! All perfectly normal apparently, but the combination of heat from the screed setting reaction, the well-insulated relatively air-tight house and (presumably) 1000’s of gallons of water created an atmosphere that made Singapore seem like a desert. Sadly, I failed to get any photos of the clouds created as the windows were opened and the saturated ‘sauna’ atmosphere hit the September morning. By the afternoon, with all the windows and doors open the inside of the house seemed perfectly normal again. Seeing the screed poured in a few hours and reflecting on how fiddly all the underfloor insulation had been to lay, made me wish there was an option for a poured floor insulation - it would surely have been so much less effort and faster? Edit: There is apparently - https://www.rtu.co.uk/assets/documents/RTU-Ultrabead-Brochure.pdf. I have no idea if it is any good, what the pros and cons are etc, and it is too late for us but if we were doing another build (Mrs P: “We’re not!”), I’d certainly look into it. Render Just to make sure we weren’t missing an opportunity to get some outside work done while the focus was on the floor, we had booked our render team (Caesar Spray-rend and Plastering) to start boarding up the 50% or so of the external walls that are to be rendered (the other 50% will be vertically clad in Brimstone Ash). So on week 14 the STS construction boards were fixed to battens and last week the base coat was sprayed and smoothed out. It already looks a lot better just for some of the shiny breather membrane walls being covered up. We now have to wait a week before the top coat can be applied. We’re using EcoRend Thincoat for anyone who is interested. And finally… Marcus from our super groundworks team came in on Thursday to set all the stainless steel oak post brackets in concrete on top of their support pillars, and also to lay the smoothest, tidiest concrete slab you have ever seen to rest our ASHP on. …Which is just as well because the ASHP arrives on Monday! Dashboard: Contractor days on site this week: 22 Contractor days on site previous week: 16 Contractor days on site since build start: 249 Budget: Getting more challenging tbh - beginning to eat into the contingency - mainly costs I hadn't properly estimated. 😱 Plan: Still on track to move in by Easter 2026. Issues and worries closed this week: UFH pipes laid. Screed down! Current top issues and worries: Insulation - the additional ceiling insulation is still a worry - scheduled for w/c 15th September.10 points
-
This day has been on my mind for months. We really struggled to find a company that would visit the site and confirm whether we could get a static down the lane. In the end we took an educated guess and purchased a 2023 37x13 unit from a private seller. So at 1100hrs today, the wife of the driver (Greg Caravan Haulage) appeared in the driveway telling me I needed to go and cut some low hanging branches. We got the static on site relatively easy, but then it got bogged down twice whilst reversing it over the type 3 MOT. We had to Jack it up and then finally decided that sheets of 18mm shuttering ply under the wheels might be the way forward. In a nutshell , if we’d done that from the start we’d have got it done much quicker. It’s in position and I just need to get it levelled and on blocks now. A bit too stressful for my liking, but relieved. I’ve been more concerned about getting the static on site, than building the house.10 points
-
Back by popular demand! (Well, one person asked.) I said the previous blog was my last. I lied. This bonus edition focuses our efforts to landscape the garden. Just before we moved in in February the rear ‘garden’ looked a bit like this: Fortunately, we’d stayed close enough to the build budget to have some funds still reserved for landscaping. It turns out that landscaping is expensive - similar costs to groundworks in our experience. Last year, while waiting for planning and itching to do something, we’d engaged a garden designer to help us meet some key requirements. We wanted to create a small garden with multiple planting and seating areas with level access from the house and wheelchair access to all areas. The designer came up with a design we liked - an interesting mixture of curves and angles, with planting and seating areas as requested. We ended up adapting this design to form the skeleton of the garden. In truth we were never likely to take any design without tweaking it but if we attempted the design ourselves it would have been very boring compared with the garden we now have. (We also ditched the designers planting list suggestion but Mrs P. was always going to have the plants she wanted, and why not?) One reason we had to adapt the design was that the fall in height was more than we planned for at 1.6m, and we only had about 12m distance to manage it given we wanted a terrace with level access next to the house. For comfortable wheelchair access I find it’s best to limit ramps to no more than 1:20 gradient, which implies we needed to fit in 32m of ramps in a 12m x 15m area. So the paths became a bit more meandering. Here’s my amateur attempt at trying to gauge shape and fall of the paths. Our excellent local landscape gardener Ashley Ralph (Ashely Ralph Landscaping - I’m not on commission!) started work in February to turn our amended plan into reality. Marking out was fun! This photo shows just how tight a space Ashley was working with. Cern Abbas Giant eat your heart out! Anyway... we needed quite a few retaining walls, which means a lot of trenches and footings. It rained a lot in February too, which added to the challenge. It would have been nice to achieve this with less concrete and fewer concrete blocks but I can’t think how that could have been done. Ashley, with Francis driving the dumper. The block walls were capped with sandstone copings and given a sand and cement render finish. We remembered to run some armoured cables and blue water pipe to allow couple of electric sockets and water taps. In the end we decided not to bother with external lighting even though we’d got planning permission approval because we rarely need it and are happy to use portable rechargeable lamps when we do. The paths and seating areas are in resin bound gravel; here are the paths edged in red setts then with and a concrete sub-base on type 1. Here’s the scene before the resin top-coat is laid but after the planting beds have had their topsoil put in. Troy's taken the idea of 'beds' too literally: For the terrace we used the external version of the internal 900 x 600 porcelain tiles we use throughout the house. The external tiles are 20mm thick rather than 10mm and have a slightly rougher surface for slip resistance. We used the same tiles for the front porch area. The walls at either side of the rear garden have drops of over 600mm so our building inspector insisted we put up ‘fall protection’ which we did using locally sourced cedar slats, fixed horizontally to posts ‘resin-studded’ to the walls. This doubles as screening from our neighbours and provides extra shelter and structure for climbing plants, so we were not too upset at having to do this. (The wider gaps at the bottom are deliberate here, to allow jasmine to grow through from the other side. Beer at bottom right is entirely incidental!) The final step for all that hard landscaping: the resin bound gravel surface. We think it looks great. It’s very smooth to wheel on and all the gradients are good too! For the planting beds we imported a fair amount of loamy topsoil to go over the existing heavy clay. Hopefully this will give a good balance with the underlying clay retaining water whilst the surface soil doesn’t get waterlogged. The beds are not enormous but it is going to take a lot of plants to fill them. That, and time to allow the plants to grow and establish themselves. Er… planting beds Troy! Obviously Mrs P. is in charge of the planting as I haven’t got a clue. The beauty of raised beds is that you can put the soil you want in them. One of the beds closer to the house will have sharper drainage and is going to become a Mediterranean garden. Another has been filled with ericaceous soil for acid-loving plants. I do know that we have some of our favourite plants already planted or planned, including roses: Nye Bevan, Claire Austen, Queen of Sweden, Champagne Moments, Donahue; also various peonies, hydrangeas eryngiums, achillia, lavenders… and lots of others. But plenty more planting opportunities according to Mrs P. - I’d better check that budget again! Well, that’s it for this bonus edition garden landscaping blog. A big thank you to Ashley and Francis for all their incredible work building our garden, and to Mrs P. of course for great plant choices, all that planting, and green fingers. After all, what is a garden without plants? That’s definitely it now… …until the epilogue maybe. Ben9 points
-
Once upon a time a deluded wrinkly, his much less wrinkly wife and their noisy little dog left their almost fairy tale rural retreat to live in a freezing rented bungalow while they buggered about trying to build a new semi-urban retreat nearby. (How clever am I avoiding the word suburban!). Everything would have gone swimmingly but for the fact that the head of the wrinkly was just too full. It sort of still is I think. In the four months since the last post (stop thinking of a bugler at sunset even though some days that feels appropriate) much has been done: We’ve built a garage and the front of site is much less of a moonscape. All our blockwork is in, much of it rendered. We’ve now got one flat roof and two slated rooves, one with loads of solar panels. All our windows and some of our doors are in. We’ve got 240mm of underfloor insulation and a circa 100mm sand and cement screed with lots of buried pipes, of both the heating and soil varieties. The screed alone changed things to more house than warehouse - fabulous. Almost all the internal wall skeletons are back up - so now we get a much better feel for the layout which is a very good thing. (We built some downstairs walls earlier but took them down to make the DPM and insulation easier.) Most of the frame insulation is in. There’s even loft insulation in the loft - ok it’s still in its rolls ready to be fitted but it’s still there, patiently waiting. And there’s some VCL in place and we’ve made a start on the inner skin - some battens and yet more mineral wool to form what is really an insulated service void to give us a half decent wall U value. The man cave has its insulated metal panel roof and is usefully storing tons of stuff. All the service pipes and wires are buried in a trench ready for connection to said man cave which meant yet more depressing hours on a digger, and now the back garden is a moonscape. A humongous insulated twin pipe monster conger eel of a thing is buried, surfacing at the concrete plinth for the heat pump at one end and in the under stairs cupboard at the other. We have surface water drainage pipes installed at the back. Phew. No wonder we are worn out. And I’ve probably left lots of things out too - when you are on site every day it’s so easy to forget what has been done and focus instead on the rather elongated to do list that keeps me awake at night. Not every night mind, some nights are a lot better than others and I am getting a vaguely sensible amount of sleep more nights than not now, thanks to constantly talking stuff through with J. But there is an essential difference in the build. Before we sold Bramble we knew we were running out of money so we weren’t going at full hurtle. I had a twenty minute drive to and fro and a soak in the bath, all of which helped me keep my head in the game. It felt like there was time to think. Now I have a twenty second walk (if I dawdle) to and from site. Despite the ice box (aka rented bungalow) having a really powerful gas combi boiler it has a low power electric shower that dribbles just enough water to get clean but not get warm. And we’ve the money we need to complete, so it’s warp factor 8 Mr Sulu. Now if I was doing this on my own I’d have no choice but to slow right down, and try and get my head together, and feel in control again. Thankfully we are totally in this together, so we aren’t slowing down. Not that it’s without tensions. J and I talk everything through and she keeps track of tons of things that I can’t (hopefully everything that I can’t, which is an unfair burden but that’s how it is). We identify short term priorities and I focus on them, with me tacitly accepting that I am not personally in control of everything as for me to be so would mean a lot slower progress: neither of us want to stay in the ice box a day longer than strictly necessary. So the tightrope act is to balance keeping the pedal down as hard as possible without us actually losing control or allowing any major cock ups to occur. Simples. It gets harder when there is anyone else on site but ourselves and Rolly, our chippy. Peeps are incredibly (and I believe unconsciously) attention hungry especially when their needs are coupled with my need to monitor all work and limit disturbance to the neighbourhood. It’s so frustrating that when a contractor is on site my own productivity declines enormously. And then there’s the gargantuan mess, especially in one particular case - the thoughtless dumping of spare stuff; the treading of material up and down the road without a care for the frozen moron still sweeping and hosing down the road in the dark hours after they’ve finished their second pint; the drifting flocks of discarded paper bags mixed in with fast food packaging. Sigh. At least everyone we’ve had on site so far has done excellent work, so that does compensate. The feeling of a lack of control is not helped by the fact that I’m completely useless at estimating the time needed for tasks - though as J frequently mentions we’ve not done lots of this stuff before so we should accept that we can’t know. The DPM and underfloor insulation took me many, many times what I imagined and I’ve a black belt in beating myself up. I enjoyed doing the lower polystyrene layer, so nice to work with, but hated the PIR layer. The polystyrene has spring in it and one can cut pieces a little oversize, lever them in and get a really nice, tight fit. It’s messy in that little baubles of white stuff get everywhere but they don’t get down your throat. PIR however is sooooo different. The dust it creates is truly horrible, it lingers in the throat many hours later even if a mask is worn, which it mostly was. It almost appears to shrink away from it’s neighbours - when cut to precise size and shape, wrestled into place shooting showers of nasty dust up as the air trapped underneath is expelled through the tiny gaps at the side - it still sits there showing a small but definite gap between the sheets. Not at all satisfying. Thank heavens we ignored the architect and chose not to put PIR in the walls. So it turns out that there is a job worse than moving tons and tons of crush. But thats now done, thank heavens. As an aside I’d planned just polystyrene, but the reinforced slab came up a bit more than planned so I switched to part PIR to get the insulation level I’d targetted. Note to self: get quotes for different thicknesses of stuff before deciding. Buying stuff that local suppliers have on hand saves tons, which accidentally benefitted us on the underfloor insulation - had things gone to plan it would have cost us rather more for the same insulation performance due to me designing in theoretically available sizes. Odd world, innit. The need to book contractors is a real source of pressure. An example: We have been recommended a plasterer who everyone says is brill and so is v busy and we don’t want to lose him, but that means guessing a timescale and thence sticking to it. I’m an ex-project manager. I know that to manage the project requires knowledge of the timescales for each task in the train, and as above - I really don’t have a scooby. Well, I do, but Skooby the Skoda probably doesn’t count in that regard. So, in summary we’ve got tons done, but tons still to do. Xmas has annoyingly punctuated the project but that’s probably a mental godsend - at least I’ve a popped ballon to enjoy putting in my empty honey jar. We’re working really well and closely together as a couple and I will get used to the feeling of panic just below the surface that not feeling personally in control causes; the foreboding that I cannot be confident that I haven’t missed something important; the relying on J that will deliver much faster progress. You never know, my next post might even be a bit about the build…9 points
-
This time of the year gets to me - sometimes. And in the context of self-building, its dark for longer, wet for longer, cold for longer, windy for longer than I'd like. Optimists say that some of that can be sorted by proper clothing, and decent site lighting. But wetness can make a site misery quicker than anything, cold can stop concrete and mortar dead. Wind is a bastard on a scaffold. Self building's a character test. The push to complete never lets up despite all of the above. I suspect that a few of us are having to 'dig-deeper-than-normal' these days. Got any ways of picking yourself up when things are more than merely gloomy?9 points
-
Hi everyone. It’s been four weeks since the last blog instalment and despite the Christmas and New Year break, quite a lot has happened. Apologies for a somewhat scattergun approach but I wanted to try to cover all the progress. Kitchen units and appliances Last time, just before Christmas, carpenter Chris was halfway through fitting our kitchen units. That work was completed during the first week of January in readiness for… Kitchen worktops Martin from Langford Stone came out to template the kitchen/pantry/utility units for our worktops. While he was at it, we also asked him to template for several granite surfaces for our master ensuite. A week later Langford’s team of four fitters arrived with some very large slabs of granite, which they duly fitted without issue and to a high standard. We’re very pleased with the results: Internal doors Chris and Alan fitted the four pocket doors to the sliding gear installed back in September, before plastering. They then fitted the oak door linings for the 8 conventional doors and hung those doors. The door linings required some thinking about because we originally opted for rebated linings but these have had to be reinforced with ply backing to give enough meat to confidently screw in hinges that can take the weight of the (44 kg!) doors. We hope still to get the rebated look by fixing full width door jams, which we’ve now ordered. The doors themselves are 33” Avon Oak fire doors from Todd doors. We opted to buy them unfinished because the factory finish doors felt a bit ‘plasticky’. Mrs P. has done a brilliant job with sealing them with Osmo Door oil and we are very pleased with the results - they have a lovely look and feel to them . The doors supplied were really good quality - no need for further sanding before oiling and no complaints from the carpenters (except about the weight!) Troy Pointer supervising operations: 2nd fix electrics After a pause at the beginning of January, Darren is now back with us and making good progress on the second fix electric. Skirtings Steve, our tiler came in to fix the porcelain skirting tiles and was able to make a start, but the rethink needed for the door linings meant we are not ready to fix all the architraves just yet. So he has promised to come in on a future Saturday to finish those off. The skirting tiles themselves are 900 mm long and have more of a bow in than we were expecting (well I was expecting them to be flat to be honest!). Steve was worried that they would not look great but in reality unless you look along the line of the wall you can’t really notice the bowing and we are happy to live with it (especially since we can’t think of any sensible alternative at this stage). Once grouted or caulked to the same colour as the walls we don’t think it will be an issue. Ensuite boxing-in I’ve been whiling away the odd hour here and there preparing the ensuite for final fix by my brother next week. There’s quite a lot of pipework which needs to be hidden - given the way the house design squeezes three bathrooms into a small space, the stud walls are just not wide enough to take it all. So my idea was to create some boxing-in using spare 4x2s to hide the pipes, provide some built-in cupboard space, and form a framework for timber cladding on the lower walls. Sure, I could have asked the chippies to do this and they’d have done a great job in no time... but where’s the fun in that? For the timber cladding itself we’re going be using some of the left over Brimstone heat treated ash we have used to clad the outside of the house. This time of course we'll seal it with Osmo oil. The quality of that Brimstone Ash is too good to waste solely on the outside. You will hopefully be able to see from future blogs whether this bathroom design idea has been successful or not but for now here's some 'boxing-in'. Moving in next month! I mentioned in the previous blog that we had brought forward our target moving in date to the end of February. We now have a removal date booked of 23rd February. - so only five weeks away! We should be fine, we could probably move in and camp now if needed. The main things we really need sorting are a fully working bathroom, electrics, and ideally smooth and solid access to the front of the property. Hopefully we can get all that done in the next five weeks. Council tax Mrs P. and I were wondering about bin collection and also how soon the council would want to start charging council tax, when lo and behold the man from the council turned up. He explained the process, gave us a form, and told us we could request bins (for which we have to pay a £81 one off charge - of course we do). Since we will be ceasing the council tax liability on our rented house, we are happy to start paying council tax on the new house. The council man said it could take three or four months to get a council tax valuation but they will backdate the charge to our move in date. Address After seven months(!) Royal Mail have finally got round to adding our address to their postcode checker database. They say on their website that they will only add it when you move in but as anyone who has self-built will know it’s really very difficult to arrange deliveries, service installs, etc. if your postcode is not on that Royal Mail database. My advice for anybody starting a self-build is get that address registered as early as possible. Fibre Another service that’s taken seven months from request to delivery is our full fibre to the house. Many of you will know this is a new build building control requirement for England, so we requested (and paid for it) back in June. It finally arrived last week. Unfortunately we didn’t get added to the Openreach fibre database straight away so no service providers could offer us a fibre service until that was resolved earlier this week. We’re hoping to get the broadband service up and running next week. Focus for the next two weeks: Electrics, still lots to do. We’re hoping to have two sparkies in for most of next week so they should make a lot of headway. Plumbing. My brother Chris is back for 4 days next week and will focus on getting our master ensuite up and running, the kitchen & utility sinks fully plumbed in, and then if there’s time progress on the family bathroom and guest ensuite. Landscaping. Ashley, our garden landscaper is making a start on the front landscaping from Monday. We’re really looking forward to seeing the crushed aggregate disappear under something more wheelchair-friendly. Dashboard: Contractor days on site this past four weeks: 47 Contractor days on site since build start: 495 Budget: No change - over budget but within contingency. Plan: Moving in booked for 23rd February. Issues and worries closed this fortnight: N/A Current top issues and worries: None.9 points
-
Floor The main focus this week has been laying the DPM + 220mm PIR floor insulation + 50mm upstand insulation round all the walls, then the UFH perimeter expansion strips and the vapour separation layer ready for the UFH pipes. It’s proved intricate work. Ken our first fix plumber assisted by local builders Barry and Jordan together have been working hard to complete the task by the end of August so that the liquid screed can go down during the first week in September. Early this week it looked like there was too much to do in the time available which added to everyone’s stress levels but by the end of the week the guys have made good progress and appear to be over half way through. We have a little bit of contingency with the screed team who are happy at this stage to leave the pour date a bit flexible during w/c 1st September, so we are hoping we will be alright. One thing that is particularly pleasing is the meticulous attention to detail being applied by Ken, Barry and Jordan. The PIR boards are being cut and fitted really tightly and the taping of joins and of the DPM is being done with real care. If we were doing this again (Mrs P: “We’re not”), I’d consider building the non load-bearing internal walls later, on top of the screed, which would have saved a lot of effort intricately cutting, fitting and taping DMP and insulation to those internal walls. But no doubt a different series of problems would have ensued. Electricity supply Also this week, SSE came in and moved our electric supply from a meter box which used to cling to the side of a now-demolished wooden garage, inside to the plant room. Two SSE engineers for two hours = 3p change from £700(!) Hey-ho, it’s done now. External battens I reported that these were all done last week but I forgot about the cross-battening required for the vertical timber cladding. Anyway, that was duly completed by Alan and Chris this week and the walls are ready to receive STS construction boards plus Ecorend thin coat render (for the rendered sections), and Brimstone Ash vertical timber cladding on the other areas. I need to arrange delivery of the latter when we have sufficient space (the cladding is bought and being held by Vastern Timber pending delivery). But work on the backing boards for the render starts on Monday - yes I know it’s a bank holiday but the render people are keen, so who am I to stop them? Carpenter Chris also sorted out the ply protection for the front door and here's our lovely temporary door - the real one is safely wrapped up in the workshop. Scaffold Also keen to work the bank holiday weekend (well, ok, after a bit of encouragement) were the scaffolders, who arrived on Saturday morning to remove the scaffold, which they did in a few hours with no dramas. So we can now see the house! although it’s still looking very shiny-silver. The plastic protection is remaining on part of the zinc pending the completion of the vertical cladding of the wall on the left And finally… Remember this rogue beam from last week’s blog? Too close to the window reveal to allow us to fit an external blind… Well, I asked Matt at Turner Timber Frames to check with the engineers whether it and the one at the other end of that roof canopy are structural and it turns out they are not, they are purely 'cosmetic' and can be removed if we wish. However, in the meantime we are wondering if we really need and external blind anyway(!) Also, we need to talk to Alan the carpenter about how we are going to finish the roof in that area, and he’s away until next Wednesday. The soffit will be clad with some of the Brimstone Ash but should the soffits be horizontal or follow the slope of the rafters? Do we need some kind of clad gable at the end? Also, how easy will it be to take that beam out? It’s on joist hangers at the wall end but how is it fixed to the top of the oak posts? At least we have options to consider now though. Dashboard: Contractor days on site this week: 19 Contractor days on site since build start: 211 Budget: No change, running slightly over. Plan: On track to move in by Easter 2026. New measure - Number of bacon baps bought: 8 this week; 41 to date. These are ‘keeping people happy’ baps. Unfortunately there is no entry in the budget for them so I have explained to Mrs P. that they’ll have to come out of the kitchen budget. Kitchen -> food, it’s obvious! (Although as Mrs P. points out: "No kitchen; no food" which is a concern.) At any rate bacon baps from time to time feel like a worthwhile investment to keep everyone happy. Issues and worries closed this week: Scaffold is now down; the renderers can get at the walls! Current top issues and worries: Insulation - the additional ceiling insulation is still a worry - going to need to schedule it in after the screed now. PS We’re at a wedding next weekend so the weekly blog may be delayed or skipped. I imagine you’ll all survive the blow.9 points
-
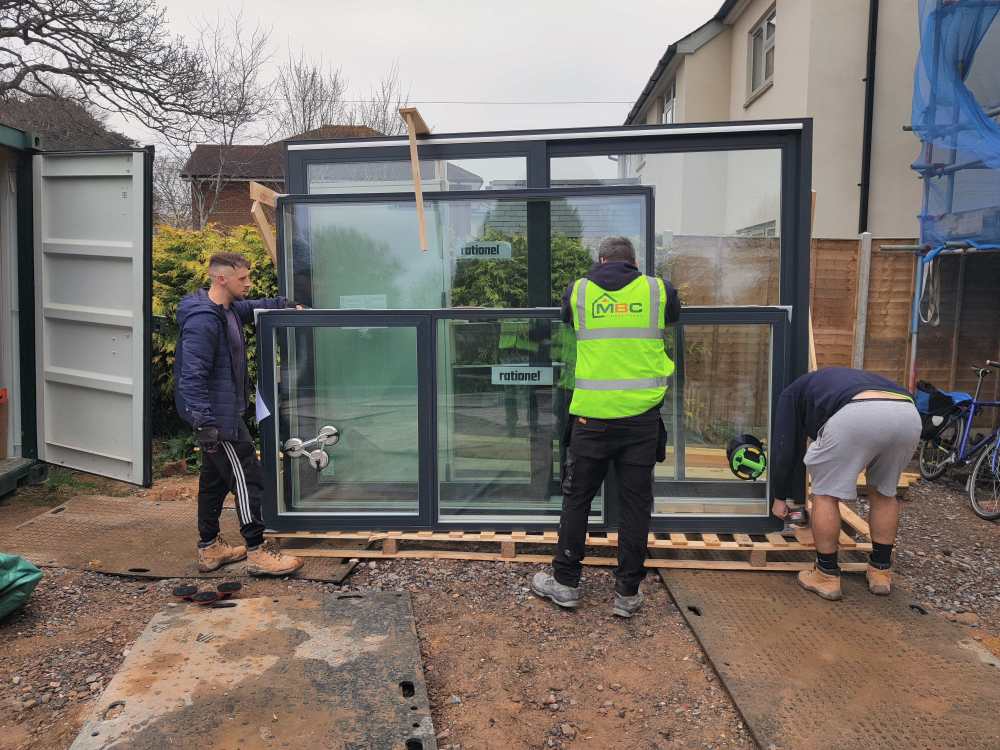
A quieter week this week but good progress nonetheless. The main build focus this week has been on the south-facing single pitch roof which is to be covered using in-roof solar panels with slates around the boundary, then zinc facias to match the rest of the roof. It seems the zinc roof guys don’t do slate roofs and the slate roofers don’t do zinc, so two roofing teams required. Fortunately, both teams have been excellent: professional, tidy, friendly and turning up when they say they will. All you could ask for really. Also fortunately, the slate roofers (Pete and Dave from G M Spicers) will fit the solar PV panels under the guidance of our electrician Nick. And that has been the main activity this week - roofing battens and then the solar PV panels. (I should just give a mention to Travis Perkins who supplied the cleanest, straightest 2 x 1 battens I have ever seen, barely a knot anywhere. It’s a shame they’re florescent yellow - I wouldn’t be surprised if they glow in the dark.) The solar panels are by Solfit and clip together to form a watertight roofing surface - no trays, they just fit straight on the roofing battens. They’re about 1790 x 1220mm and weigh 26kg each, so getting them on roof is no easy matter but the Pete and Dave seemed to manage ok. We have 35 landscape format panels (5 rows of 7) at 425w each giving 14.8kW total generating capacity. There are no doubt cheaper panels available but we have saved 77m2 of slate or zinc roofing, so that helps the economic case. By the end of the week, all the panels were on and the team had started to fix the slates around the edge so we can see how that will look. Also this week the zinc roofers stripped off the protective film from most of the roof so we can see that now and I have to say it looks really smart. Aside from the actual build work, we’ve made good progress on planning future activity with an number of trades now provisionally booked in including: UFH fix, screed, floor tiling, external rendering, airtightness test, decorating (single-colour spray all through), and bathroom fix, courtesy of my brother Chris! (Yes, there are lots of other activities booked in too - but we didn’t book them this week!) The next few weeks remain very busy (hopefully) so watch this space for more progress… Our windows and doors are due to be installed on Thursday and Friday, so if you see Kevin McCloud in the vicinity of north Dorset, please send him away! Dashboard: Contractor days on site this week: 10 Contractor days on site since build start: 166 Budget: No real change, running slightly over. I keep finding things I’d forgotten to include (e.g. decorating!). But I also realise I haven’t factored in our VAT reclaim yet. So overall, all ok good. Plan: On track to move in by Easter 2026. Issues and worries closed this week: Velux flashings. At last, we have solved the mystery worry of the Velux flashings. More detail here for those really interested https://forum.buildhub.org.uk/topic/44742-velux-flashings-for-standing-seam-zinc-roof/#comment-626128 but in summary: Velux twice got it wrong and the second time tried to sell us some flashings at £588 + VAT each, when we actually needed some £43 kits…also made by Velux. The latter are now fitted, so all is resolved. Current top issues and worries: Scaffolding - unresponsive scaffolding company. The scaffolding needs to come down in two weeks time but I’m worried that we’ll be used as free storage and thus be held up. Scheduling future deliveries: insulation, battening, cladding, render boards, MVHR, UFH kit, ASHP, HW cylinder… all due in the next six five weeks.9 points
-
On your marks: Get set : Wait! Day 1 of panel erecting was rained off. Humph. I tried to pretend to be human again by popping into town with J for a spot of bargain hunting (for stuff we don’t need, natch) but inside I’m still a self build automaton. My recovery won’t really start till we move in methinks. Next day we start the day by admiring my new paddling pools. The previous week I carefully swathed the piles of panels with tarps before it rained oodles. Good theory. But without me noticing the panels with doors or windows happened to be uppermost so they filled with gallons of water - pulling the tarps into the hole with them, so parts of the panels got a bit wet as I wasted time bailing and lifting tarps to get rid of the water. Eventually we started fitting sole plates. Happily the blockwork was very close to mm perfect so there was little in the way of adjusting needed. Next job was to fix trimmers to the outsides of the windframe which stabilises the rear of the house, and was, we felt, the safest place to start fitting panels. Cue Hilti gun. I was dead clever at this point. Instead of wasting money hiring I bought a cheap ex-hire one. After a false start requiring the gun to be swapped I tried to use it to fix a trimmer to the windframe. Nil pois. The flange was 12mm and there was no way a Hilti nail was getting through. So I’d ended up wasting more money than hiring. Damn. Will try and resell. The self drilling screws I’d bought as a backup didn’t work either, they just snap. So the cavalry, in the form of J, raced to Grip Fixings for some FB self drilling screws which, after some experimentation we did get to work. Once the sole plates were down and the trimmers were on it was time to play musical panels (without music, we are a no radio site). The panels were stacked for most effective transportation, not in installation order. But that doesn’t matter as each panel has easily removable lifting straps so it’s dead easy for the crane to pull them off from the top, drop them into position, apply a temporary prop and go on to the next one till they are all up and can be stapled together. If you have a crane that is. Our site is oversailed by next doors telephone and mains cable, and the front of the site has both kinds of wire strung across it too. That’s why almost all of the timber frame companies I talked to at the self build show wouldn’t quote. Just one SIPs company would but they gave every impression of not caring about minor details like feasibility, perhaps because with the prices they charge they could hire a Chinook. The company we are using typically supply builders who instal themselves, which suited us a treat as tins of spinach aren’t that expensive, and otherwise it would be stick built on site which was a bridge too far. We’ve benefitted greatly from the experience and engineering knowledge of the panel company so in hindsight right now it feels like a really good plan. But on the ground, when the panel that logically should be installed next is at the bottom of the biggest pile with the biggest, heaviest panels sitting on top of it, one questions previous decisions. Many times I called time out to consider if we needed more muscle on the team. I have excess bloody minded JFDI determination but compared to Rolly the Chippy I’m a snowflake. I’m not sure he understands the word can’t, which makes ensuring on site safety requires both strength of character and a big gob. And firmly resisting the temptation to ‘just go for it’. To start with it really did resemble one of the old sliding tile puzzles I used to do as a kid. Only with tiles that don’t slide and are up to 8’ x 11’ and weigh up to 135kg. It started getting better when I took some time one evening to ship as much possible down to the man cave slab at the bottom of the garden. With each panel it got easier and we steadily accelerated. Happy days. Not so happy when it rained though, but we erected the little camping shelter I had in reserve which gave us somewhere to sit and plan in the dry and it gave us the chance to deploy my table saw, which is useful. On the Friday the joist delivery and subsequent stacking took me most of the day. The delivery driver was about 4 decades younger than me, a foot taller, looked strong and was brilliantly helpful. At first, us moving 6.3m 47kg posijoists from the lorry to our slab saw me running to keep up. After the first few he slowed down to match my speed, or so I thought. A few more and I found myself wondering why we were going so slow. I’d worn him out. By the time we’d finished he was visibly wilted, but we’d done it. I separated the flat roof stuff out and shipped that down the garden too, which used up the last of my day. Thankfully nothing stops Rolly the Chippy so he’d carried on doing useful stuff. By the end of the week we’d got the two sides mostly done. I stood in the back garden and looked back at the pics of the site when it was first cleared. We’ve come a long way. It was a needed boost. The next Monday our big glulam arrived, easily transported on my super useful little trolley. I’ve been laughed at and teased about my trolley, but it’s moved an awful lot both on the slab and up and down the garden. Rolly’s little board with casters is better for moving panels on the flat slab but my DeWalt trolley is the bee’s knees otherwise. By the end of Tuesday we had all load bearing panes (external and internal) up, with header plates in place so we were ready for the metal men to come and instal about 800kg of steel atop the panels. So Thursday Rolly and I rechecked everything was still plumb (small adjustments needed) after the weight of the steels had landed and then it was time to focus on getting ready for joist hanging. Friday saw the arrival of the same team of brickies who saved our plant based bacon equivalent two weeks previously. They are a team of celebrity look alikes: Pete Townshend; Paul Weller and Charles Branson. Despite this they are a whirlwind. It hadn’t occurred to me that hitherto I’ve only worked with builders, not brickies. They are brilliant at what they do, but they only do brick and blockwork. So I needed to ensure that all was done/planned ready for them. That meant sorting all the breather membrane on Friday late afternoon ready for the brickies’ Saturday shift. J and I worked late to do enough to be ready for them and whilst we managed it, with only a modicum of tetchiness, I now realise, that looking back, I really needed to stop and carefully think through how the brickies would work in with the project. They are a force of nature. Light the blue touch paper and dive for cover, but in a good way. Sort of. Once they start things happen so fast that there s no time for me to think, and frankly I wasn’t ready. I think we’ve just avoided cocking up but only by overusing J and my combined brainpower and if I’d been on my own the project would now be in trouble. It isn’t helped by the fact that they’d offered to do two days to sort the plinth bricks. That bit I was ready for. But then they announced that they could stay till the house blockwork was all finished, so things I thought were a good few days away were suddenly NOW! I’m loving working with Rolly on the frame, he’s precise, informative, patient with my constant stream of dumb questions, and he makes us productive. But I need to do my part of project management too. And it turns out I find it too easy to get lost in the woodshavings. J and I are project managing between us and that is working well. At least I think it is, if you’ve seen Arthur Christmas we’re a bit like his parents, Dad, like me, wears bright clothes, smiles a lot and peeps think he is leading, but in reality Mum, like J, is keeping track and thinking and usually quietly steering. I must try harder next week or we won’t be ready for the upstairs panel delivery next Friday! And like Rolly the Chippy, I can’t let the word can’t onto site.9 points
-
Hi, last September we found a plot we liked in South Cambridgeshire and started to look into doing our own self build. This is something we had considered doing when we retire, but plots that align with our requirements are not super abundant, so we decided to do it now instead. We are looking to build a Passivhaus two storey dwelling and have it certified. Energy efficiency is important to us and so is having a home at the end that is really comfortable to live in. A few months later and we have exchanged contracts and are a couple of months into a planning application, awaiting the final outcome any week now. We started the journey with an architect, but two months into the relationship we realized our timeline would be heavily affected by the fact that we were not totally aligned and not fully listened to (despite very lengthy email threads back and forth) and decided to learn how to do the architecting ourselves, and hire any experts we needed to help with things along the way. But having a third party handling it all for us was... too low touch for our liking. We'll be managing the build ourselves, as we've decided against having a main contractor. Maybe we'll need a project manager at some point. We've been reading the forum and learning from you all, hopefully we contribute something back soon!8 points
-
No apologies needed. As self builders sometimes the pressure of managing everything just gets too much and when things go wrong it's usually our closest that bear the brunt. I recall a renovation where we had sunk everything we had into it and needed it finished desperately in order to sell it before we ran out of money just for day to day living. Our 10 year old had got used to coming to site with us most weekends as we scrabbled to get done. I gave her the job of painting a short length of cast iron downpipe with some black gloss. She did ok with that but didn't put the lid back on the tin. I picked up the dust sheet without noticing and poured black gloss all over the indian sandstone patio that had been freshly laid only a couple of weeks before. I do admit to ranting excessively, not directly at her but just how unfair life, god, the world and everything was. It was the straw that broke the camels back so to speak. Later that day, having dropped her back home and returned to site, her elder brother rang to say he couldn't find her in the house. A frantic search all over the village ensued to no avail. As we widened the search with the help of neighbours and decided to alert the police, a call came in from a nice lady in Cambridge who had found her wandering the streets. It seems she had packed a bag (including an OS map for reference!), boarded a train (unmanned village station) and traveled a few stops into Cambridge with the intention of going to her aunt's house. She had got upset and thought all the problems were her fault. Boy did that bring home the important things in life and certainly gave me a new perspective. We never let ourselves get into that situation again and despite many a frustration over the years you just have to press on through it - worse things happen at sea!8 points
-
BuildHub is a non-profit, self-funding forum, run by volunteers. We've grown steadily over the years to become the UK's largest (and certainly best!) self-building and renovation forum. While the unpaid contributions of our volunteer managers, administrators and moderators help reduce our running costs, we still have unavoidable direct expenses, such as software and hosting. Unusually for a forum of our size - we recently registered our 23,000th member - BuildHub does not accept sponsorship or run ads as a way of covering our outgoings. Over the past 2 years the money raised from the tool loan and the Octopus referral scheme - both run by @jack have kept us in funds and we owe him a vote of thanks for that work. Costs have risen and we therefore need to turn to you, BuildHub's wonderful members, to ask for donations. If you are able to make a financial contribution at this time, it would be very much appreciated. There is no minimum or suggested donation amount, and even a small donation will have a positive impact. Donations via PayPal can be made to the following email address. Please remember to select 'gift' / Friends & Family or Paypal will charge fees. Please note our new PayPal account: @buildhubforum You can also request the forums bank details, please PM @AliGfor those details and let him know of your donation. We'll post again once we've received sufficient donations cover expenses due in the foreseeable future. BuildHub's Treasurer, @AliG , manages our funding account. Could anyone wishing to make a donation please send him a PM with your email, username, and the amount that you have pledged so he can confirm receipt of the funds and log your donation accordingly? All donations will be treated as confidential. If you can offer any skills that may assist with the support of the forum, please contact either Herb (@HerbJ) or Mike (@MikeSharp01) for details about how you can help run the forum or if you have ideas that you feel might make Buildhub even better. Thank you, as always, for your ongoing support.8 points
-
I’ve got to be honest, there are times when it feels like we are inching towards the finish line ever more slowly, with lots of jobs nearly but not quite done. Pulling together this regular blog is really helpful in that respect: Every fortnight I start off thinking there is hardly anything to say so it’s probably not worth issuing an update. But once I start to look at what’s happening since the previous blog I realise that we have generally made good progress. And indeed it’s a case of more good progress over the last two weeks. It does now feel like we are nearly over the line. Several long-standing activities have been closed off thank goodness. So here are some of the things we’ve made progress on since the previous blog. (Confession time: I meant to take more photos of the bathrooms, kitchen and lighting but seem to have forgotten to do so, so you’ll have to wait for next time for those.) Bathroom After our disaster last time with the wall hung shower toilet, my brilliant brother came back over from Sussex to hang the replacement, even though he had managed to break his foot in the meantime - that’s what I call dedication to the cause! The (revised and up-to-date) instructions we were given with the replacement WC pan said to tighten the wall bolts to 7Nm torque. Which seems really very low - the sorts of torque used on bicycle parts. Anyway, that’s what we did to the best of our ability. It was just about enough to stop the toilet feeling at all wobbly and the good news is nothing cracked, nothing fell on the floor, and the toilet seems pretty stable. Especially now it’s been siliconed around the edges - though I’m sure the silicon doesn’t add any strength at all. While he was with us, Chris also fitted the small hand basin in our ensuite, tiled and grouted the splashbacks, then fitted a lot of sound insulation into the stud work between the three bathrooms (they all back on to each other, so good acoustic insulation is a definite plus!). He also bailed us out of a looming problem with our porcelain tile skirting… Tiling We were getting increasingly concerned whether our floor tiler would finish off the porcelain skirting tiles before we moved in. The quality of his work has been great, but since Christmas it’s been hard to schedule any time from him partly because he’s been ill and also he’s got a lot of other work, I guess. So we agreed to part company amicably, we agreed a payment for his completed the work, and my brother Chris stepped into the breach. Chris then spent a long day finishing off the skirtings, which really meant doing all the tricky mitre corners which had been left until last plus a few straight runs. For a simple, relatively open-plan house we had a surprising number of corners! Chris then went round and grouted 130 m of skirting. Great job Bro! We decided to hire a recommended specialist silicon guy to apply silicon around the bottom and the top of the skirtings, 260m in total. He did a great job, and very quickly. He is certainly getting a good rate for it! But I’d agreed a fixed rate and he did it to a good standard so, fair enough… Specialist siliconing is obviously where the money is these days! Anyway, all our tiling and skirtings grouting and siliconing is now officially… done! Kitchen Chris the carpenter has finished off all the outstanding jobs in the kitchen, including the final fit of ‘wall of ovens’ in the alcove where they sit. I’d been pondering the best approach to ventilation and with Chris’s help we came up with a what I think is a neat solution - creating a slender recessed ventilation strip above the ovens which is there but doesn’t catch the eye. Chris also fitted the plinths which make the kitchen look finished rather than work-in-progress. The Quooker tap is now powered up in as well as plumbed in and we have been using it for the first time over the past couple of days. I have to say I’m really impressed; it works really well and feels and looks great too. Electrics Progress on second fit electrics has been frustrating, I think mainly because our electricians have got too much work on and they’re trying to juggle multiple jobs. Also to be fair, our installation has been more complex than originally envisaged due to choices we’ve made. The rate of progress hasn’t been a problem until recently but it’s begun to feel like we might not have the electrics ready to move in: However, our main man Darren was in this week and made good progress, and we now have power and lighting throughout the house. All the kitchen equipment is powered up and whilst there could still be a fair few jobs outstanding after we move in (e.g. external lights) it’s clear that the electrics are going to be working well enough for us to move in as planned on the 23rd. Yesterday Nick, the electric contractors boss, demonstrated the seamless switch-over from mains to battery by switching off the mains supply without causing so much as a flicker to the lights. I wanted to try it myself when we had friends round later but Mrs P wouldn’t let me: “it’s not a toy” apparently. I was wondering whether we would actually know if we had a power cut, but the battery app sends us a message to say the power’s tripped over to batteries and then another one when the power is restored and it’s tripped back. I was a bit worried that, with the electrical work ‘growing’ and there being a fair few extras that we’ve asked for, the final bill was going to be way over the original quote. So I have been badgering Nick to give us a revised quote. He has finally done that, and yes, it’s going to cost us a bit more than he first quoted but actually not nearly as much more as I feared. Which is a result! Joinery Meanwhile on the joinery front, the oak we ordered to use as full width door jambs and the pocket door frame sections have all arrived. Mrs. P. has Osmo oiled them, fitting has started and they should all be installed by the time we move in. Rear landscaping Lots of activity is now underway on our rear landscaping. We have a fall of about 1.5 metres from the house finished floor level to the far end of the “residential garden“ part of our land. As I am a wheelchair user we are naturally wanting to have step free access to as much of that as possible. The garden design we have involves level access from the house to a terrace seating area, then 1:20 ramps down to three different further small seating areas between planting areas. That obviously involves quite a lot of low retaining walls and ramped paths. So given we are in the middle of the winter monsoon season, it was clearly an ideal time to start work on those walls, paths and terraces! Ashley and his team have made great progress despite the weather, as you can see - although if their landscaping work ever dries up (ha ha!) they could probably get good employment as World War 1 battle scene recreators. Front landscaping If the back garden looks like the Somme, in front of the house the parking/turning area is looking much more civilised. We debated about how to finish the surface, considering a number of options, but in the end we’ve gone for simple tarmac. Gravel is a no-no for the wheelchair, resin bonded is too expensive, brick pavers we don’t like the look of and need regular cleaning. In a previous house we had hot-rolled grit into tarmac and that does look nice but we found it collects dirt and is a recipe for bringing grit into the house, so we’re keeping it simple this time. The base coat is down and the front apron is being done tomorrow(!). The aim is to leave the top coat until all the heavy work in the back is done, to avoid damaging it. Ashley has told us several times we’re doing it the wrong way round - we should have started at the back and worked forward - but having that base coat down is transformational for me - no more wheeling through lumps of clay or getting bogged down in loose type 1. Preparation under way: Troy anointing the prepared sub-base. "May God bless her and all who walk/wheel on her": Laying down the blacktop: First flower bed planted! Focus for the next two weeks: Moving in! Dashboard: Contractor days on site this past two weeks: 45 Contractor days on site since build start: 572 Budget: No change - over budget but within contingency. Plan: Moving in on 23rd February. Issues and worries closed this fortnight: Hanging that toilet Whether the electrics would be ready Finishing the skirtings Current top issues and worries: Packing! (I expect Mrs P. has it all under control ;-))8 points
-
In case anyone is interested, we had some good news today. To recap: the plot is a disused commercial building, in a village centre, in a Conservation Area, and in a National Park. It's directly overlooked by the neighbours who are on higher ground. There were two reasons for refusal - the impact on the Conservation Area and the impact on the neighbours. We'd offered a detailed study of the local area and showed how our design responded to it. The Inspector agreed with us. But the Inspector agreed with the neighbours that there would be a negative impact on them. He weighed it on the opportunity to redevelop a derelict site, the need for housing and the environmental credentials (EPC B in this case). So that's the end of that chapter. Start = 11 July, site visit = 9 October, decision = 5 February. Thanks for the moral and technical support from this group, and I'm happy to share more details if anyone needs them. Now the actual work begins!8 points
-
That's a good call on both counts. My recommendation is also to have a serious look at the tools out there available - as well as rigs you can knock up with spare timber - that can make your life easier to move and fit materials. One of the things I've noticed is that the trades and builders generally are really bad at thinking things through like this and will scoff at stuff that makes life easier - as a consequence we unconsciously follow those practices. Building on your own takes a very different mentality than a testosterone filled building site with lots of labour available or those who are willing to harm their bodies (I once got laughed at by a builder for putting on some chain saw trousers when I was about to chop down 3 trees). One very small example is atool I bought several years ago was this: https://grabo.com/ It turns lifting plywood, plasterboard, windows, paving slabs, you name it, into a one person job and means you can hold a sheet up to a wall single handedly with putting in a screw with the other. When I first started using it I got giggles from staff in the builders merchants about how I'd just got the vibrator out. Then that turned into how they wished the company would buy a few in for them. I had no idea how much I'd end up using it.8 points
-
After a full on week of getting the following jobs done. We’ve finally moved in. Given we have to hand the keys back to the rental on Monday, it’s been cutting it fine. 1) caravan foul drainage connected to the sewage treatment plant 2) water supply to shed for washing machine 3) installing Starlink. This was very easy 4). Fitting a skirt to the static from salvaged 18mm shuttering ply 5). Making some steps. So glad I never burnt the pallets. They are perfect. I won’t miss the hours drive each way and my commute to London is now 45 mins instead of 90 mins, plus our daughter is moving into her first home shortly and she’ll be 7 minutes away. A new chapter has begun 😃 ps - site currently resembles the Somme8 points
-
Two weeks since the last blog and there’s a lot to cover - but lots of pictures too, so persevere! The main issues and concerns two weeks ago were 1. how well the airtightness test would go, and 2. keeping ahead of the plasterers. The good news is: both of those concerns can be consigned to the bin. Airtightness As previously reported, we had engaged Aerobarrier to test, spray their magic mist, then retest the airtightness of our house. Prior to their visit they asked us to send video walkthroughs of the house. Because of concerns we had about how well the airtight membrane had been fitted and taped, which the videos did nothing to dispel, I asked Josh from Aerobarrier to plan some extra time for them to re-tape some of the wall ceiling interfaces, for an agreed price. The Aerobarrier team duly turned up as planned - Josh plus two others. After a few hours taping the house, the initial airtightness test gave a disappointing if not entirely surprising 3.2 ACH - go enough to satisfy Building Regulations but above our target of 1 ACH. But after running the acrylic misters for a couple of hours the airtightness improved to 0.8 ACH - an 80% improvement which we are obviously very pleased with. Aerobarrier left the place quite tidy, they had masked the horizontal surface on window frames, door handles etc. The only weird result was the screed floor was left as sticky as a dodgy Wetherspoons. A week later and the stickiness has more or less gone though. No photos of the process in action I’m afraid, tricky to get inside with all that mist flying around. First fix electrics …is now complete! Power, lighting, PIRs, smoke detectors, data cables, room stats, TV… there are a lot of cables threaded round our walls. We’ve had a great team plugging away at this for a few weeks - Nick, Martin, but especially Darren, who installed the majority of cables and boxes, have done a super job. Carpentry In parallel our two chippies Chris and Alan have been making sure various false walls and ceilings have been put in place ready for the plasterers. They have also fitted three of our four pocket door frames - just one more to install next week. Somebody also needed to run the MVHR ducts and fit the vent plenums to the rooms the plasterers were planning to start with. This seemed like a golden opportunity for Chris and Alan to acquire some new skills. I am not sure it was high on their wish list to be honest but they cracked on with it nonetheless. Regular free breakfast baps still works wonders when you’re asking people to go the extra mile. Acoustic insulation I could see that Mrs P. was itching to get involved with something and fortunately someone needed to push all the Rockwall acoustic insulation in to the internal stud walls. Luckily as it’s Rockwall rather than glasswool no further itching was involved. Anyway, Mrs. P has done a great job, as you can see. Plastering All of the above were things we needed to have done (or at least done enough) for the 8th of October, which is when our plasterers Dan, Sam and Brandon were booked to start. They duly turned up as planned and we had enough of the rooms ready for them to get started. In the plan, all the carpentry work would have been completed before the plasterers started but they seem happy enough to board out then skim one room at a time as the carpenters keep ahead of them. The initial focus has been on the boarding out bedrooms 1 and 2 and the bathrooms and the early progress bodes well for the rest of the task which we aim to complete by the end of October… ready for the floor tiler! In other news… Our timber cladding has been delivered. We’re using Brimstone Ash from Vastern near Swindon https://www.vastern.co.uk/timber-cladding/brimstone-ash/ which we will be having fixed vertically. Once Alan and Chris have finished all the internal work required for the plasterers the plan is for them to move on to the external cladding - assuming they haven’t had enough of us by that stage. More breakfast baps may be required! We have also had a number of trees delivered, which Mrs. P. was strangely much more interested in than she was in the pallets of plasterboard or multi-finish skim! 🤷♂️ And finally, I have bought a new toy… a Topdon infrared camera to plug in to the iPhone. Cue quizzical look from Mrs P. “er… and you needed this for what exactly?” Good question Mrs. P, but I have at least been able to check that the UFH loops are all working: During the next two weeks... … we hope to be getting plastered! Dashboard: Contractor days on site this fortnight: 32 Contractor days on site since build start: 311 Budget: No change - still over budget but within contingency. Plan: Still on track to move in by Easter 2026. Issues and worries closed this fortnight: How well the airtightness test will go. Keeping ahead of the plasterers. Current top issues and worries: Nothing too pressing - it'll be something we haven’t thought of, probably.8 points
-
Weeks 40 to 56 So it’s been a year now since we started the build and I’m happy with our progress but perhaps more importantly I’m still enjoying it. If you have followed the blog from the beginning you might have thought this was going to be a quick build as the shell went up quick but don’t worry work is continuing as we expected at our own slower pace, we have no definite finish date but it would be nice to be in for winter next year. The cladding is finally complete. David started the cladding at the end of March and I think it’s fair to say it took him a lot longer to complete than he expected, but like me he likes to get the details correct ie drip angles on bottom edges etc and neat finishing around the doors and windows. The photos show how the Thermo Pine has already started to fade. We are happy with the colour changes it is greying nicely and hopefully will blend in with our working barn after another summer. Above is a sample piece that has not been exposed to the weather and the other image shows the first signs of the greying colour change. This is our working barn the wood on here is a minimum of 20 years old more likely 40 years old. Inside I have completed most of the insulation above ceiling height, we have slopping ceilings in 2/3rds of the building that will be completed after the screed is done. The MVHR ducts are in the roof, I carefully insulated around them as they pass through the Rockwool layer and the Celotex, then the VCL layer which is Gerband SD control. Not the most expensive VCL but still a reasonable price for a control layer. Putting the VCL up on my own was tricky I used double sided tape to attach it to the Celotex initially pressing it on top, middle and bottom as I unrolled it for 12m. This held it in place surprisingly well leaving me ample time, (days as it often too hot to work in the loft) to tape it up properly with Gerband airtight tape. I finally took a break from the roof insulation and moved on to floor insulation which is a much nicer job on my knees. Back in June we had a Cornwall/Devon meet up of fellow build hubers. It was great to put a face to the user names. The weather had one quick shower just as some arrived but then cleared up so that we could all sit around eating pizza and chatting. The waste for the two wet rooms is completed ready for the screed. I’m now ready to lay the UFH separation layer for this I have chosen something a bit different https://www.laminon.co.uk/. The material is a bit like weed membrane which if any body has ever pegged down knows how those pegs don’t want to come back out easily. It also has a grid marked on it that might make it a job for me on my own, together with the decoiler and stapler I have borrowed, or David will help me. Like many on here I downloaded LoopCad, input all the data about my location and the build then designed the loops. For reference I used the Ashrae load calculation method, rooms that didn’t need UFH e.g. the pantry I input as already having a heat source. I have kept my results and all the print outs but in the end I have chosen Wunda because they are very competitive compared to me buying the manifold and pipe from an online UFH trade shop. They have saved on their costs because they can send the coils out in lengths more compatible with my circuits e.g. I have 5 circuits between 109m and 117m so they can send out 5 x 120m coils. No matter how I combine different circuits I always ended up with a lot of wastage pipe. They don’t use LoopCad to its full extent e.g. the whole house modelling for the load calculation but from what I discovered most UFH suppliers don’t either so I might need my LoocCad summaries for the flow rates as Wunda are not accounting for a well insulated and air tight building. They are for now not supplying the pump or any thermostats as our plan is to get the house fully insulated and the VCL layer completed on the at least most ceilings so we can monitor the room temps with a few data collecting thermometers. This will hopefully tell us how cold its going over winter without occupation, and so far its certainly feels warmer than our current house. We now have drains connected to the main sewer line and our soak away is installed. Next job will be the guttering. I had to take down my potting shed for the build but hopefully next year I can reassemble my potting shed in its new location which is the opposite side of the cow shed than it was previously, but my view is a lot nicer. I also finally finished the Gabion wall, I used all our own stone and rubble. Most of the stone was from the initial groundworks that we had moved down to the lower field. This meant that I took the lawnmower and the garden mini dumper down there, climbed the piles and picked out the best stone and brought it back up to the house. When I was nearly completed and I knew the groundworks team would be returning for our drainage connection and soakaway I decided to wait for them to hopefully unearth some more nice stone. They did but I had to work fast to use it before it was back in the ground around the house getting the levels correct. There is still a lot of stone in spot on the lower field but for now I don’t want to build any more Gabion walls. Of the trades people we have had on site so far the groundwork’s have been the best and I would be happy to recommend them. To the left of the photo is the old stables you can see how this wood is aged, hopefully our Thermo Pine will age similarly and blend in. The photo above was taken just after the Groundwork's finished for the day, you can see the mist has blown in and the cladding looks different again when wet. The following day and we can see how great a job the groundworkers have done, its hard to believe this is the same soil I have picked the stone for the Gabion walls from. They sorted the soil with the digger and buried the bigger stones leaving quite good soil on the top. They are returning next week with a bigger dumper truck to bring the soil back up from the lower field. They will then fill in the bit to the right of the photo and round the front.8 points
-
That was an advertising slogan from the 40’s and 50’s, which persisted in popular culture into my childhood in the 60’s (I’m a wrinkly, but not that much of a wrinkly). And oh boy, with the recent downpours we desperately needed a hat on the house. As kids we used to turn the phrase around - “if you want to get a hat, get a head”. That’s what counted for humour back then. But like all my frivolous tool purchases over the years that turn out to be really useful if not vital during this build, so that phrase became immensely apposite. Our timber frame paddling pool needed a head to put a hat on. In the case of our design ‘a head’ meant a full set of trusses, all braced as per, a layer of OSB (a softy southerner version of sarking), anti everything mesh closing the continuous ridge vent, the eaves bunged up with timber, and the flue hole cut and the attic bits of the flue in place and the final length ready for erection. Rolly the chippy and I had discussed in great length how to put the trusses up. They were in a pile on the upstairs floor needing the bird’s mouths to be cut. We concluded we needed more hands to do it. At this stage we both nod, look round, remind ourselves that we are alone, then stay silent till one of us gives in and says “shall we give one a try anyway? See how we get on?”. That’s the danger of two peeps working together who each refuse to believe they can be beaten. So, Rolly cut the bird’s mouths on three trusses while I pointlessly thought through different lifting options for a pair of old codgers whose combined total age is 140 years. If only I’d bought a chinook. Anyway, there we stood, each end of a truss, silently psyching ourselves up. That was brought to a close by a series of half sentences, which we took turns to utter. Things like “well, we could lift this end onto the plate, then, ummmm….”; “would a rope, sort of….”; “could the scaffold tower help with, maybe, erm….”. We were facing certain defeat, or at least, the need for help. Where was my octogenarian neighbour when we needed him. Visiting friends in Europe, actually. So we did the only thing left to us, we applied good, old fashioned BF&I. (A core skill of mine, as it happens.) We fluffed it twice, each time returning to the starting position. I’m not sure an onlooker would have been able to discern any difference in approach between the three attempts, apart from facial redness growing by each failure. But attempt three worked. Hussah! We sort of repeated the same process, each time making small changes. By the time the eighth truss went up, as I mopped up the blood (I’d bashed my nose) I wondered what on earth we’d found so difficult. Rolly then did his orang-utan impression, while nailing the bracing on to give us a firm set of trusses to build from while I tidied and generally fussed, pointlessly. It’s amazing how a couple of well nailed cross members stiffen an otherwise wobbly set of timbers. That done we continued getting more trusses up. With each one it got easier with practice but harder with less room to work with, ending up with three trusses bunched at each end that we walked to their position once all was up, Rolly on the scaffold outside, me on my tower inside. Simples. By the end of that day we had got all the trusses up and braced enough to get through the expected storm, v pleased. Not so pleased about the next day though. The forecast was dire so Rolly stood down and I tried to have a Tidy Friday. However most of the weather missed us so it ended up a day wasted in many ways. The only really good bit was the roofer popping by allowing a discussion about gable verge and soffit details - that went well, or so I thought - with the roofer happy with our design and booked in to felt and batten us next Thursday. Monday we got the rain we were promised for Friday. Sigh. Dean, the neighbour, turned up to help just as it started hammering down and I’d put the kettle on. Obviously we blamed him for bringing the rain with him. I fed everyone biscuits but had none myself (sniff) as our BCO turned up, and I discovered the recipe for a quick and positive BCO inspection. Try really hard to do good stuff; know one’s design intimately and by heart; and further than that, understand it at a micro level; and have the inspection done in pouring rain so it happens quickly. I think the last bit overrides all the rest, but they’re still a good thing. We are lucky to have a BCO who is a nice guy, who is himself a self-builder, and who loves his job. Either way our BCO was a damp but happy man with our build. Dean and I got a bit of the OSB sarking on when it dried up, while Rolly closed the eaves, so it wasn’t a complete wash out. Next day Rolly and I got a rhythm going and got loads of sarking up, using ropes for security, leaving just the top rows each side which were thankfully half bits. So next day, with nearly a complete layer of OSB on, we discovered how useless sarking is at keeping rain out. Cue yet more depressing sweeping water off of the upstairs floor. Yet even in such circumstances illumination is to be found. Tony trays. You thought they were just for keeping the air in, but no! they are far more versatile: they keep the rain in too. With a flat surface like an upstairs floor however fast one sweeps torrential rain towards the stairwell much of it reaches the walls. When it hits the Tony trays it is skilfully guided round the end of the joists and then down the inside walls. Of course, this is good news especially when one has carefully stored lots of stuff out of the rain, neatly stacked round the edge of the downstairs walls, as all that dry and dusty stuff gets a good cleansing rinse in pure rainwater. All my paslode nail boxes are now papier-mâché, which doesn’t bloody help. The best laid plans and all that. And the delays meant that the plan was starting to look too tight. We had a day to get the rest of the sarking on and a few other bits and pieces done to be ready for the roofer. Cue the cavalry - which in Suffolk can be a helpful neighbour. Rolly did the clever woodworky bits while Dean and I got the top rows of sarking on. Our scaffold is v thin on one side as we are so close to our neighbours, so I could only safely lay a ladder up the roof on the other side. We’d used a roofing ladder for the lower rows but that didn’t work for the top row as the hook was in the way of fitting the boards. So we laid a normal ladder up the roof, and then I laid on the roof, feet atop the ladder, while Dean attached each sheet to a rope and pulled it up to me to fit in place, first on my side then on the other. Worked a treat and with Dean holding the rope we had a backup against the gusts of winds which was never really used but was a comfort to have anyway. Actual safety verses perceived safety is fascinating. As I lay on the sarking getting ready to pull up the next board, waving at a regular passer by (who took another picture), Dean took one look at me, perched on the top of the ladder and asked if I was sure it was safe. “No”, I said, “I’m at significant risk of bashing my thumb with my hammer”. If fall off the ladder AND I didn’t keep one hand on the top of the last fixed board I’ll collect the odd splinter as I slowly slide down onto the scaffolding. Our 40degree pitch means one cannot walk on the OSB but it did mean I could hold myself in place with one hand very easily. OK if I did slide I’d swear a lot but we’d have a laugh about it after. If I was monkeying about on a felted and battened roof the risk of falling through would be massively greater and much more dangerous. In reality I was much more at risk of injury lifting panels on the slab - back injury, crushed fingers, etc. But Dean saw height and that triggered his ‘oh my’ function, (he’s American so he says things like that and “do the math”, and “oh shoot”, etc. bless him), whereas he and I lifting panels didn’t bother him one bit. Peeps (no names, no pack drill Rolly!) constantly leave stuff about which constitute trip hazards, and I’m regularly kicking them to the side or picking them up as I fear peeps tripping and the resultant injuries, which depending on what is there to fall on could be really nasty. Hence my obsessive tidying and my Tidy Fridays. It took me a while to realise if things get untidy I get a big knotty ball of anxiety in me that I just couldn’t turn off. But everyone else wanders past the mess oblivious. So my perhaps irrational trigger is disorder. Go figure, as Dean would say. Once I’d put the last bit on I treated myself to a sit down with a view, on the ridge. I had been looking forward to that moment for many, many days. My favourite place in our current house is on it, on the ridge to be exact. The view is spectacular. Turns out the new pad’s ridge view is just as good. Sitting there, looking across the river towards the ancient burial mounds, even with the rain starting again, felt like the Pooliverse (any Perishers fans out there?) was telling me that it’s all ok, this is meant to be. As the roofer arrived next day I was back laying down on the job, this time fixing stainless steel anti-everything mesh along the gap at the top for the ridge vent. I was very glad to see him, until that is, he asked about the gable verge and soffit details. They are as we agreed, I said, happily. Only it turns out that he had no memory of our previous discussion and anyway he’s a visual sort of guy, rather than a discussion with drawings, sort of guy. So I’ve simply no idea what he thought he was agreeing to the previous week, but we had to do the whole discussion again, this time with wood to mock it up. Fortunately the end result was very similar to my original design, but sometimes trying to plan ahead and get things nailed down in advance in the building industry does feel like trying to buy spirit level bubbles - impossible, and at the same time a source of great amusement to others. That discussion was had on the scaffolding in bright sunshine. But grey clouds were on the horizon so that time wasted was bad news. Two strips of felt later the heavens opened in one last assault before we put our hat on. I guess the Pooliverse has a sense of humour which is hard to appreciate as one sweeps and sweeps and sweeps endless puddles away. But the rain stopped and the roofer got back up there and we finally weren’t topless any more. While the roofer roofed I carried on setting out my flue and while my back was turned Rolly threw up our internal upstairs walls. Perhaps he wiggles the end of his nose, that would account for the speed. We were slowed a lot by the joists being slightly not where I thought the plans showed them to be, (“what do you mean I can’t cut through a pozijoist? I’ve big saws, of course I can!”), but a small (40mm) wall shift sorted the flue run and suddenly we’ve gone from wooden cathedral (micro version) to embryonic home. Albeit a damp one. The week ended with just me doing my Tidy Friday bit and knocking off early for a bit of a low key garden party held by one of our new neighbours. I know our build has upset some a bit but, we are again, ridiculously lucky that the vast majority of our new neighbours are very welcoming and tolerant. The Pooliverse continues to be good to us. Oddly, I then hit a downer, which is very ‘me’. I have no idea if this is an unusual habit, but when faced with the achievement of an important milestone I don’t feel like celebrating, I suddenly have the bandwidth to contemplate what’s left to be done. This time was a lot worse, as I suddenly realised that my time working with Rolly would soon end, and working with him felt really good. Funny old emotional roller coaster, this building malarkey.8 points
-
Don't Panic - we're not selling what we've been building. Back at the end of April (I thought it was longer ago than that - time either slowed down or we sped up, not sure which) SWMBO had just had a toe joint fused together to try to resolve a long period of pain following the critical infection she got over 3 years ago. We're pleased to say that it seems to have done the trick, and she has now rejoined me in getting the house ready for habitation. I left you all with another list to contemplate. So here it is with some brief updates: Hassle the SH1T out of the window installation company to investigate and fix the leaks (three fixed windows and a sliding door) that came to light after we did the first lot of plastering - it worked, and the window no longer leaks - yeehah!! the rest of the plastering - was all completed the rest of the mist coating and painting - one bedroom and an ensuite left more stone work - still on the list moving as much stuff into what we now call the attic (a very large room downstairs as we don't have a real attic) in order to clear all the other rooms - done Install the UFH upstairs with plywood cover - done, and manifold connected up and filled fit the bathroom - done fit the kitchen - done fit the utility and cloakroom, utility done electric 2nd fix - done and signed off rainwater soakaways - still on the list rainwater collection system - still on the list backfilling - partly done, still on the list concrete lego brick retaining wall - delivered, to be fitted Flooring - in progress Wood cladding - still on the list Air tightness test (as I write this, I think "oh, sh1t, I must get that booked in") - done and certificate issued Fit internal doors - still on the list Fit en suite - still on the list Build MY garage - still on the list A green roof system, because its on the planning application, and may be required for certificate of completion (unless someone can enlighten me as to how to avoid this, and be able to delay the installation) - still on the list So, that big window, the one in the middle bottom below. First chap who came to inspect and report back left the company without doing anything, so two chaps came out (I think mainly as protection for each other from my wrath). Suffice to say they inspected thoroughly having listened to the fact that we had investigated excessively to find the point of ingress of the water. The ensuing repair entailed the whole window (glazing, individual door frames, and the outer rail frame) being removed from the hole (thank goodness for the steel beams above), a manufacturing fault being rectified, and the multiple installation faults also be repaired and then finally reinstalled correctly. A few days later to allow the massive amounts of sealant that were applied to cure, we sprayed a large amount of water at the window and gladly it seems to be OK. We now await a traditional SW'ley storm this coming winter. All the remaining plastering was completed, and not only did the mighty SWMBO mist coat all but one bedroom, she also painted all the walls bar the bedroom and the en-suite. I'm not sure she wanted to see a paint roller for a few weeks after doing that lot. As you can see in the picture above, on the right hand side, we started laying the UFH insulation and pipes and overlaying that with 6 or 9mm ply, depending on what the final floor finishing was going to be (we planned ahead 🙂 ) In May, we were joined by our son who had stated clearly that he wanted to help us with fitting the kitchen. This was very welcome as there were a few heavy units to move into place, and it was fantastic to have a pair of stronger arms (than mine) around. And so with his help we managed to get to this point (left photo). Since then I've been doing all the finishing off (doors, plinths, hidden handles etc..) But the "pièce de résistance" was having the breakfast bar made from planks of the trunk of a walnut tree that we had to remove to build the house. Here it is in the right hand photo Having done the kitchen, focus turned to the bathroom. Here's the result We started putting down final flooring. In the breakfast bar picture above you'll see the stick down LVT that we had fitters into do, and we've done LVT click flooring in the bathroom, a bedroom, the utility and cloakroom, and one other room. We also had some of the backfilling done, meaning we could do away with the temporary steps upto the front door and the areas around it. So, still a lot to complete. This last week has seen the temporary utility removed and the permanent one installed, and a bed has arrived into the one floored bedroom. Selling up: We've sold our "holiday home", and our primary residence is on the market (anyone want a four bed detached with double garage in the Reading area?). Next week we begin the process of moving into a building site, albeit one with a few luxuries (like the ability to cook a full roast dinner without the electricity tripping, and have the option for a bath!) No new list this time around 🙂8 points
-
A longer than usual blog - we’ve had a lot going on this week. We definitely reached site capacity with five vans and seven contractors on-site on Thursday and Friday. Seven pallets of cellulose bales arriving mid-week didn’t help space management either. The whole week got fairly stressful but somehow we seem to have got through it. Phew! Membranes The plan was for the team from SW Insulation to fit the VCL membrane to the vaulted ceilings, cross-batten with 25x50mm in preparation for the cellulose fill, then move on to the wall VCL and the additional 50mm PIR and 38mm service cavity battens on the walls. As I type that it sounds like rather a lot. It proved to be too much indeed… Our lovely vaulted ceilings turned out to be a nightmare to fit membranes to. Those, plus the ceiling cross-battens (essential to stop the cellulose blowing the membranes off the rafters) took three guys pretty much all week to do. So the walls will have to be tackled when the team return on the 11th August. We had no carpenters available Monday to Wednesday but on Thursday and Friday both Alan and Chris were on site. Chris rushed around closing all the external gaps around the roof edges off with OSB, while Alan worked flat out trying to keep ahead of the zinc roofers (see below). Closing off the roof edges was essential if we wanted to avoid the cellulose blowing into the rafter space and straight out across the neighbouring countryside. Before: After (ok, different section of roof but it all had to be done): The pressure to prepare for the cellulose fill was heightened a bit because I’d cunningly agreed to the cellulose team coming in on Saturday to fill the roof… Cellulose Ray and Devlin from JW Insulating arrived mid-morning on Saturday and worked straight through to 6pm to fill all the rafter spaces. It wasn’t plain sailing - they were worried the membrane wouldn’t hold. They had to put a some extra edge battens in to make sure the membrane did not get blown off due to the pressure of the fill and they had a couple of ‘blow-outs’ they had to fix. Apologies for my terrible photography but here is Devlin blowing the cellulose in to one section: After filling the first section they checked the density by cutting out a cylinder of the filled cellulose and weighing it. The core sample came out cleanly without disturbing the surrounding cellulose and after weighing they pushed it back in place and taped it up; it's amazing how the cellulose (which is simply pulped paper, treated to make it fire and mould resistant) seems to bind and 'set' in place once it is blown in. The test showed we were a tad over target density. I asked Ray whether that was a problem: “Not for you” was the reply. I assume they could end up using more cellulose than planned but they were happy to carry on. By the end of the day we had a fully-filled roof. Another milestone achieved! The photos don’t show it too clearly but the visual effect is as if there’s a vast silver duvet placed over the house. You can see the patches they used to cover up the entry points for the 'blowing hose'. We hadn’t realised the cellulose blower was 3-phase and came with its own noisy diesel generator which ran for 9 hours non-stop. Not much fun for our neighbours - we’re hoping they forgive us. Fortunately it was all done in one day, so peace was restored today (Sunday). Have we done the right thing? Choosing the best approach for insulating the roof has been tricky. With hindsight, PIR between the rafters might have been easier (especially since I now know you can get open web rafters with PIR between the webs, so no voids to have to insulate). Alternatively, maybe we’d have been better to have a warm roof with 200-250mm of PIR on top of the open web-rafters, which would then have served as service spaces for cables, pipes and MVHR ducting. That would have made for a very thick roof which would have been difficult to disguise though. But we liked the idea of cellulose fill for its eco-credentials and its noise insulation levels (especially with a zinc roof). Having said that, to get to our target u-value (0.1 max) we still have to add another 100mm of PIR on the inside; we'll leave some channels to run the MVHR ducting through. That’s the next job for South West Insulating when they return on the 11th August. Another option would have been to go for a more ‘Rolls-Royce’ solution like the timber frames offered by MBC, where they take responsibility for the roof insulation, VCL and airtightness. But although our costs for adding the insulation and membranes are higher than expected, it’s still going to be a lot cheaper than the MBC frame. Anyway we* have made our decision so we have to stick with it and see it through; it’s definitely proving trickier to implement than anticipated though! (*Well me - I can’t blame Mrs P.) Zinc roof The zinc roofers, Wessex Metal Roofing were also working through the week, finishing the main roof, fitting the small areas of zinc facade, and various facias, ridges, and gutters trims. They also kept Alan busy on Thursday and Friday making sure the necessary ply backings were in place to keep ahead of them. Scaffold issues: One area of challenge we have is the scaffolding. Ideally we need some limited changes. The scaffold company are in a fix though - too much committed work for the people available. In fairness they are communicating well and being open about their issues: fitters unexpectedly leaving or having to be let go, holidays, potentially over-ambitious work commitments... I have some sympathy but I sense it is going to be nigh on impossible to get them out for a minor adjustment any time soon. We’re going to need to think imaginatively to avoid being held up. I'm going to imagine everything's finished and we've moved in - feels better already. Next week: Work should start on the south-facing monoridge roof which is mainly solar PV panels with some slates round the edges. It’s a different roofing company because it seems the zinc roofers don’t do slates and vice versa. They sounded busy and stressed too, so I’m hoping they turn up. Aside from that, it’s a quiet week. We were supposed to be doing the blown cellulose roof fill but.. oh.. I see that’s already been done! Well done on getting to the end of that blog! Just for fun I've added a summary 'dashboard' below. This is turning into a weekly project report - sorry about that: old habits. Dashboard: Contractor days on site this week: 26 Contractor days on site since build start: 156 Budget: Currently running £8k over (Benpointer budgeting rule 1 breached - poor management 😂). Plan: On track to move in by Easter 2026. Issues and worries closed this week: Making the roof space airtight enough for the cellulose blow. Completing the cellulose fill. Confirming the window and door opening sizes match the ordered windows and doors. (Actually that was checked as ok by the Norrsken pre-install visit last week but I forgot to mention it, but its a big tick in the box and would be a huge disappointment to C4 had we been on Grand Designs.) Current top issues and worries: Scaffolding (see above). Velux flashings - more on this next week. Scheduling future deliveries: insulation, battening, cladding, render boards, MVHR, UFH kit, ASHP, HW cylinder, PV panels… all due in the next six weeks.8 points
-
Block and beam? No! Ground bearing slabs. A decision that has given me sleepless nights and resulted in some serious hard graft. We had 60 ton (that’s what we were told 🤔) of Type 1 MOT delivered and had to then proceed to get into the bays and levelled up, before compacting it. The brickie was an arse as he should have stopped building and said “get your hardcore in and laid”. His work was rather shit, so I knocked some of it down to enable me to get a dumper in distribute the piles to make levelling it quicker. Building control were fine with me using grano dust as the top layer. This compacts nicely and gives a much harder surface than sand. Below are a few pictures. Hoping to get everything finished by tomorrow. I’ll breath a sigh of relief that it’s done and dusted.7 points
-
Well, it's been nearly 9 months since we moved in, and I didn't leave a list last time, so here are the parts of the last list that still needed work. As you will see there still remains a lot of stuff to do. You'll soon learn why they're still here 😞 more stone work - still on the list but much reduced rainwater soakaways - still on the list rainwater collection system - decided after deliberating a lot to leave this out for now as it's not a condition backfilling - partly done, still on the list concrete lego brick retaining wall - delivered, to be fitted Flooring - en-suite and "attic" room left to do Wood cladding - still on the list Fit internal doors - one last door to do Fit en suite - basin and bog outstanding Build MY garage - still on the list A green roof system, because its on the planning application, and may be required for certificate of completion (unless someone can enlighten me as to how to avoid this, and be able to delay the installation) - still on the list, but good news on the completion element for this below. Back in August 2025 we moved into a building site, and worked hard to get the remaining bedrooms completed before our first Christmas for which SWMBO had invited MY family. Not sure whether to label this action as bullying, blackmail, fraud, spousal abuse or whether another specific crime was committed. But, we got there, and a fantastic Christmas was had. Also during this time, we managed to secure a buyer for our old house. We had decided to stop calling it home to start the process of removing 29 years of emotional attachment to the place in which we brought up our two children, and in December we removed pretty much all the remaining furniture in readiness for Christmas and what we thought would be a completion on the sale in January/February of 2026. You may recall me asking questions about a retaining wall which was holding up the new buyers getting a mortgage. Now, this wall was not a part of the house but on our boundary about 2 feet or so away from the side wall of the house. It has a crack in it and the lender wanted it repaired. We had requested an SE to come give us a report, hopefully to tell the lender to stop being a d1ck, and we had arranged to meet them on the 6th January. We arrived the day before to find it difficult to open the front door because there was some plasterboard behind it which had come from the landing ceiling at the top of the stairs. This had been caused by a leaking water pipe in the loft. Subsequent water bills showed that 28m3 of water had come through the ceiling - we now had a major water leak insurance claim repair to deal with. And the upshot of the SE visit the following day was they said it did need fixing. B0110cks!! So, now instead of a completion in Jan/Feb, we were looking at a completion in 3-6 months. We then found out that the retaining wall was our liability, and not the people who owned the land behind it. This put a huge dent in our plans. Everything we had planned to do in the first half of 2026 (work on the house and a ski trip) went on hold as we got someone in to repair the wall (in March, once the rain had stopped) and to deal with the insurance company who thought it was a great idea to appoint two separate companies to complete the drying out/repair work - WHAT COULD GO WRONG? We sat down, and reworked our plans for work on the house. This has been limited to work that we could carry out with little spend because either it was something outside in the "garden" (read mud bath), we already had the materials on site, or the materials required were not hugely expensive. What have we been up to in between complaining to the insurance company about the lack of co-ordination and progress (WHO WOULD HAVE THOUGHT?) We bought parts to start finishing off the rainwater drainage pipework, which also allowed us to do our first bit of hard landscaping, some steps down to one side of the house, and starting off the path as well. We still had a lot of stone cladding to complete, so once the weather improved, I set to completing most of this. There are still a few odd bits and pieces to do once the balcony and connecting bridge have been completed (one of the large ticket items that is on hold). The other main area of work has been the en-suite bathroom, where we spent a little bit of savings and created a service wall on two sides, got it plastered and painted, and also installed the walk-in shower. After a bit of back and forth, SWMBO agreed to a wall hung toilet pan (thank you to those who responded to my cry for help). So, the en-suite requires said bog, a basin and vanity, tiling behind the basin, flooring and a door to be completed. All materials on site or on order, and the plan is to get on with that over the next few weeks. So, where does all this leave us? Well, the bits of good news we've had:- - our BCO visited just before Christmas and gave us a list of things he'd like to see before he issued a completion certificate, and on that list found that the green roof was not required to be fitted, but just some documentation about what we proposed to put up there. I know what many will think, but we will probably still install one at some point, but it does mean we can delay installing it until after completion. - I mentioned we secured a buyer for the old house. Well, they have stuck around through all our tribulations and we will be completing on June 5th. Come mid June we should have the following major items to complete, and the funds to do them: Balcony including balustrade Connecting bridge to balcony Balustrade by internal stairwell Exterior porch floor rainwater soakaways - still on the list concrete lego brick retaining wall and backfilling Flooring - "attic" room left to do Wood cladding Finish the en suite - as outlined above Build MY garage - still on the list A green roof system Once all that is done we might also be ready to clear the site of the touring caravan we used for the first four years of weekends and holiday time we spent building the house and a lot of left over building materials. I'm glad to say there is very little of that as I resisted the "order 10% more than you need" rule, and am pleased to say it only bit me twice in extra delivery charges. This has meant we have incurred zero cost for skips/clearaway etc. and, no, we have not buried it all in a very big hole in the 3 acre field we bought. There's still a lot to do, but as we approach June 5th with lightened hearts, we have a much clearer view of some form of end game, with may hours to be spent creating a new garden around our NEW HOME!!7 points
-
UPDATE……. so after emailing and posting the letters by hand, the builders truck arrived at the neighbours yesterday. This morning I was doing some work outside and the neighbour called by and said the builders aren’t starting Tuesday now. They (neighbours) put a halt to it to clear up what’s going on. Said builder said he would deal with communications, they didn’t know what was involved with access or PWA. Didn’t want any bother so it’s paused until further notice. It was the first amicable conversation about it. So the builder is available for work now if anyone is interested 😁 In the meantime I’ve painted the fence, walls have a had a coat of brilliant white, jet washed and pointed slabs and oiled furniture. looks lovely for any future photos 👍🏻 Thank you7 points
-
My faulty Brink Flair unit has now been returned, and I bought and installed a DucoBox Energy Comfort 325. All of the problems I attributed to the Flair have now gone away. This is as good a like-for-like test as you're going to get, everything is the same - same house, same ducting, same vents, only the main unit has changed. Just for completeness, I want to mention two additional (objective, measurable) tests I did on the Brink Flair in the last days we had it, using a CO2 and humidity monitor. Why didn't I think of this earlier!! I placed the monitor inside one of the supply vents, luckily we have two through-wall vents which are perfect for this (https://www.ventilationland.co.uk/en_GB/p/uniflexplus-wall-manifold-rear-connection-1x-o90-mm/9744/) so the whole monitor can sit in the incoming airflow. We then left it for a few minutes so the values could settle down and we could get a general background reading: the RH was about 55% and the CO2 was about 450ppm. First test was a humidity test: I boiled a kettle in the kitchen and let the steam be sucked into the extract valve. The RH jumped to 70%, then went back down again. I also showered, and again the RH shot up to 70% (see attached graph). Second test was a CO2 test: I disconnected the flexible noise dampener which is connected to the Flair's extract port, and breathed into it several times. The CO2 reading at the supply vent briefly increased, from about 450 to 485, then went down again. I tried this again with my partner, and the CO2 reading went up to about 540 PPM. (This one is difficult to show on the graph though, as the unit only logs every five minutes, so the brief peak isn't logged. It's difficult to keep breathing into the extract!) This can only be because there was a leak inside the unit. This does echo the results of my smell test, but is more objective and can't be written off as me having some sort of super-nose! I consider that to be proof that the Flair was faulty, despite Brink's inistence that it wasn't. The new Duco works as expected. I've done the same tests, and showering makes no difference at all to the moisture levels of the incoming air. It's been in for over a week now, and the RH in the house hovers around 44 to 54%. Even while boiling a big pan of potatoes there's no moisture on the kitchen window, whereas with the Flair it would be dripping wet. With the Brink Flair the humidity in the house was always high. The 55% mentioned above was only acheived because we had left the above-window vents open, and aired the house out every day by opening the windows for several minutes. Until we started doing that it was always above 60% and would jump to over 70% when cooking/showering. I must say I'm really disappointed with Brink. They showed little interest in the problem, I had to nag them constantly, and were almost totally unresponsive, and it seems they closed my 'case' several times. If I hadn't kept the pressure up they would never have responded. Which is a shame, as I really liked their products otherwise.
 7 points
 -
Hi chaps, UPDATE! been a while since I posted. Hope y'all doing well. Good news & an update on this heatpump! I finally won the battle with Vaillant, & they've come up trumps, by replacing my problematic Split system with a Monobloc. Installed 10 days ago. No mechanical noise in the house anymore! hydraulic unit gone- good riddance! My goodness, what a long battle tho. I got the final agreement & date set, after approaching a different female at Group Service dept, picked up my sword for one last effort, & with careful navigation (tricky & complex & 5 years of stress tbh) she empathized.. & got the ball rolling for me. Which had been stalled for over a year & my energy spent, & I was defeated & demoralised tbh. And with it I had a fantastic installer too. Extremely competent & friendly. Fab work done, you can just see the difference. Vaillant's west UK choice, so had tiptop credentials. Thanks to all who offered help & advice on this. Zoot7 points
-
I think what you've done is that brave, put your head above the parapet, admission of human vulnerability in an arena that is still steeped in 'manly toughness' mythology. And what you've done is highlight the experience that probably most, if not all self-builders go through during their build. I come from a psychology background - I began in the engineering field and then gravitated to psychology, so I originally trained to BACP levels in counselling and eventually moved into a field called coaching psychology where I worked with a combination of high level athletes, business leaders and business founders. Now, I can say that every single one of my clients has experienced major ups and downs and a lot of their time is spent grafting in uncomfortable places. But context is everything. In both business and sport there is at least a good proportion of acceptance around psychology and mental health. The most successful ones embrace this as of primary importance for their day to day function and successes, but even in these contects, there is still a long way to go. My experience so far of the construction industry is that it hasn't even begun to accept this. When I go and see construction sites, I don't see pleasant, human environments and people just don't talk about or readily and openly acknowledge their vulnerability. Sometimes I see quite frankly highly unpleasant working environments, with lots of miserable staff - which I see as one of the reasons why we get such shit building and trade quality - it's a UK construction industry cultural context that just doesn't seem anywhere close to shifting. Last summer I spent a couple of weeks in a construction academy training centre and it was one of the most miserable places I've been to in a long time and the trainers wonder why they get such poor engagement, performance, and results from students. This cultural context to me goes a long way to explaining why the construction industry has one of the highest rates of suicide. Here's a quote from the ONS about this: " These are pretty alarming figures. There are obvious exceptions to this. I know a contractor fairly near to me who runs a small company where he treats and pays his staff well. As soon as you go on site you can tell this from the nice, smiley and friendly atmosphere. In another example, a previous client of mine who engaged me when he started up, we spent 18 months to 2 years exploring how he wanted to lead the company and what kind of culture he was looking to foster as he wanted to be very different from his experience in construction with very large construction companies. Most of his contracts are in Europe but his company has now surpassed £1 billion in annual revenue. The context of a self-builder changes things and can make them more complex, especially if you're very hands on. As a self-builder you are completely invested and I know myself that this can make you feel trapped - you can't just walk away like you can from a job because not only have you ploughed loads of money into it, it's your blood, sweat and tears too. It's personal. You're also in the construction industry, but an outsider without necessarily having all the domain knowledge to navigate your way through a different working environment. So it's realy no surprise that self-builders feel down and it's great that this is being discussed so openly here with so much support being offered. I too can offer help and to talk, if someone wants to do so. I'm based just out side of Bath Oh, and to mention a little celebration I had for myself yesterday. My company is now officially MCS certified for design and installation of air source heat pumps - but please don't crucify me for that 😉7 points
-
Thanks all for the supportive replies. This forum is one of the best sources of support a self-builder could have. I want to give special thanks to @BotusBuild and @Fallingditch for their generosity with both practical and moral support, and to @Gus Potter, @Nickfromwales, @ProDave, @SteamyTea, @ToughButterCup and others who have responded to threads and direct messages with advice and wisdom that I could not have managed without. Knowing that you guys are here, and willing to show such kindness and generosity with your time and knowledge, is invaluable.7 points
-
Ufh pipes will cost a grand to buy, if you don’t put them in you need a serious word with yourself. I don’t understand the figures like some on here, but I know I’m sitting in the most comfortable house I’ve been in for a long time, just a gentle warmth in the tiles emits to every point of the house. it’s just an absolute pleasure.7 points
-
Been a while and I was just randomly passing through when I noticed a few recent posts on this thread. Current update is we gained our Completion Cert in July (almost exactly 10 years to the day since buying the land), and the interior is nearing completion with just the kitchen to finish. Fully offgrid, we haven't paid a utility bill in 9 years. Living our dream and still pinching myself, tbh.
.jpg.6d82280948da1ced357e791676969673.jpg)
.jpg.f5ad4d134bf18cc792740d393cdb1432.jpg) 7 points
7 points -
7 points
-
Came across this forum recently whilst searching for information about BNG, after delving deeper I wish we’d found you all about 2 1/2 years ago. My wife and I are just finishing our build, hopefully by the end of this month. Maybe 6 months later than projected, so probably not too bad. Our struggles along the way have been for the most part due to our main contractor going into liquidation in December 24. In some respects this may have been a blessing, in others not so. We realise now that not all of the headaches end with the completion of the build; reverting to LA building control after the liquidation is challenging, we still have outstanding land transfer issues and obtaining planning permission for a ground mounted PV array is laughable. Our build is a new build replacement of an old tractor barn, close to the ridgeway in Oxfordshire. It seems the forum likes photos so I will attach a couple.
.thumb.jpeg.b28cd0cbc0f4f6cb4c86bc6d7270cc5f.jpeg)


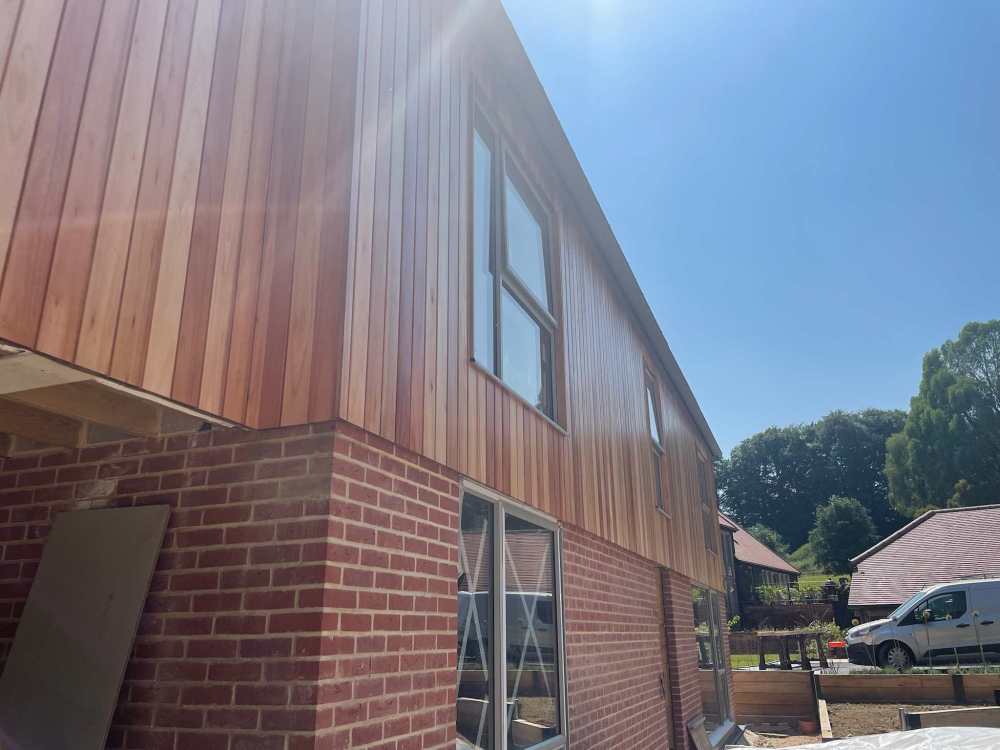
 7 points
 -
Cheers for the help everyone... got people lined up. Joiners are on site now fixing up / measuring. Brickies and welders coming next week. Should have things fixed up in no time hopefully.7 points


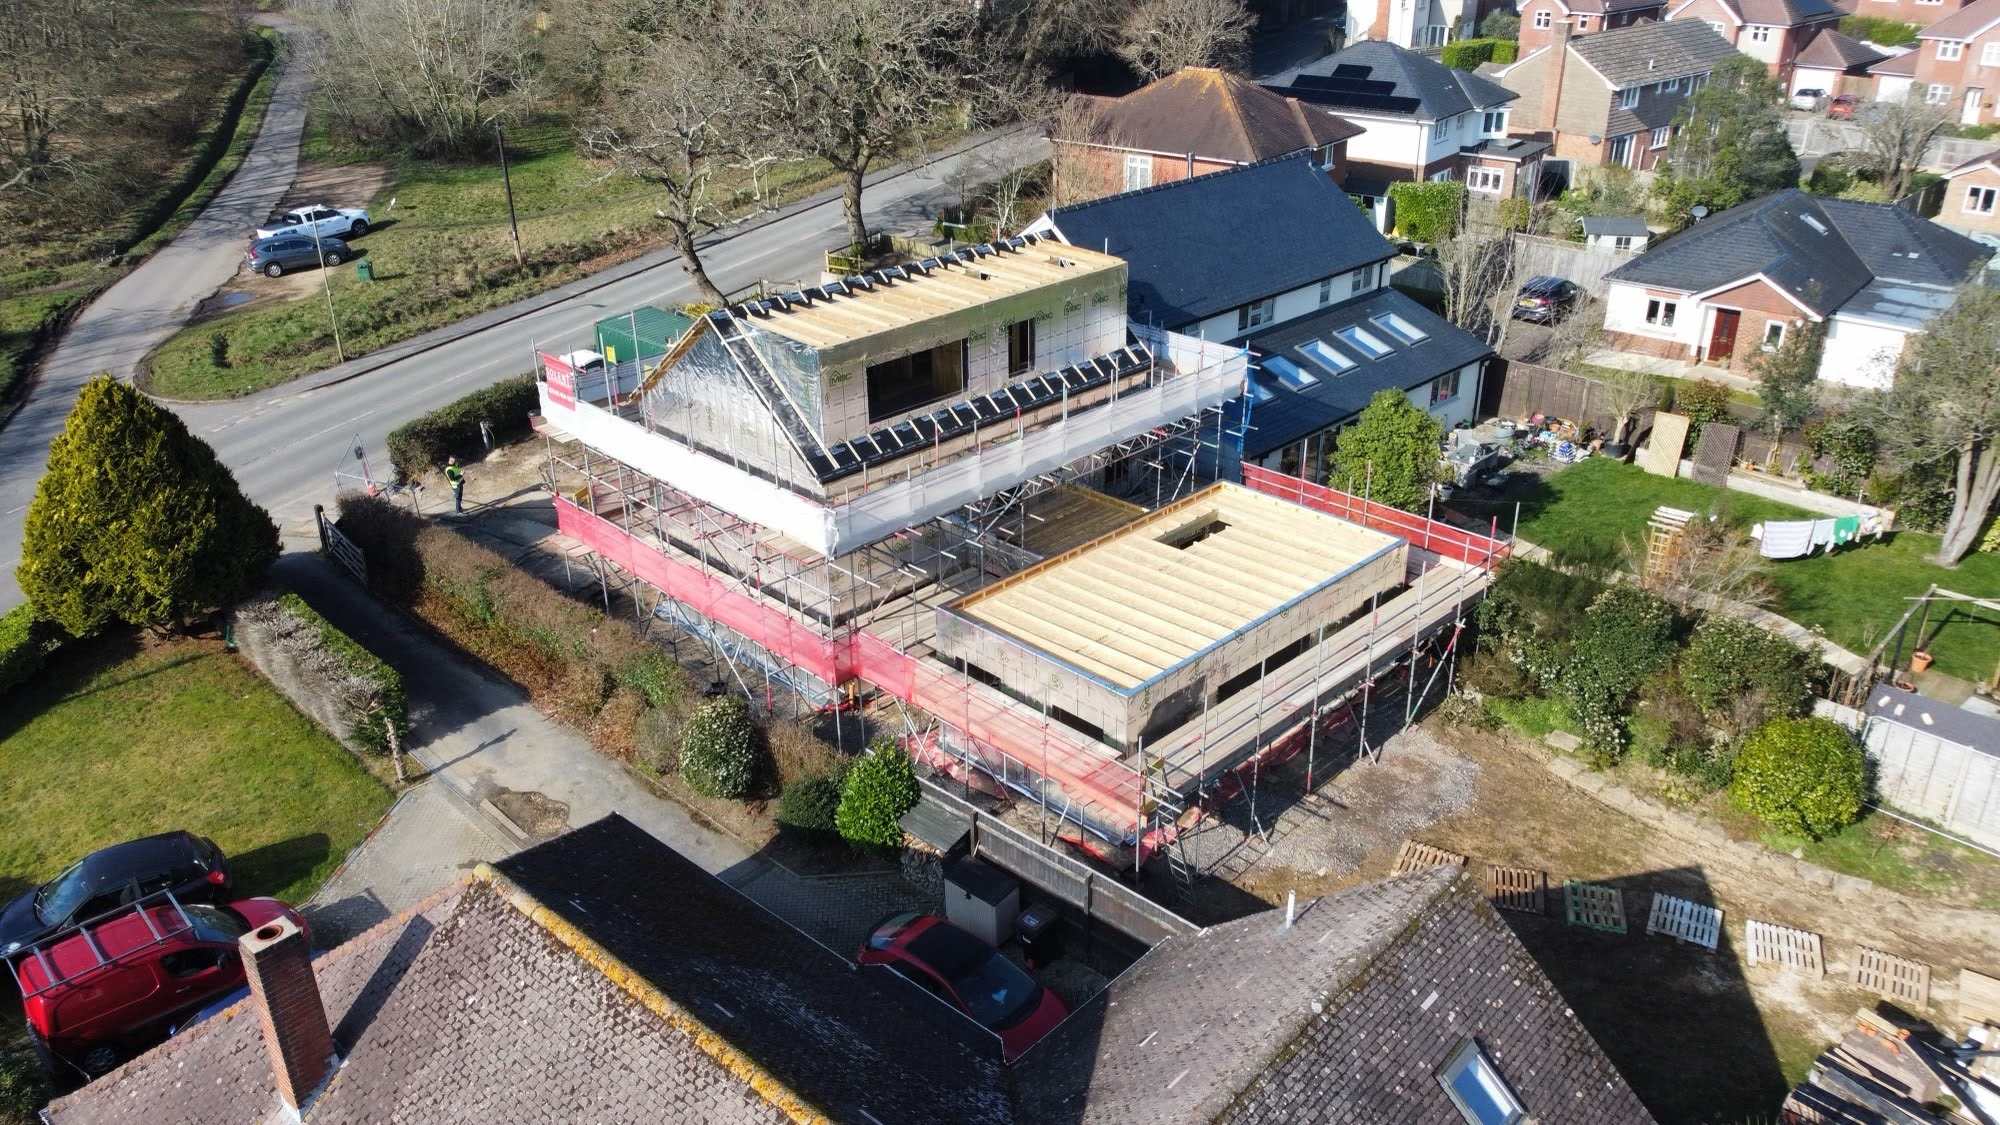

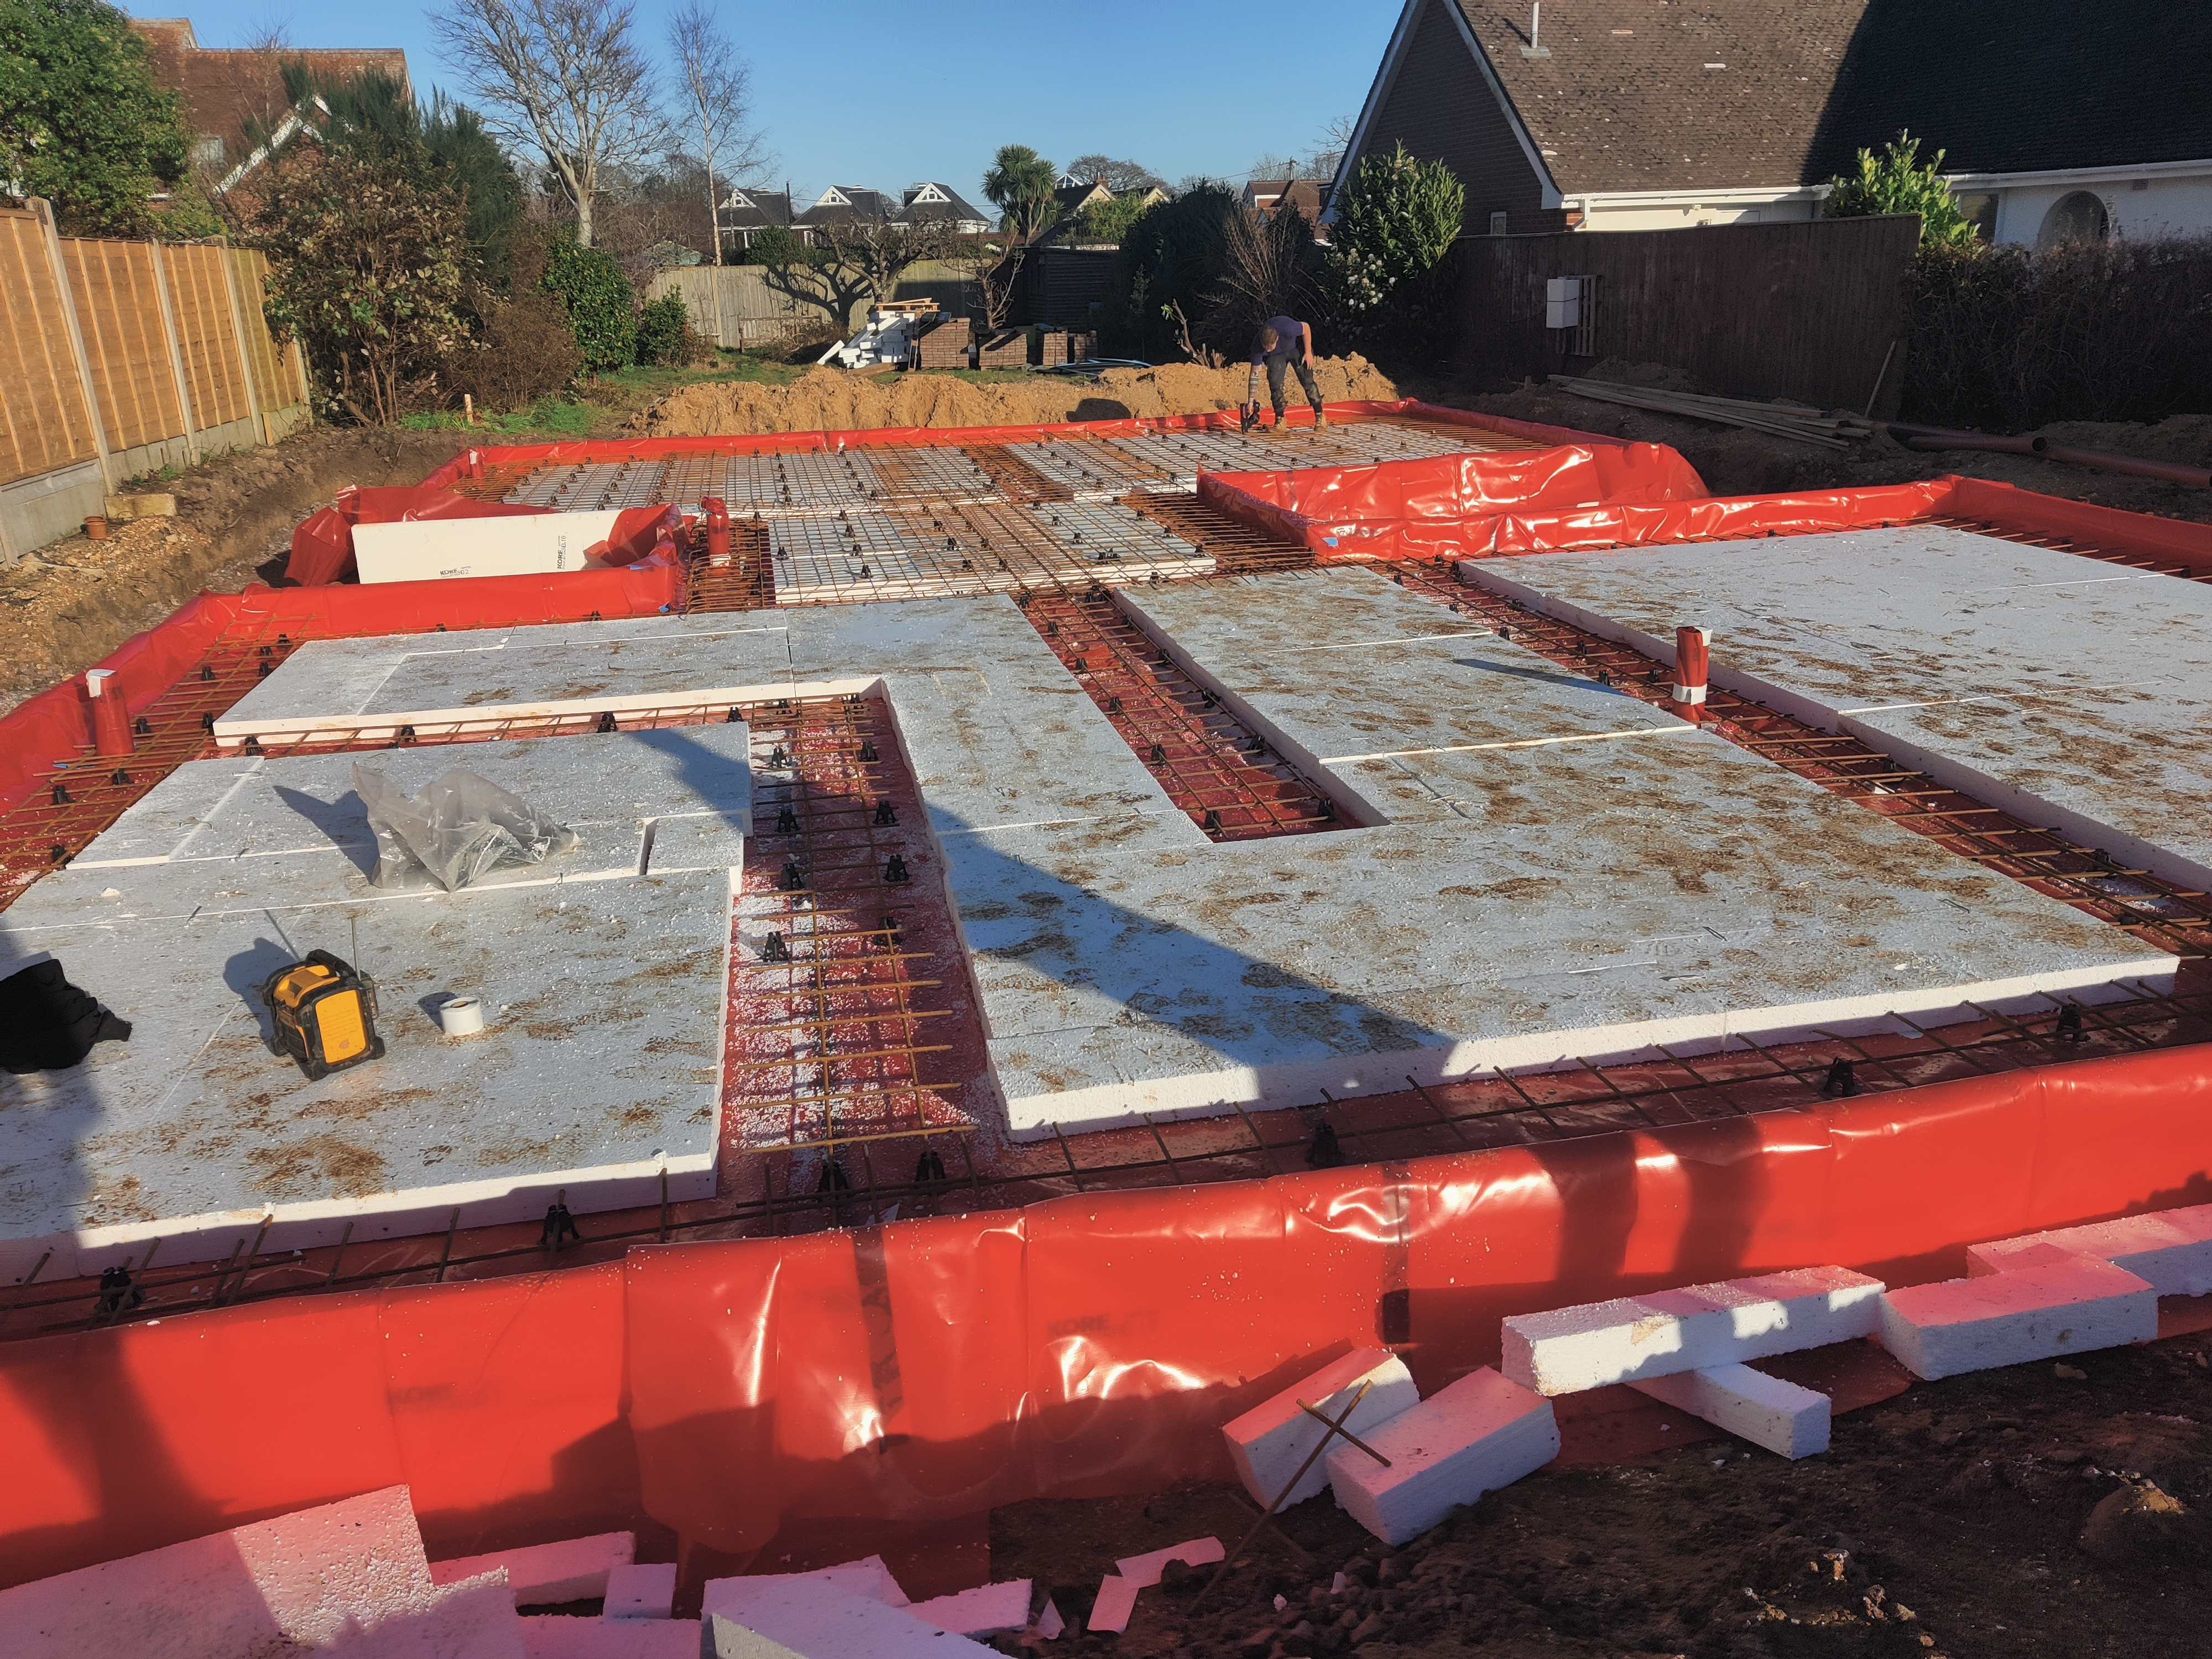

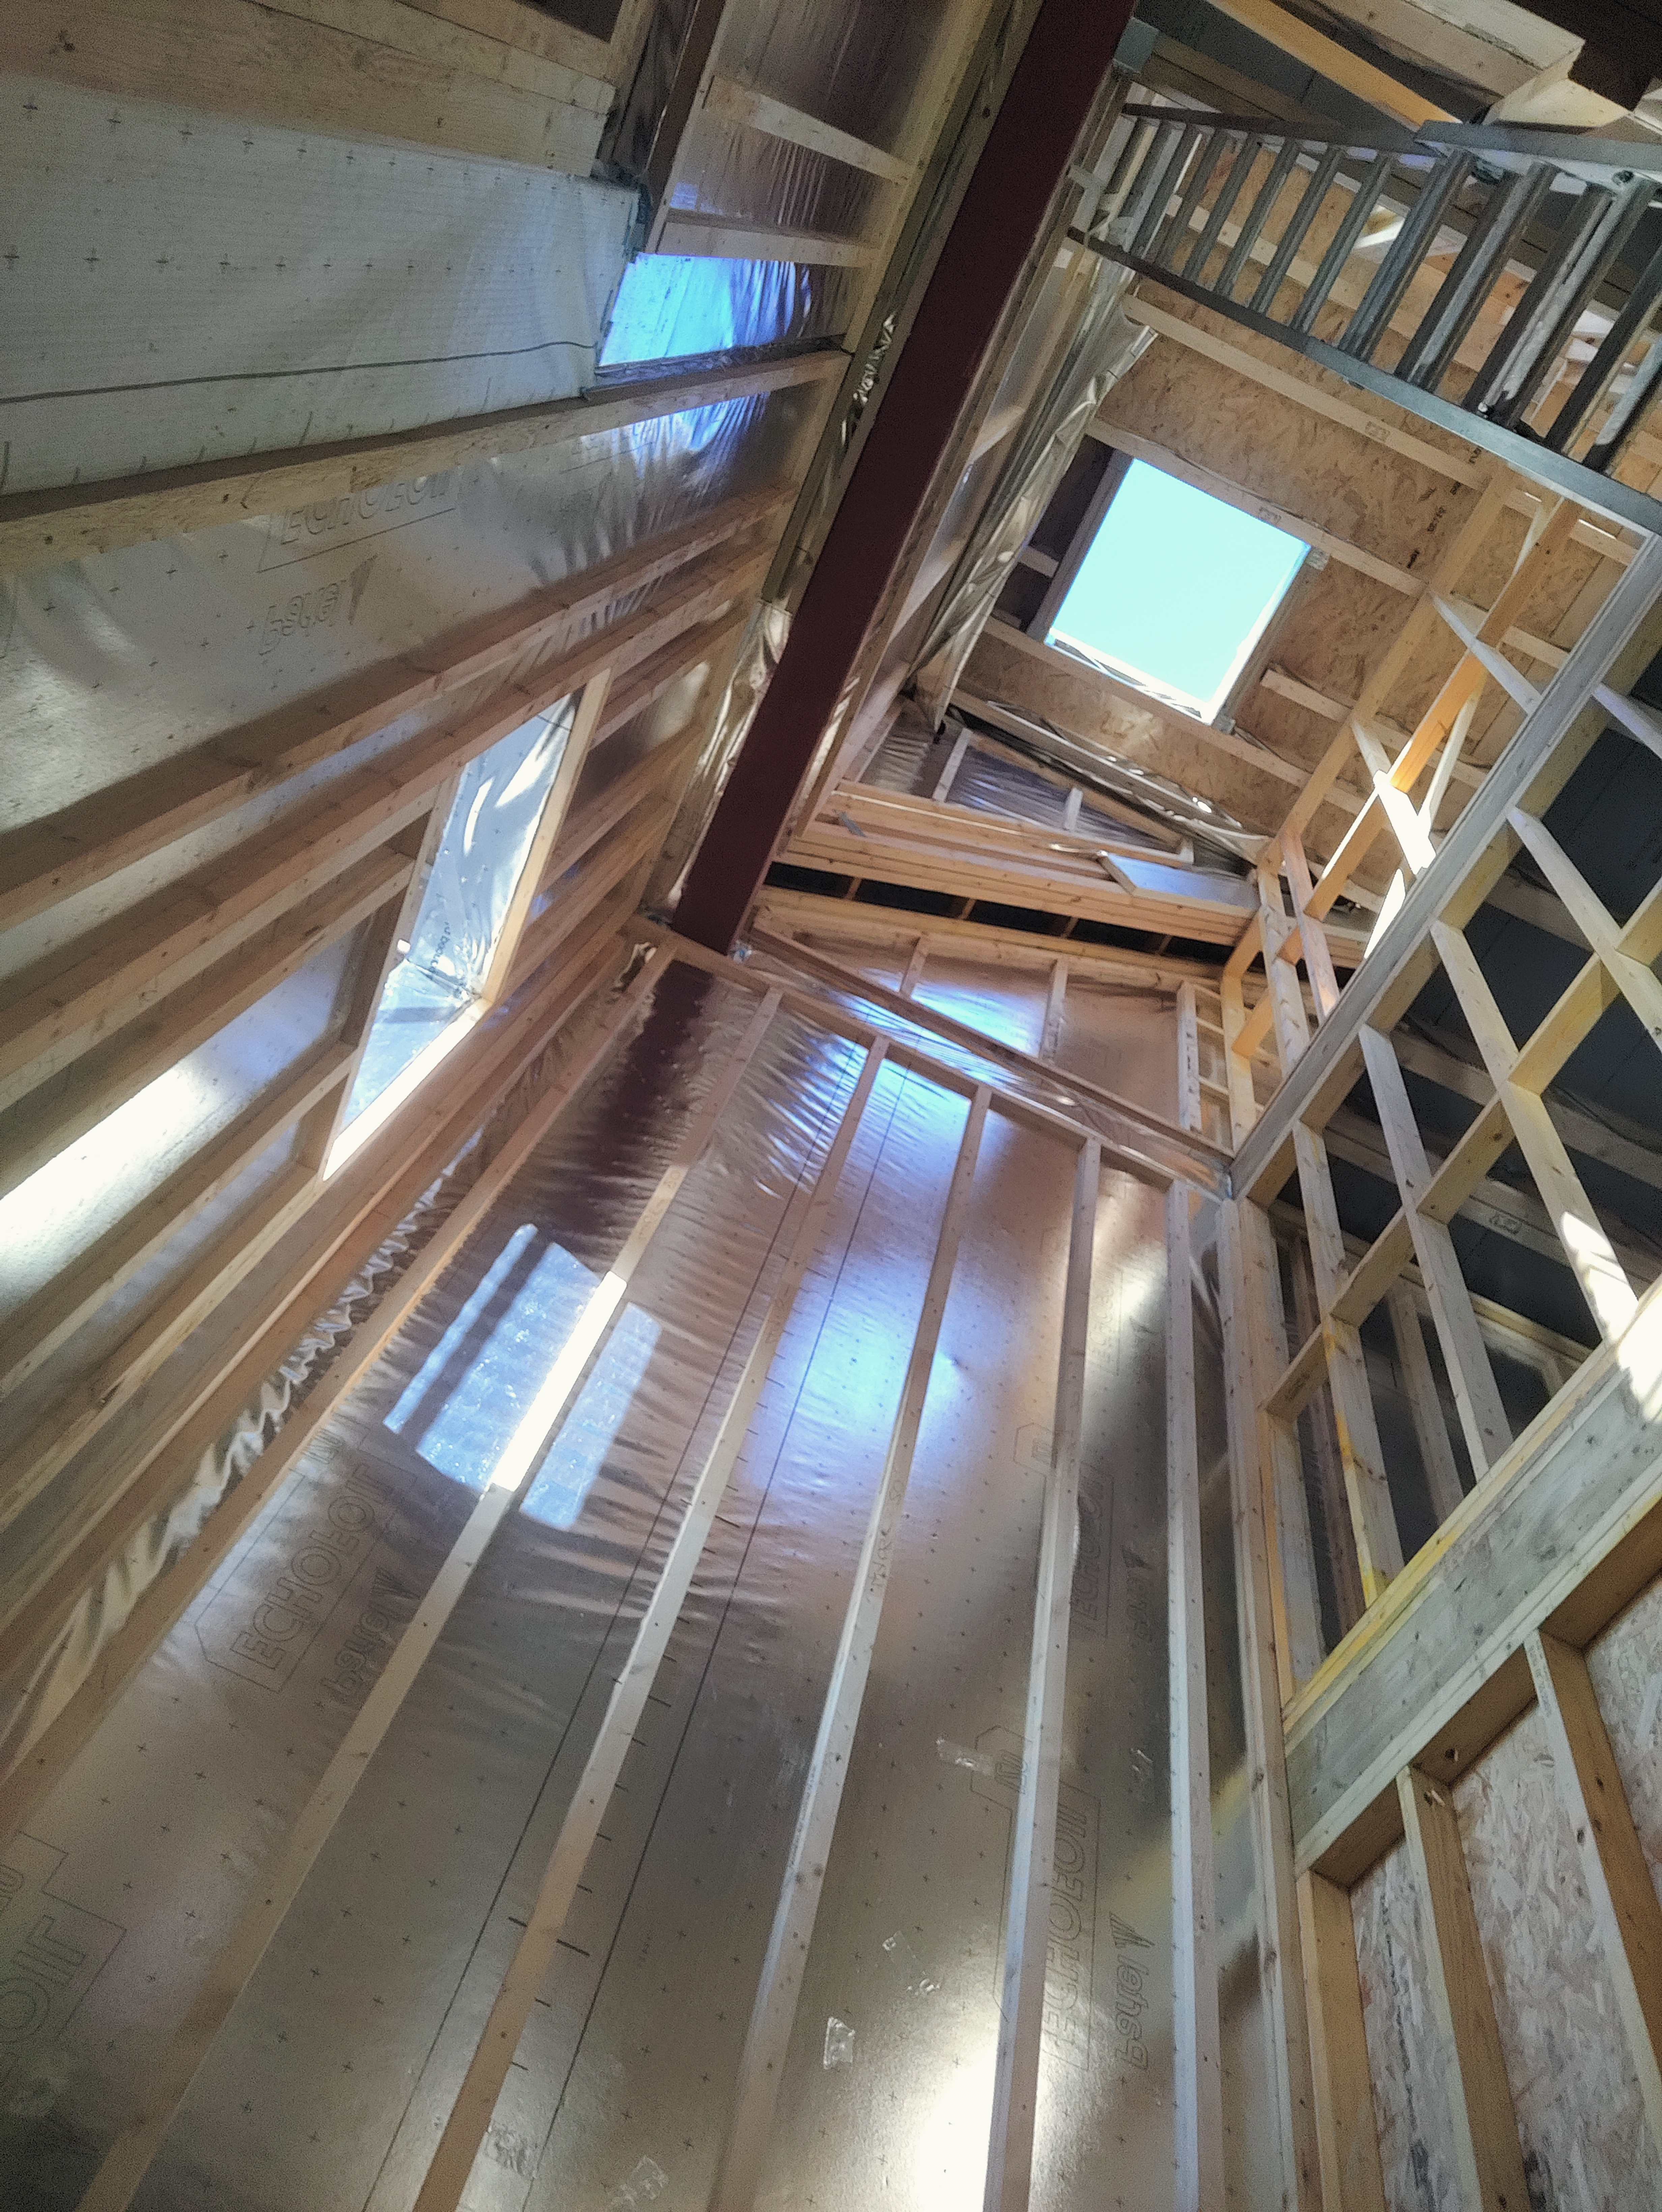
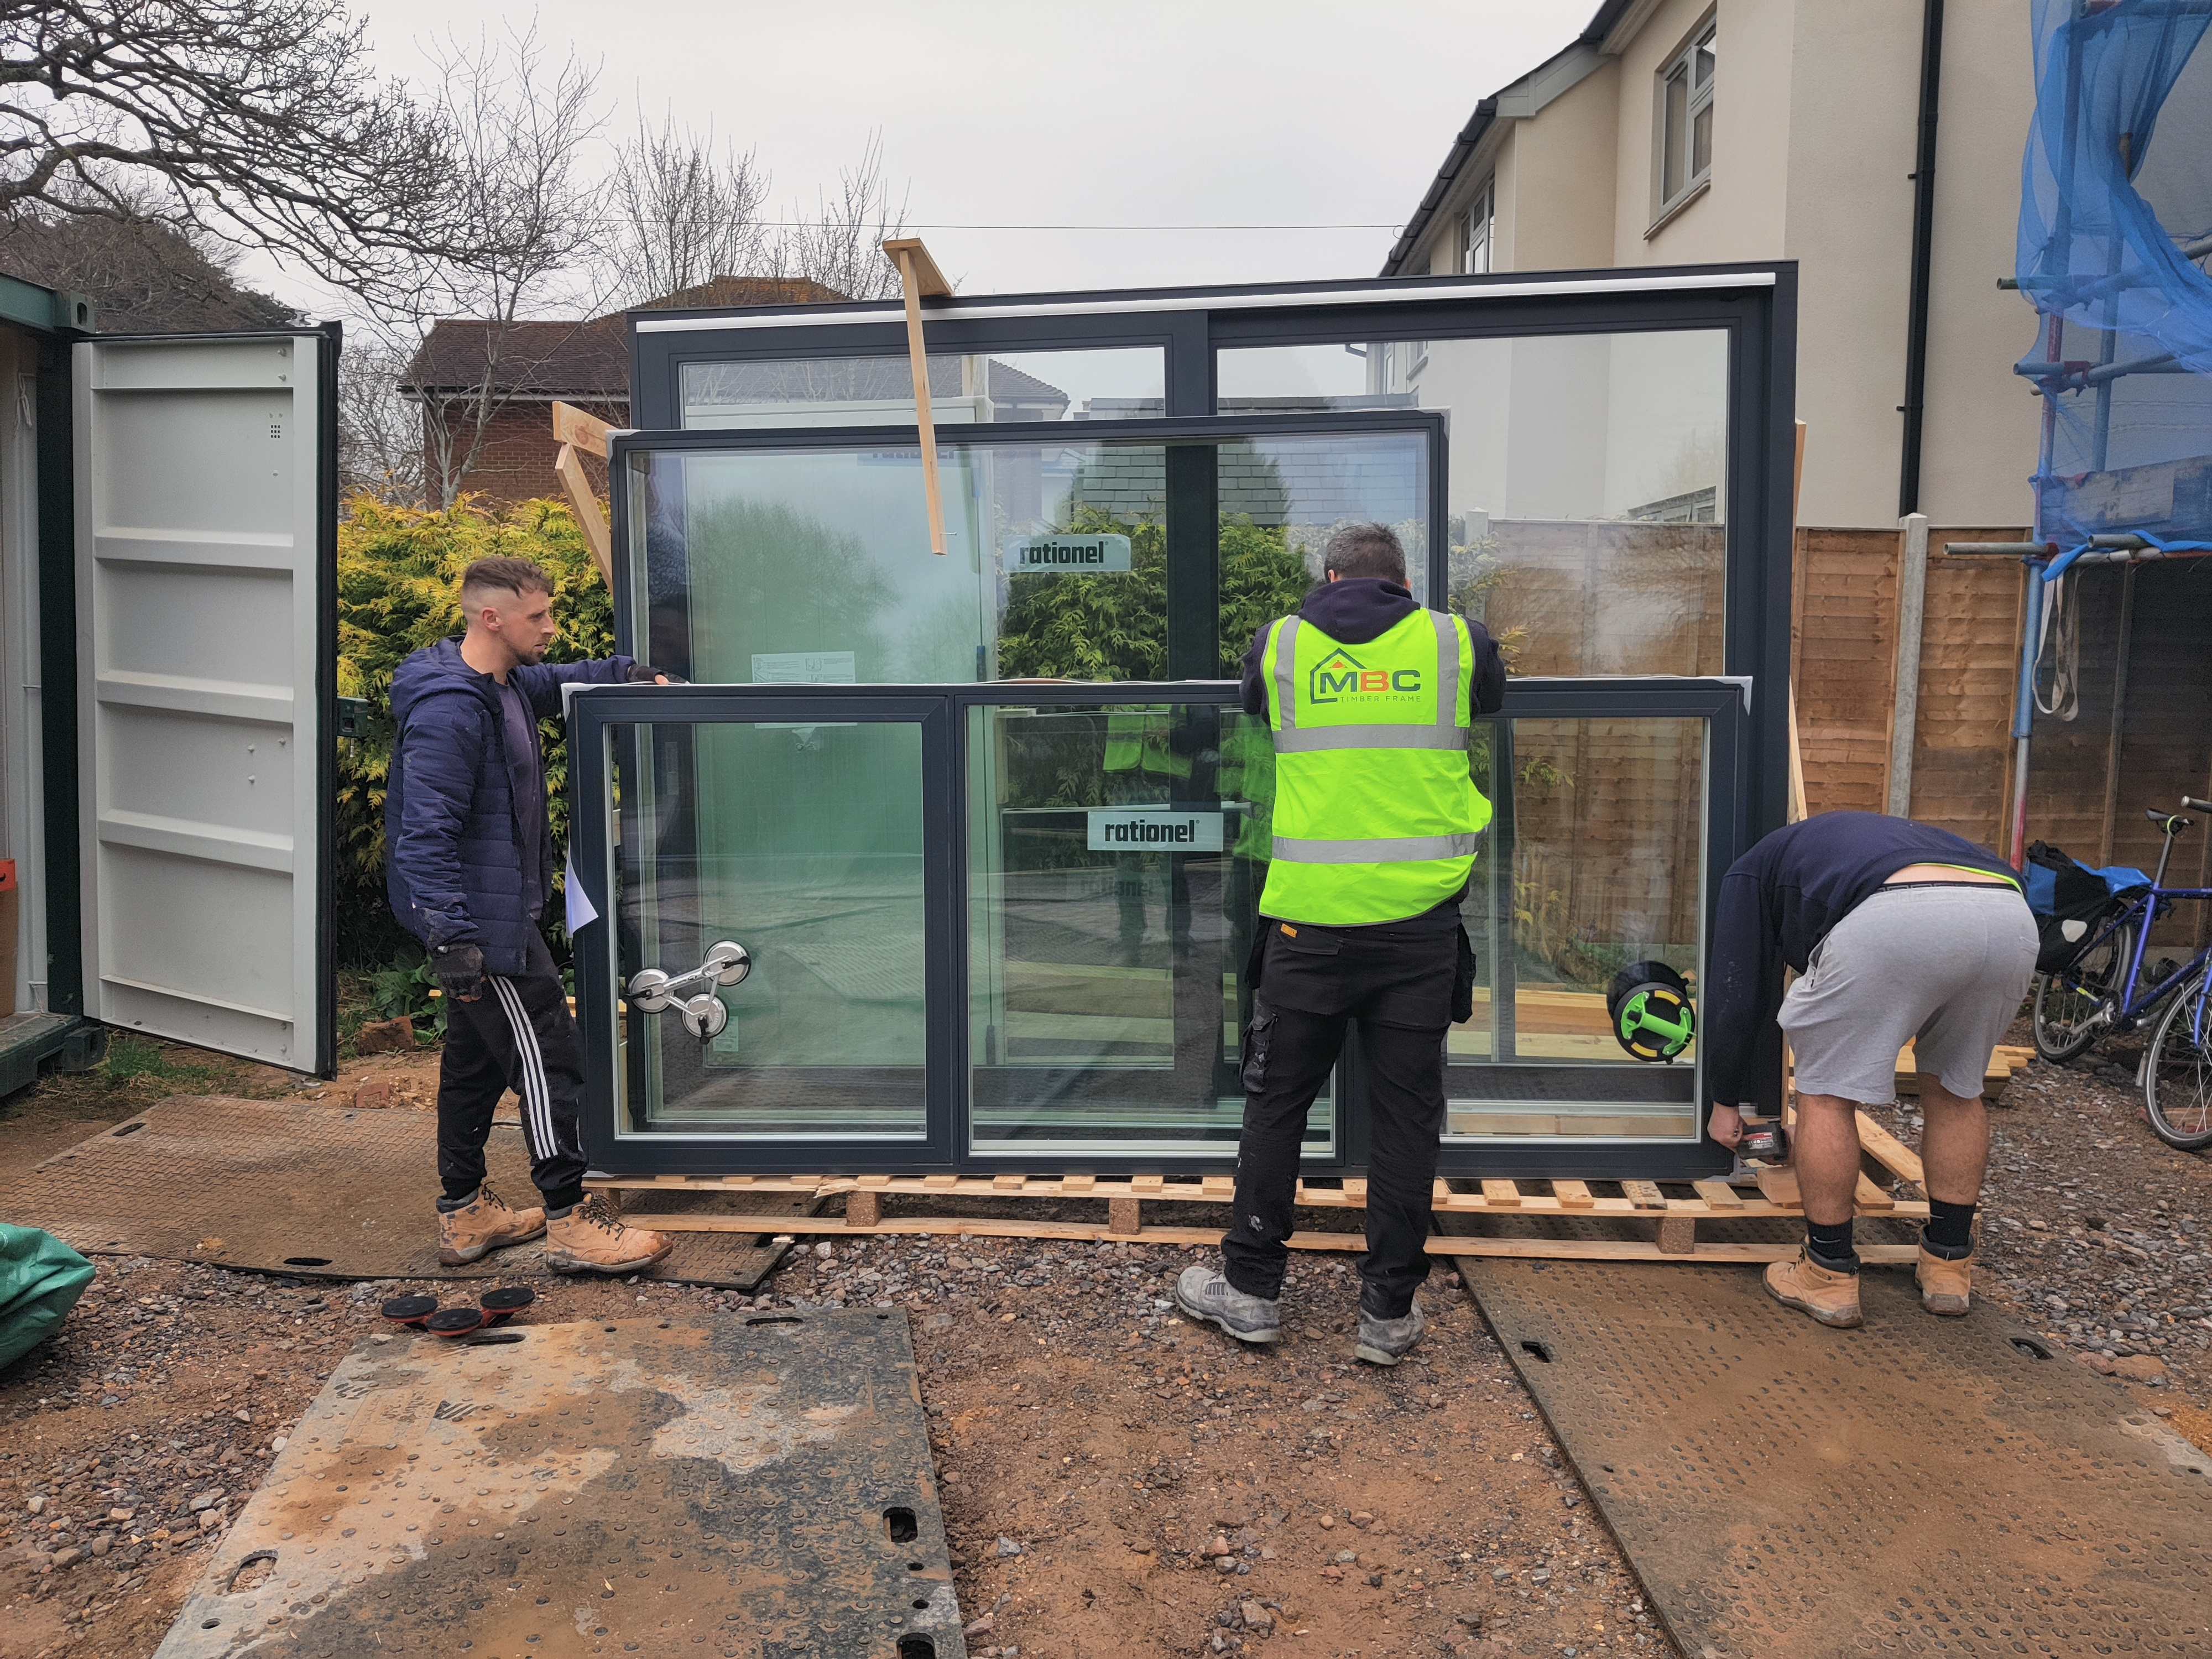


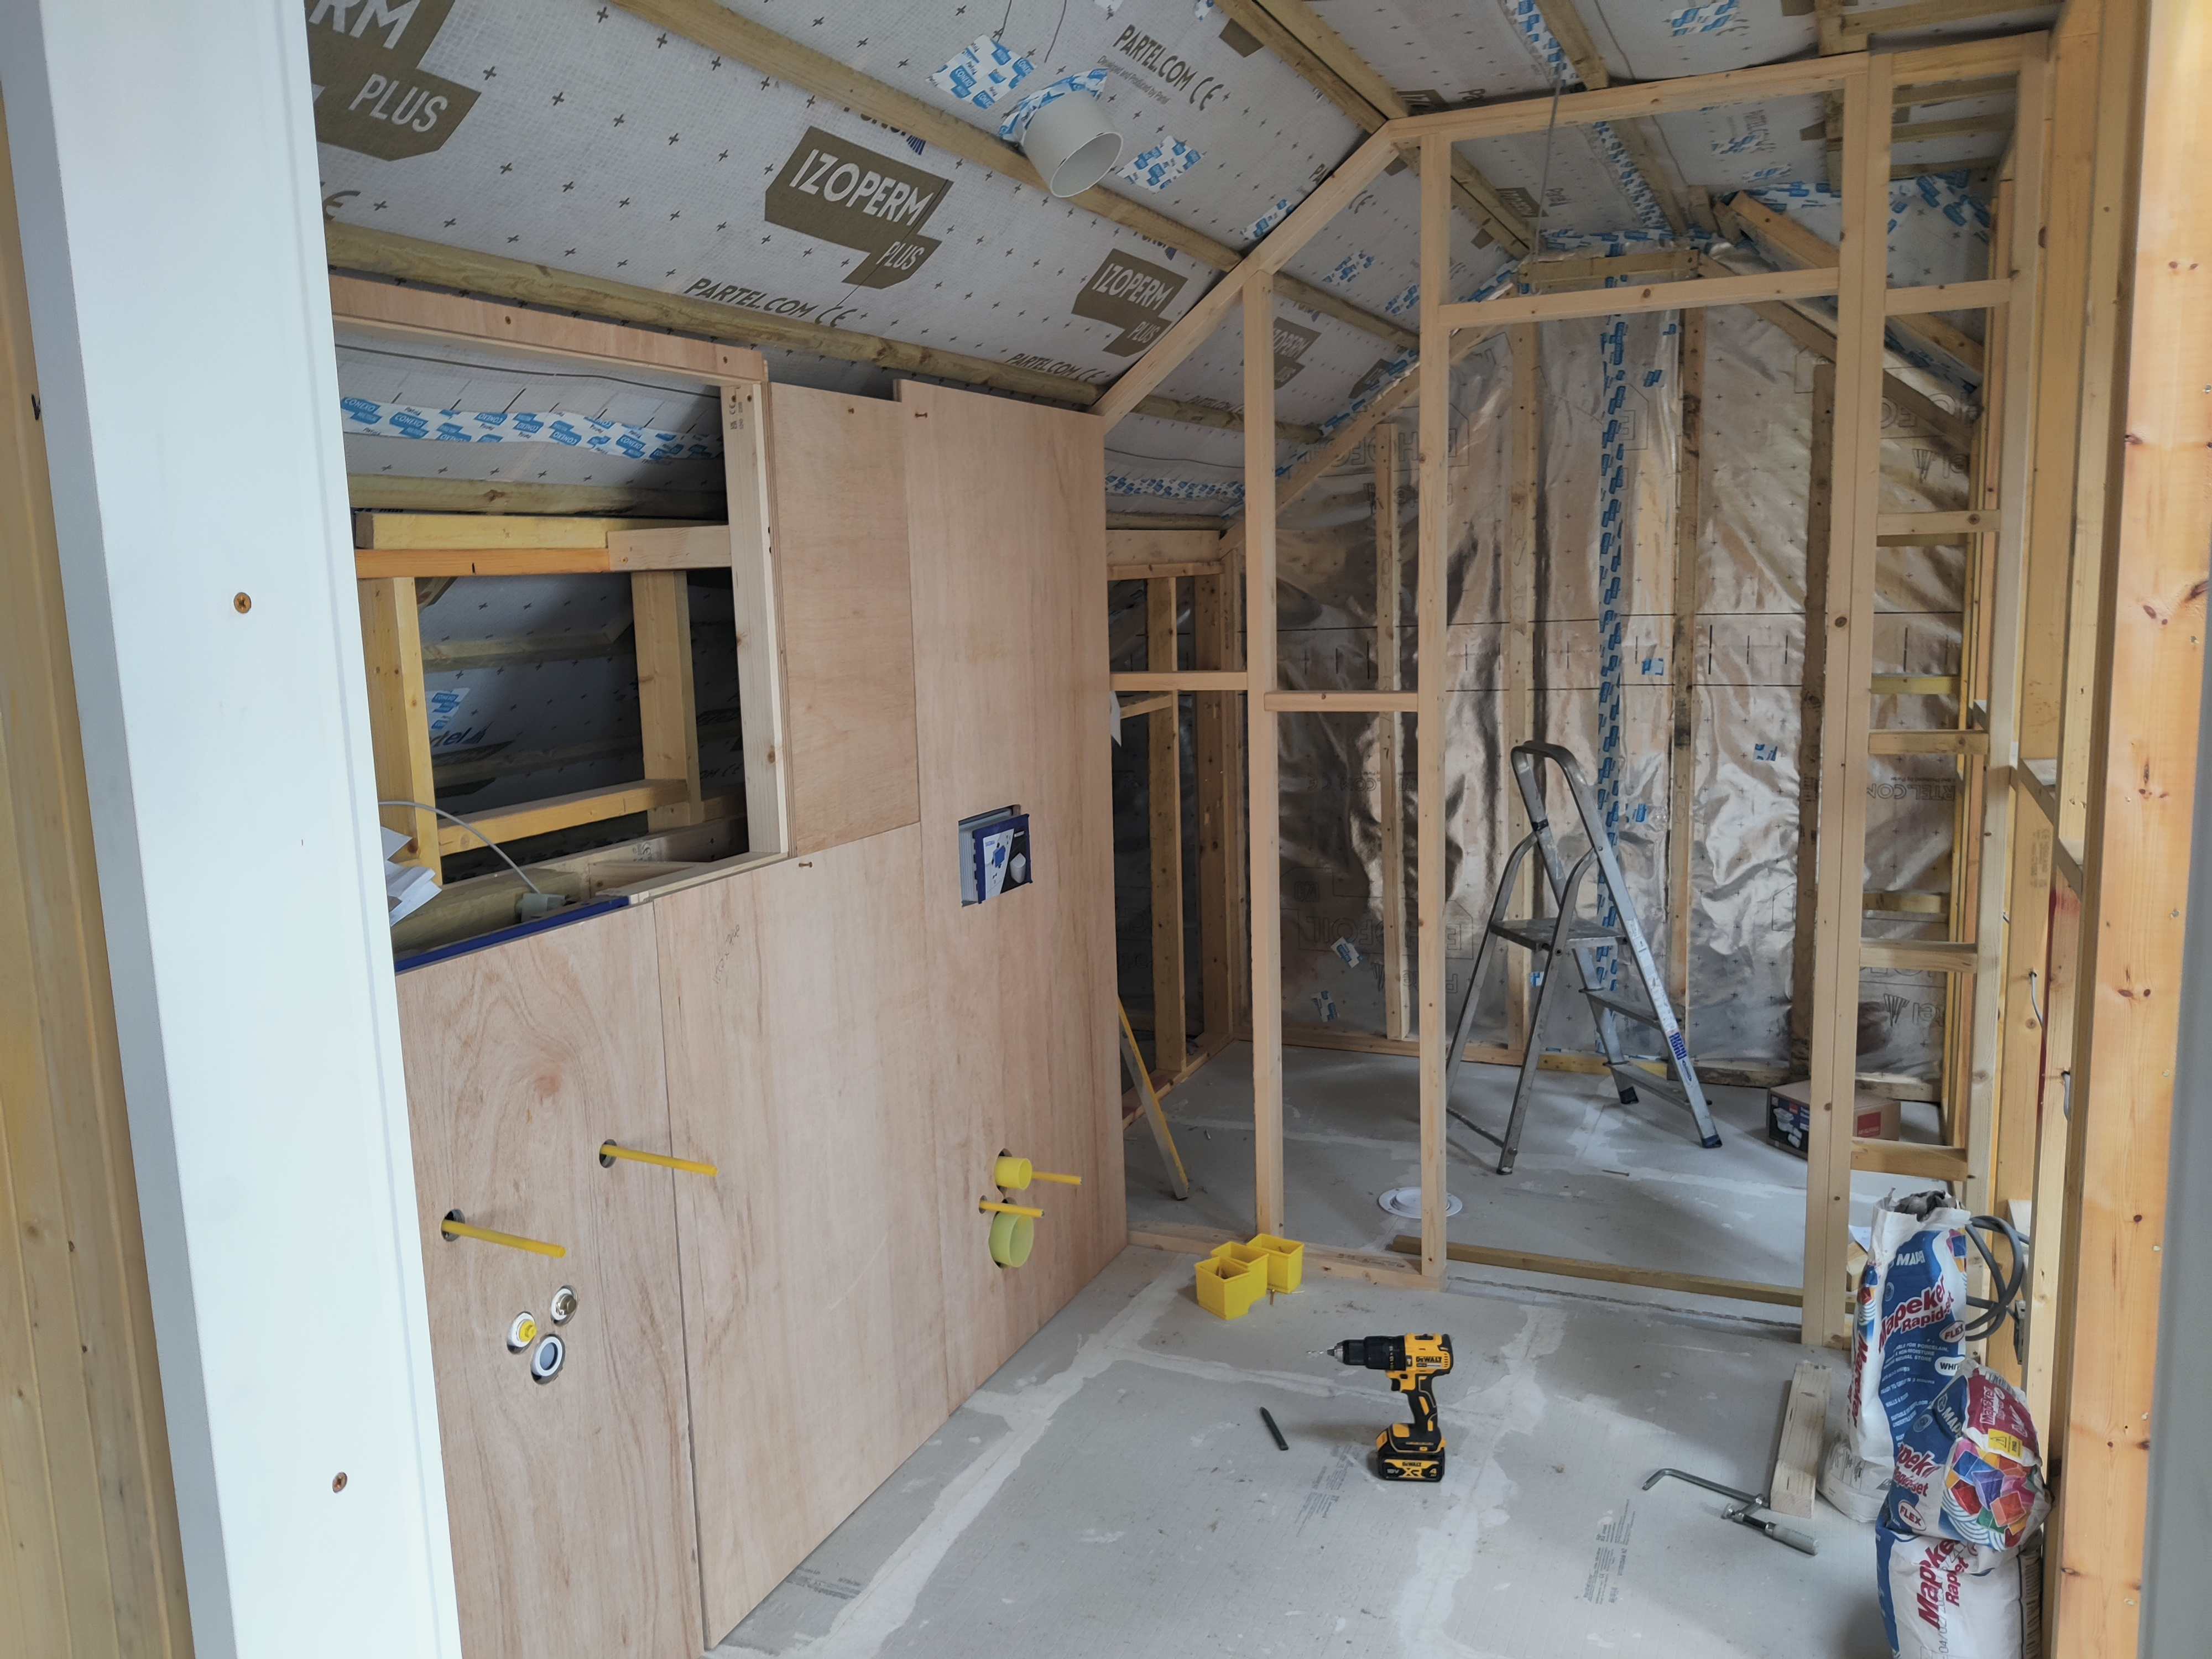

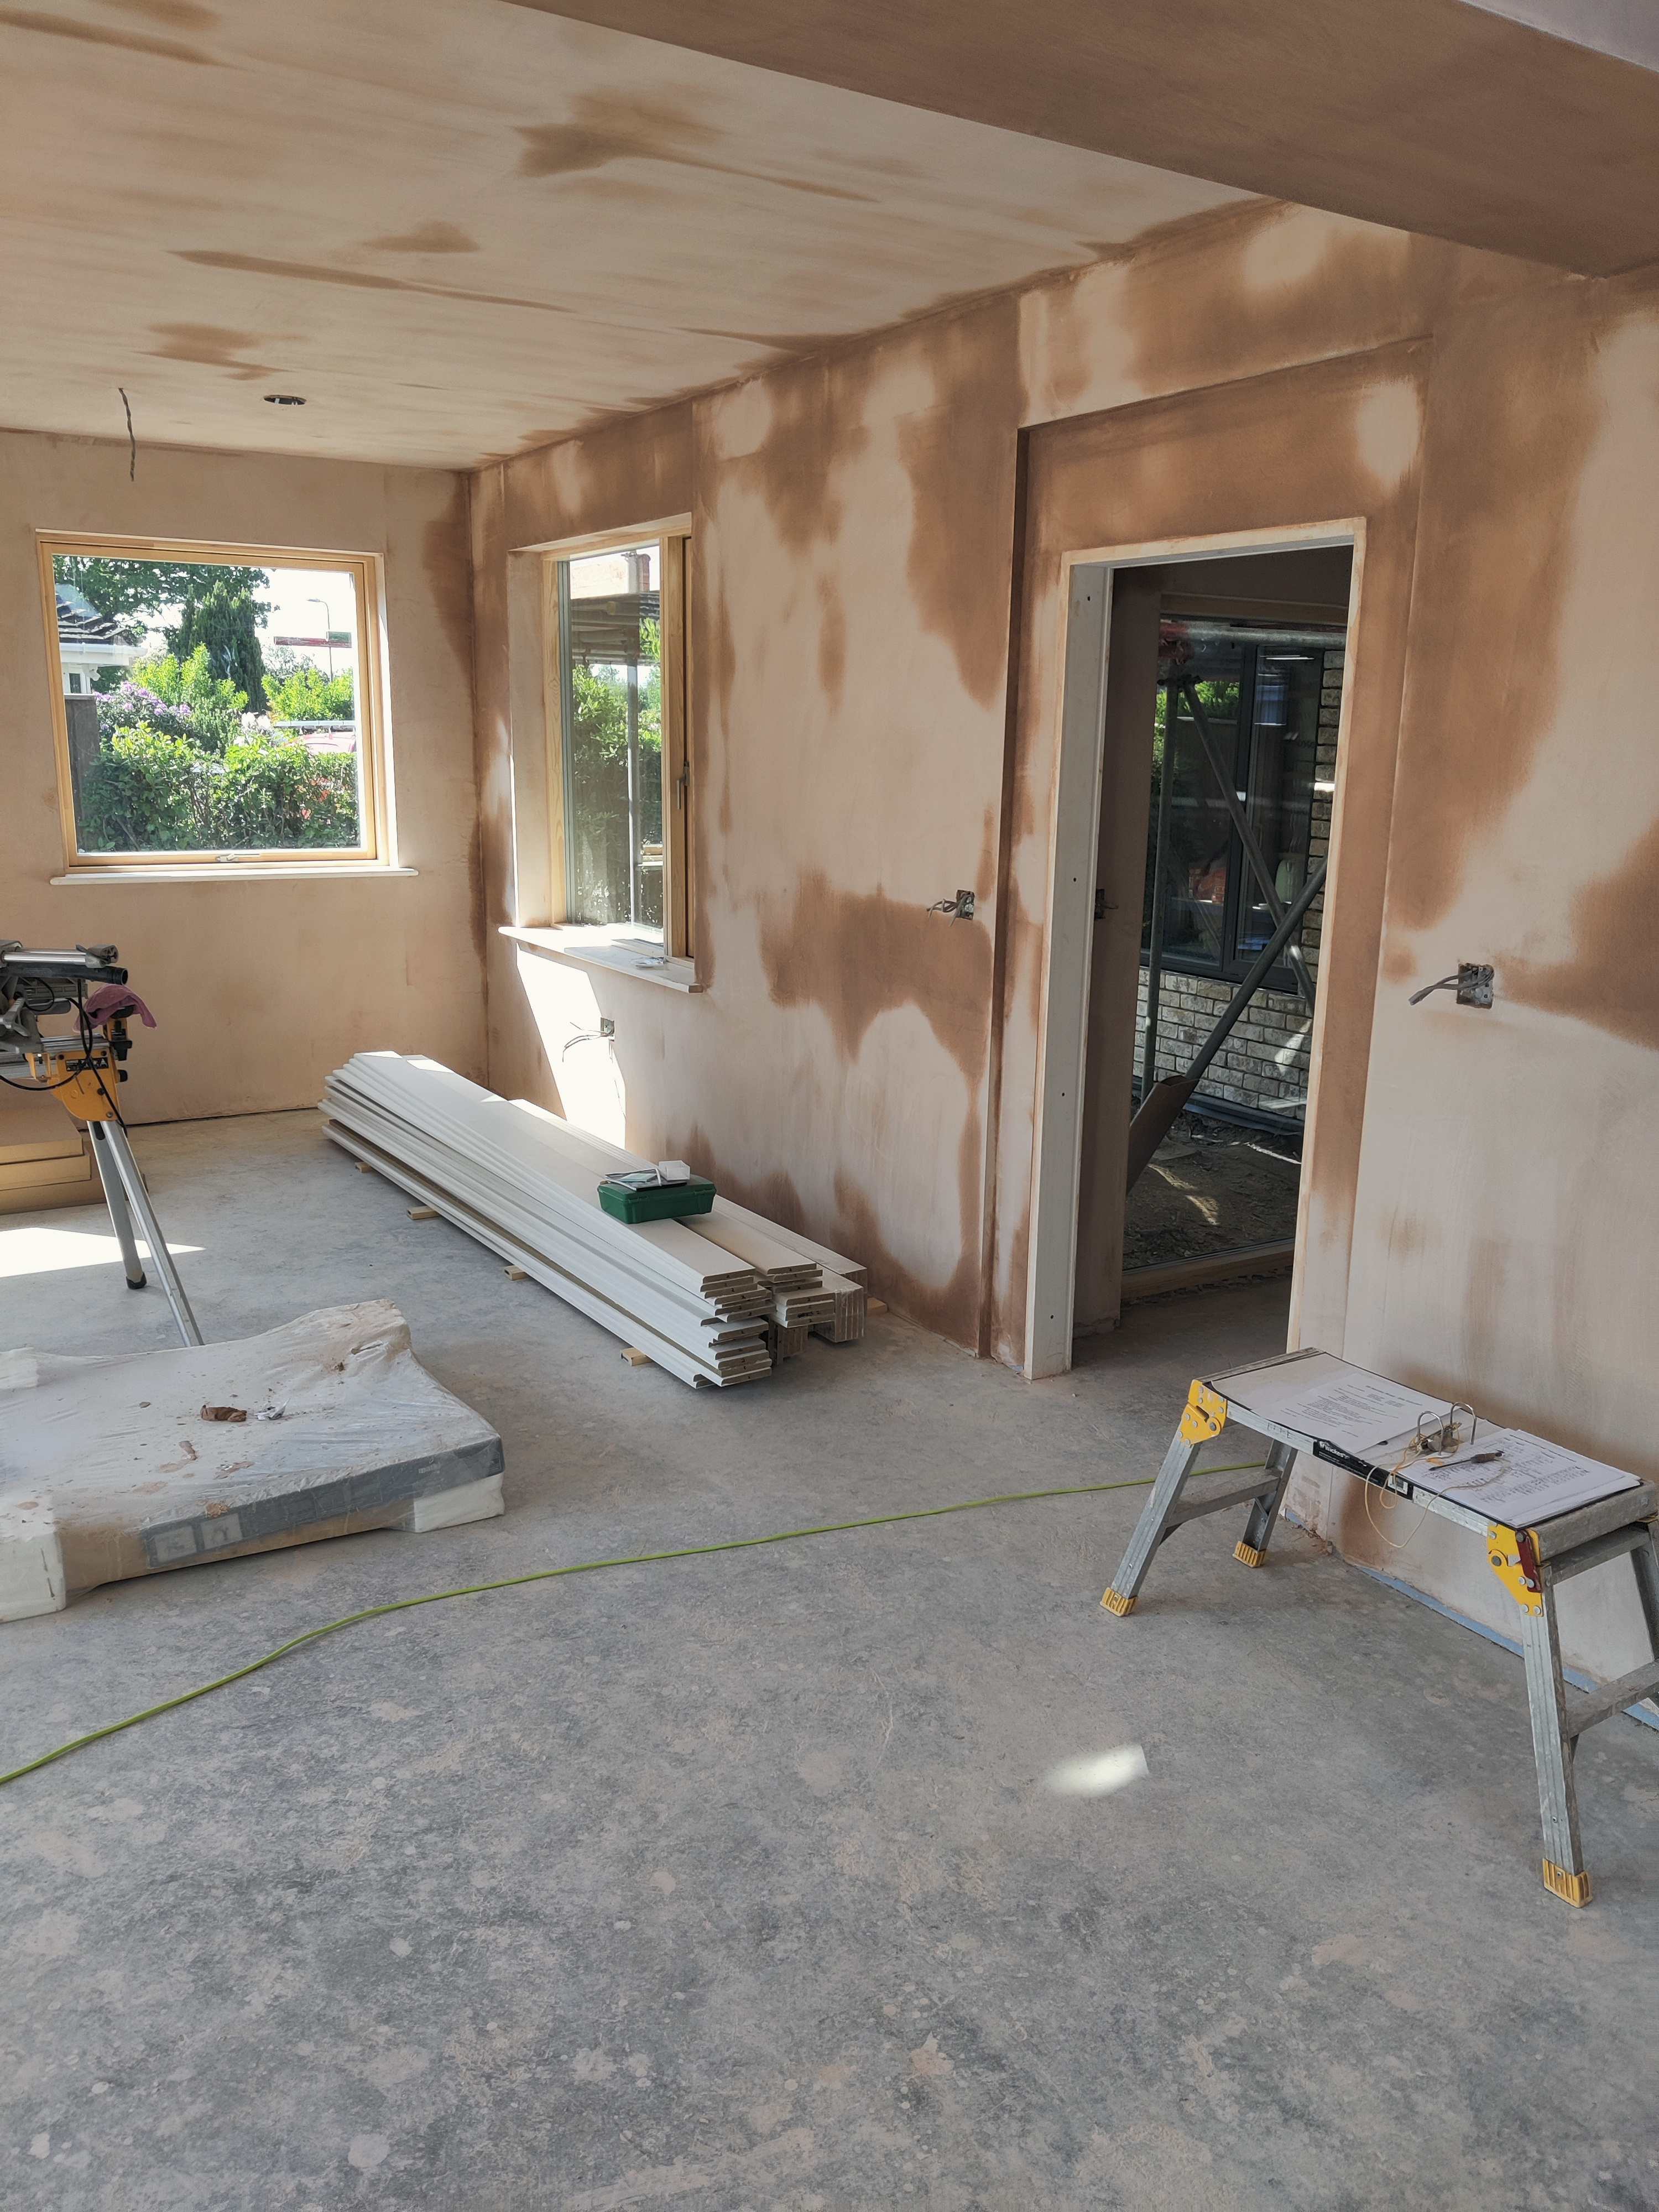
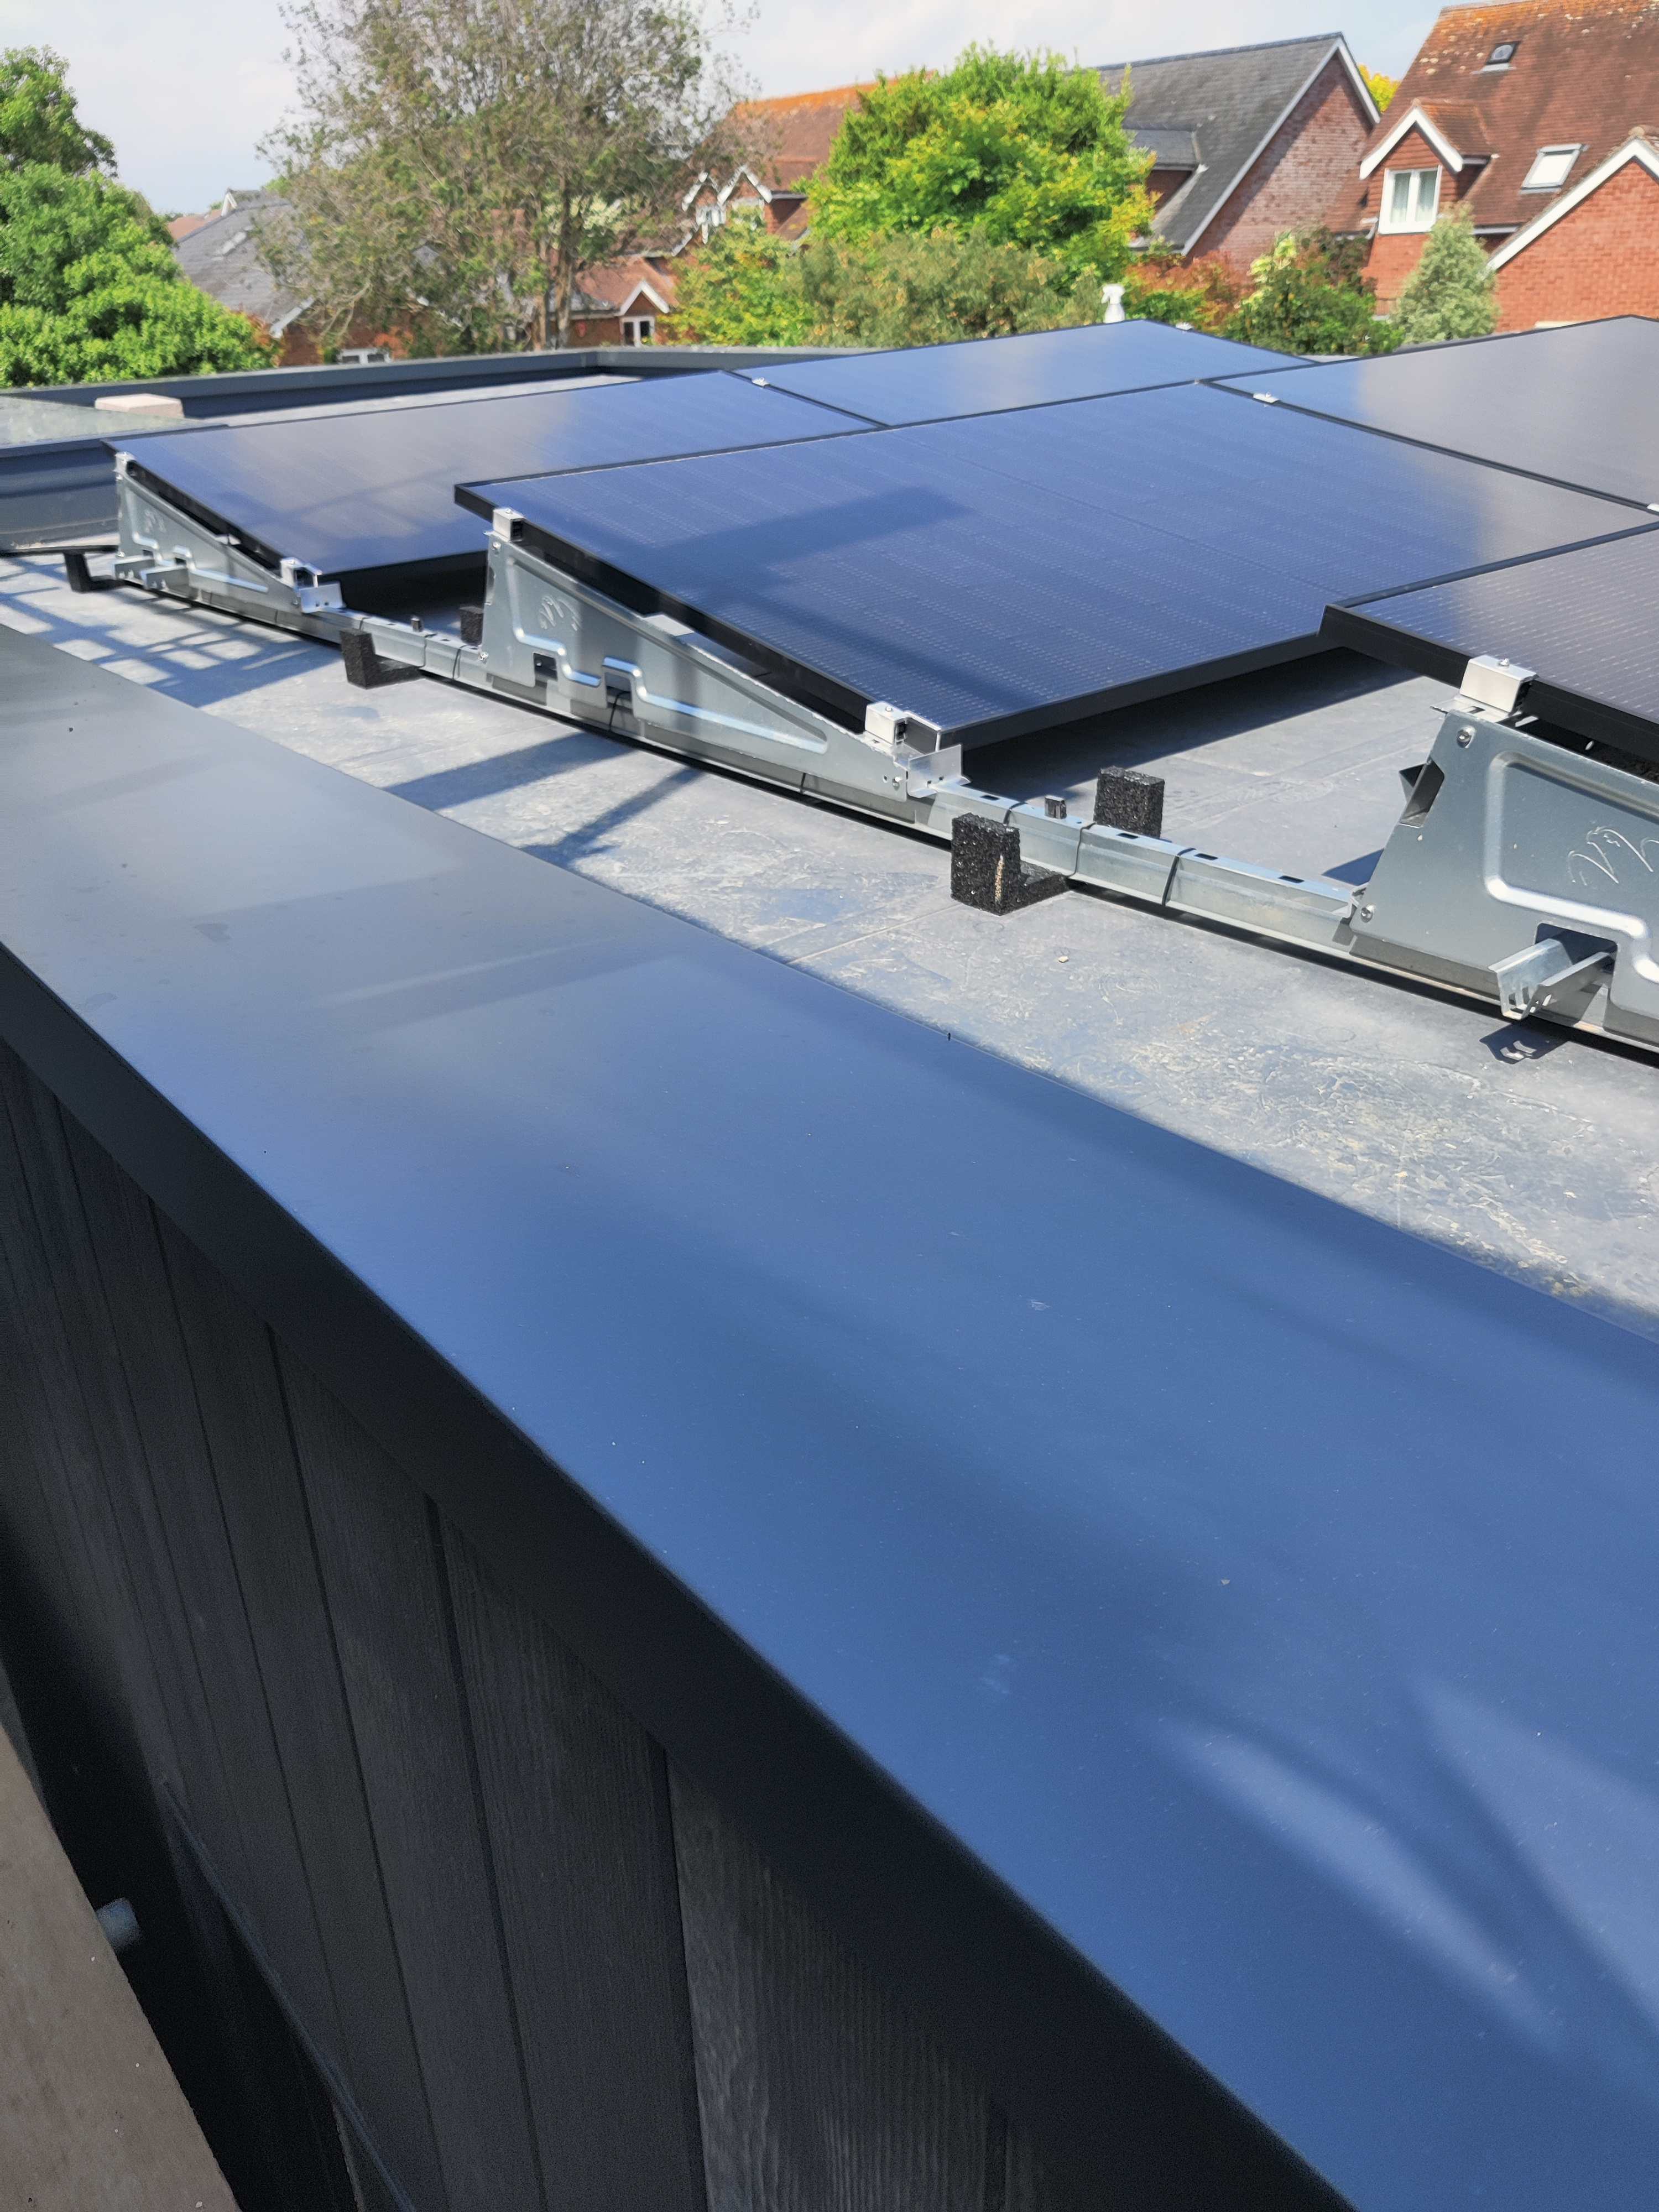
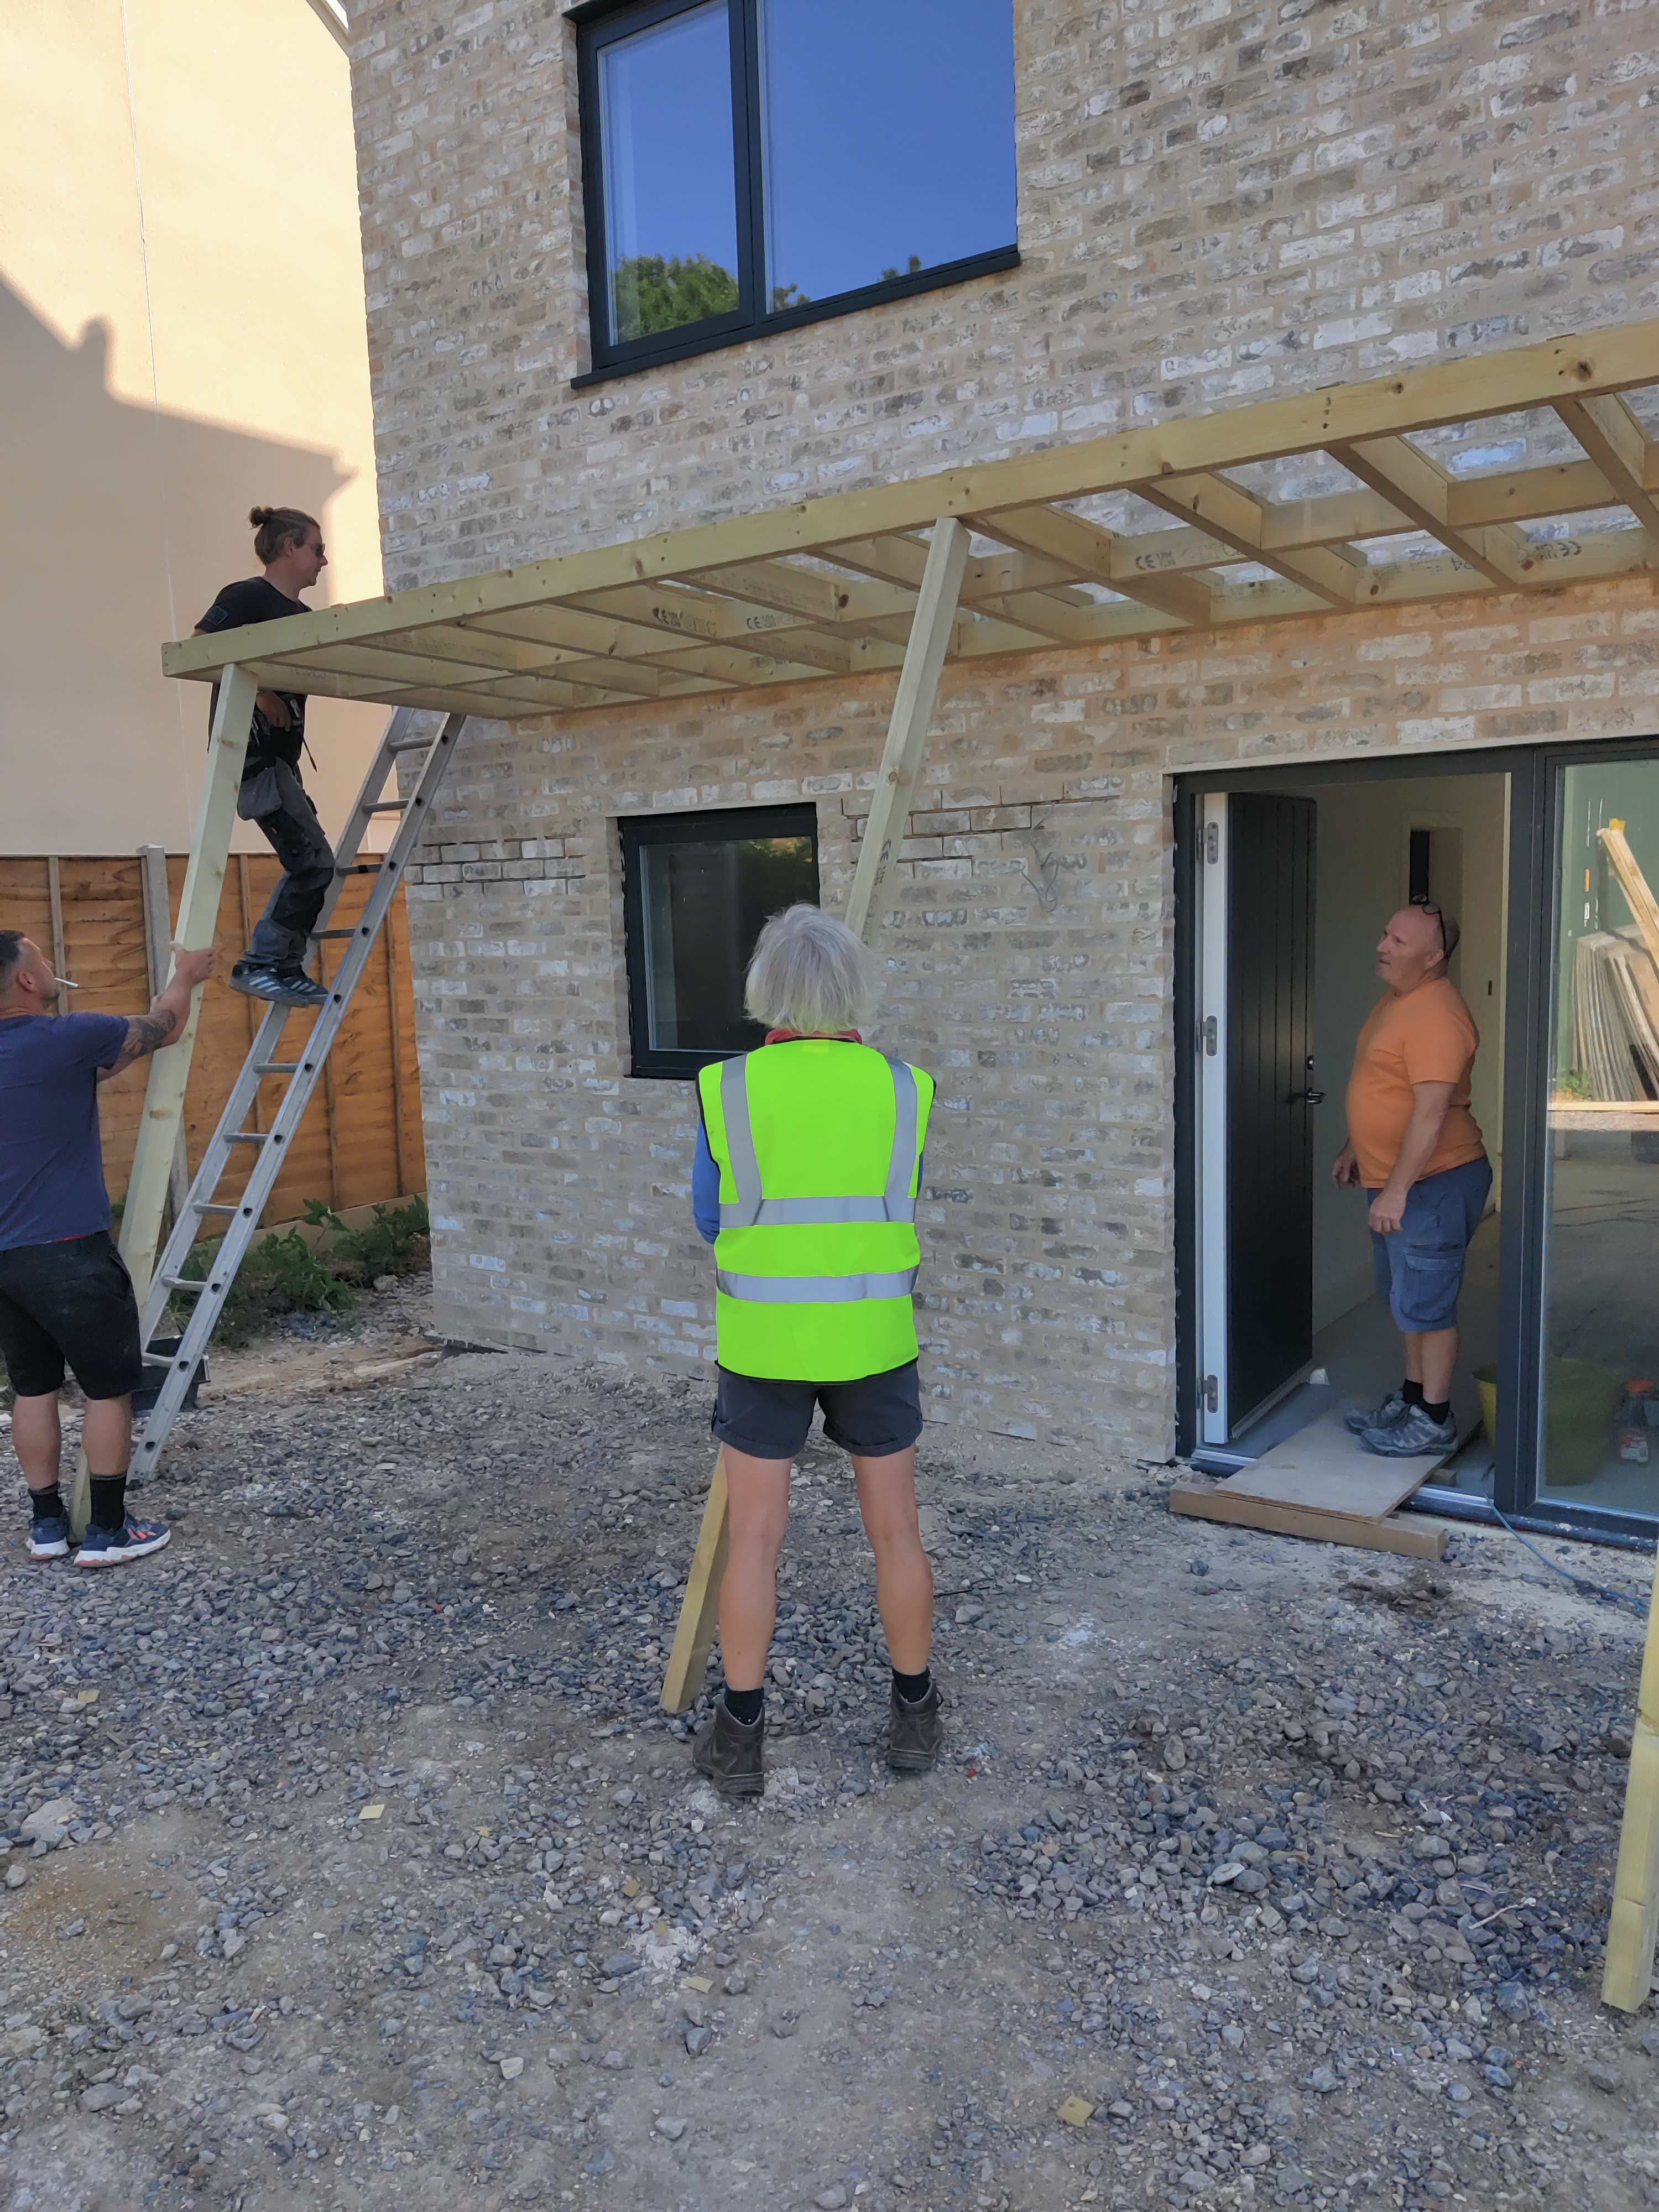
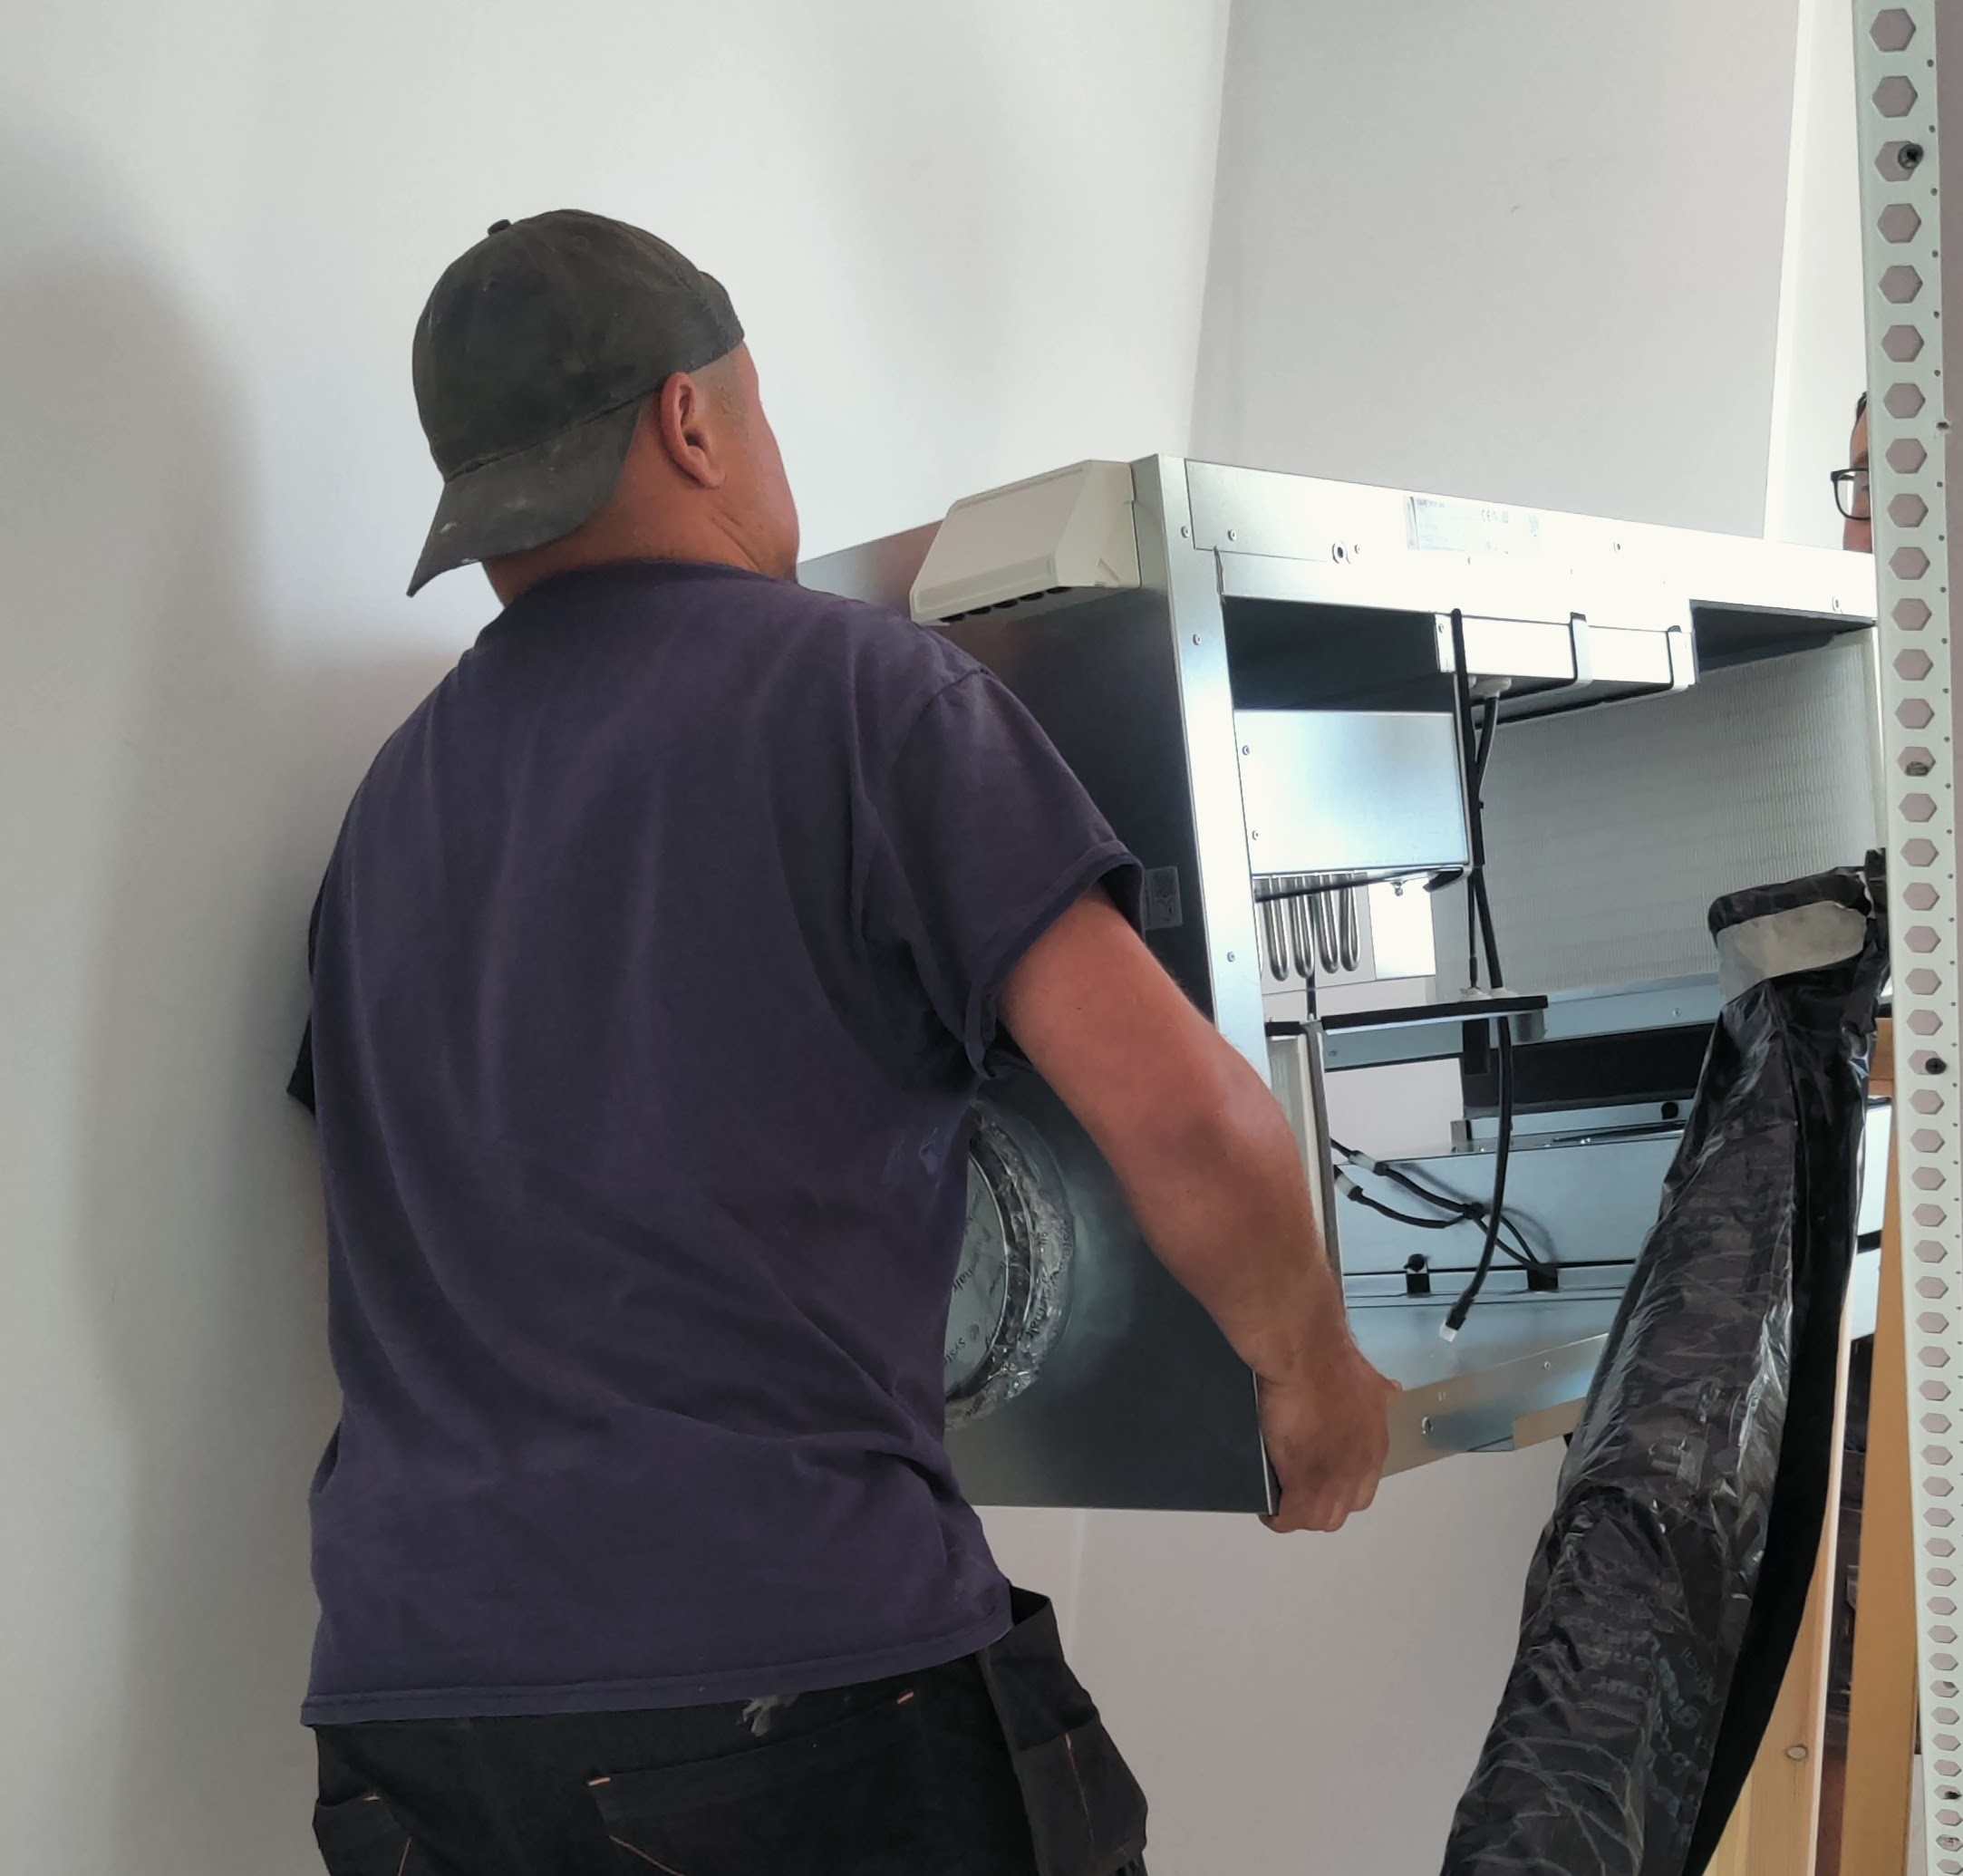
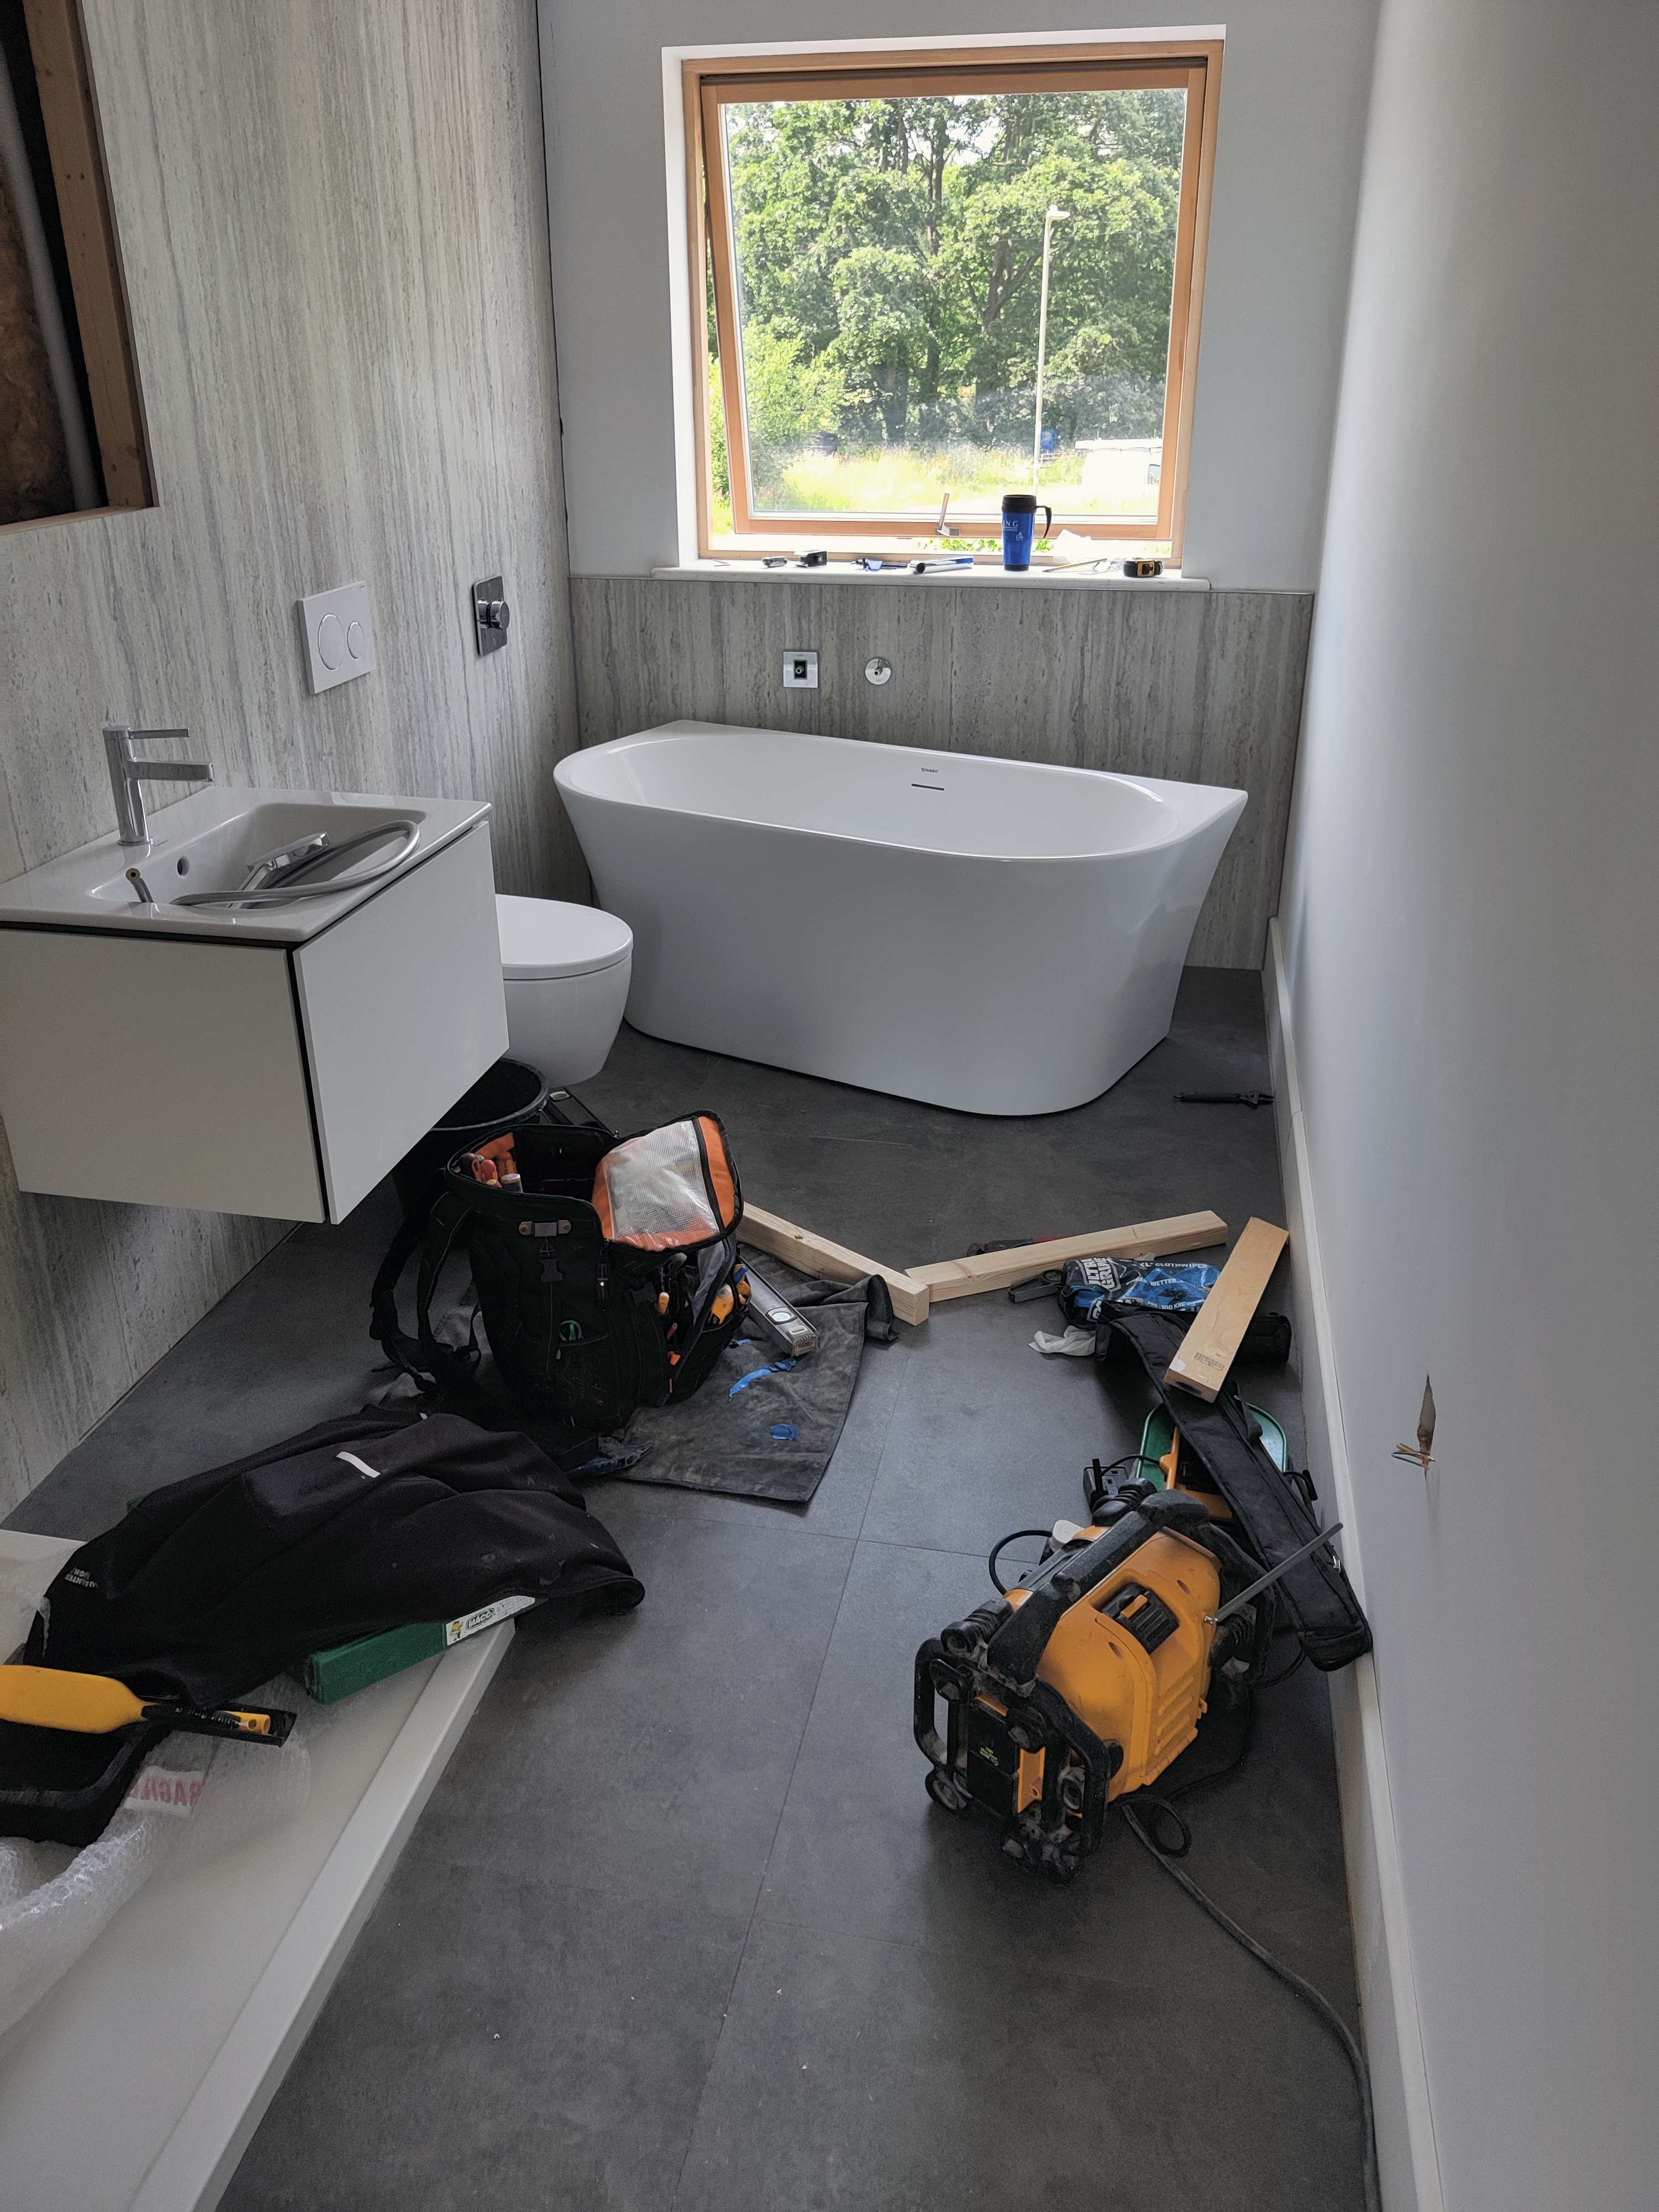
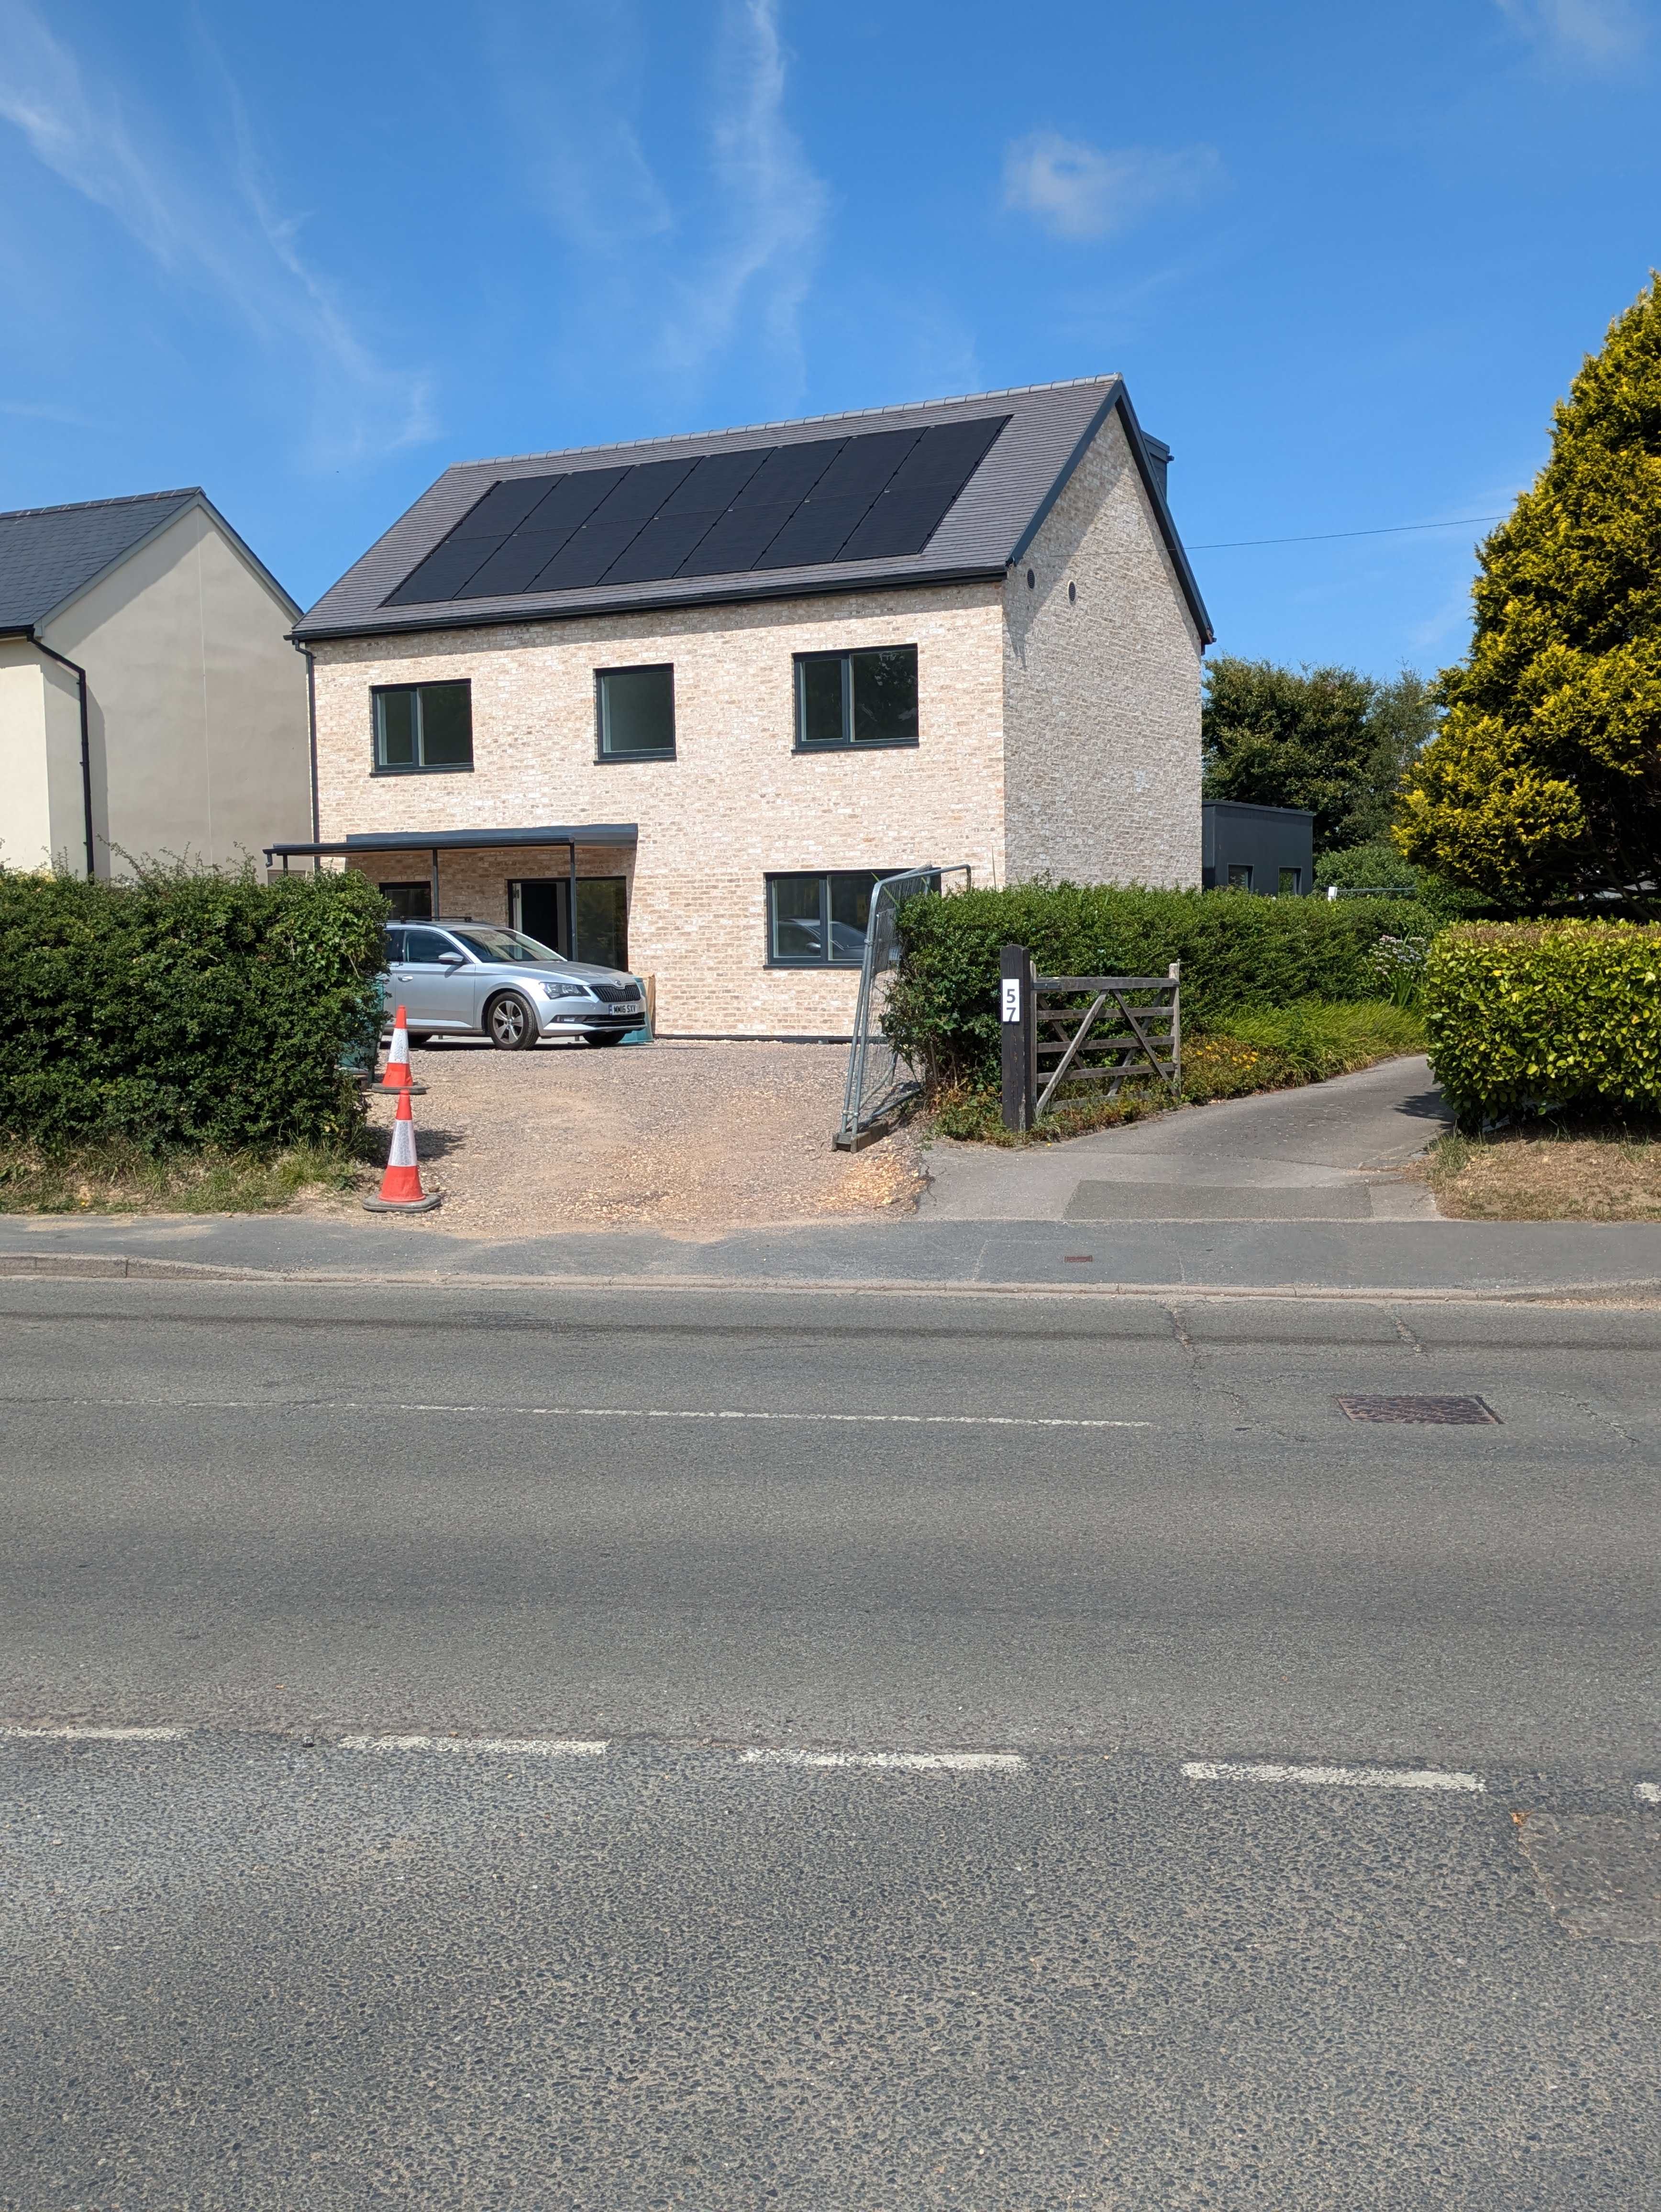


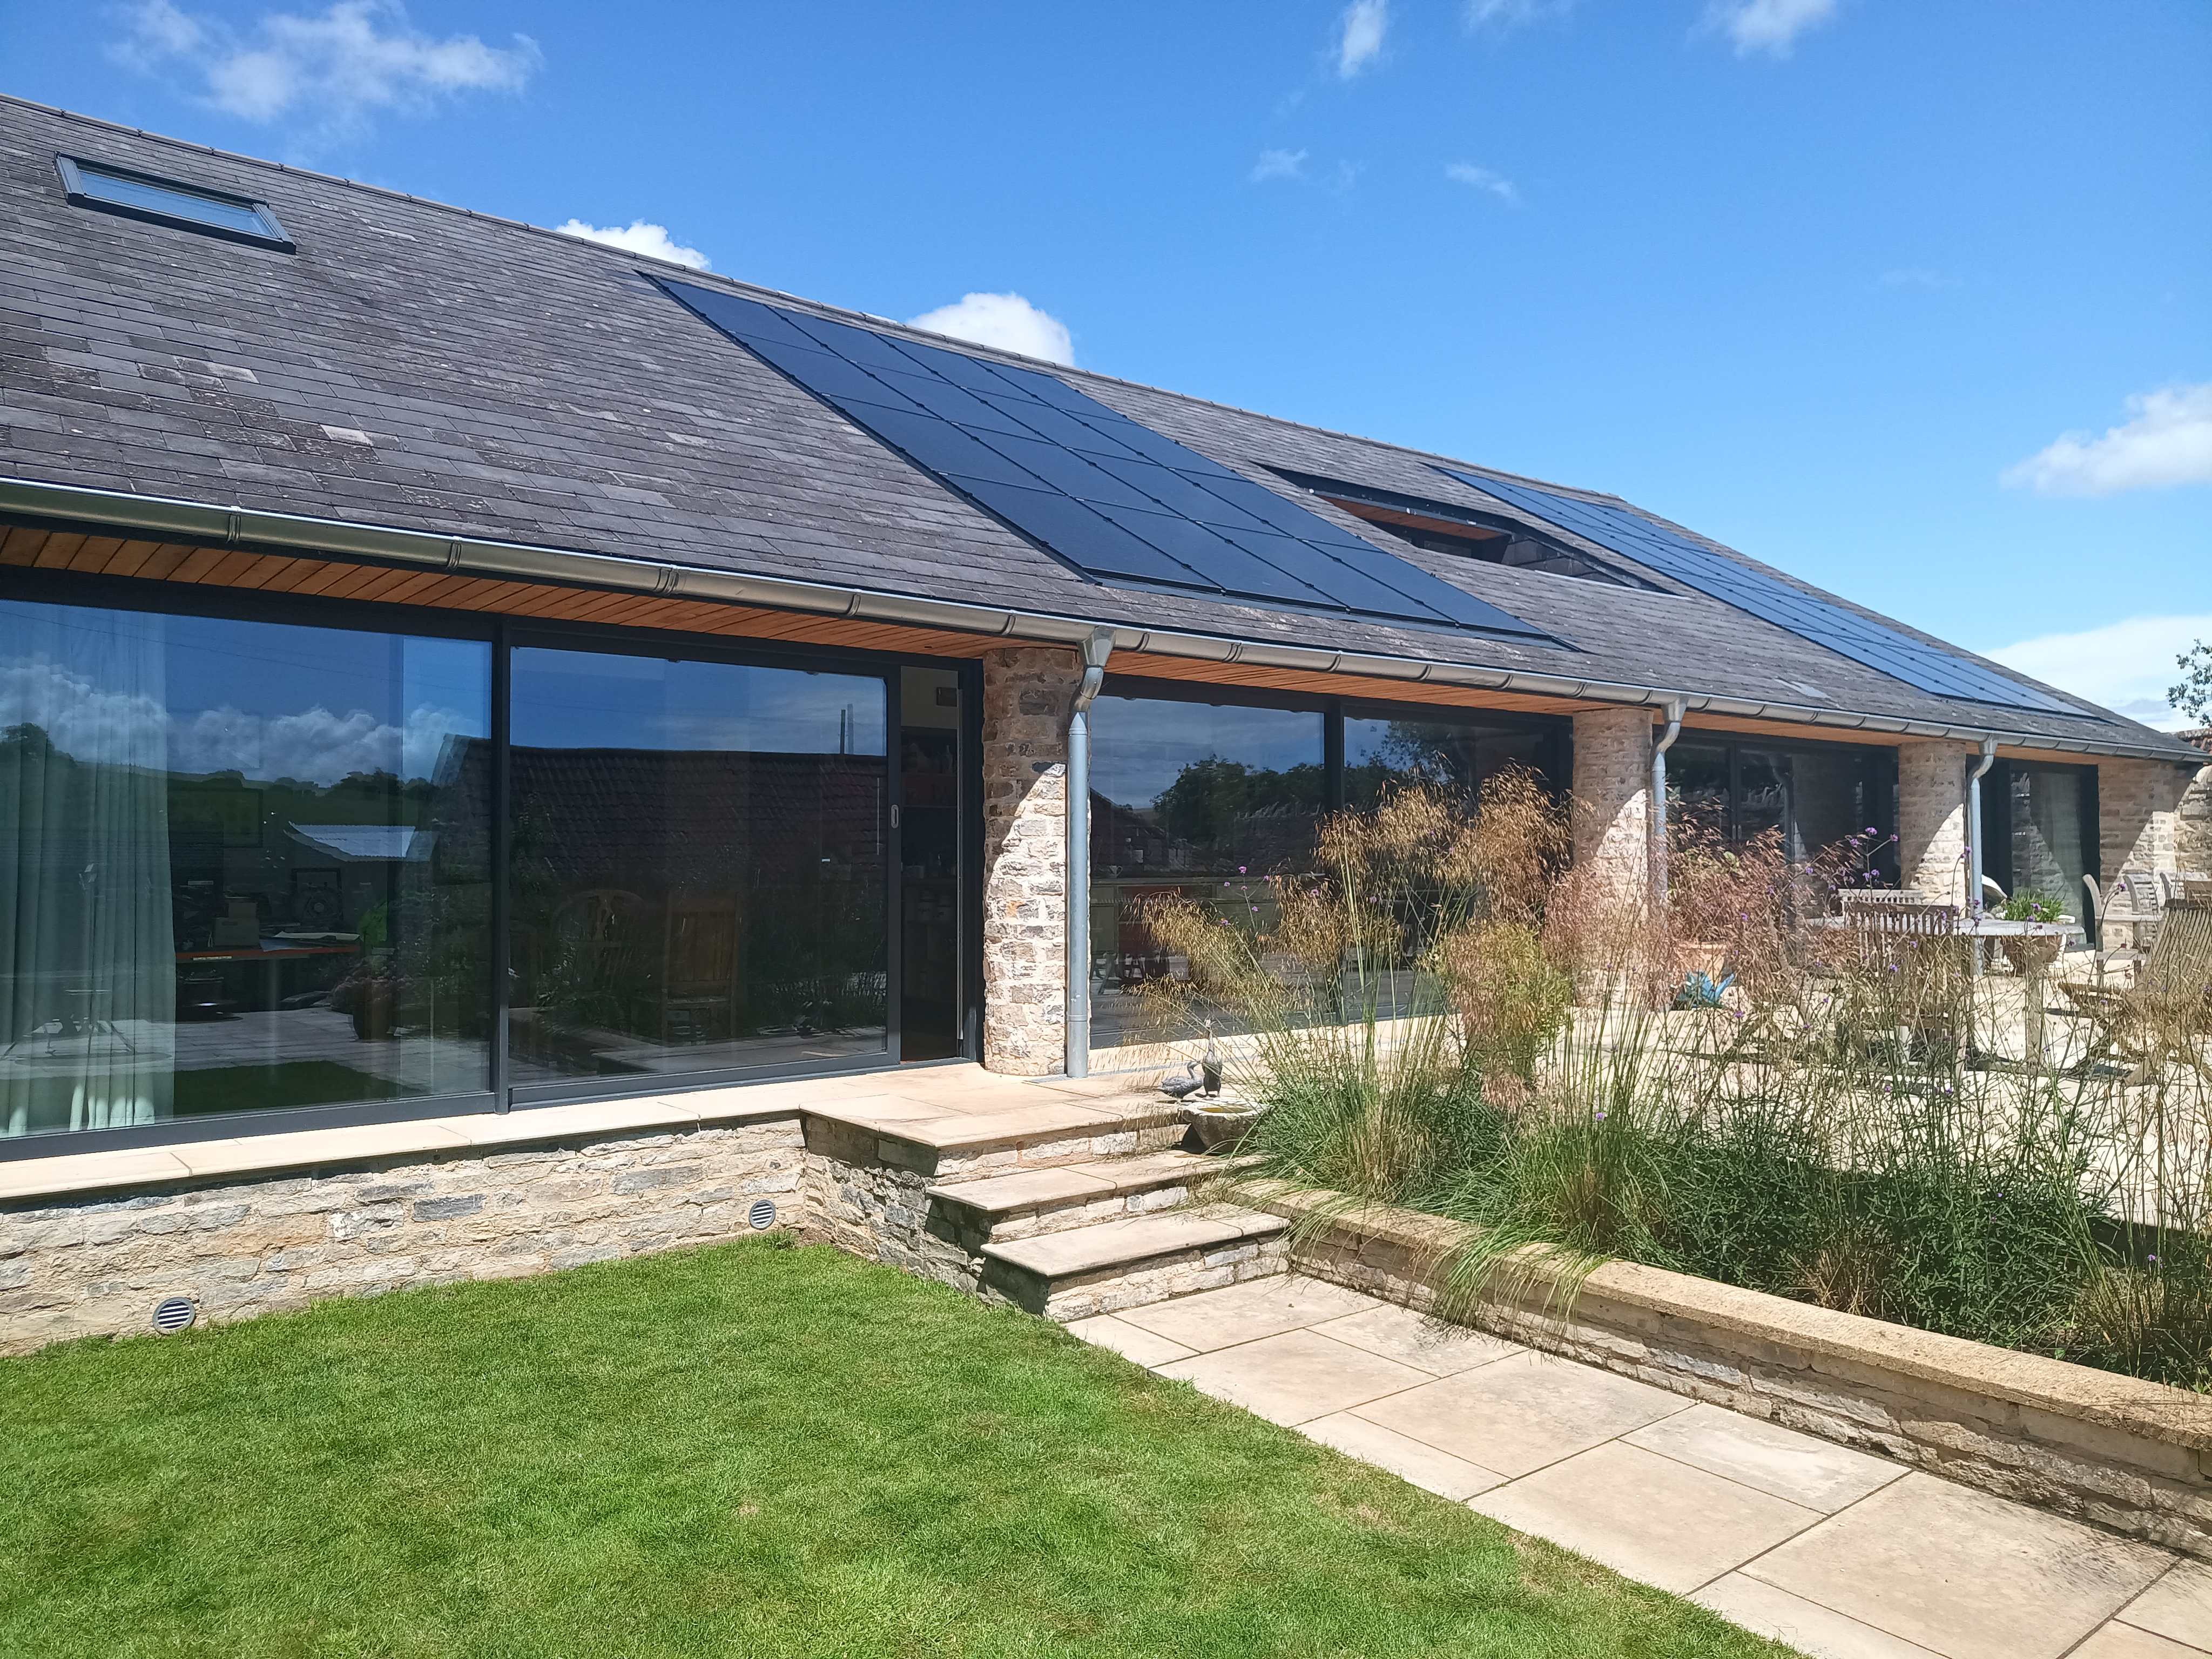

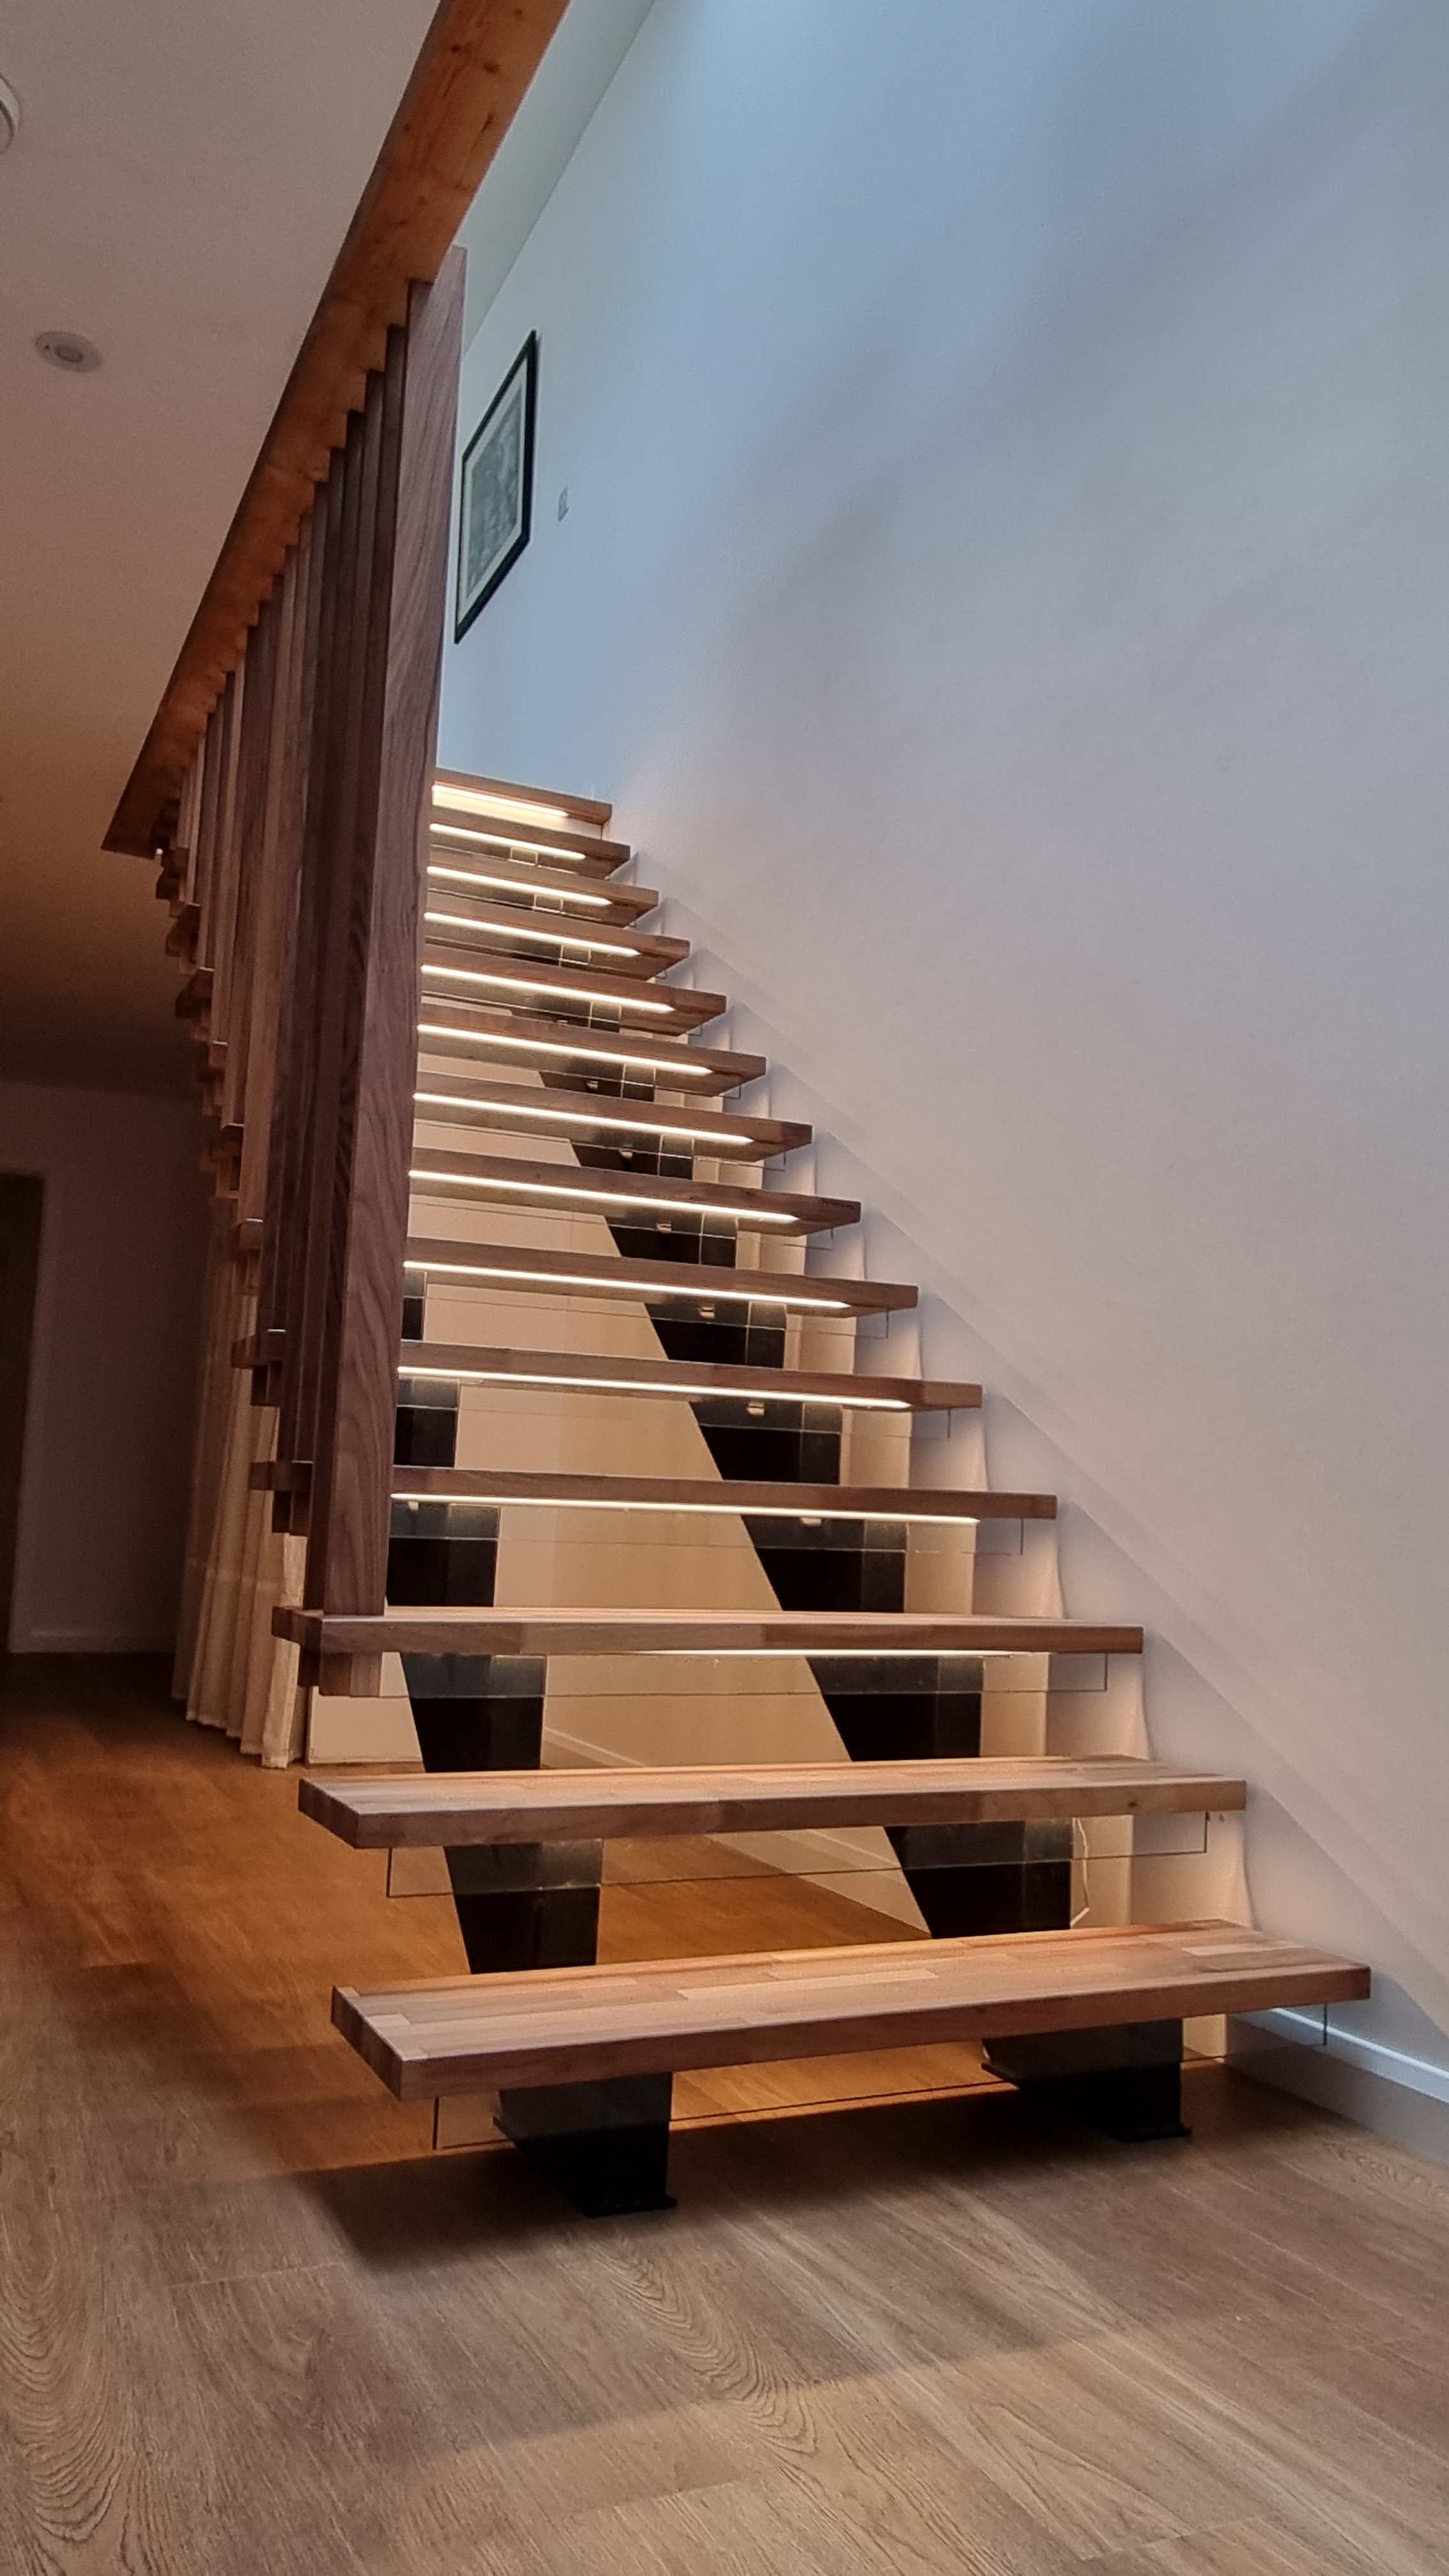


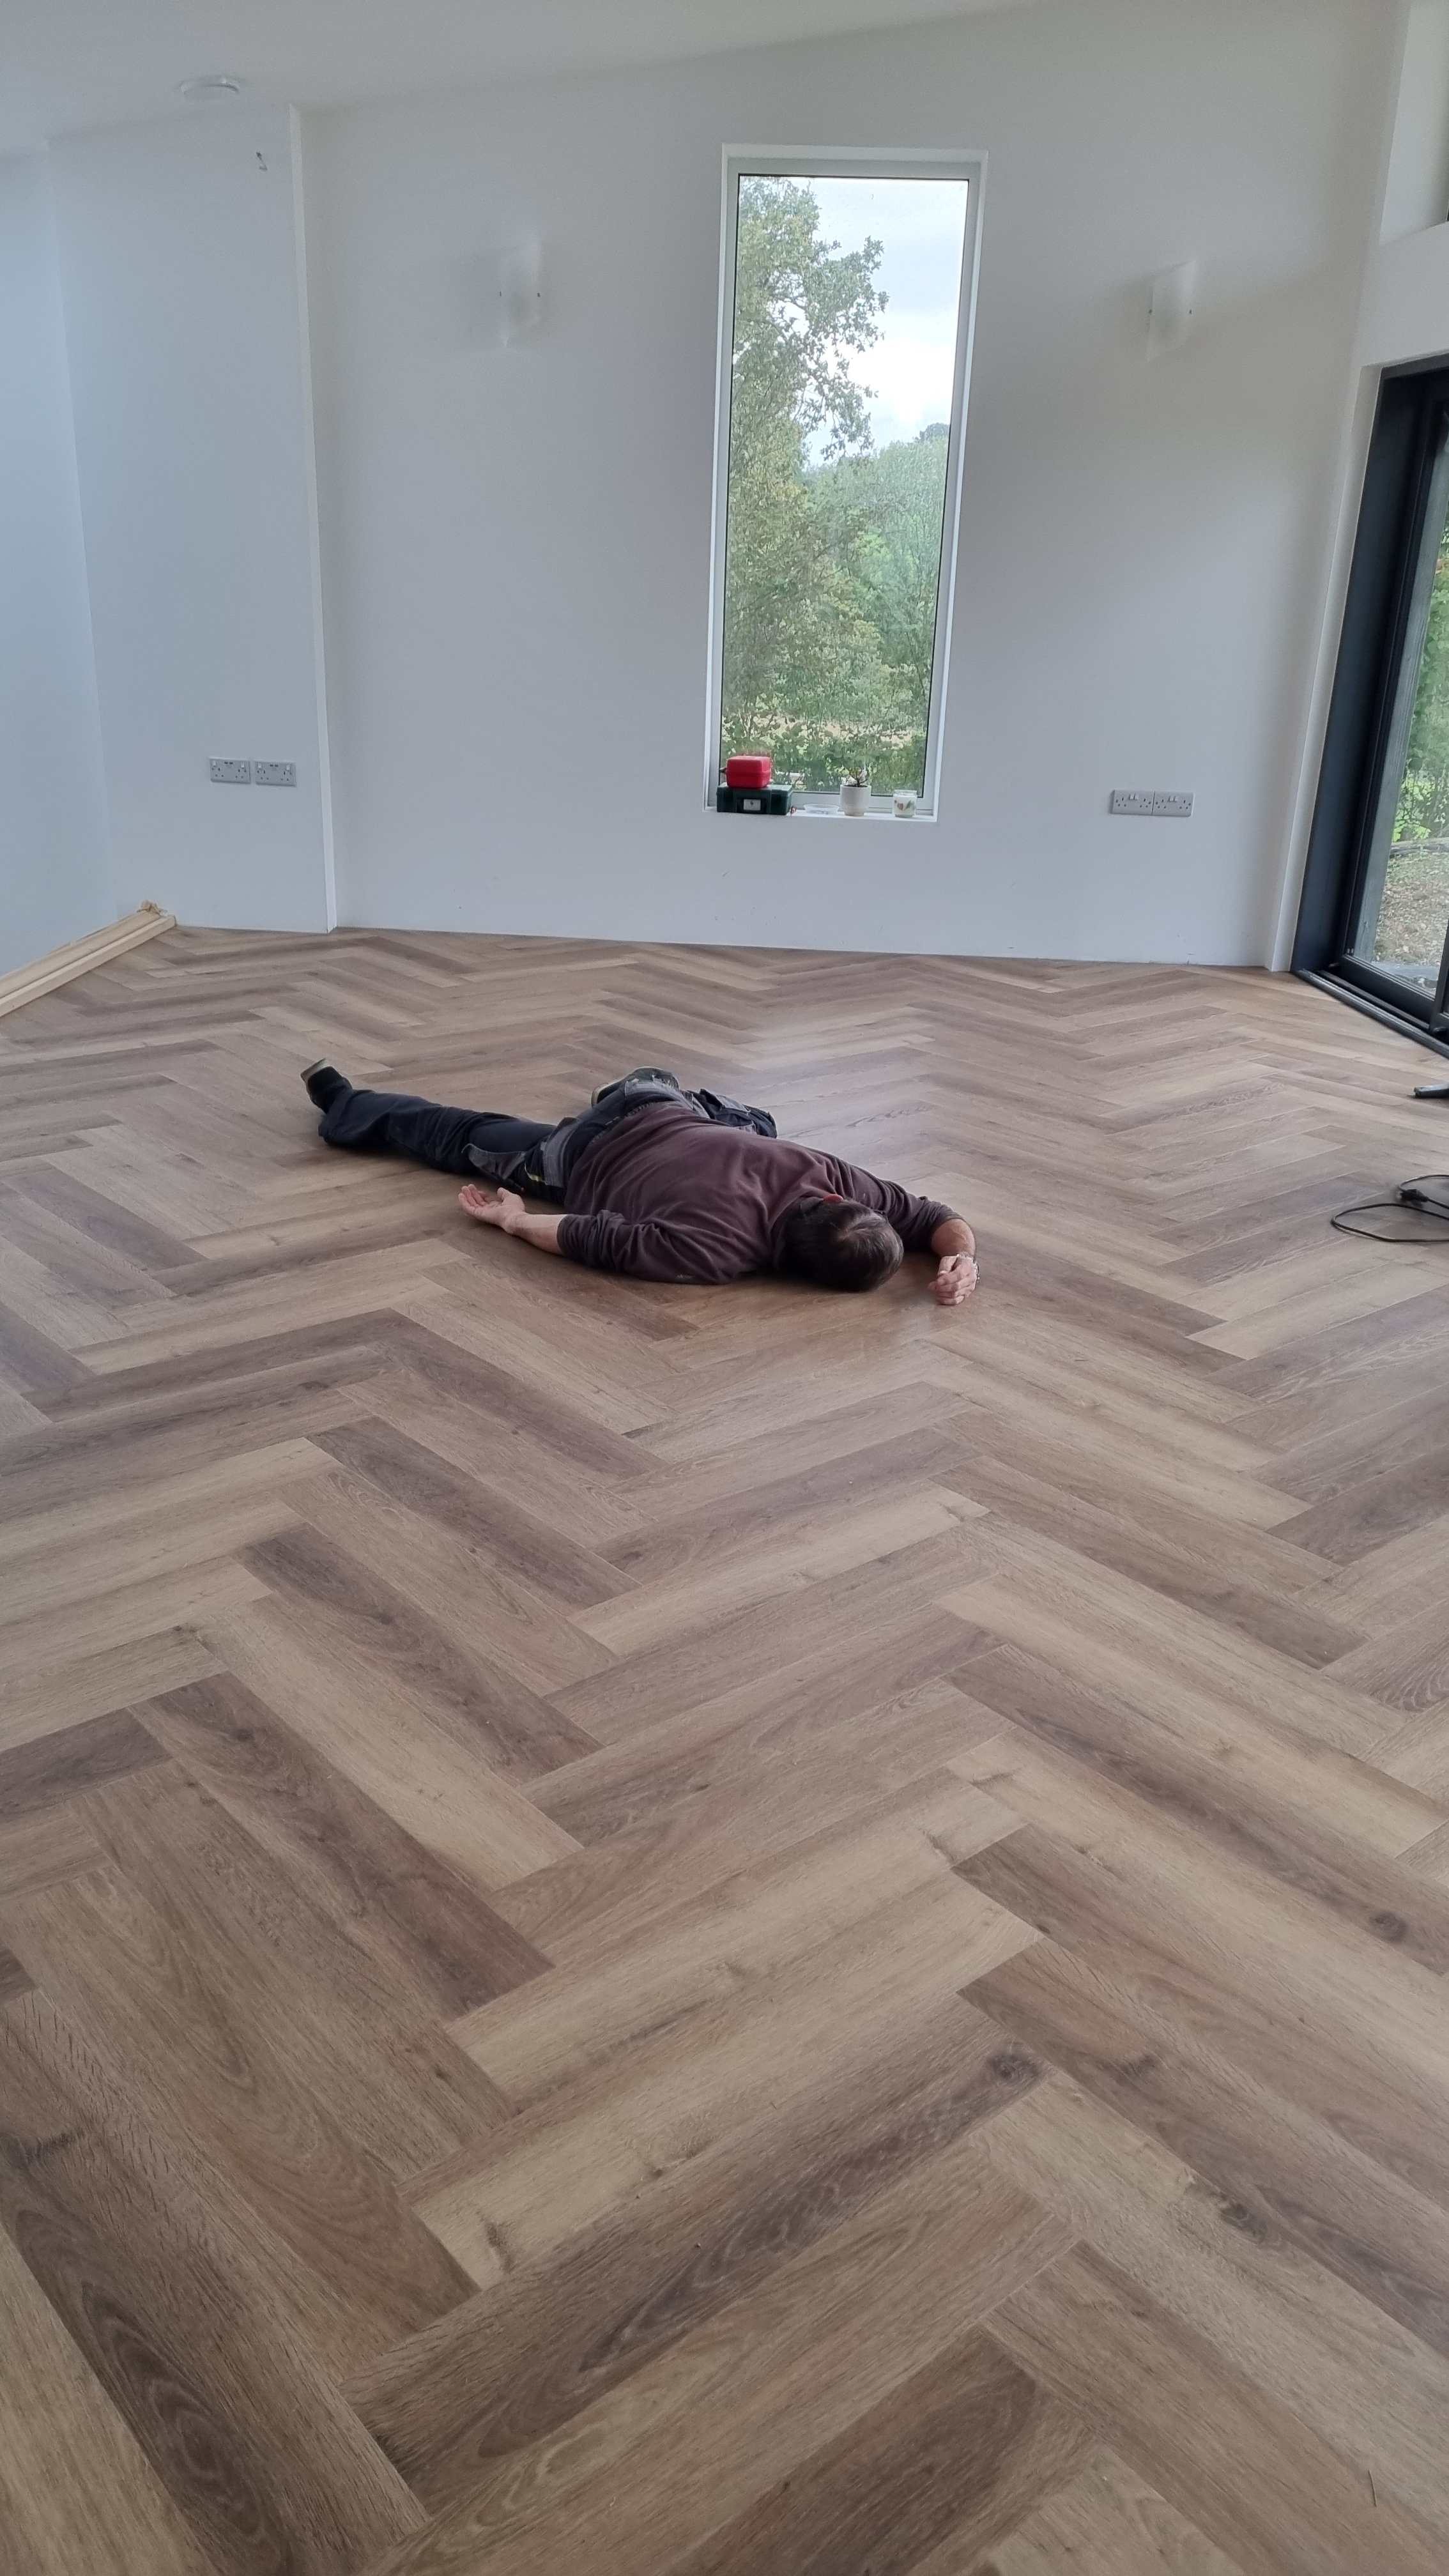

.jpeg.65566fad17f808f0db9ae8e344b5c979.jpeg)
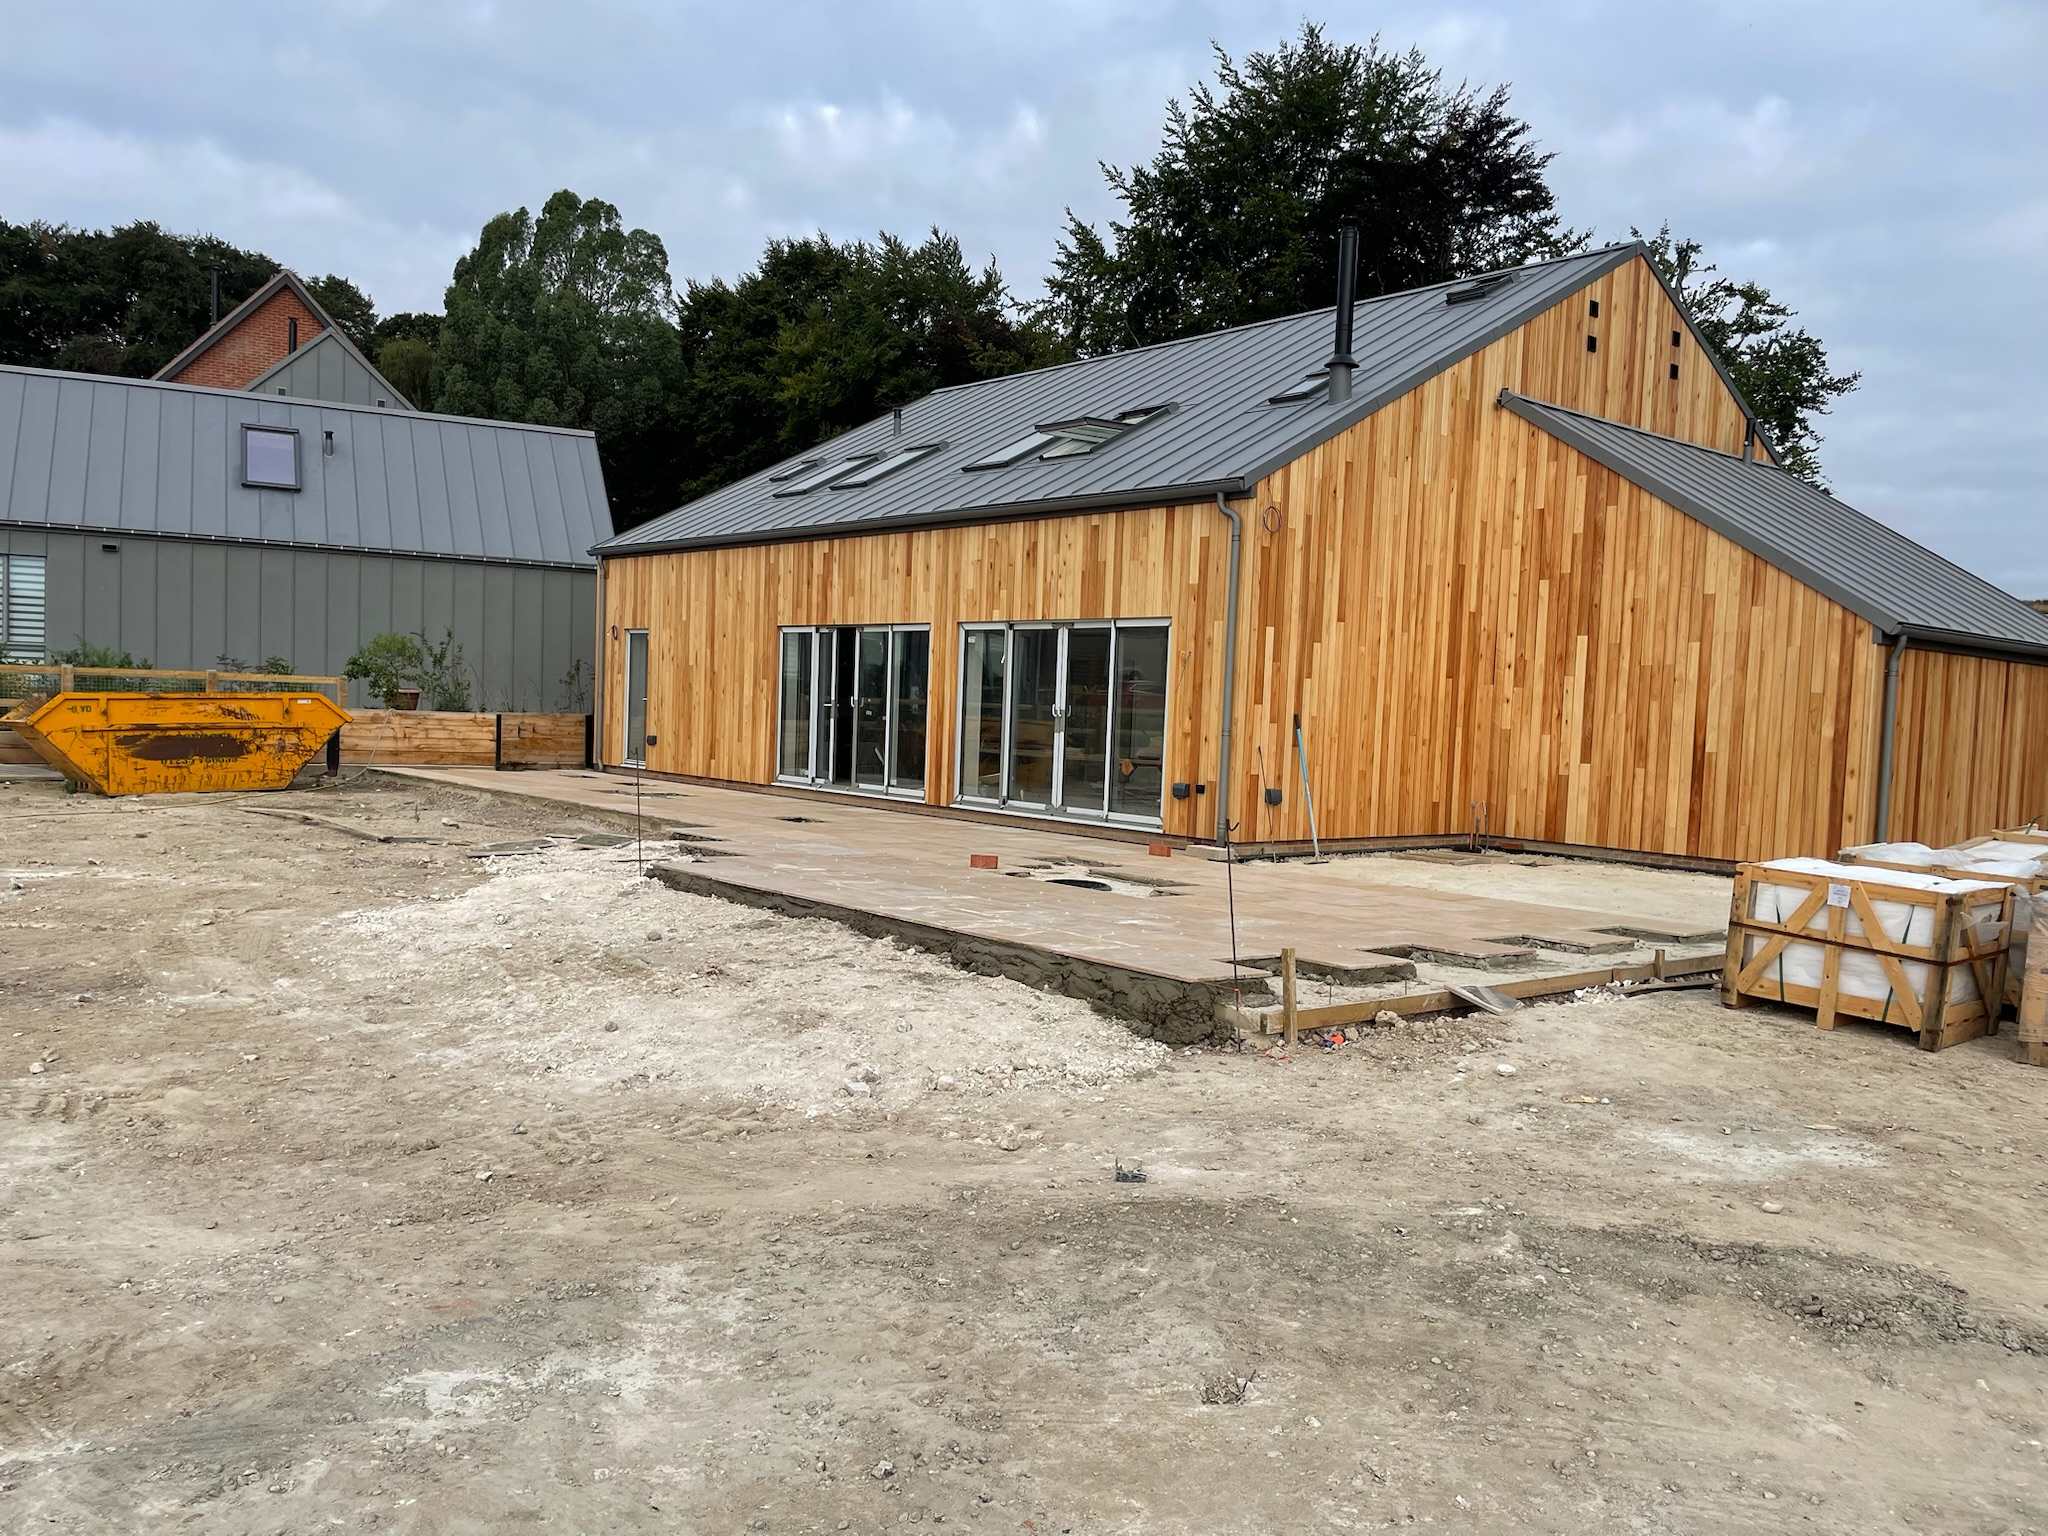


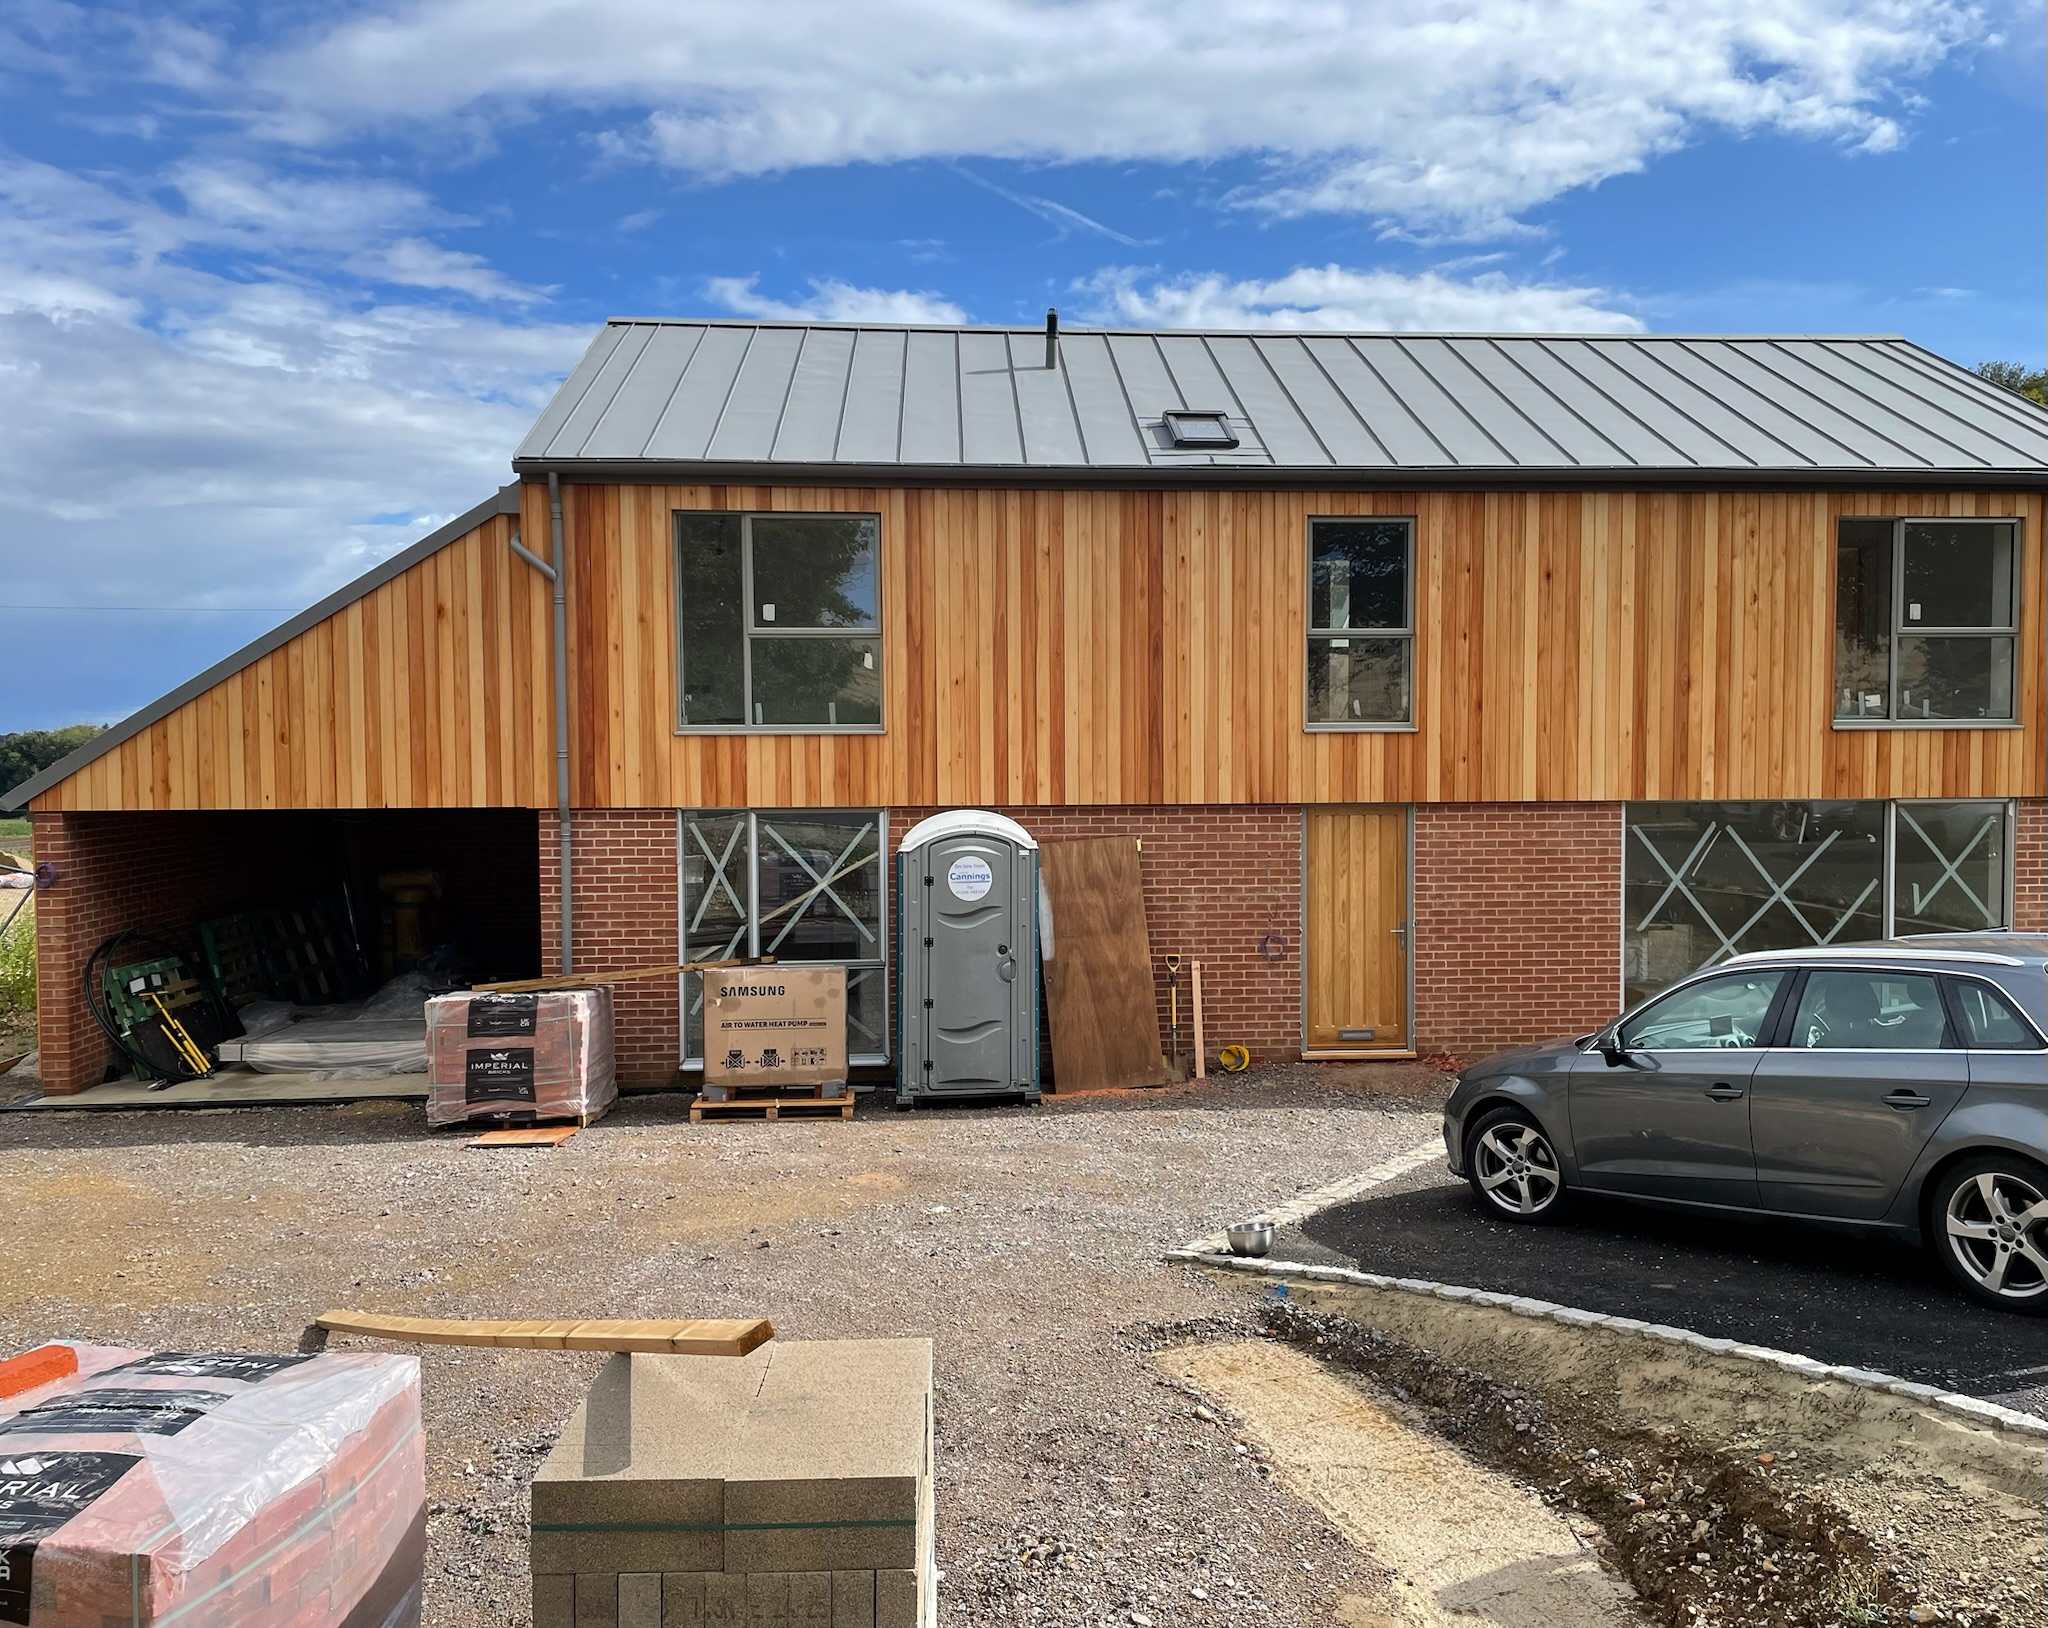
This leaderboard is set to London/GMT+01:00