Leaderboard
Popular Content
Showing content with the highest reputation on 11/16/24 in all areas
-
Yes, there are at least a couple of people on here who've done that, to automatically boost the speed if a rise in humidity is detected. I'll be doing the same with my current part-installed system, plus manual boot. Zehnder have a good reputation, with good results in the Passivhaus database, and self install & self-commissioning is certainly possible - there are threads on here about those topics that will help. It's more about having a healthy internal air quality than cost saving, though there should be one. But how do you evaluate what things are worth? Is the cost of your windows / kitchen / bathroom suite worth it? It was worth it to me - I've installed Zehnder. More expensive units tend to use less electricity to operate, have better heat recovery, use better quality components, be better built and offer more features (fan adjustments, control options, more sophisticated summer bypass, etc.) If your budget will stretch far enough, then the above mentioned Passivhaus Database is a good place to look. Units there have been independently tested, are evaluated using a different (more accurate) formula for heat recovery than that used in the UK, and take into account electricity used to come up with an overall efficiency ratio.3 points
-
If your just tiling it It’s a quite straight forward job Start straight and mark one side out at a time I’d loose the mortar bedded hips in favor of dry verge2 points
-
Hi, just starting a very small self-build bungalow for my son & granddaughter on a tight site riddled with drains! Waiting for structural calcs to give screw piles the go-ahead, got my build-over licence, getting building regs package together (aargh). Site scrape done (swapped for some drawings) & almost ready to start in earnest. Wish me luck....2 points
-
Apart from the “picture from the mound” timelapse blog entry, there’s not been much of an update since mid September 2022. So, get your preferred hot drink (maybe a SteamyTea), and settle back for the next instalment. Where were we? SWMBO was still in recovery from her foot infection - you remember? The one that might have killed her? The second floor ICF had been installed, and the concrete poured. I’m still going to spare you any pictures of the foot, but here is a concrete pump truck instead. So, next on the list - a roof please. But before that, the final steel beams had to be installed [FX - thumbs twiddling in the foreground and whistling can be heard as we wait for the steelworker once again], but it wasn’t too long a wait, and by mid October 2022 we had the beams installed. In late October and early November I set to work with the ground worker to do some backfilling, and of course on the days I chose to have the digger onsite, Cornwall delivered some of its traditional autumnal weather so any attempt to properly compact anything was nigh on futile. In the meantime, more joists, endless sheets of T&G OSB, vapour barrier, 160mm deep sheets of PIR insulation, and some of the biggest screws are readied for ordering. The joists arrived in and in early December I had my supervisor and client (SWMBO) back on site 🙂, and she has graduated to being a mountain goat. She now refers to the site as her "happy place", even though we have a strong suspicion that the infection was started by a visit to a local beach. By mid April, with help from some now local family members, we’d installed the roof joists, and in mid May we were ready to start boardin’, vapour barrierin’, and insulatin’. The GRP was installed in mid July 2022 (by others). I’d also been readying the Great West Wall (GWW) to have the triple glazed sliding doors and windows installed (by others), and this took place in mid August, just in time for my significant birthday. There were some fitting errors, but I have to take my hat off to the installation company, they have been back to rectify their work, and have supported me with making the suppliers change some of the sliding door fittings as they were just not correct despite their protestations. In October, we had the mains electric and meter moved from their temporary location to inside the house. Over the ensuing autumn and winter months, we’ve been installing some of the final internal partition walls, running water pipes, installing more insulation around the GWW windows, and recently started on the ventilation ducting following some core drilling being undertaken (Tip: always ask for a hole to be drilled that is about 10mm bigger than you need - expanding foam is your friend. I donate my scar tissue to you all 😂) In December, I got made redundant. No worries, this may actually be a blessing in disguise. Next up on the list: Finish ventilation system Finish insulating the GWW Finish backfilling Electrics Floors Walls ASHP and HWC Kitchen Bathrooms The remaining plumbing Outer wall coverings But, in the meantime, we have the small matter of our daughter’s wedding. DOES SHE NOT KNOW WE’RE TRYING TO BUILD A HOUSE!? (Time to end: 2 years 🙂 )1 point
-
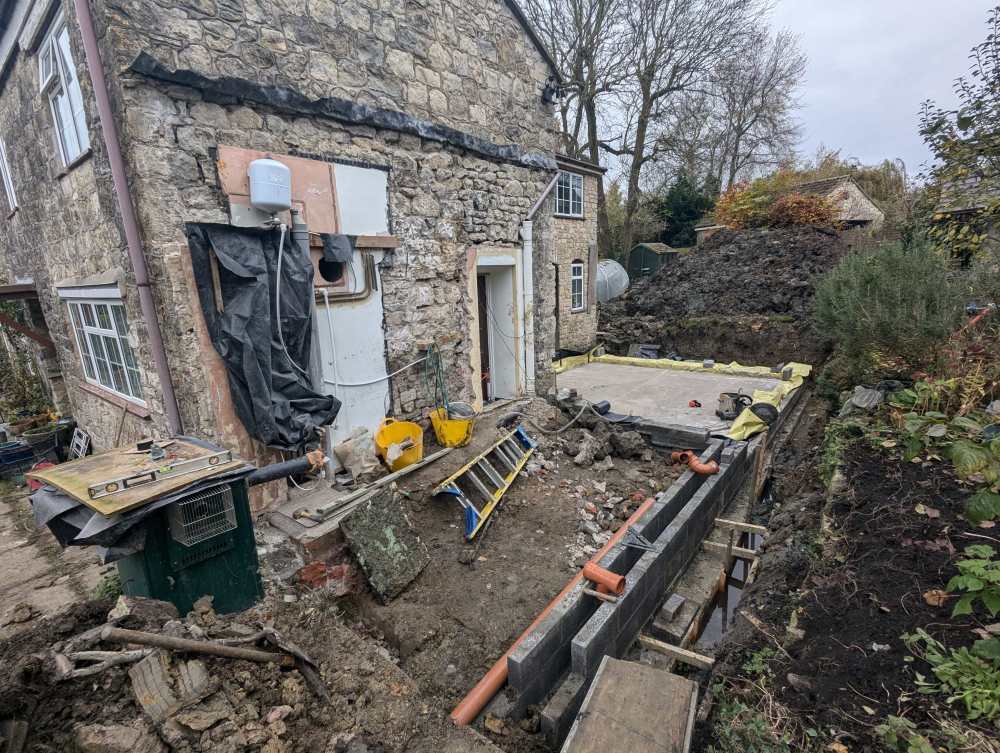
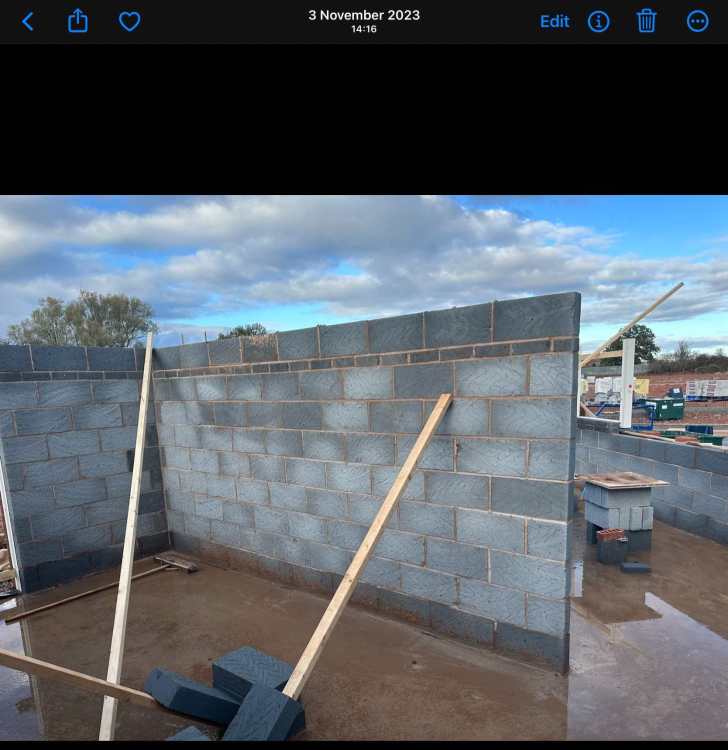
Once again it's been much longer than it should have been since I last posted with my last entry being July, wow where has that time gone. Back then we were building the walls for phase 1 and installing the window and door lintels. Back then it was warm, unlike now and building could be done in shorts and T shirts Once these walls were built then it was time to think about a roof, even though it is going to be a temporary one for now as the whole house will have the final roof at the same time. This part of the conversion is designed to look like an extension as it did on the original. So, the South wall is higher and this 'hooks' on to it. We also have on-site building inspectors checking out their new home Then we had to start getting the rafters in situ, allowing for the overhang on the sides and end. The roof 'ladder' was built from the wood that was used to line the windows whilst building. These did take a long time as the roof is 4 degrees so slightly sloped so each block of both cavities times 2 had to be cut to the exact size required The weather wasn't always kind, but we did have some visitors to check out what was happening. Eventually, it was finished with the temp roof on. Windows covered for now as this will become our storage shed for a while During this time, we also had to move the stables. From this, already part demolished, not sure where the original pictures have gone. To this to this, luckily moved by a local farmer. Not sure when the horses will have them back though. Next is to start on the East side of the main part of the build. Originally our SE said that we had to have 2.4m deep underpinning foundations. But, our BCO had on on-side meeting with the SE as he felt this was over the top. We dug some example trenches to show what the soil was. He agreed with the help of the dog that it really is sand in this area. We do have some clay further on where we can have stepped foundations But he has agreed that we can have 750mm where it's sand so we are doing phase 2 which will be the office, master, bathrooms and 2 bedrooms. It will be the plant, another bedroom, family room and pantry which need deeper foundations. We have started digging out for the 2nd phase so will post my next update in due course. Thanks for looking and good luck with your builds1 point
-
How things can change on a six pence! After deciding to go for the ASHP, I had a couple of local firms in to quote. CVC did come back with a quote of around 20K but without a site visit, I was worried things could add up and that seemed too much. see the whole ASHP saga here; So next week, the new ASHP is being installed. And the unit is going in the back garden, under the kitchen window. This is not where I wanted it to go but the company were adamant that we could not have it at the front of the bungalow. And with certain changes in the pipeline, I am not sure now that we will be doing the extension at all. therefore I am going with the easy option for now. If at a later date, we DO decide to add an extension, we'll just have to move everything. 🤔 The reason for the big change is that the property next to this one came up for sale and after looking at it, we decided to put in an offer. It is larger than our current bungalow and while my parents need help and care, it makes sense to be next door, rather than a 20 mn drive away. It ticks all the boxes for our current situation, garage, workshops, as well as being next door so seemed the right thing to do. We now have a complete chain so are just waiting for it all to happen - hopefully January 2025. Fingers crossed! Looking to the future, we will have the option to choose which we live in and which we sell. OH prefers the new one already....... and we arent even in yet. 😁 I'll update things once the ASHP is in. I just hope it works as well as they say it will.1 point
-
https://polyroof.co.uk/system-applications/simulated-metal-finishes/ Or fake the metal roof effect with GRP.1 point
-
1 point
-
Considering @SteamyTeas comments you could consider a multitude of cheap “short term” solutions… EPDM, felt, pvc… the options are there…1 point
-
Not sure to be honest. The styrene will evaporate off for a few years, and the fumes can still cause problems. So really depends on the amount of ventilation between the two. Just look at a polyurethane system, they have the secondary advantage that they can be used when the substrate is damp. Would need to use a powder bound chopped stand matt, rather than an emulsion bound one, and that has the advantage that it does not itch anything like as much.1 point
-
Are dry ridges an option with the tiles you are using? I did my own roof 190m2 but it has gable ends not hips1 point
-
@marno17 No, Planning is different to Building Regulations. No, it is not mandatory.1 point
-
Most GRP roofs will be made with polyester resins. The problem with polyester, as opposed to epoxy and polythene resins, is that the crosslinking of the polymers is not so great (why they are cheaper and weaker than epoxy). This means that there is free MEKP (the hardener) and styrene monomer (used as a thinning agent and what smells), both of these are oxidants, so can cause steel to rust. So while you can do it, and it will probably last a decade or so, it really does depend on the roof steel coating. If it was me, I would look at using a polyurethane resin with glass reinforcement. I would also make up a test sample and 'rapidly age' it.1 point
-
"How do these figures look" Your PV production is very good for your location. I don't know about 'up there', but our weather has been dreary down here all year.1 point
-
I see no reason why not. I have installed single ply (read Sarnafil or equivalent) underneath kalzip before (a long time ago mind) on a modular solution where we wanted weathertightness quickly to allow for quick occupation of a building. We completed the roof post occupation. The final covering was effectively cosmetic only. Just be mindful that the overall cost will be greater.1 point
-
It wasn’t a form For both builds I contacted the Cil by phone They where quite clear Cut trees and clear the plot Remove slates but not joists No heavy machinery On our second build the SE required test holes I contacted them again and asked about taking a mini digger on There response was that I could take a full size digger on But leaving it there Or storing it onsite would constitute a commencement Im not sure if the Cil applies to you But that’s the main one Planners are more likely to tell you to stop what you are doing and that’s pretty much it Unless there’s a complaint It’s unlikely anyone will know Except All of BH 😁1 point
-
If you are having a joint, get a detailed drawing of how they join them. we have two windows that join and they have a joining strip that fits into a routered out channel in both windows, loads of sealer applied and screwed together. a friend had a similar thing fitted and he could actually see through the gap between the two windows, no method of sealing at all just a couple of screws 🤬.1 point
-
Depends how keen you are but one way would be to route out a rectangular section of the door face and drop in a flush section of solid timber slightly smaller than the coat rack. You'd just make up a frame to route against and have at it. It would even take out the inner cardboard down to where you could glue the timber to the back of the opposite face with D4 or similar. Just weight it down, no screws. Similarly you could drill each vertical side at / on the centre line and height of the coat rack then knock a "broom handle" through to screw to, from one side to the other. You would have to remove / get through the inner corrugated card. Could be into hole saws with long extensions etc. In both cases you'd be screwing into "real wood". Fun either way!1 point
-
The metal fixings are for plasterboard.. They are designed to grip in a minimum of 9mm, usually 12mm thick gypsum wall. Not a 3mm widen fibre board off a door. The fixings from B&Q state that they are designed for exactly that purpose, I strongly suggest if you're going to use a fixing in the door, to use those.1 point
-
I have an unvented cylinder and a mixture of radiators and UFH. Many people have this setup and it's no problem at all to have one boiler that does everything, these installers sound like total scam artists trying to fleece you and the work is substandard, you should get rid of them and do not pay a penny more. Being qualified means nothing nowadays unfortunately, but you are in the right place now to get sound advice on getting it done properly1 point
-
Don’t use mortar, it will crumble under the constant deflection of the joists, just a tiny amount of movement magnified many times a day times days a week will result in the mortar wearing or crumbling ever so slightly leading to the gap increasing. either slate packing or a nice timber to spread the load. work out your wall courses, you could get a nice 4x1 fitted to the joists sitting on top of the blockwork, or an equivalent depending on the gap. buy it a bit bigger and run a plane over it until you get a snug fit.1 point
-
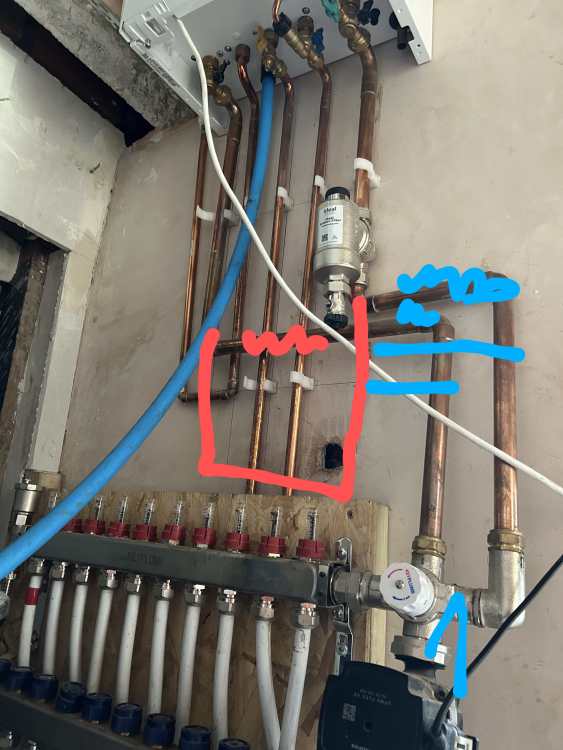
Yup, agreed, but the isolations are probably moot as there is just so little system volume above the manifold rails to not have to worry about 'draining the whole system down'.1 point
-
1 point
-
Couple observations You have a combi boiler, so that will have a recirculation pump, there is zero protection for that pump. It needs a min flow valve or connecting via a close coupled tee. Would question the need for the pump and mixer on the manifold at all, it's doing nothing. Your boiler has a pump and temperature control, it could be direct connected. Run on either weather compensation or fixed flow temp and a thermostat switching the UFH on or off. Basically as set up currently the flow through the system is reversed. It's a bodge. The pump and mixer can go either end of the manifold so that's not an issue, it just needs connecting the current way about. Or as above delete it. Also missing is isolation valves between pump/mixer and manifold. To fix it either the pump mixer assembly needs to set up correctly or delete it.1 point
-
Hi. For one, the flow gauges iirc will only register flow if the water is going into that rail, as the water pushes into the pipe loops there is a slider that gets drawn into the current and that pulls down the flow register in the gauge. As per your pic, the pump is running but the gauges aren't appearing to be doing anything? The other thing, is that pumps are suppose to be mounted vertically, but that's just old school mentality from 30+ years of plumbing (I don't mount pumps any other way) so air can rise upwards with flow vs against it. Also, as the boiler is only servicing UFH via a mixing valve, there should be a bypass, other than the one ion the boiler, so when there is pump overrun (the boiler pump is pumping faster than the UFH is consuming that flow/pressure) it can cycle back on itself. That promotes longevity of the boiler, and shouldn't be dismissed as 'unnecessary'. Finally, does that gauge show 70oC flow temp?!? Who commissioned this and what is the target/design flow temp that's supposed to be going into the floors?1 point
-
So I spent 3 days with a 1.5 tonne excavator and a pecker breaking up the huge amount of concrete slab. Thankfully, it wasn't reinforced and all I can say is that I didn't envy the neighbours. I am just finishing off pulling up the broken slab with a 3 tonne machine and getting the concrete collected with a grab lorry. There is about 5-6 loads to collect and that is going to cost me about £700. I could have hired a concrete crusher, but I calculated that to hire a crusher, 5 tonne excavator would have exceeded this cost. I also do not have any water on site for the dust suppression, and there was a lot of large lumps, that would have not fitted into the crusher without having to broken up smaller.1 point
-
The roof rafters are being installed with the openings for the roof windows. LABC visits for the second time, there have been a few photos sent as well, they inspect the roof, anchors and fastenings etc. The internal walls are built up around the steel goal posts. Not as many hours on site this week were one man down, its half term here. I started a Gabion wall, filling it with rubbish stone and facing the front with nice stone from around the plot, it just separates off the garden from the vehicle parking area, holding back about 400mm depth of soil. You can see on the photo the remaining post of the old wooden fence which was behind a skip now removed. Total man days of labour for week 8 is 20 days.1 point
-
Not posted an update in a while but was focused on getting the outside of the house rendered, painted, guttered and drill vented before the scaffolding came down. It was off hire on a Monday and I worked 11-12 hours days on the Saturday and Sunday to get through a few tasks including chain drilling the MVHR vents (2) among other things. Basically anything at height. Anyway, while peeling the masking tape off the soffit while lying down on my side I moved to all fours to get up and my back went into spasm! I was still able to move around but the next day it was sore. Off I went to the Chiropractor the next day and he thankfully sorted me out. A few weeks later and I was putting the floor down in the new attic and again lying down while slightly propping myself up to secure the T&G OSB with screws and I felt my back get sore. The next day again I was in agony and off to the Chiro the next day. The following week I took a different approach to finish the attic, very carefully, and remaining standing on the ladder all the time working backwards towards the hatch opening. Thankfully this avoided any further injury and I completed the task. Fast forward a few weeks later and I visited my mum, contracted covid and while propped up in bed the OTHER side of my back went. And this was no fun. No Chiro for me while testing positive (had to wait another 7 days) and it really set itself in. As soon as I tested negative I booked in to the Chiro but despite two visits it was still sore. I could do a 1/2 day at the weekend and a good nights sleep could repeat but it was hindering me. I'd booked 30 x 2x4 and 100 2x6 for delivery this week before the latest episode and had taken the week off work. After they arrived on Tuesday (I insisted on a HIAB thankfully so they could be dropped inside my boundary where I could secure it) I moved the thirty 2x4's inside but felt my back beginning to go again. I lay down but it was getting worse so I covered the remaining lumber and headed home. A few bad days to follow. I tried one Physio my neighbour recommended on Wednesday but it didn't shift the slow, gradual healing along much. I tried Panadol, Ibuprofen, even CBD oil but nothing was helping. I went to a local Physio yesterday and have received some treatment and exercises so I'm resigned to 2-3 months of recovery (my estimate, not theirs) to make sure this is really healed but start Pilates as soon as the Physio says I'm ready. I've been resting up all week and just have to accept I'm the weakest link! In an 18 month project so a few weeks isn't that much but I'd hoped to crack on this week after covid etc. Not to be!! Yeah, so take care of yourselves, especially if you are solo. I've accomplished so much over the last 10 months to get here, it was just one deadline where I pushed my body too hard and am now paying the price. It was a fear of mine but now its here I'm just going to rest, get back to work, wait for my back to be comfortable again (it's still sore) and take things easy for a while (I can plan electrical, home automation etc in the meantime!). How do people in their 60's even do this?!! I'm in my 50's and finding it hard! Fair play to those folks!! Anyway, Off to lie down, I'll call a few favours to get the lumber indoors when I fell I can help at least a little and only tackle jobs when I have a good back regime in place. I reckon it's 8 more months to finish. Can't wait!!!1 point
-
It happens when you have lots of zones. Control by either less zones, have the zones open longer by reducing the need for the thermostat to react by reducing flow temp or flow rate or both. My UFH system went from thermostat in every room, big buffer, multiple pumps, to no thermostat, no buffer and one pump. More efficient, more stable room temps.1 point
-
Sounds like you have some expensive panel heaters disguised as a TV and amplifiers. Just check our TV it's been on for the last hour and it's almost cold to touch.1 point
-
Not really, and I've been installing for 30+ years. Just look at getting more pipe in than you will be recommended by the "knee-jerk" posse, and install at 100mm centres on an 'inverted loop' pattern. This will promote better W/m2 with the lowest possible flow temps. This takes heated water to the centre of the room quicker, vs 'serpentine'. Insulation will be the biggest issue, and the more you put in, the less heat the floor will require to do the same job.1 point
-
On Monday the internal structural walls are up to the top of the ICF walls and are tied in to the ICF walls. The windows and doorways have extra bracing ready for the pour. Nobody on site on Tuesday it rains all day and no more prep is needed before the pour. Wednesday starts with the last minute checks ready for the pour. The concrete pump arrives on site at 12pm it takes 30 minutes to set up before the first concrete pours out. We have 4 builders onsite plus the concrete pump operator. The concrete is poured into the ICF on all four walls in stages twice round and its up-to window cill height, the ICF cills are pushed into the wet concrete and the wood boards replaced so that the pour can continue higher. A poker is used to vibrate the concrete to ensure the concrete fills the ICF without any voids. At 4pm the pour is finished and the cleanup can start. The pump driver tests out our hammer head turn which was required by BC as we are so far from the road and Fire Engines are not allowed to reverse more than 20m. I think this proves our access works and it’s all down to the driver of the vehicles, the pump driver is great if only all delivery drivers are like this. The gables will be completed later so the concrete has rebar inserted, the other two walls are trowelled level. By the end of the week one gable is braced and poured. Total man days of labour week 6 is 17 days.1 point
-
Looks great - must be such a relief knowing that the "pour" went without any of the dramas, usually associated with such an option. What do you put that down to - good prep work?1 point
-
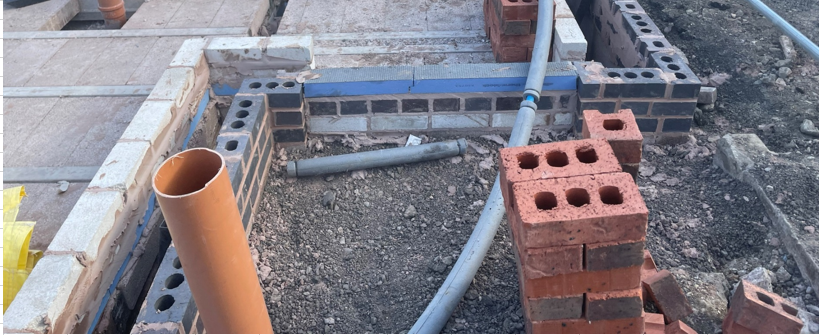
Despite the yellow weather warning we luckily had the coastal wind pushing it away, most of it fell on Tuesday but only 6mm The trench foundations are excavated and inspected. Then the concrete poured, and the first blocks laid followed by dolly blocks and internal supporting wall starter blocks Total man days of labour for week 2 is 131 point
-
1 point
-
Another beautiful week in Cornwall only 7mm of rain on the Sunday The week starts with laying the soil pipes then it was sand, hardcore, burying the soil pipes, laying the radon barrier, mesh and more concrete for the slab leaving a lovely surface to start the ICF walls next week. And the field was cut and baled, not as much as a normal September cut due to us moving our spoil down to the far field and tramping the grass down and making a very very muddy gateway between our two fields. Nether the less it was 10 bales for our friendly farmer Rob. Total man days of labour week 3 is 9 man days Cost to date Brought forward from blog Building Regs, Part O and SAP £14625 Refund from Architect £300 Fee to LABC for inspections £600 Foundations Weeks 1 to 3 £30,000 Total to date £449251 point
-
If that is an uninsulated concrete floor you may want to consider a new insulated floor. Otherwise, some levelling screed.1 point
-
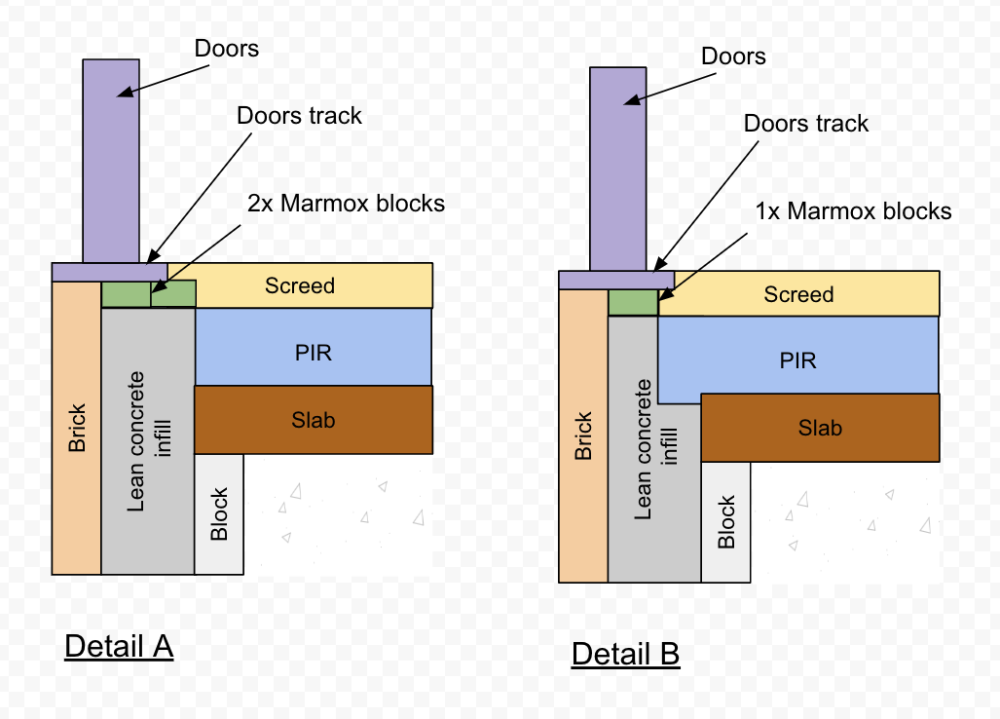
Whats your floor finish inside? Youve got a 210mm wide bit of pir before door how will you cover?1 point
-
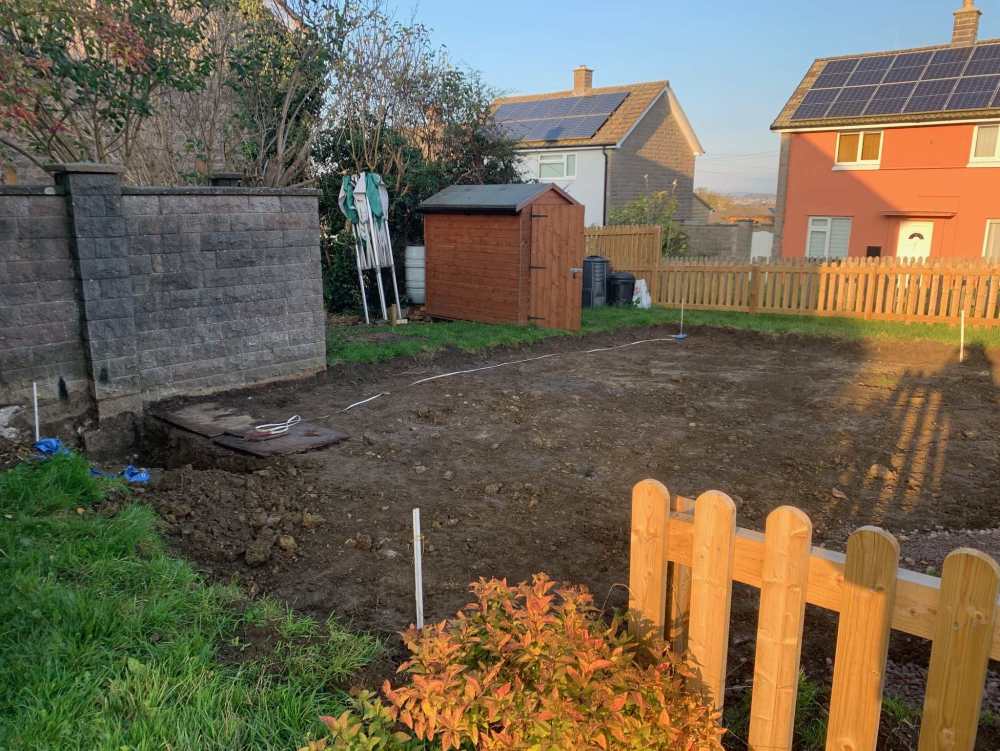
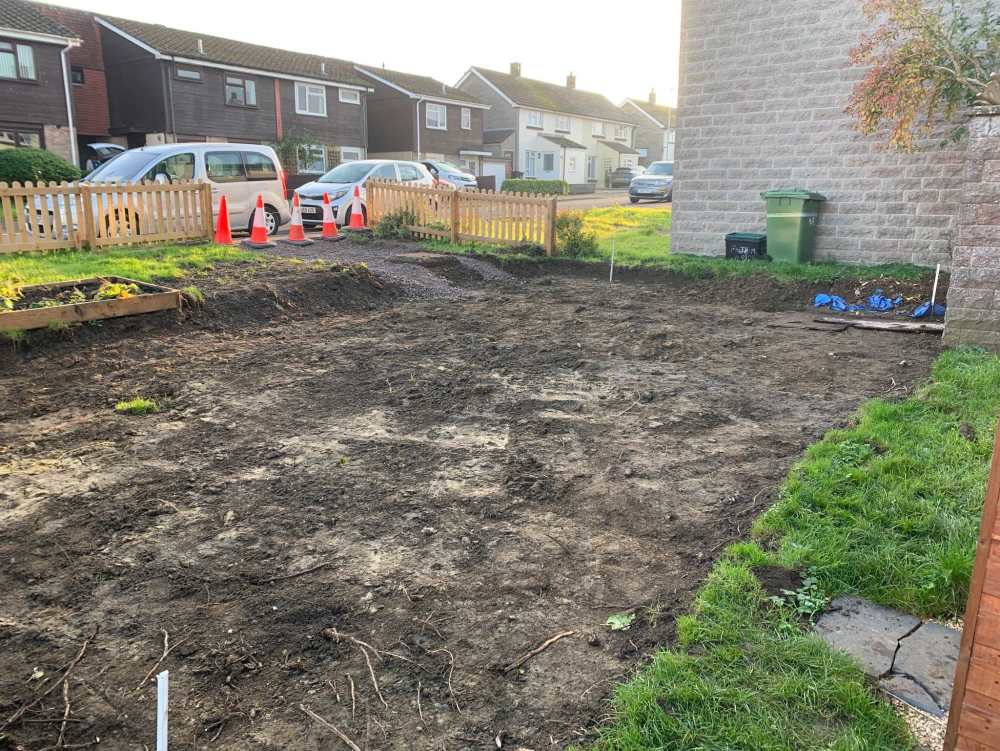
We have finally started to build. Day 1 was Monday 2nd September 2024. It was nearly 3 years from the first invoice which was for the private planning consultant to discuss and review the possibility of demolishing one of our old barns and building a bungalow on its footprint. Back then we weren’t overly confident of our chances but the consultant gave us a fairly good chance. Our current home is a listed property on 3 floors. It is far too big for us with 4 double beds, 3 baths/ensuite and two lounges. It makes a great multi generation home but no longer fits our needs. We are both in our fifties and looking to downsize into an economical to run bungalow. The old wooden barn was given away locally on condition they took it down and removed it without our help. We had birds nesting so we had a planning condition it had to come down between November and February. All that remained was the concrete down the middle, one wall and concrete lintels separating the bays. We chose a local building contractor from Bude, he came recommended and so far his groundwork’s subcontractors have been very good. The build starts with lovely weather but by the Thursday most of the UK has a yellow weather warning for rain, we had 23mm of rain Thursday, 14.2mm on Friday and another 27.7mm on Sunday. By the end of the first week we had a cleared and level site marked out ready to start on the trenches on week 2. Week one total man days of labour is 61 point
-
@Mr Punter in both details or just in detail 2? Is the second matrix block required in detail 1?1 point
-
1 point
-
if you want a level threshold, which you probably do. to thermal break it marmox directly under the cil same level as screed. Dont fill behind it with foam or any other non load bearing material as this is your finished floor surface. You are extending your internal floor to the outside skin and at same time breaking the thermal bridge with the PIR under the screed and the marmox block at screed level.1 point
-
Edit.... Double checked drawings and it might actually be detailing 1, it's been 18 months now and I can't fully remember! Apols Ours doors are sunk flush with the screed though, so we have a flush threshold inside and out to the tiles, and no cill. Means the metal frame sucks up the cold from the thermal bridge and then sends it into the tile/screed, hence my cold feet when I stand next to the frame... But 20cm out it's all lost in the warmth of the slab (hence wife 'well don't stand so close to the door then' comment) Doing it again I should have done a thin layer of aerogel on the inner door frame, between them and the screed and had the tile bridge the 10mm gap... As a crude solution I have retrospectiveky considered. It's the only thermal detail we really messed up tbh (albeit for the top 10% anal self builder, not the buildhub top 0.5% OK insulation detailing).1 point
-
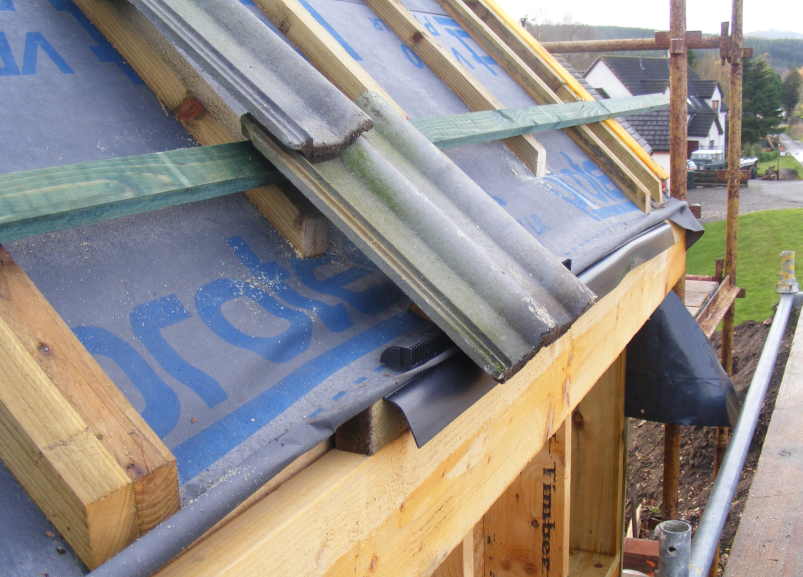
This is what I did in a similar situation Eaves tray on first. Membrane lapped over eaves tray Counter battens than battens. OV10 over fascia vent on next Then tiles, bottom tile resting on OV10 vent. The OV10 vent is made for this job, it is in line, most other vents tend to "turn a corner" so the outlet would face downwards.1 point
-
Encounter this nearly everyday at work. lintel is more than likely right up against back of the block. Chop a slight chamfer at the back of the block where it meets the back/bottom of lintel. Add more compo to the front than the back so it’s not squeezing up behind the block and pushing it out. Place blocks dry across the cavity from front to back to hold the front in place until they go off. With the weight holding them in place you can knock the tops back to the line and leave until set. The thicker the DPC the more you have to chamfer the back of the block. On paper it’s a wonderful thing but using hyload DPC with a tight lintel is a pain.1 point
-
We have managed to stay in our home for the majority of previous builds. This time we had to sell before we could buy the plot / donor house. So yesterday, we packed up from our 325 sqm house in Stroud, moved into a 114 sqm rental house, sold Stroud, purchased the plot and by coincidence the Planning Application was accepted by the District Council. A big day. https://planning.newforest.gov.uk/online-applications/applicationDetails.do?activeTab=summary&keyVal=_NEWFO_DCAPR_221599 We have a mountain to climb, but already we can look back on some good progress. We have a plot, we have a design, we have planning submitted and we are some weeks into requesting Timber Frame quotes. Many priorities, but one near the top of the list is talking to the neighbours to see if they will comment positively on the planning application. As a courtesy I gave the drawings to the immediate neighbours before planning submission. Good neighbours are invaluable, especially for demolition and a replacement dwelling.1 point
-
After my horrid time earlier this year I am now going to post something more positive. As of yesterday, I was offered a job, not ideal (is any job ideal), rather than working from home I must go to the office which takes 40mins each way and hubby is disappointed that he will be left on his own all day. That said even with time out for funeral 250 miles away and wet, wet, wet we have progressed. Some pictures. hardcore & binding (take 2 after previous issues) now the expansion foam around the sides The heave protection next then taping next was the rebar here is the pour on top of the rebar - 200mm drying concrete slab with no hint of everything underneath, typical building, lots of expense and nothing to see. the first row of outside blocks added showing the cavity first blocks over DPC with all the rain we have created a bit of a swimming pool It was at this point that we purchased a puddle pump as hubby really didn't like having to kneel and build low in water going up with some windows & doors framed insulation going in joining the existing walls to the new part this is where some of the kitchen cabinets will be hung, so although internal we are using heavier blocks to take any necessary weight On the left hand side you can see part of the existing barn that will be staying. The roof is currently being held up with barrels and wood building from scaffolding is a real milestone, makes it seem like we are getting somewhere. To protect the insulation, we have the original insulation from the barn roof cut up to provide a 'roof' over the cavity. Having made the frames for the remaining to windows these need to be placed in situ for building around. This area will be our front hall and snug. Of course, the front door will only be used by visitors, but we will go through the hall internally to get into the snug. With all the cavities it is smaller than I hoped, but with all the insulation it will be much warmer than our single skin house. Hope you enjoy the pictures, next time I hope to be at lintel and wall plate level, but we would like the weather to improve. Thanks for reading Jill1 point
-
I really hoped that now we are progressing after our suspended floor saga that things would get better, but something somewhere is determined to make sure that doesn't happen. The only change is that this time the things that have gone wrong are not build related. Firstly, my brother, only 63, died of a heart attack with no history of problems. I spent 5 days with him and his wife / kids in intensive care hoping against hope that he would pull thorough, but at 6am 6th Feb his heart gave way for the last time, no more restarts, RIP Alan 😞 Just before that, 6 days before, I got told that I've been made redundant, as the only breadwinner that's another major blow, the build funds are sorted, but we still need to eat and pay the bills and run the cars. So, forget build PM I'm now looking for a job that offers enough for us to live on. The only snifter I've had would be a 20k reduction in pay with an hour's drive each way and 24hr on call once every 4 weeks. I may be desperate, but I'm not that desperate yet. The trouble is I'm in my 60's so although age discrimination is illegal you can't prove it's happening. But, with ALL the experience on my CV it shows that I'm not just out of uni. Right, back to the build. In December we had just got the details about our suspended floor. It had to have a bearing of 130mm, plus 20mm expansion foam, plus shear links. After much huffing and puffing it was prepped and ready for inspection. The BCO came out and just said yes with no hassle and went on to talking about the other parts of the build and our future under pinning of the back wall. He was really helpful and has even sent a message to the SE saying that he feels that 2.5m deep foundations is over the top with our sandy soil. He wants us to dig two trial holes of 1.5m deep and then have a site meeting with BCO & SE to discuss what we really need. He feels that the SE is being over cautious bearing in mind we are converting the barn into a single storey bungalow when there have been no issues with the existing barn over the last 70+ years. This will all happen about March as hubby is going to build this 'room' first. This will actually be our hall and snug. The above is the inside wall of the cavity wall up to DPM. As I speak the mostly external wall is finished although the bit nearest stays internal as that borders the kitchen. I wanted a 'proper' wall for hanging a sliding door and kitchen cabinets. It was already a separate space when it was a barn so it is a bit like an extension. The long awaited concrete pour happened, at one point it looked like they might not make the slope as it was raining, but after a lot of slipping and sliding they got there. bit of a wet day for it, but all dry now The only other thing we did this month was buy a block saw at auction (for not a lot of money), it needs a new engine as it's been stood outside for years, when hubby took off the old casing it was obvious just how long. This is how it arrived and this was what was under that casing. I wonder how many years the birds were nesting. We actually got 2 for the price of one, when we got to the auction to collect they said, oh there were 2 of these in a lot. So, hopefully we can make a bit of money by cleaning, replacing the engines and servicing. These beasts are seriously expensive to buy working at about £750. Hubby has worked with a company in the paste who are going to do the work for us and refurbish so we should end up with at least one working machine for less than £250. I've not been able to work for over a week on the build and we stopped for 10 days over Xmas so a very short month. Once again, I'm just hoping next month will be better, but somehow I'm losing hope on that front.1 point
-
My initial plans were to have rainwater harvesting, build hub taught me no.. so with that scrapped I needed an alternative, soakaways are difficult due to bed rock levels. In addition to this we have lots of run off on the croft, and the track to the house floods. We have already installed a pond for the ducks and this has a large berm to the back and sides so that the runoff is held back and slowly soaks away, but this winter has proved it overflows regularly, that's around 3000L extra. So the plan was to install an overflow pipe from this pond to a new larger pond. The larger pond also acting as rainwater run off capture. The larger pond will have 2 levels, a pond and then an extra layer to act as a overflow that can evaporate and or be pumped to the rubble drain in drier times. I got a big carried away with the backhoe and ended up with around 10M x 8M and over a meter deep. The overflow capacity will be around 30k - 35k L. We had to peck out some of the rock to get depth, and at the front used "as dug" rock from the quarry to form a rough and rugged stone wall, quite in keeping in Caithness. Time will heal the scars and soften the edges with planting. Due to the two levels we came up with the idea of hiding the liner under some camo net, that we intend to plant up in time. Not sure how this will stand the test of time. From the house the rainwater enters a rock filter, an idea loosely based on a post from @ToughButterCup- thanks. From the rock filter we have created a little stream that the rainwater will flow down and into the pond. In addition to this we have a pump that will take the water via a home made skimmer from the pond and filter the water from the pond through the rock filter and stream constantly. This also has a diverter to pump the water past the house and into the field to reduce the overflow capacity in drier times. This is the rock filter, and some of the pipework yet to be buried. Getting to this stage ticked a box for building control as we now handle our run off. We got our completion certificate on the house this week, yeah. There are some things to finish, the second bedroom needs decorating and trim work. And a few small jobs here and there, but in general the house is decorated, and fully functioning. We started the build in earnest around May 23 I think, so quite pleased with the effort and timescale we achieved. It's was built by me and Mandy with the odd person helping with concrete pours. 3 months in summer were busy with the cabin rentals that saw Mandy spend 3-4 hrs a day turning them around for the endless NC500 travellers.😁 We're embarking on the VAT reclaim soon. To summarise the build: 89sqm True bungalow Floor 0.094U (300mm EPs 120mm concrete) Walls 0.139U ICF with 50mm EWI and 25mm PIR IWI Cold roof 0.1U 25MM PIR 400MM mineral wool. UPVC triple glazed windows and composite doors MVHR, 4kW PV in roof, 5kW ASHP, UFH. EPC A103, Airtightness 0.83 ACH.1 point

