Leaderboard
Popular Content
Showing content with the highest reputation on 05/30/24 in all areas
-
3 points
-
A 100A leisure battery would have a theoretical storage of 1.2kWh, but in reality less than 1kWh as you can't discharge it to 0. So you could run a 1kW element for less than an hour or a 3 kW element for less than 20 minutes. In the middle of a power cut that is not going to warm your house up much. Save the battery for lighting and other useful things. On the other hand my WBS can deliver 5kW for as long as I keep adding logs to it. The one in our static caravan ran nearly non stop from November to March the winter we spent in it.2 points
-
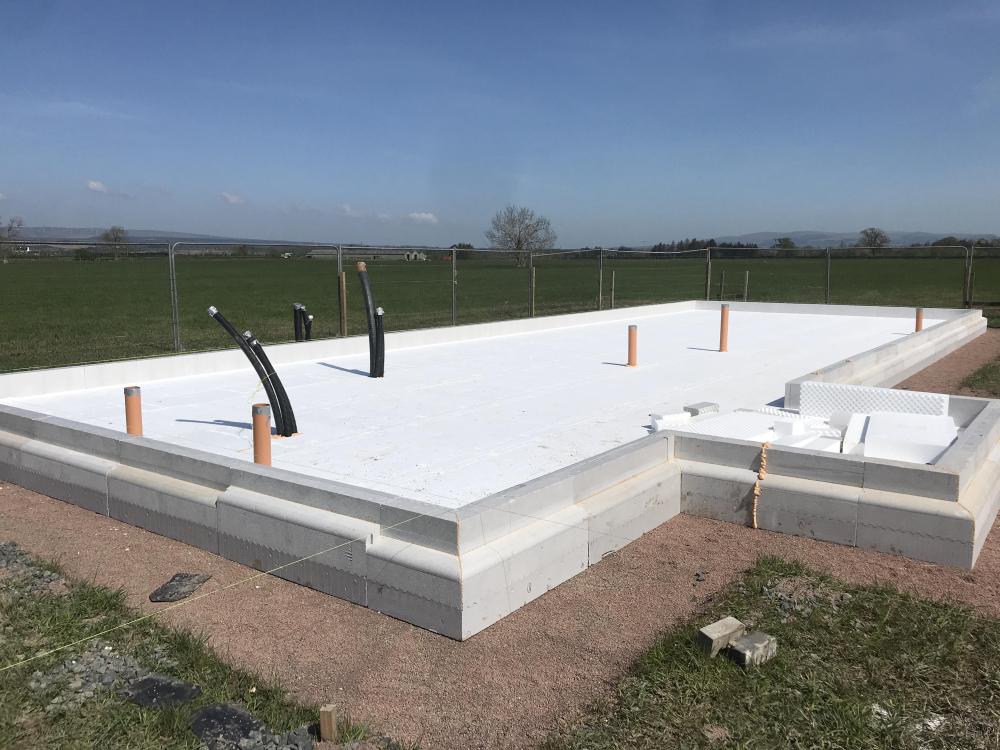
Pretty much any builder in the UK knows how to dig a 600×1000mm (or whatever depth is used for local soil types) trench-type foundation and fill it full of concrete. Making an insulated slab is still (in the UK) really a specialist exercise, so the crew needs to know what they are doing and have a true quality work ethic. The actual sequencing of the build and pour is very tight so the crew need to be on the ball. In our case, the concrete was a little wet and the weather cold. The concrete is power-floated to finish and level to 1-2 mm across the entire base and the time window in the set where it is firm enough to walk on but still workable is quite narrow. If you don't do it during this window, then you might end up having to power plane the finished slab. Our crew foreman stayed on site over night and started about 3 AM! The approach doesn't fit well with some soil types, especially if there is a change in type across the pad. Tree roots running near or under the pad are an absolute no-no. You need to have a pukka soil survey including cores across the site and this is probably around £3+K today. The SE uses to spec out the sub-base. But we went from a hole in the ground that 100s of birds were using as a shallow lake to a finished slab complete with UFH loops fitted in just over a week. It was amazing to watch the process.2 points
-
we have considered that. There is likely space for 3 buildings and valuation post built would net profit, but would be a huge headache I don't want to go through. We have had some informal advice from a planning consultant who indicated that we would have a strong case on appeal, and that was before we had identified any of the other comparable applications that have been approved.2 points
-
First whole house and room by room heat loss calculations. From the room calculation you find the size of the radiator required for each room. dT 15 means the flow temp I'm the radiator is 15 degC hotter than room target temperature. This will get you most of the way https://www.heatgeek.com/how-to-size-my-heat-pump-or-boiler-heat-loss-cheat-sheet/2 points
-
The original joiner should have realised that, and fitted the original 2 hinges literally as far apart as possible. When adding a third hinge, putting it in the middle has added nothing That is the point it will pivot about if the first 2 hinges are straining.. You might, just might fit another hinge above the top hinge, if so that would have been a good place to add it, and if one would fit a 4th hinge squeezed in below the existing bottom hinge. There is a good reason why you see heavy doors hung with 3 hinges, but 2 near the top, not in the middle. He might be a good joiner, but he is a poor engineer.2 points
-
1 point
-
Only and only if you install it flush with the inside face of the wall so that the parapet doesn’t create a step otherwise 1100mm from the top of the parapet.1 point
-
Obviously ask building control, you might find a pragmatic one. height wise it needs to be 1100 high, but if you mount it on top of that wall, you must ensure the wall can’t be used as a step up, if you can step on it then you will need to measure your 1100 from the top of the wall not the roof height.1 point
-
1 point
-
I would say it needs the same rail. Otherwise BC will say nothing to stop you walking onto the green roof then falling off that. Of course if that bit of handrail were to fall down after completion......1 point
-
If can walk on it even if not designed for walk on it needs fall protection. So you need to stop them going on the green roof. Remember you cannot use horizontal bars etc that a child could climb up and over1 point
-
1 point
-
1 point
-
Has yours been talking to mine? I now think of those snagging issues seen elsewhere as '... comforting ...'1 point
-
What you have shown looks OK. You may be better going through the wall with the shower wastes and connecting them to the SVP with a boss rather than using the pipe from the WCs, which will likely be too high in any case.1 point
-
1 point
-
MBC and at least a couple of other specialist passive house suppliers use warm-slab construction as standard. The MBC SE knows his stuff and he has probably designed over a thousand such slabs. BTW, it's not just any EPS; it's a special construction grade, designed for load bearing. There is typically EPS 300 under the ring-beams and EPS 100 under the main floor pan. It our case there were two load-bearing cross beams so the main 100mm pads only spanned some 3½m and had an extra 100mm (i.e 200mm deep) cross braises every 2m or so. Have a search on YouTube: there are some really good time lapses of some MBC builds. Incidentally, I mate of mine had a house in Texas in the Houston Bay on what was essentially reclaimed swamp. This type of reinforced slab is the standard construction technique in his area.1 point
-
I’d advise to forget it as those lights will almost certainly be junk quality.1 point
-
Yes, but , well look at this ...... The Lancaster CoHousing Project solved that problem. Yes, it's quite large now . But it started with one or two people talking to one another, and so shows that You aren't the first to face that problem and There is a way round the issue. They have Open Days and are very approachable. Go and see them: we did. (Here) Lots of help and enthusiasm - even if it's " I don't know, but I know someone who does "1 point
-
When we moved in there was a Fortic combined HW and header tank in a cupboard in the bedroom (with a noisy pump), cos it was directly above the Baxi Bermuda gas fire/back boiler and had gravity circulation. Fortunately there was room for a UVC in the bathroom when we had it all re-plumbed. Fire went as spares to a friend, quiet replacement pump is going to be part of HP system in our present house, old pump has replaced an even noisier one on the UFH. As my grandfather would say "nothing wasted where they keep pigs..."1 point
-
might not be financially feasible but can you put an application in to demolish the bungalow and build 2 x 2 story houses orienting them to suit? could be a nice profit in it? otherwise maybe a planning consultant could help? our case officer was against our development. we got a planning consultant involved to fight our case and we got an approval. sometimes it's worth the money to pay someone to fight for you!1 point
-
1 point
-
As @MikeGrahamT21 says above read the notes, we can’t help really as we don’t know your build details 🤷♂️1 point
-
We did something similar. We put in a 2nd application after the 1st was refused, providing evidence (to our minds) that the original refusal was invalid in its observations. At the same time, we started the appeal on the 1st application while the 2nd was going through planning. At least that way we didn't lose 5 weeks on the appeal timescale when the 2nd application was refused too. At the time, putting in another application after the first refusal was "free" of charge. Appeals are also free and our appeal could have been withdrawn had the 2nd application been approved.1 point
-
Anything specific you don't know the answer to? You may find it easier to use the web portal to do this: https://buildingcontrol.planningportal.co.uk/1 point
-
Just to expand on my post above I put in four applications, no 1 being exactiy what we wanted and no 4 what the planners wanted, which passed. However the ground floor was exactly the same for all four applications. We then started building then went to appeal for application no 1 (a clever planning consultant told me this was possible). We then went to appeal and won before we got to first floor level but this was worth the gamble as we had to build something!!,!. In the appeal notes the inspector slated the planners for not abiding by their own policies. (Never heard from the again). edit, my appeal took 4 months (but at least we were on site building 👍) yes it was emotional but at least we were doing something (I hate planners and have fought them and won before).1 point
-
And if you do go to appeal, it sounds like your case officer has already written the basis of your appeal claim for you. Make it CLEAR to your planning officer that if it is refused you WILL be appealing.1 point
-
who wants to be cutting wood into their 80,s1 point
-
At almost 73, I'm also a definite no, to woodburners.1 point
-
at73 i,m a definite NO-- to wood burners1 point
-
Couple coats of whitewash. It's what my brother in law uses for his glasshouses and tunnels during the summer in his horticultural business. Rain eventually washes it off.1 point
-
@msmithuk77 strange it seems like your plumber is 80% there with his knowledge, but a 35kw boiler is insane, an 18kw would do the job undoubtedly I'd do as @JohnMo suggested and run everything at the same flow temperature, this will provide maximum efficiency, reduce the amount of equipment needed, reduce electricity (pumps etc) and also reduce the amount of things that can go wrong in the system.1 point
-
Be interesting to plot it against age.1 point
-
1 point
-
Little bit different (new build high insulation) We plumbed upstairs radiators with a ufh manifold so no trvs. We also run cable to each room for adding in a thermostat at a layer date but tbh the rads are never on.1 point
-
1 point
-
People are very wedded to their wood burning stoves. I was chatting to someone local recently who said the ban would stop them from self-building. Seemed an odd deal breaker to me.1 point
-
Comes down to time, will, inclination and money. Paid to have foundations and built to watertight Paid to have windows and external doors installed. Paid to have Ducted Aircon installed, solar panels aswell. First fix insulating, joinery, metal framing, plumbing, electrics, Mvhr done myself, but it has taken a long time whilst I procrastinate over the best way to proceed and save up enough to pay for materials out of salary. Will install/commission the ASHP myself. Going to order the first batch of plasterboards tomorrow, then shift them inside ready to start fixing to the mf ceilings. D&D plaster boarding and Skimming, someone else can do that, scares me that I wont get the plasterboarding right plumb and flat Tiling the ground floor, again someone else can do that. Reckon I'll do everything else apart from the kitchen worktops tbh It's just a big 3d jigsaw really, just the parts and skills are a bit of an unknown!1 point
-
It doesn’t always go down well. You have to carefully recruit open minded builders/ trades etc. A lot don’t know about airtightness detailing.1 point
-
Yesterday we exchanged contracts on the purchase of a house in Lymington and on the same day we submitted a planning application to demolish the house and build a new house in its place. Probably Timber Frame, definitely to Passiv Haus standards (fabric first etc), 225 m^2, no fossil fuels but plenty of solar complemented by batteries. We have done this before with a TF house in 2009, a small development of brick and block houses in 2015/16, and an ICF house built into a hill in 2017. We hope for a simple, fast build with a high quality result. One thing we have learnt is to always be ahead of events and don't change your mind. Let's see1 point
-
I would spend that money replacing the high temperature radiators with radiators designed for dT 15. That would allow you run the whole system at a single flow temperature. Install limiter trv's on the radiators. Run the whole lot as a single zone with a 2 Deg setback if you want at night. So all heating is either on or off. Everything on a typical winter day will be running a very low flow temps 25 to 30 and to a large degree self modulating. If room temp increases output decreases to keep room temp quite stable. No additional pumps required, no LLH or mixing sets, run the whole system from the boiler pump on WC run from the Vaillant controller, no additional thermostat required. If it looks or sounds complicated, it usually is with little or no advantage. Your shopping list reduces to Valiant kit: Boiler Valliant Ecotech Plus (new model) sized to suit heat loss - definitely not just a big one. Wiring centre Weather Comp Unvented cylinder - install a heat pump cylinder with 3m2 coil. This will give super quick recovery at low flow temps. Size cylinder the same as a heat pump and store water at about 50 degs. So 210L to 300L for 3/4 bed. VR10NTC temp sensors: Unvented Cylinder pocket 2 Port Diverter splitting the flow from the boiler to A) the DHW (for hot water priority) and B) Rads and UFH Some radiators and plumbing. The above will give continuously condensing running conditions and efficiency of around 105 to 110%. Compared to closer to 80 to 85 with the other design mixing down from hough temperature. The first step is a heat loss calculation for whole house and the radiator rooms. This will allow a suitable boiler and radiators to be specified.1 point
-
Heat loss calculation for house at your lowest practical outside temperature, normal to do it at about -3. But what you are being offered sounds huge. Not true, you run UFH continually at a low flow temperature, if you find a room is too warm or cool you tweek the loop flow rate to compensate, once set it is self regulating to a large degree. Only time you need lots of control is if are trying to blast it with really high temps for short periods. WC is the opposite to that. Would suggest you find a different plumber. Have you thought about increasing bedroom radiator size so you can flow all the house at the same low. temperature? With WC you don't really need them, but if you insist you have them as over temperature limit stops. So target room temp is say 21, set them to 23. Install the correct sized boiler and you don't need this. Have a watch of this video on a Vaillant boiler install.1 point
-
0.25 W/m².K. But you can get to 0.18 with 25mm internally, so 227mm total wall thickness.1 point
-
Chinese are awful, same as Brazilian in my opinion. Good quality Spanish like cupa H3's are extremely good.1 point
-
Hi, thank you for all the information. I took your points to Ecobrix and the Ecobrix technical director and inhouse Architect (Andy) kindly showed me how they got intouch with all the former durisol clients and offered some free blocks to finish their projects. They also took me to meet a client that had been let down by Durisol but Ecobrix stepped in to help the client. The build was really impressive. Right in the middle of Brimingham. I had a private conversation with the owner and he was nothing but thankful for everthing the new owners of Ecobrix did for him. We also went and met David from Isotex but he said they would have to connect us with the head office in Italy and we had to prvide all the quantitiies needed or if we gave them the quote from Ecobrix they would match it. TBH, we did not feel comfortable with the poeple from Isotex as they only seemed interested in getting us to put down a non refundable deposit to some poeple in Italy that we'd never even spoken to! It all seemed a bit rushed and all they wanted was to see what Ecobrix had done for us. One thing that we thought was nice, was that Andy from Ecobrix never said a bad word about Timber frame or Isotex. The same could not be said for Isotex. They spent at least 15 minutes tell us how bad Timber frame moved and shrank and how terrible the Ecobrix people where! Having been to the Ecobrix factory in Wales for a free training day and after meeting the team and the lovely Welsh man that runs the factory, I think we are feeling confident to use the Ecobrix blcoks for all our walls and then timber frame for the floors and roofs. We are due to go to Carephilly In July as Ecobrix arranged for us to meet with A1 timber and Celtic offsite to discuss the Roof and floors.1 point
-
It is better to keep the outer leaf up to floor level, this gives the cladding something to meet up with that won't rot and gives the telescopic vent somewhere to sit.1 point
-
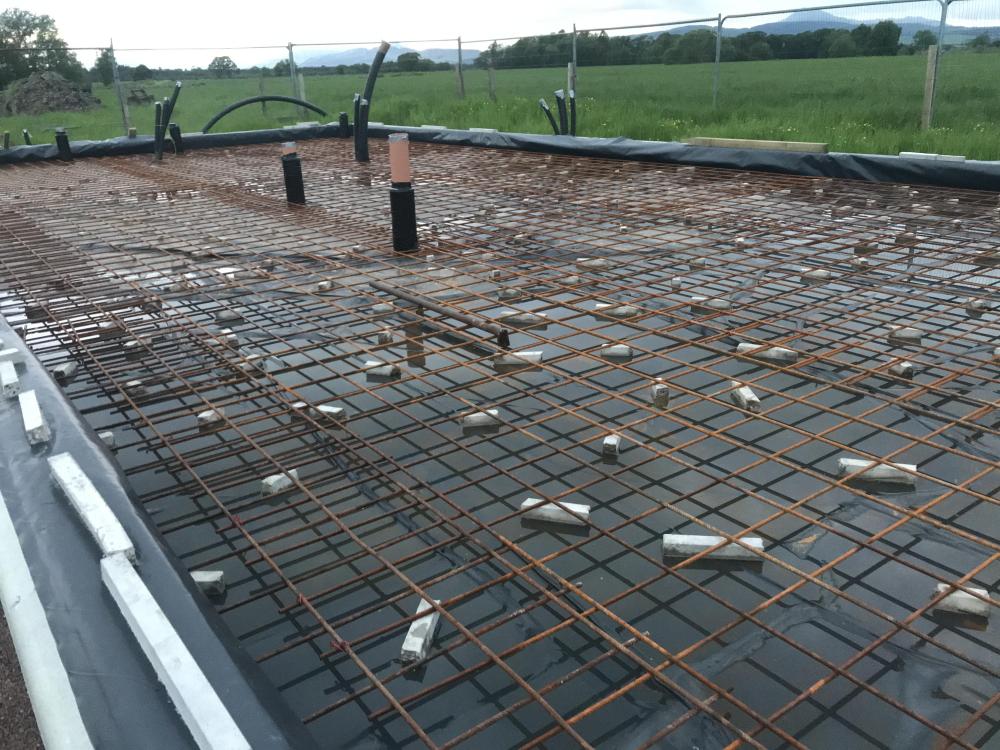
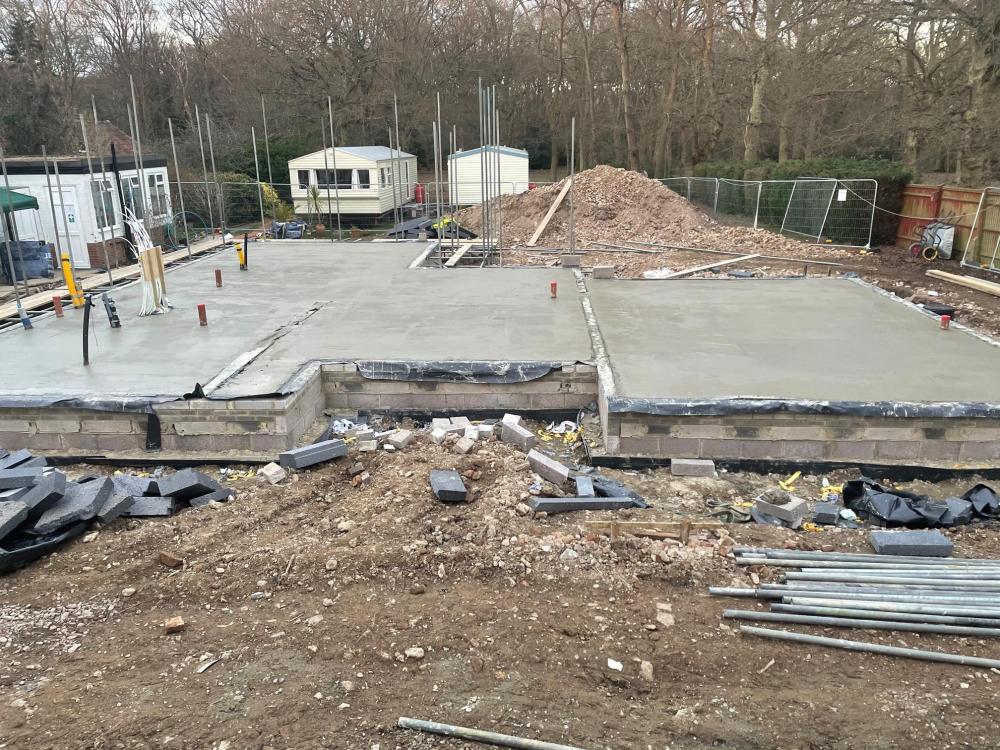
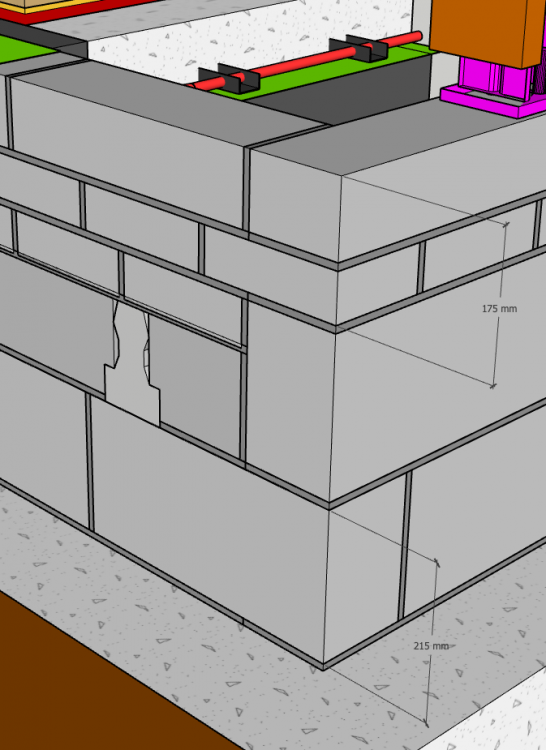
I though I'd post an update - sharing some lessons now we have the substructure complete, especially for anyone considering an insulated beam and block floor. To recap, this features an insulated beam and block floor from Milbank - make up from bottom (as specified in the BBA cert of the insulated floor system, which I believe is used by a number of concrete beam suppliers that offer an insulated beam infill option? Conventional pre-stressed concrete T beams with EPS insulation infill the full depth of the beam, A 150mm EPS top sheet across the top of the beams. Damp proof membrane Structural concrete topping to finished floor level (there is no conventional screed on top of the slab). Underneath all this are piles plus reinforced concrete ground beams. The foundation blockwork supports a timber frame structure with 140mm studs - and blockwork is 140mm wide to match the timber frame. Lessons: 1 making the blockwork the right height upto DPC. From my detailing, the final course of blocks to DPC would need to be 175mm high (not standard 215mm high for blocks). So the plan was to cut down the blocks lengthways so they were 175mm high. I hired a masonry bench saw with a view to accurately cutting down a large number of blocks - one course is >70 Linear metres so > 140 blocks. After cutting a few blocks with the masonry saw I abandoned this due to the time to cut each block and the fact the sliding table on the saw had no fence and I could see no way to attach one, so could not get accurate repeatable cuts. In the end I located two sizes of coursing bricks/blocks to make up the required height: W140mmxH65mmxL215mm and W140xH100xL440. These blocks cost me best part of £1K mainly due to the latter only being available in Cornwall and had high shipping costs (via Jewson). 2. Telescope vents (needed for any suspended floor) - make sure the brickies build as specced. I specced the vents to be in the side elevations of the house which ran parallel to the concrete floor beams. The brickies did not put them in because they said they normally go in the infill blocks at the ends of the floor beams - which is fine for a conventional B&B floor as they will vent below the inserted concrete blocks. However, this won't work so well with an insulated B&B floor where the insulation infills extend the whole depth of the T beams. Another problem with placing the vents here as the front/rear walls has dropped thresholds so there would be nowhere for the vents above finished ground level. I now need to cut in the vents in the side walls where I specced them to be. 3. Fixing UFH pipes in a concrete slab. It's not uncommon to bury UFH pipes in slabs, however most seem to attach them to the topside of steel reinforcing mesh. The BBA cert for our insulated floor system specified that the steel mesh should be at mid height in the slab and there must be min 75mm concrete above any "services". So our UFH pipes would need to go under the steel mesh. We opted for self adhesive clip tracks. They struck fine to the DPM. However when the pipes were clipped in they pulled the clip track upwards and the DPM with it - with such force that in places the pipes also lifted the steel mesh to the point it would have been protruding from the top of the slab. There was no option but to place some staples at the pipe loops to keep them down. I'm not sure what the alternative method of fixing the pipes would be, perhaps plastic pipe tray, but not sure how the chairs for the steel mesh would sit on these. 4. Ordering Readymix concrete. So my CAD model told me the slab had a volume of exactly 14m3 - which I'm sure is correct. So I ordered 14.2m3 - 0.2m3 for contingency as we don't want to be short when pouring a slab right? I also had not subtracted the volume of UFH pipes (almost 1km of 16mm pipe) and steel also in the slab which should mean we had even more ready mix left over. When it came to the pour we were indeed short of readymix and it was too late to order some more from the plant. By chance we had a bulk bag of aggregate, a mixer and many bags of cement, so we mixed some more conrete - all of the bulk bag and we were still short. We got the last couple of barrowfulls from our spoil pile where the pump had been emptied. Lesson is that you need to allow for vibrating which we did that allegedly gives a better finish and stronger concrete but reduces the volume of the concrete and also allow for the waste in the pump (substantial) and readymix truck. 5. Generally very pleased with the insulated floor system - very easy to install and all quantities calculated correctly by manufacturer. Beware the insulation comes by default on an artic due to the sheer volume - we had to pay for the shipment back to warehouse then back to us on two smaller vehicles when the artic driver refused to enter our road.1 point
-
0 points


