Leaderboard
Popular Content
Showing content with the highest reputation on 07/04/23 in all areas
-
3 points
-
3 points
-
There seems to be some confusion about my comment on storing energy as hot water. It was never meant to mean store all your energy as hot water. That would be a bit silly. It is also silly to heat and store more water than you actually need. So while the volume of a cylinder may be fixed i.e. 200, 220, 250, 300 litres, the mean stored temperature and be varied, within limits i.e. not too hot, not too cold. There is, as @pocster and @ProDave illustrate with their set ups, a zealous need to export nothing and overstore. That is a bit silly as well. When the original question was asked by @DazRave, apart from spending £10k on a system, which says nothing about the size of the system, I was also unaware that he had gas already. But let us look at the cost of gas. I don't have it, but there is a standing charge, is that similar to electricity i.e. 60p/day? How much is an annual service £150? Assuming a combi boiler, how efficient are they when heating water for a few minutes shower, 80 to 85%? Never seen anyone work that one out. There is also the added benefit that roof integrated PV can decrease solar energy entering a loft/roof void by about 18 to 20%. This may help, depending on house design, reduce the need for summertime cooling. Cooling should not really be necessary though, it is a building design failure.2 points
-
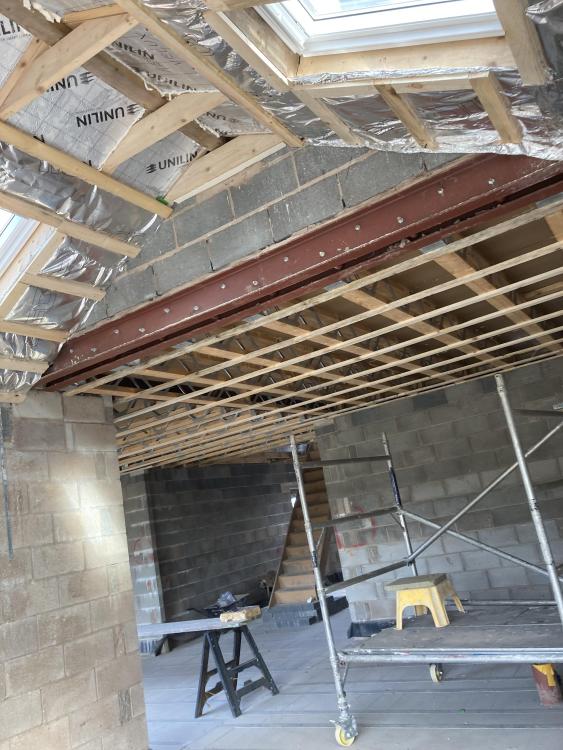
Was a wee delay in getting the ceiling sheets up, but was on site with the boys putting the sheets up today. They're good joiners and put resilience bars on most of the jobs they do (mix of commercial and residential). "So it's 25mm screws you're using?" "No, we just use 32s" "But you're 16mm for your resilience bars and 15mm sheets, so you'll be going into the joist" "It's only a mil and you'll hardly get any biting across the full place" "Are you not kinda missing the point of resilience bars?" Lunch called early while I ran for some collated 25s. And just the latest in a long line of how decent trades would miss the important details if left to their own devices.2 points
-
Being a new expat living in the Highlands, it's not rare hearing a Scottish accent, but I reckon I hear more English southerners than Scottish, of my 3 closest neighbours 2 are locals, and one came from around 10miles from where I grew up in Manchester. Agriculture: two crazy examples. A local farmer sold his head of sheep, as the government are willing to pay him more for the next 5 years in subsidies to sell them, than he would earn rearing lambs and selling.( with a hope of meeting next zero) absolutely crazy shortsighted planning. Reminds of engineering in the 90's outsourcing everything to China, only for costs to increase, but no way back when the foundries closed etc. Secondly wool. I had my second hands on experience of rural life today assisting my neighbour with the annual sheep shearing. ( Started paying back my long I owe him list) He gets about 30 to 50 pence for a fleece. And it costs him £1.50. So why is wool insulation so expensive, my gut is big business not wanting this cheap raw material when they can sell profitable glass fibre / PIR products lobbying government for favourable incentives to use their products. Sitting here at 74M AMSL, I'm quite happy that the planet will do what it needs, the UK hitting net zero with the introduction of EV's and decimating farming will not work, and have a more detrimental effect on the planet as we will need to secure food security by way of more transport.2 points
-
Nothing to do with a lack of water though. South East Water have imposed one on me yet their reservoirs are 97% and 82% full, due to the very wet start of the year we had. The problem is huge amounts of extra housing in the area, and not enough investment in the infrastructure (as with pretty much everything in this country). They literally can’t treat the raw water fast enough and get it to all the houses quick enough if demand surges when it’s hot and dry (as you’d expect it to do). Blaming climate change is a total cop out and let’s these incompetent clowns off the hook. Water should be really be nationalised (along with energy, rail and anything else that is vital to a functioning society) and run for the good of the people. Unfortunately, you’ll get clowns, charlatans or crooks running it most often whether it’s run by the state or the private sector!2 points
-
I’d like to offer help to anyone who needs help doing drawings or designing their home or extension. I'm a Registered Architect with some time on my hands. I use my iPad and an app called Concepts to draw and have already helped out a few Forum members.1 point
-
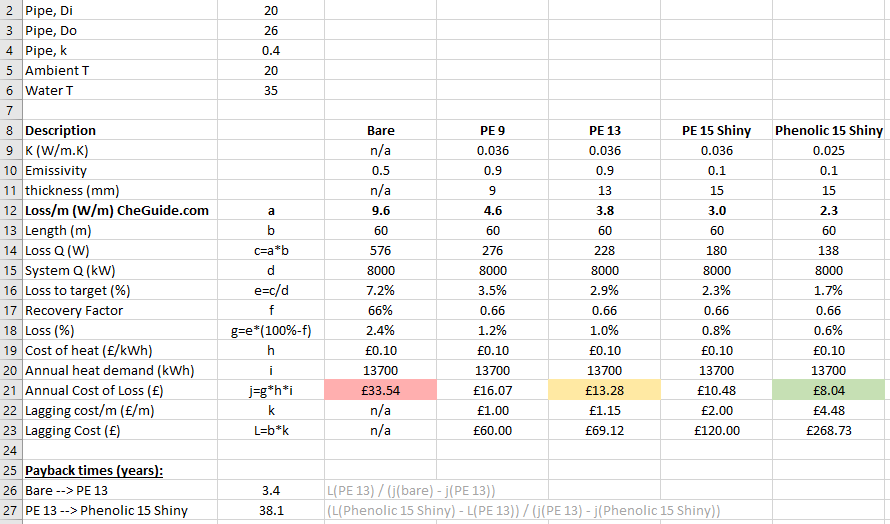
On another thread I think I worked out that there is little point in insulating domestic hot water pipes unless you have a circulatory system. Cold water pipes should be insulated to avoid condensation. I've been wondering about UFH manifold feed and return pipes and did some calculations I thought were worth sharing: I adapted the pipe insulation spreadsheet from the CheGuide.com. The table shows the amount of heat lost in the feed/return pipes. 'Recovery Factor' represents the usefulness of heat that is lost since it isn't truly lost, it is staying within the heated envelope, but in the wrong place. I intend to have a relatively uniform heat and so most of the heat will be 'recovered'. Various insulation scenarios are considered with the resulting annual cost of lost heat as well as the cost of the insulation (material only). The payback time for insulating PE 13 (e.g. ScrewFix) is just 3.4years. The payback time of upgrading from PE 13 to Phenolic 15 Shiny (e.g. Kooltherm) is 38years. That ignores interest/inflation. There is no consideration of the carbon costs, either of lost heat or insulation manufacture. 'Cost of heat' is based on £0.30/kWh electricity an a COP of 300% which is hopefully pessimistic, but who knows these days. Not everything comes down to cost obviously, but using 13mm PE insulation looks to offer the best compromise for my system based on a relatively low 35C average flow/return temperature (e.g. 38C flow, 32C return). I hope to have lower temperatures than that, in which case the payback times go up higher. If however you run your ASHP flow temperatures at 65C, the payback time of upgrading to Phenolic 15 Shiny would be about 13 years.1 point
-
Day 48 of the build was a big one, we poured the ICF ( PolySteel) walls. Following the slab pour 2 weeks earlier, we start on building the PolySteel ICF walls. I've no experience with ICF, and thus can only comment on the usability and quality of PolySteel. The process is straightforward, all the blocks are t&g on all edges, so you simply use a bead of fire rated foam and push the blocks together. Each block clips to the last with two **clips joining the metal mesh inside the block together. Our rebar spec, was I think over the top, but basically we had a pair of 10mm starter rebars vertically every 300mm centres so the first two rows we had to position the blocks over the starter bars. In addition to this each corner block( 2 left-hand and 2 right-hand in our case per course) have 4 off 10mm L bars and pairs of 10mm horizontally on 300mm centres. Our perimeter is just shy of 40M, so all in that's just short of 2KM of rebar. Point 1, the spec calls for 400 mm L corner bars, (which I had cut and bent) you can't fit these. You can get 1 in but the other 3 need to be shorter on one side to get in, this was more so on the first two courses with the precast starter bars in the way. I ended up cutting 1 to 400mm X 300mm and 2 to 400mm X 200mm per set. These were tied in place to the metal grids in the PolySteel. With so many starter bars I made the ones located at windows longer so that they were around 80mm below cill height l, (this was when I poured the foundation.) This saved me adding extra verticals bars after, and in the main worked out. To cut out the windows I had to figure out a good way to cut the blocks. The Steel mesh in the block has a 30mm plate that sits under the surface of the IFC to allow you to screw into with self drilling screws ( one of the reasons I liked this block) For window openings This needs to be cut, I had an old rage metal circular saw and this worked amazingly, if I did this again I would buy one for the job. But I'm never doing this again😂 The most difficult part was cutting the mesh, this is 3mm bars, I used a small cheap set of bolt cutters which worked but was difficult getting into the cavity of the block and then squeezing the cutters. The angle grinder was too cumbersome in the tight space, and ripsaw with metal blade just too bouncy it felt like a bodge, so patiently cut hundreds of 3mm bars to make the openings. I think a small cut off air grinder would work well, as I did try a Dremel type cutter but this was painfully slow. At two courses high it was time to start bracing. This was done by fixing 4x2 to the blocks on 1M centres and at every opening ( the 4x2 will be re-used for studding later) I secured the timber to the blocks with 100mm baypole screws 3 per block in pre drilled holes. Below shows a bit later on but a 4x2 ring beam tied to all the verticals. We also tied the long walls (N&S) to each other with long ratchet straps and more 4x2. A little security if the winds picked up. Once 3 course we're built, I made the boxes for the windows and doors, basically 6x2 screwed through the ICF into the timber. These we're then sealed with some silicon and or foam. On the back of the 6x2 I screwed in some coach bolts to act as a key to fix them to the concrete. Each course we added the corner and horizontal rebars. We then erected some Kwikstage scaffold around the inside perimeter. This is old rusty scaffold but wasn't ready for the scrap man just yet. The bays fit really well, snug if you like. When I purchased the scaffold I also got thrown in a load of 5ft tubes, swivel, couplers and clamps. So I went around and braced the scaffold and tied each section to each other with short sections of pole. This made the stage rigid, lastly used some standards to brace the North and South walls together, creating a mesh in the middle. The final course of ICF seemed easier to cut out the openings, not sure why. All blocks were screwed to the vertical 4x2 and then the vertical 4x2 we're plumbed and tied to the scaffold. This made the whole lot rock solid. I used string lines to make sure the walls were straight and plumb before fixing to the scaffold. Now we put in the vertical rebar, pairs of 10mm rebar on 300 centres. Pic below shows the corner L bars before the verticals were fitted. To pour the concrete, around 12M³, a pump was put of budget as they would have to come from Inverness, we were quoted 2K, so reverted to the 360 bucket method. I created 2 pour boxes and 1 corner box put of OSB, to act as a funnel for the concrete. We poured in 600mm levels and vibrated the concrete. Moving the pour boxes along as we went. The first wagon had 7 cube so this would be over all the cills, once the cills were full, we capped them off and screwed some 4x1 in place. All working like a dream... When vibrating I noticed some of the ** clips holding the blocks together pinged off.. I went down to check levels etc, and noticed that one corner block on the SE corner, between a long window and large lounge window had moved😱. The t&g was holding but the was a 15mm gap. Ok panic starting now. We stopped pouring here and moved moved on but needed a solution. I'm not proud of this, but we used a haulage strap, through the window around and out through the door and back and ratcheted the section of wall together with some timber on the corners to prevent the strap digging into the ICF. Followed this up with some OSB and timber straps. Then the cheap electric vibrator we were using in to window voids gave up. Couldn't handle the stress of the day, my heart rate was in triple figure now. The hired in vibrator we were using from the top was still going strong, and I also had some cheap plate vibrators to hold against the walls which were doing enough. I went around all the corners and added more bracing, berating myself for not adding large strips of OSB on all the corners.why didn't I do that. If your reading this because your planning to use PolySteel then screw large sheets of OSB to the corners.. Ok, heart rate still in the hundreds, but the first truck was done, we were level, with the exception of the problem SE corner to about 1.4m. everything was holding and plumb. The moved corner will be ok, as long as it stays put. While waiting for the truck to go back and refill, around 90mins, I went manically around screwing more battens to the corners. The concrete was setting up on the SE so I was feeling a little better, but worried about filling up the corner With the excitement of the corner issue and my manic battening, I forgot to add the additional supports for the two large windows, these were left out so we could fill the lower part of the wall from the 360 bucket. We start the second lorry on the West wall, working out way to the SE problem, all working well, vibrating and filling as we go, shuffling the pour boxes around. Then the hired vibrator started smoking and gave up. Back to sticks and the flat plate vibrators for the last section. We skipped the SE corner and worked our way along the S and then W walls. With about 3m of wall to complete the digger shut down. Spanners out, more fuel, clean the filters, bleed the injectors, no go, dead. Ok. Fire up my old loader and get it as close as possible and shovel it in... No this wasn't happening, the steering piston decided to come off, an old fault that came back just at the right time. FFS anything else. Yes, those supports for the lintels I forgot.. Pete!! Those lintels are sagging argghhhhh. Acro props and some more tense moments we jack them back into place level and plumb. Ok back to the other fire. We were contemplating buckets when my neighbour brought his Manatu with a big bucket and managed with shovels for the last bit around 1/2 a cube. While the tops of the walls were being floated, and in anticipation for excess concrete we managed to fill some shuttering for a front path, and the start of the ramp to the rear door. This is the offcuts of ICF from the windows that will form the path and increase the levels at this corner hopefully softening the height in this corner. So it's done, it's up, my heart rate is now normal, and I think I dodged a bullet or two. But with DIY and house building you have to adapt to react to the events as they unfold. My list of favours I owe my neighbour has expanded. But we can sit here today and be proud of the product. the SE corner will need a little fettling to get square,but nothing to worry about. On wards and upwards. Day of rest today, just off the strim around the pods, guests due later.1 point
-
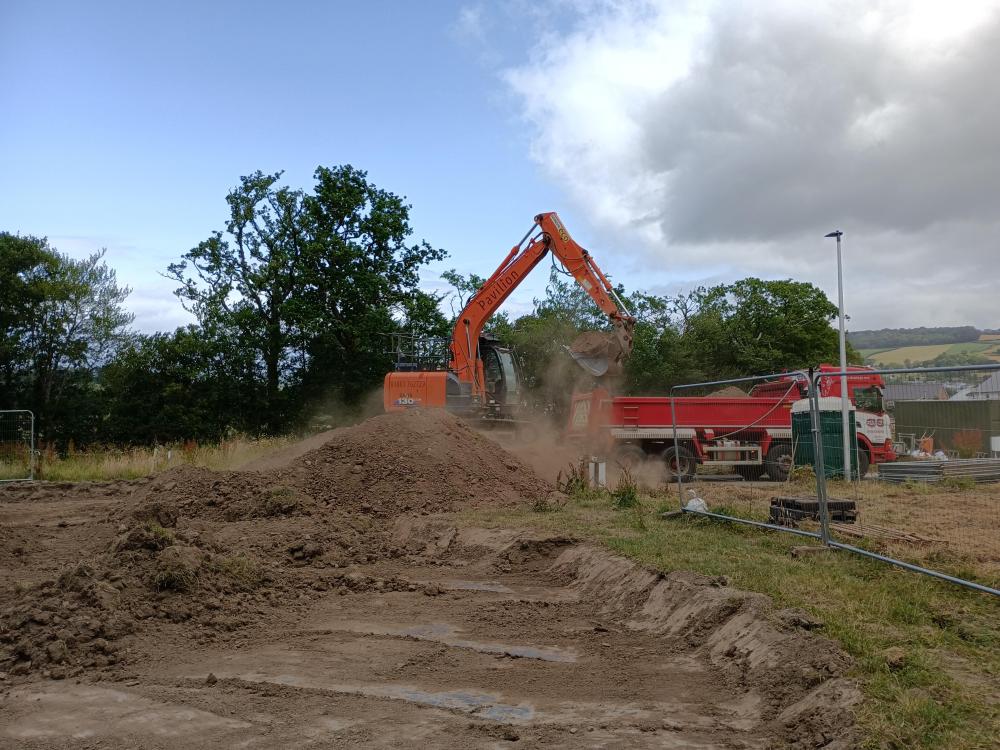
It wasn't ME who started this! A couple of members have been to my place and will likely agree the amount of work needed etc. After a hard 5 days last week I came home and as I pulled up in the drive could hear a digger. I walked round the back and SWMBO's first words were "Don't moan..." The house is surrounded by mismatched paths and patios in some cases patios over cracked patios! The common theme is that they either slope towards the house, are higher than the internal floor levels...or both! 😂 Really it all needs to come up. Anyway...we'd discussed extending the patio area a few weeks back. I suggested doing the opposite side of the house first so we could store various materials out of sight, sort the drains etc. It would appear that fell on deaf ears. On a whim she'd gotten her brother with his digger to, well...start digging! Various reptiles & amphibians appeared and were safely relocated. He then dislodged an old clay soil pipe along with the bees nest and got stung. The "Don't moan..." was because he'd also found the oil pipe! 😂 I did a 180 on the path and shot down to Screwfix for a few 10mm pipe couplers. Been pegging out the excavation tonight using the laser to see what levels I have. Paving slabs are coming free hopefully. Aiming for this to be as cheap as possible.1 point
-
1 point
-
Best guess is a belemnite fossil. Like an ancient squid but with an internal skeleton. I'm giving it to the girl who identified it as she's been seriously ill and thought it might cheer her up.1 point
-
1 point
-
How big is your new build ICF house to require an 8.5kW heat pump? Let's is know U values, size, single storey etc, airtightness and UFH or rads? I'm at around best part of 225m2 (including plant room) and have just installed a 6kW and could have got away with 4kW. Assume the quote doesn't include the heating system as nothing is mentioned? To me the price looks like a total rip off!1 point
-
With a price tag to match and most users won't use 10% of what it can do. I quite like Draftsight for 2D (£200 PA) and OnShape for 3D (Free - but you have to share your drawings with anyone who wants to look!)1 point
-
I just use cad light now, I have used cad architect, but it’s not necessary. you can buy an add-on for sketchup that makes it easier to set up pages, it makes it to scale. I think it’s called LayOut? I find Cad the easiest, maybe you could get a trial version and do it in 30 days?1 point
-
Thanks to the admin for allowing me to join. I live in a very rural part of France, in the hilly lower part of the massif central. I was prompted to join because of a rather sad event. Our next-door neighbour was several years into an unusual ecologic self-build project when he died, very unexpectedly (and nothing to do with the building). His widow will be selling the unfinished project at some time, and I wanted to get some ideas here of what options there are for finishing the property, and perhaps what value it has in its current state. I am consequently more likely to be lurking than posting in the near future.1 point
-
Interest rate on savings isn't great. You may want to reconsider toughing it out in a caravan until the build is complete instead of spending £12k/yr on rent and then some on council tax etc. Look at it this way, you'll have £12k more per year to get your build closer to completion by not renting if that makes sense.1 point
-
Hi @steveoelliott Yes this sometimes happens... Otherwise search on ebay for Basin waste ball joint. - a few choices...1 point
-
Hi @steveoelliott The pin that goes into the waste has a ball on it. The nut with the green on in the photo tightens up to seal it. Undo the nut, wipe any gunge off. petroleum jelly around ball. Refit nut. Do up a bit and feel the resistance on the sink plunger system: to easy need tightening. Too stiff undo a little. Good luck M1 point
-
100mm of concrete will hold plenty of weight. Unless it's like Everest it won't make any difference. It's not going to be like soup and run down the hill. Tarmac laying is a skilled job. You will need plenty of tools like rakes and shovels and barrows if it's hot. Plenty of red diesel on each to stop the tar sticking to them and get it in as fast as your able. If it goes cold your in deep sh1t.1 point
-
I have added to my system since . Doubled pv , added SE battery . Ufh of uvc and ASHP . We are ( as you can imagine ) very well insulated. I personally find the house too warm even in winter - SWMBO begs to differ . In essence I’d be happy with zero heating all year round - that would save a few more quid 😁1 point
-
Then we all wait for the next big thing and actually do nothing . The number of times I’ve been told my EV is no good as we will “ soon all have hydrogen fuelled cars “ - which clearly it isn’t possible to produce hydrogen in the quantity required . Even if a home hydrogen battery ( or whatever ) technology came out tomorrow; so what ?1 point
-
Great stuff - exciting times ahead. As for starting a blog, I'm sure one of the MODS will be along soon to point you in the right direction. Hopefully you will be able to record your progress, not only for your own benefit but others on here too. Good luck. @ProDave @PeterW @MikeSharp01 @newhome etc1 point
-
1 point
-
The problem with the excess pv into water is ; it is the most efficient route ; but how much hot water do you need in summer ? . My general view is stored electric I.e battery allows for *any* use .1 point
-
1 point
-
@DazRave You need to decide your “ reasoning “ as you’ll get multiple views . I personally think of all this like a car . If I want flash , fast then I’ll buy what I want and ROI is meaningless. If I want efficient , low cost then I’d choose a different car . Are you simply trying to lower bills ? Do you want your annual lecky bill to be zero ? ; would you like to ‘earn’ from excess PV etc ? People fixate on ROI - which is fine if that’s the ONLY thing that matters . Even then what’s a ‘good’ ROi ? 5 yrs ? , 10yrs ? ; compare it to a savings account . Your reasoning for having pv/battery determines what’s important to you and (expletive deleted) everyone else 😎1 point
-
You're absolutely right about efficiency, but again if you're not using much you're not wasting much...back to the mantra of always minimise your inputs. Utilita have a gas options that has no standing charge, just a higher rate of 23.7p a kWh making it a very good option for users who don't use much gas. Regarding annual service, essential for a rental property but optional for your home. If the boiler is undisturbed and working properly it should not be an appreciable safety risk provided you have good mains connected CO alarms fitted. Rightly or wrongly I work on the principal of if it's not broke then don't fix it. I didn't plan solar into our build, but having added it I can't imagine trying to run without a battery, even given how expensive the battery was.1 point
-
Cheers for the help btw guys No offence taken to any accusations of penny pinching btw I’m just glad to hear I don’t need to worry too much1 point
-
Hi @DazRave In my humble opinion I would install as many panels as possible as long as the mains doesn't need to be upgraded. You will produce too much energy in the summer and not enough in the winter. We also have battery back up. both are DIY installed - with DNO permission. We have AIM and APE, That is Airtightness, Insulation, Mechanical Ventilation with Heat Recovery, and an Air Source Heat Pump, Photovoltaics and an Electric Vehicle. We installed our own PV system (not including batteries) and it cost about £4k for a 5.12kW system ( that is to say all things being perfect on the best sunny point of the best day the system would produce 5.12kW an hour - never seen it by the way) Inverters usually allow you to instal up to 20% more panels than its limit. Our inverter is a 6kW one but allows up to 7.8kW of panels. We judge our PV system (not including batteries) would last about 7 years so the daily cost is about £1.60. Batteries are a funny thing, and unless you are paying more for your day time electricity and less during the night on some scheme I would recommend thinking long and hard about your decisions. In the winter you would have almost nothing spare from the PV to charge your batteries In the summer you would have far too much to charge your batteries. In the other times you would have power to charge your batteries. If you charge your batteries using cheap rate night mains you waste the spare power from the PV for about 5 months of the year OR you charge the batteries using the cheap rate night mains and waste the PV power. When you do all the maths, if you have PV, the most logical system I see is one that supplies enough over night power to run your night time low demand load. This system can support say about 3 days worth of night time energy, but go beyond that and the figures don't really work. If you want to go through the iterations leading to the same conclusion PM me. This goes for anyone else as I would love to know of the exceptions. Good luck Marvin PS. Don't forget the significant losses converting AC to DC and back again.1 point
-
The issue you will have is how will you turn the equity in your current house into cash ? Maybe extend mortgage ? Self build normally works by you buying the plot outright and then haviing a deposit to the build in cash. Selling up and finding a cheap renter (put furniture into storage) would be my preferred option over a caravan and all the issues that come with it.1 point
-
No and no. Some roofers have been the least skilful, biggest cowboys I've ever known. I think if is that nobody normally goes up to inspect their work. On the other hand general builders know a bit of everything. So I think you are probably better off. Apologise if you have been rude or doubted him to his face. Perhaps offer extra payment for getting on with it despite his subcontractor letting him down.1 point
-
How much is that 'lite' version?1 point
-
‘Can you add the steel fixers invoice amount to yours so that you can pay him then we will pay you because he doesn’t pass our compliance checks. ‘ 15 people planning the Xmas party for 3 days, monthly re painting of the site hoarding etc. I did 2 sites for them and saw 3 subbies go bust. Things went downhill for me after I sent them a clean up notice after their assistant site manager installed a TV in the canteen leaving the mess all over the floor. This was after they stopped me working because my brick stacks weren’t plumb. Never ever again.1 point
-
I've got three manifolds: 2.5m, 8m and 15m from the low loss header. Doubling as flow and return gives a total of 5+16+30=51m. I pessimistically rounded up to 60m. Payback times should be independent of length in this calculation.1 point
-
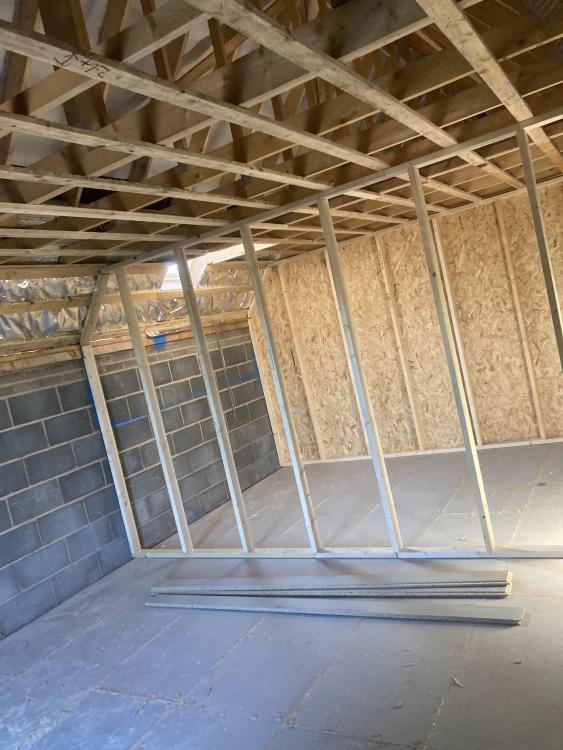
2 x 2 is plenty. id use a top plate to catch a few joists/noggins and frame off that like an upside down lantern upstand.1 point
-
2 x 1 battens would be cheaper and easier, there is little weight to support1 point
-
You can get 'diverters' that sense when the system is exporting power to the grid and turn on the water heater, or battery charger. The thing to remember is that PV is not a constant power, or even a normally distributed power curve. It is very variable. If you can find a local WeatherUnderground station that has a solar meter on it, you will see how, even on a sunny day, there is often a lot of variation. Two very very rare days in a row. 3-6-23 4-6-23 5-6-23 6-6-231 point
-
You need a solar diverter. Good in summer not that good in winter. As the amount of solar irradiance is low.1 point
-
I insulate all DHW heating flow and returns, but where it splits to go to UFH manifold I have left it uninsulated as it's useful heat.1 point
-
The measure of electric are kW that's the power, kWh is the energy usage. So a 3.4kW array is the max power the array can generate. If it generated 3.4kW for an hour, that would 3.4kWh, if it generated for 2 hours that would 6.8kWh and so on. Panels are generally sized in watts (W). Panel sizes carry slightly depending on efficiency. My 340W panels are about 1.7m X 1.0m each. So 10 panels in a line would be 10m long by 1.7m high. Do the maths on pay back, electric is 29p per kWh, so you have a lot of kWh to generate to pay back a £10k spend. Have a play on here to take a look at yield. https://re.jrc.ec.europa.eu/pvg_tools/en/tools.html#api_5.11 point
-
1 point
-
first bathroom shower and basin waste in and tested with no leaks. fall of 22mm/m in the end which is within the max/min @Nickfromwales mentioned above. very happy with it all. got some drop ceilings and plaster boarding to do this week then I'm back on the plumbing at the weekend.1 point
-
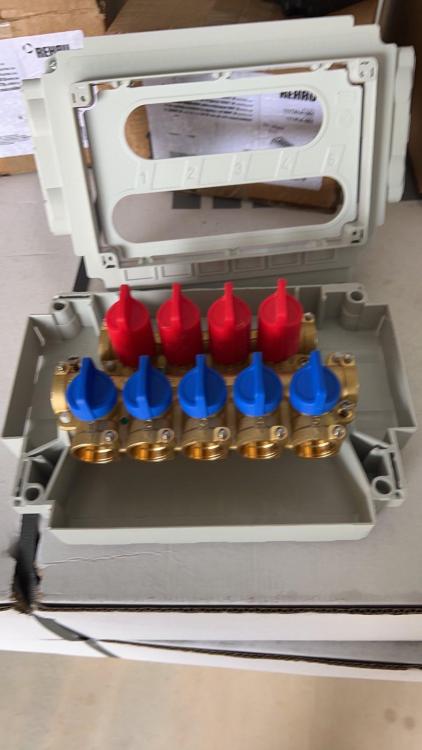
Clevercouplers will help you when it comes to zone valve removal, worth looking at.1 point
-
1 point
-
I hope so; I did it on my extension roof abutting the main elev. No problems in 6 mths. I think the width of mine was nearer 125 than 165.1 point
-
1 point
-
1 point
-
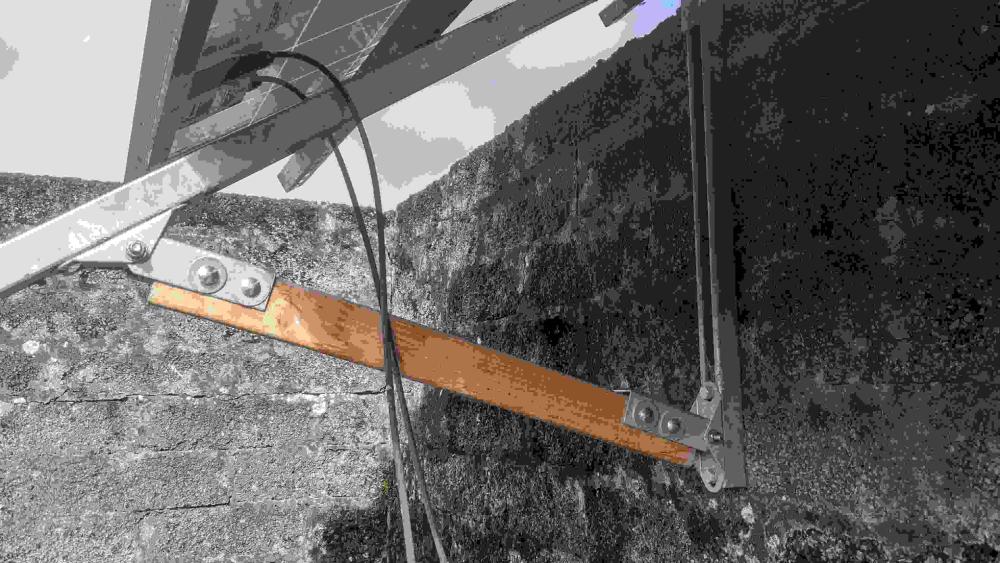
I have mine wall mounted with a vertical channel every 2 panels with a hinge mount to the 6 panel frame. I have 2 sets of wooden beams for winter and summer settings, less than a hour to change each set of frames for 6 panels from one season angle to another. The hinges are at the mid point with equal weight above and below so as long as there is no wind a set of 6 panels will pivot using one hand.1 point


