Leaderboard


Popular Content
Showing content with the highest reputation on 04/14/23 in all areas
-
Perhaps ask him what he thinks of the insulation requirements of the Building Regs? Don't say any more but note if he see it as an expensive regulation or inadequate target. If you are going for ASHP ask him what he thinks of them. He should say something about them working well if you have UFH and a well insulated house. Ask him if he thinks airtight houses are unnecessary. Hopefully he will tell you its important. If you are on a self build mortgage that has strict stage payments you might want to sound him out on what stage payments he normally wants. It's not a great idea to agree exactly the same schedule with the builder as your mortgage lender but they must be compatible schedule's obviously. Perhaps don't tell him what they have offered you. You might want to negotiate more favourable terms with the builder so you retain a bit more to the end. It's not unknown to retain a percentage for a year after completion to cover snagging. Ideally find out where he's working at the moment and go look at that house. Is the site tidy? Neat work? Messy? I've said it before - If you ask him to take you to one he's built it will probably be his mother's house 🙂3 points
-
I do a lot of lighting design, and these are great for lighting the vaulted sections. Look on the Tornado lighting website for the full range of plaster-in flush / trim-less stuff.

 2 points
 -
Just make sure the sand can't be washed out at the edges?1 point
-
Self levelling laser to get the correct starting points at both ends then a chalk line and snap a line.1 point
-
Hello all. A bit of technical stuff and a few tips on self building an insulated Kore (say) slab. Yes spot on. For a bit of fun here is an bit more of an explanation as to why and what is more important (in my view) for insulated raft design and construction on self builds. Roughly the plate load test involves a stiff metal plate, usually 300, 450 or 600mm square, a jack and a strain gauge and a load gauge (ring). The plate goes on the ground, and you jack against something heavy. You can create a big cradle weighed with kentledge.. expensive for smaller stuff or you can use a 16 tonne excavator to provide the kentledge. Excavator is the easy way as you drive it about.. if you have the room. You start to jack measure the amount the plate sinks by at what load, plot a graph etc and from that you derive what is called the CBR ratio (California Bearing Ratio) based as a percentage value. The CBR value is a number that is often desired for highway design. In a domestic context we may want to know this if say we are building a few houses and the shared access is to be adopted by the Highways agency or for some reason the fire brigade have a particular requirement for access during a fire.. they need to know the access will not sink under the weight of a turn table ladder.. you would have to have an exceptional site for this.. but just to mention anyway. Another time you may need to know the CBR ratio is if you are doing piling, need a heavy rig and need to design a piling matt for the rig to safely get in and do the job. The piling Contractor will do due dilligance and often ask for this number especially if they are designing the mat. If you find you get stuck on this there is the option of proof rolling. Here we may run a roller with a dead axle weight of 5 tonnes over the ground.. if it moves about like pastry then we know it is not promising. Now a key thing about the CBR (plate) test is that it only gathers good information down to 300 to 600mm, much depends on the size of the plate and the ground you are testing. The pressure / stress the plate exerts on the ground is roughly the shape of a slightly extended (droopy) light bulb (incandescent). Lastly it is possible using some rules of thumb, charts to roughly convert the CBR value to a value that is roughly equivalent to how elastic a material is called the modulus of elasticity and this is good as we now have units that are compatible with our hard core, slab insulation and concrete slab above.. not quite but closer. But on an insulated raft we are probaly using an insulation 300mm thick on 150 - 300 mm of well compacted hardcore. These spread the load a lot so the underlying formation ground is much more evenly loaded. The CBR value is now not really that useful any more to us on BH. What is useful is the value the SE puts on the soil they see in the hole as this gives them the allowable (presumed) bearing capacity of the ground. Often you see a value of 100 - 120 kN/m^2 in decent clay soils. That value equates to you being able to put about ten tonnes per square metre on the ground with the expectation you might get some 15 -25mm settlement in a clay soil. Houses are designed to move about a bit. Now if we know the allowable bearing capacity of the underlying soil, know we are using good well compacted hardcore, know what kind of insulation thickness we need and roughly what kind of concrete slab is going on top we can then design all these layers for the loads. What 99% of the time drives the design (Kore etc) is the slab loadings (slab point loadings / spread out loads) and how these interact with the insulation directly below. This is the critical bit as it drives slab thickness, amount of rebar required and the complexity of the slab / rebar and that is one place where money can be lost. The SE then iterates the design to get the most economic slab by balancing rebar, concrete thickness, concrete strength, concrete shirinkage (movement joints, water bars if applicable) and the underlying layers of insulation etc. OK. Things some you can look / think about when doing an insulated slab to set you on your way for a good job. 1/ When you excavate out the ground to the level that you are going to start from.. called the formation level look after the virgin ground surface, be quick to get a covering layer on it if say clay or friable chalk to stop it softening in the rain / frost or drying out too much. remember that value of 100 kN/m^2 .. if you soften the top 50 -150mm that bit it will move later. The last time that soil may have seen daylight could be some 100k years ago so treat it gently. 2/ Lay your hardcore in thin layers 100 -150mm thick and get a good whacker. Take extra care at corners.. try and get the compaction even.. no soft spots but also no really hard spots. Hard spots can break the back of a foundation.. strip foundations can suffer in particular if you have say a big boulder that does not move. What you are trying to go is to create a platform that moves up and down in an even way. Rafts are less succeptible but never the less. 3/ Often you need to run drains under and that involves excavating a trench and back filling. The objective here is to try and backfill so the filling is about as squashy as the ground next to it. If you were to say backfill with a lean mix 10N concrete you create a really hard spot on a line that invites a floor slab to crack, if you chuck disturbed clay back in that has got wet you'll now have a nice soft line under the slab. Hope this helps someone.1 point
-
Yes, I have moved in and have paid council tax. I'll just send it off next week, I can't face a fight as I need the cash. And yes, I will be buying a bunch of materials next week to max out the claim, but I know certain things will be missed. Thanks both1 point
-
What about the ac to dc inefficiently ? - 10% is quite substantial1 point
-
They could probably eliminate the delay by running the inverter constantly but that might waste more energy. I suppose some types of load might also cause the inverter to switch on and off rapidly if the response time was too quick. I suppose that might put a lot of noise on the supply?1 point
-
The Facebook group will be private from tomorrow or Sunday1 point
-
There really isn't a definitive answer unfortunately. HMRC is completely inconsistent: they treat similar situations differently, they tell you one thing on the form but do something else when they look at the facts. It's just a complete mess. Be aware that HMRC will potentially use anything you tell them (e.g., moving in date on the form) along with any available public information (VOA register, even Google streetview in one case!) to show that the house was complete according to some arbitrary standard more than three months before you put in your claim. Personally, given what's at risk I'd be conservative and go with the VOA date. Can you buy the materials in advance so you can reclaim? Even if you put it on a credit card, the additional VAT will more than pay for a bit of interest if needed.1 point
-
Have you moved I yet? The forms ask for the move in date. Started paying Council tax? HMRC really don't seem to understand self builders. They like to think people finish their house, get Building Control Completion, then move in. Any other sequence seems to be a grey area. So if you haven't moved in yet its should be safe to assume you have three months after BC completion. If you have moved in there is a risk they may decide your move in date was the effective completion date. So three months from then. Anything else you might need to justify.1 point
-
Just a thought. Would it be effective for those involved to set up a Whatsapp group. I think it remains totally private so any tactics etc and discussions of names and incidents would not be visible to the other side.1 point
-
Any chance we can collate how many members have been affected directly with this financially?1 point
-
Can you show us that statement please? I'm hoping for your sake that this is a misunderstanding. It is unfortunately common for a ground report to summarise the worst part. They aren't designers. Then the SE works to that. I made my living partly from finding such overdesigns. These shrubs are zero risk. How far away is the hornbeam? It says on a drawing "clear trees", so that seems to be wrong.1 point
-
they're going in the ground so need to be walk-on-able (like your glazing) also i have a posi-joist in the wrong place so can only fit very narrow cutout spots. all of that means the availability in the UK is poor. found some Astro ones at £30 exc. (https://www.lighting-direct.co.uk/astro-terra-round-28-led-ground-light-brushed-stainless-steel.html) but only 1W, lower lumens and requires constant current drivers. also still 3x the price of buying direct! once i've found a brand i like the look of i'll take it apart and show it to my sparky and see what he says. after all that testing it will still be much cheaper. plus it's low voltage so risk 'should' be lower i guess.1 point
-
I’m close to leaving Isotex yes as may cause me to many problems. I’m not crossing off using similar blocks though I have to disagree with the air tightness, I built in Durisol and my air tightness (sap) test was unreal! I had it carried on on water tightness AND completion of everything. Inside had no issues with l, and I used the 170 internal walls. From raft to watertight we completed in 10 days so going to EPS which needs different things and fixing to it later is not close to woodcrete blocks (just my view) have you built in Woodcrete AND EPS?1 point
-
Sadly ALL these LED's are manufactured in China. The only advantage of buying from a UK seller is that they've probably already vetted the various models they've imported to eliminate the truly awful stuff.1 point
-
Bringing us back on topic? Like herding cats no1 point
-
Is today not a UK business / working day? I’d be sat outside the trading address before 5:30 today!1 point
-
Has anyone got anywhere with their bank and claiming money back, or is it the case if paid direct from bank it's def lost? Another question ...was Insulhub licensed by Isotex?, if so might make a difference, I do think we need to push Isotex in Italy on certain things for sure. I doubt we will get anywhere with how they work there/laws but worth the push to get some clear answers. I realise they have offered 45% discount but would be nice if this was just their opening bid..so to speak.1 point
-
My job for Monday!1 point
-
1 point
-
These piles would be encased in concrete at the top, then very tight within the clay beneath. Rust needs oxygen, so these should last a very long time.1 point
-
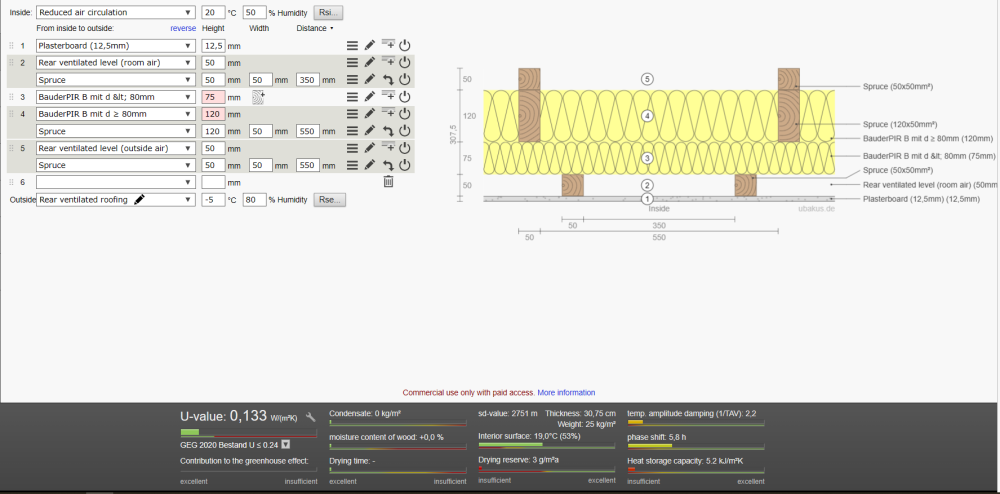
Your current proposal. I'll be ghrd to fit PIR between rafters and lots of foaming and waste. Long term my confidence I don't have much confidence in PIR not to shrink and leave gaps between the rafters. You'll need 175mm screws for 50mm into the rafters. I would put flexible insulation between rafters, far quicker and cheaper and more forgiving of any movement in the timber. Better for noise and fire too. A 22mm service cavity with 3x1 strapping @600mm cc would work well for 15mm plasterboard. 175mm screws again. What kind of membrane have you used above the rafters? Full fill may be an option. If you could do this with woodfiber you'd have a far superior decrement delay. You could go to 150mm screws too to save some money and make it easier to fix through the PIR.

 1 point
 -
Thanks I've ordered a new decent knife and a pack of new blades and will practice first. Luckily our flooring company sent out about 20 extra packs of flooring too many so we have absolutely lots spare Incase I make a dogs dinner out of it. Not sure how I'm going to cut out the circle of the waste in the floor but it doesn't matter if it's a bit rough as we won't see it.1 point
-
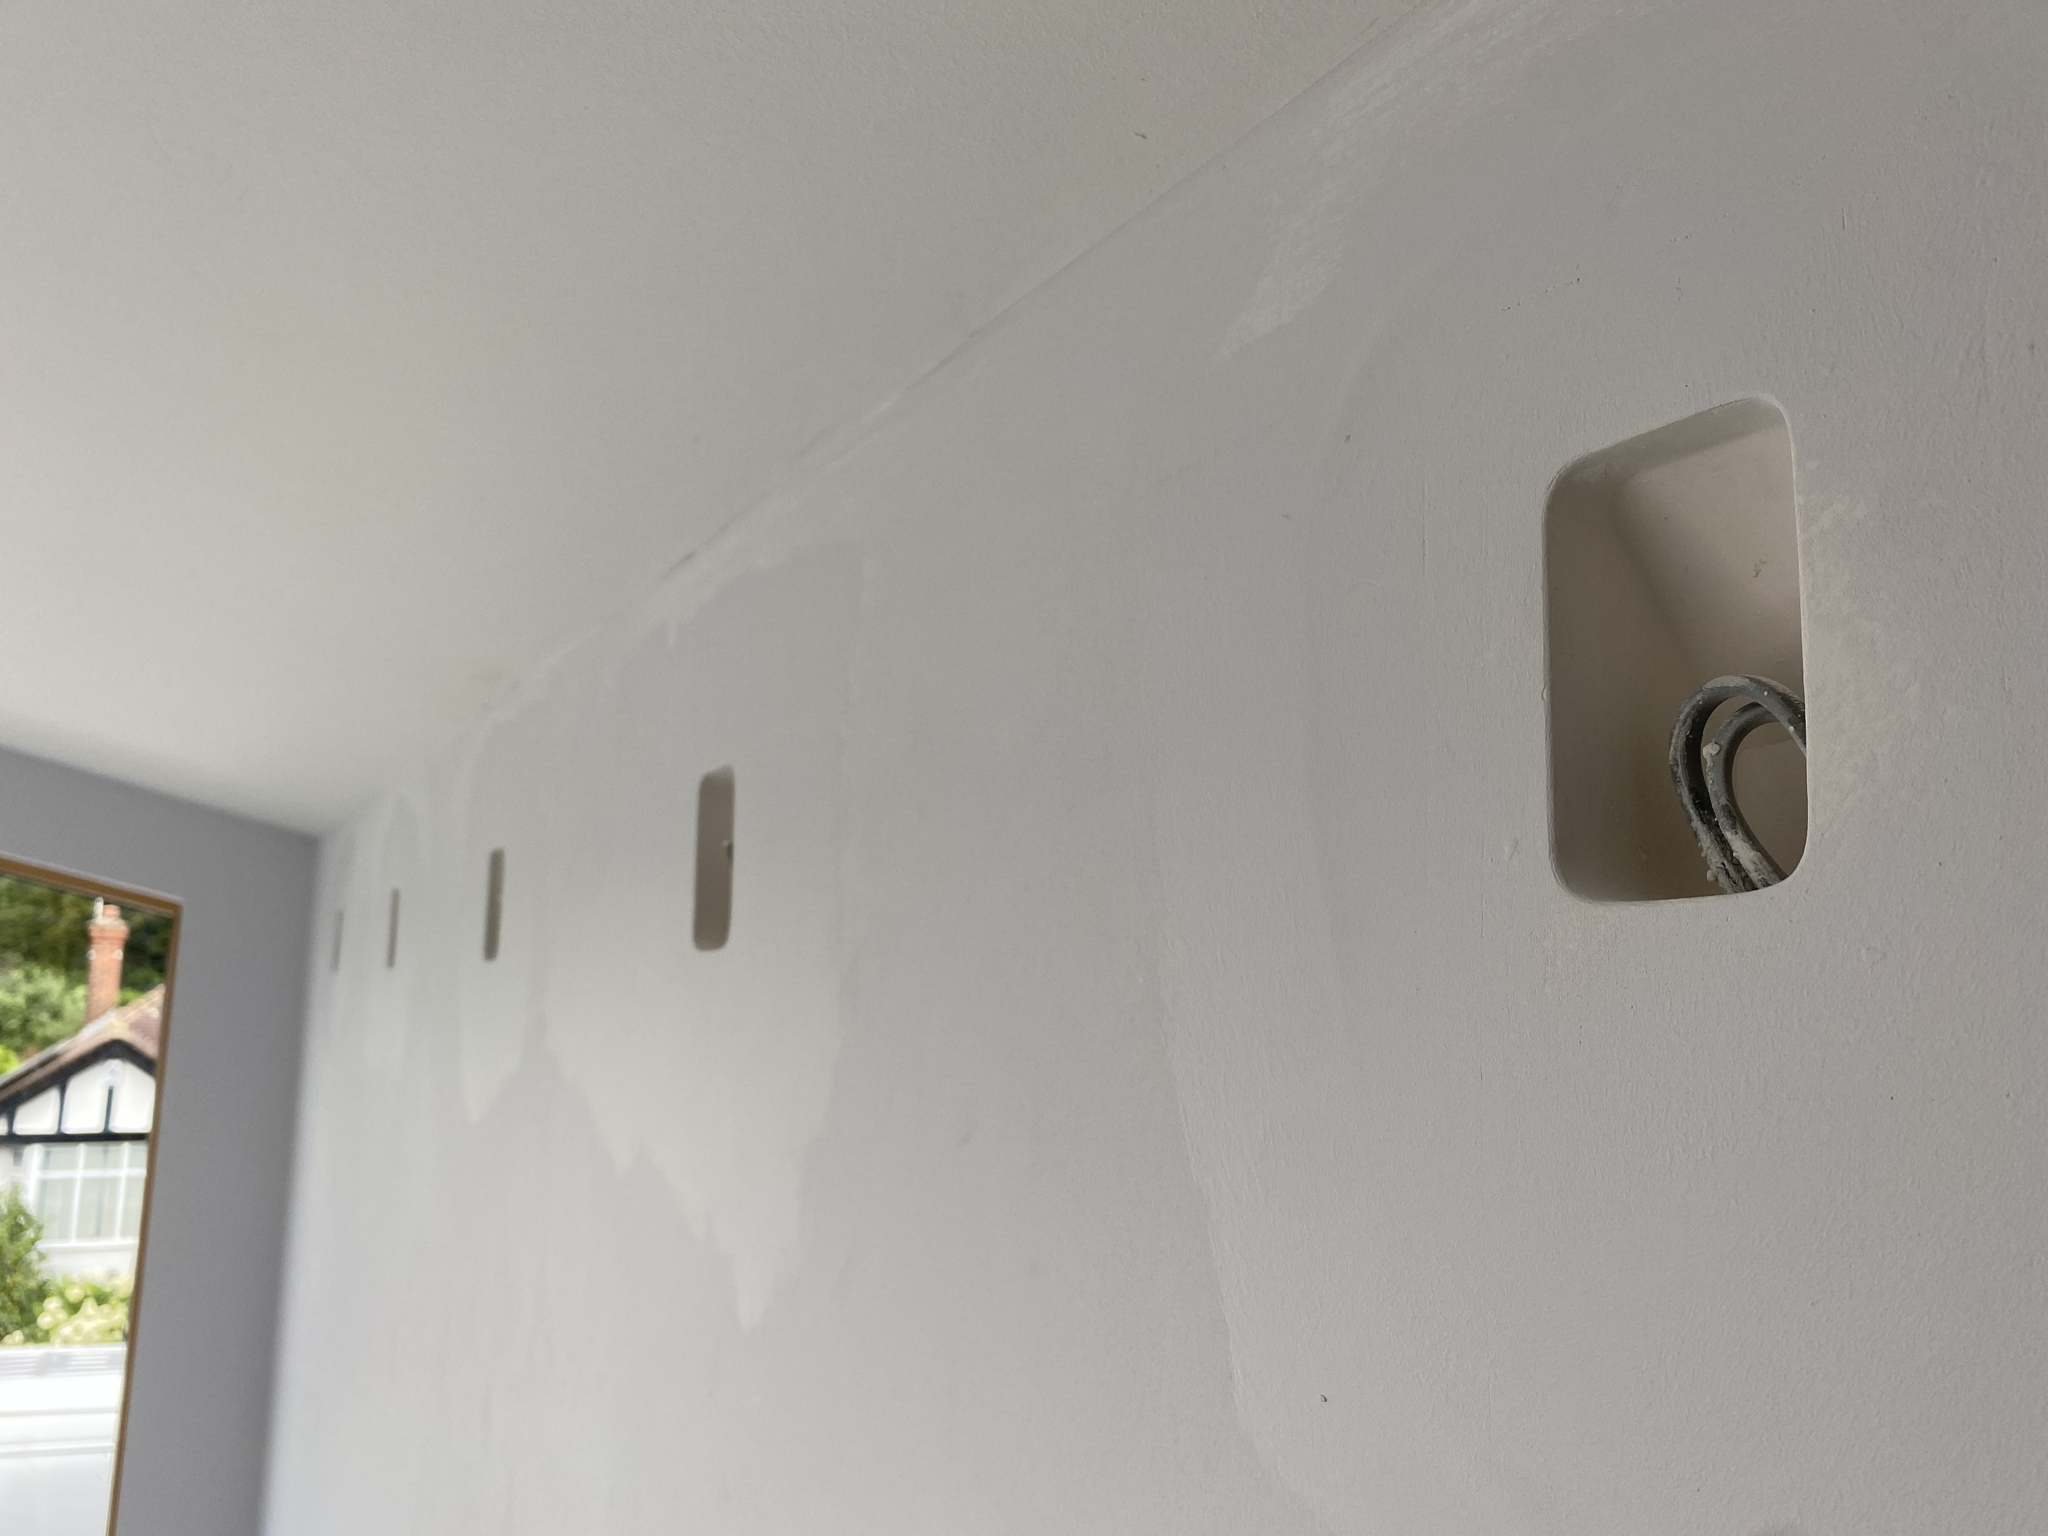
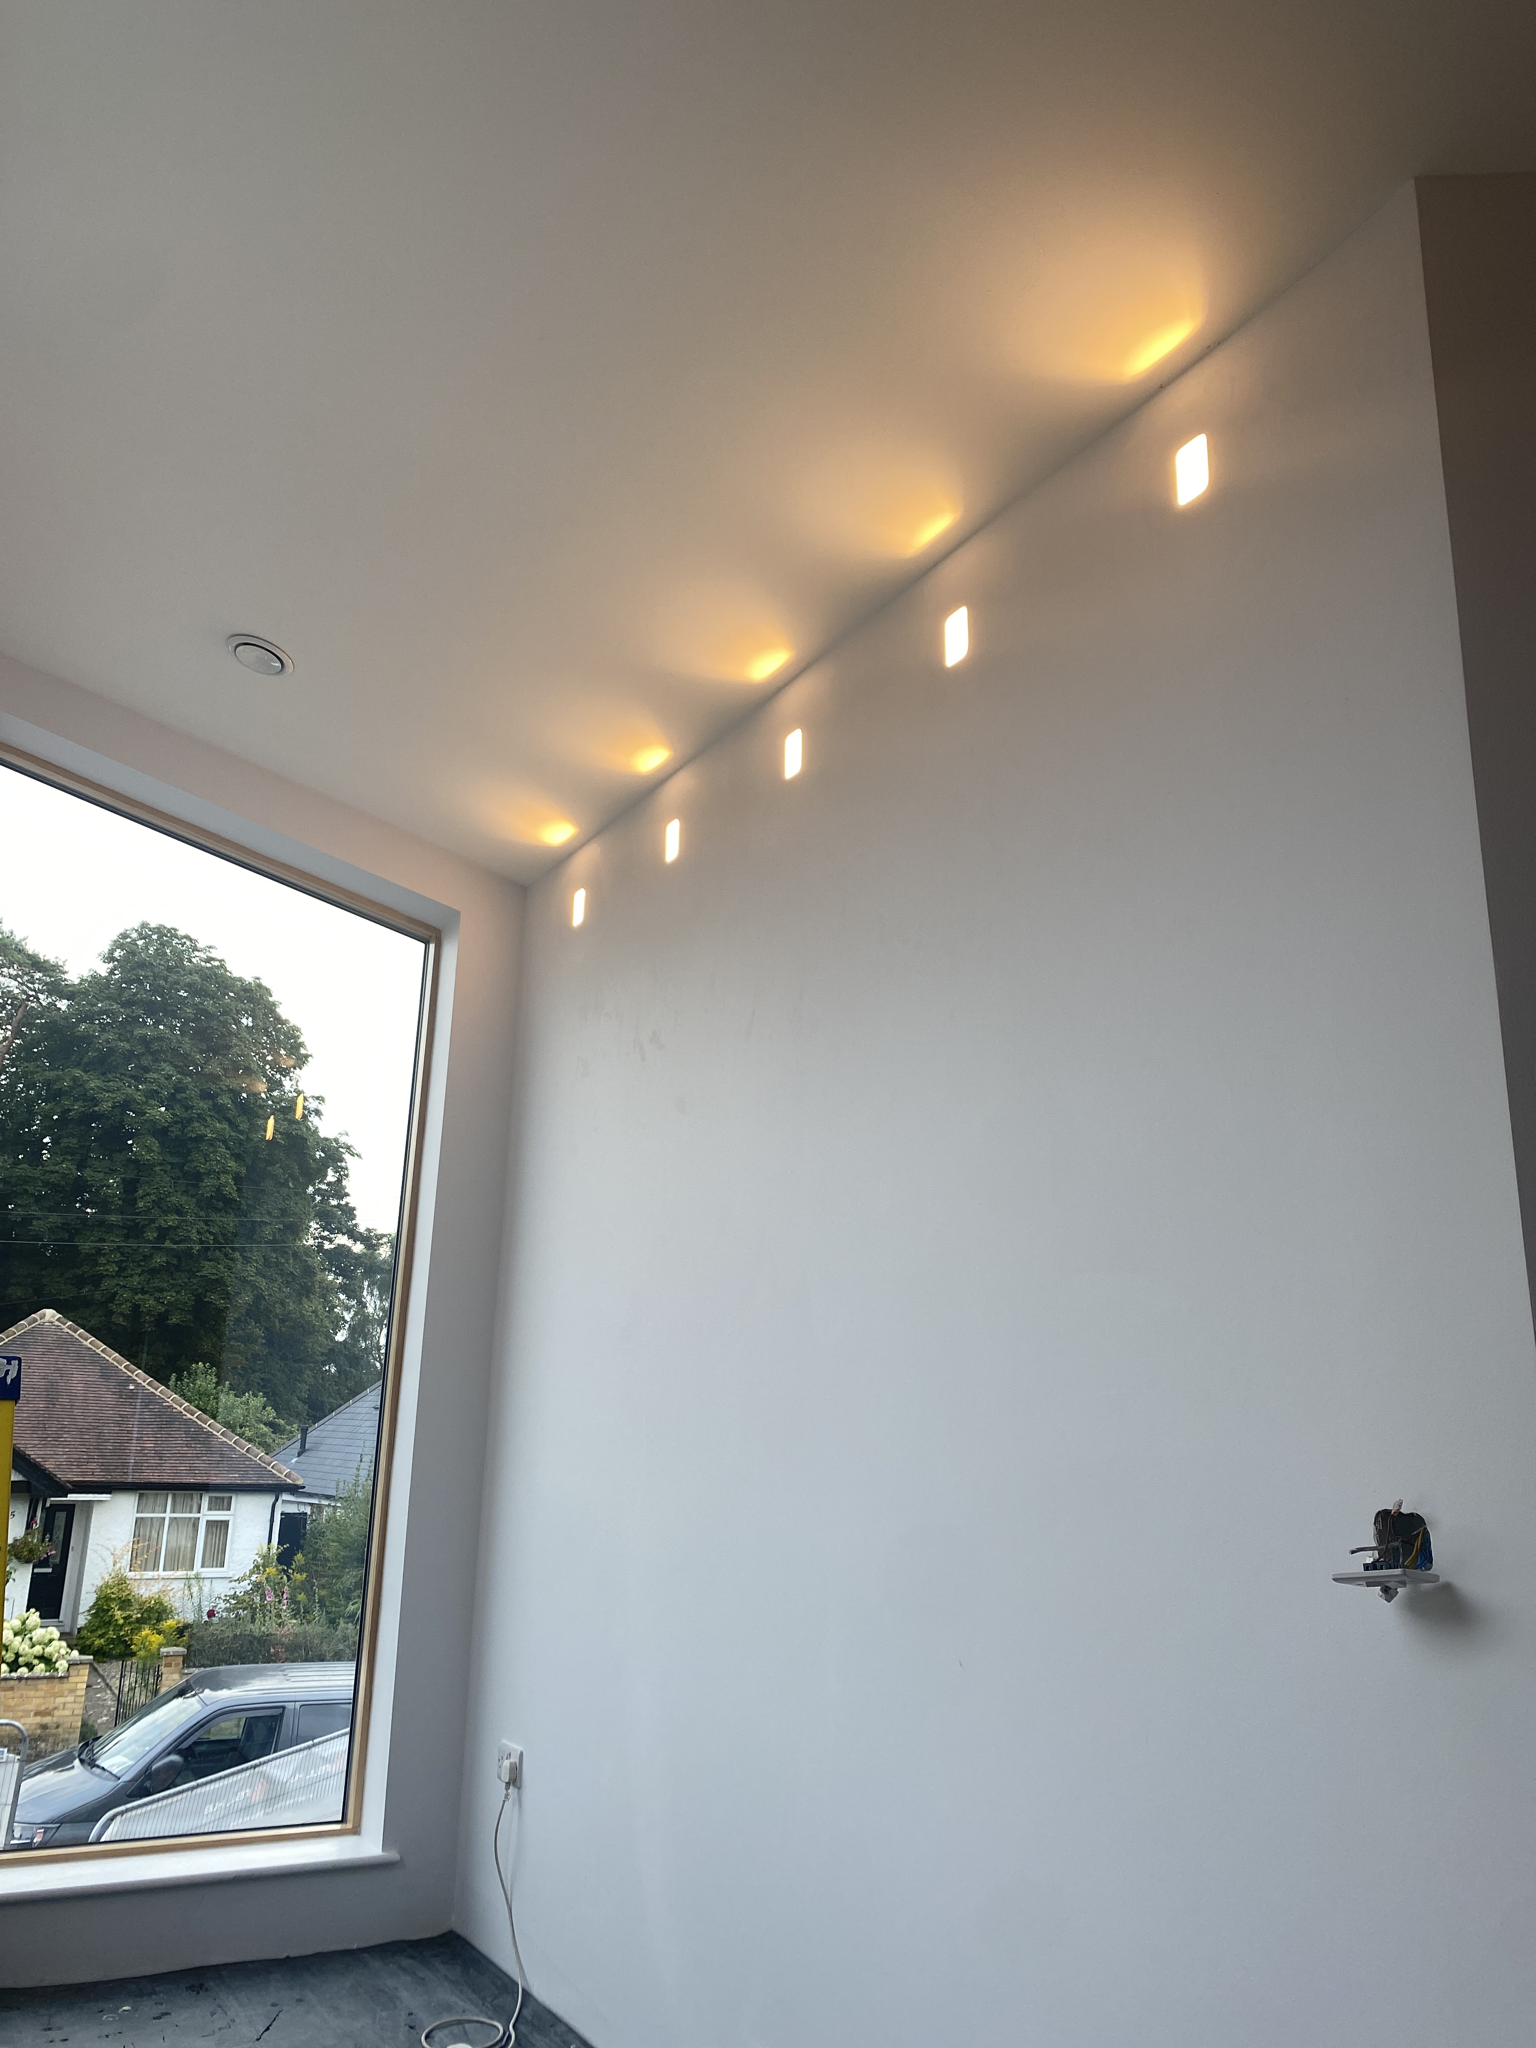
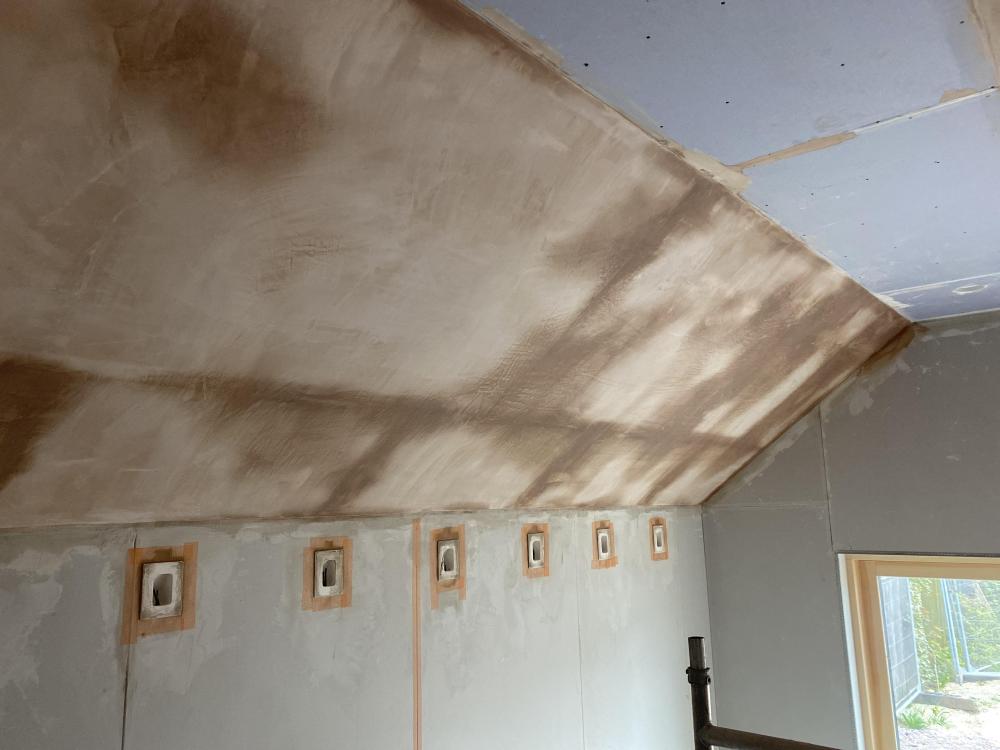
The downstairs ones in plaster, as they needed to be made airtight ( as they had to be recessed eg cut into the wood crete ) but the upstairs ones above I cut in after the plastering and painting ( mist coats ) were done. I then, personally, cut these in, mechanically fixed them with off cuts of plywood , sealed and foamed the cavity behind ( injected in after fixing the lights into place ), and then Toupret filler a-plenty. I let that all cure overnight, then sanded and painted to check for any imperfections. 👌👍😎.
 1 point
 -
Interesting. Please keep us informed how this proceeds. In summary, the screw system will cost a fair bit more but reduce hassle? Please remember that, from your SE information, the foundations will not be 2.5m deep everywhere, some being distant from the trees. It reduces to 1.3m, and you will still be digging at least 0.5 out to concrete around the screws. It's up to you of course. Make sure you get a fixed price for the screws and the SE knows your plans....I am guessing that SE will add reinforcement to the concrete, and the groundworker will have to hand dig around the screws....but I look forward to hearing more. One more concern. How long have the trees that were in the way, been gone? It takes a year or so for the ground to adapt to the reduced water demand.1 point
-
Hi all - a question... It has been said earlier that insulhub contracting is still trading but insulhub ltd is the one in liquidation. However, I was invoiced and paid insulhub contracting in march so my money must have gone to that company....or am I missing something? Anyone else the same?1 point
-
Here is a register that showed a few. https://www.istructe.org/find-an-engineer/members-directory/ I just set the location to Cardiff1 point
-
missing the edge trims, how have the flashed it into the wall ? https://www.rubberroofingdirect.co.uk/buy-flexiproof/epdm-edge-trims.html Whats with that downpipe ?1 point
-
If you are heating the whole contents of a 300l cylinder from 15 to 48, that's about 12kWh. So from cold to hot about 2 hours (7kW unit). But that should only happen once the rest of the time you only be heating about half the water or less, so about an hour. Assuming you have a big coil in the cylinder. If you're well insulated your floor temp will only be a couple of degrees warmer than the room. So the floor temp will be around 22-23. With weather comp you set a curve based on outside temperature, the colder it is the warmer the flow, thermostat is only there to help stop overheating so set a couple of degrees hotter than target. Ours flow temps vary from 25 to 32. On UFH based on our house I can operate in two ways 1. Run WC and let it look after itself, set the thermostat slightly higher than target temp. This works best for us on a gas boiler when consistently cold. 2. A variation of the above is set WC curve a degree or so higher than needed, use a thermostat (0.1 degree hysteresis) with a combination of time temp targets to force heating on when house temp drops and off again just below target temp. This basically batch charges the floor overnight based on outside weather. The heating is off for about 14 to 16 hours. This works best at start and end of heating season, when there is plenty of solar gain in the day, our heating hasn't come on for about 10 days now. Note we have 300mm loop spacing and 100mm screed, floor response time is slow. Someone will chip in if I'm talking rubbish.1 point
-
7kw. The rotary piston may technically be better, but the minimum output on the 10kw unit is a significantly higher and wouldn't have been suitable.1 point
-
You can do, if you mount the transformer elsewhere, or just cut out a pocket in the insulation for the transformer to install into. Very few fittings will either be shallow enough, or are void of a transformer tbh.1 point
-
We have a slightly similar setup and play about a bit with trying to maximise our PV use. We have a 210l oso tank with two 3kw immersions and an eddi connected to 3.6kw of PV. Family of 4. We rarely run out of hot water. In the middle of winter we tend to assume the PV does nothing and just use the immersion (using the eddi boost timer to programme on/off). At this time of year we'll have it set to boost for a couple of hours later on after the sun goes down. Soon we'll switch off the boost altogether and just let the PV diversion do its work. On the odd occasion of prolonged grey weather in summer it might need a manual boost, but I think it's a small price to pay for the saving.1 point
-
I'd go for the second option. You don't need three phase for that size. Your installer should do the DNO G99 application for you, or you can do yourself. I did ours and only took half an hour or so (although I did do a lot of reading on the subject before hand as well as getting a schematic design from the inverter manufacturer). We are single phase, and have a steel standing seam roof with 7.6kW PV array (19 panels) already installed but waiting for our G99 to come back for our inverter and battery storage. Personally I would get battery storage too if you can as you avoid paying VAT on them plus you have the option of storing excess energy instead of it going back to grid for very little whereas you can use stored energy in the evenings to run appliances in your home or if you have a powercut. The Solis 6kW is a good inverter as it is capable of running continuous loads in your home up to 5kW (when running off batteries such as in evening or in a power cut) or 6kW loads when connected to the grid. The smaller 3.68 kW solis inverter will only handle much smaller loads up to 3.6kW so not worth it in my opinion compared to the larger 6kW inverter. Hope it all goes well.1 point
-
The data for the LED on Aliexpress is confusing. It could be 12V DC, 12V AC or 12-24V DC. However one of the photos is a diagram showing how multiple LED are connected. This shows a 12V DC transformer. It also shows the LED wired in parallel. So I think it's most likely to require a 12V DC voltage (possibly 24V DC) and very unlikely to be a constant current type. With a constant current type LED you would either use one driver per LED or possibly wire multiple LED in series not parallel.1 point
-
Cracked on with the garage.
 1 point
 -
Buying China stuff always a bit maybe / maybe not work . I always fit dimmers to all lights now ( controlled by HA ) then the issue of burning my retina not a problem. I like buying stuff off AliExpress - always a bit “ lucky dip “ - but as so cheap - why not .1 point
-
When we did it, I measured the opening in the TF and provided that to the manufacturer clearly, in bold, as actual measurements deductions to apply, they made deductions. When they arrived I slid them into the openings then added my 50x50mm treated timber around the openings and I was able to pull them in tight to the windows, they were faced with DPC then the block work was built up to and over the frame by about 1-5mm. I still used the proper brackets so to remove them you could just remove the internal linings and pull them out, but the fit was essentially tight.1 point
-
I suspect they allowed tolerance twice by mistake. The installer measured the openings, and took 15mm off all round. Then the manufacturer did the same. I don't know what industry standards there are, but I would think at least they pay for the extra cost in finishing this.1 point
-
Reading this thread has been a wake up call to me as feel for all those effected. I originally was keen on Durisol doing their course last year and then discovered Isotex which was my chossen route up until begin of Feb. My original contractor had changed numbers..not a good sign and so I decided I'm going to build the ICF myself and thus have decided to go Nudura who have a proven system with 8 foot by 18 inches high blocks so quick building times. Going to be placing orders next month...a long as can at least pay deposit with credit card after having reading others misfortune on here.1 point
-
- Call out hydrogen-in-boilers as the most ridiculous thing you could possibly do at every opportunity - Campaign for welfare taxes/subsidies to be part of general taxation rather than on electricity; and for cost reflexive pricing on electricity including transparency on their make-up (standing charges are way too low vs reality; unit rates are way too high vs reality; all of which conspire to make heat pumps less economic than they actually are for UK plc) - Prepare for electrified heating as the house is renovated generally (induction hobs, electric ovens, sacking off gas fires, recreating space for hot water storage in many cases etc) - Decide when end of life is for your existing heating system so that the upgrades can be a thought through exercise rather than an almighty panic whereby the easiest thing to do is replace has with gas e.g. Newbuild gets heat pump. That's a no brainer. I don't have an air to water heat pump at the existing place in Cambridge though. Uneconomic at the time the boiler went in back in 2017 and still uneconomic/undesirable to install a hot water cylinder where none exists. I do have a little 3.5 kW air to air unit downstairs though; which has electrified ~80% of space heating load at a sCOP of ~5 if datasheet are to be trusted; for a peanuts installed cost and disruption. The combi is retained for instantaneous hot water and top up space heating. Radiators can heat the place with a 55C supply/47C return and the connections are all under the plinths; as is a 32A supply for a heat pump. Cooking is all electric already. When propane splits become available a tall kitchen unit gets swapped for the all in one tank. Hopefully they become available before gas standing charges skyrocket and/or disconnections cost real money. (next 2-3 years) Or when propane monoblocs ceae with their stupid restrictions on placement near doors etc. Prefer the split though to keep the size of the outdoor unit down, keep all water indoors, and keep the valuable half of the system indoors. (EV chargers are already starting to go missing; monoblocs won't be too far behind once the pikeys realise that two hoses and an a cable is all that secures a couple thousand £s outside the house and all you need to operate it is a new thermostat etc) Gas boiler is therefore end of lifed based on availability of alternatives / roughly in next 3 years rather than on it expiring in this example. There's been a few years of "whilst at it" preparation beforehand and a quick win of an air to air unit in the interim. (which given the low install cost, PV, and recent price hikes has probably already washed its face economically in addition to providing the welcome sanctuary when it's chuffing hot out) Alternative option is a standalone DHW cylinder with heat pump is and a slightly more powerful standalone air to air for heating. (probably a two head multi split) It's the winter DHW that's hard though.1 point
-
All - thanks for your input on this. It's decided, I won't try and reinvent the wheel, seems the tech just isn't ready for anything more creative just yet. UVC and a monobloc ASHP it is! Now onto deciding on the most suitable ASHP make, am swaying towards Vaillant in this scenario, shall keep the research going.1 point
-
Yup. I have an ever-growing portfolio of “deceased” Sunamp units, which is a constant reminder of why I fit unvented cylinders. With an UVC you get; 1/3 of the price. Lifetime warranty. Sunamp will insist your install is “non-standard” and try and palm you off with you stumping up the replacement cost. Site interchangeable immersion heater. Sunamp / Thermino has to be disconnected electrically, drained and all the plumbing disconnected, then hump 200kG of dead weight out of your house, palletise and return it to base, and wait for it to come back. Wash your hair with a kettle until it gets back to yours. Local service & maintenance is pretty much on every street corner. Sunamp units need “specialist” installers and they all rely on SA for the technical info / design. Used to take an age for any kind of response, and that was usually just to say “we don’t deal with the public”. May be different now, but this used to be a major gripe from the clients I used to get sent to to repair / replace these things. UVC every single time for me, and I regret swaying towards these things for the time that I did. Most recent one to go ‘pop’ was January 2023. Sunamp tried to wriggle off the hook stating the usual “it’s not covered by warranty as it’s a non-standard installation”. What these idiots forgot was that my company developed the design with them for this client, so it was all installed with them involved directly!!! Wasn’t long after I got involved that they ‘decided’ to replace the failed unit FOC. 🙄👎.1 point
-
I would say that plays absolutely no part in it. Again, to clarify: this is likely true when using direct electrical heating (immersion heater) only Anyone attempting to charge it from an ASHP would do well to have an installer that understands how to get the two to work together.1 point
-
Are you staying on site during the works or living elsewhere? Electric Your electric will need disconnected from the house and relocated to a temp site supply for the workers to use. You need to pay the local DNO for this, much cheaper if you expose the cable and dig the jointing pit, dig the trench & lay duct for the new route. You will need to prepare the temp kiosk and have your sparky prepare the DB board, sockets etc.. as the DNO only moves the meter and company fuse. If it's genuinely temp, you need to pay again to move it all back into your finished house. Now, many of us have only done the move once by putting in a more substantial kiosk and making that the final home for the meter. You then run armoured cable from there to your new build. In our case, we did the meter move early on, and ran temps to the old house (so we could stay in it for a bit longer), to the caravan (that we subsequently moved into) and to a site office. Plan was to try and reuse a lot of that cable but most of it got damaged and needed to be replaced, shame but only a few £100 in the grand scheme. Water This one is easiest - just chop the supply after the meter or stopcock into your site and put in a standpipe. If you're living onsite during the build then you'll need to run a supply to your caravan. As soon as required, groundworkers can run the new feed to the house - I was surprised that practically the last thing that happened - I.e. days before moving in, was the live water being connected to the plumbing system (there were pressure tests etc during first fix). Fouls If you're living on site then you'll need to connect your accommodation to the mains sewage (assuming this is what's present today). Otherwise you let your GW grub up all the old sewage, typically back to the IC before the main connection and build out the new set of ICs and ducts etc.. Any fouls and other ducts for power, telecom, ASHP etc need to be in situ before the slab is completed. Some GWs don't like putting in too much foul too early as it often gets damaged (i.e. driven over) by other site activity. Rainwater normally goes in later too as it sits relatively close to the surface and does not touch the main sewer but will go to a RWH tank or straight to soakaway. Gas Gas needs capped off by the network at the site boundary ahead of demolition. After this the meter can be disconnected and collected (or stored safely on site) by your provider. There is a fixed fee for this and it's not cheap. Some GWs will 'arrange' it to happen for cash in hand but this is at your own risk. It took the team who did mine about 20 mins. Located pipe, dug hole, capped it off, filled hole. Re-instating gas is cheaper as the new connection is subsidises and it was a much more involved process - proper days work for a 4 person team. Your GW will have installed the yellow perforated pipe that they will expect to be there. Telco If you're staying on site then you'll probably want to keep DSL and phone services. Not as easy as it sounds as you need to facilitate a 'move' which can mean loosing service for a week. A more common approach is to just get one of your crew to disconnect the cable from the house pre demo and if possible, run it near the new location. Then you call BT, and get them to 'fix it'. You then reverse this or ask for a new connection when you move back in. We ducted the telecoms into the house to avoid an overhead wire, we bought and pulled the BT cable ourselves and left one end at the bottom of the pole and the other inside the house where the master socket was required. I think this is it. Remember, ducts are easy to put in during the build, hard after. Think about external power (garden, garage or shed), lighting, gate controls, access systems etc. Put in a duct and one or two poly rope drawstrings and you'll be grateful later.1 point
-
Crikey I think that's a first for the forum. Ecology actually working in the self builders favour1 point
-
way too late for me! there's no way i'm taking mine all down and replacing them. 😂0 points
-
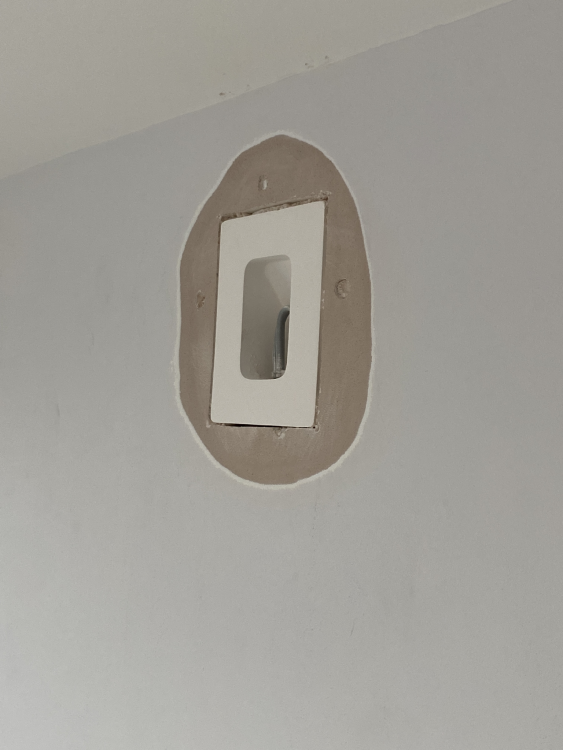
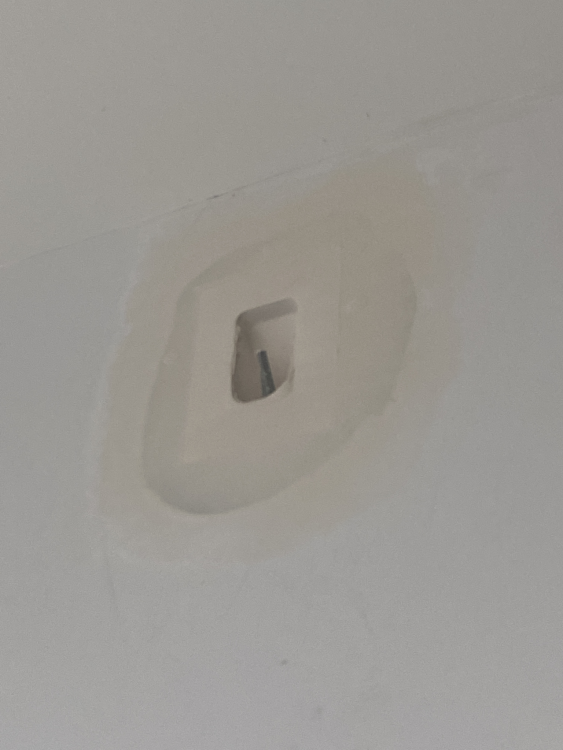
I can hear the plasterers swearing under their breath......0 points


.jpg.c21f3ac78c9b7efd90cbdcb312744dc5.thumb.jpg.7adcad4c0e384f5ecd7d56b0618df6e5.jpg)