Leaderboard
Popular Content
Showing content with the highest reputation on 08/19/21 in all areas
-
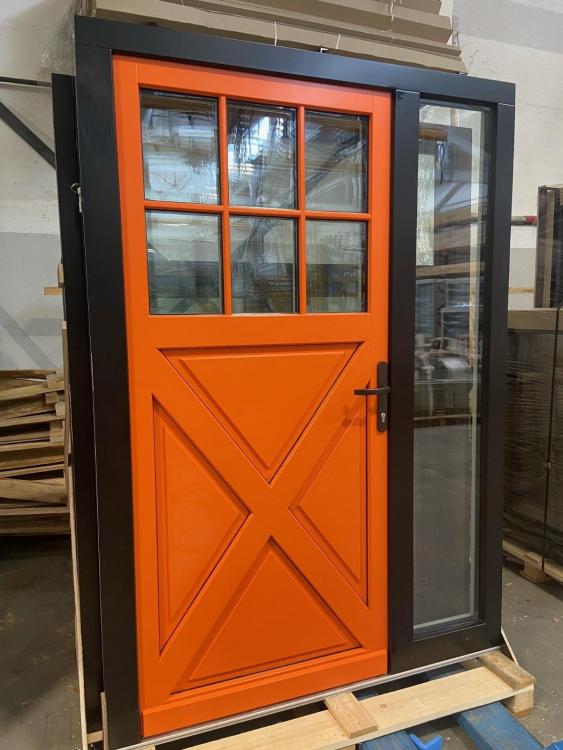
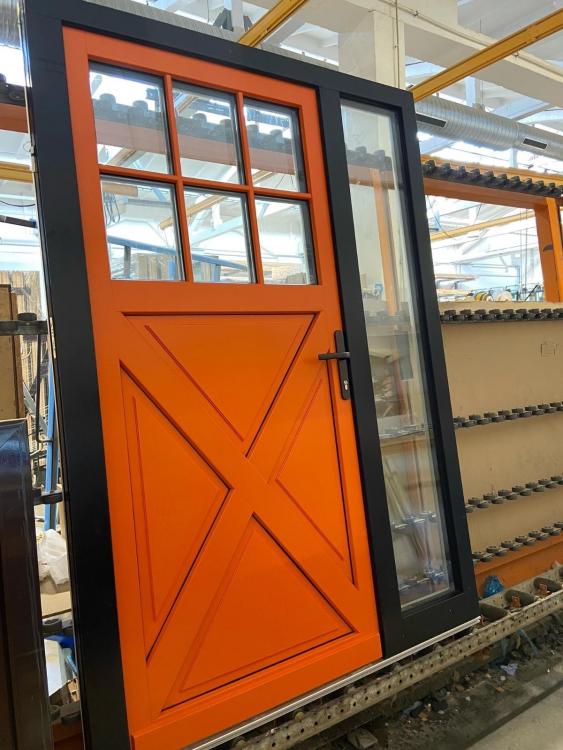
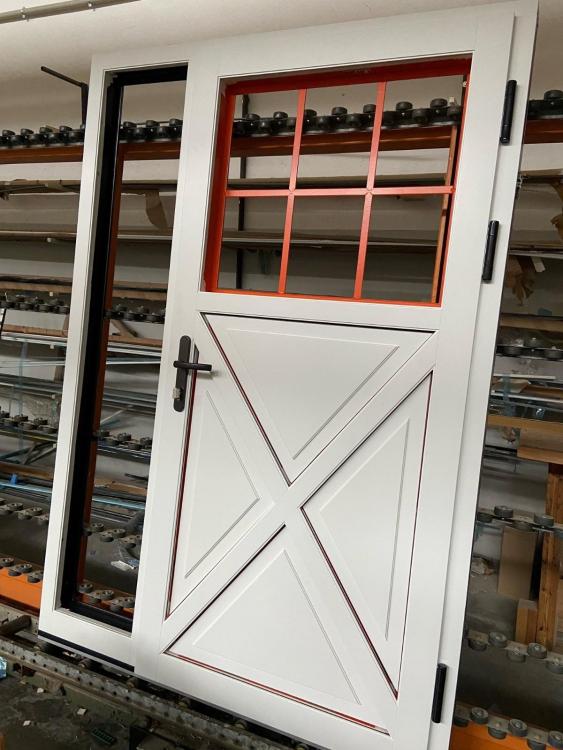
Our new door arrives next week from Zyle fenster...got a wee sneak peak yesterday....we decided to avoid being safe on colours and go bold in the news house....poppy orange it was. Looks great in the pictures and hopefully even better when fitted next week. It's a wooden door but with a something core (I can't remember) but we drew down what we wanted and they have CNC machined the panel which looks great. Shamleess plug goes out to @craig and the team at ecowin who havr been great throughout so far and answered my millions of questions look forward to getting all the windows and doors fitted next week which include a set of 4.6m sliders. For all those thinking about going bold with some decisions go for it!2 points
-
I use a Clarke BPT 1200SS booster pump, this sucks the water up 2m from a well and then pumps it up at at a guess 6m to a loft header tank, it has a pressurised bladder in it as well so the pump is not switching on and off all the time. Works by sensing the pressure in the line, from memory pump switches on at 0.5 bar and off at 2.5 bar but don’t quote me on that. Works very well and I think it would be more suitable for your needs.2 points
-
Take a sample of the current kitchen (door or something) to an automotive/industrial paint supplier and ask them to match it - or better, take it to an automotive paint shop and ask them to do it. Even the medium sized firms will have a colour-mix system in house. When I want to match things, like say a light fitting to a piece of furniture for example I take a sample and leave it with them, they go and play with the colours and usually give me 5-6 options to pick from, they basically make up tiny amounts of paint and dab it on a card. I've got some excellent results including some very difficult colours including metallics. For house stuff I get the colours in a solvent-borne basecoast and coat them with 2K satin lacquer to get the final finish I need. Good thing with 2 stage paint systems is that if you get the finish too glossy you can alter ratios and settings and re-laquer without messing with the basecoat, or some may call it colour coat. Lots of thinner in a gloss lacquer and a really wet coat can give mirror finishes, less thinners and applying a "dry" mist can give a much more satin look, then you get satin lacquer which again can actually be made quite glossy or even more satin through ratio and gun control. An intentional light orange peel on a paint finish can also give the colour a variance to it as you look at it which can help hide colour match irregularities. Another thing to bear in mind is the primer, use a grey primer on a metallic silver for example and you will get a light, sparkly finish, use a black primer and you will transform the final finish because part of the depth of colour comes from the primer, black can leave the silver looking slightly darker but also washed out as the layer build is wrong. Do something like use a blue primer and you can create some really interesting finishes. So sometimes even if you have a close colour match but it doesn't look right, then the chances are maybe the prep was not right to achieve the tone or depth you need. I could apply the same paint to 4 different primers and make it look like 4 different tones of paint.2 points
-
5x2 will be +/- 2-3mm on dimensions anyway so a 2mm variation on the the seat will be lost in the thickness of the rafters and variation in the wall plate. I would just use a jigsaw to cut the seats after making up a marking template and then crack on.2 points
-
Sooner rather than later to allow the ground to stabilise… moisture wise. no specific time frame but if you remove the tree now and dig the root bowl out the remaining roots will sort themselves.2 points
-
Thee are lots of people who claim a basement is cheap to build as it doubles as foundations. I do not agree with them. Excavation, retaining walls, stairs, fire risk, tanking / damp proofing, muckaway, natural light and ventilation are all issues that are simple to deal with on a 2 storey house but a PITA with a basement.2 points
-
2 points
-
Whilst we are all "enjoying" the present spell of hot weather, many of us are thinking of ways for cooling our houses. Many of us have an air source heat pump that can operate in cooling mode as well as in heating mode. So I would like to look at using mine to cool the bedrooms. What I am looking for therefore is two wall mounted Fan Coil Units (FCU's) one to go on the wall in each of the 2 bedrooms that we use. They need to be wall mounted as one bedroom has a full vaulted ceiling and the other a partial vaulted ceiling. It makes sense to get two identical units so bot can be wall mounted. What I had in mind was something that looks a bit like the inside unit of the air conditioner that @JSHarris has just fitted and detailed in this thread It seems to me that it would be a very simple unit. It would take the chilled flow and return water from the ASHP pass it through a heat exchanger with air passing through that from a fan inside the unit. It needs the minimum of controls, it really just needs a manual fan speed adjustment and control of the fan on or off by a (cooling) room thermostat, probably separate to the FCU. I thought this might be something easy to find and cheap. but 45 minutes on a browser and I am disappointed with how few units seem to be available, how expensive they are, and how over complicated their controls seem to be. So I open it up to the forum to discuss options and try to find a small, simple, basic, cheap FCU to put in each of our bedrooms.1 point
-
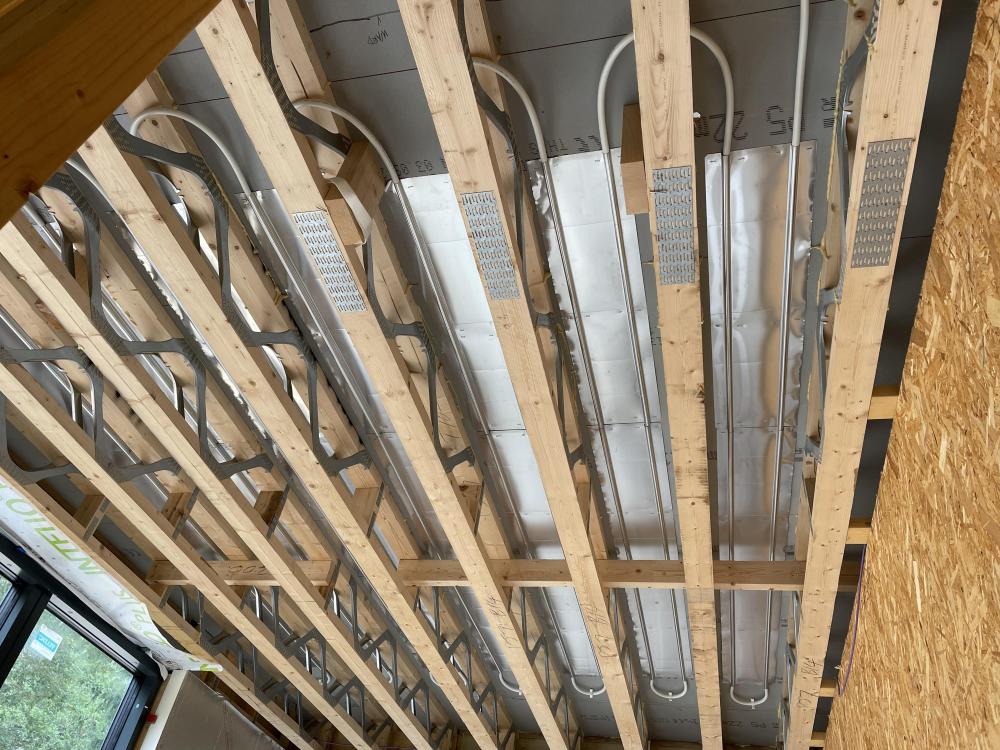
A quick update on threading pert-al-pert pipe through posi joists and fixing with spreader plates. Now completed the first section for real with loops pulled down between joists and not a single kink. Takes some time to plane the route to pull through and time consuming to complete the install. I did price up switching to Wunda over floor, but that added £5K and I suspect would not be much quicker in areas that require duo boards to be laid on to of Wundatherm.1 point
-
1 point
-
Just done this on my old wall that is exactly the same as yours, I just picked a big stone and dug under it and did the same on the inside, put my 110mm soil pipe under with a swept bend coming up on the inside and then refilled the hole with stone and cement until it was back up to wall height. Previously I have core drilled (I have a proper petrol core drill) straight through but you can get into difficulty with the rubble in the middle of the wall…. and on another building I just used a drill hammer + chisel to remove the mortar around a stone, pulled it out and repeated on the far side, removed the rubble very carefully so as not to dislodge excess amounts and fed a 100mm extractor fan pipe through and re cemented the hole.1 point
-
I cored a hole for the flue and it took 12 plus hours( borrowed all the correct gear from work) when we first bought the house i kango’d a hole for a waste pipe years later when we did an extension and it it was done in an hour! so coring for me had no making good, kango/img the hole required some making good but was still quicker1 point
-
Isn't that before the Banksy got removed from the side ..?1 point
-
Suppose it depends, you could kango a hole insert pipe and rebuild quicker than it could take to core the hole, depends on the stone, but that’s my experience with my 600mm thick whinstone walls.1 point
-
yeah there'll be at least 5mm movement with copper and I hope to be within that lol Not opposed to using HEP20, just new and as I said, just the fact it would be a few fittings and bulk to go from the 3/4 to 15mm pipe at a right angle1 point
-
1 point
-
Mine was just stapled to the insulation with 70mm flow screed above, no mesh.1 point
-
1 point
-
is this really necessary? seems excessive when you can just get ufh pipe staples to hold the pipes down. maybe someone who knows what they're talking about will be along soon to correct me. ?♂️1 point
-
I've used the Tam105 pump but I believe this is the replacement for it https://www.machinemart.co.uk/p/clarke-bip1000-1-electric-water-pump/?da=1&TC=GS-051011330&gclid=CjwKCAjwgviIBhBkEiwA10D2jyB8AXfQ5YbSNAtXoDgwmghtTgqZUn-fRFzmsCc73Bk62sw9H7DFvRoC7kQQAvD_BwE&gclsrc=aw.ds1 point
-
I think it is 1 in 80 or 12.5mm per meter. My wise old building adviser who has worked for 40 years in the gradient challenged East Anglia told me that 1 in 100 works.1 point
-
£250 to get a panel painted? Go and find yourself a little back street automotive painter or if you use a local independent garage who are decent ask them if they know any auto painters. Where are you located? Not in Scotland are you?1 point
-
I have not looked in detail, but I suspect the pump is activated by a flow switch and comes on when you draw water. If your tap is higher than the water level in your IBC's then there will be no flow whatsoever to trigger the pump to start. Your water level needs to be high enough that at least something flows from the tap without the pump. Otherwise you are looking at an accumulator and pump operated from a pressure switch so the pump runs to charge the accumulator.1 point
-
200kPa is equivalent to 20 tonnes per square metre. 150mm of concrete weighs 345kg… Think you’ll be fine ..!1 point
-
Just looking at the specs and installation guide, I would guess there is not enough input pressure, can you put the pump on the floor, hose from top IBC tap to pump,this should get you enough input pressure to activate1 point
-
Depends on the tree and the soil type. Worse case would be something like a willow on a clay that shrinks and expands.1 point
-
Thinking back to the last roof I built I used a hand saw, found it more controllable than a jig saw (blade wobbles). Buy yourself a new good hand saw (or a band saw if your looking for excuses to buy more tools ?).1 point
-
I think though you need to take into account the value it adds to the property. What I mean is there’s probably little point adding a basement to a house thats market value is 400k . But if your build has a value of 1 million it might be worth it . Guess it’s an extreme version of never spend more than 10% of the value of the property on the kitchen . What added equity does a basement add ? . *Always* assume you will sell the property one day . Find a good estate agent and see what the ceiling price is in the area . Is it an affluent area ? . Good schools nearby ? ( hence larger properties preferred ) . So many factors to consider . A basement living is like a freebie as planning usually has little to object too .1 point
-
Cut yourself a former, saves lots of grief, use it to draw pencil lines where to cut as well. ?1 point
-
I can now see how a wider belt sander would help produce a squarer flat finish. Back to the Screwfix catalogue! I hope to do most of the cutting and trimming in the loadingbay built into the scaffolding.1 point
-
Sorry to jump in but if you're not already aware, my wife's regulations apply here. All dwellings must have at least one generous bath or more, otherwise it isn't habitable. These obviously supercede G5 which otherwise states either or. Unless I'm missing some other obscure regs...1 point
-
I have a 4” belt sander, with 60grit paper 1 or 2mm would be easy, a wide belt sander would give a flatter surface, I am sure you can hire them. Why don’t you cut yourself a former out of ply the exact shape you want using the top face of the timber as a guide then you have something to go by to save heaving rafters up and down ?1 point
-
I would still use a chisel, but if I had to choose between a power file and a hand rasp, I would go with the rasp. Power files are great on tube and cylindrical surfaces, just very difficult and slow on any flat surface.1 point
-
Definitely plan and do it now if you can, but get specialist advice in case the ground heaves. Also check to see if you need permission or if you have a TPO on it (and hope not!).1 point
-
1 point
-
I would go for a contrast - or statement - colour or finish. Copper sheet ..?1 point
-
Maybe get in touch with someone who paints kitchen cabinet doors as their job, they will use a sprayer and may be able to better achieve the finish you are after.1 point
-
i would have thought this could be sorted with sanding and filling?1 point
-
It’s quite normal for a sem-dry screed to be loose around the edges along the membrane1 point
-
Lots of reasons for cracks, too dry mix, too wet mix, incorrect sand, too fast drying out, movement of the sub base or concrete, stress cracks, movement of the insulation, thermal movement cracks difficult to tell which you have what will go on top? I can’t have been compacted properly at the edges or it would have fully filled the gap and so yes bits would easily break off for that reason- use better edge protection movement material and quash screed right tight up to it1 point
-
This thread may help where @PeterW gives advice on "how to".1 point
-
The supply and return flow rates need to be in as close to equilibrium as is practicable, otherwise the rate of air changes will not be optimised. If any hint of cooling is to be realised, this needs close examination and to be executed robustly. Elevated flow rates associated with 'cooling' or 'heating' bring with them a few bugs also, as in the audibility of the system when operating will be higher than that of domestic MVHR. For this type of install I usually fit 2x 92mm ducts to 2 separate air valves for supply, and then the same for return, with the cooled air at ceiling height and the return as low as is practicable. This promotes quieter operation and equilibrium in the room, which in turn preserves normal function of the MVHR system which would be running in the same room in parallel ( and must stay in balance as per its condition when commissioned ). The fan that provides air flow for this cooling should be room sealed to these ducts, both on the supply side and the return side to make sure the MVHR balance isn't compromised.1 point
-
1 point
-
Sod the compression fittings ..! 3/4x15mm Hep2O with some PTFE Tape/ paste in each connection and do up tight then run 15mm Hep2O pipe up to the valves. Nothing needs to be 22mm1 point
-
+2 to the basement I am building into a slopped site and its a 3 sided basement, i knew that the costs for it would be high, but its the pain in the arse factor to also account for. Any contractor looking at it will add a lot of risk to the job. If you can, for cost savings ditching the basement as its adds significant costs to any build. I can't see why anyone who's site isn't sloped or isn't in the middle of London would want to do a basement from scratch @Thorfun why did you go down that route?1 point
-
Who’s BCO..?? If it is from 3 properties then it is the Water Co problem to resolve.1 point
-
The move to net zero won't be achieved simply by swapping gas boilers for heat pumps, and then all the extra electricity needed to power all these heat pumps being provided by gas fired power plants. It is just one part of the solution, and it relies on an increase in carbon neutral electricity production.1 point
-
I expect foundation design can mitigate any risk to the extension, but perhaps need to consider damage to existing foundations through heave if the tree is close, depending on soil type and tree size. It may need to be removed over the course of a couple of years; get some expert advice.1 point
-
The No 1 thing to create a "carbon neutral" home is insulation and air tightness to keep the energy requirements down. Then a low power heat pump will be all you need, and throw in some solar PV that will over the year generate more electricity than your house uses to run the heat pump, and you have a carbon neutral house. That is easy to do for a new build (but still a lot of new builds don't come anywhere close). The real problem, is what to do with the huge number of poorly insulated and draughty old houses? Just sticking a heat pump in won't solve the problem. I look forward to reading that chapter in your book.1 point
-
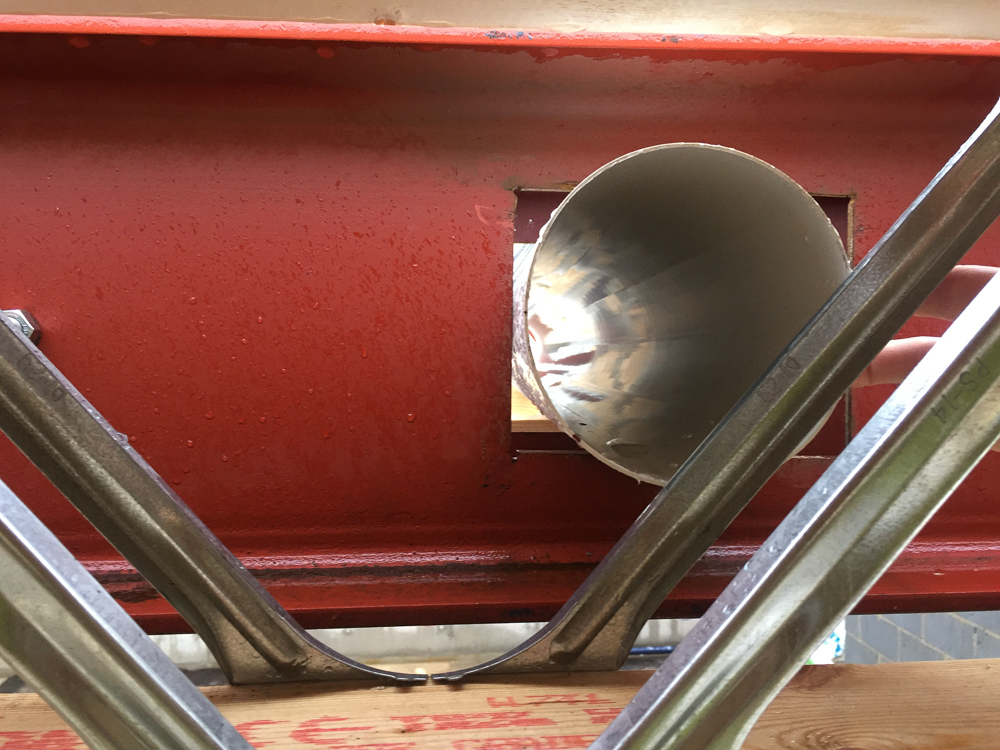
I needed 160dia holes and had to modify beams to 305 deep as a minimum to accommodate this.....and position holes according to rules; Hole should not be located closer to the support than two times the depth of the beam or 10% of the beam length. (therefore in this instance 254 x 2 = 508, say 550mm OR 305 x 2 = 610, say 650mm) The best location for a hole is between 1/5 and 1/3 of the span of the beam. Holes should not be closer than the depth of the beam apart. Beware if you are using metal web joists with varying profiles, differing bearing systems or any other characteristics that might throw their natural service channels out of whack. I couldn’t establish workable positions for the holes in advance of installation, ruling out plasma cutting off site, so used an angle grinder to cut 160 x 200 oblongs in situ which also provided much needed wriggle room.1 point
This leaderboard is set to London/GMT+01:00


