Leaderboard
Popular Content
Showing content with the highest reputation on 04/02/21 in all areas
-
We have sold our house and are moving in the near future. There is a lot to sort out so won't be on here for a while but hopefully will come back at some time with questions and contributions. Good luck to all with their projects.2 points
-
Oh god just stop. Put them on Facebook and get the right thing, by the time you’ve faffed about ( I changed my original wording to save @PeterW having to ) you will have cost yourself more than you saved. Just dont FFS.2 points
-
Did this with a neighbour mate circa 1991: Concrete with red dye in it and loads of waterproof PVA. I then made a board up with strips to effect the mortar lines. Put slight tapers on the strips. Once "pressed" I dipped a plastic broom head in black dye and "splattered" the whole area by holding the broom head upside down and pulling back on the bristles. Then a half inch paint brush in all the mortar lines turned them very dark due to the black dye. It still looks like this to this day. Retained its colour etc.2 points
-
2 points
-
Take advice on this, as I've seen conversions which are like Trigger's Broom, and my understanding is that it must not ever come down all at once, so support up and replace, is OK, reusing what you can. I would say don't ask the planners tho', ask a consultant. Also get an architect experienced in this area as not all are familiar.2 points
-
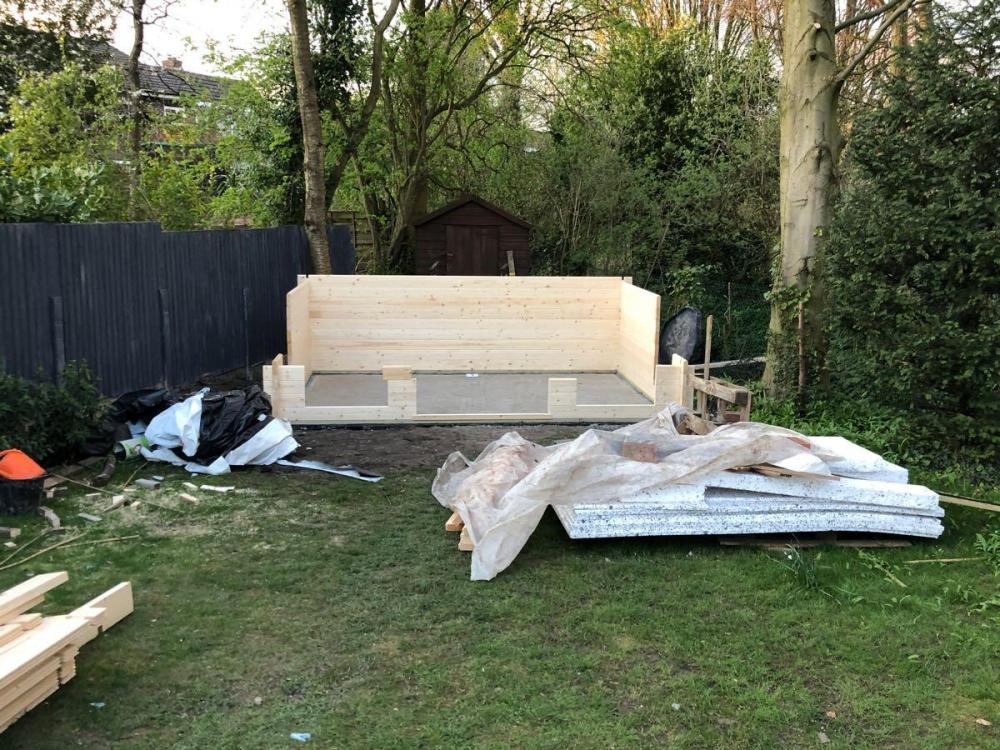
We’re part of the way up now. The stuff i did in the dark on monday is dogshit so it’s shimmed on one side and the massive pigeons keep shitting all over it. I emailed Tuin with a few queries about construction details but they’re running weeks behind on support so just had to make it. I haven’t fixed the foundation beam to the blocks as there was nothing about it in the instructions (one of my queries). It does say to fix the bottom logs to the beam. Without any supplied long fasteners to screw through 2 logs and the beam so I’ve just angled in some screws through the bottom log into the beam. Another thing with this cabin is that the size is 4.35 x 3.5 but the supply foundation beams in 3m lengths. You do the math. I actually planned out how to use the supplies planks with 2 pieces on the short side and 3 on the long. But as there was a spare piece, I thought I would do it the stupid way - 3m length plus the extra. And the stupid way is what it’s sat on. ? The other thing I really noticed today when trying to make some shims is that my mitre saw is awful. I know it was cheap and didn’t expect much. I’ve just used it to quickly cut stuff up but nothing on it is square. Even the main fence, the two sides that are split by the blade, one piece of metal are not parallel ? ffs. I’m going to struggle even to make some shelves with it for the cabin fit out with it.1 point
-
A “For Sale” board ... sell them, buy the right thing and move on... I first thought they were Heras fence blocks, they will not do what you want so get rid and buy the right thing. You could even offer someone some free walk on glazing if they buy the lot ...1 point
-
1 point
-
Is the roof on? i.e battens and tiles yet? If not make it a warm roof with insulation above the rafters then you won't lose internal headroom by having to insulate under the rafters.1 point
-
Yes PP plans were DIY, building warrant plans were professional. I did all the digging for foundations then a builder poured the foundations, did the under building, built and erected the shell. I took over again doing most of the work just employing a couple of people when needed, plasterer, tiler and a joiner for some kitchen work.1 point
-
Those blocks are designed to go on a solid bed like sand, mortar or concrete. If you want to use the stilts you can use decking or pavers. I have them with non-slip porcelain slabs on a roof terrace. Maybe just store the blocks somewhere next to the walk-on glass...1 point
-
you can add more than one if needed. your peak heating load is what you’re after. there’s a good spreadsheet here somewhere if you search for it.1 point
-
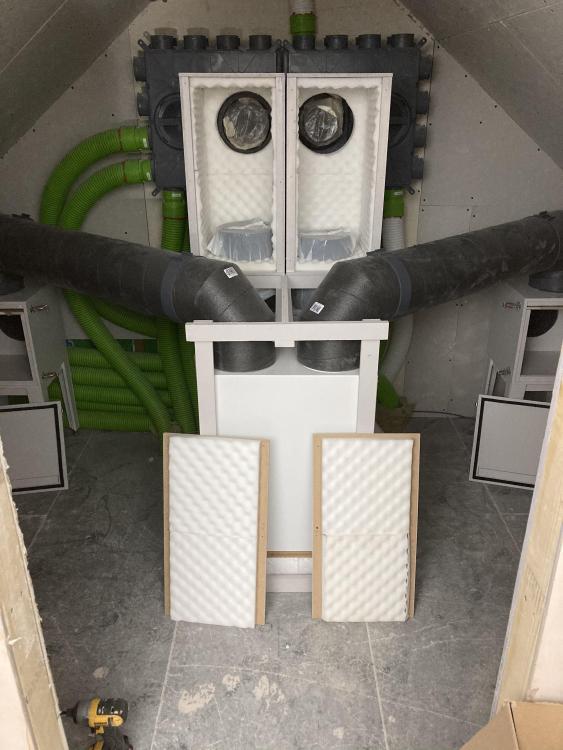
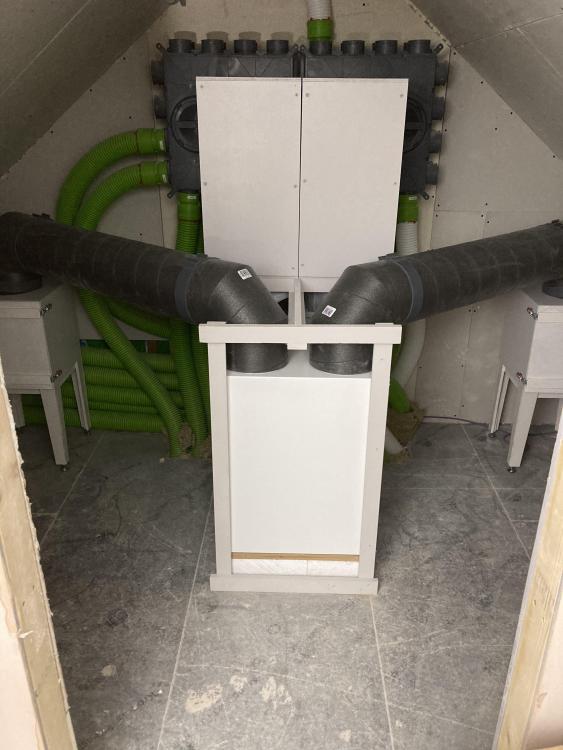
I doubt there's all that much difference between them, not least given many (most?) will be using off-the-shelf components such as the fans (ebm papst being very common) and heat exchangers. That only really leaves control boards and external controllers left to fail which I wouldn't expect to see differences in reliability given modern manufacturing techniques.1 point
-
I think this all needs a rethink, if you are restricted on height you need a concrete slab type foundation to get it low.1 point
-
Should have asked which direction the heat is convecting. Eg it sounds like it’s heading away from the cylinder in a reverse direction vs travelling through the cylinder and back in itself.1 point
-
1 point
-
Don't forget that the shed makers can possibly get 10'x5' sheets for a start. Was the roof osb originally? It's timber slats on my hand me down shed and they run up slope. You'll have to graft a strip of OSB on either at the bottom or move the whole sheet down slope (to overhang) and graft on a strip at the top. Wherever, the "graft" will need a full length supporting strip underneath.1 point
-
Which way is heat converting? You may need an anti gravity valve in the return of the boiler to the cylinder to stop unwanted ‘reverse’ convection.1 point
-
Tnx buttercup (funny name btw ?) I will look into that.1 point
-
where does the bottom of the Willis connect to the tank? Looks like it's circulating in the F&E pipe instead of the tank...1 point
-
They literally trowelled the stuff on and pressed it with a mould to get the pattern. Batted on about special resins. I remember trying to warn him off at the time. Mug! ?1 point
-
My mono block has been down for 15 years and hasn’t moved, simply because it has 4 edges that aren’t going to move so the monoblock doesn’t move, and appropriate sub base installed correctly yes it gets a bit if moss, but either a bit of power washing or chemical application clears it- maintenance is required on most things to keep in good condition1 point
-
That is exactly what motivated my post. Even after reading the paving expert and seeing all the reassurance on here about sub-base, I'm still feeling half-minded about it.1 point
-
I'm in the process of taking on an early Victorian house, that no doubt will be requiring much work. Some of which I'm hoping to complete myself...........with some help and advice from others!1 point
-
Hello everyone, I live in Cheshire and occasionally carry out home and garden DIY jobs, so hope to find this forum useful for exchanging views and ideas and also obtaining advice from others when required. So thanking you all in anticipation !1 point
-
sorry @PeterStarck. what I meant to say was.... ...I've got one of these (https://www.kelseyplanthire.co.uk/diesel/rollers/120-rollers/) on hire to compact my driveway type 3 sub-base. it is a beast! I forgot to paste the url in the original post. ?♂️1 point
-
I'd go with Clive's hole saw option. Less material to remove...1 point
-
If its only a few areas that need rebuilding you can try spelling out what you propose in the planning application. Call it a conversion but make it clear somewhere in the Design and Access document the parts that will need rebuilding. If most of it needs rebuilding you will need to apply for a knock down and rebuild. Perhaps go for the former and let the planning officer decide if it needs to be considered a knock down and rebuild.1 point
-
I've got one of these on hire to compact my driveway type 3 sub-base. it is a beast!1 point
-
A block paved area will last as long as any other finish IF put down properly but the problem is very few are. Alot are done by people that think they know what they are doing but don't, the all importance is picking the right block for the job AND proper drainage and compaction , a whacker plate is F all good if you are going to be turning heavy vehicles / plant on it on a regular basis but might be ok if all your doing is driving a car on and off it. It needs to be built for the job it has to do like most things there is no one fix deal1 point
-
It took us 35 years to get planning permission. By the time we got permission, we'd been through the mincer a few times each and many times jointly. And that had taught us resilience: hardened us off if you like. Lost mates in the forces, been through several of the severest domestic trauma you can think of - and out of the other end. Alive. Kicking. Because we'd just bloody well got on with it . Self build - no difference. Its exactly the same. But if you can't take a joke, don't start.1 point
-
Bookmark this site for when you need info on anything like paving/drainage etc.. https://www.pavingexpert.com/ Check Block Paving in the index.. https://www.pavingexpert.com/pavindex Loads of info. They also have specifications for some work you can ask a contractor to quote against.1 point
-
I fitted these after a bit of looking around. They are mains powered and use wireless communication, not your wi-fi. Got them from "your IT delivered". Cavius 8080138 Main powered 230V smoke 8080138 5 £13.69 GBP1 point
-
The local farmer used a vibrating roller when compacting the driveway of the converted barn next door. Bloody noisy it was too. https://www.hirestation.co.uk/tool-hire/Compaction/Vibrating-Roller-Hire/050070/1 point
-
You will want some form of hardcore otherwise you will never even get it into place the wheels will just bog down in the ground. If the ground can support the wheels then it can support the support piers. Mine has a total of 12 support piers so the load is well spread. Some 2" angle iron cut to a point should hammer into glacial tilt and be a good secure anchor to keep ith there when the wind blows.1 point
-
maybe these and some span sets and webbing. https://www.leachs.com/scaffold-fixings-anchor-testing/m16-scaffold-ring-bolts?code=AF-6140&gclid=EAIaIQobChMIqY3b6_Dc7wIVjON3Ch3WWAsIEAQYByABEgLLyPD_BwE Regards James1 point
-
20 ton Lorries and driving my 8.5 ton jcb compacted mine, ain’t never going to sink ?1 point
-
Cherry picker is a good way to stuff up your driveway. As others have said, correct compaction of base is crucial but is normally just done with a lightweight wacker 2 passes. We have clay blocks which keep their colour really well.1 point
-
To hold a large child’s swing down i walloped 3’ lengths of scaffold pole at an angle into the ground, worked very well (it’s still there 20 years on!.)1 point
-
By hold up, do you mean act as a foundation or stop the mobile home being blown around - as in stable in a chirpy wind? I ask because ground screws can be used for both. The difference is the price.1 point
-
For tie down I just hammered lengths of angle iron into the ground and strapped down to those with steel wire. It has not blown over yet.1 point
-
1 point
-
1 point
-
I did a lot of research before building ours. I'm no expert but here is my experience. Unless you're excavating under an existing building, if you hire someone with 'Basement' in their company title then you're probably paying a premium for what is essentially a concrete box that any decent ground-worker firm can build - i.e. the type of firm that would build an underground carpark etc. Here are the steps that I followed: 1) get our planning permission for the basement element of your build. In our case, we re-submitted the planning app once the above ground element was approved - our planners were mostly interested in the lightwells to the front of the house (which are only visible as grills in the front paving and not so much the emergency egress to the rear the footprint itself. We represented the basement as a big empty box with 'basement' on it - not not indicate any room division or use at that stage. 2) get your SE to commission a ground investigation spec that will give them the relevant data (soil bearing, composition, water levels etc) and will also satisfy any conditions imposed by your LA (we had archaeological and soil contamination conditions). You can shop the spec around yourself but don.t be tempted to come up with your own. Then choose your GI contractor and get them to do their stuff. In our case, they were probing and coring around the existing house (that we later demolished) but they got enough data points to satisfy the SE. NOTE - steps 1 and 2 are committed costs, depending on what comes out of the report, you may decide that it's not cost feasible to build your basement, especially if it requires piling etc. 3) get your SE to design the basement, paying attention to supporting the loads imposed by the house above. In our case, we already had a MBC structural design with calcs so the SE was able to take these into consideration. BC will also need to be consulted to ensure that the basement meets regs regarding emergency egress in fire (either a separate exit to ground level or sprinkler system). You will also know your groundwater situation and this will inform your waterproofing strategy. What shape is it? Ours was a slightly off square box (11.5m x 10.5m) with an additional rectangle bit for the plant room. We used stud-work to create the internal rooms and a web of steel above to hold the suspended timber floor. Wet ground floor UFH is on spreader plates. Complicated shapes, corners etc will cost more to build as there is a lot of labour in the formwork and steel placement. How will light get into the basement? We sourced german GRP lightwells (MEA Bausysteme) and specc'd holes to fit. East then to get a window made (UpVC) to fit the hole. Cheaper than specifying made on site concrete lightwells. Will you have wet services in the basement (shower, toilet etc). Wet services will need a means to connect to the ground level fouls (pump). We decided not to but do have a plant room in there for the gas boiler, MVHR, UVC etc. Just have to get rid of boiler/mvhr condensate and we have a external drain for the UVC tundish where the external exit stairs are. Will it have a solid lid or be open and rely on a suspended floor (we did this). Will have implications on how you heat the GF if you're thinking of UFH. How will it be insulated? We put ours on a layer of 300mm of EPS200 (the bearing strength, calculated by the SE) and applied 200mm EPS70 to the walls (with LE foam) which then met the insulation detail from MBC. This was not hard to do but that grade of insulation is not cheap. We did not heat our basement, it's always 20oc year round due to being in the ground and having decent insulation. Also, there is lots of ambient heat released by the plant room and electrical appliances, people etc. 4) you will need a waterproofing strategy - really depends if water table is far below you or you're effectively building underwater. We had gw at 6m and as only digging 3.5m down type B alone was ok. A is an external membrane - can be effective but only as good as the application - a problem will not be apparent until you have a leak B is waterproof concrete - uses an admix to the concrete, water bar on vertical and horizontal pour joins and penetrations (like fouls) and special plugs to fill the formwork bracing holes.. We used a warrantied SIKA system that was inspected and signed off C is an internal membrane, sump & pump. In this situation you are expecting the walls to leak so collect water internally and have it run down to a precast sump which is continually emptied by a pump. If the pump fails, the basement floods so it's good practice to have two and some kind of warning system and plan for power failure. If you're above ground water then you need a land-drain at the perimeter of your basement to a soak-away. Covering in shingle and using clean stone as backfill for the gap between excavation and wall will act as a giant french drain to deal with rain water. 5) you need a build strategy. How will your basement be built? Concrete poured in situ using movable formwork (most common method), ICF? Precast insulated panels? Bored holes filled with RC? Blockwork? How big is your site, how much plant can you fit on it during the build? How close are you to neighbours? Does the party wall rule come into effect (the 3/6m separation bit) NOTE - you may choose to build in ICF but be aware that for a waterproofing strategy that depends on the walls being a barrier, ICF has the challenge of not being able to see the quality of the pour (marshmallow finish due to etc) as both sides covered with insulation. Does not mean it will be a problem, just means you won't know if there are any issues and will have to trust your contractor to get the mix perfect and vibrate well. Will you need to de-water during construction - we had friends who live by a river and they were in this situation, they used an (expensive) system that pumps ground water out of the excavation continuously during the build. 6) when you have all of this info (most from SE) you can get groundworking firms to tender. The SE quote should detail the concrete spec, bar schedule, waterproofing strategy, backfill spec etc. If not, you're leaving some discretion to your contractor so pay attention to what they propose. Most GW will sub out the concrete work to specialists so they essentially dig the hole, get rid of the spoil and then backfill when the concrete is done. You'll probably use them to do any pre-site work (demolition, clearance etc) and put in the services for the new build (fouls, water, ducts for gas & telecom, power). You should make it clear that you expect a turnkey package based on the SE spec and make sure that all elements have been included - contractors will look to cut costs by using spoil to backfill (vs stone) etc which will lead to more settlement after. At this stage you will know what your basement will cost You may want to get the SE to spec traditional foundations to understand the incremental cost / m2. in our case we had the passive slab quote from MBC as a comparison. A basement company may do all of the above for you but some costs may be opaque. Our friends in the river used Glatthar and were very pleased, however for our basement their waterproof system was overkill and was about 40% more expensive than the route we took. They also don't do any groundworks. Do not be bounced into using the system a contractor is used to if it's not necessary for your site - i.e. an internal draining membrane if you're miles above groundwater (we had one who was very pushy on this) Make sure the critical elements are warrantied with insurance backing as you will depend on this to get your overall house warranty (if you need one). Good luck, it's a cost effective and amazingly useful space if you get it right.1 point
-
0 points
-
0 points
-
No ! They will be used in the method SWMBO has decided . Also storing them with walk on glazing is taking up quite a bit of space ....0 points
-
My brother had his drive paved a few years ago. He also needed a new supply to the garage (to replace the original 1mm micc laid in scaffold poles). The paving contractor was dead against digging a trench when the old drive came up saying "Nah, just lay it directly under the blocks, I can supply you some cable if you want!" The trench was dug but they didn't use a trench whacker to compact the backfill. Drive looked superb except for the sunken line where the trench was!0 points


