Leaderboard


Popular Content
Showing content with the highest reputation on 02/12/20 in all areas
-
Since the last entry we have completed the upstairs. This area consists of two bedrooms and an open plan play area landing. Carpets were fitted after the Christmas break. Lights, switches, sockets and fire alarms have now been installed. My wife is working her way through the rooms downstairs. Painting, caulking and tidy up plastering work. We are really happy with how this is coming together. The temporary supply electrics have now been taken away and we are now wired up to our consumer unit. It’s great to be able to use lighting and sockets throughout the house. The bathroom, en-suite and utility have been ordered today so hopefully I will have some progress here in a month or so. Feels very close to being finished or being able to move in!2 points
-
That and the thin wall.2 points
-
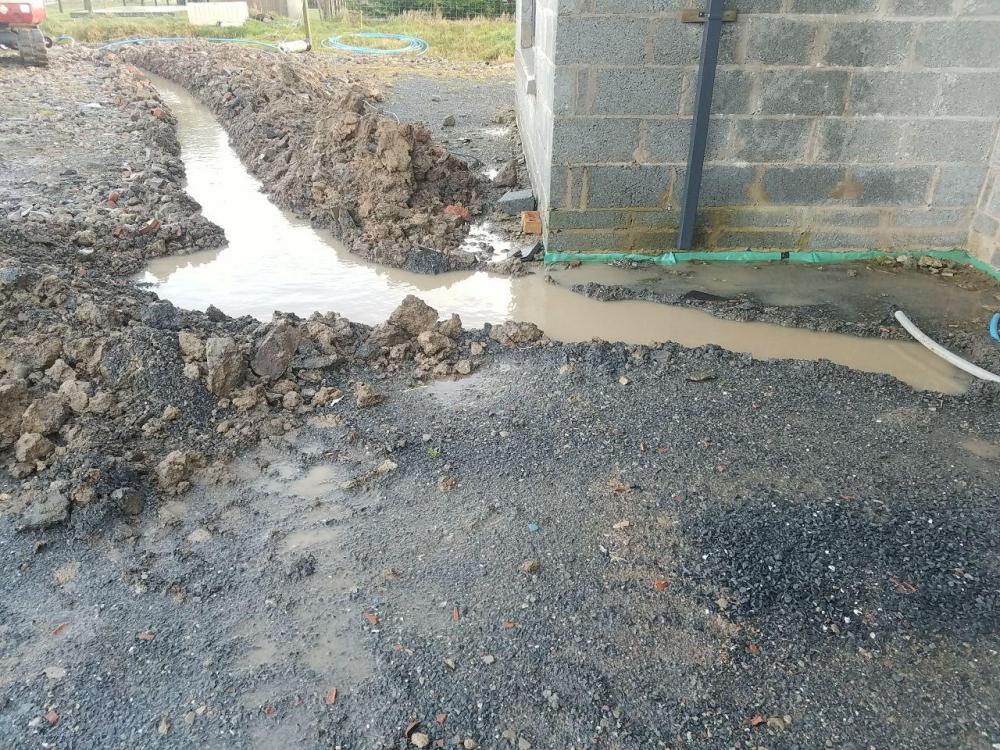
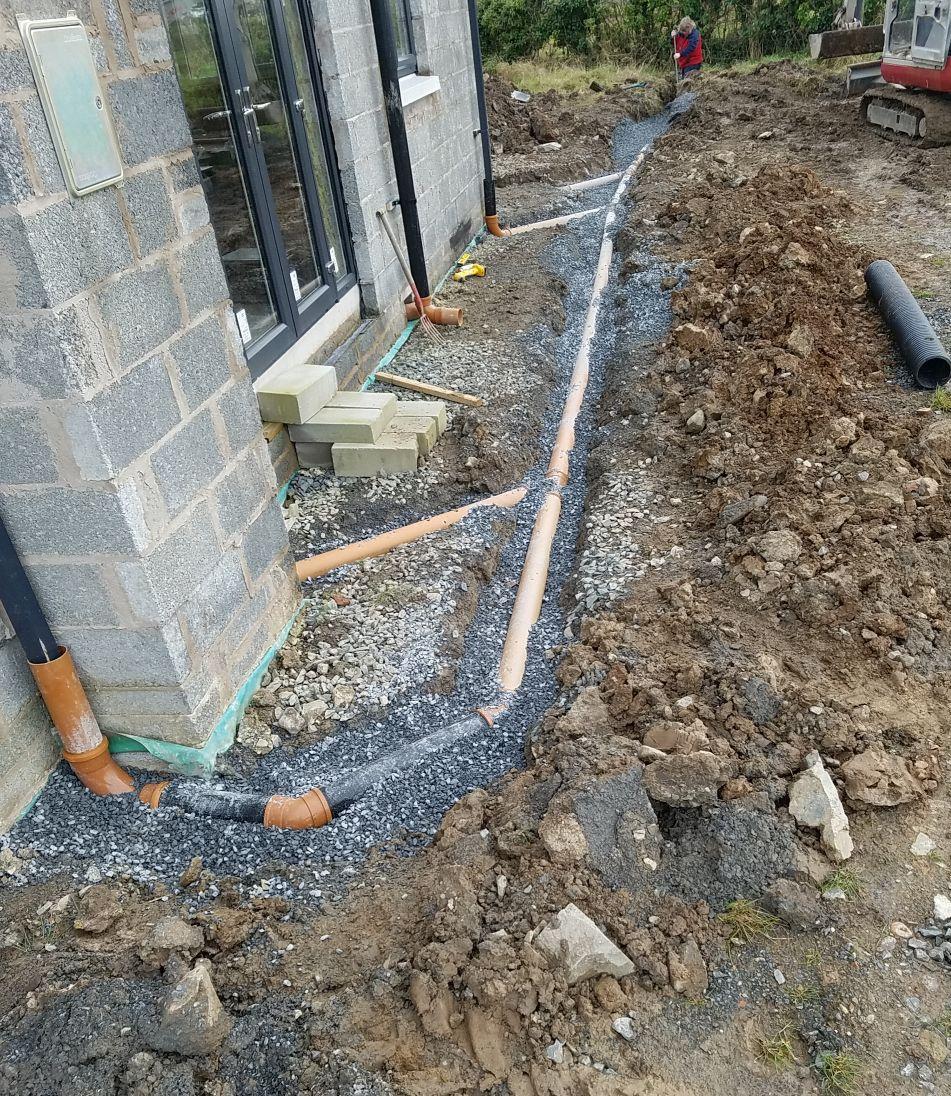
More progress today, more milestones. Paul was down bright and early (freezing!) and by the time I called down for the morning update he'd cut a fine-looking trench out the front to let the front downspouts and future ACO run straight out to the open field drain. ...which dealt nicely with the weekend's problem. The trench dug for the mains water drained into it. We then brought the water into the house, dropping from the long 32mm down the lane to a 25mm at a toby, so we've local isolation. Sent me up the lane to turn off, and them promptly made the joint live before I had a chance to even get the screwdriver out of the car. Phone line is in alongside it. For completeness, here's the rear and right rainwater drainage, with a rare sight on Sandy, in the trench, trying not to lose her wellies to the clay. All the foul works sit on top of this pretty much so we'll need a few loads of rubble now to build levels up past them. No piccies of the foul yet, must do that for my records. And the final result? Loo flushes, and Chinesium hot-water tap works. Bought on a whim but it's actually a pretty smart item. I stripped and checked it for all the usual Chinese failings. Metal clad element, earth wire connected to it, overtemp and underpressure control. Super. Just need to pull the SWA out to the treatment plant and get it commissioned now.


 2 points
 -
Its an issue with metal roofs that can occur. Like people said before, it's an issue of tightening screws too much. So partly to do with the way you fix it . Also sheets can be designed wrong. Any straight metal sheet will have problems to compensate the stress of movements within. So the more profile it has, the better. We do not really sell any of these roofs without profile anymore for that reason. Can work with straight pieces, but the risk is oil canning appearing 2-3 years down the line.1 point
-
The first big DIY job I ever did was fit a new bathroom in the first house we bought. I'd never touched plumbing, tiling etc before in my life. The internet didn't exist then, and I didn't know any plumbers. There weren't even any DIY sheds then, so I had to get all the stuff needed from the local plumber's merchant. The chap behind the counter there had the patience to give me some advice, and ensure that the bits I bought all fitted together OK. Fitting the new bath and shower went OK, the bit I screwed up was the tiling. It was functional, but far from elegant. At the time I did this it was out of necessity, we just didn't have the money to pay someone to do it. When I fitted a new bathroom in our second house it turned out a fair bit better. By the time I came to do all the plumbing, bathroom, kitchen fitting etc in this house I'd probably done maybe half a dozen bathrooms and three kitchens before, and I wasn't at all fazed by taking the job on. Everyone has to start somewhere, and anyone starting out now has the massive advantage over the position I was in decades ago when starting out, as everything is easily available online and the internet has loads of resources that show how each job should be done. A bit of patience, together with some practice on test pieces, and I reckon anyone could make a reasonably good job of it.1 point
-
Have you looked at a similar product from a co called metal solutions, we looked at tata but I wasn’t happy with the fixing method. The metal solutions one has a stainless steel clip so the sheet can move under the fixings, the tata one is fixed directly through the sheet. Tbh any metal roof will expand and contract. Have a look at a zink roof they can have a few ripples.1 point
-
I agree Danny, but the unprofessionalism and unreliability of tradesmen has been insane. I’m not trying offend any tradesmen here, but getting guys out to do work has been impossible. Everyone’s always fully booked and when they schedule us in, they don’t show up and reschedule us. It’s taken six weeks to get two day’s worth of work done. It’s frustrating and annoying, and I’ve had enough.1 point
-
Please don't do this job yourself , GET a qualified plumber to do it. Trust a trader or any other builders sites on the internet . Read the reviews then choose someone who is reliable, I'm sorry this is not a job for a complete novice.1 point
-
I like EPS for that sort of thing but mabe some thought needs to be given to EPS with respect to spread of fire depending on the proximity of other buildings, boundaries, etc. Obviously it's used in standard EWI but that's not with timber cladding over it.1 point
-
I adore timber i beams Peter. I have been using them on flat roofs for years.1 point
-
Saw a great test on this sort of thing, the chap made a frame like a big picture frame and stuffed it with layers of material. He then just put a canvas on the front, it was far better at stopping noise than the boards they sell. A bit of old carpet would do the same. So perhaps rather than buying expensive board why not carpet the ceiling then use normal plater board ?1 point
-
I guess letting the timber frame settle before boarding or fitting windows etc would solve the problem. Wouldn't work for those wanting a quick build though. You could use engineered timber like I-beams which would move a lot less.1 point
-
is this noise from the outside breaking in, or noise from rooms above? look below as some of the different densities of plasterboard. If its external in, this is what i am doing for reduce noise in bedrooms from aircraft noise 100-150mm PIR 22mm roof board 200-250mm I-Joists min 200mm porous insulation within the cavity. 2 x 15mm Soundbloc (or similar) of resilient bars
 1 point
 -
Not that I know anything about the subject but putting a rigid product on a timber frame does seem counter intuitive. The same reason I don’t like ridge tiles mortared on, timber moves, mortar does not .1 point
-
I thought I'd update this thread: Cleaning with a water, light detergent and a brush not only took forever but it was pretty patchy too. Like painting the Golden gate Bridge - before I finished the bit I had started had already deteriorated. I didn't want to jet-wash as I was advised against it as it would apparently roughen the surface and further help the dreaded mould to grow even more. After talking to a few providers of commercial cleaning products that would have cost me many hundreds of pounds to buy let alone the labour to apply, one of the technical people was very honest with me and recommended I try soaking the surface with clean water then using a weak bleach/water mixture 1/10 applied with a fine spray nozzle. At first this looked promising but the mix was drying-out before it had time to work properly. I increased the mixture incrementally to about 1/4 and this worked really well. IMPORTANT to do this at a time of the year when it's still quite damp outside and cloudy i.e. so that the mixture will not evaporate too fast thereby giving it time to work. It's very important to thoroughly soak the surface with clean water, starting high up and I did arreas about 3m2 at a time. I applied the mixture to a really wet surface so that on contact the mould can run down easier. Leave it for about 20 mins max then wash with clean water. After looping the whole house once some stains were apparent where the mould had run. A second application of the whole house cleaned that up. After about 2 weeks the cladding had turned to near white, like drift-wood. At first I was worried but since I did this very early spring it's now weathered back to a kind of grey. I wanted to leave it for 1 summer and 1 winter to see what happened There are no apparent signs that the bleaching has damaged the wood The surface is a kind of grey but not grey enough for my liking Right now the mould is showing signs of coming back but nothing like the images above My next step is to repeat the cleaning process in a few weeks time but this time it should be easier as the cladding is nowhere near as bad as it was. In the summer I'm going to treat it with Textrol. This was apparently used on the London Velodrome so if it's good enough for them it should be good enough for me. Not cheap though at approx £1,500 materials only for my job1 point
-
You have to decide exactly what board you want. Bathrooms should have moisture resistance. http://www.mgmtimber.co.uk/images/SheetMaterials/plasterboard-types-mgm.jpg But the chances are your builders merchant will only have around 5/6 options, at which point you decide if its worth the extra performance.1 point
-
If you use a top access trap a flexible pipe may not support the bottom part of the trap enough during assembly. If the bottom part moves too much it could be hard to screw the top part into it through the tray. Solvent weld may seem bit scary but it's not really. Helps if you mark the outside of the pipes after dry assembly and use a reasonable amount of solvent. Then you get enough time to rotate the pipe to line up the marks before it sets.1 point
-
Hello Pocster, For any "damp" room such as a bathroom or utility room etc. I would always plan on using a foil backed board for the ceiling. I havent come across any acoustic board that has a foil backing so can only suggest a couple of "work-arounds (none of which are perfect). 1. Install a 500 guage vapour control layer (with all joints and edges taped) above a standard 15mm acoustic board, but this will still run the small risk of moisture getting on the back / top side of the board. 2. Use an acoustic board such as the Gyproc Soundbloc MR that has moisture resistant additives added to its core as part of its manufacture. This will have an improved moisture resistance over a standard board, as well as the acoustic benefits. This type of board is intended for moisture rather than movement of vapour, but will have improved performance over a standard board. Without wishing to to tell you how to such eggs, bear in mind that any recessed lights or unsealed penetrations for extract fans etc. in the ceiling will render a foil backing or other solution pretty useless. Also, dont think that accoustic insulation and sound insulation are one and the same. Typically, in a ceiling both would be a rock or mineral wool roll or batt, but different products can and do do different jobs. So dont write off the option of using an acoustic insulant in the ceiling void, particularly if there are going to be penetrations for lights etc. Doubleboarding could be an option, but do consider the additional weight. If you do opt for this option, then stagger all joints and ensure the boards are very tightly butted together to get the best performance. Kind Regards, Matt.1 point
-
Sounds like fixings over tightened or holes too small so it can't move when it expand and contracts?1 point
-
And to be fair, I still have to strip half the beds from Christmas visitors. And I am planning to move the tumble dryer to be directly next to the washer - just like yours. That will create space for a second dishwasher. More seriously, I do have more time at present as I have lost my caring responsibilities, and am trying to get back into the swing of maintaining a more extensive network of friends, looking for volunteering opportunities and membership groups etc. Potentially quite a creative time.1 point
-
I have just done this in our ensuite using top access trap. This was the sequence I did for fitting the tray... Shower trays need good support. Typically you need 16-18mm WPB or better still marine plywood same size as the tray supported on a 4*2 frame/joists. Don't fit ply yet but check it will be level. Cut a hole in the ply where the trap will go about 1/2" bigger than the trap. Cut rigid solvent weld pipes and assemble without glue to check position of trap is perfect. Lower tray onto it to check. The top of the bottom part of the trap should be a few mm above top of plywood to allow for mortar which will raise the tray slightly. Ideally the trap should be able to move up and down a bit so it can tighten up against underside of tray later. When happy with the position solvent weld the pipes. Test for leaks and screw down the plywood. Seal plywood with SBR or similar PVA sealer. When dry lay bed of mortar and lower tray onto it. I laid the tray onto two sticks of wood first and then pulled them out. Check tray is level. Fit top of trap through tray into bottom half of trap. If the underside of the tray isn't nice and smooth consider putting silicon around the rubber seal on the trap before lowering the tray onto it. You can also seal the top of the trap to the tray if there is no rubber washer provided. Later fit the innards of the trap and the mushroom cap.1 point
-
Fix one of these so it is flush or slightly recessed in the wall and screw that pipe into it https://www.screwfix.com/p/endex-brass-end-feed-adapting-90-wall-plate-elbow-15mm-x/83561?_requestid=360473 That is just an example you can get them that take a compression fitting pipe, push fit or whatever your favourite plumbing method is. Some examples lower down on the right of that link above.1 point
-
Thank you, a friend used this company as well so I think it is looking a likely candidate.1 point
-
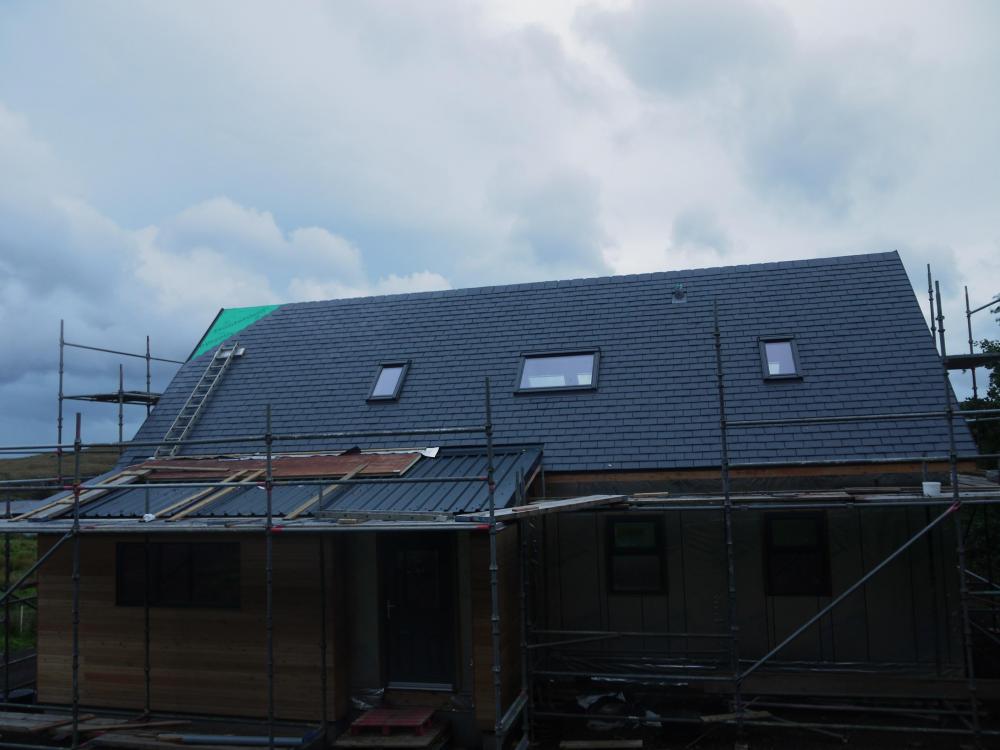
I used sheets from our local Jewsons. Seemed to be reasonably priced. But they cocked up the flashing which meets the slates. I was in a rush for this and used the company below which provided a quick turn around https://planwell.co.uk/about-us/ They are based in Buckie. In hindsight I probably would have purchased the sheets from them as well.
 1 point
 -
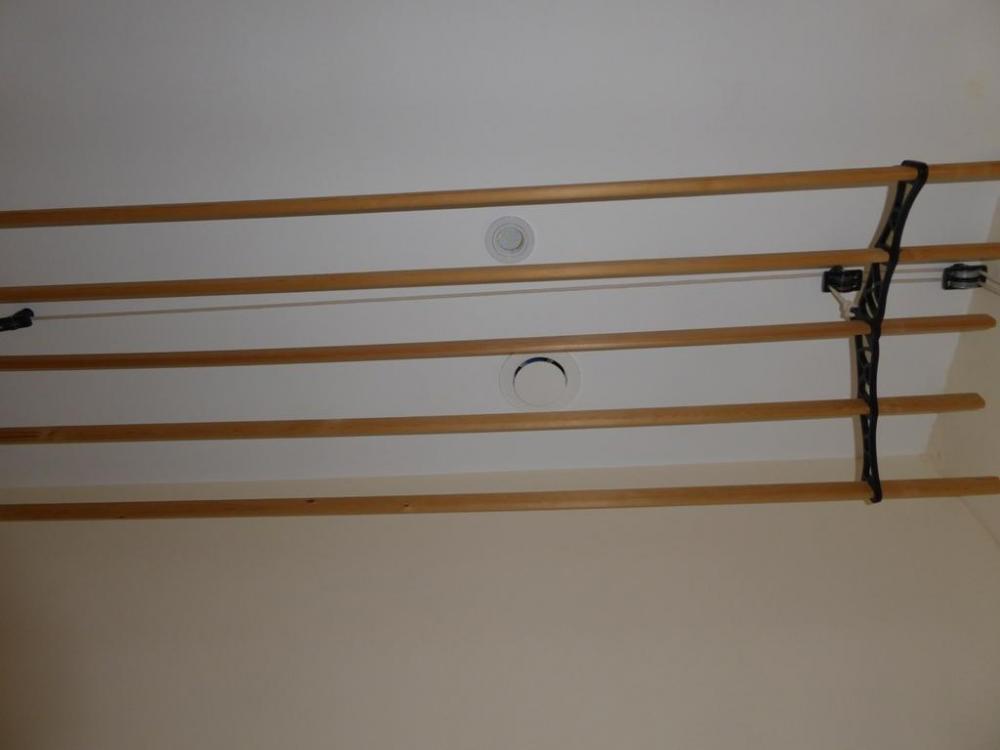
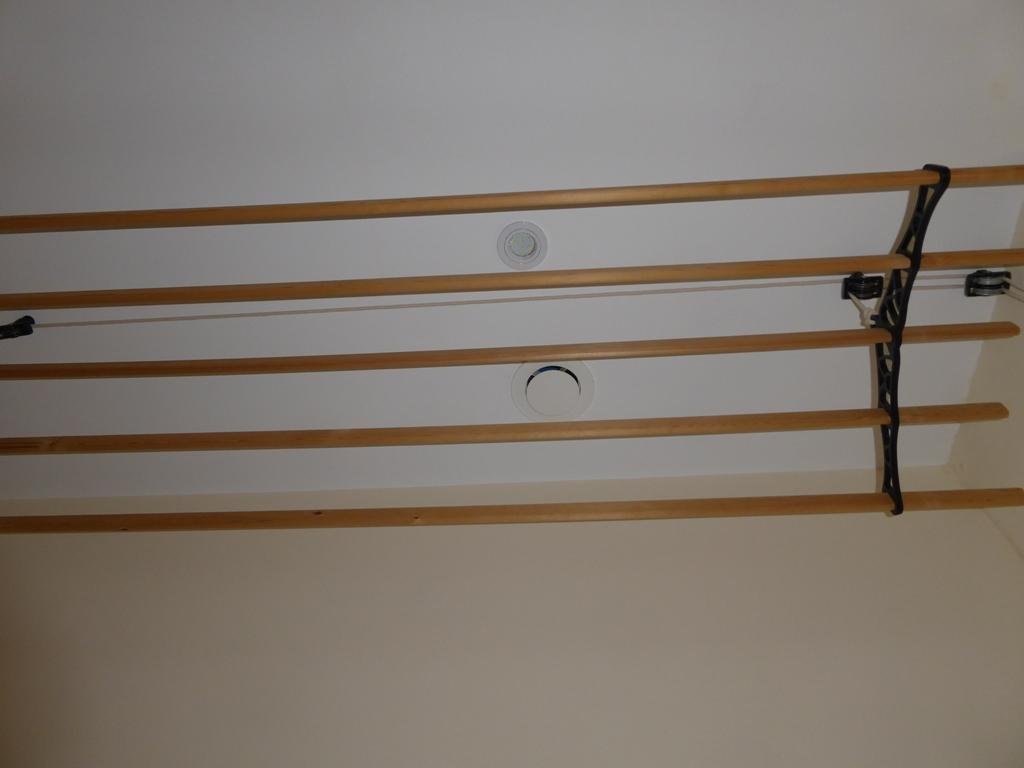
We have exactly the same arrangement, extract terminal above a pulley maid in the utility room. Works very well indeed:
 1 point
 -
Pulley in the utility room. MVHR extract vent above it. Dry in a few hours. Never makes the room feel damp and no condensation issues. Some stuff goes in the tumble dryer to "make if fluffy" but we have learned it does not need to "dry" in the TD, just have some time being fluffed up. That too then comes out, still a bit damp, and goes on the pulley. It passes the "fluffy" test when dry. In the summer we use a washing line. Eventually when we build the car port, there will be a washing line under there to avoid the frustration of the washing being nearly dry then a shower comes along.1 point
-
Rigid pipe, solvent welded to a TOP ACCESS trap. The base of the trap goes in first, then the shower tray, then the top part screws down to the base and seals. The actual "trap" then drops in, and can be removed from above for cleaning. What other bits do you have to go with that trap, I can't tell if it is top access or not.1 point
-
Yup, that will indeed be the case. I'm lucky enough to earn a good salary and be in the same position as doctors and stuck with PAYE so cant avoid it. Atm, we try and stay below £100k/yr to avoid the marginal rate where you lose your tax free allowance and would have an effective tax rate of 62% above £100k, and one way of doing that was to pay into the pension. A flat 20% relief will now make that a bit pointless and possibly be avoided, and even more of my colleagues will go part time as it's pointless working so hard and long for a little extra money. I'm going part time in a couple of months, and the marginal tax rate did enter my thinking as each years pay rise makes it harder and harder to avoid big tax bills somewhere (other lifestyle reasons were the main factor though, although a drop from 40-20% tax relief will make this issue become more front and center in future, and the end result will be less tax take for HMRC and we simply work less). First world problems tho....1 point
-
Because of gunk piling up in the corrugations?1 point
-
Its an interesting idea, and one personally i don't like, but if it changes to a level 25% then probably one that i could stomach as if it encourages more people on lower incomes to contribute to their pensions. Now if only the government would look at the high income child benefit tax charge criteria!1 point
-
Apologies for a third post. I think there may be a few clues on proposed Planning Reform in the Architectural Beauty Commission (more Bs in the name that Billy Blinking Bremner) Report - The Roger Scruton one. That came up with 75 recommendations - some rather nebulous, some quite interesting. Digital Building Passports is one of the more interesting ones imo. Attached. Ferdinand Living_with_beauty_BBBBC_report.pdf1 point
-
I personally would'nt use anything that i cant get at again, unless it was solweld. Flexi pipe would be a no for me.1 point
-
Yes just for the driveway, house will be in a concrete raft or 2.1 point
-
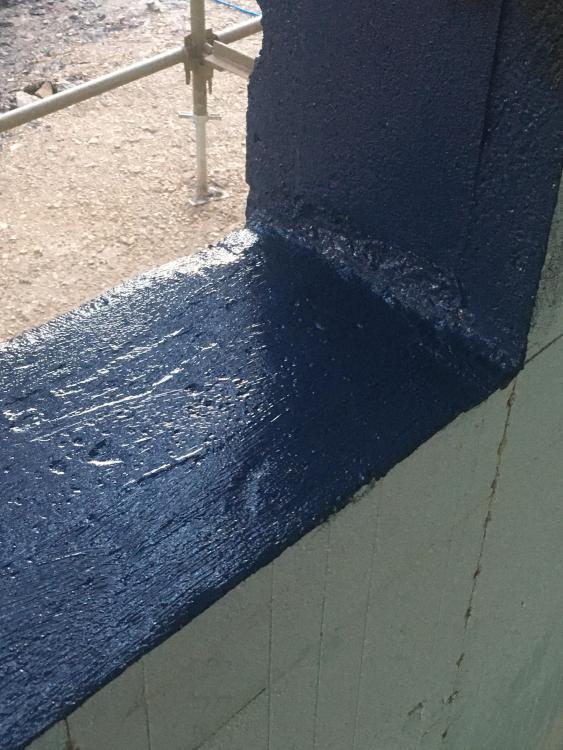
maybe just me but anything bituminous is made from oil --so you sure it will have no long term effect on foam? can,t see how it can be totally solvent free? acryilic based stone chip as used on cars --is solvent free and paintable the test to me would be if you can paint it if it don,t like it and melts --then it has a some solvent me i will be having windows just covering it and overlapping stone work by small amount+ flexible sealer at join1 point
-
I have given all the reveals 2 counts of solvent free waterproof and gas proof type paint.
 1 point
 -
I remembered seeing a post about this.1 point
-
We choose to split it 50/50. I did the outside painting last summer and now it's over to her.1 point
-
We started using an architectural practice as part of our frame package as they were the manufacturers 'preferred' architect. We parted company after number of issues; loss of trust over a topographical survey (long story), and they didn't bother with a site visit. I met and briefed who I thought was doing the design; turns out they passed it on to someone else to work on, and then a third person presented the plans back to me. The proposals were so wide of the mark, I decided to call it a day and find another one. Architect #2 was great! Fixed fee and worth every penny. It's important to find an architect that 'gets' what you want achieve, and uses their flair to enhance and not dominate.1 point
-
we got 3 different architects to come round to see us (it was supposed to be 4 but the 4th didn't seem to be interested as after I phoned and left a message with details as to what we wanted I got a voicemail back saying he'd received a message about an extension or something rather than the complete demolition and self-build we're doing! it goes without saying that I didn't call him back). all 3 came to site to have a look around and for us to get a feeling if we'd be able to work with them. we then got quotes and all were pretty similar but we chose the chap we thought we'd most like to work with. After an initial consultation he came up with a few sketches which we were completely not what we wanted and we also questioned as to whether he even listened to us at the initial meeting. we were thinking of phoning around and trying other architects but we went for a meeting and explained how we felt and he said, no worries I'm never going to get it right first time and we took aspects from each of the sketches and discussed it all and now we have final plans that we absolutely love! so, in my experience, if you like the person and get on with them then give them a chance. the first drawings will never be exactly what you want and they will change and evolve as time goes on as the relationship builds. obviously though, if they're pig-headed and won't listen to you at all regardless of how nice they are you need to dump them and find someone else! just my 2 cents and experience of our architect.1 point
-
Hi and good morning, do you get on with the architect? do you feel you can work with him, if not, now is the time to have it out with him. I had a problem with my architect, in that he kept the drawings / measurements to a minimum, and the bills include time to study , an aerial survey with a drone, (2 men ) totally bl dy usless ! it only served to "keep the bill up. moving your house should not be a big problem, but dealing with the planners can get costly if left to an Architect, I have to say I lost faith in mine !! when you get a drawing of roughly what you want, go and speak to the planners yourself. I also had problems with the architect "recommending " his friends, ie consultant, bat surveyor, contamination man, ect ect. I felt they were in a click !! together. can you find an architectural technician ? as you don't need an architects certificate, you can get insurance / building inspection from people like "build it" I used Meridien consulting in the midlands, they were brill ! regards, Stephen1 point
-
We had a bad experience with our first architect, mainly because he insisted the house he designed (which we loved) could be built for 1/2 what it cost in reality. We should have parted ways with him before we did and we wasted a lot of money. We started from scratch with a second with a much better outcome. I'm not sure about feasibility studies but being in Scotland we used the RIAS schedule of work and that sounds like the first couple of stages. Work Stage 1.0 - Preparation of the Brief 1.1 Ascertain Client Requirements 1.2 Obtain Site information from Client 1.3 Advise Client of his/her duties under CDM regulations 1.4 Visit Site and carry out preliminary appraisal 1.5 Identify Project and Construction Budgets 1.6 Develop outline brief 1.7 Agree Preliminary timetable Work Stage 2.0 - Initial Design 2.1 Prepare initial design proposal 2.2 Provide indicative guidance on cost and timetable This is where you have all the back and forth on what you want, what you don't want, budget etc. We compiled a design brief, including a flash drive of images then we had at least 4 or 5 meetings to discuss various ideas and hone in on a final design. We would have never have got to an acceptable design with just the brief and a single meeting. By the end of stage 2.2 the idea is that you have a design and outline plans that you're happy with. I think we even had a 3D Sketch Up rendering to play with. I don't recall if there is guidance on fees and obviously it varies from architect but I don't think getting you to the end of stage 2.2 should cost much more than £2k on a fixed fee basis.1 point
-
It's been a while since I last updated this, but we're slowly making progress. Since the completion of the roofing in November, we've mostly been cladding, the joiners fitted the doors and windows, we boarded the inside and last week the cellulose got blown in. It's reassuring how well the house retains the heat from a small portable heater, unlike anywhere else I've ever lived! Bit of a delay in the cladding due to me underestimating both how much we needed and also how much we discarded (too much sap). Weather's made things a bit slower at times as well. Photos below. Cladding in progress (don't look too closely). The ends have all been trimmed and bevelled now but this is the only photo I have. The snow arrives, makes for cold hands when they're above your head hammering all the time. Boarding the first floor with OSB The insulation arrives. And disappears into the walls within a day.. Next up, try and sort the foul drainage as it's been a bit neglected, MVHR first fix and then ready for electrical and plumbing first fix.1 point
-
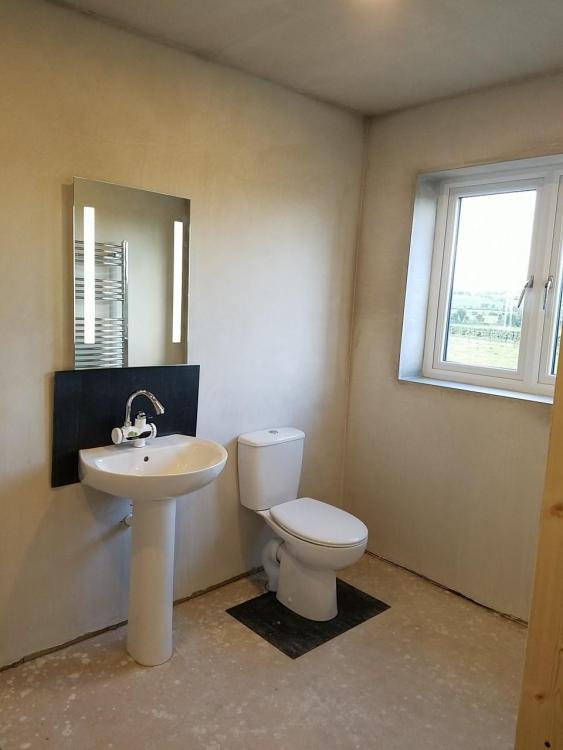
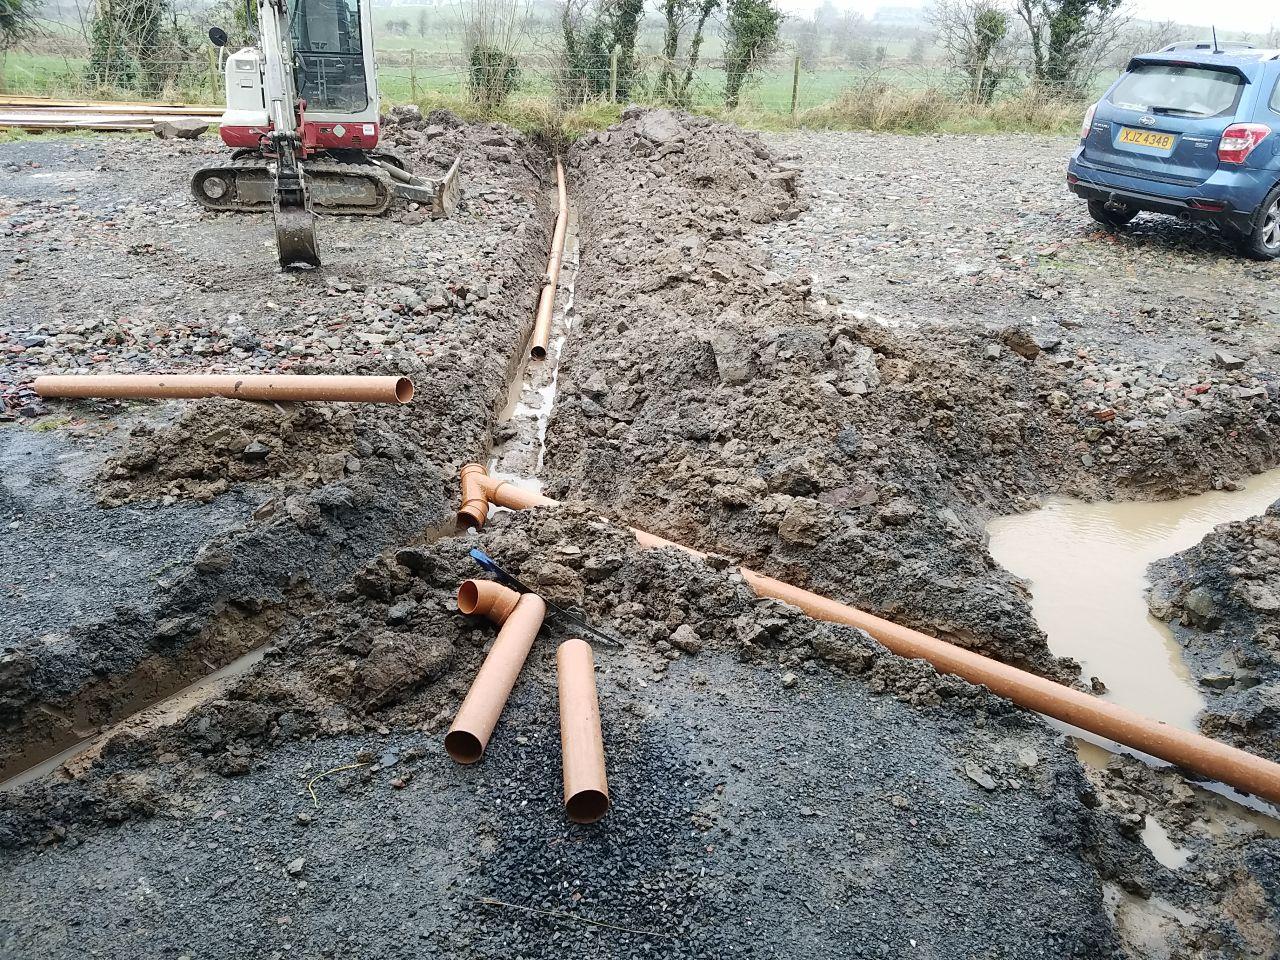
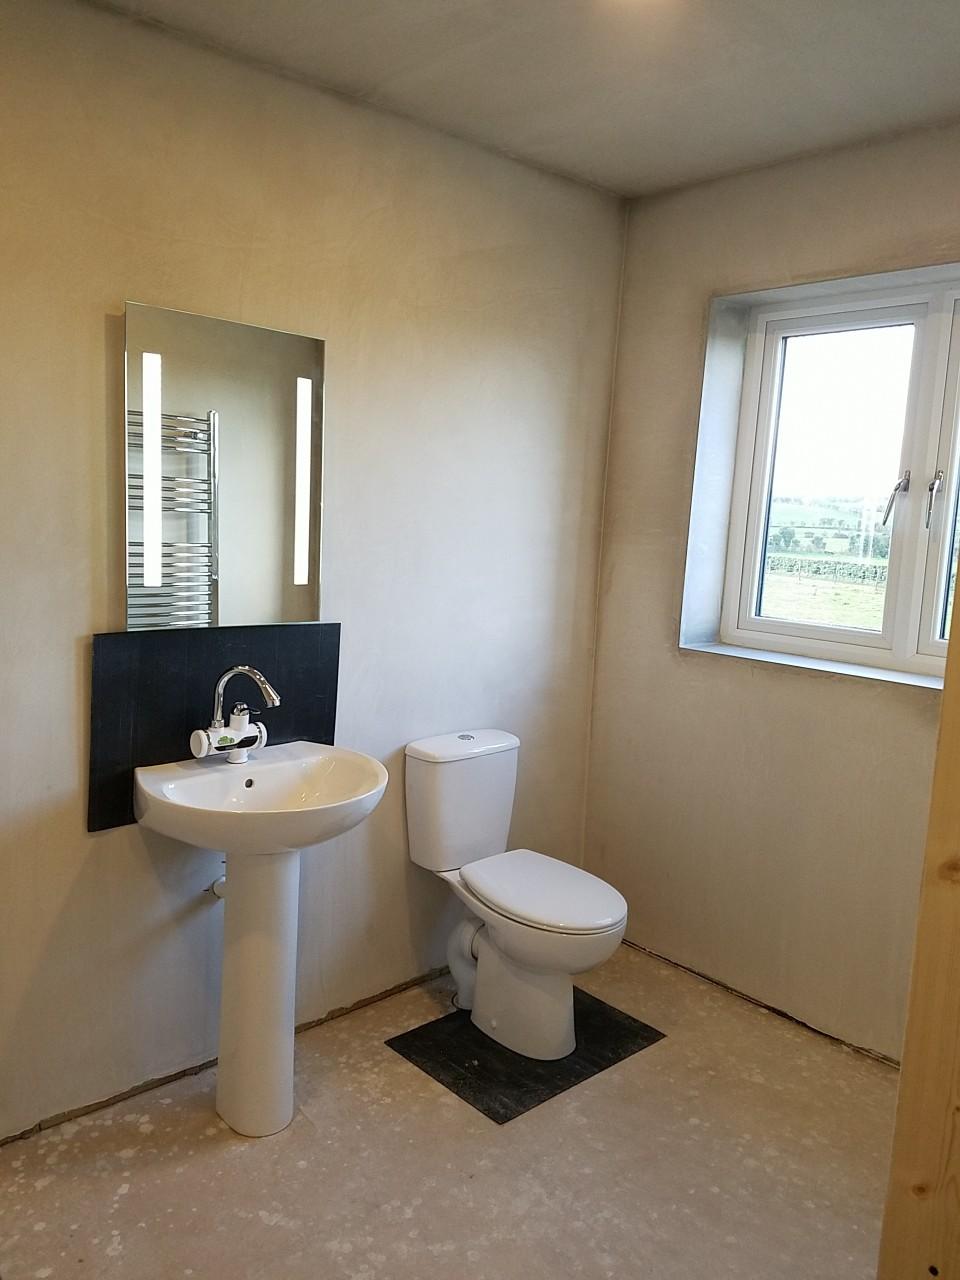
Relatively busy couple of weeks. Had the groundworks guys in for a few days and so the foul drains are ready for inspection tomorrow. Half of the rainwater drainage is done too, and a trench cut to drop the mains water pipe into. With the overnight rain it's looking more like a navigation... Had some skimming done so amongst other things the hotpress is ready to receive some pipework. And this: just the door to hang now. A touch more civilised than a site loo, yes?
 1 point
 -
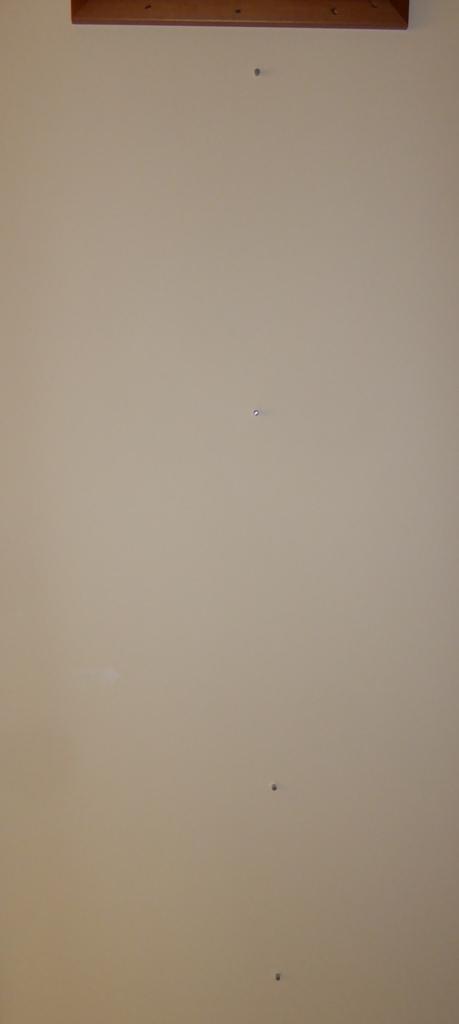
Had an interesting play last night with a FLIR C3 thermography camera. I knew the principle but had never played with one. Very interesting to see the "knock on" effects of my method of lining/levelling the walls even if expected. The vertical studs, sole and header plates show up as obvious "colder" bridges. I say colder as opposed to cold as I was aware of the potential for this just not to what degree and attempted, in my naivety to mitigate this. The studs are packed in between with PIR and all studs sit off the wall by a minimum of 5mm on packers with gun foam behind the studs. It certainly all helped but seeing the thermograpgy pictures it will influence my construction methods for future lining projects. By and large though the rooms heat signature looks like I thought it would. (What helps massively is the vapour barrier stopping draughts). FLIR pics to follow. Clever bit of kit. You can download snapshots then later drag your mouse over the "still" and see the temperatures wherever the pointer is.1 point
-
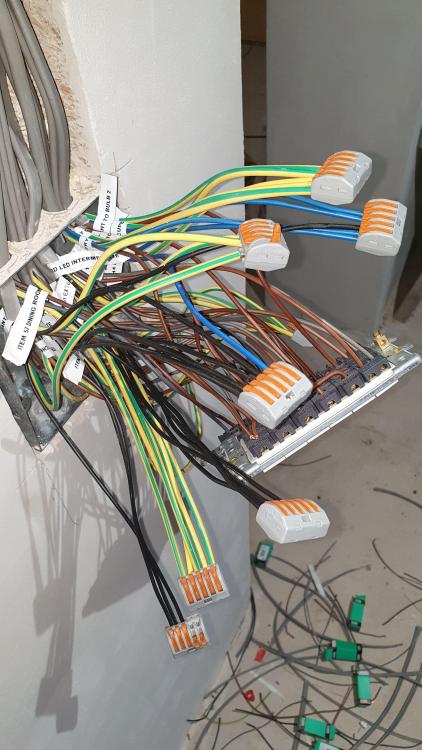
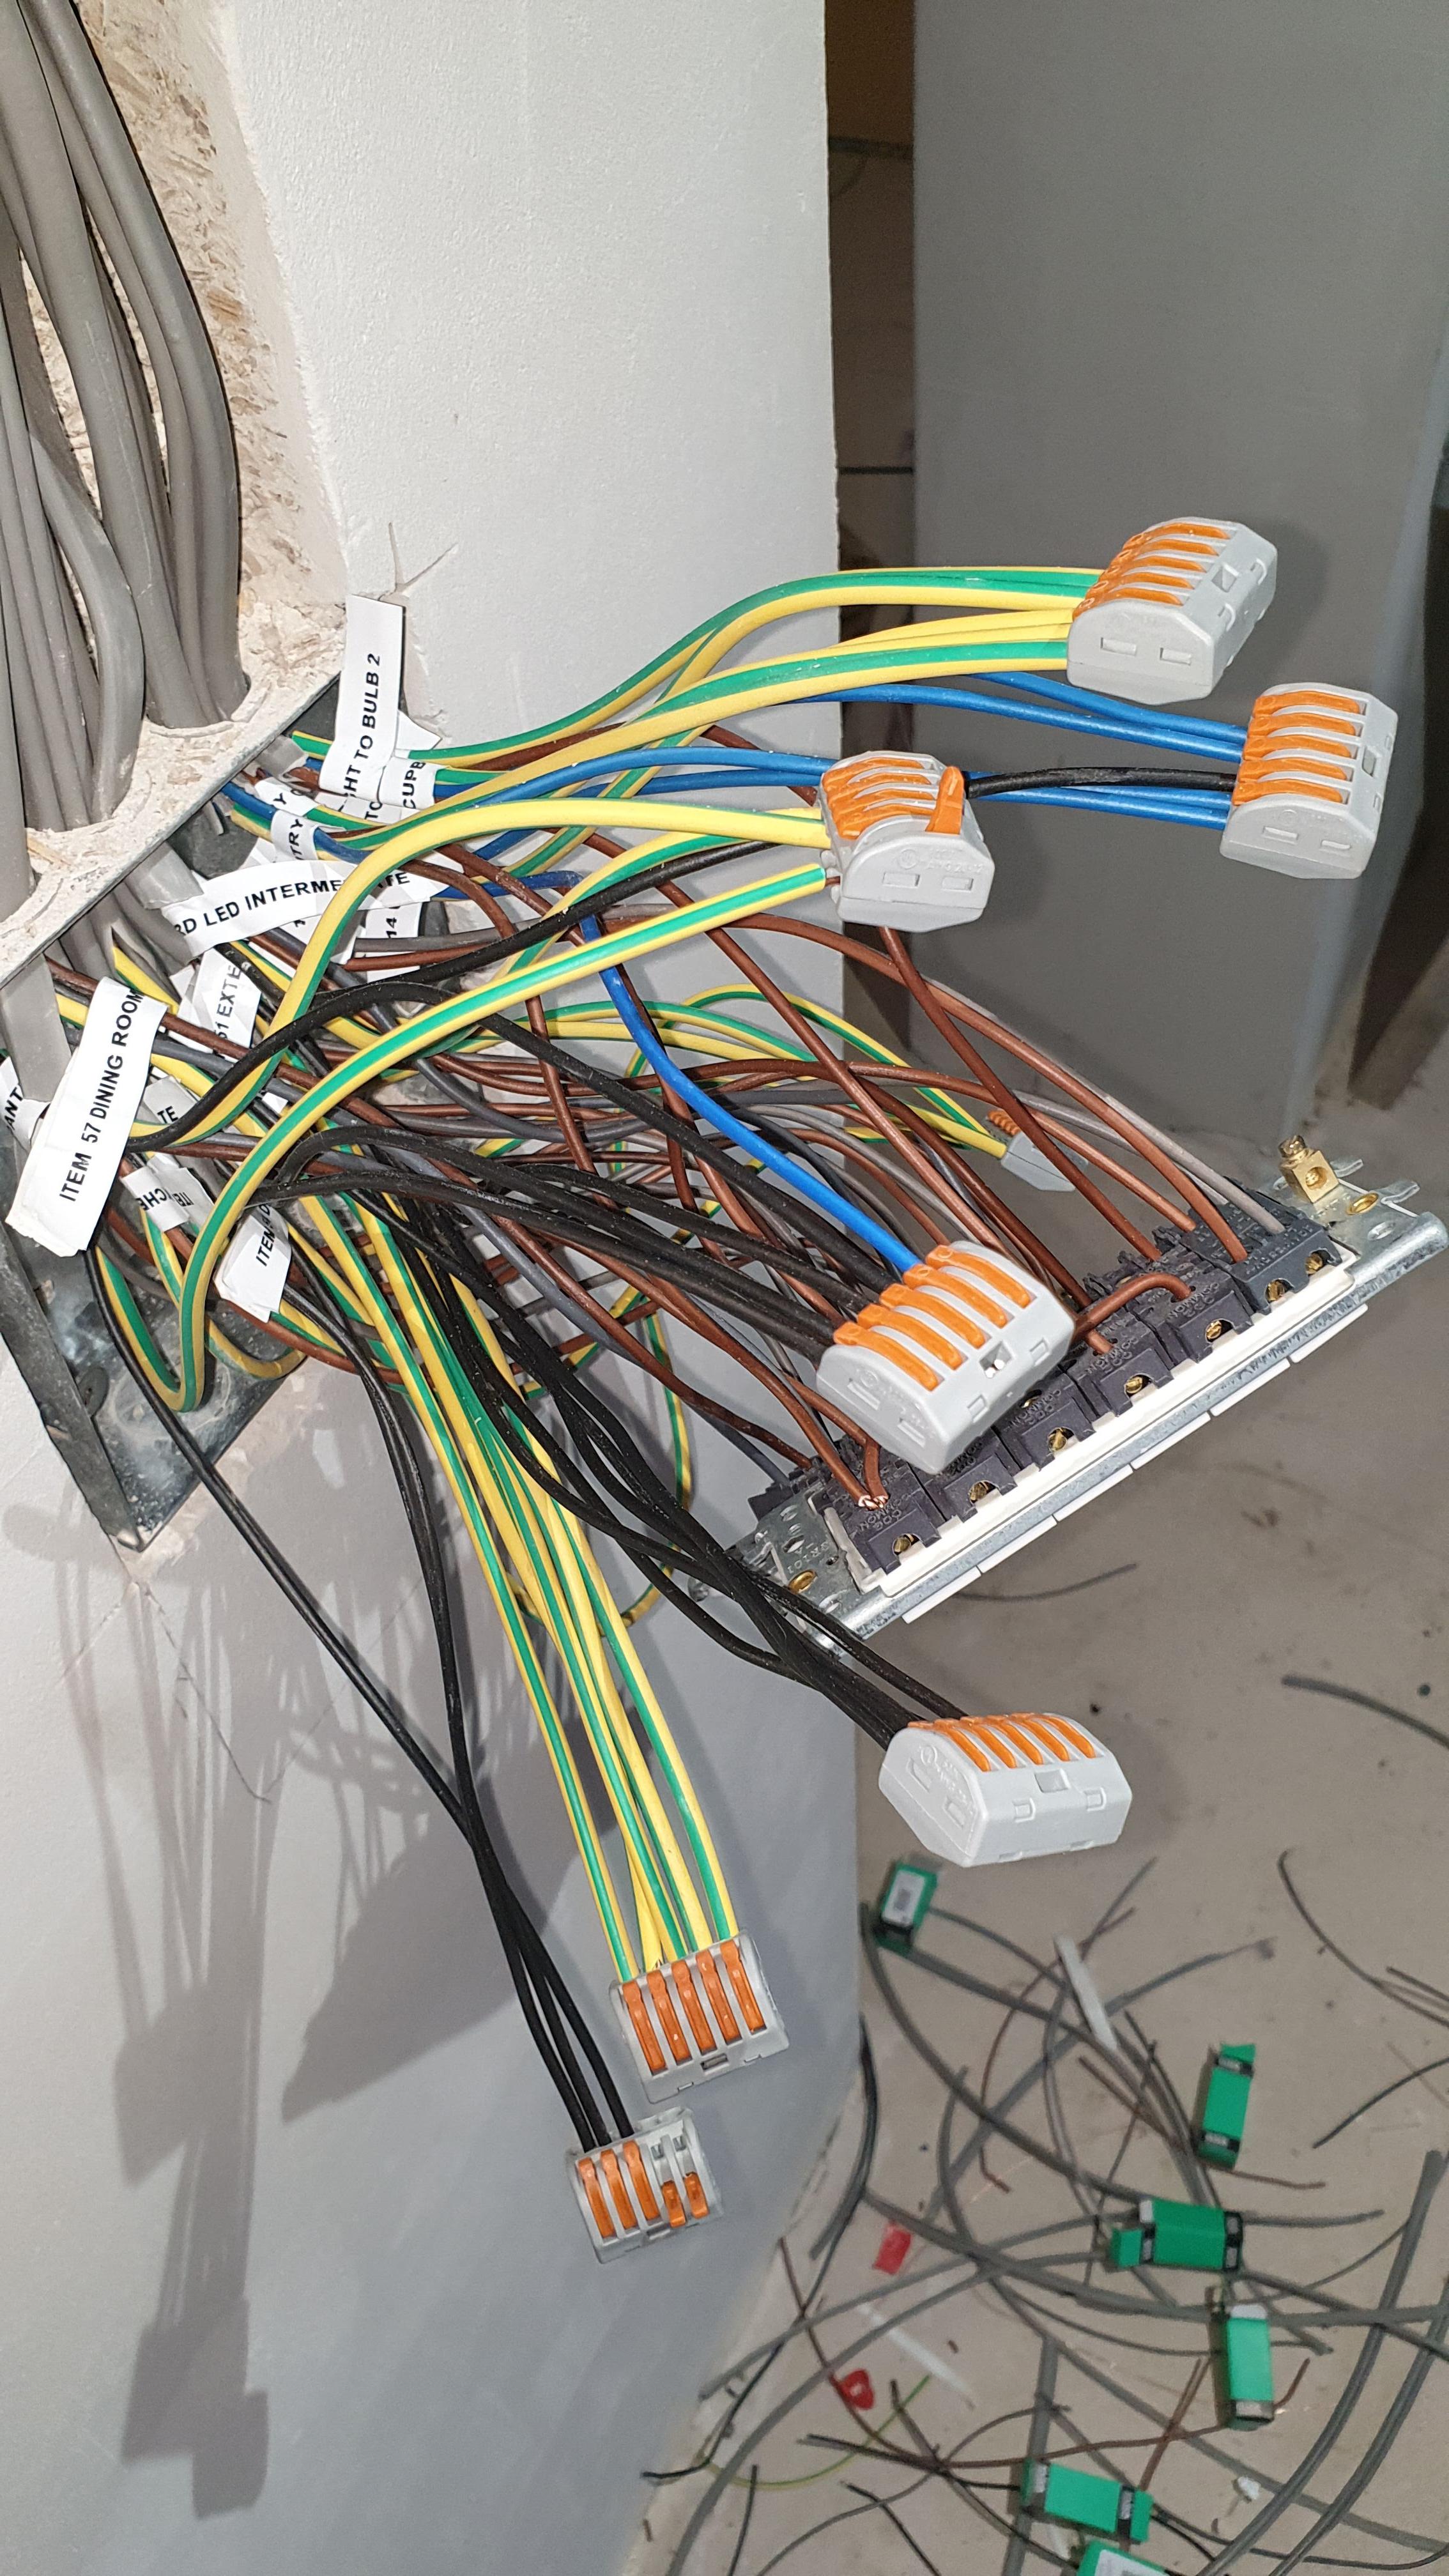
My brilliant stepson called me over today to show me how he was getting on. Here ya go : it's just a little thing .... but massive to me A humble GU10 working on mains electricity for the very first time in Salamander Cottage. Another milestone. There was this nest of spaghetti which makes it possible to switch the lights from three places and this set of intermediate switches ... Quite how sparkies 'see' it all, I have no idea. I could not be more pleased. So thanks @ProDave for telling me about Scolmore Click Mode and for all the support. Had it been up to me there would have been the mandatory 3 gang switch at the door. And that's about all. A small beer tonight methinks. Just to mark the passing of another milestone.

.thumb.jpg.3b6b15d3106e827438eb5379ca45d9f1.jpg) 1 point
1 point -
Just for info - finally got a response (far too late - we are using Lynx precast insulated floor instead), but for reference the cost is around £67/ m2 supply and fit.1 point
-
The sloping ground really does not seem an issue. In the simplest form you did the footings until you hit hard ground. sure the footings may be deeper at one end but it is easy to make them stepped and build up from there. Choosing a septic tank will prevent you from connecting to a watercourse, you would have to accommodate a soakaway somewhere. It really would choose a treatment plant, there is very little extra cost and they are so much better in so many ways.1 point
-
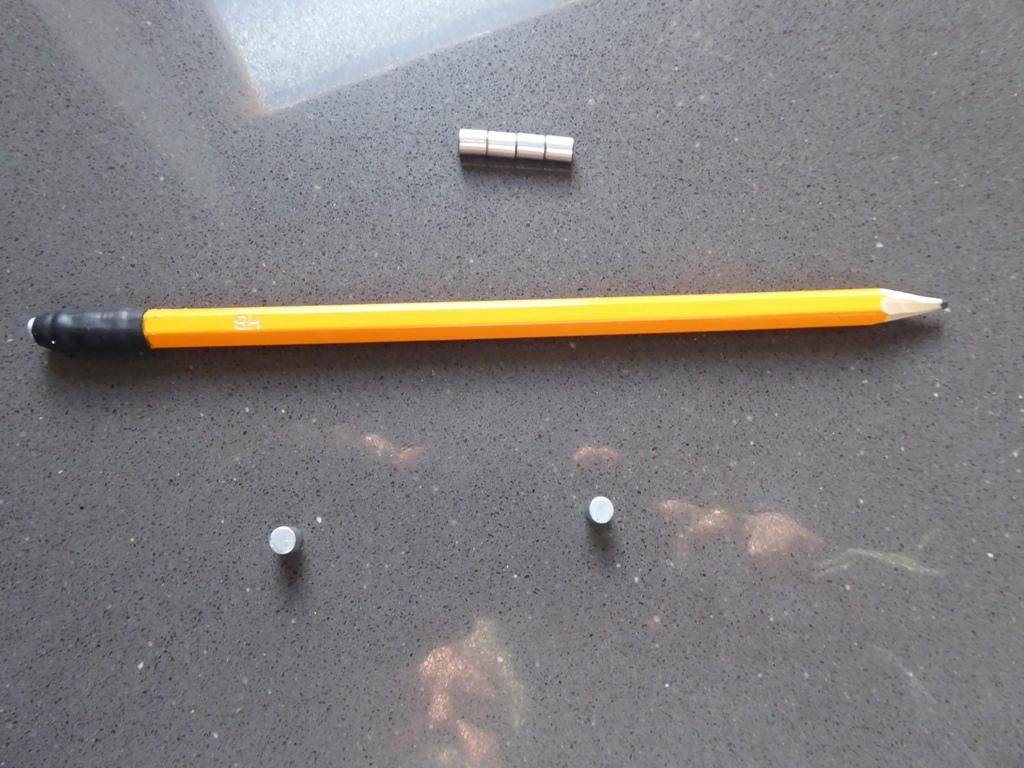
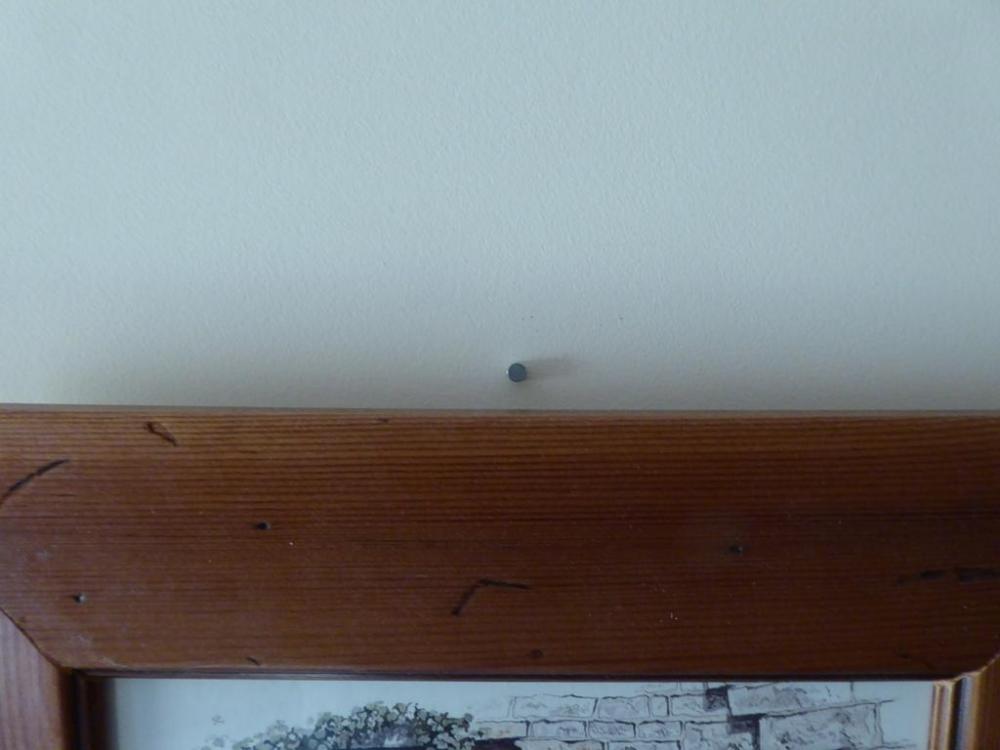
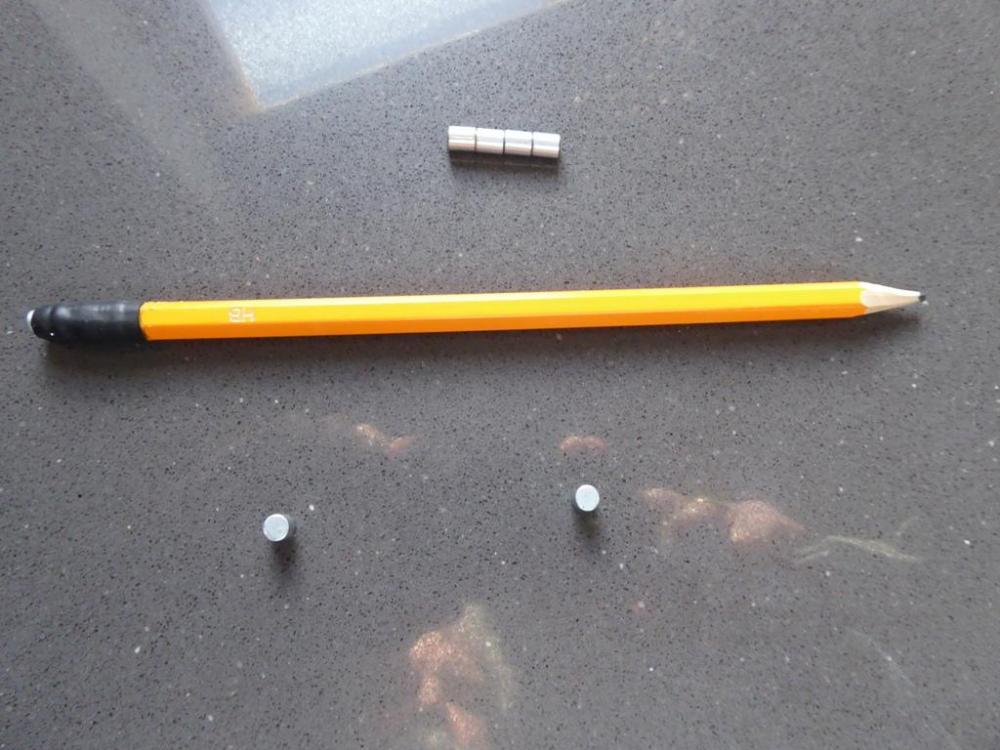
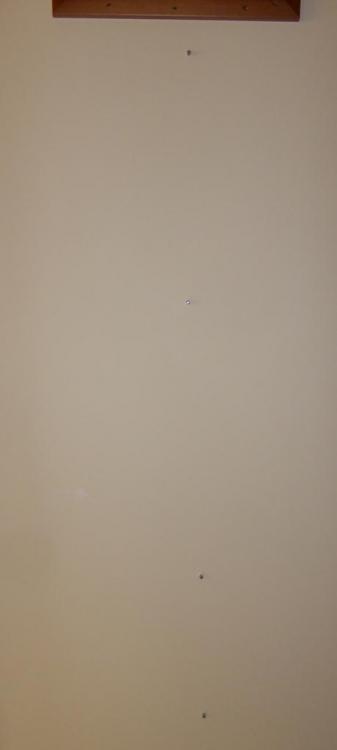
Here are some photos I've just taken showing the small magnets being used to find the centre of a stud: and this is one of the pencils I made up with a magnet in the end to find screws, pick up dropped screws etc, plus some of the small magnets:
 1 point
 -
I have a Seek Thermal camera, that works with any Android phone or tablet (but there are issues with some devices that have the OTG USB port facing the "wrong" way). I don't use it that often, in fact it's probably a year since I last used it, but it does work well. If anyone wants to borrow it I'm happy to loan it out. The Seek Thermal app is a free download and should work on any Android device. The sensor resolution is reasonably good, at 206 x 156, so a fair bit better than the 80 x 60 resolution of the FLIR One, and more than good enough for anything related to work on a house, from detecting heat loss from the whole house, to looking at details at things like a consumer unit. My main criticisms of it are that the field of view is quite narrow - good for looking close up at things, not so good for trying to get a wide angle view, My other criticism with the app is that it's easy enough to use, but it has the irritating habit of changing the screen orientation right when you don't want it changed. I found that using the free app Rotation Locker, before loading the Seek Thermal app, sorted this, in the main. Feel free to PM me if you want to borrow it.1 point
-
To muffle the screams.0 points


.jpg.3406fe88ddd91a451dc587545170b6a6.jpg)